You and me | Midnight Layout | Anna Komenda
Hello Friends! It’s Anna here and it’s my turn to inspire you with a project created with Cocoa Vanilla Studio collections. This time I left the new “Happiness” line on the side and came back to a little bit older, but still amazing, “Midnight” collection. I am such a big fan of flowers added to this line and soft colors. Pretty combination of dark navy, pink and orange was so inspiring. I was in a mood for die cutting, and I didn’t mind some repetitive job to be done. I spend some time cutting out many hexagons out of “Sunset strip” paper. I knew I wanted to arrange them in the similar color order as they are on the original paper. This is the final result of my efforts:

Such a vivid combination of hexagons needed some calm background. That’s why I decided to use “Moonlight” paper as a base. White color and soft script font works great as a starting point of every colorful project. Each hexagon is mounted with a layer of foam adhesive to add extra dimension to my page.
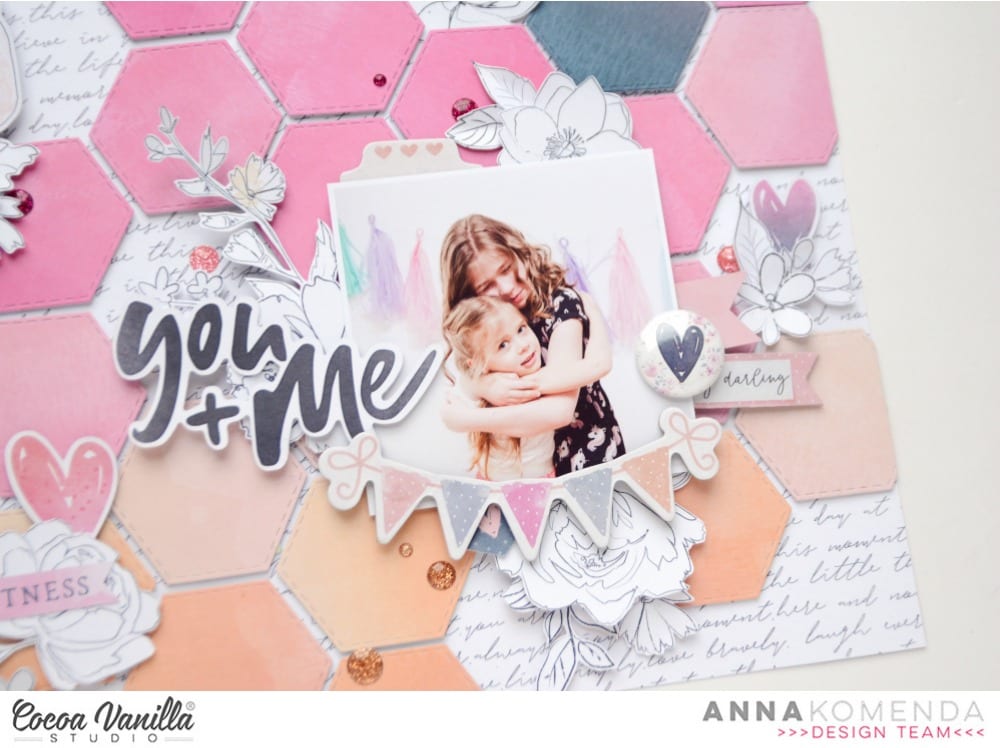
Flowers cut out from “Sophisticated” paper are my favorite flowers ever. I love how sketchy and whimsical they look. They are quite easy to cut out too. I scattered them around the page. They created such a lovely embellishment clusters highlighting the feminine theme of this page.

Title of my layout is made with word from Die cut titles pack. This is such an amazing product, if you have problems with figuring out clever titles for your pages. I love the font, colors, everything about this product.
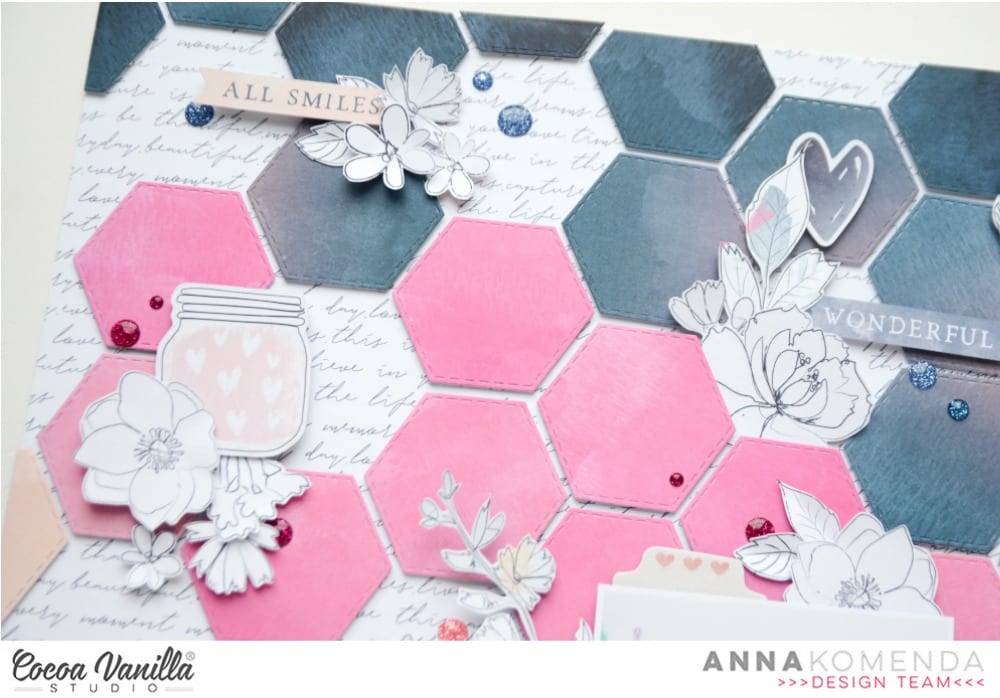
Final step of embellishing my page was adding bits and pieces from Ephemera pack and Chipboards pack. Just a little words and simple tabs. I didn’t want to cover too much of my pretty background. I also reached for older products – some glittery enamel dots from “Make a wish” and “Wild at heart” collections. They matched perfectly to this layout. I had so much fun playing with dies and paper creating unique background. Since I got my electronic die cutting machine, simple metal dies got neglected. Rediscovering them was very refreshing to my mojo.
Thank you for stopping by and see you in two weeks.
XO Anna


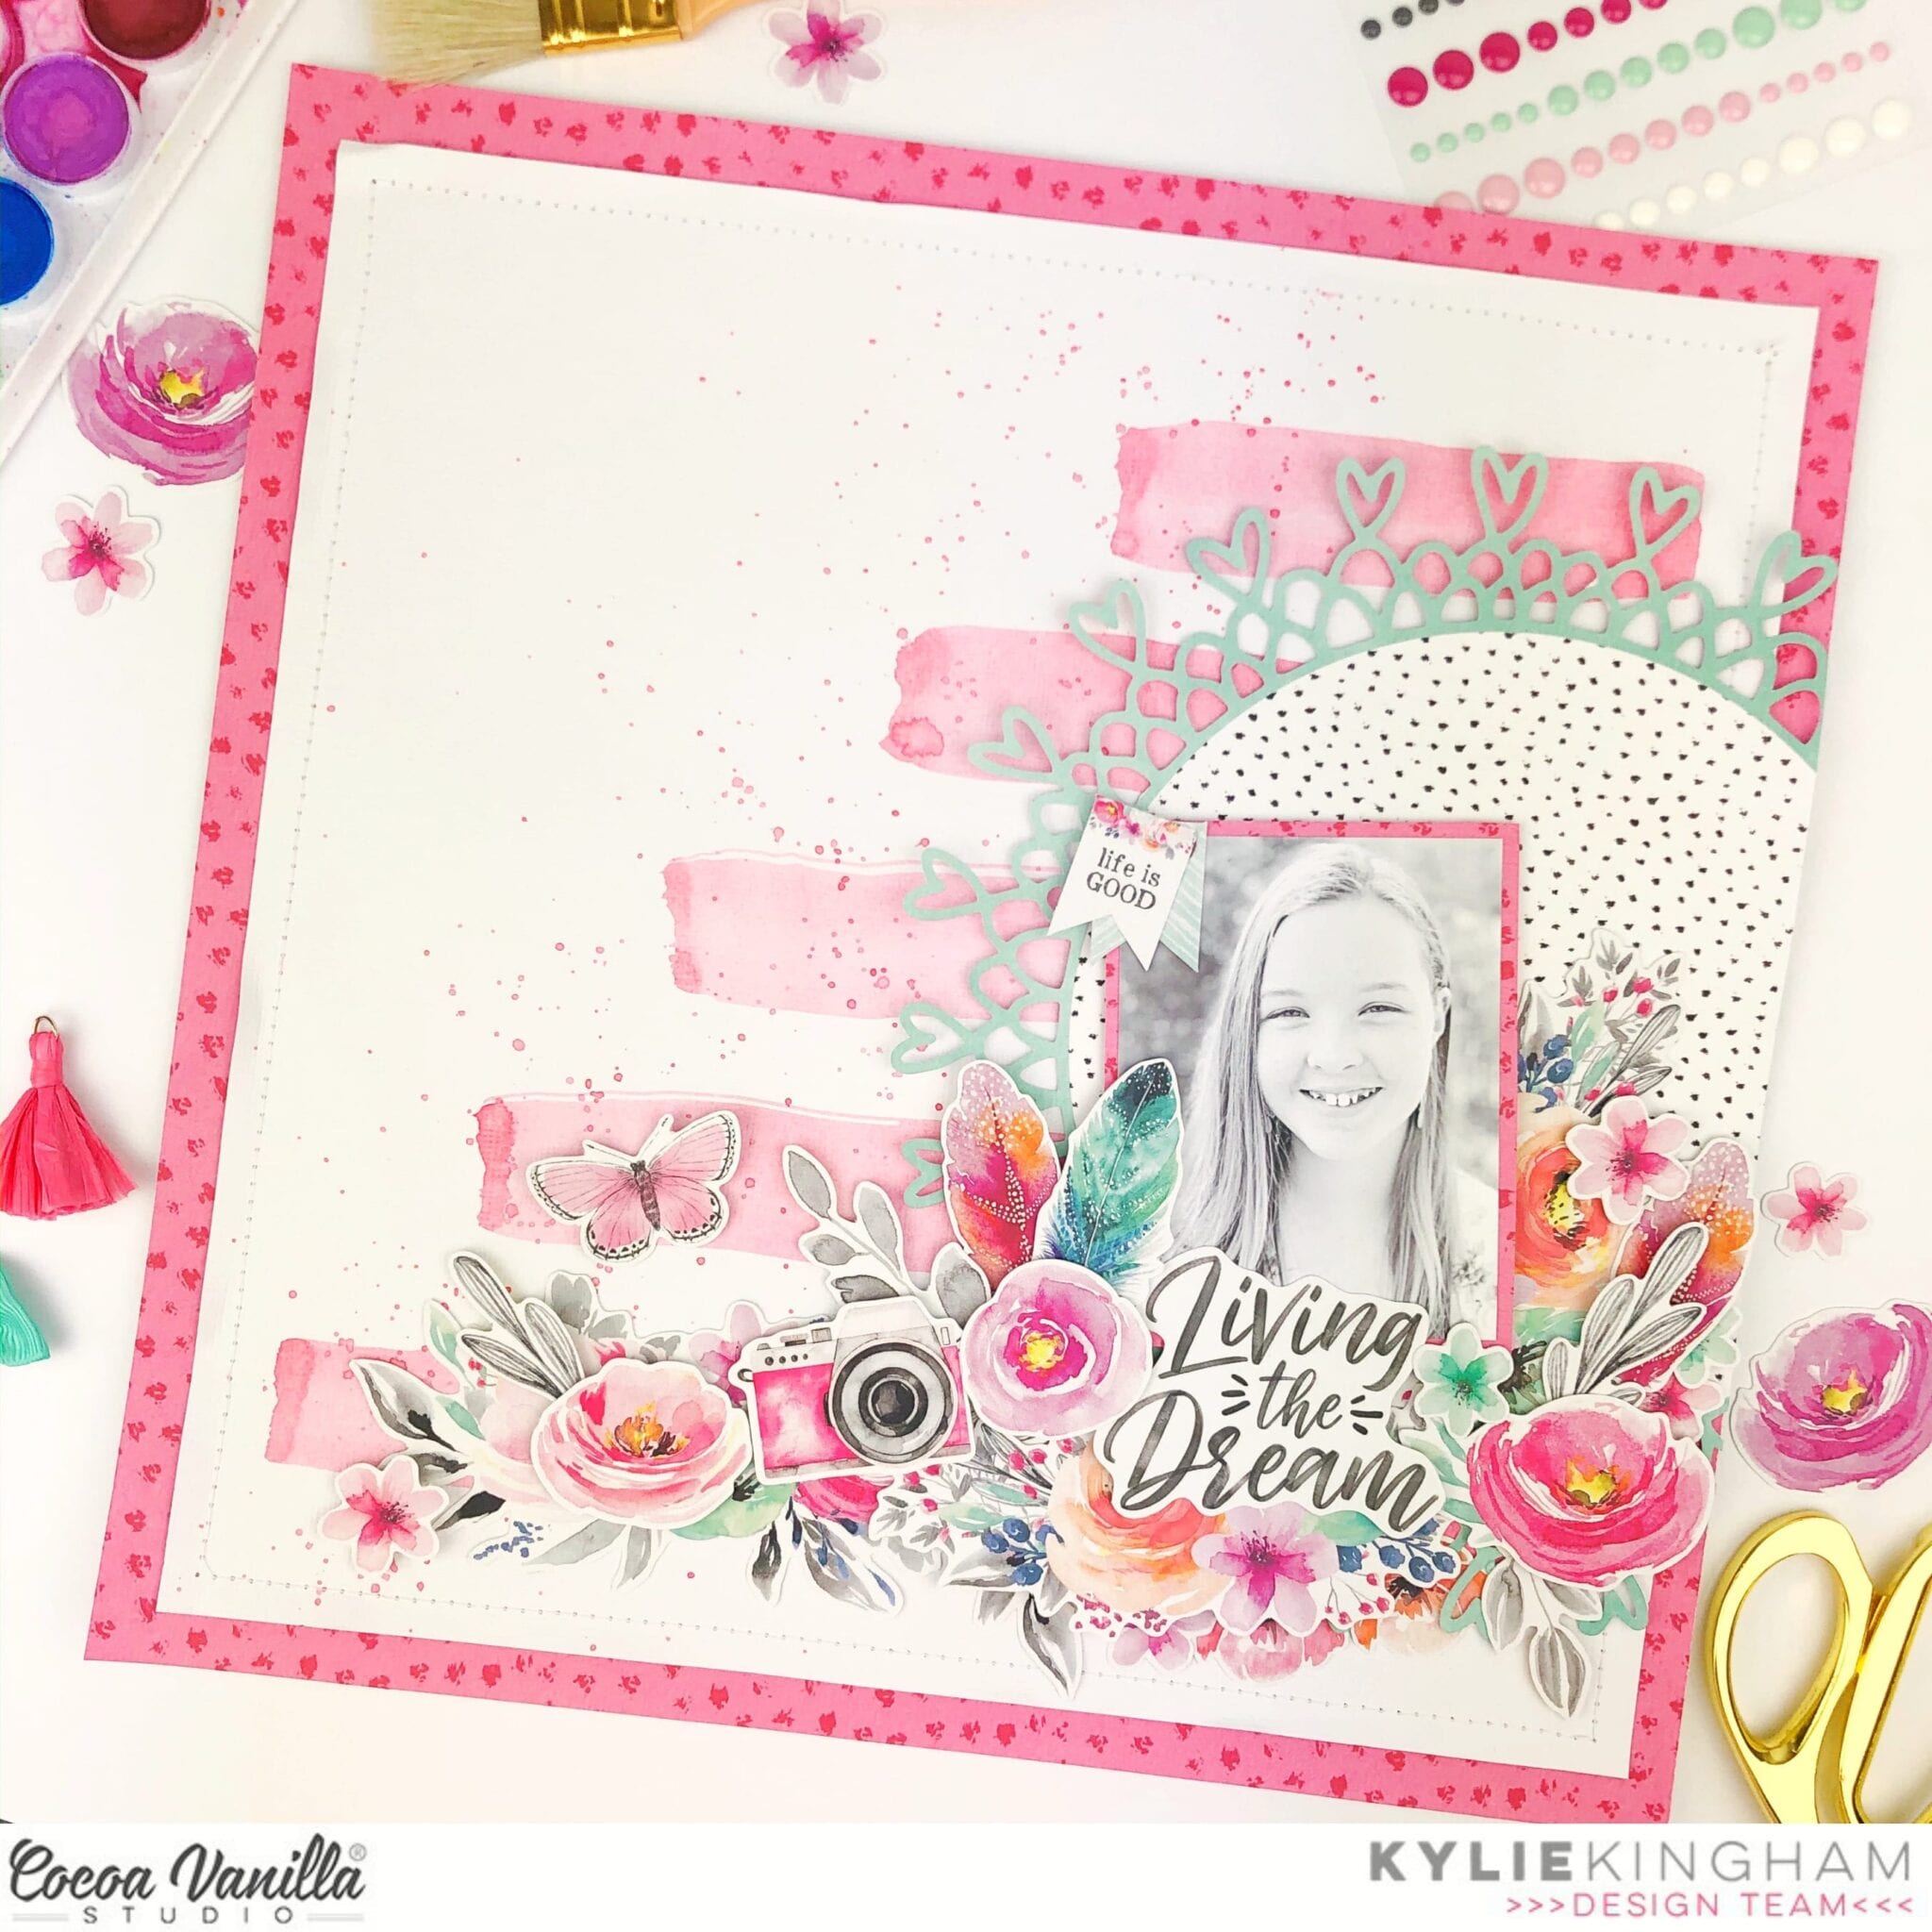
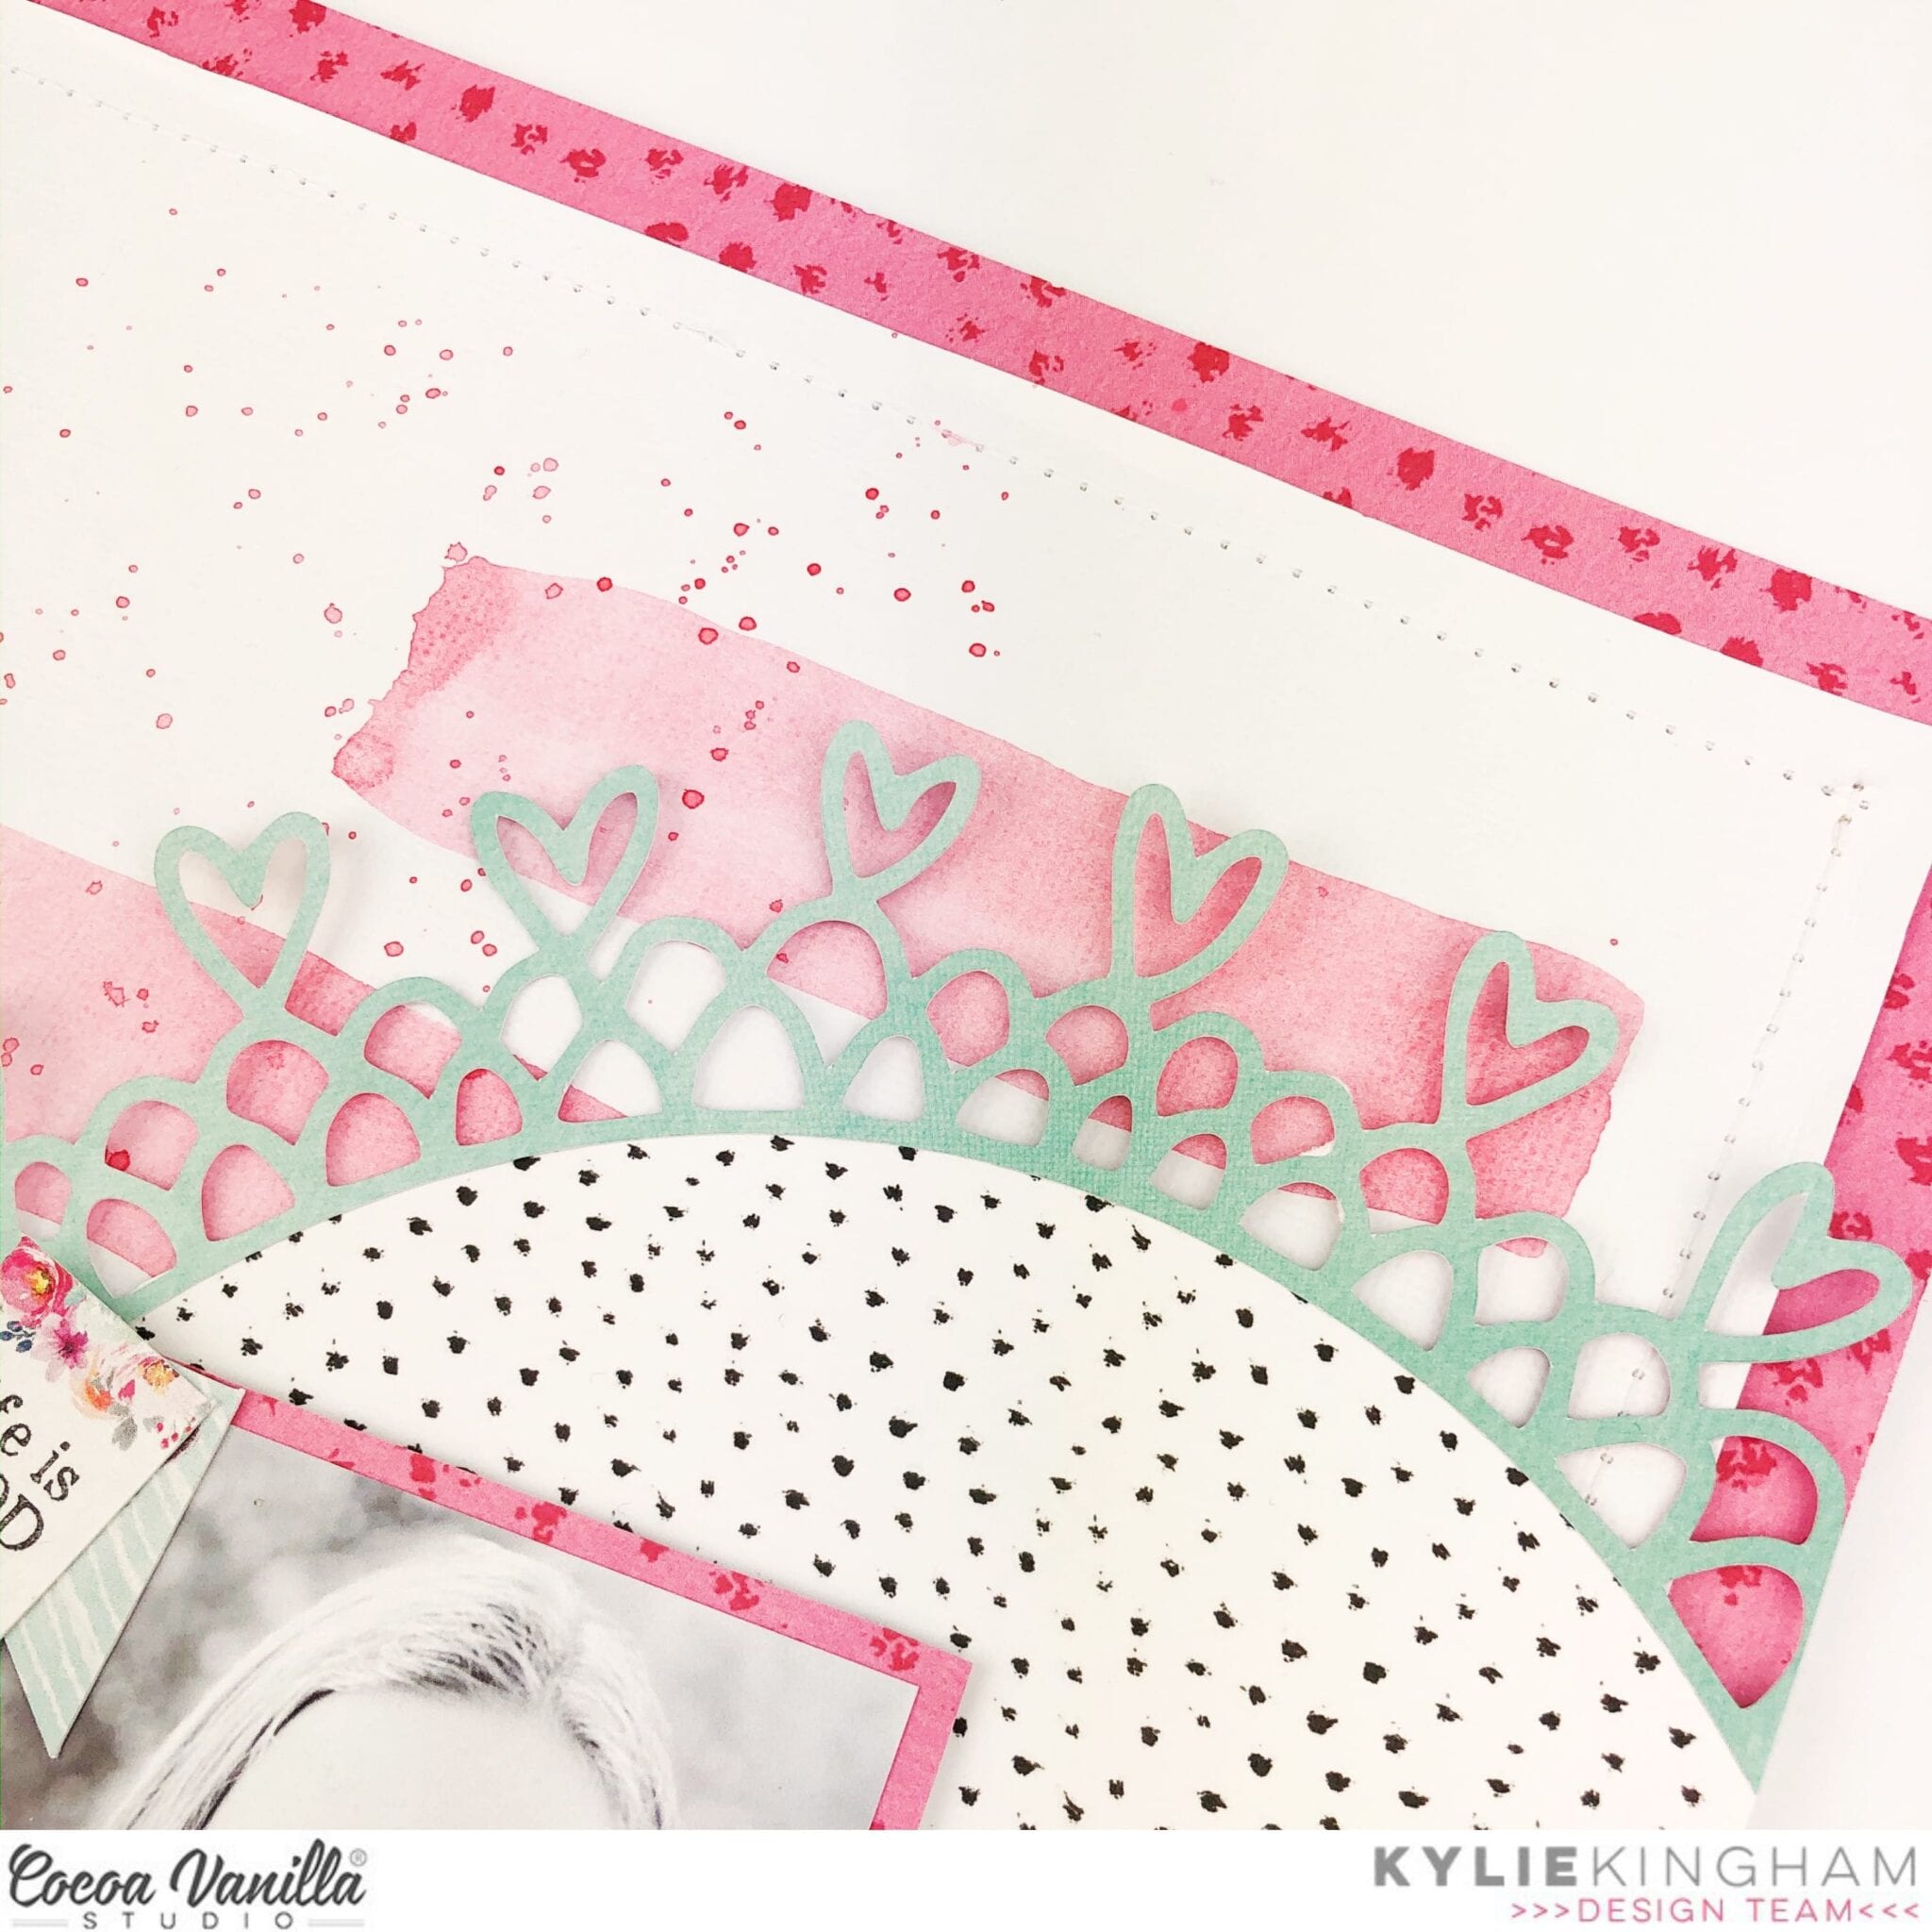
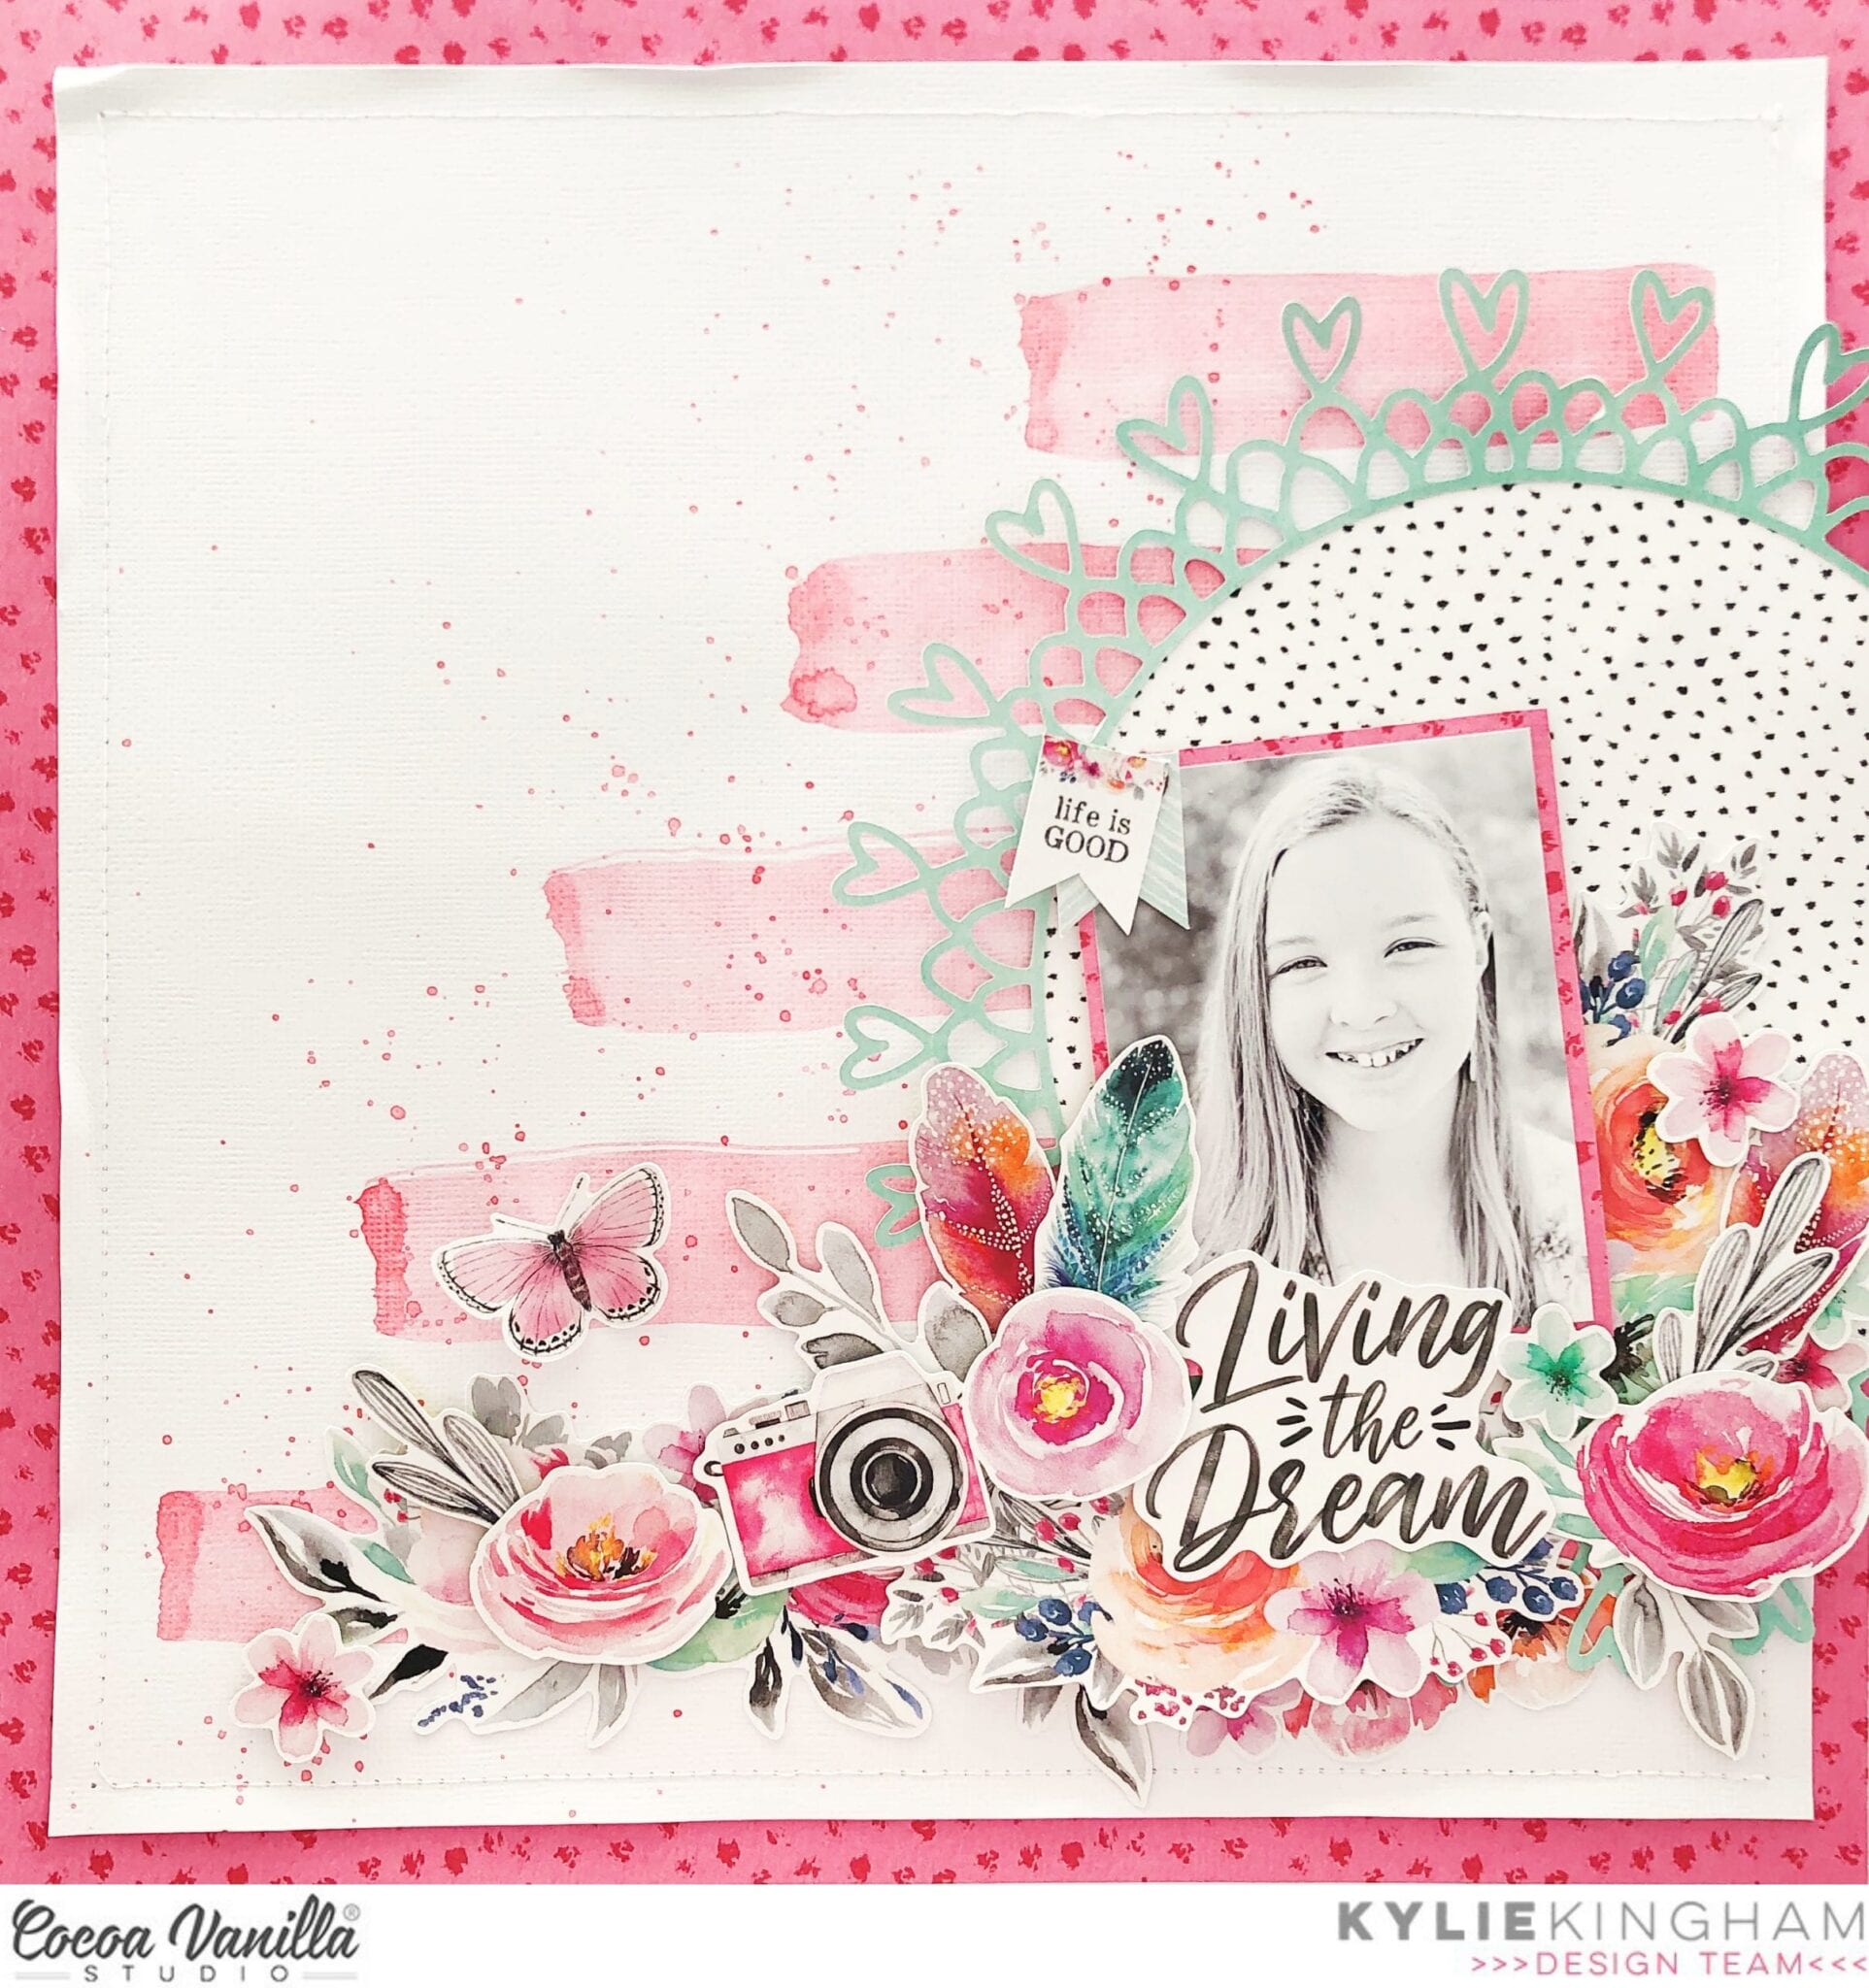


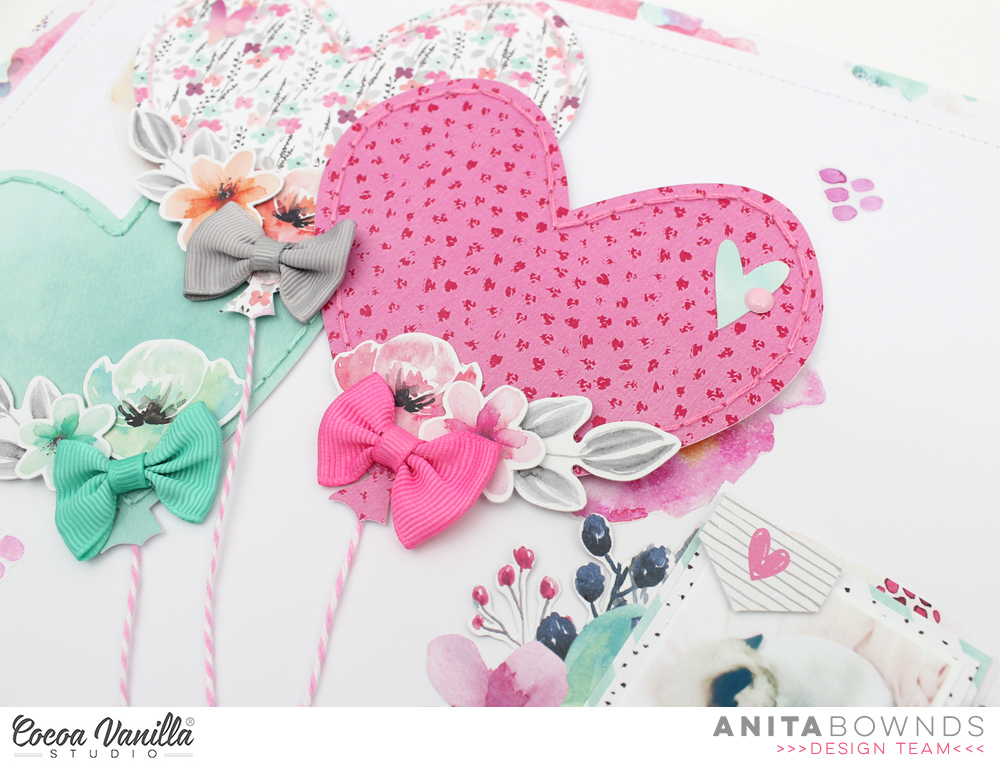


 I chose a pink, grey and white colour scheme for my layout today, I pulled some of the papers and lots of embellishments that were in that colour scheme and started out by cutting the cut file on white cardstock, I cut the file out with the intention of leaving some of the design inside the cardstock. I loved how I could pop out the hearts and create a dimensional look with them. I backed the cut file design with the pink paper and then machine stitched around the circle – you can see more detail in the photo below. I then matted the cut file and pink paper onto one of the grey patterned papers.
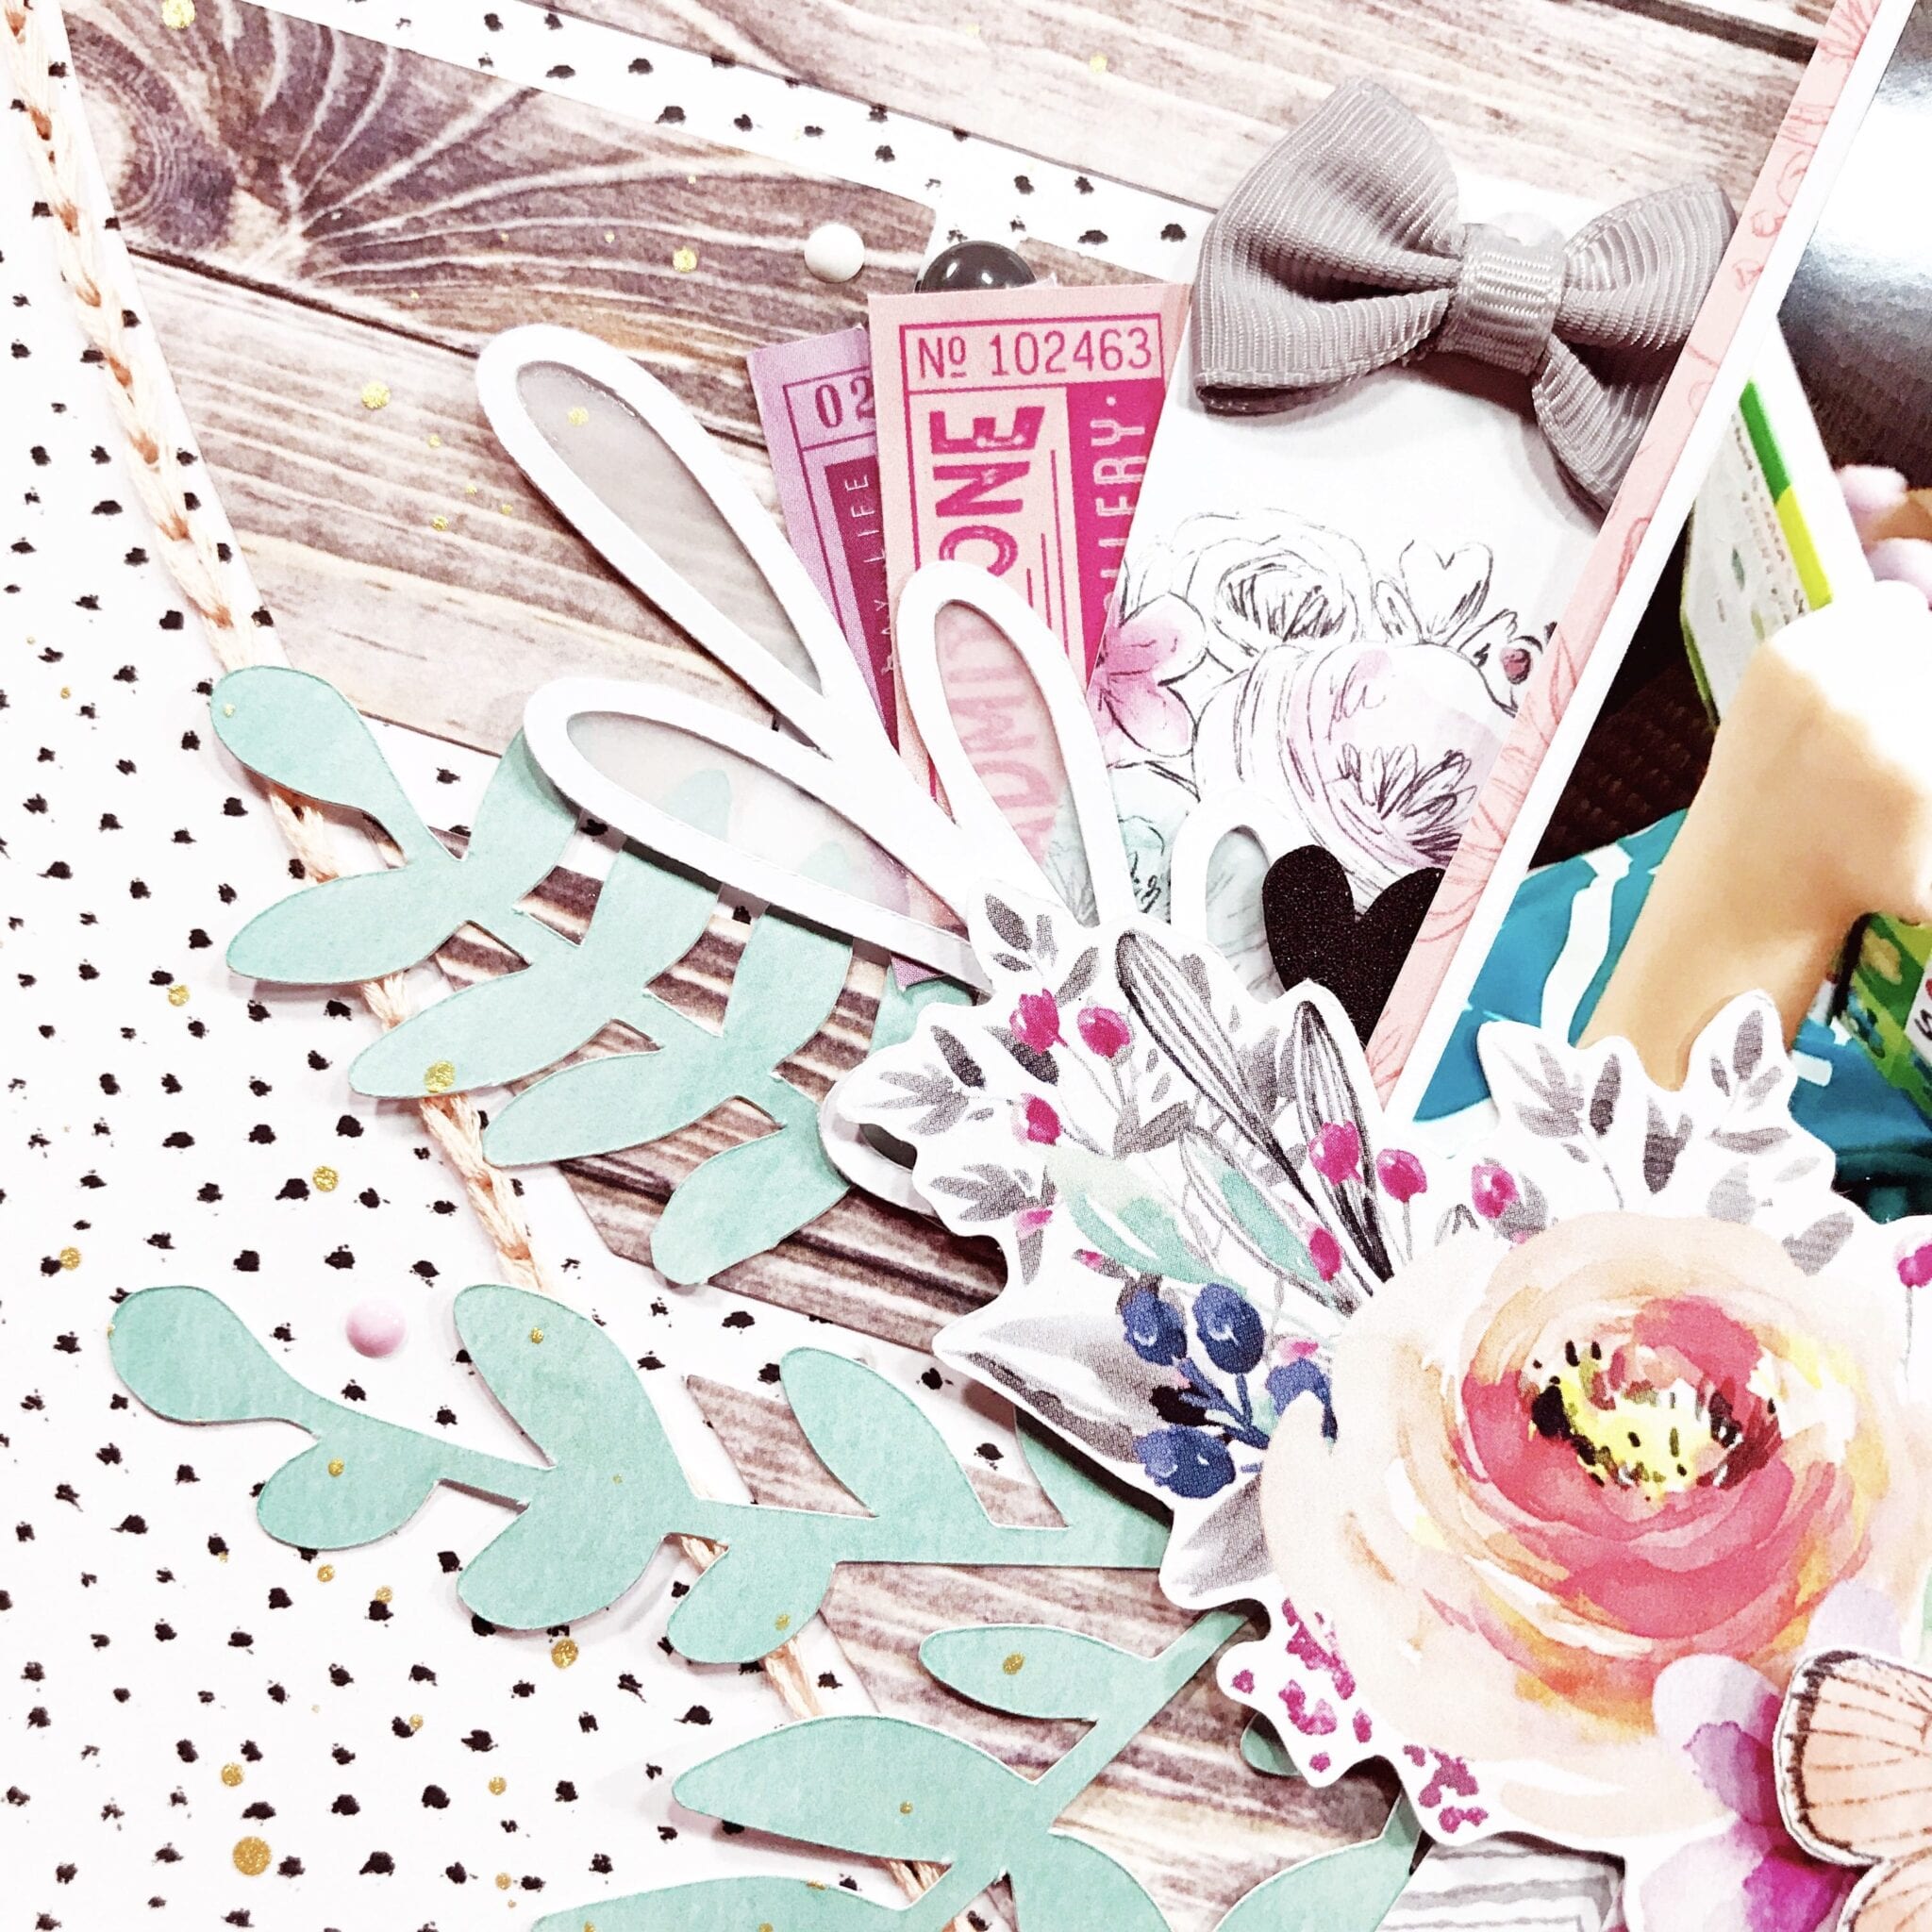
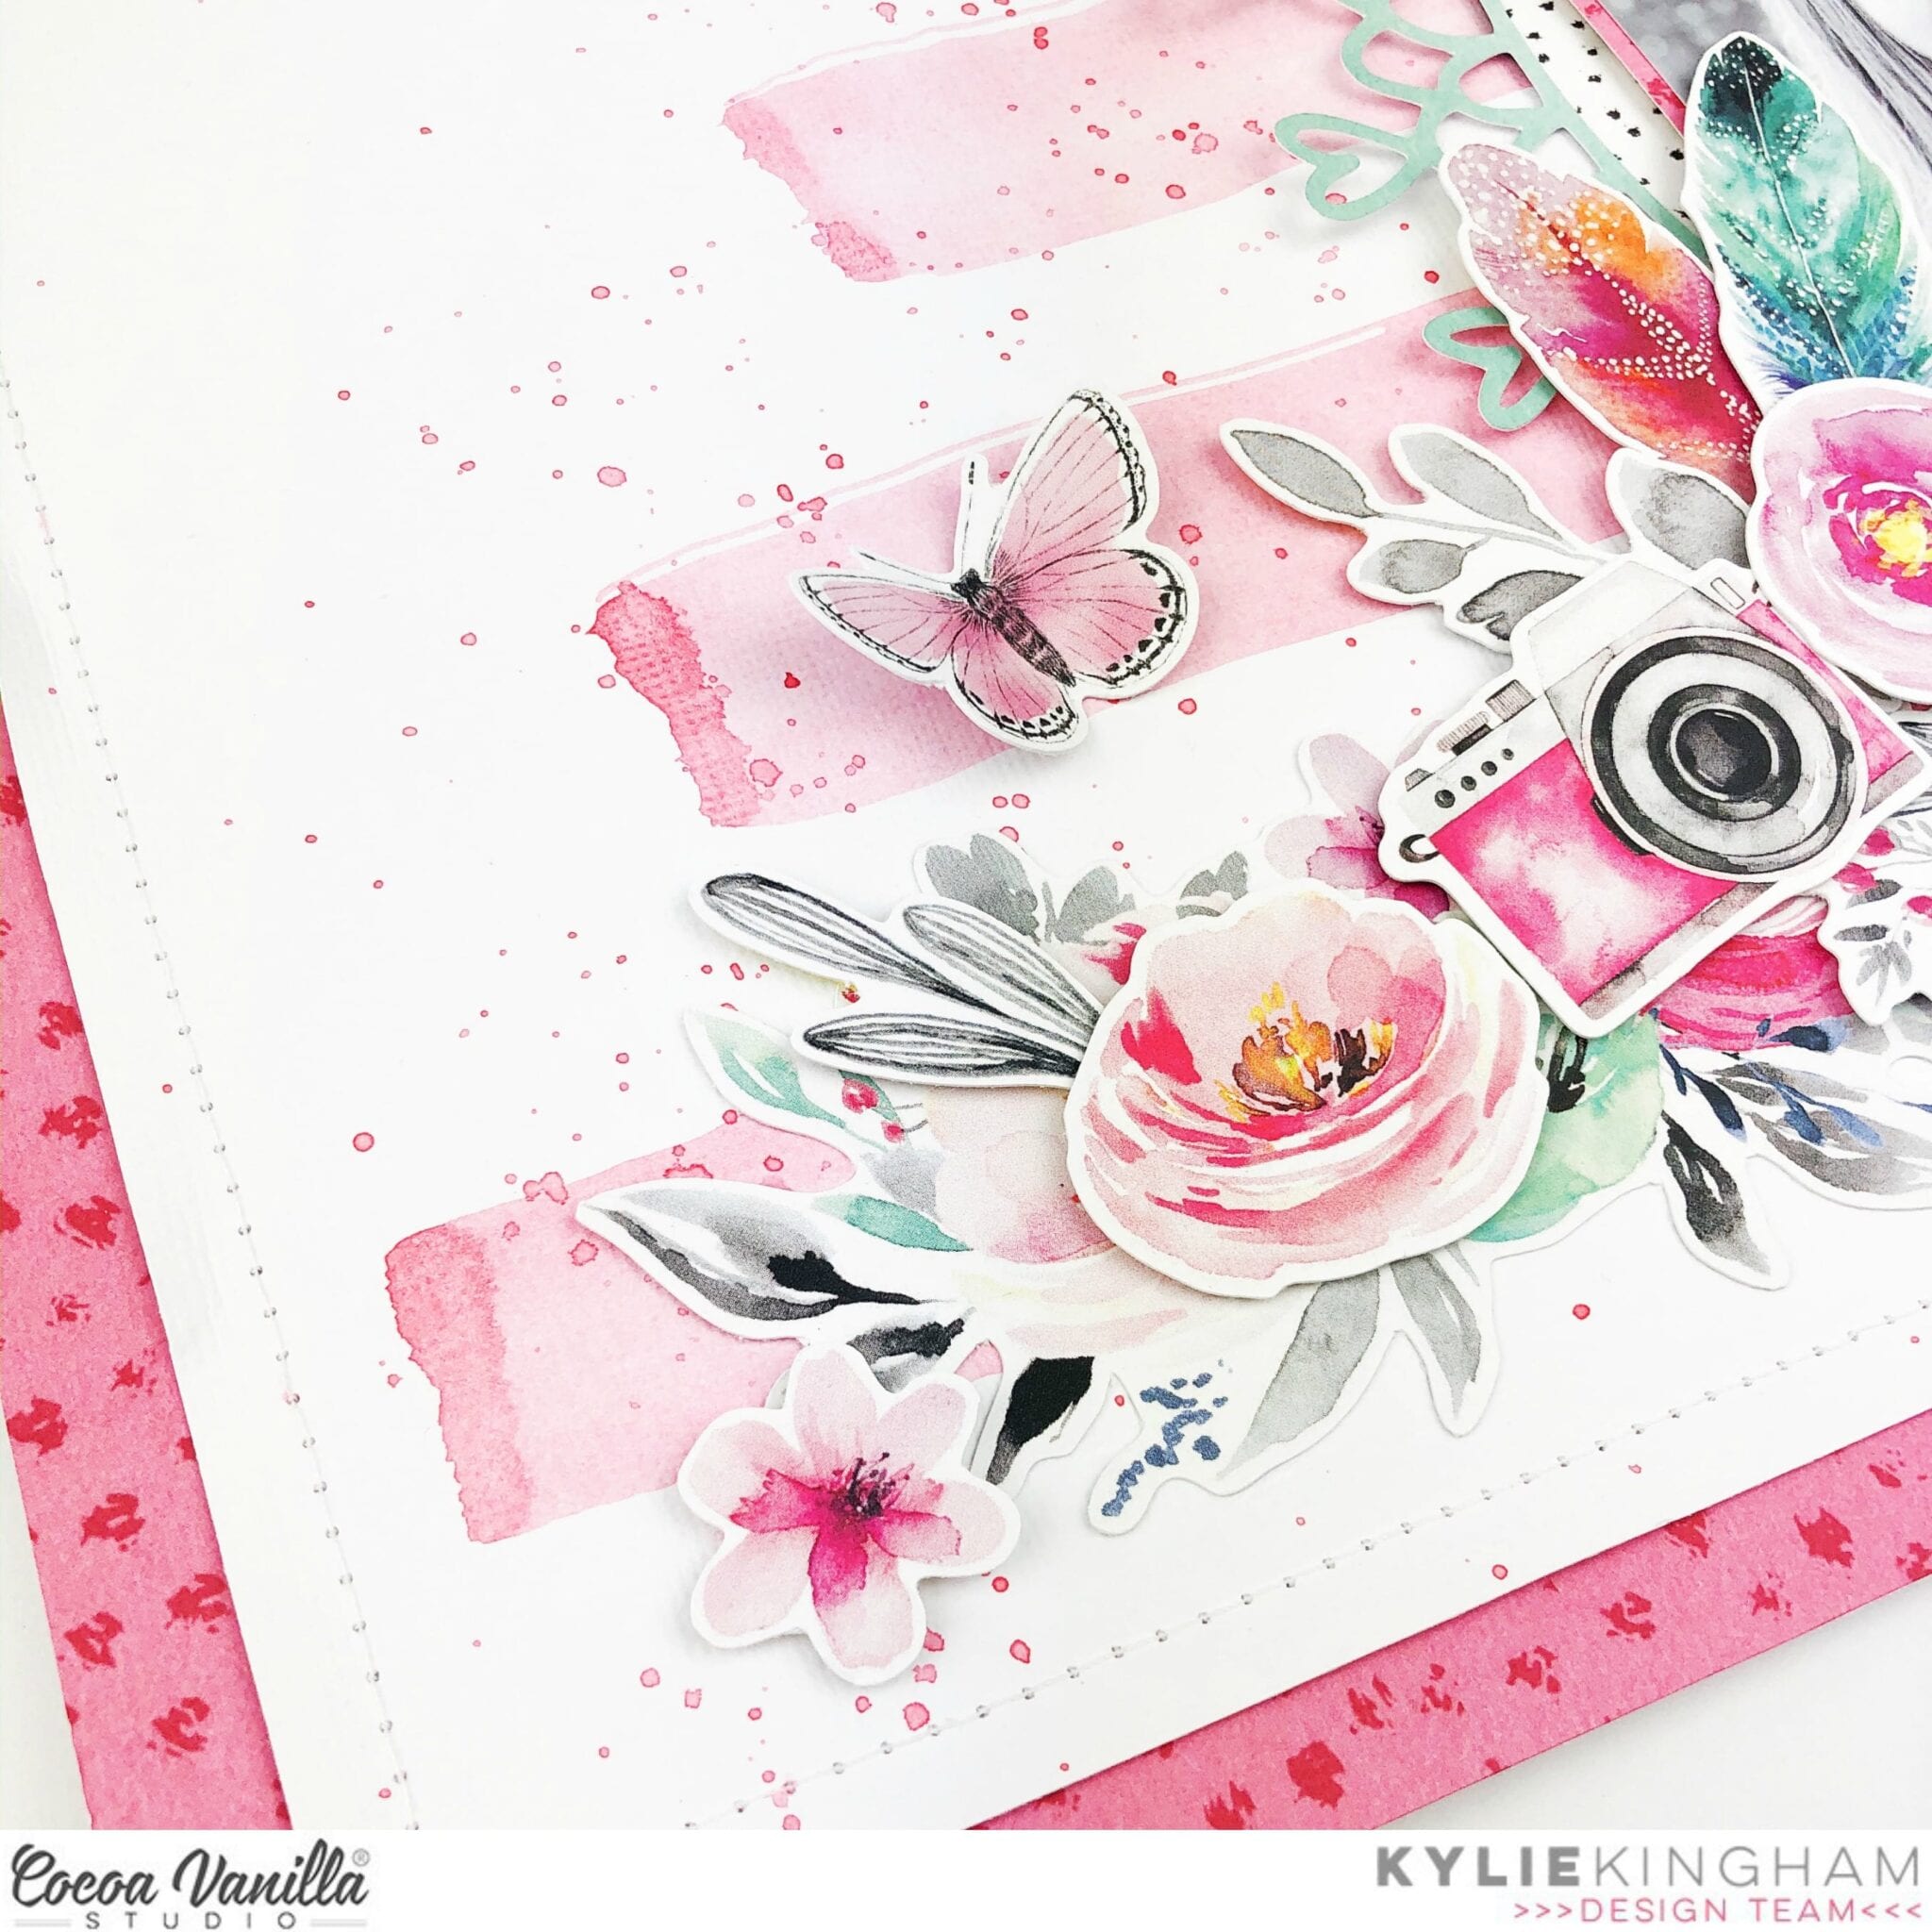
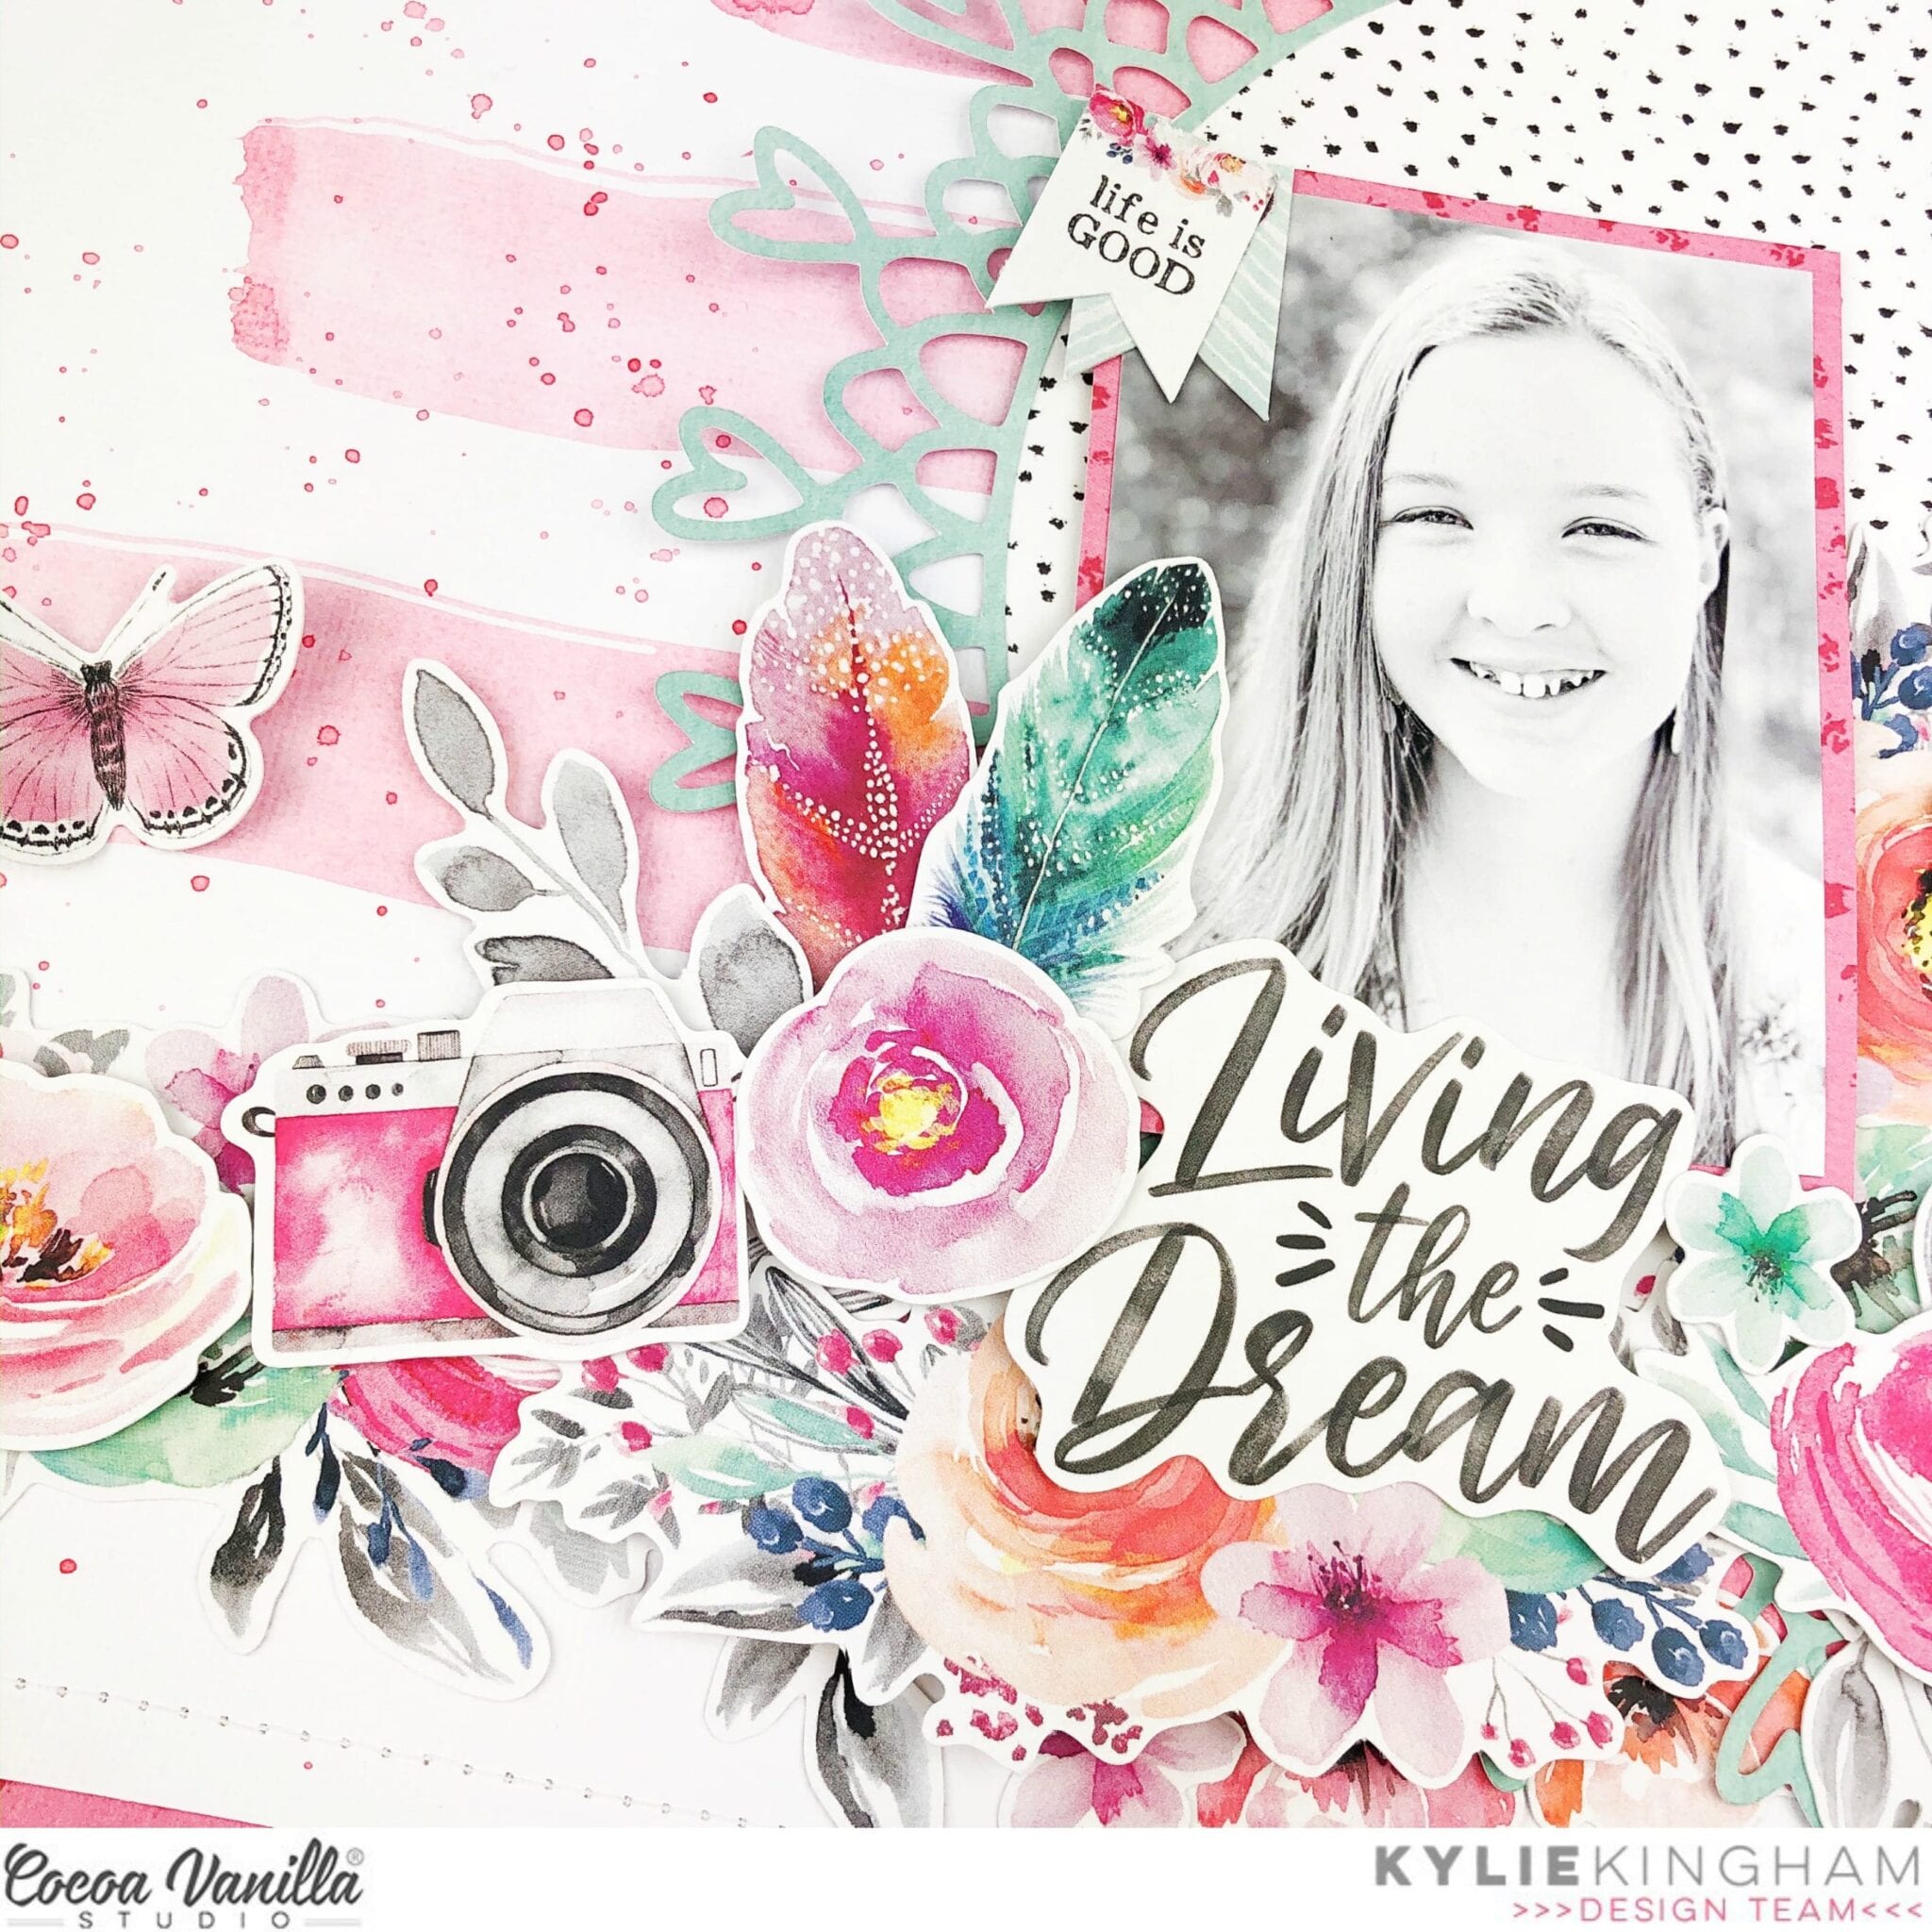
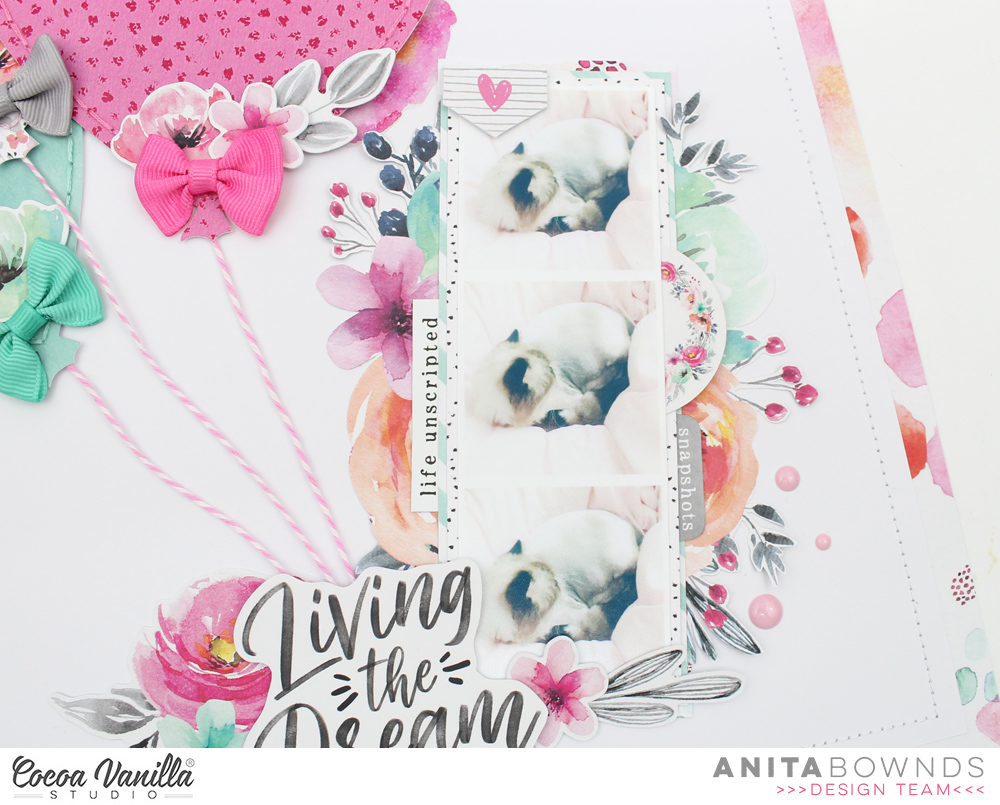
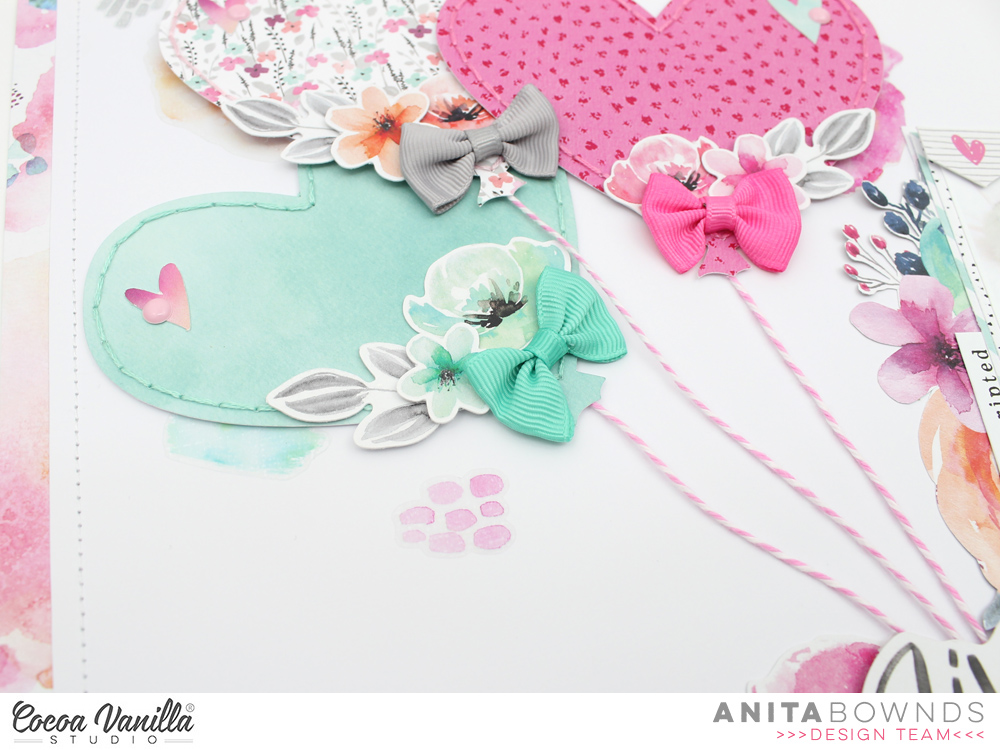
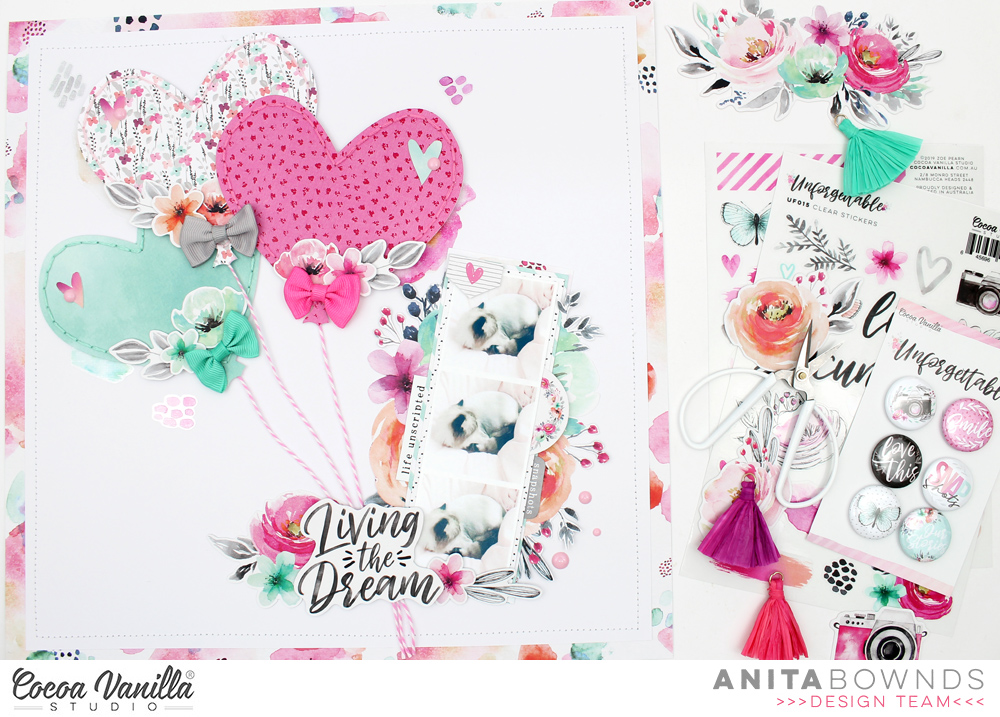
  The photo is of my sister and I at our brothers wedding a couple of years ago, not often we get photos together with both my sister and brother living in England now. I added lots of paper layers underneath my photo and used foam tape to pop up my photo from the page. In the photo below, you can see I added a cluster of embellishments including some die-cuts and accessory stickers, I used foam dots again to lift up the camera die-cut and I also added one of the enamel dots to the centre – hooray for enamel dots making a come back in this collection! I love them! Over one the right hand side is another cluster featuring some of the floral and butterfly die-cuts. I also added one of the cute bows to the right of my title.
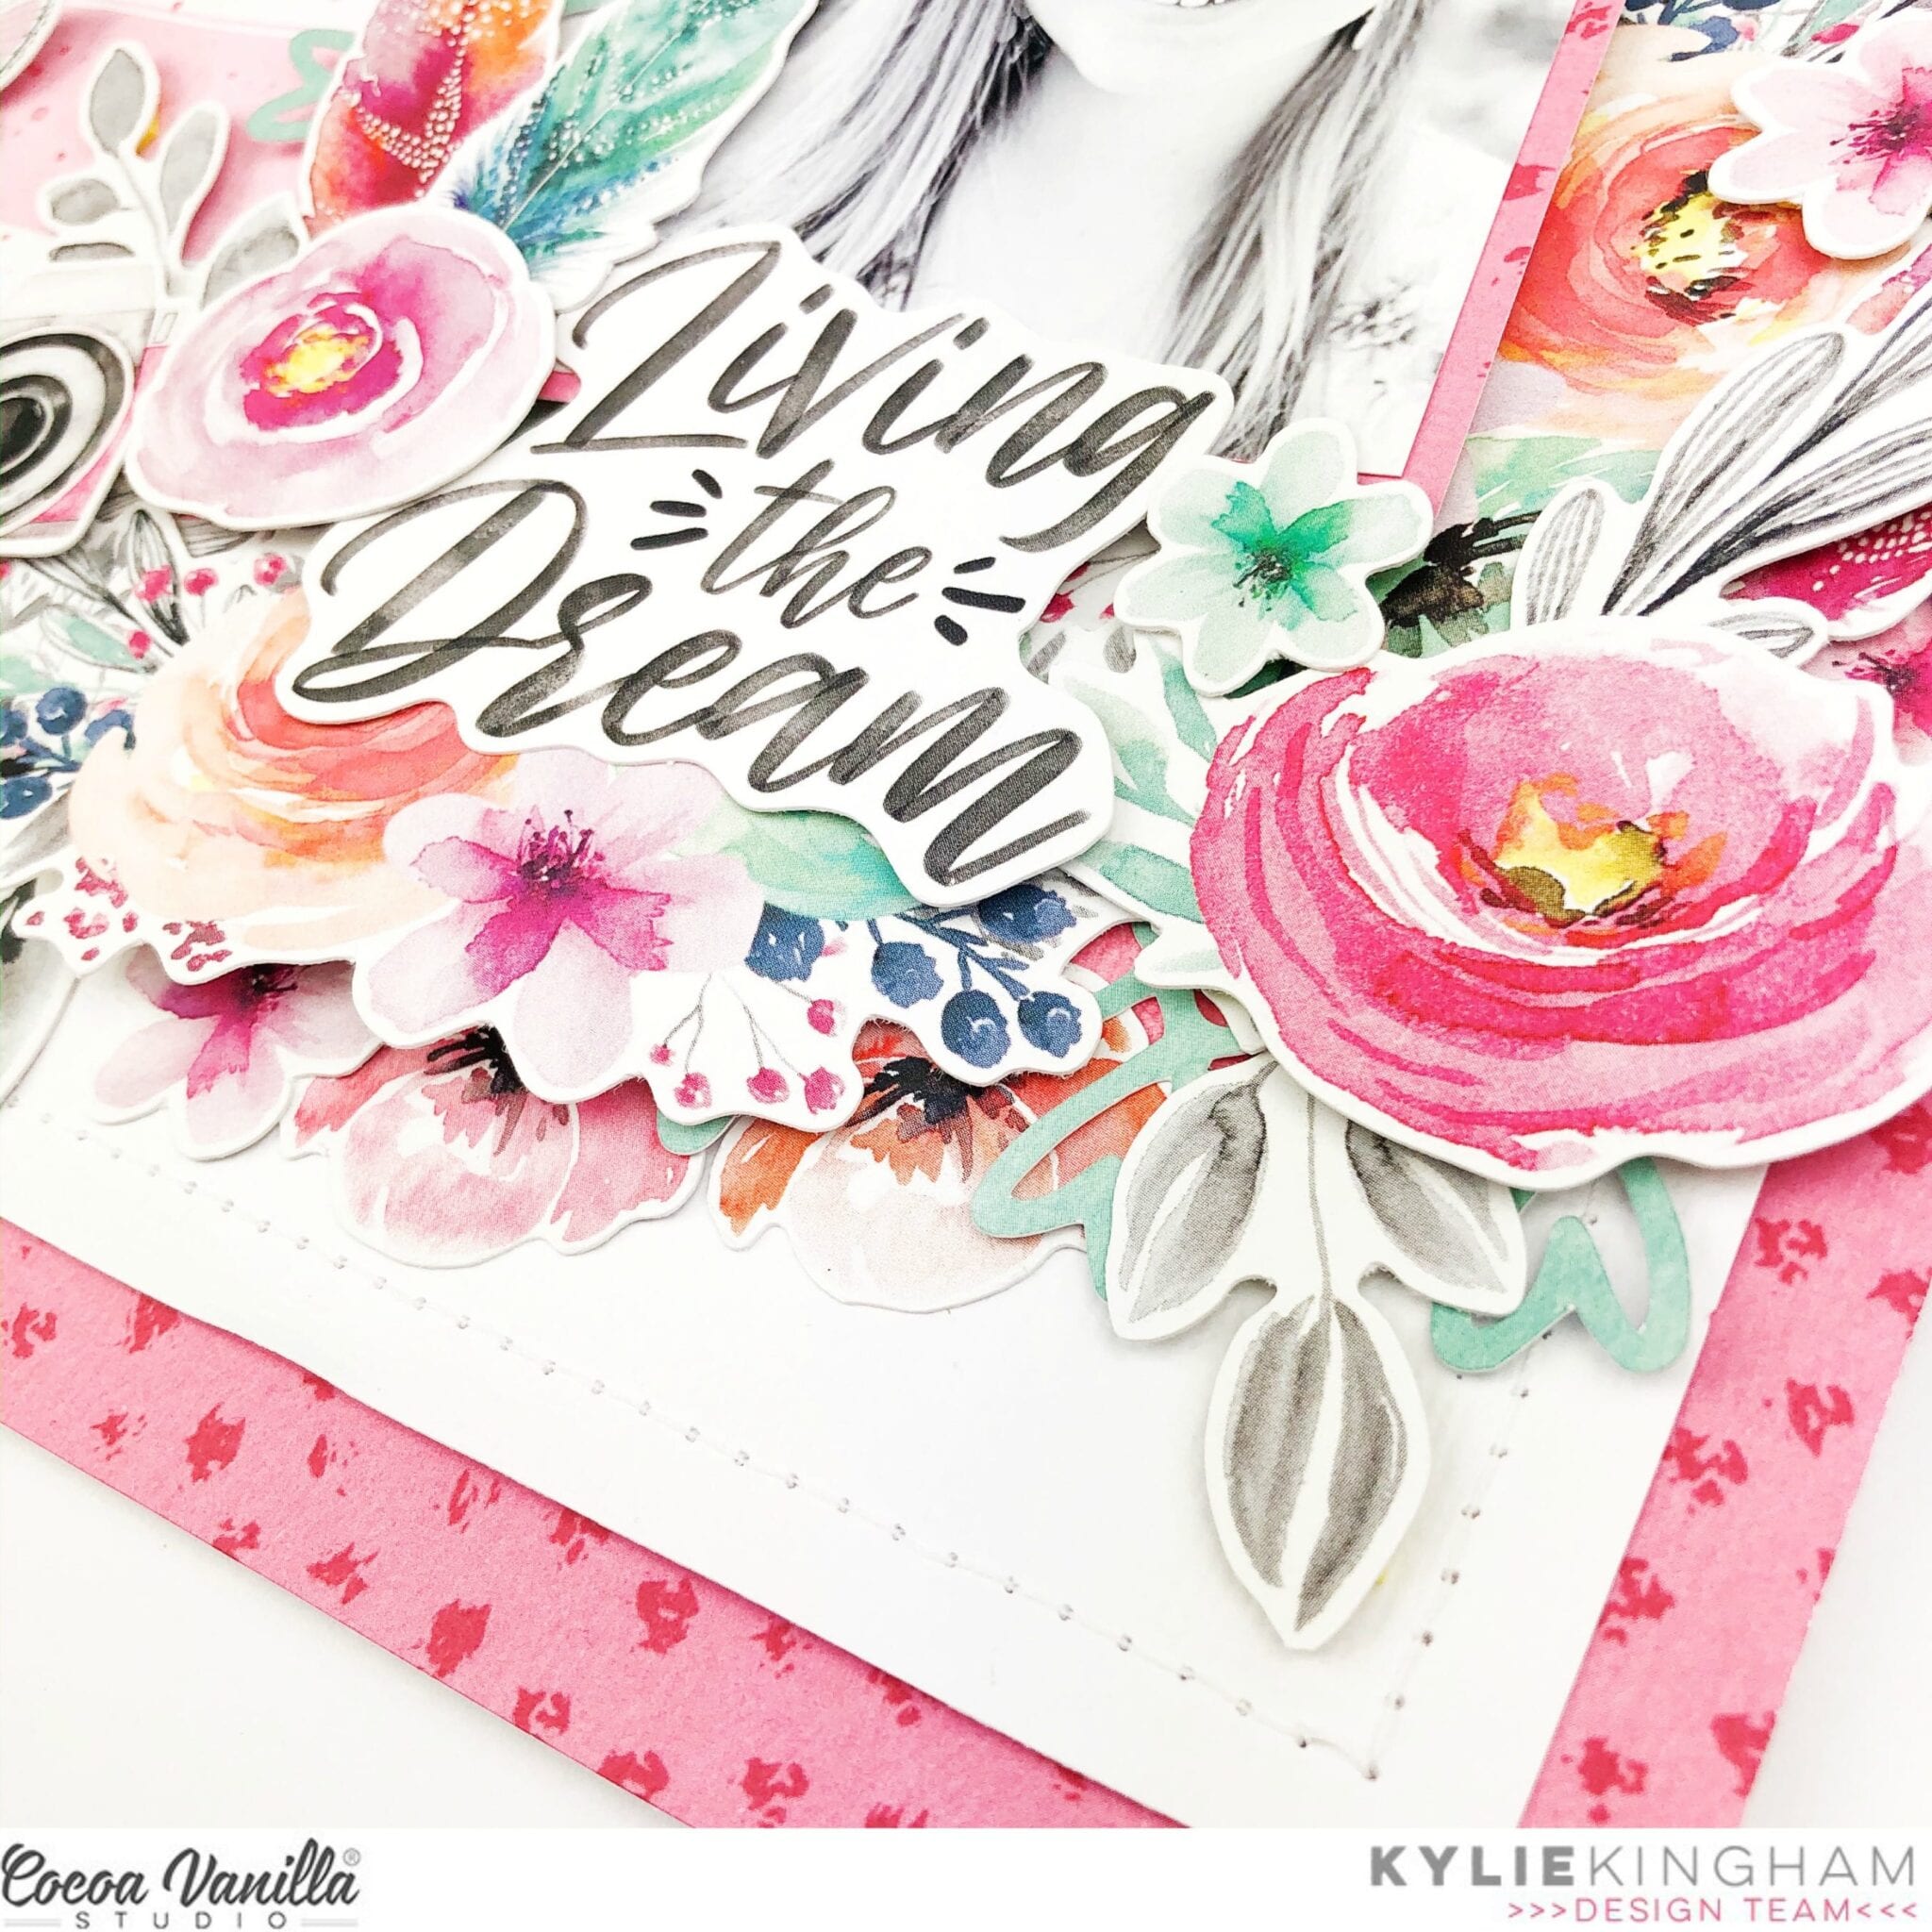
 My title is one of the gorgeous foam word titles, these are brilliant to add to any project, they make a statement and they really pop off the page too! I added one of the larger butterfly die-cuts to the left of the title to balance out the with the smaller one on the right hand side. A couple more enamel dots and a couple pf the gorgeous clear stickers were also added for some extra interest and texture.