Dream Big | Bohemian Dream | Kylie Kingham
Hello dear friends! It’s Kylie with you all again today, sharing a new layout I have just completed. Since it’s Mother’s Day here in Australia today, I thought it would be fitting to share a layout of that theme. I decided to use some of my Bohemian Dream stash and have combined it with a beautiful cut file which has been designed by lovely design team member Gwen, of Cut to You.
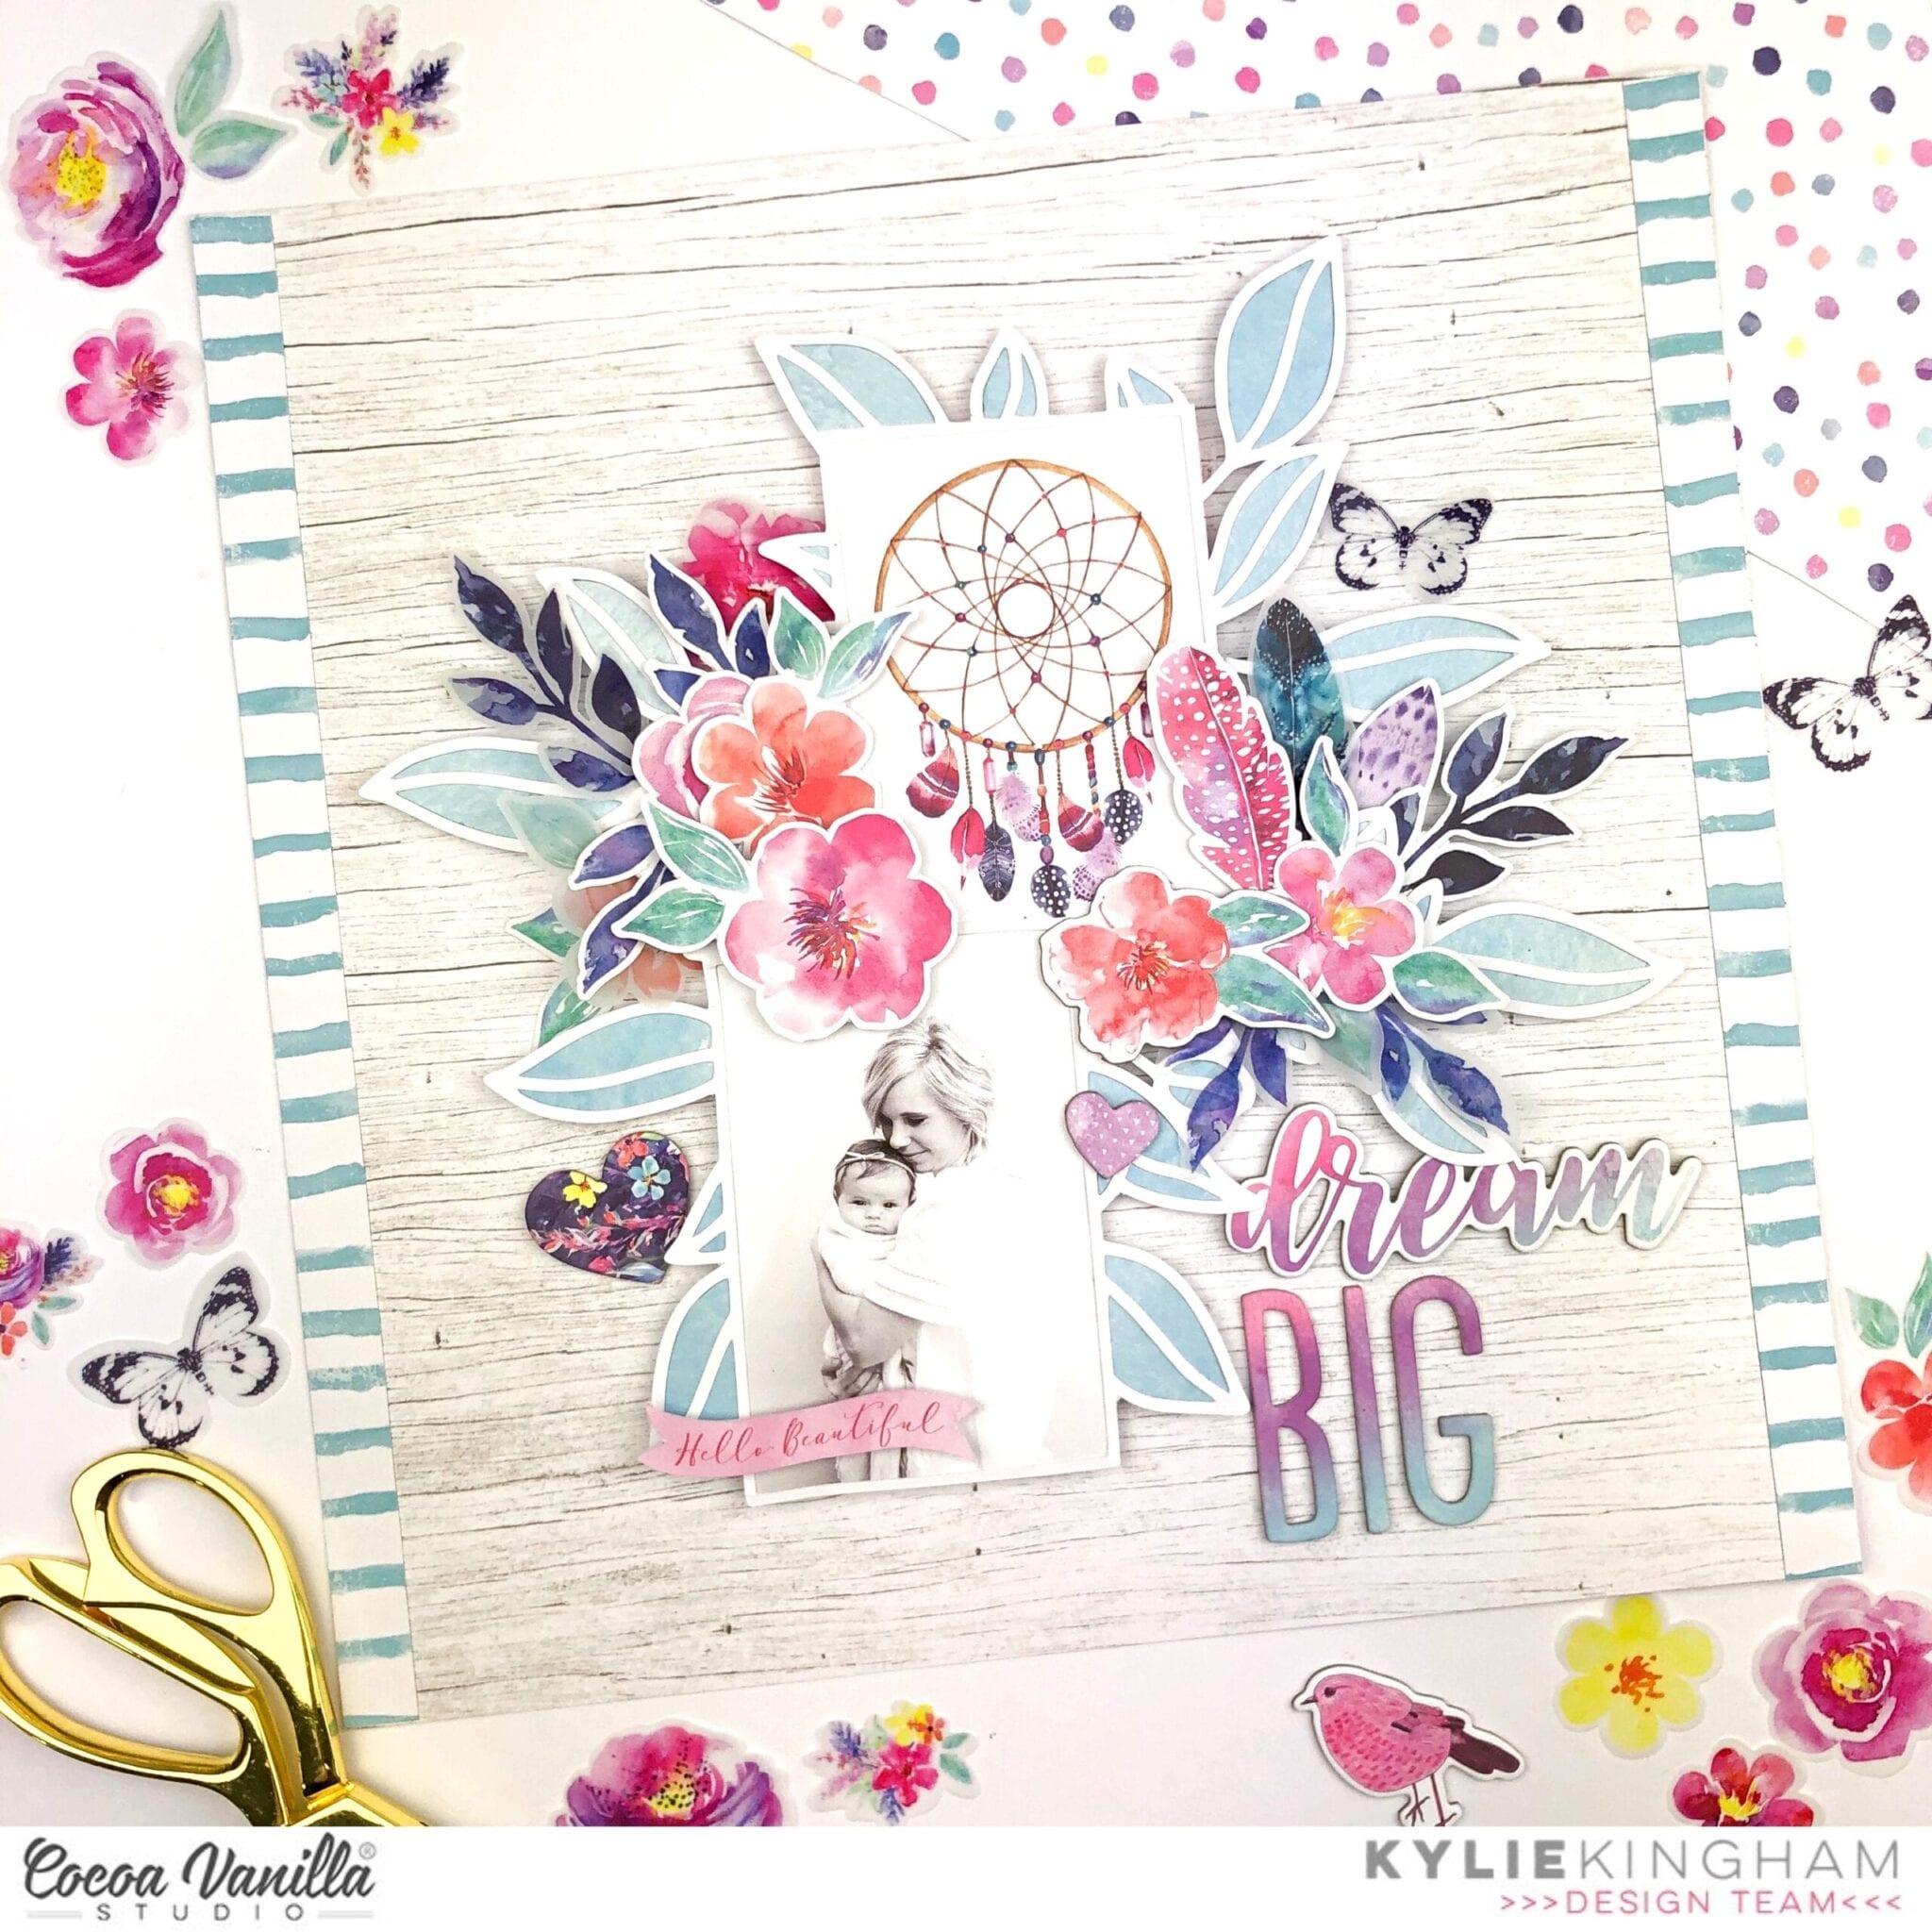
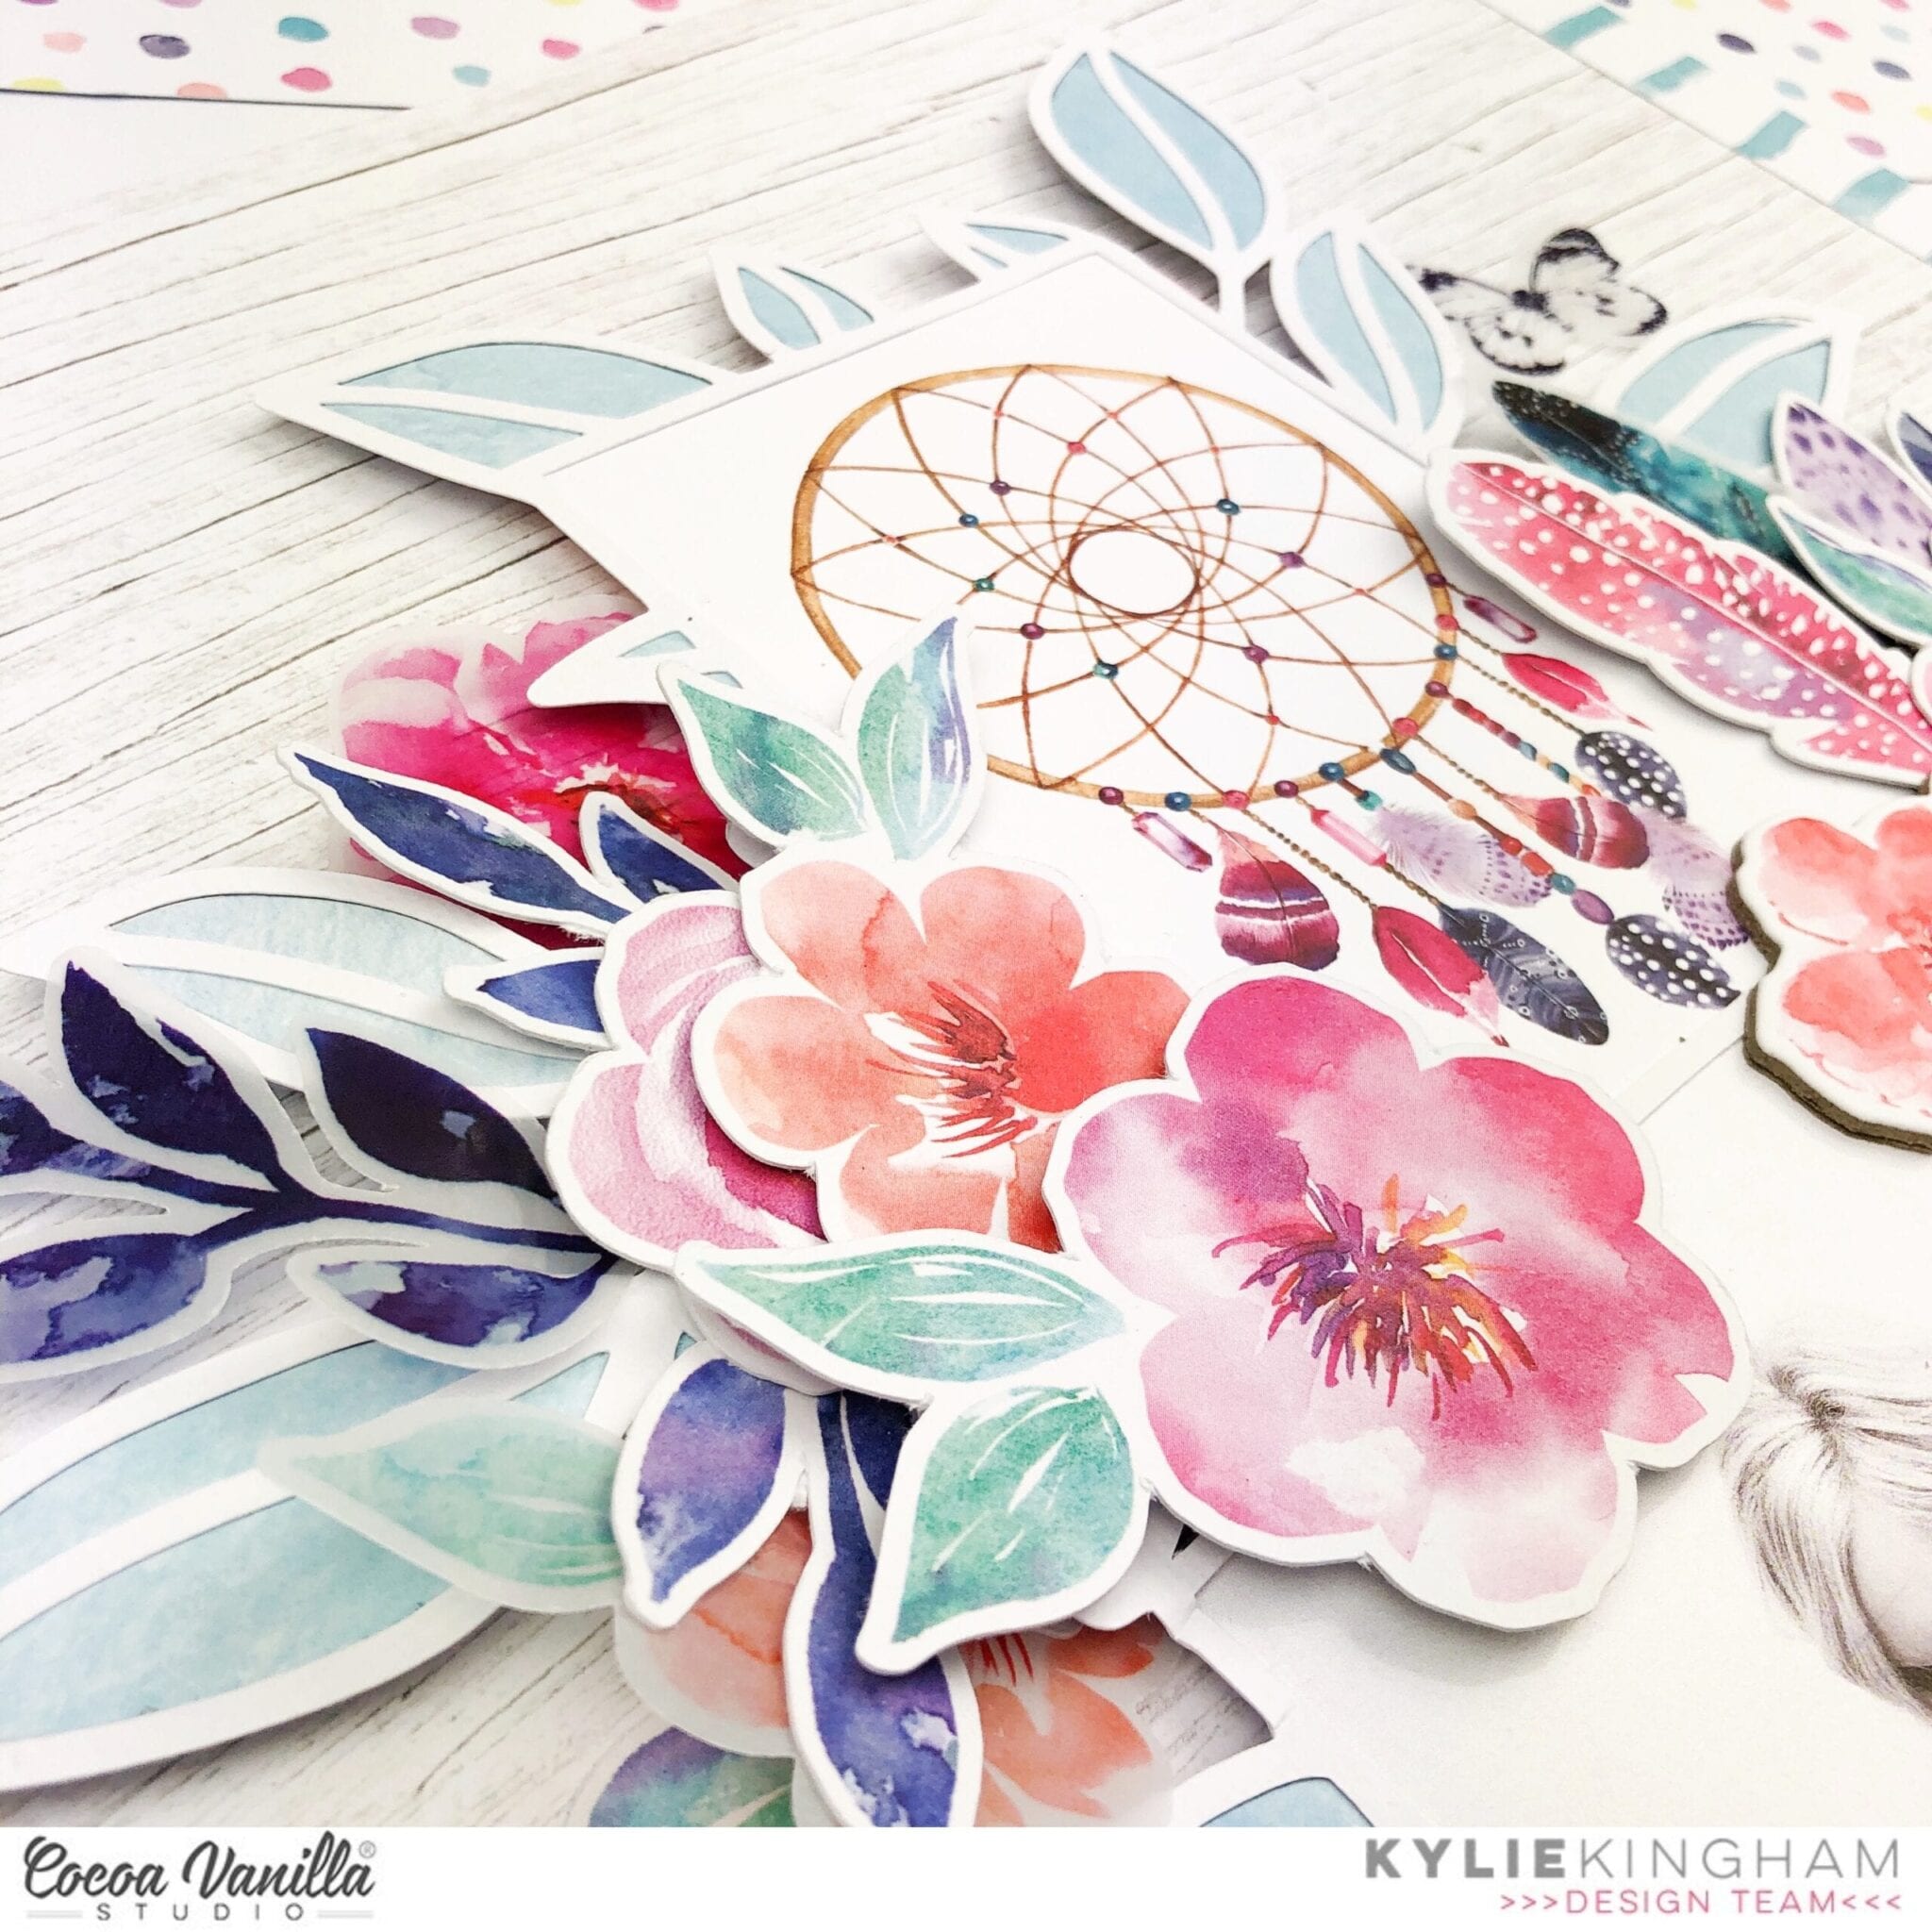
The cut file had two frames amongst leaves which were backed with the Wild and Free paper. For one frame I have fussy cut the gorgeous dream catcher 3 x 4 card from the Boho Bits paper and I have added my photo to the lower frame.Once it was all backed I adhered it to the Kaleidoscope paper with foam tape.I like the dimension and effect it gives to my layout, having it sit up from the background.For some extra colour I added two 1.5cm strips of Flower Child paper to each vertical side.

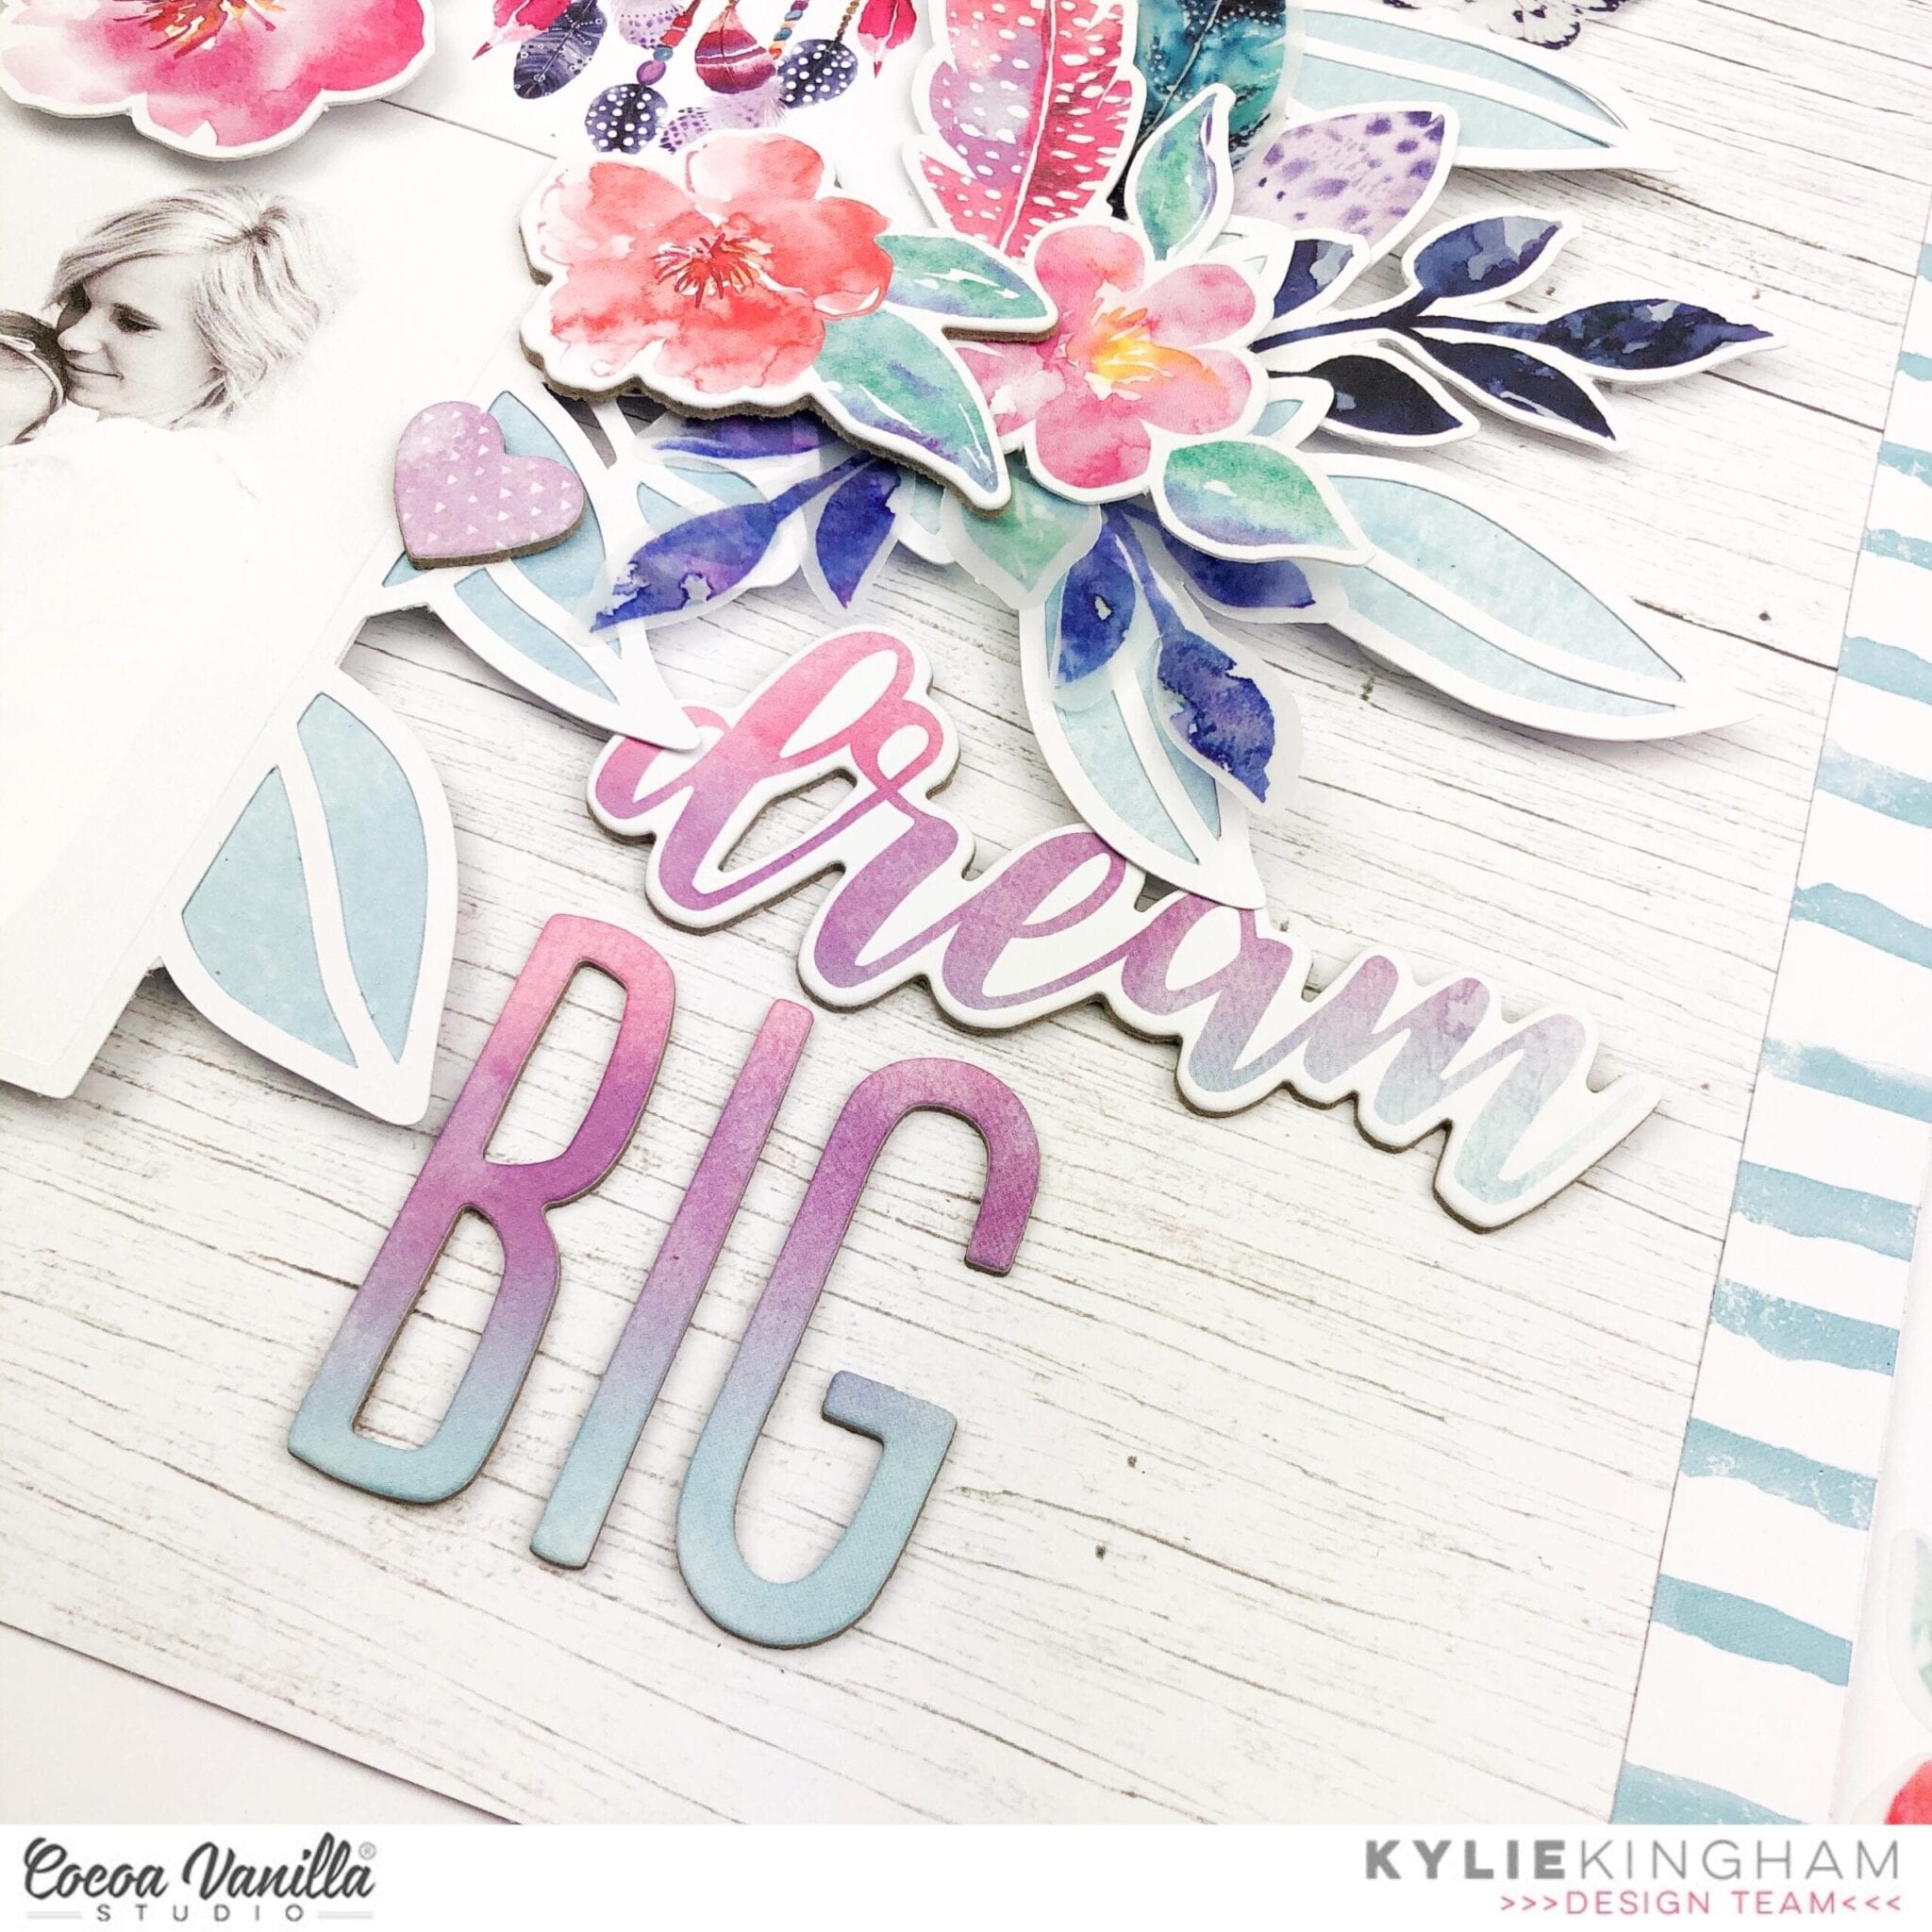
I really love to layer together different embellishments for texture and dimension. I have used the chipboard stickers, vellum accents and die cuts to support and balance my layout.Some have had foam tape added to raise them, giving a lovely natural flow.
Large titles can make such a beautiful impact to a layout. I selected the ‘Dream Big’ phrase chipboard stickers and added them to the lower side of my page. Once completed, I went back and added some of the chipboard hearts as well as a vellum butterfly to finish off my page.

Thanks so much for stopping by today. I hope you have enjoyed seeing my latest design and it gives you a little inspiration for your own scrapbooking.
Until next time, happy scrapping!
Kylie.xx
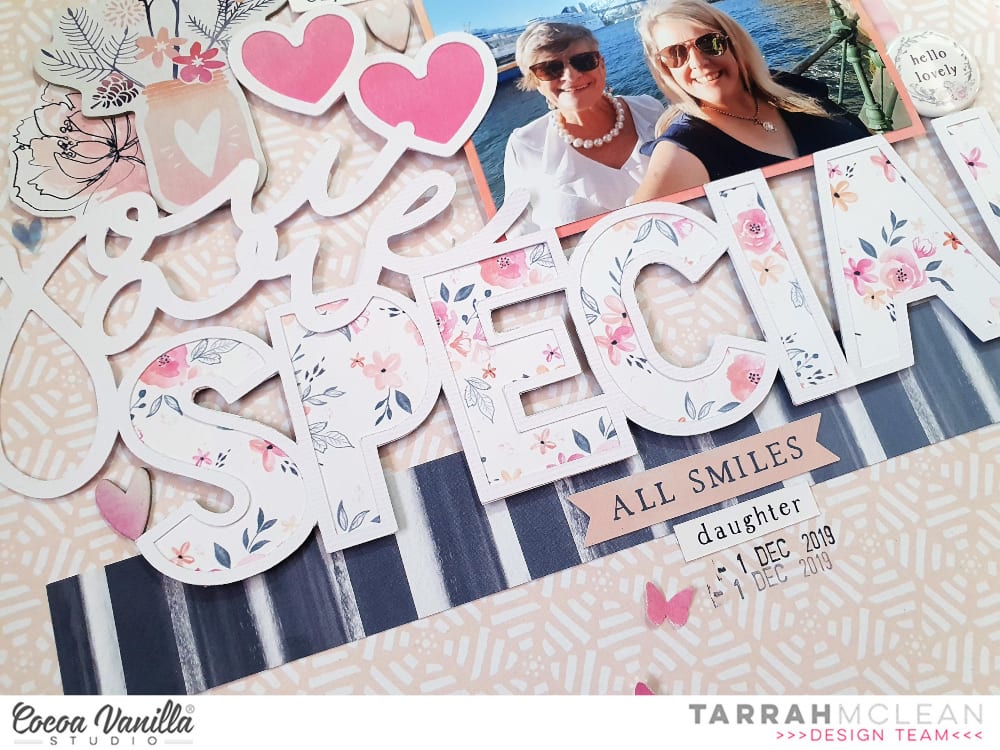
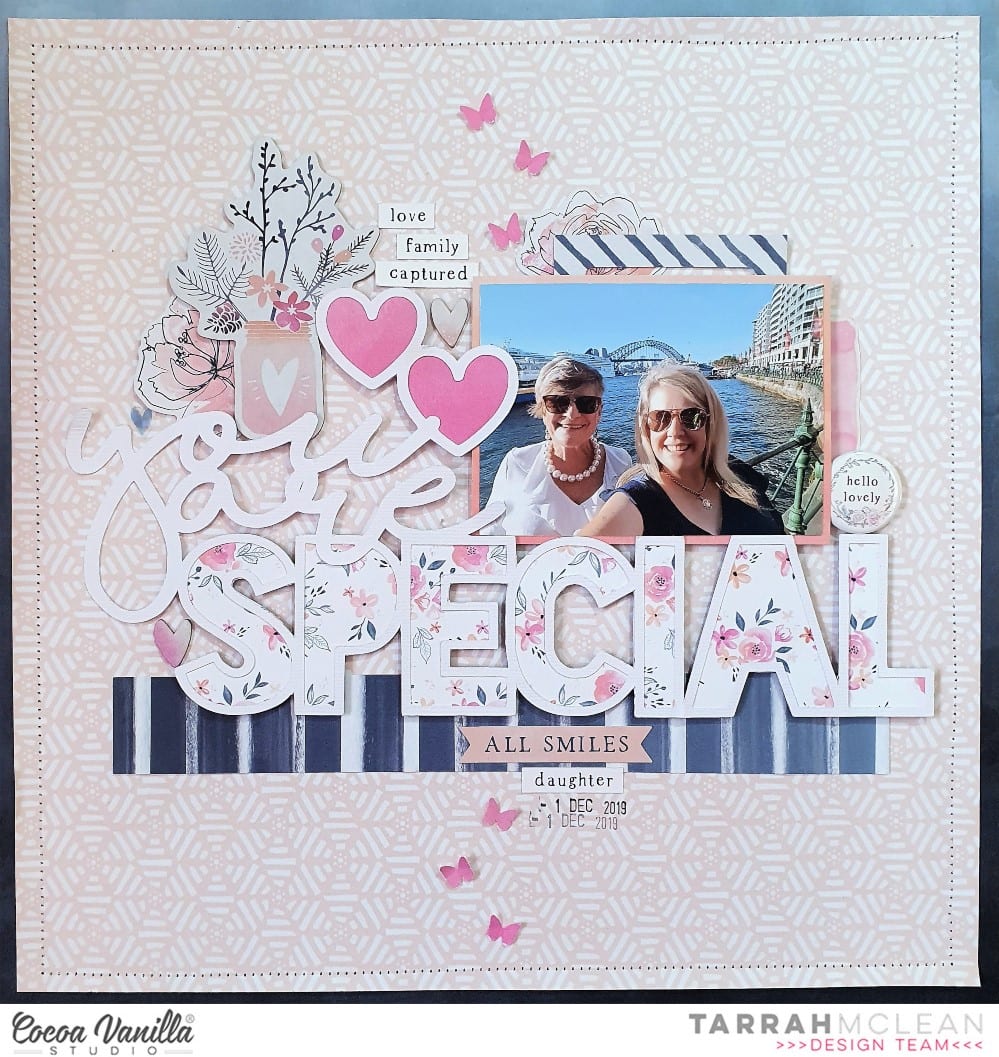 I found a really lovely cut file designed by fellow team member Gwen from Cut To You, I cut it out from white cardstock and then backed the hearts at the top of the cut file with the pink side of the
  I chose the ‘B’ side of the
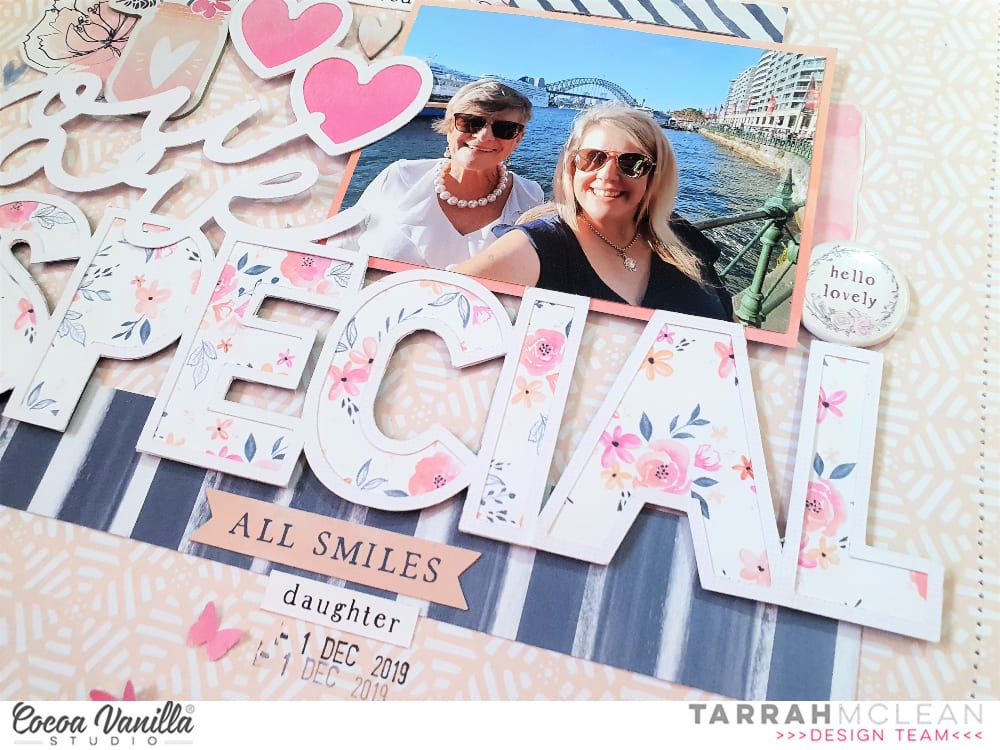 I tucked in one of the cute die-cut frames from the die-cut ephemera pack into the top of my photo, I then took one of the paint strip clear stickers and added it to white cardstock, I then fussy cut it out and tucked it into the right side of my photo. I also added one of the cute flair buttons here. The jar and flower chipboard piece fit perfectly there just above the ‘You’ in the cut file, I love how this looks here. I also tucked in one of the floral die-cuts to the left of the jar to bring in some more of the florals to the page. I also added a few chipboard hearts and also a clear sticker heart too. Lastly I added some of the accessory word and phrase stickers and the date stamp to finish off!