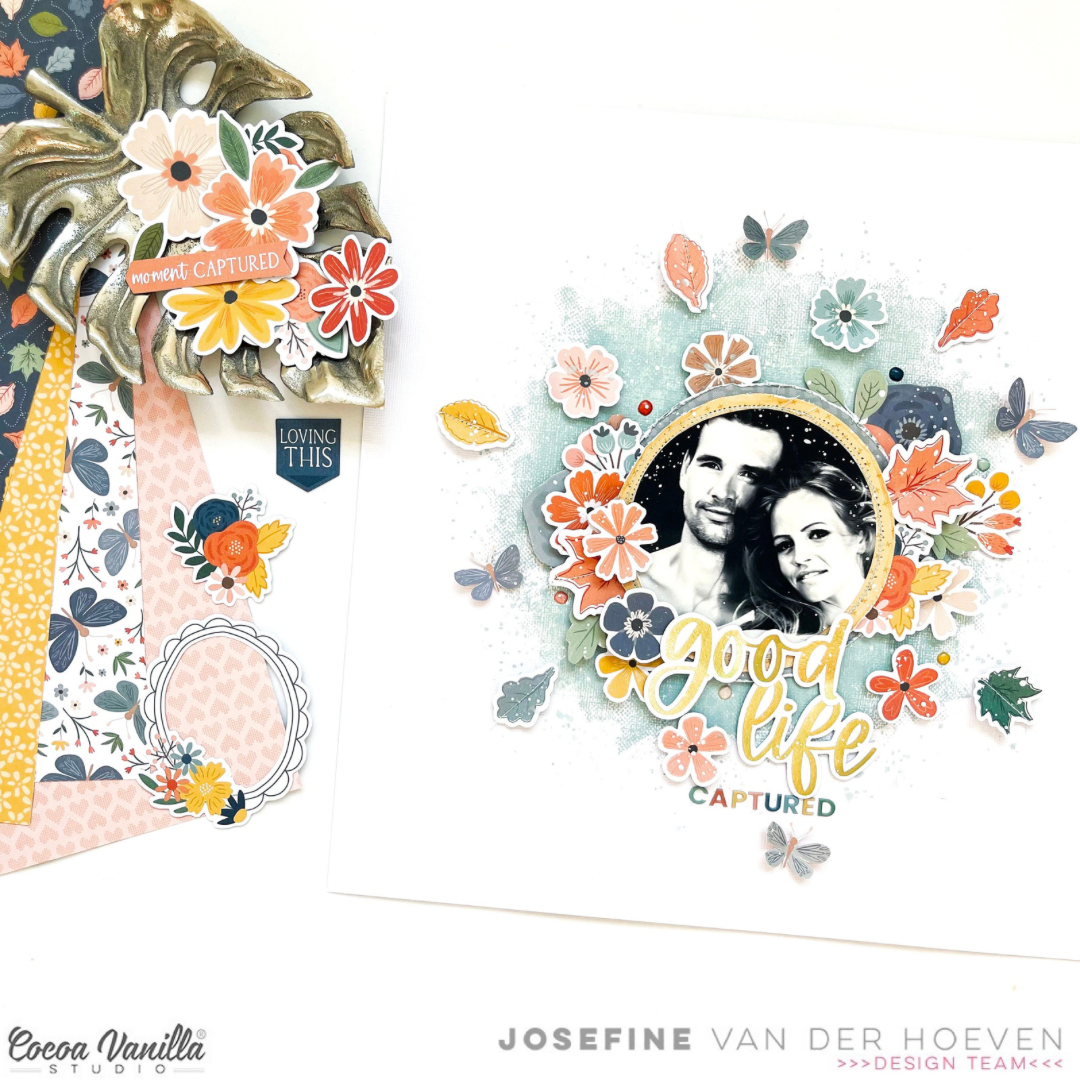
Good life captured | Heart and Home collection | Josefine Van der Hoeven
Hello, Paperlovers!
Welcome to the Cocoa Vanilla Studio blog today. It’s Josefine here, bringing you fresh inspiration. I’m absolutely love the incredible new collection “Heart and Home.” The beautiful warm and soft colors are perfect for capturing autumn memories, family moments, and, lovely summer memories.
My first layout with this collection is a sweet summer memory that perfectly matches the title “Good Life Captured.” I chose for a black and white photo and a white background to make the colors in this collection shine even brighter.
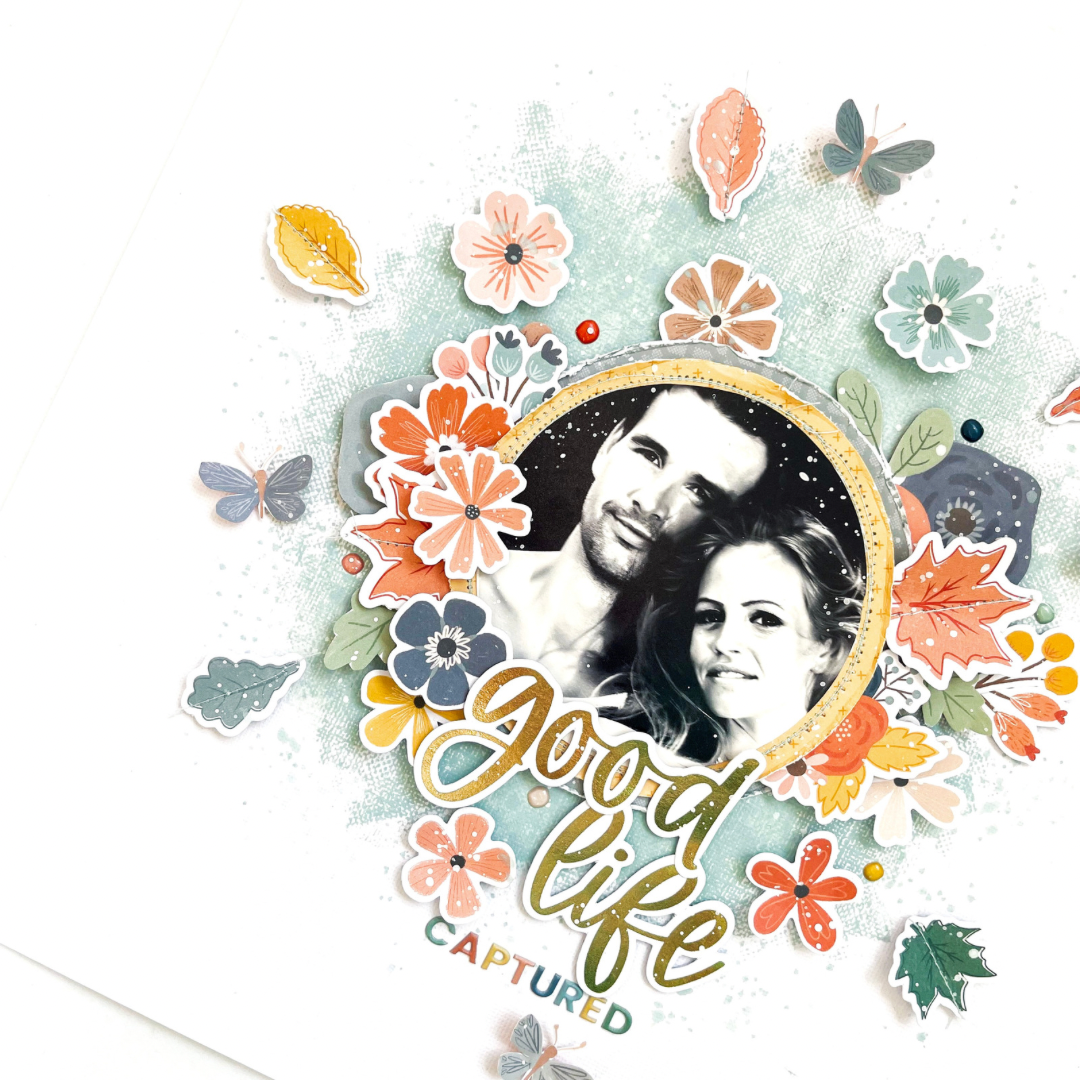
I started by creating a mixed media background on the white cardstock using one of my many oxide ink pads. The color I’m using is “Speckled Egg,” which isn’t too overpowering and complements the colors of the “Heart and Home” collection beautifully. I use a small sponge, load it with ink, and then dab it onto the white cardstock. I repeat this process several times until the mixed media background is large enough. After letting the ink dry, I move on to fussy cutting and select the patterned paper with the lovely large flowers.
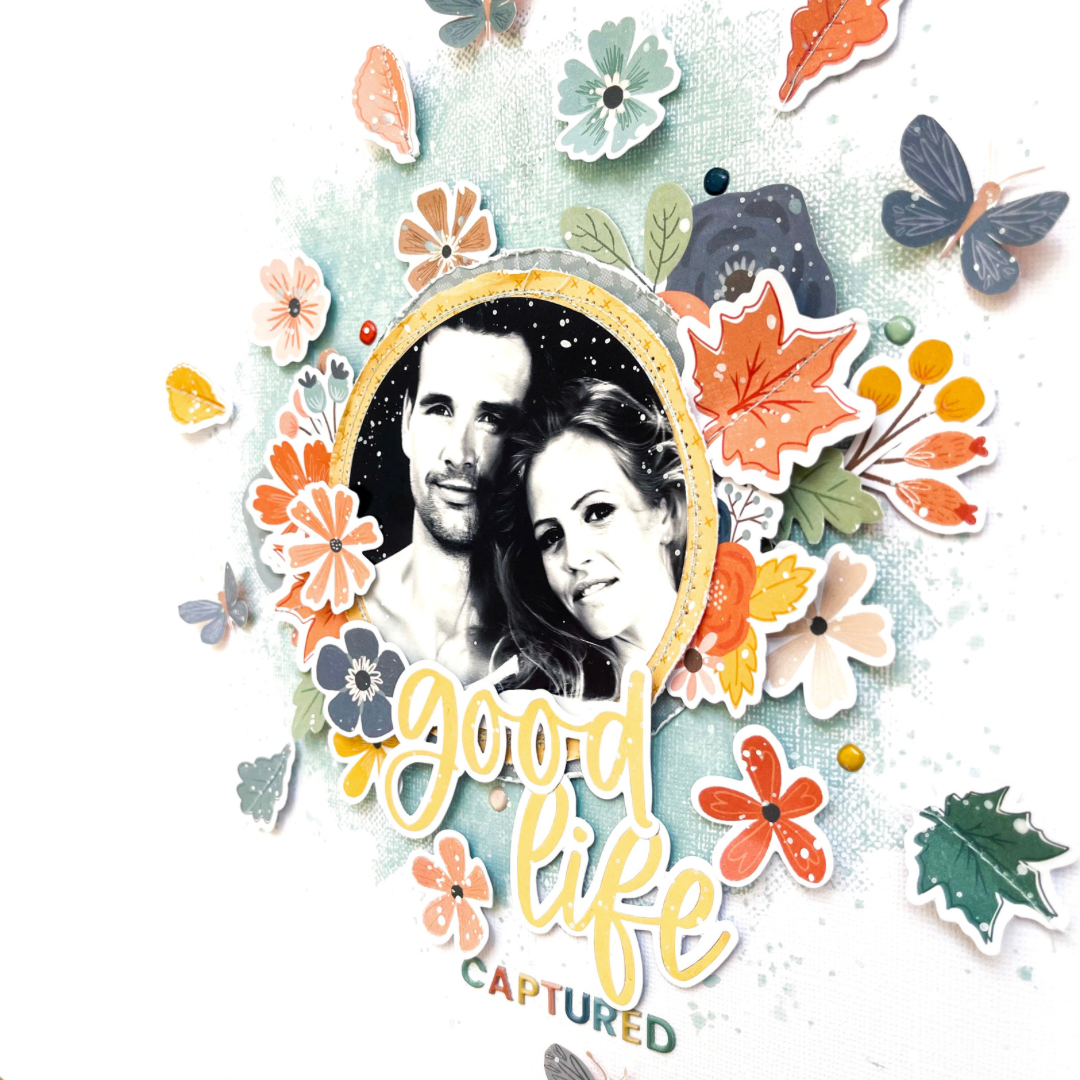
Once the ink is dry, I cut the photo into a circle. I also choose two more patterned papers and cut circles from them as well. I add a stitched border to the circle with the photo, using light blue thread that matches the mixed media background. I position the circles behind the photo and then place it in the center of my layout. Now it’s time to decorate the layout with the beautiful embellishments from this collection, such as floral ephemera, die-cut leaves, mini alphabet, puffy stickers, and the gold word title ephemera.
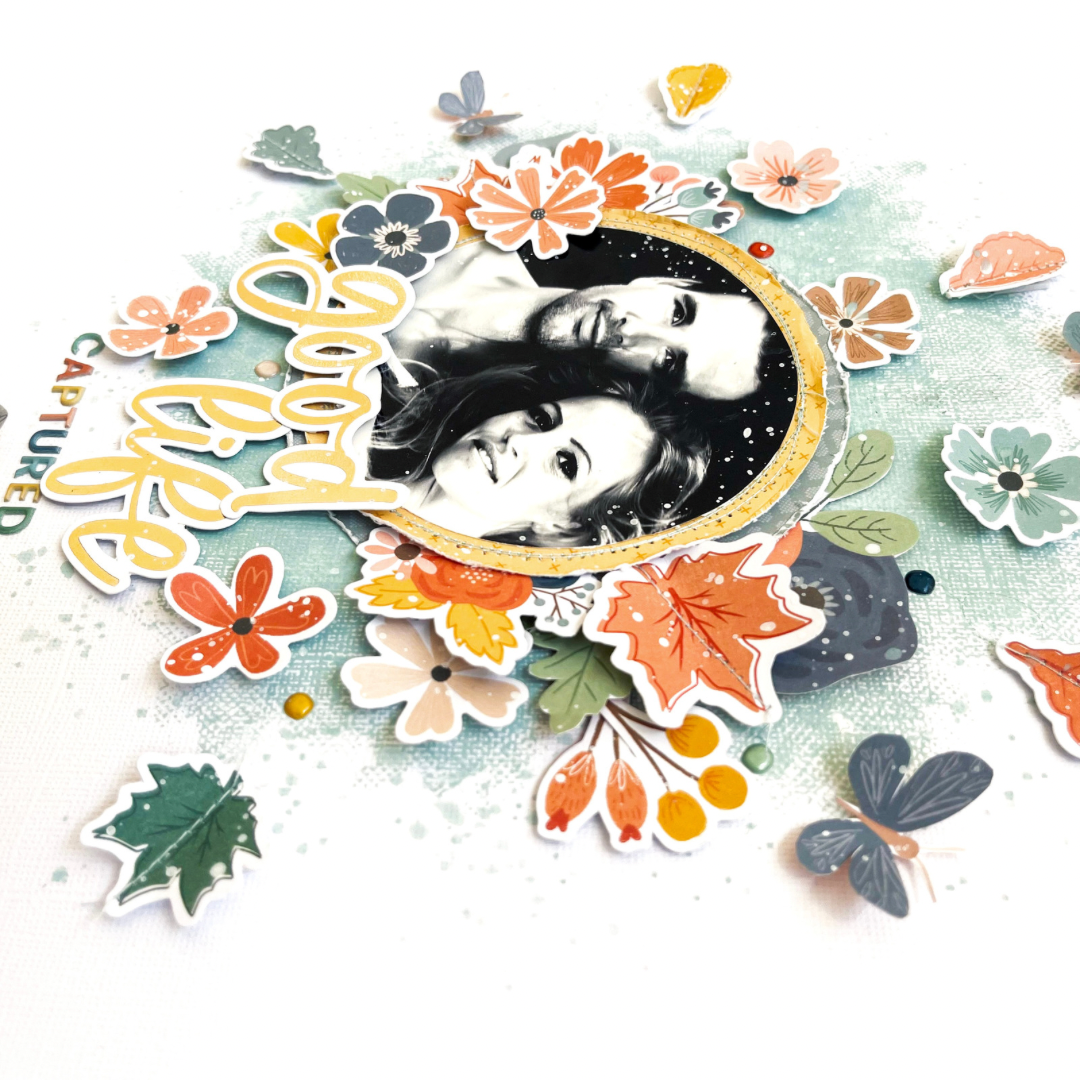
I carefully select the die-cuts I want to use and create clusters of flowers on both sides of my photo. Next, I position the title below the photo. To finish, I playfully arrange the flowers and leaves around the photo. I use 3D foam for this step to make the flowers and leaves pop from the mixed media background. I add some splatters of white gesso to the layout and let it dry. I’m so happy with the result and can’t wait to create more layouts with this fantastic collection!

I want to thank you for visiting the Cocoa Vanilla Studio blog today. I hope to inspire you again with a new layout next time. Wishing you a wonderful and creative day.
XoXo, Jo