
Together | Heart and Home collection | Tarrah McLean
Hi creative friends,
It’s Tarrah back with you and today I am excited to be sharing a layout with you featuring the new GORGEOUS Heart and Home collection! I love the handmade feel to this collection.
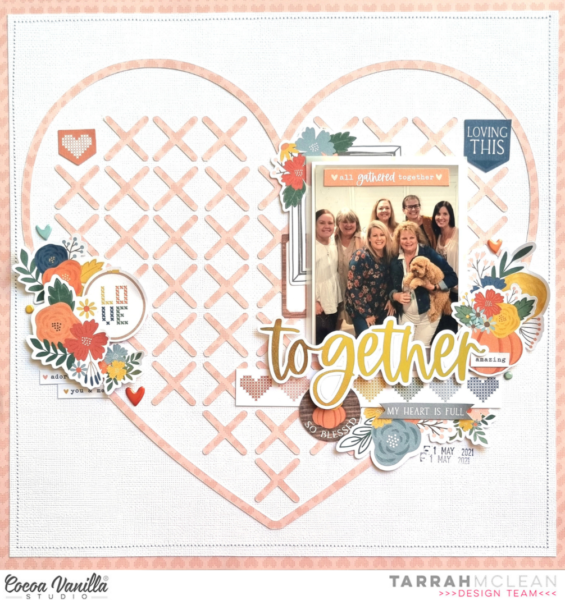
I started by choosing a cut file from CUT to YOU, I cut it out from the ‘B’ side of the gorgeous Fall Beauty paper. I was certain to place the cut file in the centre of the paper so I could use the outline as the background for my layout. I adhered the cut file to a plain sheet of white cardstock and trimmed down the cardstock to measure approximately 11′ x 11′ and adhered it the remainder of the Fall Beauty paper. I then machine stitched a border around the outside to add to that handmade feel.

I am documenting a photo of myself with my friends from one of their 50th birthdays a few years ago. Such a fun night celebrating! I placed the photo on the right hand side of the page and layered a piece of vellum and a frame from the die-cut pack underneath. I adhered the photo using craft foam to add a little dimension to my page. On top of the photo, I added a phrase banner from the die-cut pack and also placed a rectangle sticker from the accessory sticker sheet to the left of the photo.
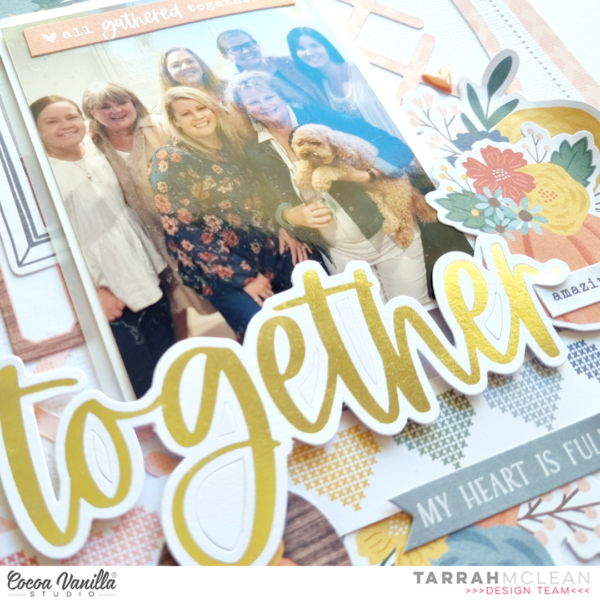
At the bottom of the photo, I placed the paper strip with the cross hearts on it from the ‘Gather’ paper. I also tucked in some florals from the floral die-cut pack and placed a banner die-cut and a round die-cut both from the ephemera pack. To the right side of my photo, I tucked in some more florals here and also placed a word sticker from the Accessory Sticker sheet. My title is the ‘Together’ word from the gold title die-cut pack. I just love the gold foil on these! So pretty!

To balance out the heavy right side of the page that features my photo and title, I created a small cluster of embellishments that features mostly florals and a Love die-cut. I used different levels of adhesive here to show different levels of dimension. I also placed some more word and phrase stickers here from the Accessory sticker sheet. Lastly I placed some enamel puffy shapes and I stamped the date stamp to document the date of when the photo was taken.

Thanks so much for stopping by the Cocoa Vanilla blog! I hope you enjoyed reading about how I created my layout as much as I enjoyed creating it.
Happy creating!
Tarrah x