Happy times | Happy Days Layout | Anna Komenda
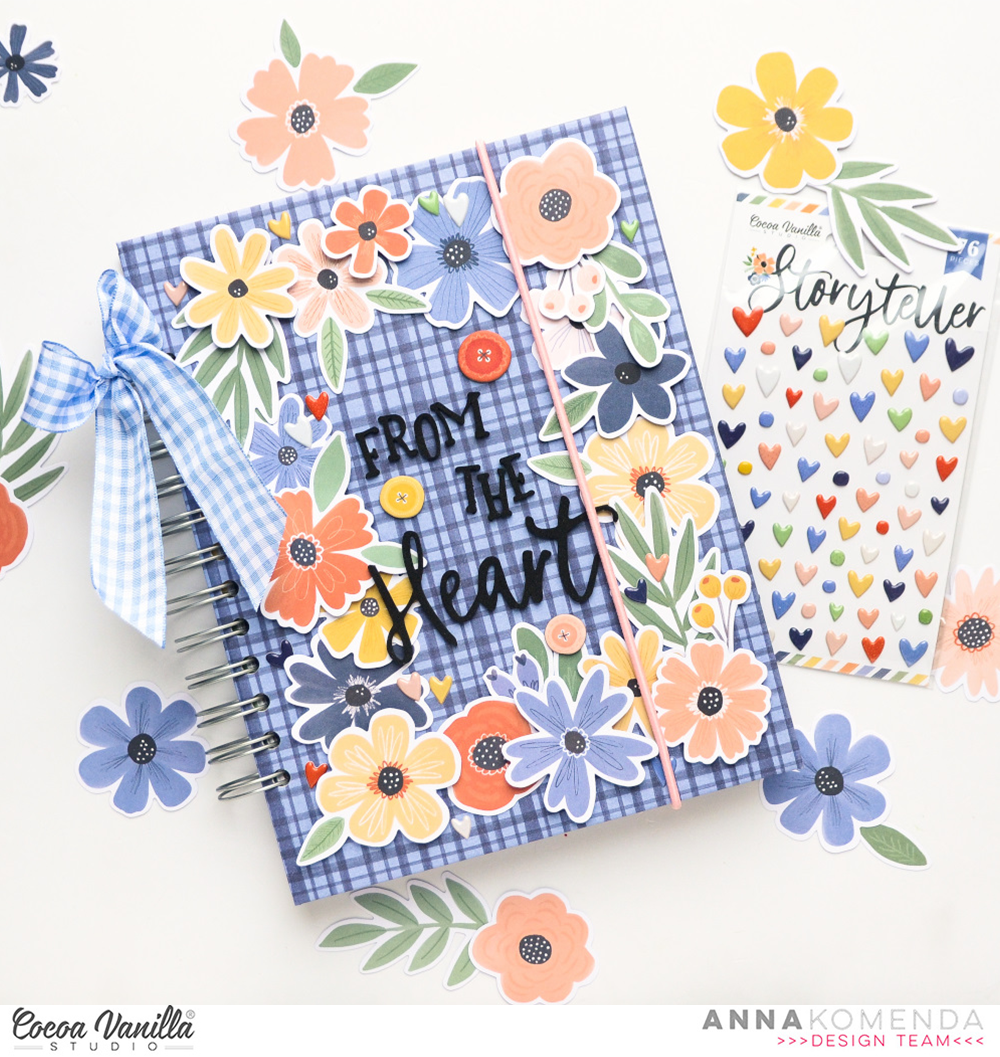
Hello, hello! It’s Anna here and I have a brand new layout to share with you. I just got brand new “Happy days” collection and I couldn’t wait to start creating with it. As always, first project is somehow hard as there are so many options and decission making process is complicated. So many patterns and colors to choose from! I like to focus on limited color combo at first or even make a monochromatic page to help me narrow the choices. This time I decided to use pink – yellow – plum colors with a bit of green added.
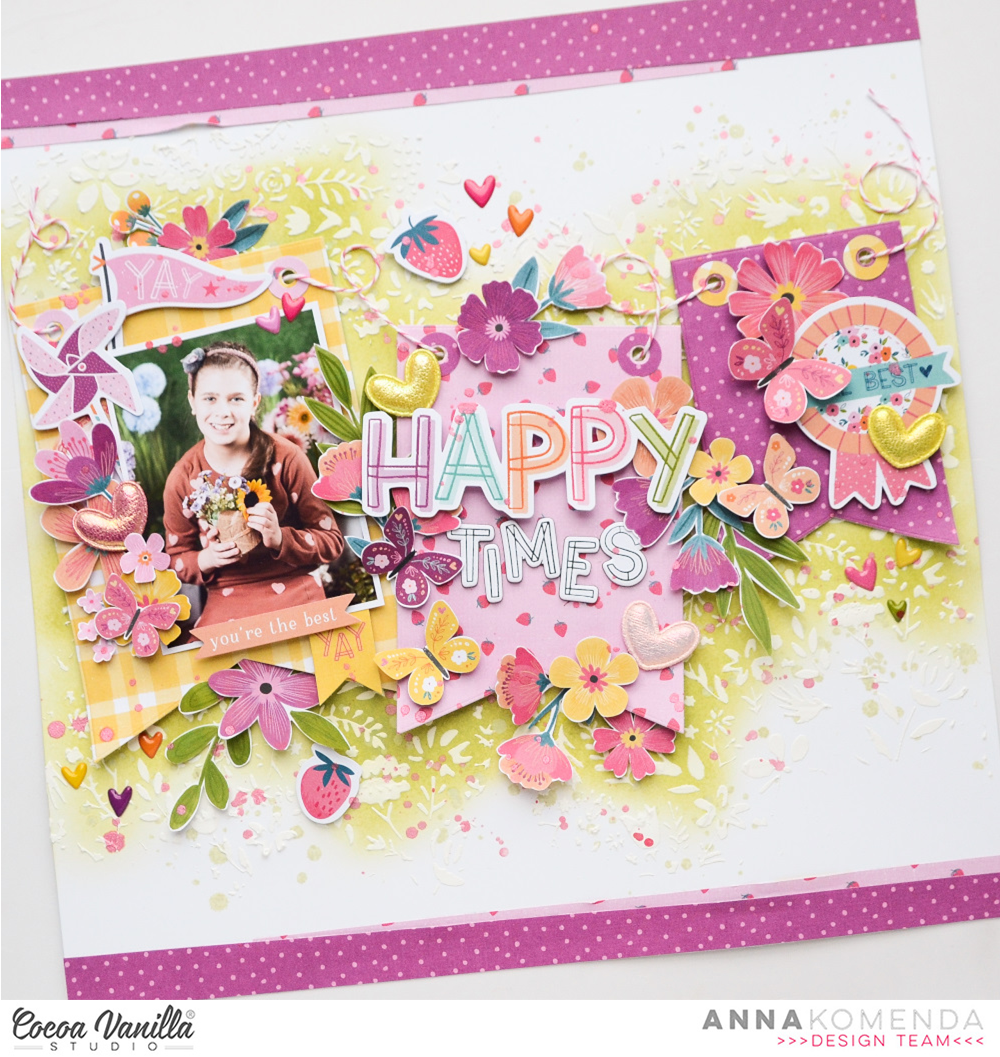
I started with white cardstock and green ink applied with a soft brush. Next I added some texture using white chalk paste and floral stencil and left it to dry. In the meantime, waiting for the background to dry, I started fussy cutting flowers from LUSH BLOOMS PAPER. I like having a lot of florals on hand even though I have three full packs of FLORAL EPHEMERA. You can never have too many of them!
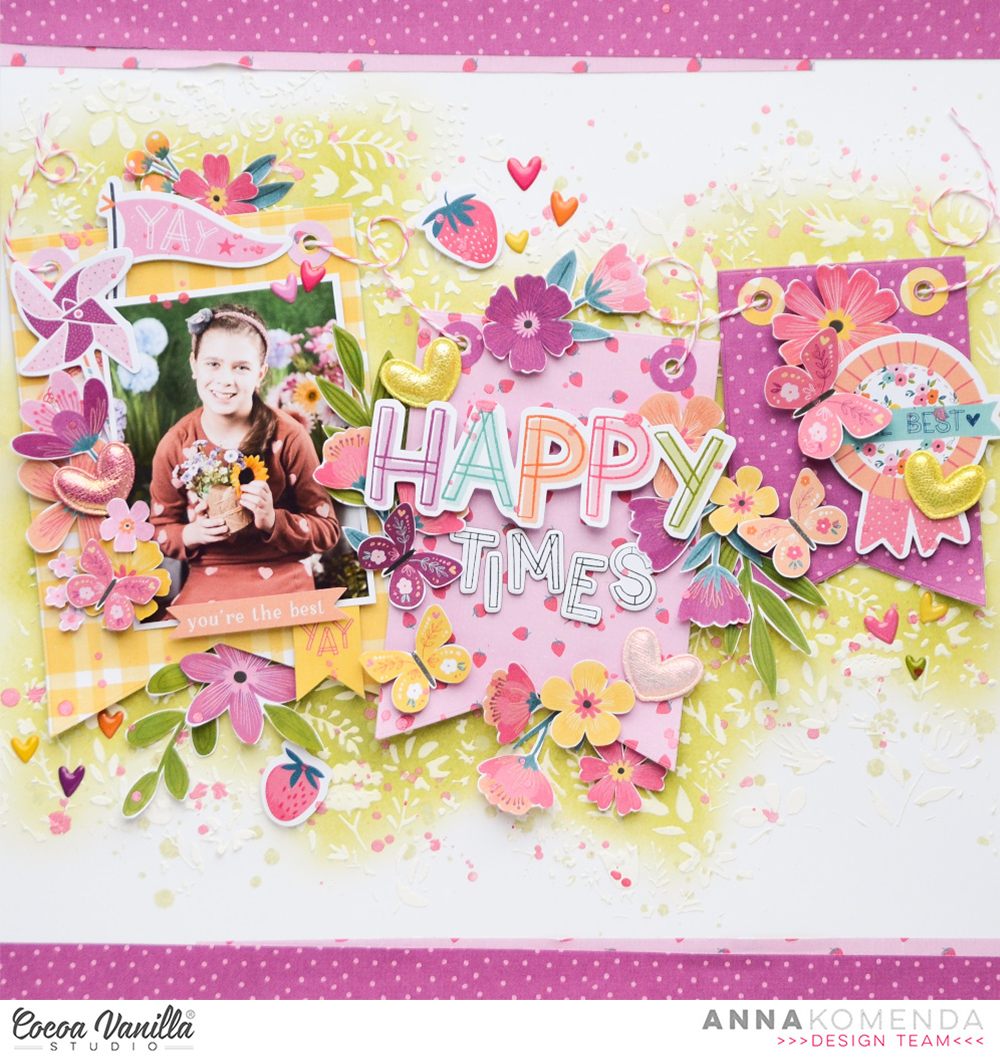
After my background was dry, it was time to add some pretty papers and embellishments. My idea for this page was to create banners on the string using different patter papers. The biggest one is made with yellow FEEL GOOD PAPER. Second one is cut out from LUSH BLOOMS PAPER (the same one I cut out flowers too!). Smallest banner in plum color is cut out with cute FLUTTERBY PAPER. I added some holes for the string to each one and glued them down to my base.
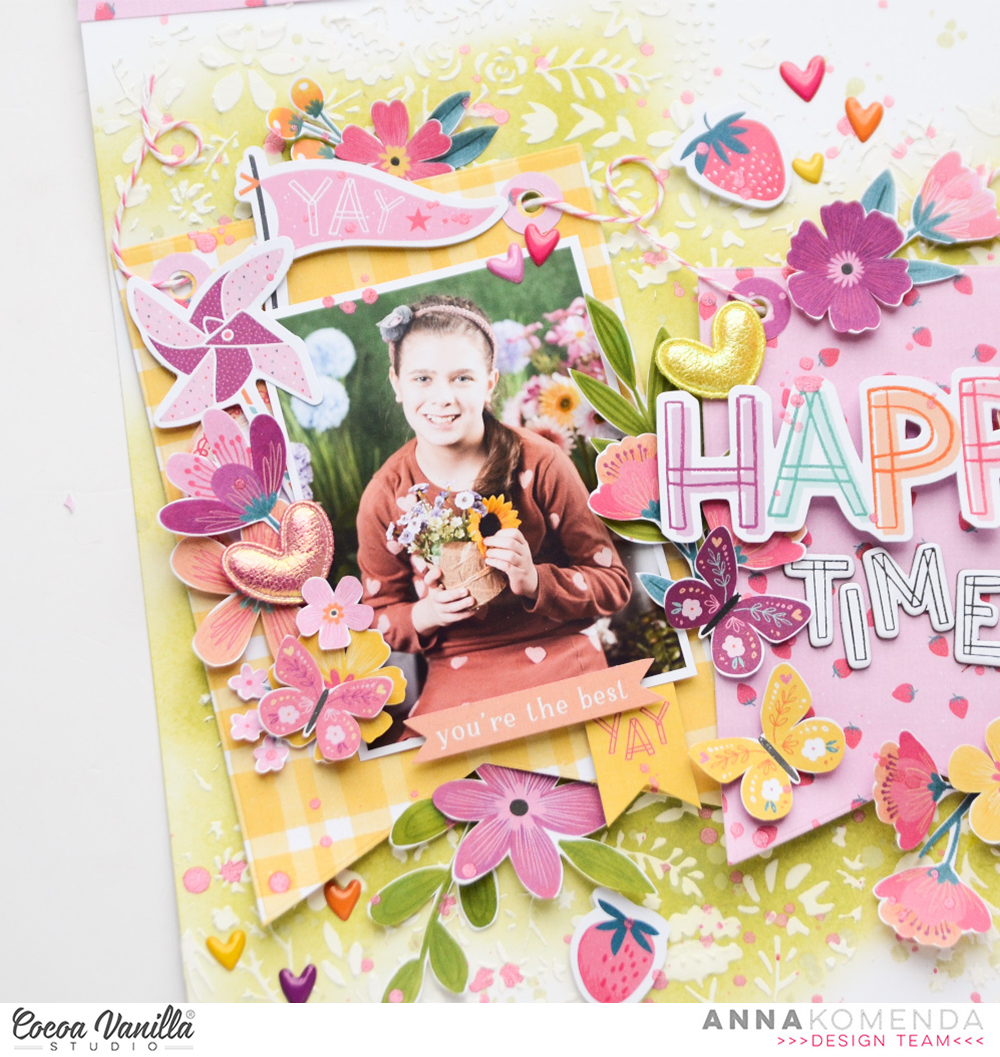
With all my main elements in place, I was ready to add my photo on the biggest banner. I decorated it with previously fussy cut flowers, some EPHEMERA pieces and butterflies cut out from FLUTTERBY PAPER. I also reached for pretty PUFFY HEARTS pack to add them here and there.
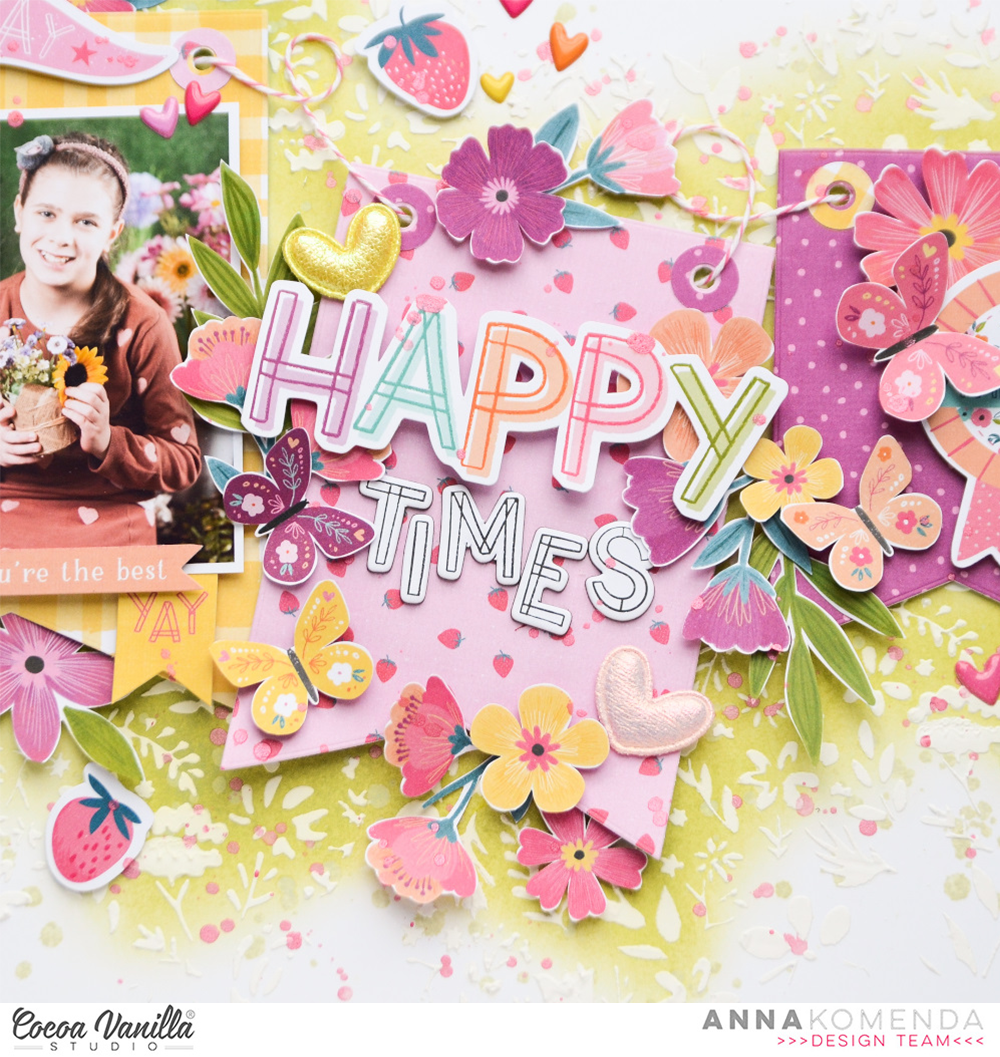
My title is a combination of word “happy” taken from EPHEMERA PACK with word “times” taken from CHIPBOARD TITLES. They look fantastic together. I love this font so much! Here I also added some flowers.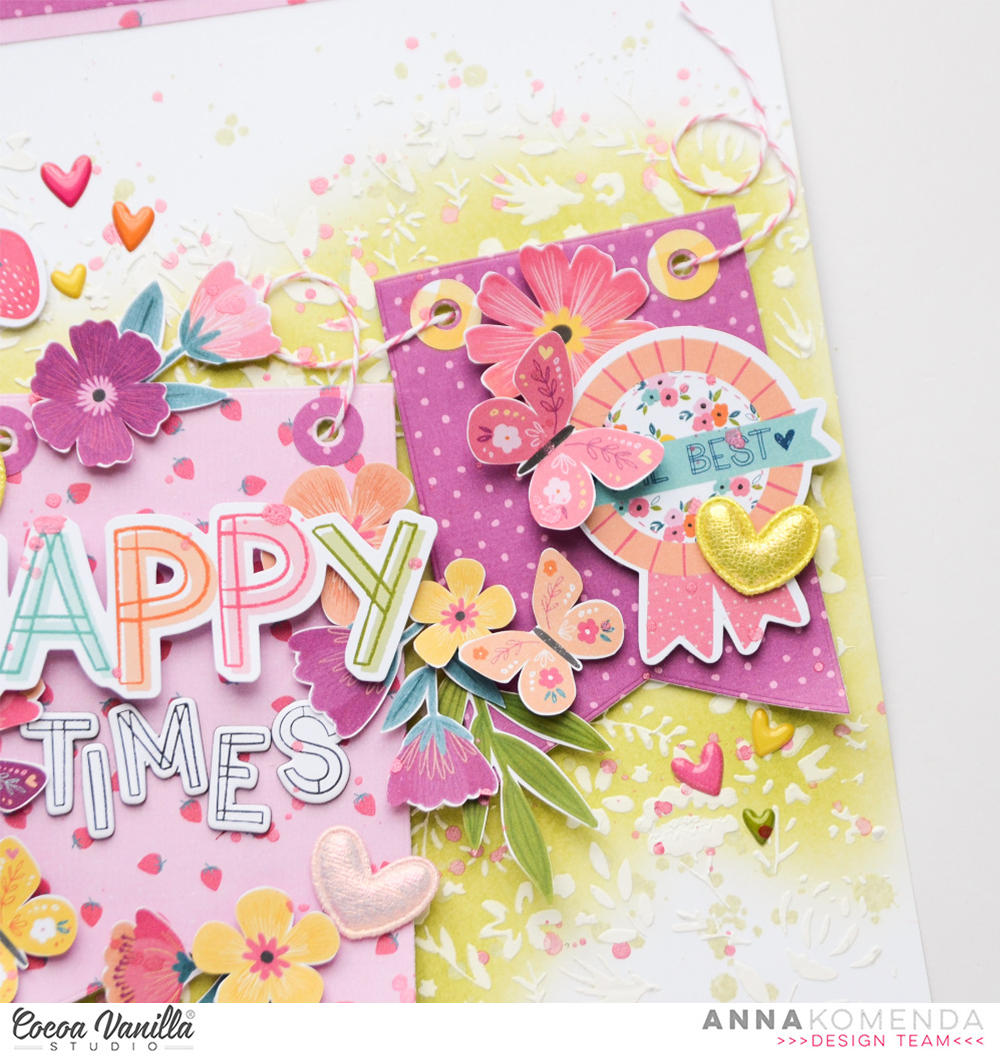
The smallest banner is decorated similar way as the other ones – with flowers and butterflies. You can also spot some cute, puffy stickers in heart shapes as a finishing touch. After finishing my composition I decided I needed to add something on the top and in the bottom of the layout as it seemed too white so I cut off strips of the papers I used for banner and glued them down! Now my page was done!
That is all for today! I hope you like my page! I already have an idea for few other projects with this line. Sending you a lot of hugs.
XO Anna
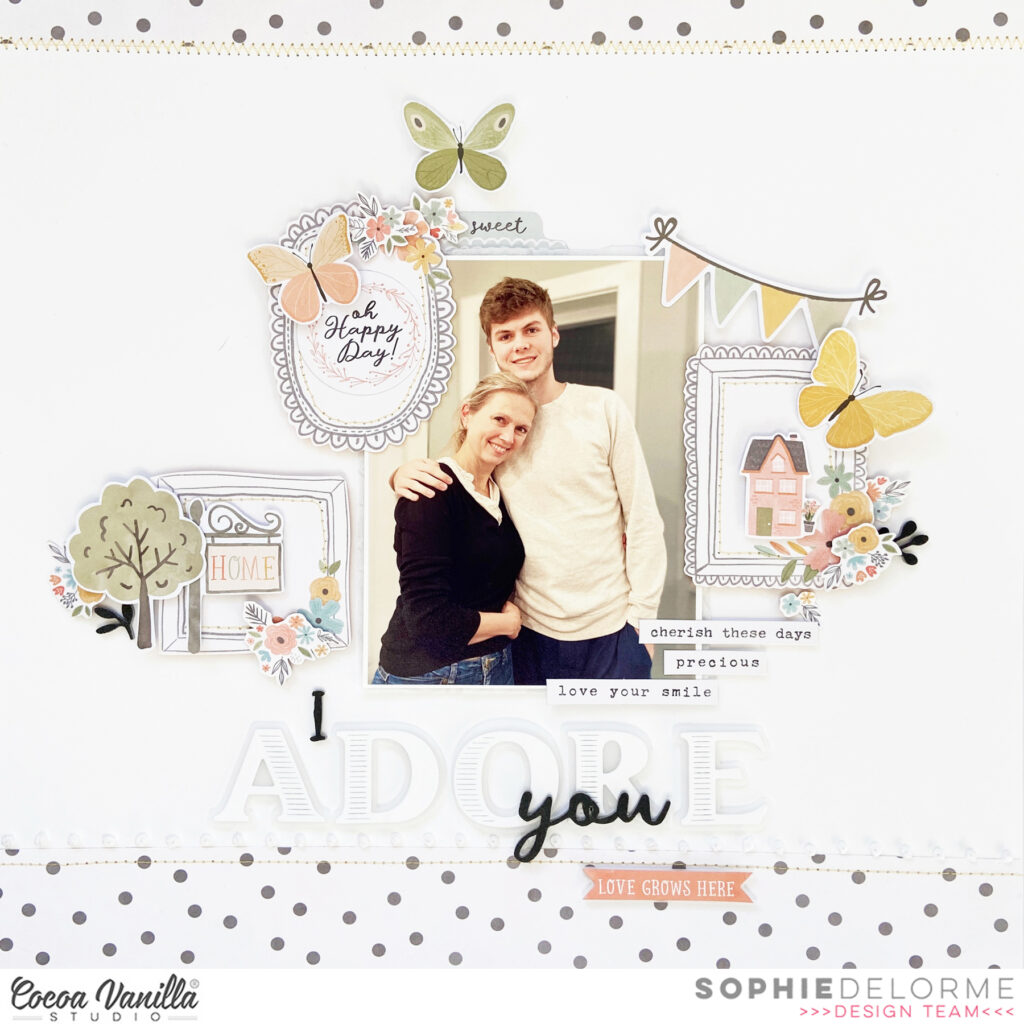


 Inner part of front cover is decorated with two 3*4 cards from


 For this layout, I challenged myself to use only pocket page cards, die-cuts (flower), stickers, word strips, puffy stickers and the gold glitter foam titles. I created six clusters on my layout. I started with the two flower clusters. I placed these diagonally across from each other. I folded the flowers a bit so that they have a little bit more dimension on the layout.
 I stitched the two rainbow die-cuts on top of each other with light blue sewing thread. I placed these next to the flower cluster on the top right. I choose three colorful hearts and fold them in the middle then I placed the hearts playfully around the rainbow. I love the beautiful, fun and playful text on the pocket page cards. I choose a pocketpage card tear it a little at the top and stitch a tab on the side with blue sewing thread. I decorate the pocketpage card with a die-cut and a puffy sunglasses.
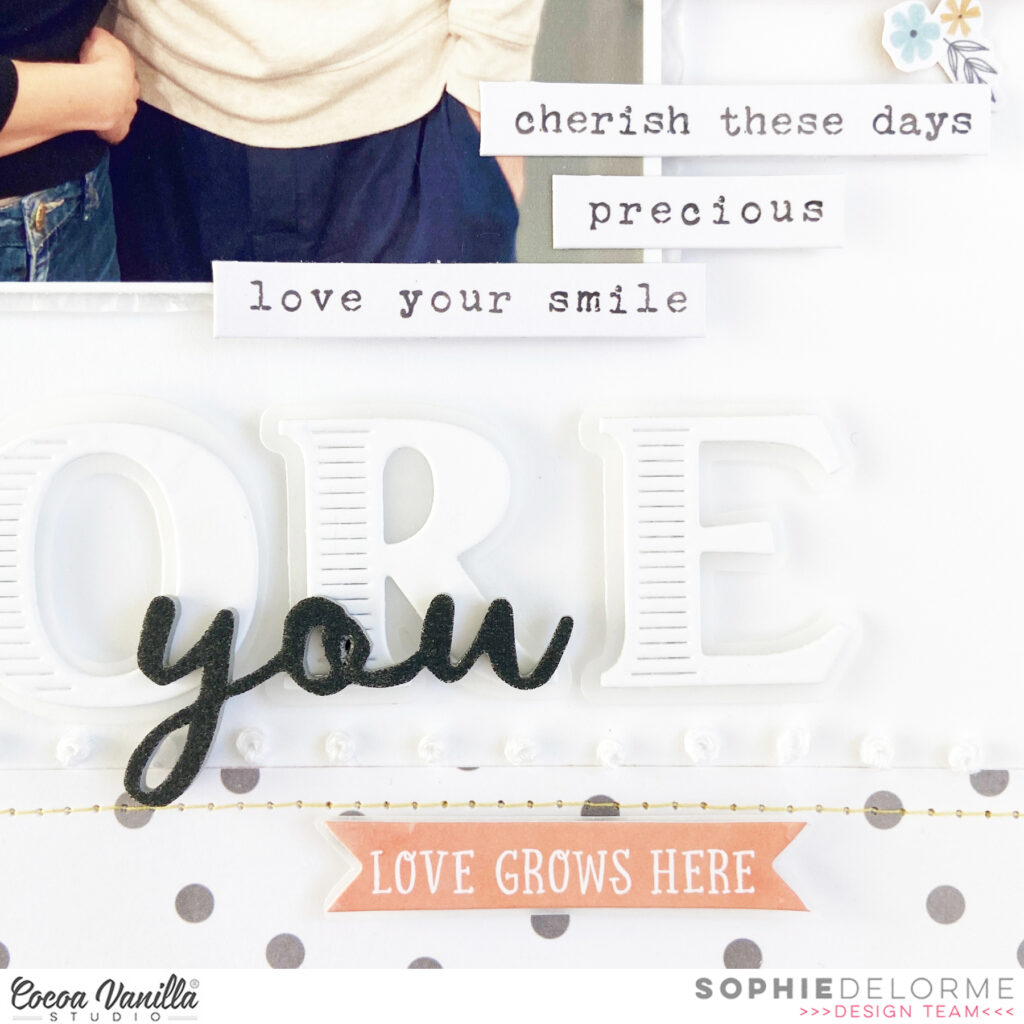
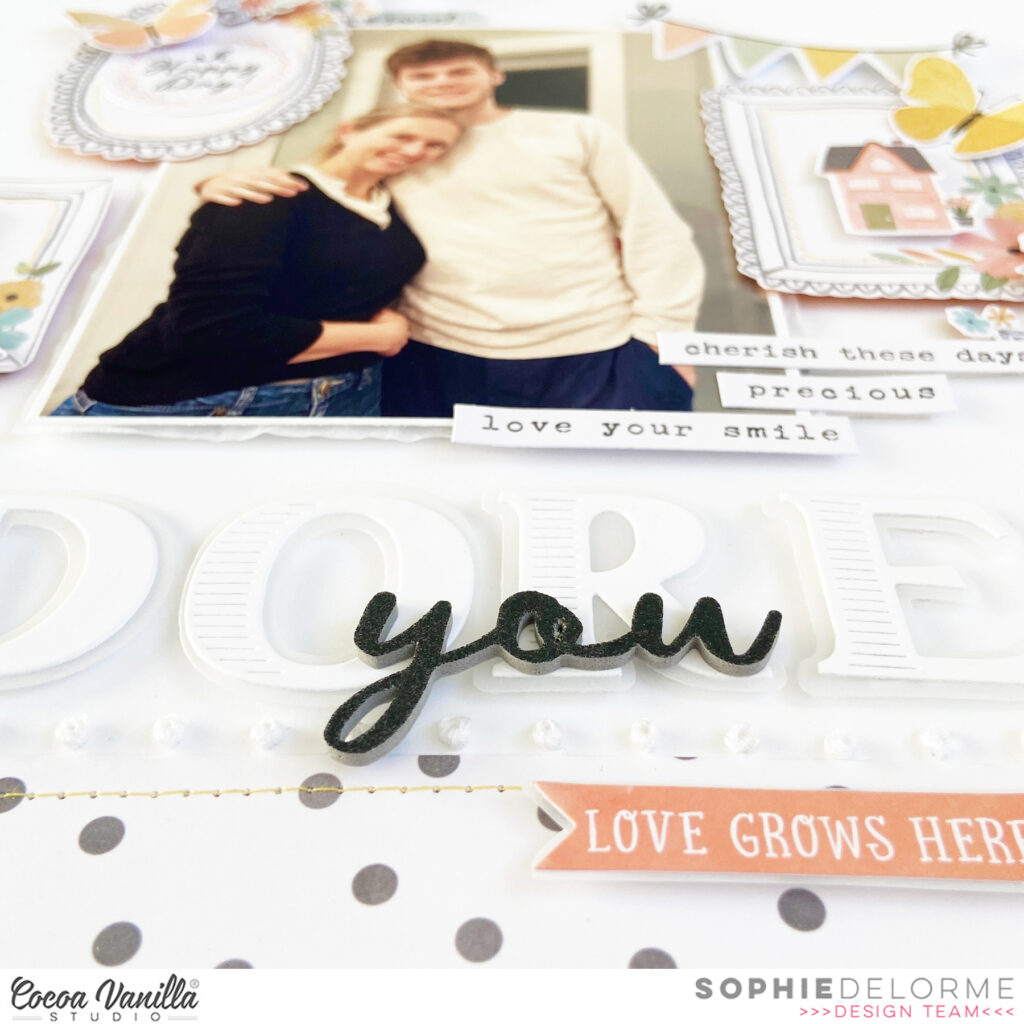
 I absolutely love the cute little “Sunkissed” puffy stickers. I even used them on the flower clusters. I tried to create a little bit of the tropical vibe. I cut a pocket page card to size and placed it behind the black and white photo of me and my hubby. I decorated the photo with a tiny heart and a colorful word die-cut. On the right side of the photo, I playfully stitched a view labels and word strips together with light bleu sewing thread. I playfully glued the labels on my layout and decorated them with three gold hearts.
