
Happy Easter | Make a Wish collection | Sue Plumb
Hi everyone, it’s Sue Plumb here to share my latest design team project with you. As we are currently enjoying the Easter break and counting down to the arrival of the bunny tomorrow, I wanted to share a layout featuring one of my favourite Easter photos of my kids. This one was taken 10 years ago, when my boys were still babies – I miss those little squishy faces!
For my layout I decided to dig DEEP into my stash and pull out a collection that I have used for Easter projects before – ‘Make a Wish’. Although this collection was originally designed as a birthday collection, it had the perfect colour palette for my cute Easter page.
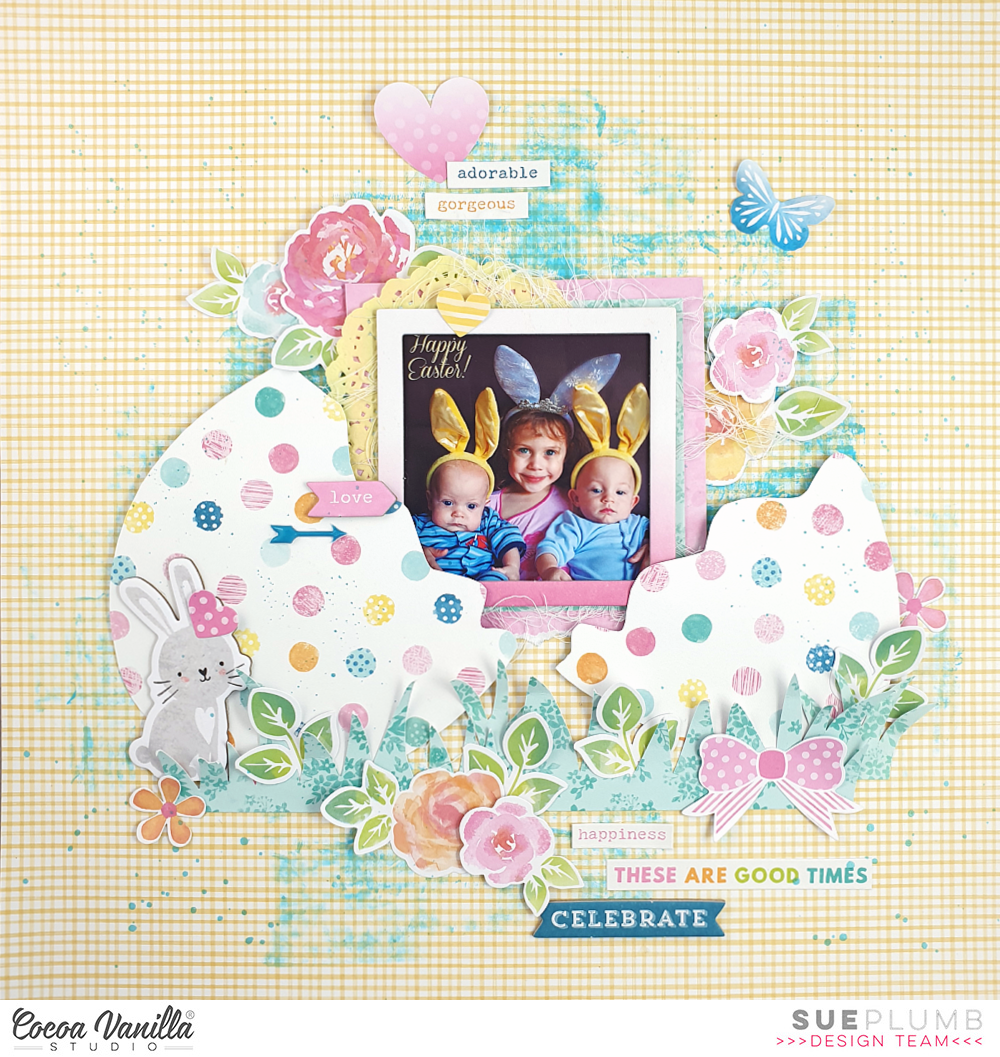
Although I was working with ‘Make a Wish’, I did borrow the background paper from the ‘These Days’ collection as I wanted to start with a yellow base. I then applied some blue acrylic paint with a brayer to help define the focal area.
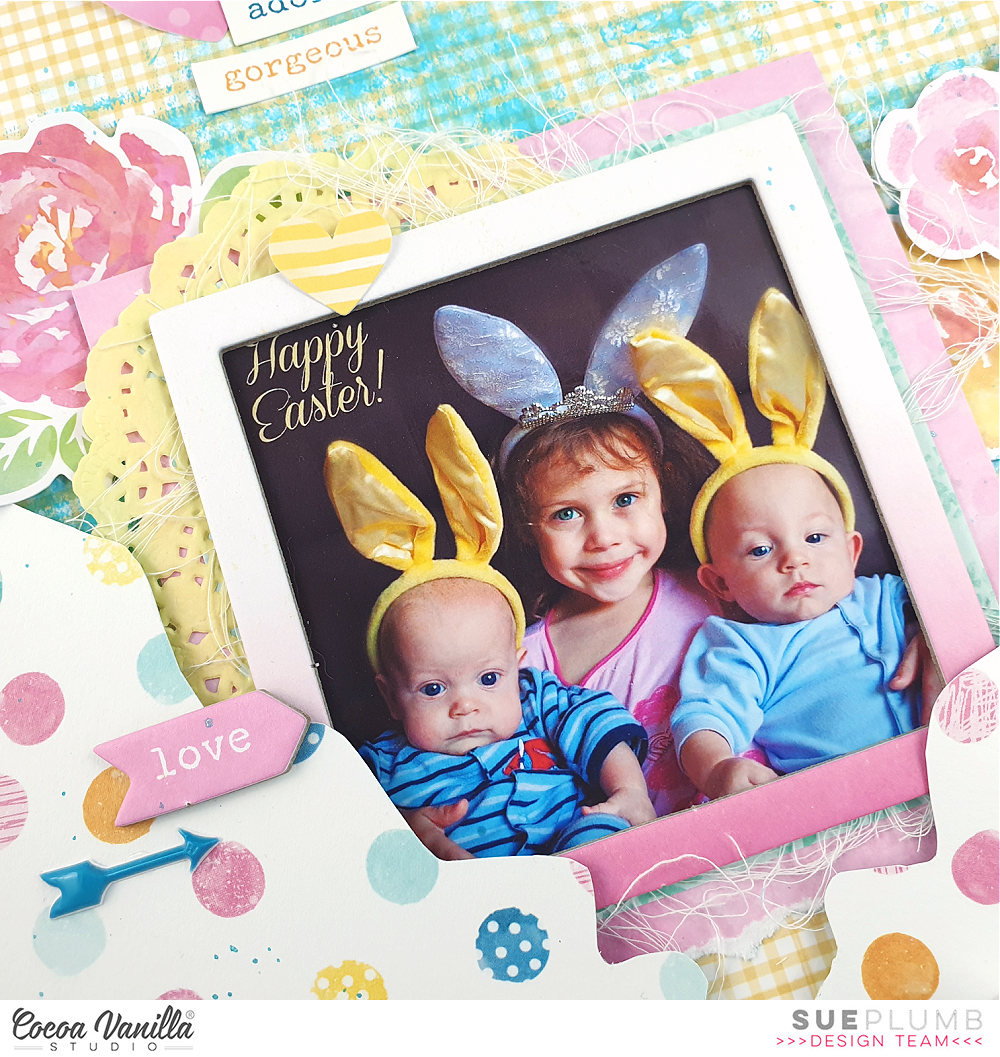
As I had some of the chipboard sheet left, I decided to use one of the frames to frame my photo with. (This is not something I often do, as I usually prefer to use frames for layering around my page.) I also added a couple of layers of patterned paper behind it, along with a small yellow paper doily and some frayed gauze for texture.
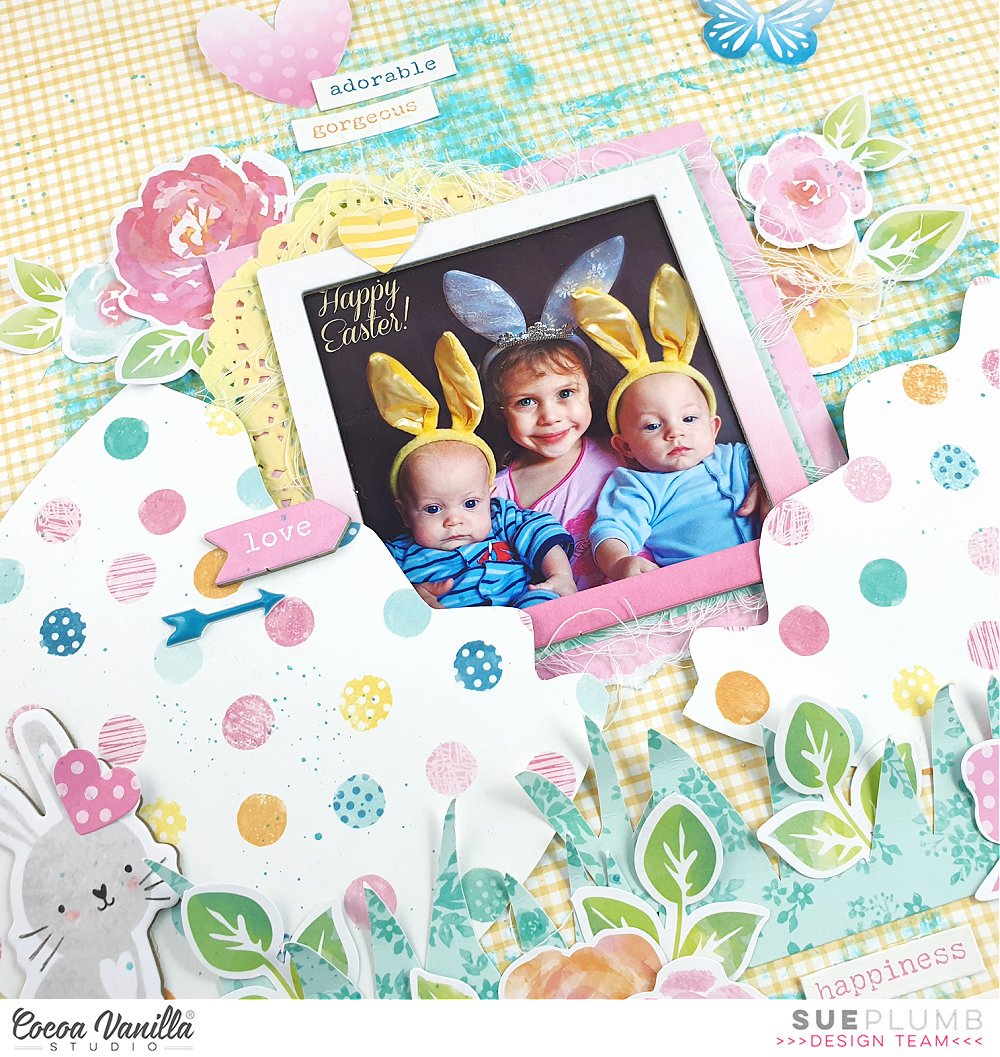
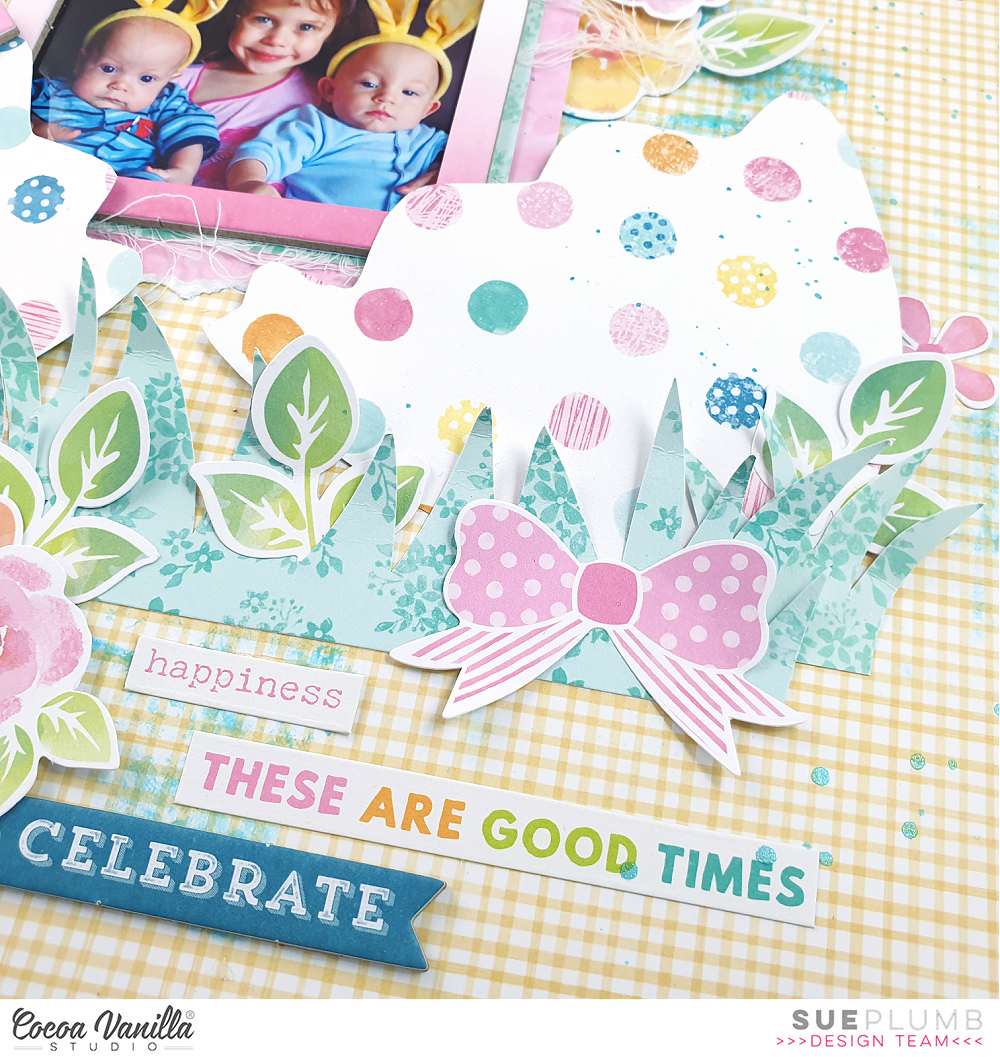
I knew before I started this layout that I wanted to include an egg shape on my page, so I decided to create a broken egg from patterned paper and position my photo as though it had come from inside the egg. I used a simple template and traced around it onto the paper, then cut it and positioned the pieces on either side of my photo, adding a little foam tape underneath to help pop it up from the page. I also cut out a strip of hand drawn grass which helped anchor everything on the page.

Tucked amongst the grass on the left side of my page, I added a sweet little chipboard bunny from the ‘Joyful’ collection. As the bunny was wearing a small sprig of mistletoe on its head, I covered it up with a small heart from the ‘Make a Wish’ Die Cut Ephemera pack.
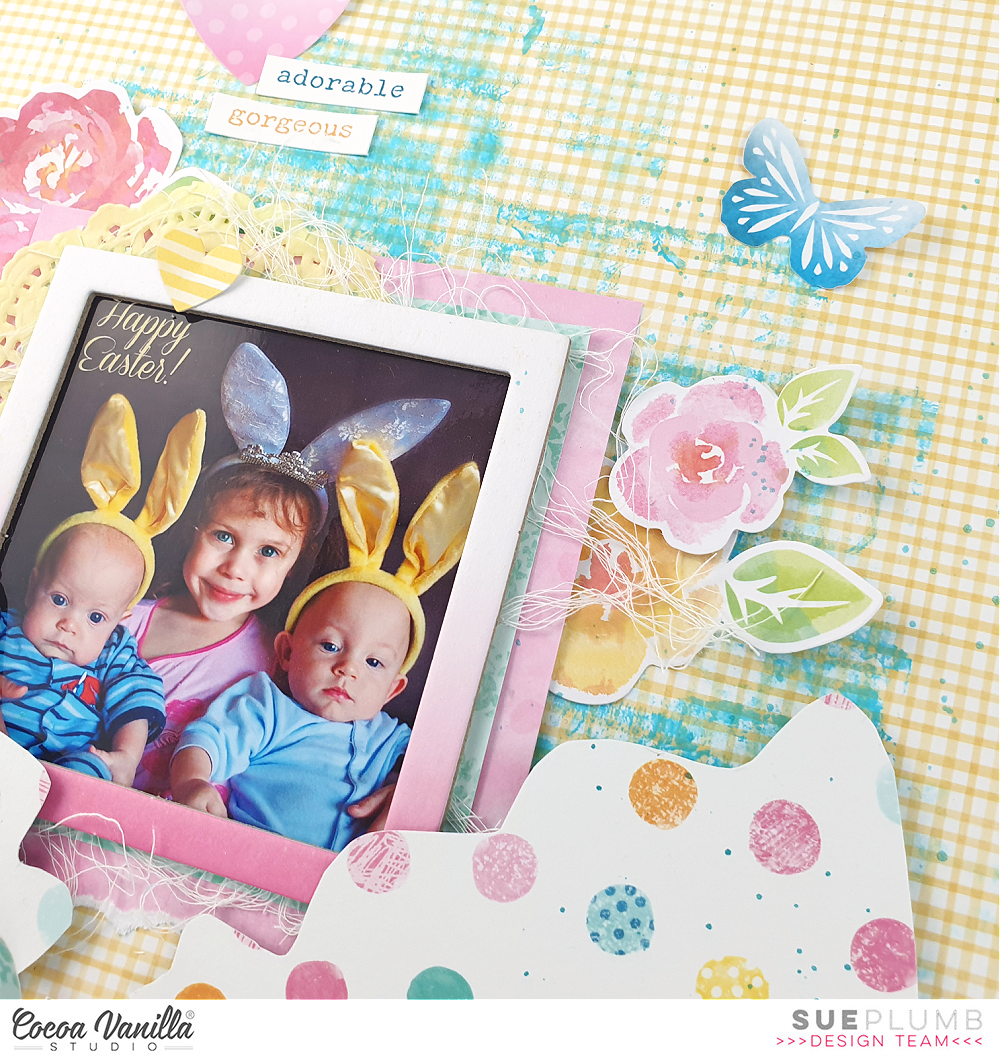
From the same ephemera pack, I used a number of floral and leafy pieces to add some clusters around my page; plus two hearts, a pink bow and a butterfly. (You didn’t really think I’d have no butterflies on this page did you? haha) I added text to my page using a mix of stickers from the Accessory Sticker sheet and a couple of chipboard pieces. (I especially loved the fact the small phrase stickers featured a mix of different coloured text.)
A tiny arrow from the puffy sticker sheet was the only other embellishment I used, then some pretty blue splatters around the page and I was done.
I hope you have gained some inspiration for scrapping your own Easter photos, and enjoyed the walk down memory lane using one of our old collections – I certainly had fun using it again after so long. Wishing you & your families a fun and safe Easter break with plenty of treats from the bunny!
Until next time, happy scrapping!