Happy Easter | Happiness collection | Tarrah McLean
Hi creative friends and Happy Easter!
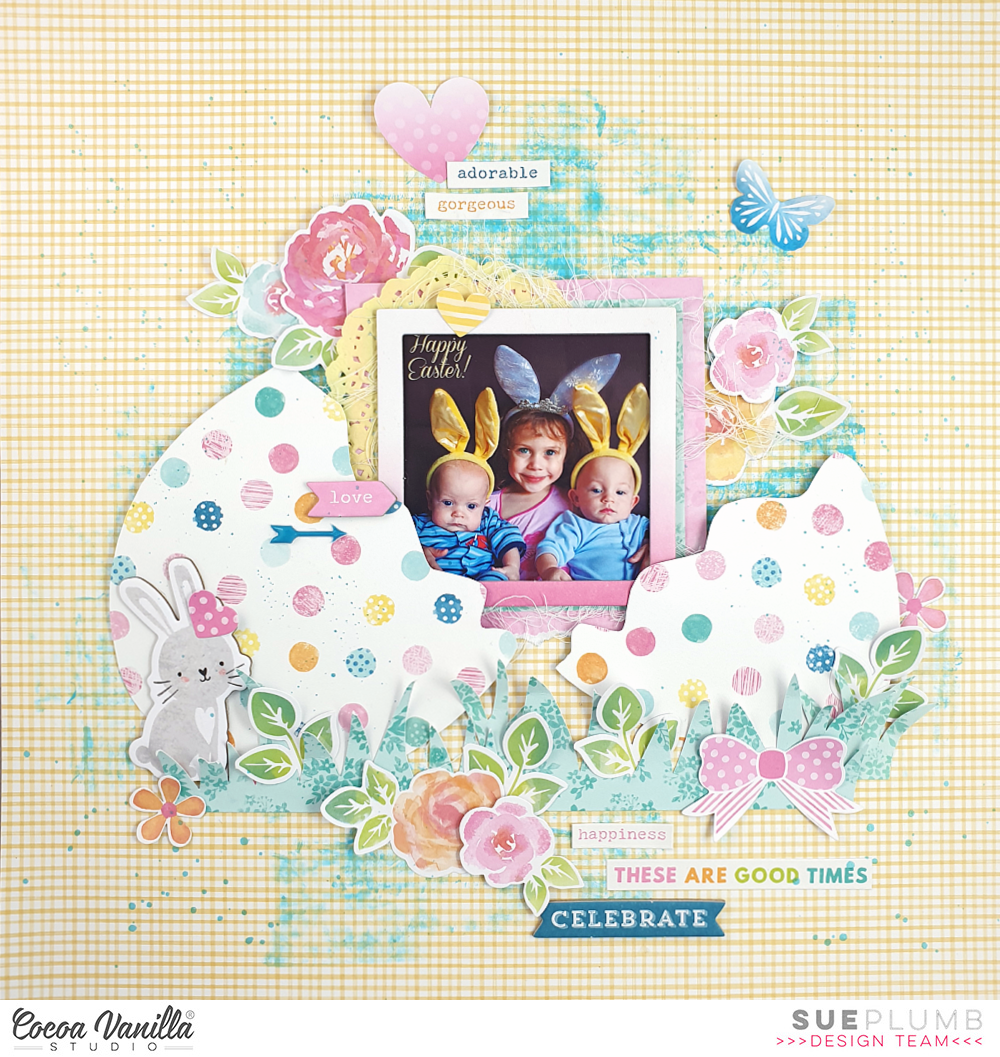
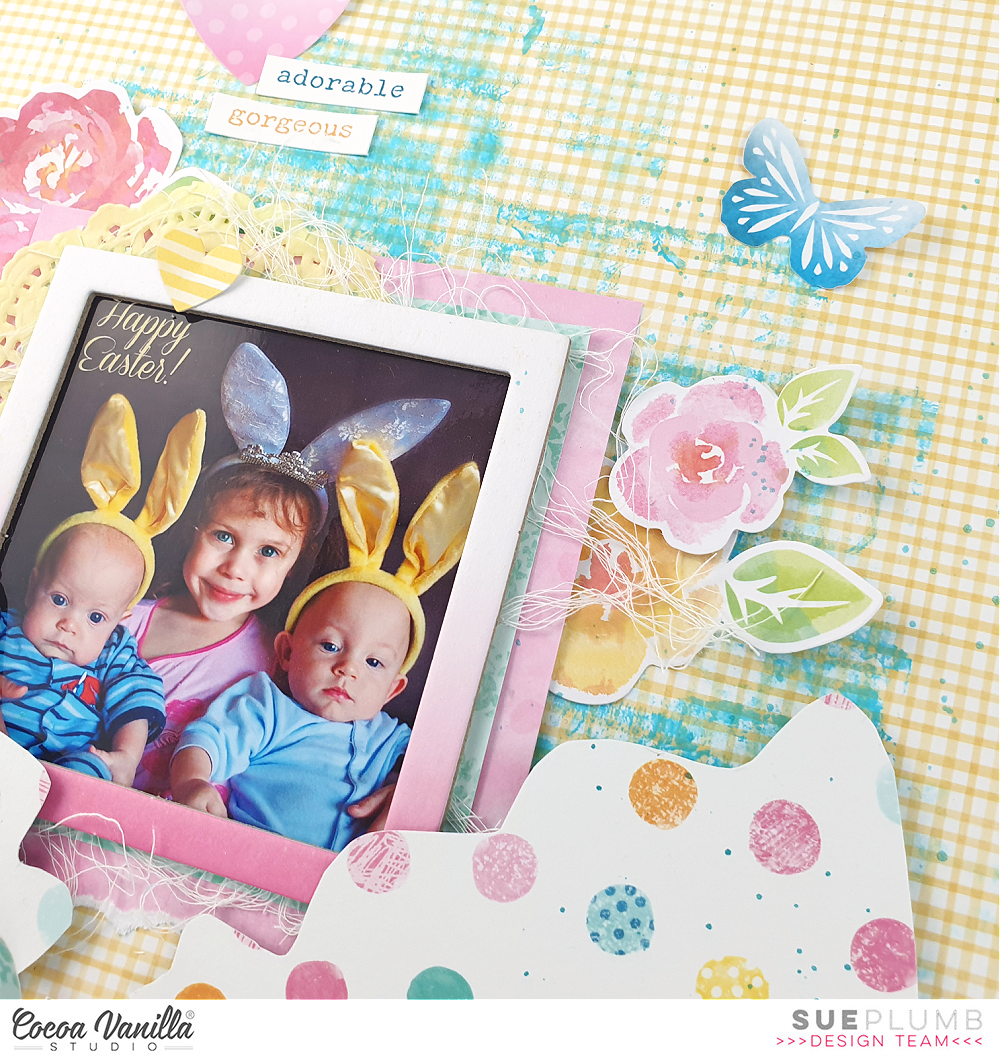
It’s Tarrah back with you today, I hope you are enjoying Easter celebrations with loved ones! I was given the theme of Easter for my project this week and have created a scrapbook layout featuring the gorgeous Happiness collection! The Happiness collection is so beautiful and perfect for my Easter themed layout documenting a sweet photo of my niece from last Easter!
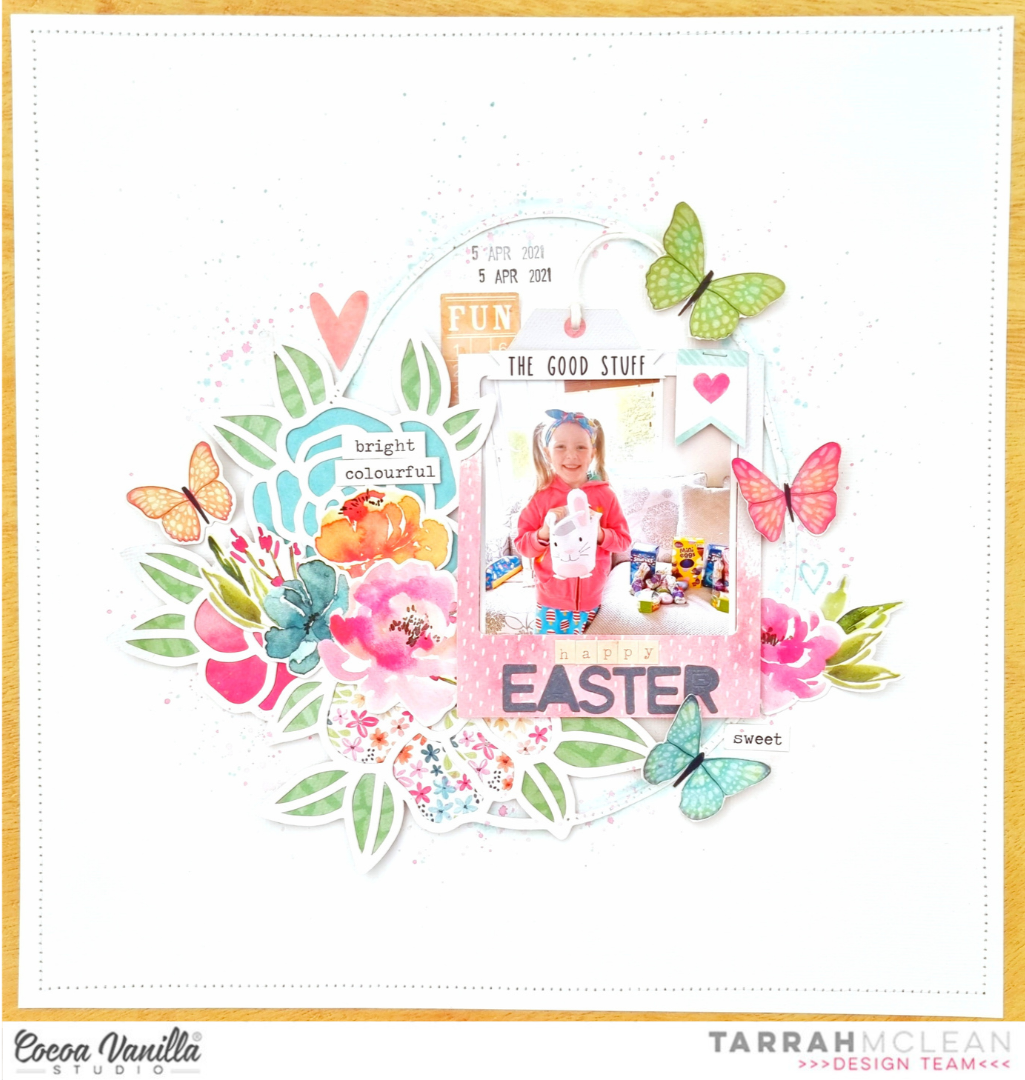
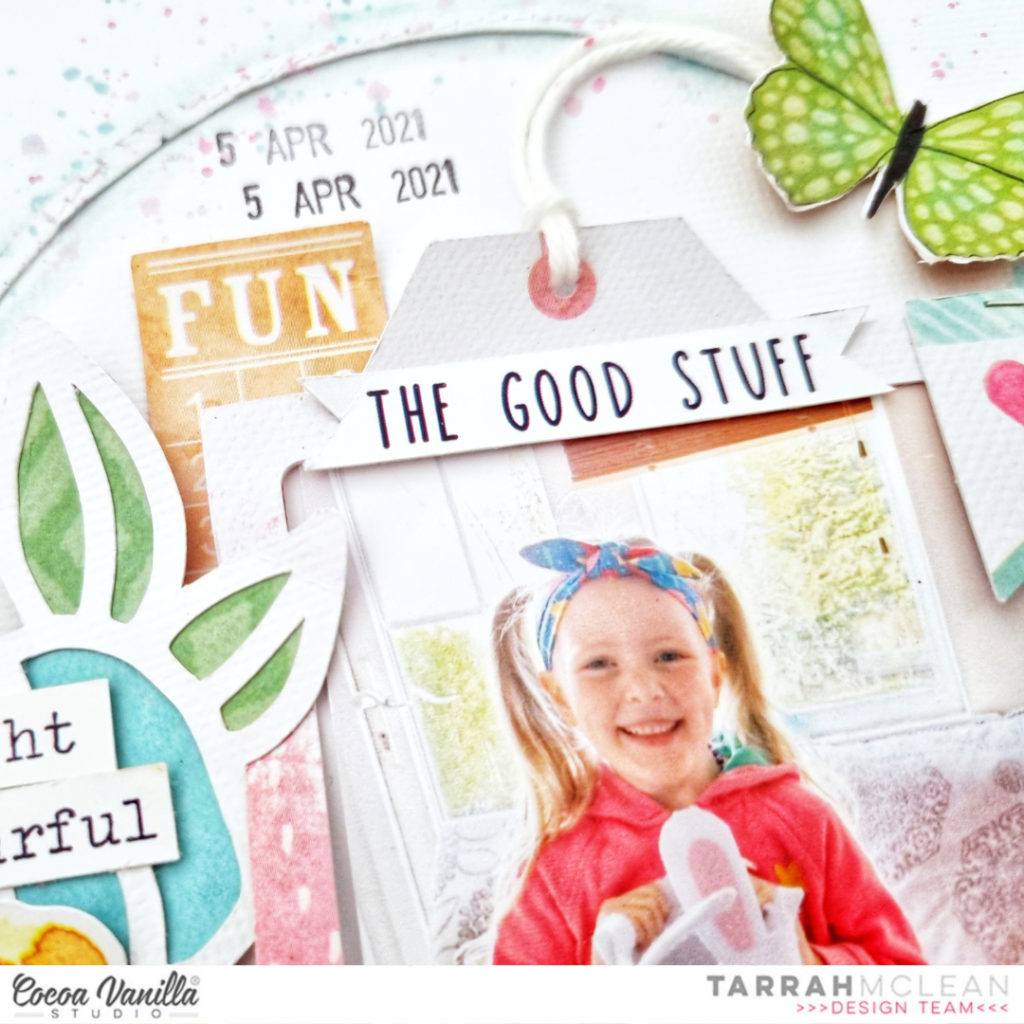
I chose the gorgeous woodgrain paper from the Happiness collection for my background and trimmed down a piece of white cardstock to measure 11′ x 11′ adhering this on top of the woodgrain paper. I then machine stitched a border around the edge to add some texture and interest. Next I cut out a pretty floral Easter egg cut file from CUT to YOU from white cardstock also. I did attempt to machine stitch the very fine egg outline of the cut file, however it did not go that well with how thin this piece was. I took the A5 paper stack and chose some pretty papers from it to back the flowers and leaves in the cut file with. This was the most time consuming part of this layout but I LOVE how it looks. Once the flowers and leaves were all backed, I added craft foam to the underneath and adhered it in the centre of the white cardstock background. The thin outline of the egg, I did adhere this flat to the background as any sort of foam adhesive would have been visible.
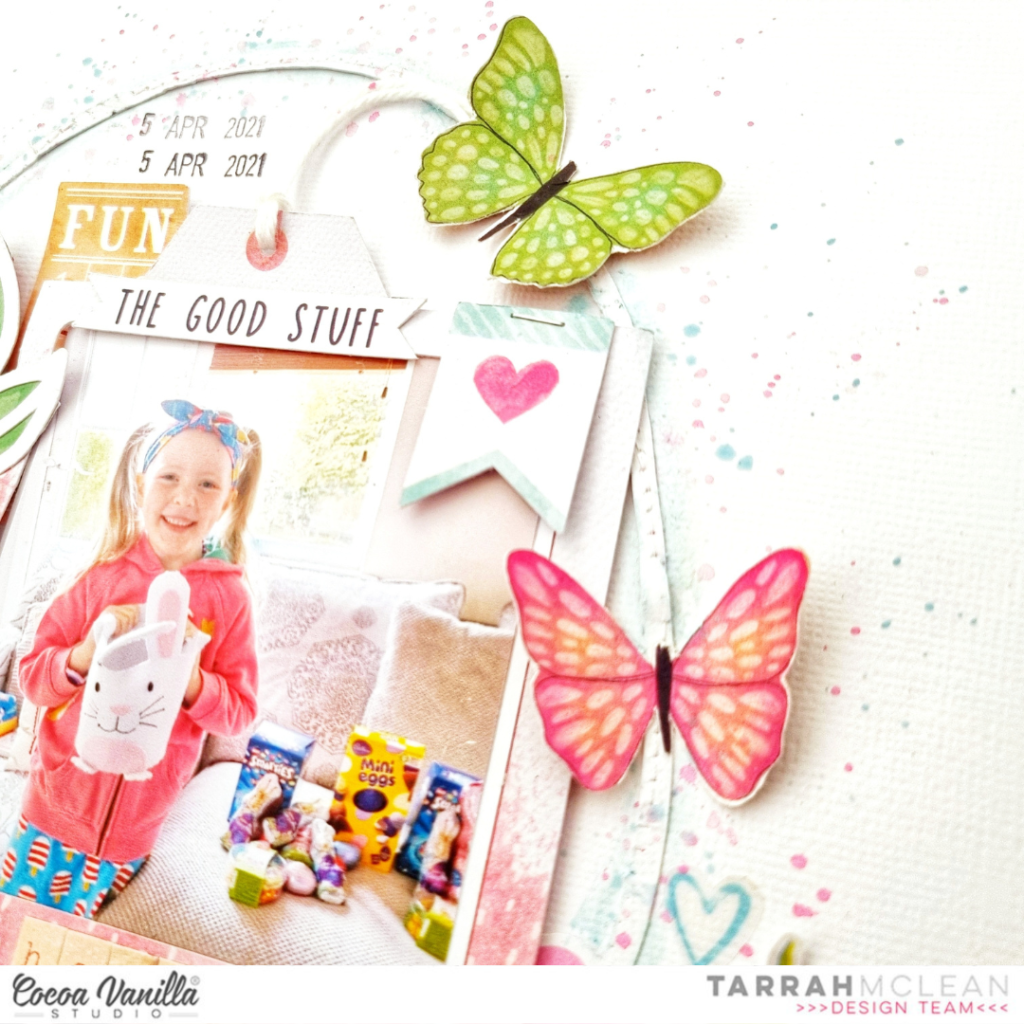
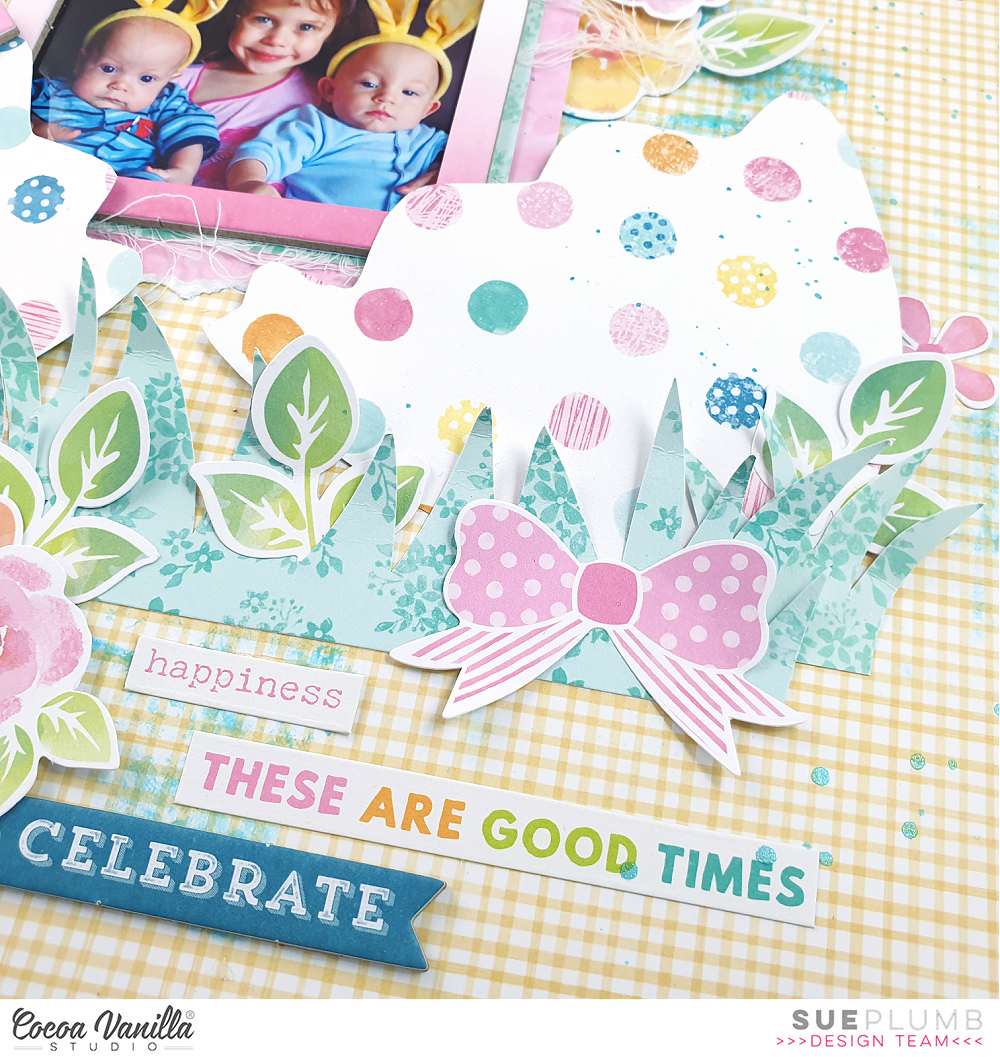
I wanted to add a little bit of mixed media ( I know! Shock!) but not too much so I took a fine paintbrush and dipped it into my Tumbled Glass distress Oxide ink and painted around the outline of the egg shape on the right. I also added some water and the ink on some plastic packaging and did some small mist drops around the edge in 3 colours: Tumbled Glass, Spun Sugar and Worn Lipstick. I love how the subtle misting and painting looks to define the cut file a bit more. One thing I love about cut files is, that they often help with the design of your page, with this one in particular, my photo placement was obviously going to be to the right of the florals. I adhered my photo to the die-cut frame, tucked in the frame from the Accessory Sticker sheet, added some twine through the hole in the top and then added craft foam underneath the frame to adhere it to my page. I stapled a banner sticker to the top right corner, added the phrase banner at the top and also added my title to the bottom of the frame.
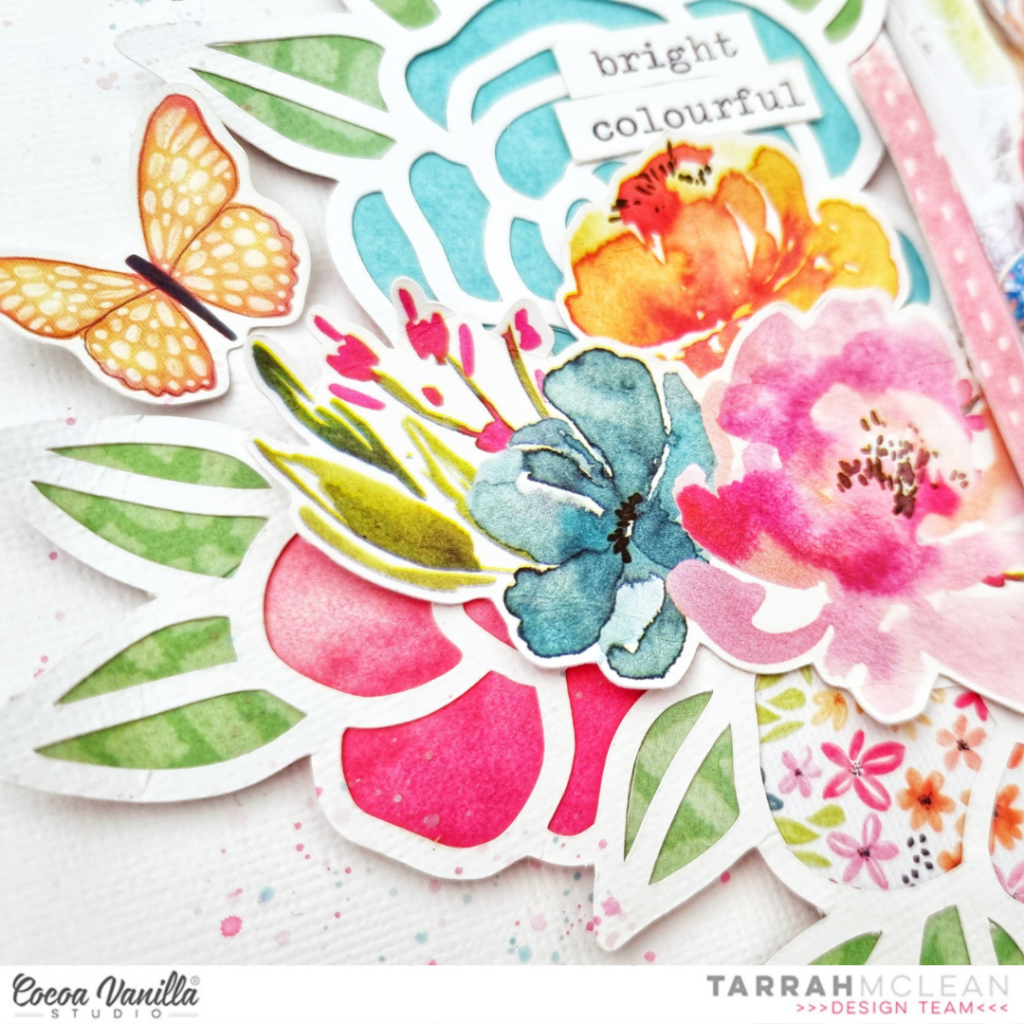
To the left on top of the flowers in the cut file, I added more flowers from the floral ephemera pack, I just LOVE how bright and gorgeous those flowers look! I also added another flower on the right hand side, tucking it in under the frame. I also fussy cut some butterflies out of the ‘B’ side of the woodgrain paper and adhered those on the right as well. I bent up the wings to give the sense of movement and dimension on the layout. I added a heart from the clear sticker sheet here as well. Like with all of my layouts, I like to get the largest elements laid on my pages first and then embellish with smaller things like die-cuts and stickers etc.
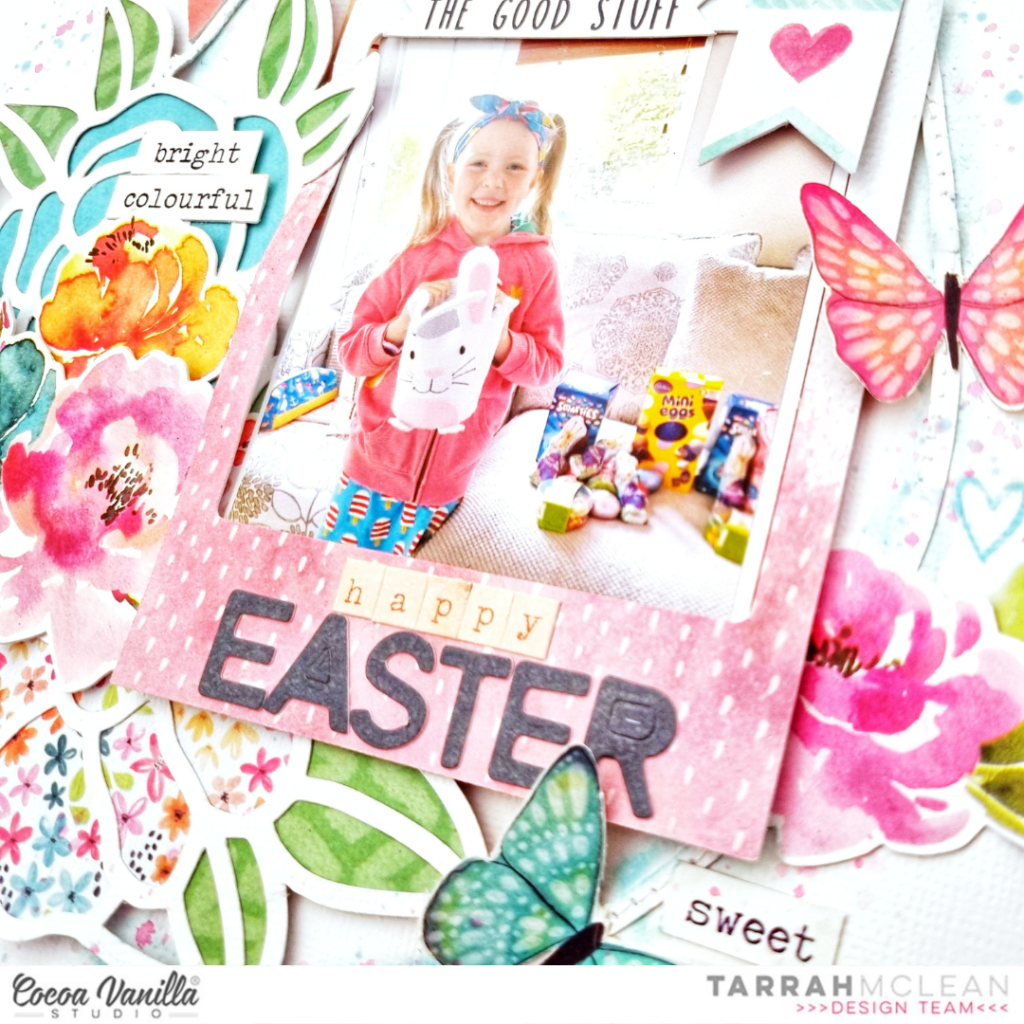
My title is made up of the alphabet stickers from the Life is Beautiful collection. At the top of the photo, I tucked in the ‘Fun’ ticket die-cut from the ephemera pack and stamped the date stamp of when the photo was taken. I also added some of the word and phrase stickers from the Accessory sticker sheet around the page to help tell the story of my photo.
Thanks so much for stopping by the Cocoa Vanilla blog today! I hope you enjoyed reading about how I created my layout as much as I enjoyed creating it!
Happy creating!
Tarrah x


 I finished the layout off by adding some die cut butterflies and hearts, as well as some


 Inner part of front cover is decorated with two 3*4 cards from


 For this layout, I challenged myself to use only pocket page cards, die-cuts (flower), stickers, word strips, puffy stickers and the gold glitter foam titles. I created six clusters on my layout. I started with the two flower clusters. I placed these diagonally across from each other. I folded the flowers a bit so that they have a little bit more dimension on the layout.
 I stitched the two rainbow die-cuts on top of each other with light blue sewing thread. I placed these next to the flower cluster on the top right. I choose three colorful hearts and fold them in the middle then I placed the hearts playfully around the rainbow. I love the beautiful, fun and playful text on the pocket page cards. I choose a pocketpage card tear it a little at the top and stitch a tab on the side with blue sewing thread. I decorate the pocketpage card with a die-cut and a puffy sunglasses.
 I absolutely love the cute little “Sunkissed” puffy stickers. I even used them on the flower clusters. I tried to create a little bit of the tropical vibe. I cut a pocket page card to size and placed it behind the black and white photo of me and my hubby. I decorated the photo with a tiny heart and a colorful word die-cut. On the right side of the photo, I playfully stitched a view labels and word strips together with light bleu sewing thread. I playfully glued the labels on my layout and decorated them with three gold hearts.
