It’s Sophie with you today with a new layout to share!
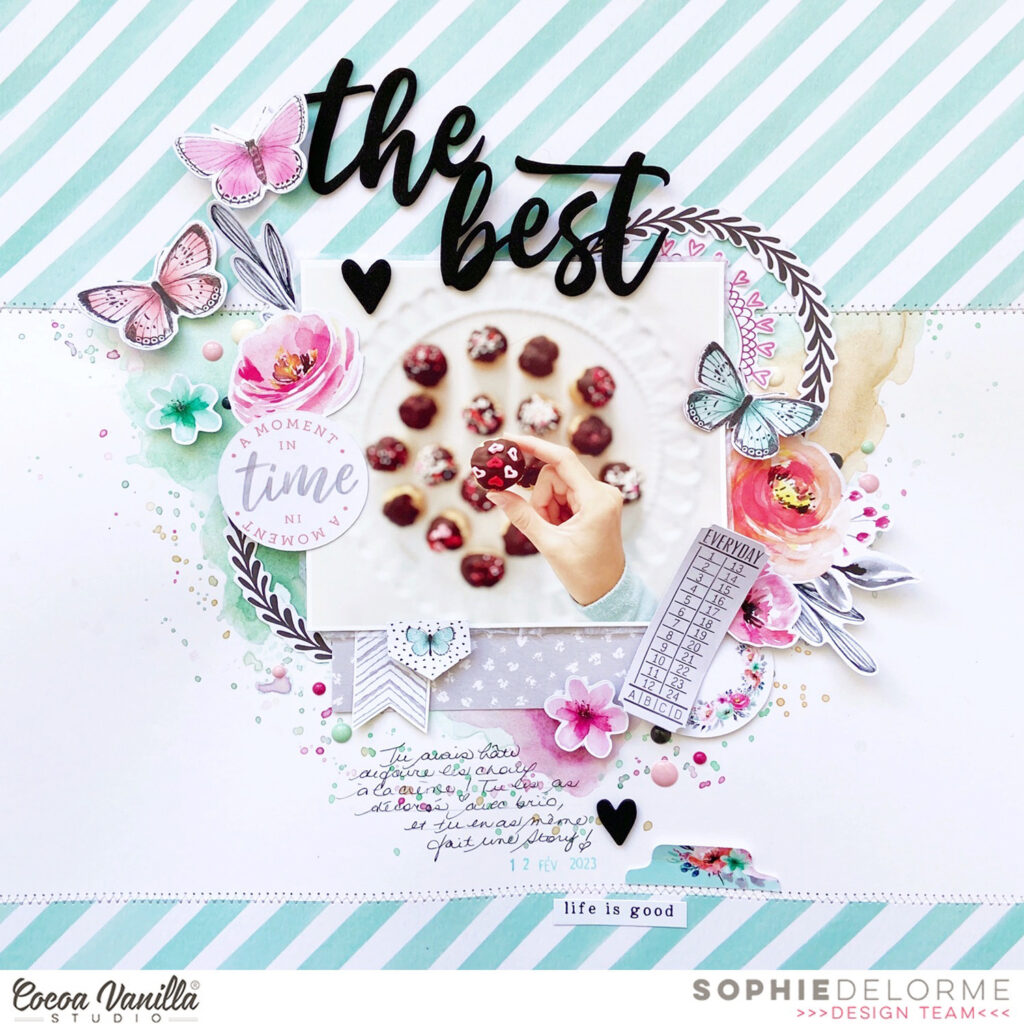
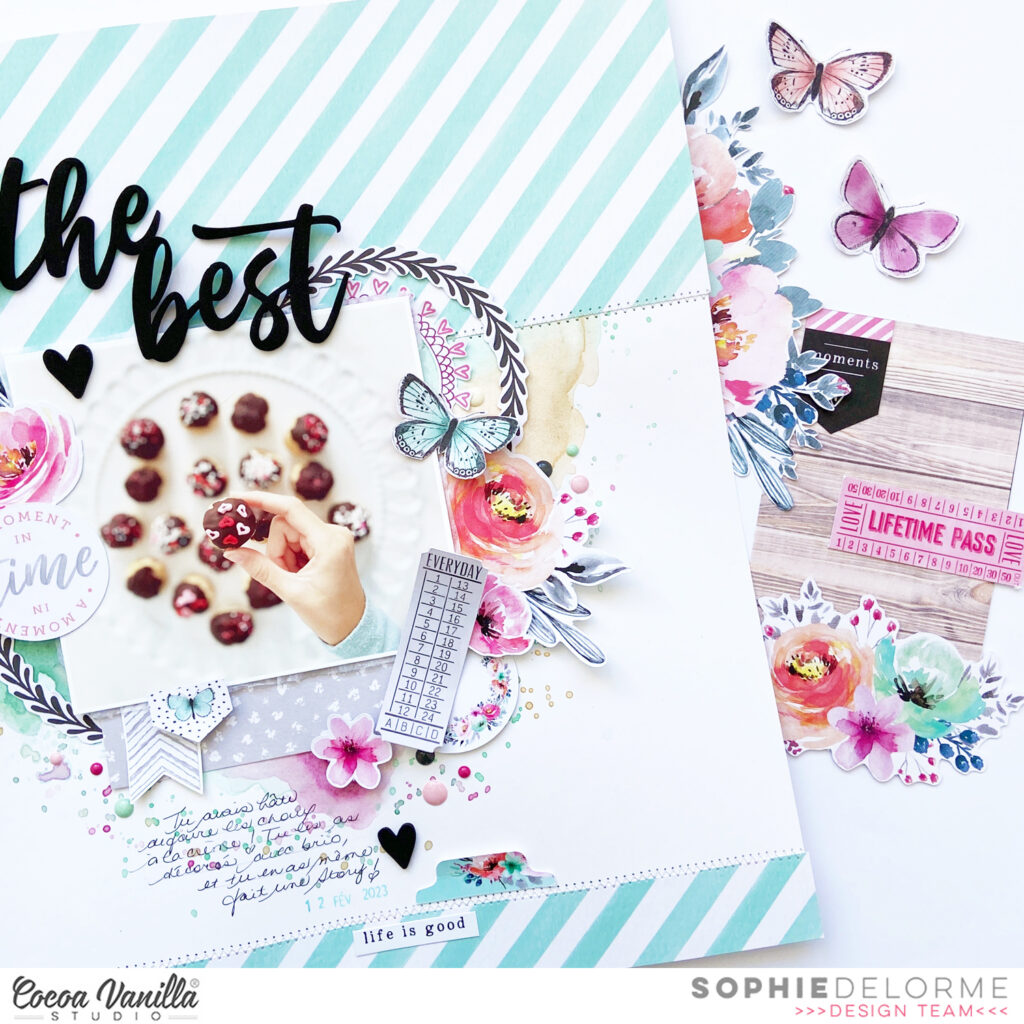
I use the beautiful Unforgettable collection this time. I wanted to highlight a yummy dessert that my sweet Sabrina baked and was so proud of!
I started with a thick white cardstock and used three colors from @Shimmerzpaints to create a little mixed media background.
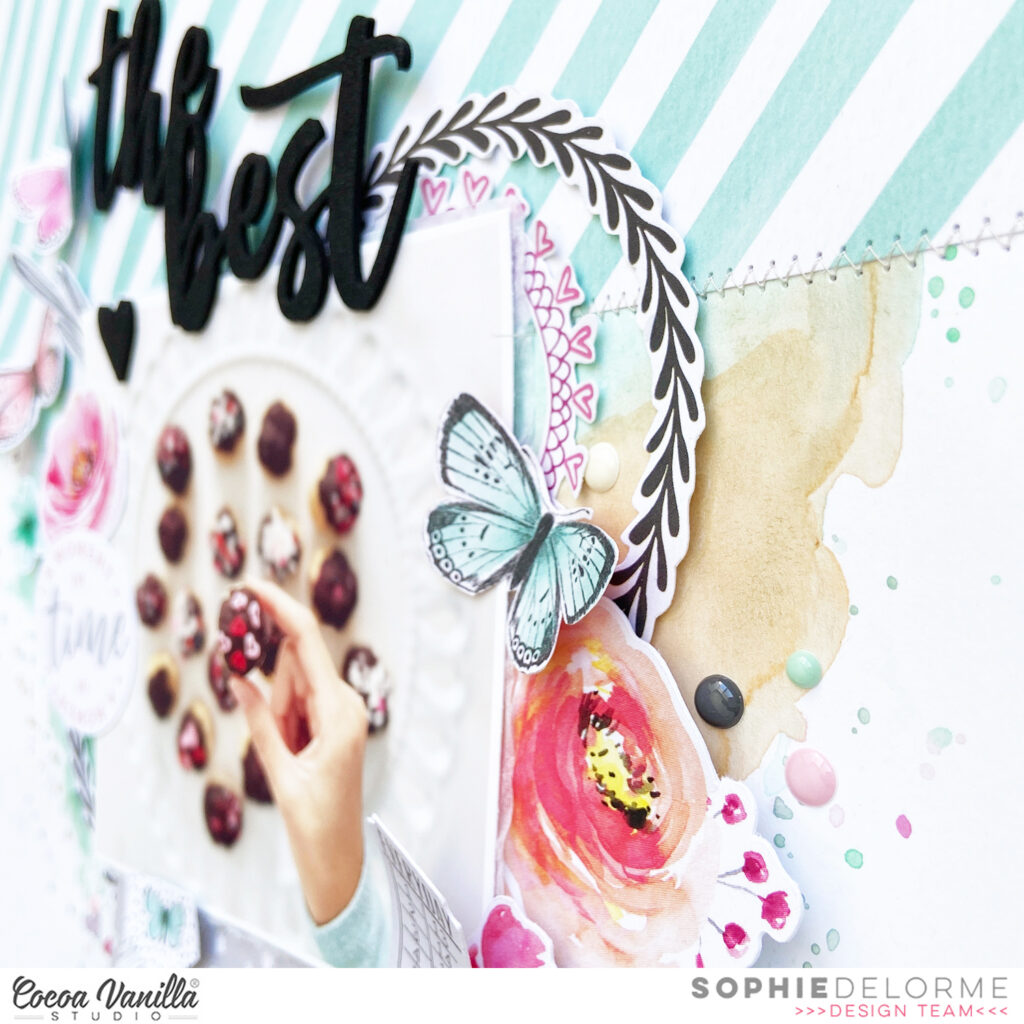
I cut two pieces of the Sprightly paper and placed them horizontally on the top and bottom of the page. I did a zigzag stitch at their edge.
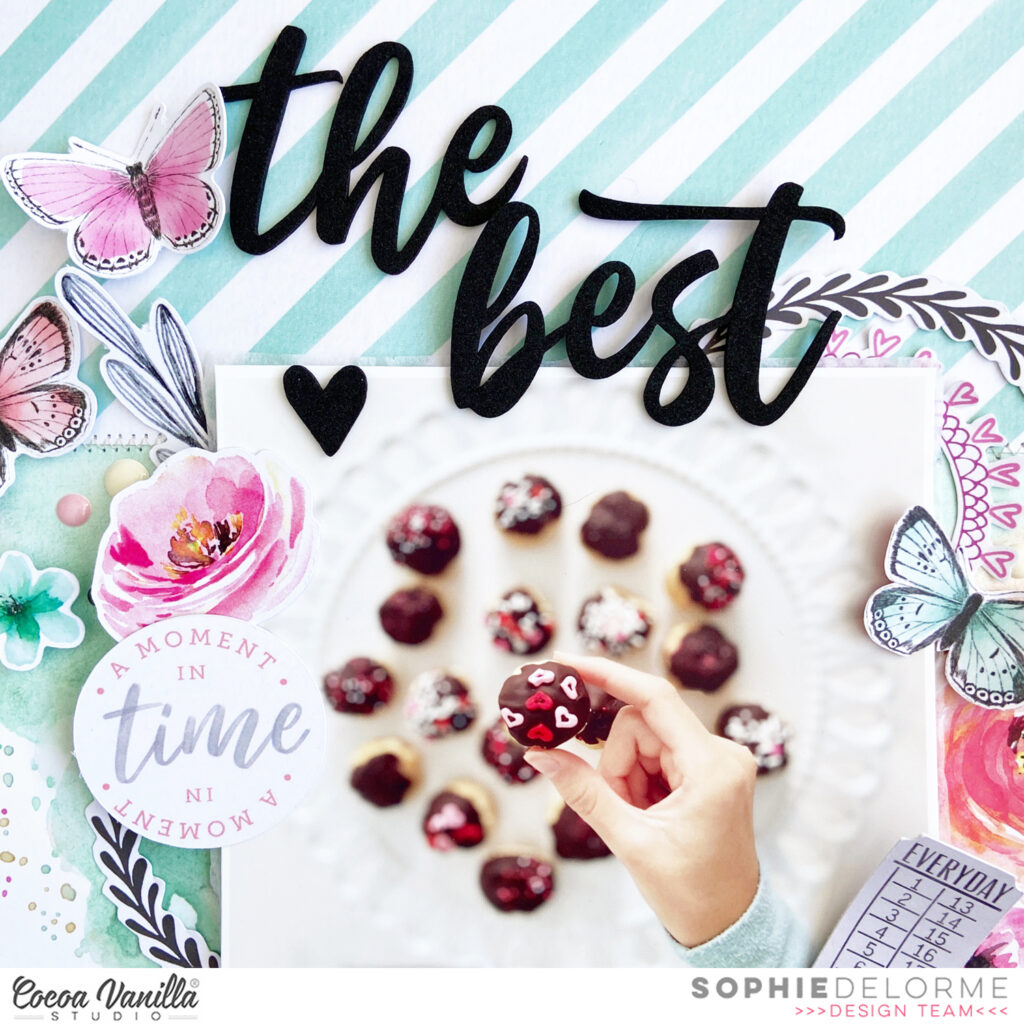
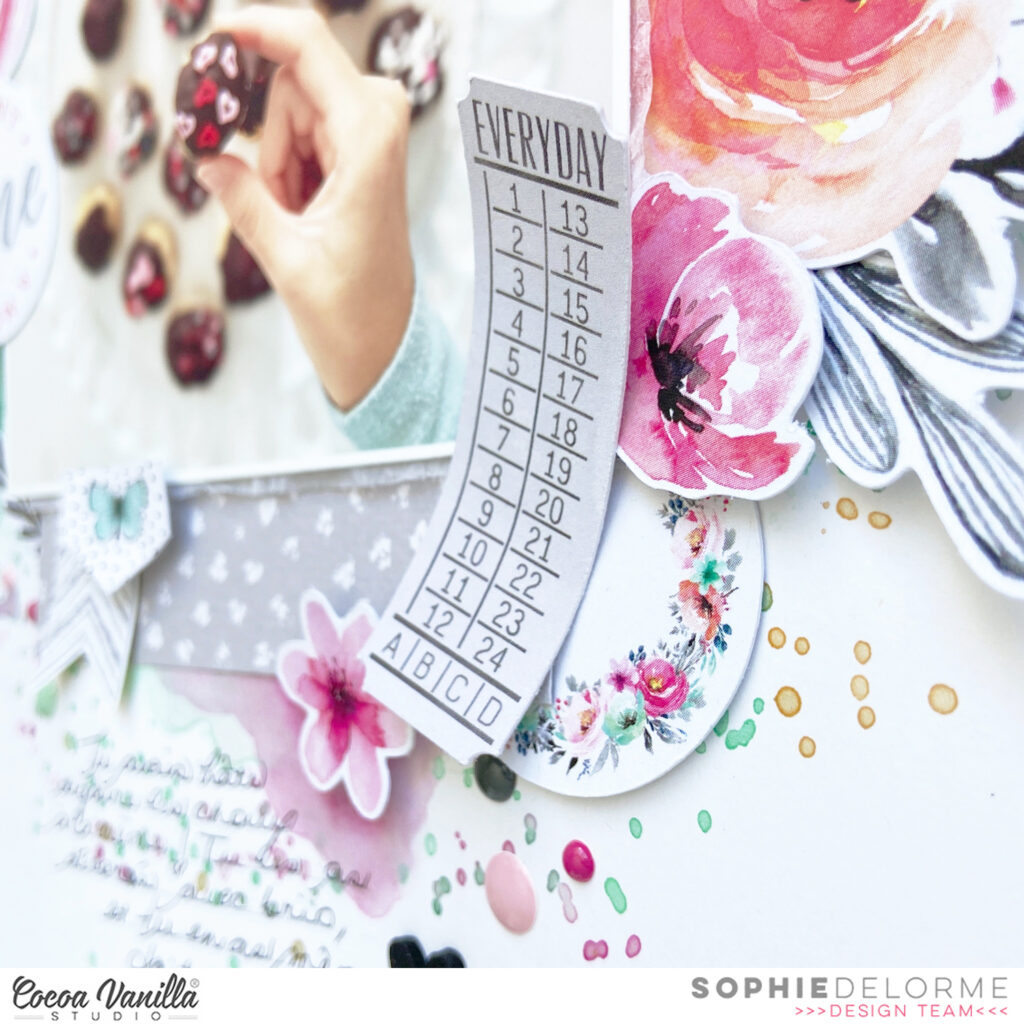
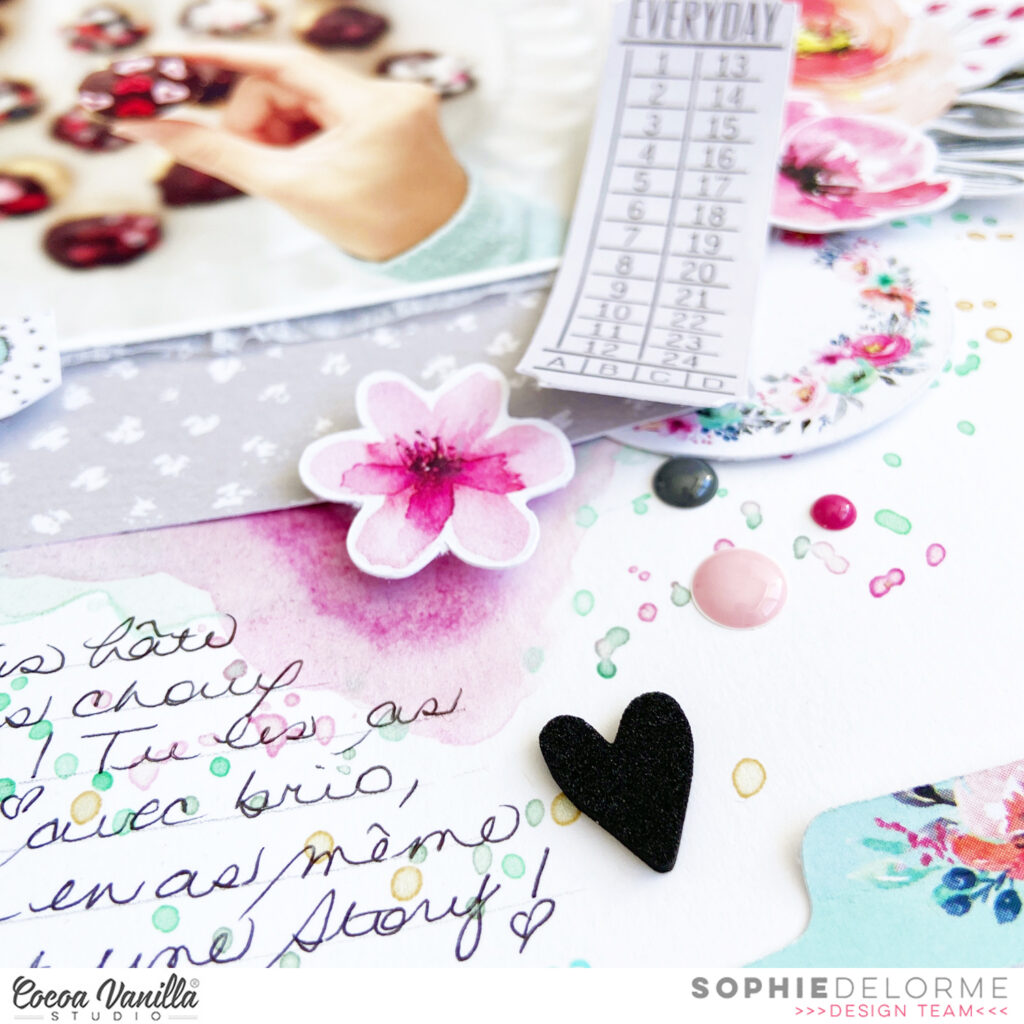
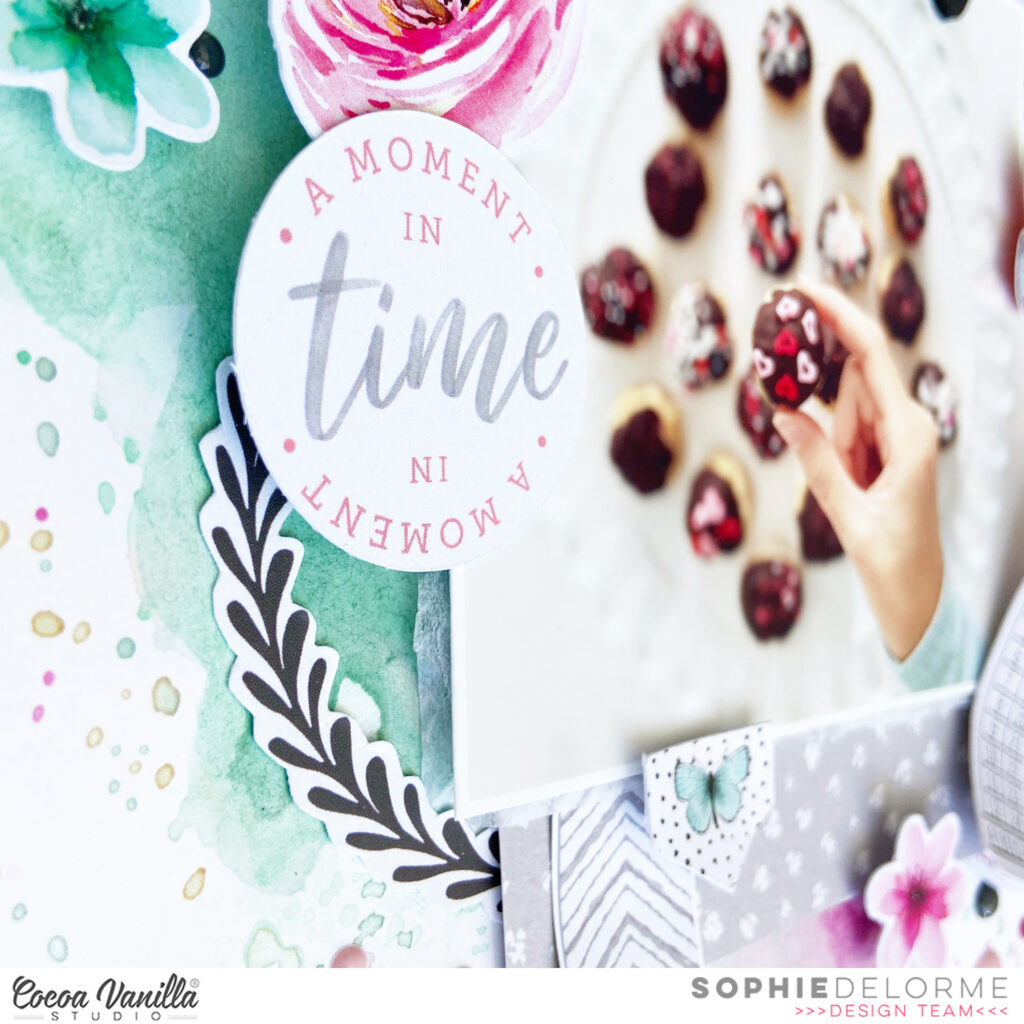
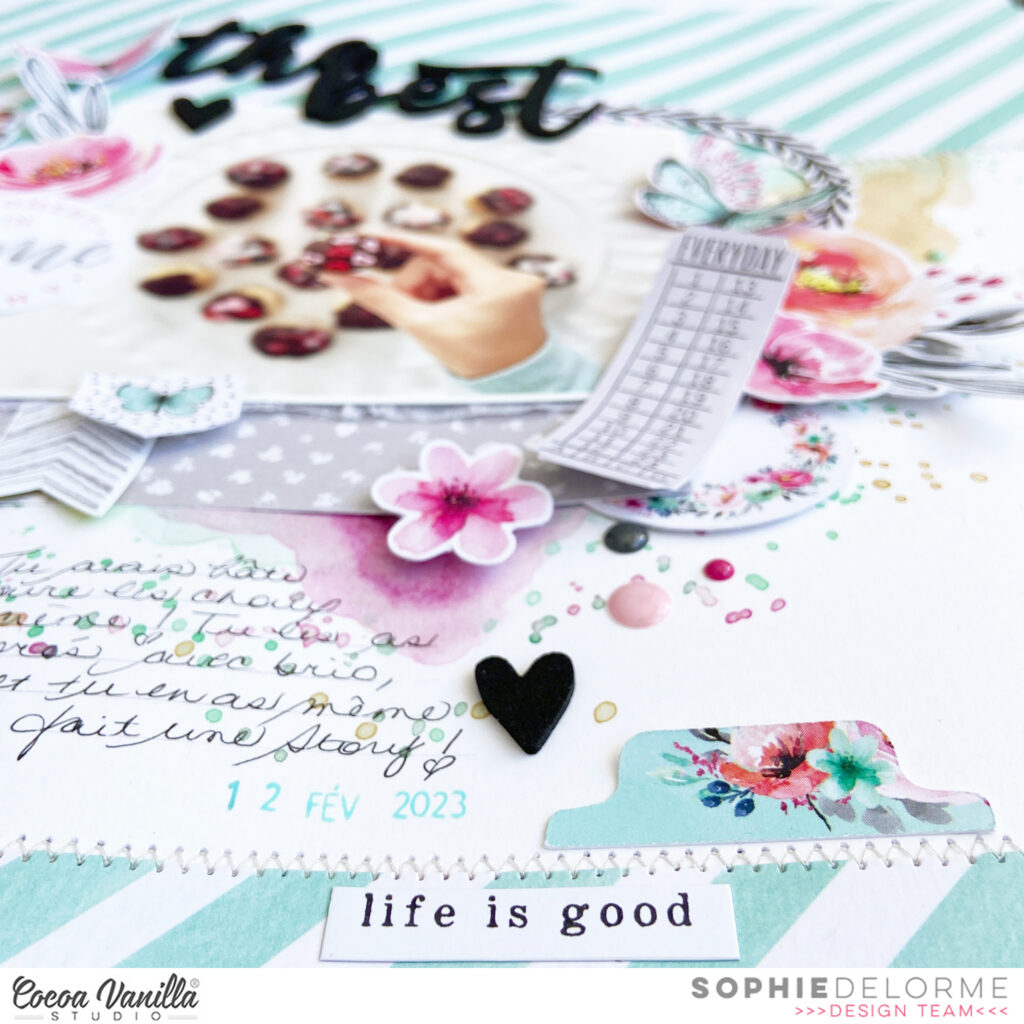
I centered my photo and mounted it on tissue paper and foam adhesive. I decorated in little clusters of embellishments around my photo and used the Foam Title Stickers – my favorites amongst all! – to create my title.
I scattered a few butterflies, handwrote my journaling directly on my background and stamped the date.
Here are more close-ups:
I am so happy with the result! I only had a few elements from that amazing collection left and tended to hoard them…! I am glad that I used them on this project!
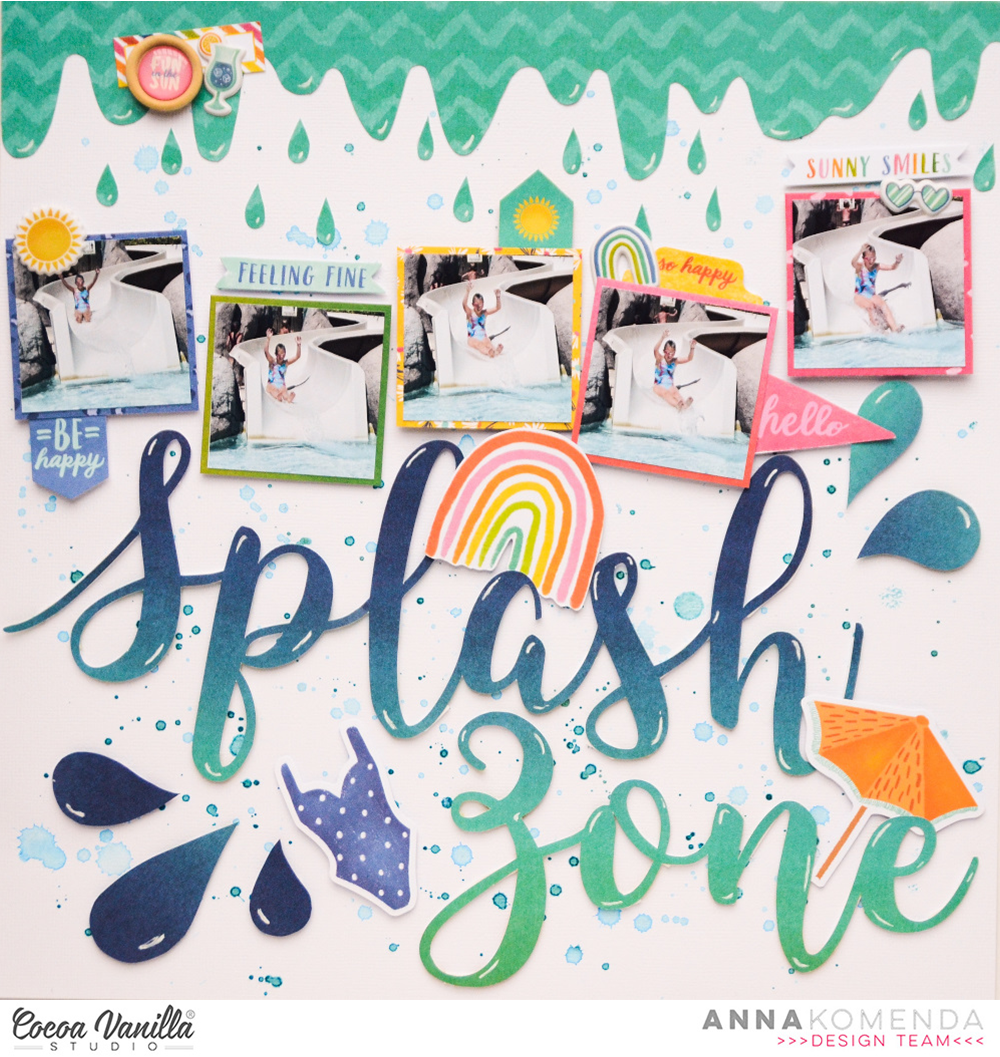
Hello crafty Friends! Welcome on the last day of February. For some of you it means summer is coming to an end and for some more lucky (like me :) ) it means spring is getting closer and closer ending up our winter misery. I so miss the warmth, the sun and the colors and can’t wait for all of this to come. In the meantime I am taking some energy bites by reliving our last year summer adventures. I found this fun series of photos of my younger daughter Maja sliding the slide in waterpark and decided to scrapbook them using my all time favorite “Sunkissed” collection.
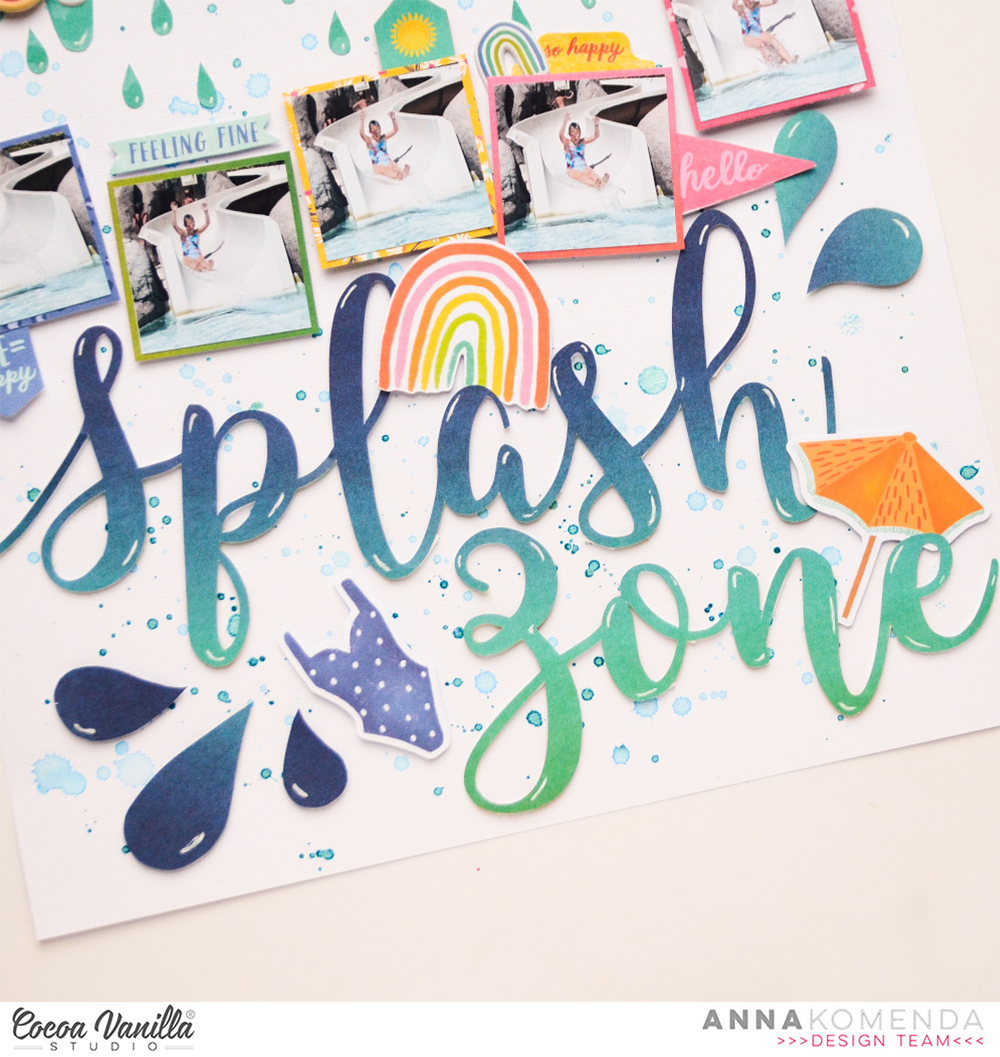
I started with a white background papers and splashed it with two shaded of blue mists. When I was waiting for it to dry, I took one of the pattern papers called “Good vibrations” and cut out my title using digital die cutting machine. When it was done, I added a layer of foam adhesive to make it pop from the background.
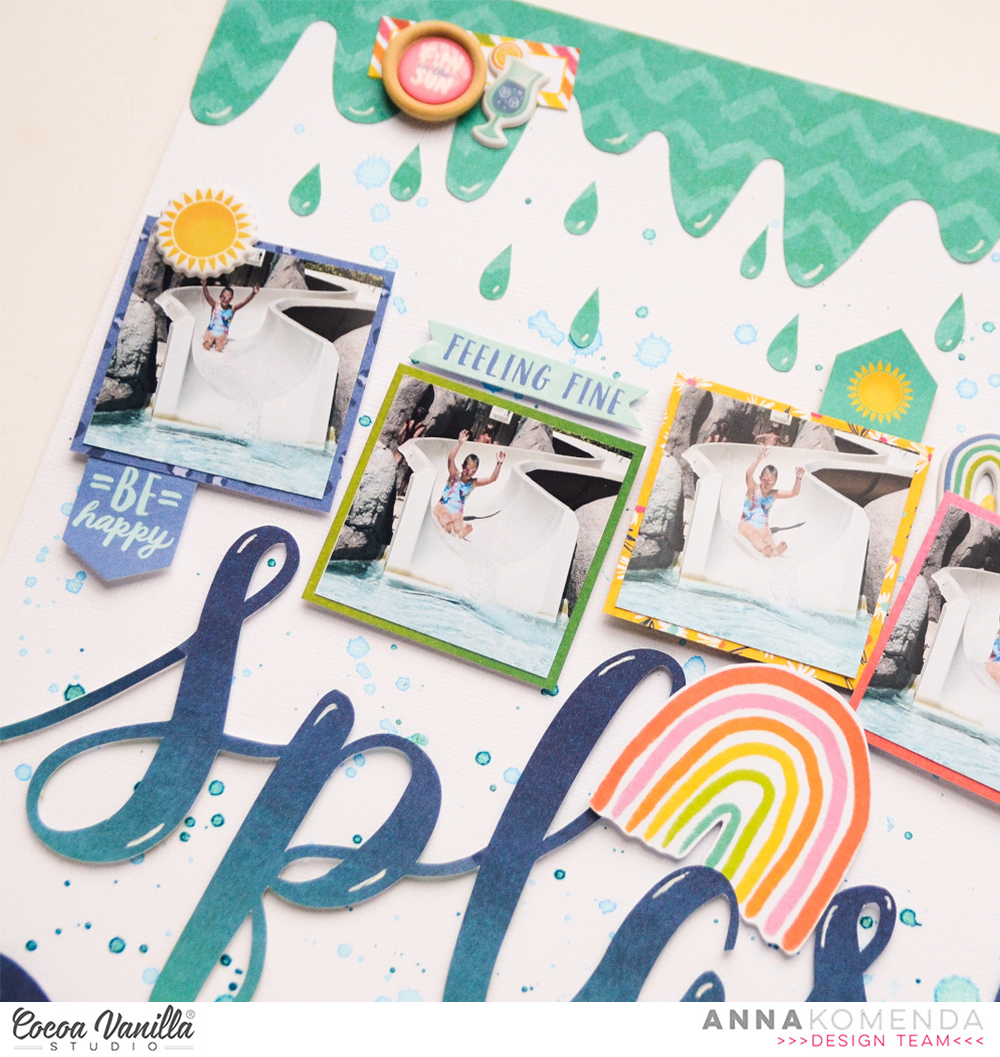
Each of five photos is backed with a different patter paper from A5 Paper Stack. I just love this product as I do not need to cut into whole 12*12 paper to get only a piece of it. What is even better – patterns in A5 Paper Stack are slightly different than in 12*12 Paper Pack! So you have even more colors and patterns to choose from.
After adding title and photos, I started embellishing everything using my leftover Ephemera Pieces (I am running really low on them). I found matching bathing suit, umbrella, rainbow and few word strips. As you can see, I didn’t spend much time on embellishing this page. Big title and multiply photos make it quite busy already.
When I was done with adding embellishments, I noticed that page isn’t balanced well with busy bottom part and empty space on the top. I was wondering what to do, and then idea strucked me. As this page is abour water splashing on the slide, I can add a dripping water! I took “Sunny days” paper and hand cut a row of “water” with tiny little droplets.
I was crossing my fingers it doesn’t look scarry, more like a slime on halloween page, but it turned out OK. I took white gel pen and added a bit of shine to the title and strip of water. The page was done! I am happy how it turned out and that another memory has beed scrapbooked!
That is all for today. Thank you so much for spending your precious time with me and see in in March!
It’s Tarrah back with you and today I am sharing a new Summer themed layout featuring the gorgeous Sunkissed collection.
Who doesn’t love a cute kid in an even cuter swimming costume right? This photo is of my youngest niece and I just love it! The Sunkissed collection was the perfect collection to document this photo.
I decided on the ‘B’ side of the Bright Side paper for my background, trimmed it down and adhered it to a plain sheet of white cardstock. I then chose a title cut file from CUT to YOU, cut that out from white cardstock and then backed it with the Summer Lights patterned paper. Once the cut file title was backed, I added craft foam to the underside and and then adhered it to the top of the page, I did leave the S and U in the word sun with adhesive though as I knew I wanted to tuck in the sun behind the letters. To do this, I fussy cut out the sun from the Fun in the Sun patterned paper, I tucked it behind the letters and then bent up the edges to add some texture to my page.
On top of the title, I took some of the pretty florals from the Floral Ephemera Pack and adhered them in their corresponding colours, so the pink one is layered on top of the pink section in the patterned paper and the yellow flower is on the yellow paper. I cut out another of the journal cards from the Fun in the Sun patterned papertucking it in behind the photo. I love how this journal card added some colour against the dark background and bought out the colours in the photo a little more. I adhered the photo on top using craft foam to add some dimension nd create some depth and shadows on my page. I also cut out the phrase from the same paper that says ‘Love This’ and layered it over the journal card. I also took one of the gorgeous gold glitter foam titles and placed it above the ‘Love This’ phrase.
On the right hand side of the photo, I took that super cute swimsuit die-cut, added craft foam underneath and adhered it right next to the photo. I took some floral and leaf pieces from the floral ephemera packand tucked a few in here and there to add some extra interest to the page. I also took some of the phrase stickers from the Accessory sticker sheetand placed these around the page to help tell the story. I added a few of the gorgeous puffy hearts and lastly stamped the date stamp and sprinkled some drops of white mist around.
Thank you so much for stopping by the Cocoa Vanilla Studio blog today! I hope you enjoyed reading about how I created my layout as much as I enjoyed creating it.
Today we say goodbye to another beloved member from our design team – Danni Visser. Danni has been an integral part of our team for a numbers of years now; ever since she first agreed to be a guest designer back in October 2019 and we convinced her stay on permanently. Today truly is a bittersweet goodbye though, because although we are sad to see Danni leave us, we are equally excited and proud of her as she begins her journey through medical school.
So today we thought we would look back at some of our favourite projects Danni has created for us, starting off with one of her guest designer projects from 2019 featuring our ‘Unforgettable’ collection and a beautiful wedding photo…
Danni loves using cut files and has created many projects for us using them, but one of our faves has to be this layout, featuring Danni’s darling daughter, muddy puddles, and our ‘Storyteller’ collection…
Another signature element of Danni’s work over the years has been her amazing hand stitching ability. She has showcased this numerous times, but no layout quite showed it off as spectacularly as this one using our ‘Sunkissed’ collection…
To finish things off, we couldn’t resist sharing a layout Danni created using one of our boy collections, ‘Legendary’. This page featured a nod to the Australian bush and some mixed media work – another element that Danni has often included in her projects over the years…
Danni – thank you for everything! It’s definitely not easy to say goodbye to you and your creations, but we are absolutely thrilled for your new opportunity and what the future holds for you. Lots of love and the best of luck – we can’t wait to be able to call you Doctor Danni!
Hey y’all! Laura Alberts back again with a little bit of wedding inspiration using one of the older Cocoa Vanilla Studio collections in my stash, Midnight! I absolutely love the elegant designs and mix of dark navy with pink and purple in this collection, making it perfect for my wedding photos.
Using a large 6×8 photo on this layout filled most of the page, so I kept my embellishing simple with a long border of florals and chipboard hearts down the right side. Behind the florals, I added a few clear stickers to give a tiny bit of detailing to the layers. I tucked a black and white floral underneath the photo and added a layer of vellum to mat my photo.
On the bottom left, I created a journaling spot with a 3D effect by layering frames, a cut-apart piece and a tag. I love how this blends in beautifully with the floral paper in the background, but still adds a pop of interest to the left side of the page.
For the title, I used a die cut ephemera piece, layered it on top of a chipboard banner, then tucked a mixed media style clear sticker underneath. All of these layers give my title depth and dimension. My favorite part is always the Nuvo trails behind the butterflies!
I hope this layout gives you a little inspiration to use for your next formal event!
Hi everyone, it’s Sue Plumb here today to share my latest design team project with you.
I have to admit, things have been super busy in my world lately, and I have really found myself pushed for both time and inspiration to create. In times like these, I often find it helpful to reach for a sketch so I have somewhere to start and can get going quickly. It was for this reason I decided to use a Page Maps sketch for this page, along with the beautiful ‘Storyteller’ collection.
And here is the sketch I was working with…
As you can see, I stuck fairly closely with the overall sketch design. One of the greatest things about using sketches though, is that they are designed to inspire you, so you have the ability to interpret different elements of the sketch however you want.
This is exactly what I did when it came to my background. I began with a sheet of patterned paper (Fly Away), just as the sketch suggested, however instead of layering this with another piece of paper or cardstock, I chose to add acrylic paint to define the focal area of my page. I then added a piece of the rainbow striped Brighter Days paper that I had leftover from a previous project.
The sketch had a couple of vertical elements, so I used one scrap strip of paper I had on hand, plus the heart strip from the Story Time cut apart paper. For my title, I used the best ever card from the Pocket Cards pack and in keeping with the sketch I punched along the top edge of it using a notebook style punch. Before sticking down the photos of my daughter and I; I added a small paper doily and some frayed gauze to create texture behind them.
With all the main components in place, it was then simply a matter of adding my embellishments. Again I stuck fairly closely with the design of the sketch, but instead of using stars, I substituted flowers instead. I created three clusters using a variety of pieces from the Floral Ephemera pack, and I topped one of the flowers with an Epoxy Wood Button. Other embellishments used included a small banner and heart from the Die Cut Ephemera pack; some Accessory Stickers; and Puffy Stickers.
You can watch how this layout came together in my process video below:
Thanks for stopping by so I could share this today. If you have found yourself short on time or mojo lately, try using a sketch like I did for this layout. You can stick close to the original design or use it as a jumping off point – just get those memories documented!
I decided to use a big black and white photo of my sweet Sabrina at the beach as the focus on the page. I layered it with tissue paper and foam adhesive, and placed it to the right of the page.
I used a cut file from JustNick Studio named “Travel often” for both my title and suitcases. I backed them with different patterned papers from the Sunkissed A5 paperpack.
I fussy cut beautiful florals from the “Growing Wild” paper and mixed them with floral die cuts arranged in clusters around the suitcases and title. I also added a lovely umbrella, a banner and a few fussy cut clouds to decorate the page.
I grounded everything on a teared piece of the “Just Chillin‘” paper.
A little bit of sad news to share today as we say farewell (again) to one of our beloved team – Lina Monaco. Lina has been a treasured member of our Cocoa Vanilla Studio family for many years, having been a team member twice now after we wooed her back to do another tour with us. Unfortunately for us however, life is just way too busy now for Lina to keep up with everything, so we have to wave goodbye.
So let’s take another look at some of Lina’s recent projects that she created for us. First up, a beautiful layout featuring a photo of the lady of the hour herself along with her husband, and using our ‘Storyteller’ collection…
Lina loves working with bright colours, so next up we are sharing a gorgeous mixed media layout featuring our ‘Sunkissed’ collection…
One of the things we love about Lina is her versatility – she can rock a boy layout just as well as she can rock a girl one. Here’s a gorgeous one she created using ‘No Limits’…
And to round things out, we couldn’t resist sharing this layout that Lina created for our Throwback Thursday featuring one of her all-time favourite collections, ‘Bohemian Dream’. (I think this collection can be found on a lot of people’s favourite list!)
Lina – thank you SO much for all the amazing inspiration you have shared with us over the years and for being such a great ambassador for Cocoa Vanilla Studio. You’ll always be part of the family. We love you and wish you all the best!
Hey y’all! Laura Alberts back again with a fun layout of my son’s university tour! I thought the colors in these photos were perfect for Storyteller and they worked really well together. I chose a column design because I had two landscape 3×4 photos and 1 portrait 3×4 photo. I find splitting up the two formats a little easier to scrap. The left-hand column has 4 journaling cards stacked one right after another, 2 to back my photos and 2 for journaling spots.
A multi-layered strip down the center gives the two columns defined areas and gives me a place for a little extra embellishing in the middle. I especially love these wood buttons with the epoxy in the middle! Such a fun way to add more dimension and texture to the page. On top and bottom of that button are round puffy stickers, then a few Nuvo drops for interest. At the bottom of this page, I collaged stickers and ephemera to make an embellishment cluster.
On the right side of the page, I combined this fun journaling card and my portrait photo for a mini-layout within a layout! This half of a frame tucked behind my photo reminded me of some of the architecture at the university and also created a landing place to build my cluster of embellishments on top of too. All in all, I used five journaling cards on this layout.
I hope this layout gives you inspiration for using your journaling cards on a layout to create a grid or just to add a little extra color! Be sure to check out the process video below to see how “The Best Story” came together!
Hi everyone, it’s Melissa here and I’m so happy to be back with you today with a Christmas themed layout. I’m using last years gorgeous Joyful collection. The cut file is from Confessions of A Paper Addict.
I knew that I wanted to use a patterned paper for my background, and chose Very Merry because I love the gold sprinkles. I painted the cut file with a sparkly powder activated with water. The powder is pink but has hidden colour in it, which is why there is a mix of pink tones. I actually love that it is uneven. I used a gold powder for the present.
I fussy cut several flowers from Tis’ The Season for embellishment. I bended up the edges of the petals for extra dimension and I love how they look scattered throughout my page. I used a couple of Accessory Stickers to help tell my story.
I backed the cut file present with papers from the A5 Paper Stack. They were perfect with their small repeating patterns.
I hope I’ve encouraged you to dig into an older Christmas collection to document your memories.