Good life captured | Heart and Home collection | Josefine Van der Hoeven
![](https://cocoavanilla.com.au/wp-content/uploads/2023/08/DF09FDAF-198C-4608-B47F-EEAA82DAB96E.png)
Hey Crafty Peeps! It’s Michelle here today with a new layout share for you all and I’m so excited about this one as its using our NEW collection Heart & Home. This collection is absolutely stunning with all its pretty florals, soft colour palette and sweet sentiments.
As this was the first layout I’ve made with the collection, I felt I needed to use some extra special photos. I found a couple of sweet family snaps from a few years back that were in need of a new layout base and I think now that its complete, I may add it to a shadow box frame and display in our living area.
I kept the base of the layout very simple by using a strip of the GOLDEN FIELDS paper across the width of white cardstock background, with machine stitching for added detail. I then built the photo cluster on the right side of this.
Under the main photo I’ve used pieces of FALL BEAUTY & LEAF LITTER with pieces from the ACCESSORY STICKERs, EPHEMERA PACK and GATHER cut apart sheet tucked in for good measure.
The smaller photo has been framed using the smaller square frame in the EPHEMERA pack and popped up using foam for a little dimension
I created the title using a GOLD FOIL TITLE word and a piece from the EPHEMERA pack layered above one big beautiful floral cluster. I chose florals from both the BOUNTIFUL paper and SPECIALTY PRINTED VELLUM to fussy cut and layer together, with the addition of some puffy dots from the PUFFY STICKERS pack to complete the cluster
I do love to create a mixed title using different elements of a collection. Tell me in the comments what your favourite way to create titles?
I made a second smaller cluster in the top corner of the layout using elements from the larger group. I even gave it a “handmade” touch by creating a faux cross stitch frame using the cute hearts from the GATHER paper and a larger frame from the EPHEMERA pack. I think it turned out pretty sweet
Lastly I gave the layout a sprinkling of gold ink around the clusters for a little extra detail
Heres another look at the whole layout
Well friends, thats all from me today. Thanks so much for stopping by to check out the first layout I’ve created using the new HEART & HOME collection. It was a joy to create, and I hope its something that inspires you to get your craft on!
Until next time, Happy Scrapping!
Michelle x
Hi creative friends,
It’s Tarrah back with you and today I am excited to be sharing a layout with you featuring the new GORGEOUS Heart and Home collection! I love the handmade feel to this collection.
I started by choosing a cut file from CUT to YOU, I cut it out from the ‘B’ side of the gorgeous Fall Beauty paper. I was certain to place the cut file in the centre of the paper so I could use the outline as the background for my layout. I adhered the cut file to a plain sheet of white cardstock and trimmed down the cardstock to measure approximately 11′ x 11′ and adhered it the remainder of the Fall Beauty paper. I then machine stitched a border around the outside to add to that handmade feel.
I am documenting a photo of myself with my friends from one of their 50th birthdays a few years ago. Such a fun night celebrating! I placed the photo on the right hand side of the page and layered a piece of vellum and a frame from the die-cut pack underneath. I adhered the photo using craft foam to add a little dimension to my page. On top of the photo, I added a phrase banner from the die-cut pack and also placed a rectangle sticker from the accessory sticker sheet to the left of the photo.
At the bottom of the photo, I placed the paper strip with the cross hearts on it from the ‘Gather’ paper. I also tucked in some florals from the floral die-cut pack and placed a banner die-cut and a round die-cut both from the ephemera pack. To the right side of my photo, I tucked in some more florals here and also placed a word sticker from the Accessory Sticker sheet. My title is the ‘Together’ word from the gold title die-cut pack. I just love the gold foil on these! So pretty!
To balance out the heavy right side of the page that features my photo and title, I created a small cluster of embellishments that features mostly florals and a Love die-cut. I used different levels of adhesive here to show different levels of dimension. I also placed some more word and phrase stickers here from the Accessory sticker sheet. Lastly I placed some enamel puffy shapes and I stamped the date stamp to document the date of when the photo was taken.
Thanks so much for stopping by the Cocoa Vanilla blog! I hope you enjoyed reading about how I created my layout as much as I enjoyed creating it.
Happy creating!
Tarrah x
Hello friends!
It’s Sophie with you today and I have a colorful layout to share!
I used the Happy Days collection and decided to go bold on colors!!
I used a 11×12 inches thick white cardstock that I placed on the Sunshine Lollipops paper.
I played with three Distress Oxide inks and water to create a mixed media background, in a heart-liked shape.
I centered two sweet photos of my daughter, mounted on tissue paper and foam adhesive and on the Juicy Fruit paper, and placed everything on my colorful background.
I decorated around my photo with beautiful florals from the Happy Das floral Ephemera pack in a rainbow manner, starting with the purples on the left, and pinks, oranges and yellows towards the right.
I also added a few butterflies and puffy stickers.
My title is a mix of a die cut (word “Happy”) and letters from the Chipboard Titles pack that I painted with the same inks as my background.
Here are more close-ups:
How I like the end-result!! I hope you do too and that it can give you new ideas to try!
Thank you for stopping by!
Sophie xx
Hi CVS friends, today I am sharing my first layout using the beautiful new collection Heart and Home. I am loving the autumn/fall vibes, so I found some photos of my youngest and I taken in fall with the colours matching perfectly!
Both my chosen cut files, leaves and The Perfect Day, are both from the Silhouette design store. I wanted to create a fall themed background and this leaves cut file is great as its not too ‘busy’ and to ensure some white space remained I only paper pieced some of them. I used the A5 paper pad blue hearts paper for my leaves. I used the Framed paper, wood grain side to cut my large title. I then paper pieced it using Golden Fields paper which has the smaller floral design. I did use foam tape on the large title to add dimension.
I next added two torn paper strips to the top and bottom of my page, using the yellow side of the Gather paper and Leaf Litter paper green side for the bottom strip. In doing this it ties all the elements together. I next added my photos, using a 3×4 inch photo to go under the phrase title and using one of the cute die cut ephemera frames above the phrase title which measures 2×3 inches. Both were added with foam tape.
I added die cut florals to the bottom photo on each side, tucking them under my photo. I added the wood grain phrase sentiment die cut and finished off by adding two heart puffy stickers and a heart tab from the Accessory Sticker sheet. As the top photo frame already had florals I simply added two heart puffy stickers.
I then set about adding finishing touches! I fussy cut some butterflies from the paper in the A5 paper pad and added around my page. I created two small embellishing clusters at the top and bottom torn paper strips. As this page had a lot going on I was careful not to over do the embellishments, sometimes less is more!!!!!
It was great to NOT have to convert my photos to black and white so they match a collection, warm toned photos match perfectly.
Thank you for stopping by today and I look forward to seeing what you all create with Heart and Home!
Rachel X
Hi everyone, I am so happy to be back today sharing my first layout with the brand new ‘Heart and Home’ collection. This range has a very autumnal, warm colour palette and I think is a very versatile collection to document all the things you are grateful for in your life…hence I chose a family photo to scrapbook. Here is my page..
I couldn’t decide which papers I wanted to use so I decided to try and get a variety of them onto my page so I started with cutting some zig zag / chevron shapes in 3 of the different papers, and to use the woodgrain paper for my background…. I LOVE woodgrain papers ..they add such a nice texture to a page.
Next, I double mounted my photo and placed it on top of the text paper with some foam dimension.
I knew I had to use some of the florals on my page so I created a visual triangle around my page… one on the top right of my photo, one to the bottom left and one at the top left of my page. I used florals from the Floral Ephemera Pack and also fussy cut some from the ‘Bountiful’ paper.
In the top right cluster I used some pieces from the Ephemera Pack..
For my title I used one of the Titles with Gold Foil and popped a house from the Ephemera Pack underneath it… then fussy cut some hearts from the ‘Gather’ patterned paper and placed them under my title.
At the top of my page on top of the floral cluster I used a word sentiment from the ‘Gather’ paper to finish it off.. and also used some Puffy Hearts around my page.
My finsishing touch was a little hand stitching…love little details!
I hope you enjoyed seeing my first page with ‘Heart and Home’ and be on the look out for more inspiration from the DT with this new collection.
Happy Scrapping!
Kel x
Hey y’all! Laura Alberts back again with a fun grid layout using the Storyteller collection for my graduation photos! If there was ever a set of pictures that had a story to tell, it’s these ones! I love how perfectly the colors in this collection matched my robes and stadium.
For this grid, I used four 4 x 4 1/2 inch bases for my 3×4 inch photos. By pairing journaling cards with the two profile photos and frames or flags with the landscape style photos, I created continuity across the grid that allowed me to go wild with the embellishing! Chipboard butterflies gave these layered squares a 3D effect that really made them pop.
By choosing colors for my bases that either contrast or compliment the photos, I can make specific photos more of a focal point on the page. The yellow squares give two of the photos a little bit more prominence and catch your eye first thing. Using a mix of puffy stickers, chipboard, and ephemera to embellish these squares makes each of them unique and interesting.
But, my favorite detail on this page is the Nuvo drop border between the grids. It’s a small addition that gives this page so much character!
I hope this layout inspires you to freshen up your grid layouts with a variety of embellishments! To see how “Special to Me” came together, check out the process video below:
Hello, hello! It’s Anna here and today I don’t have a layout for you! While I was waiting for the brand new “Heart & home” collection to arrive, I once again decided to make “use as much as you can” type of project with the older line. Those cabins won’t stretch any more further so I need to make some room. Truth to be told – I would probably need to make 100 of albums like this to notice some empty space… However, the result of my internal challenge is cute, colorful mini album made with wonderful “Happy days” collection. I need to warn you that I have many photos to share with you.
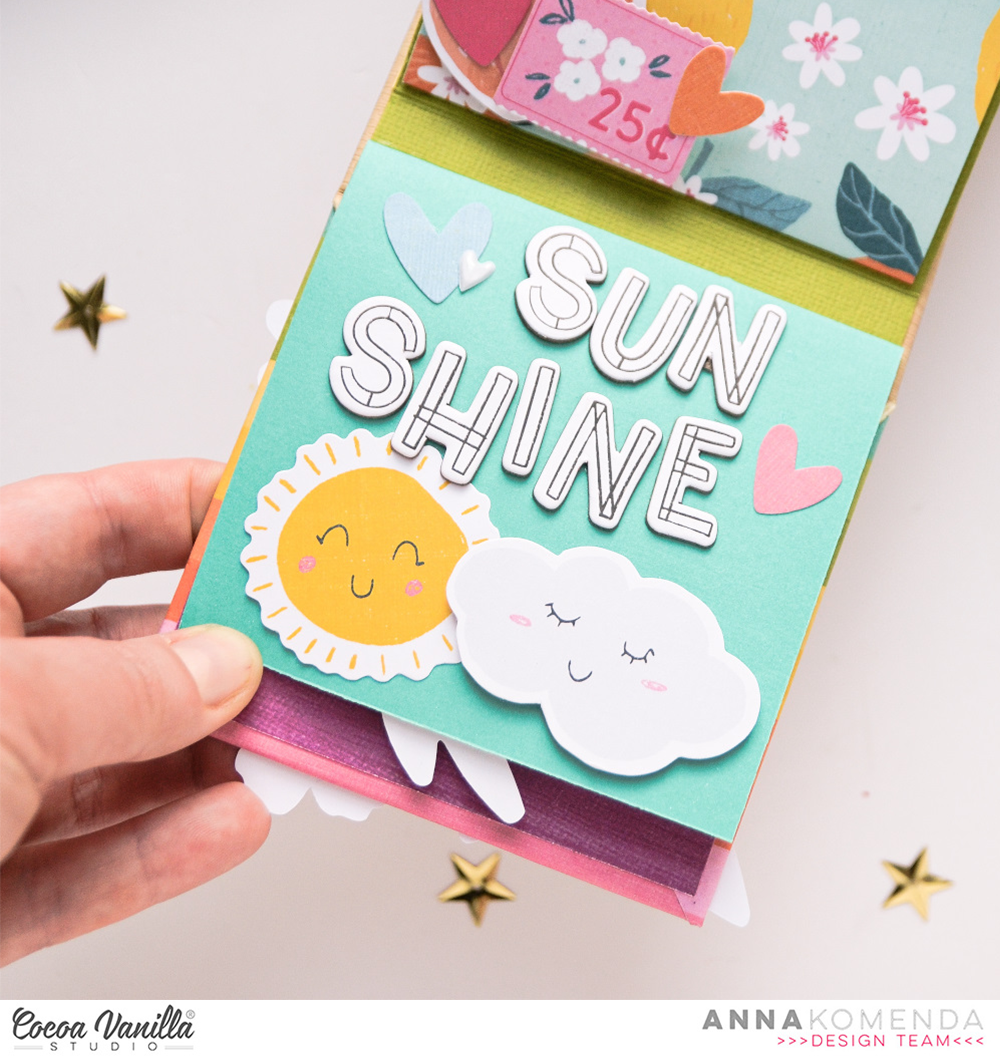
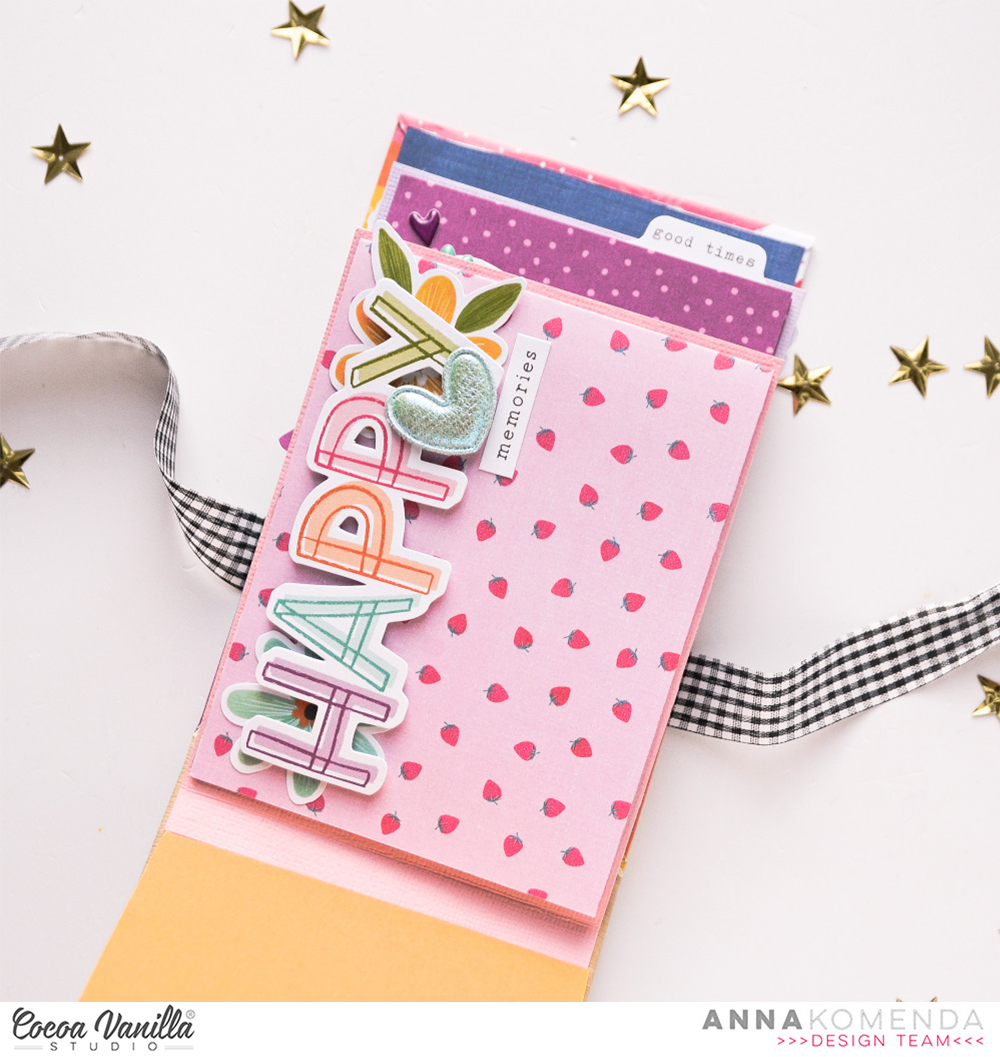
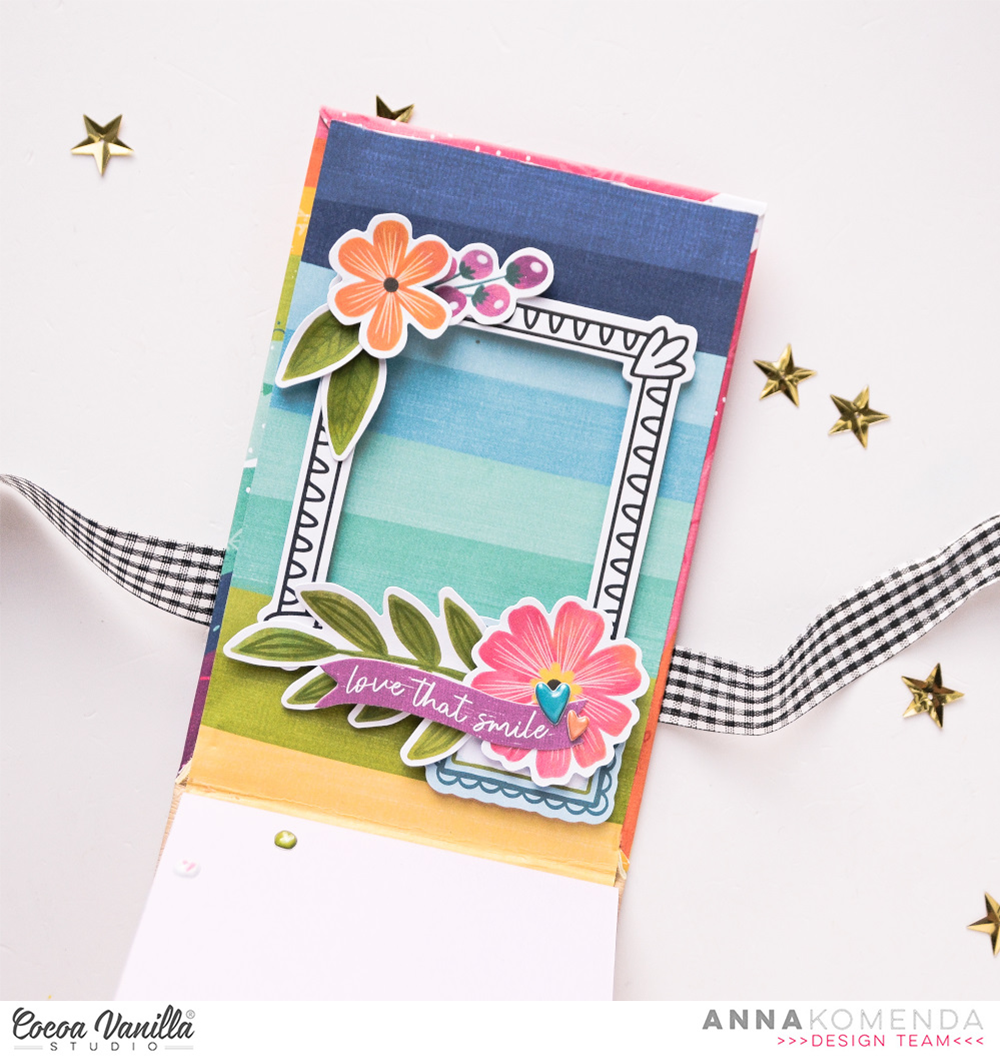
I made this mini album from scratch, using three pieces of cardboard for the cover and some colorful cardstock for the page bases. I arranged them in rainbow order inspired by all the rainbows in “Happy days” collection. I also went through all the pattern papers and chose few in matching colors to continue the rainbow trend. I used both 12*12 papers like “Lush blooms”, “Flutterby”, Juicy friut”, “Feel good”, “Little blossoms” , “Sunshine lollipops” along with A5 Paper Stack.
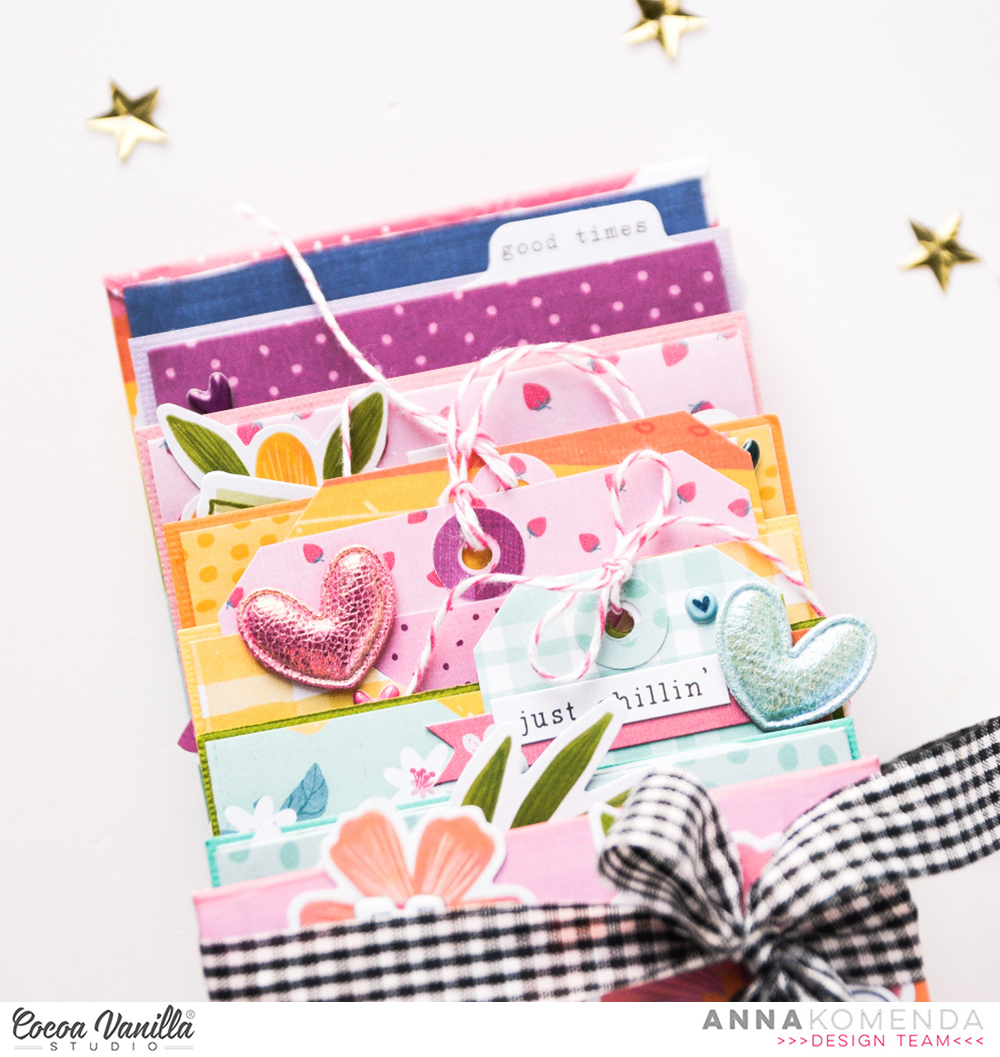
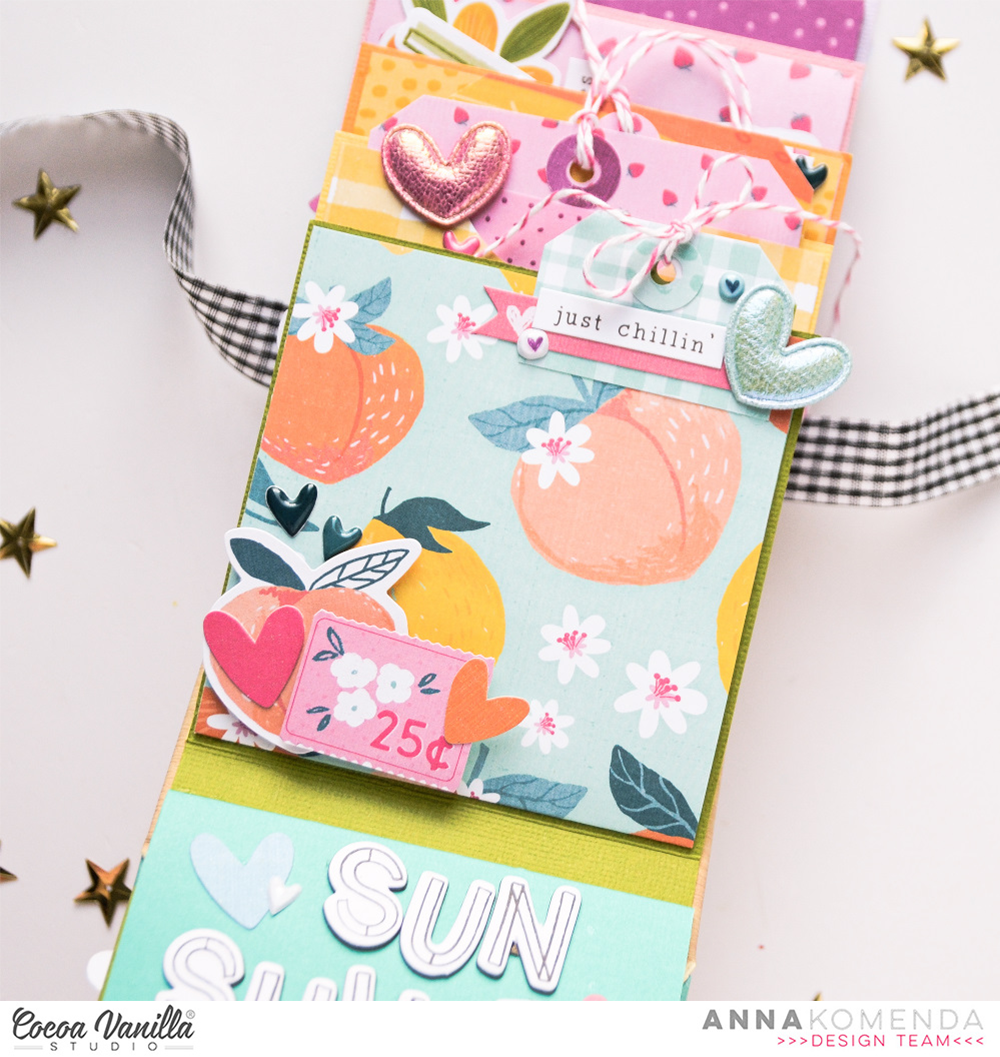
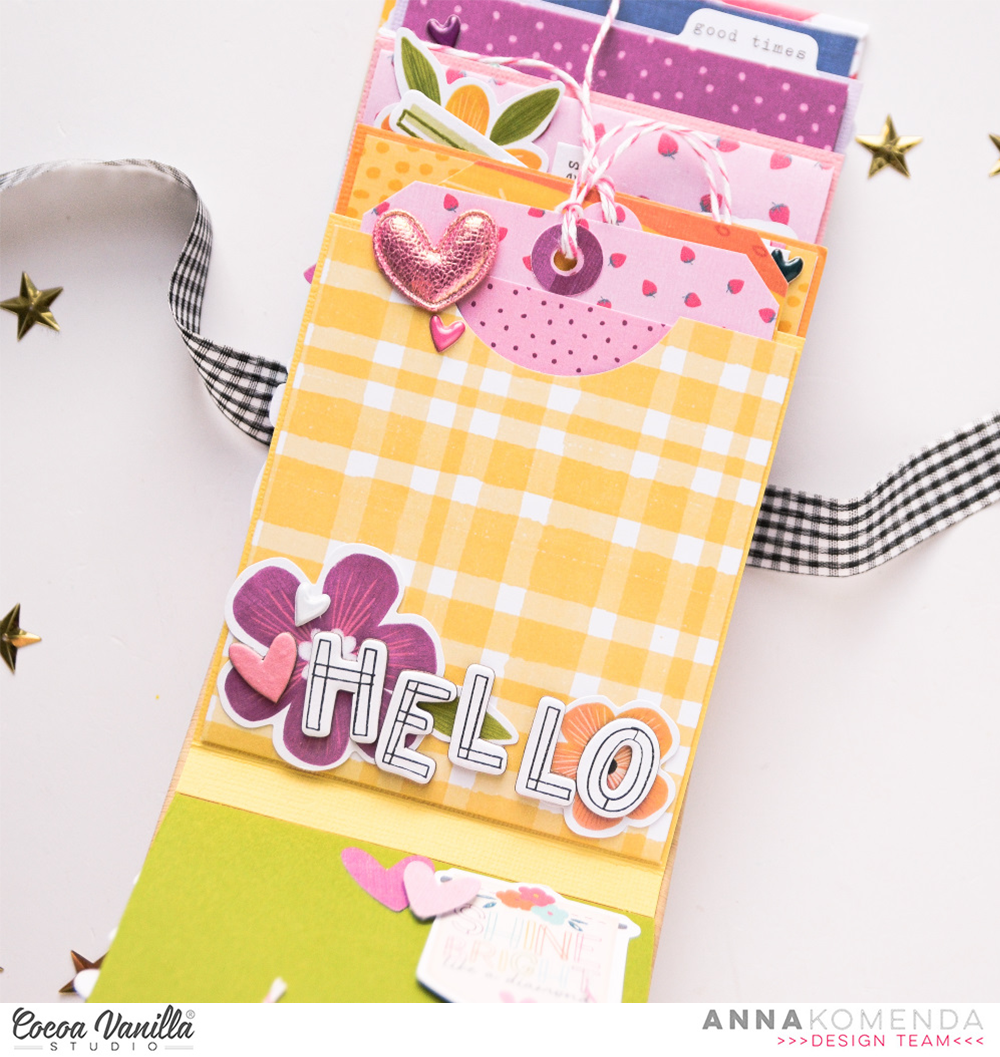
Album is quite small, measuring only 10*15 cm, but each page has some folded flaps or pockets so it can hold many photos. You can easily expand the album even further by adding even more flaps on the back of each page.
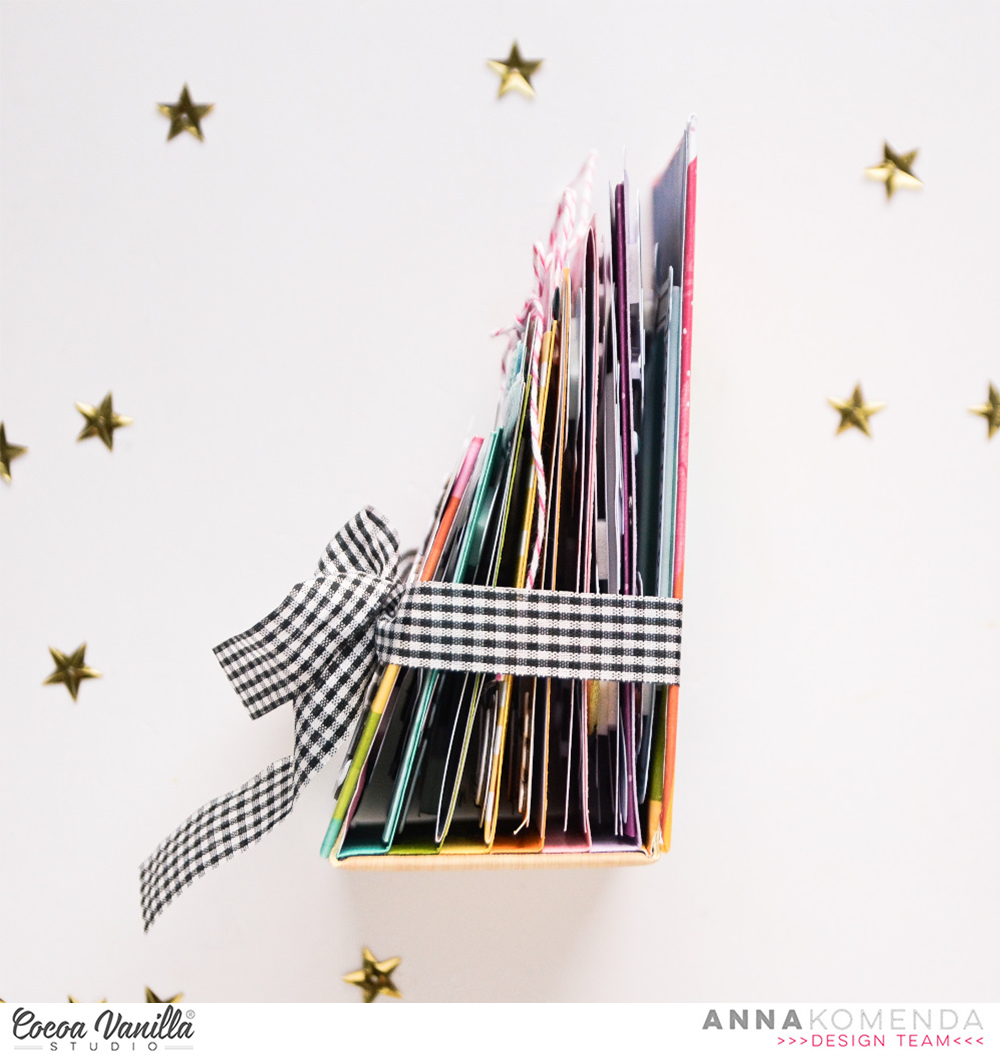
This is how it looks from the side, with cascade of pages, each 1cm smaller than a previous one. There is plenty of room to add more volume with photos and embellishments.
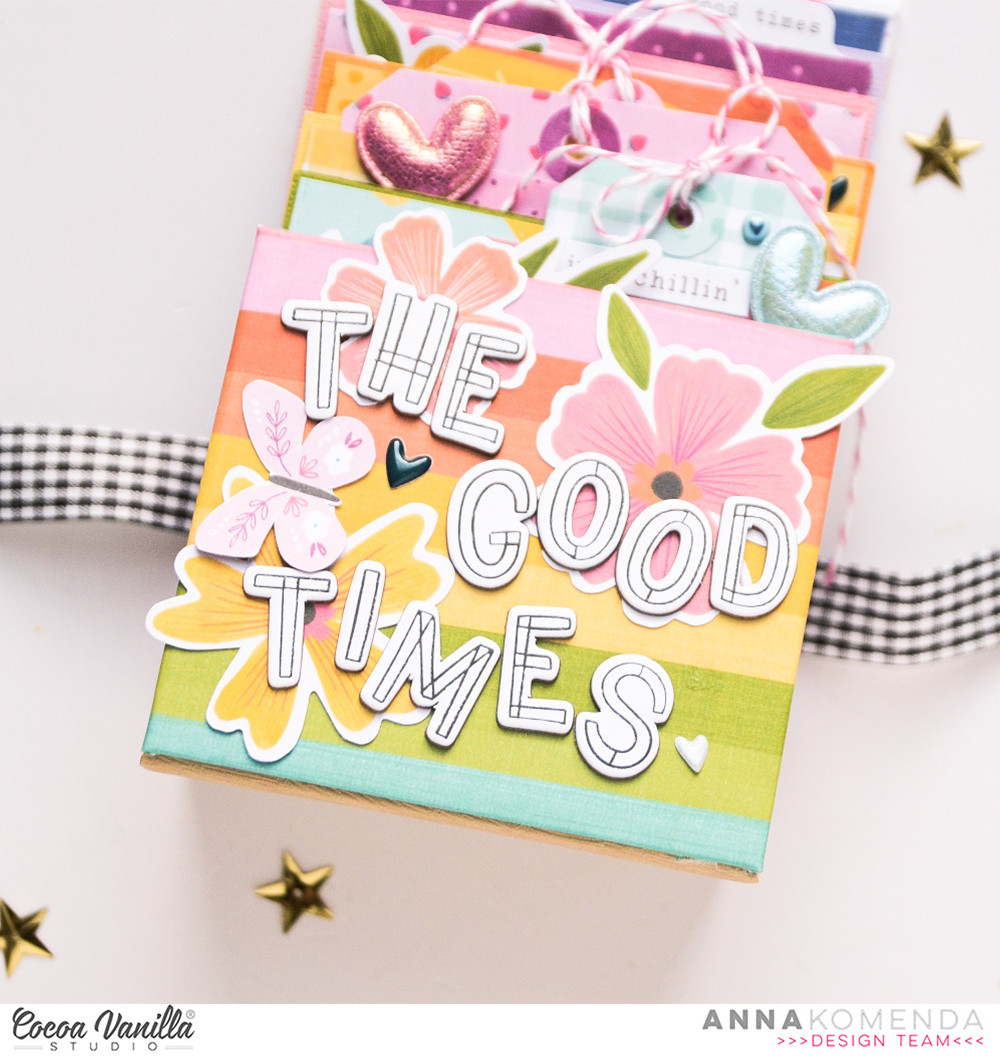
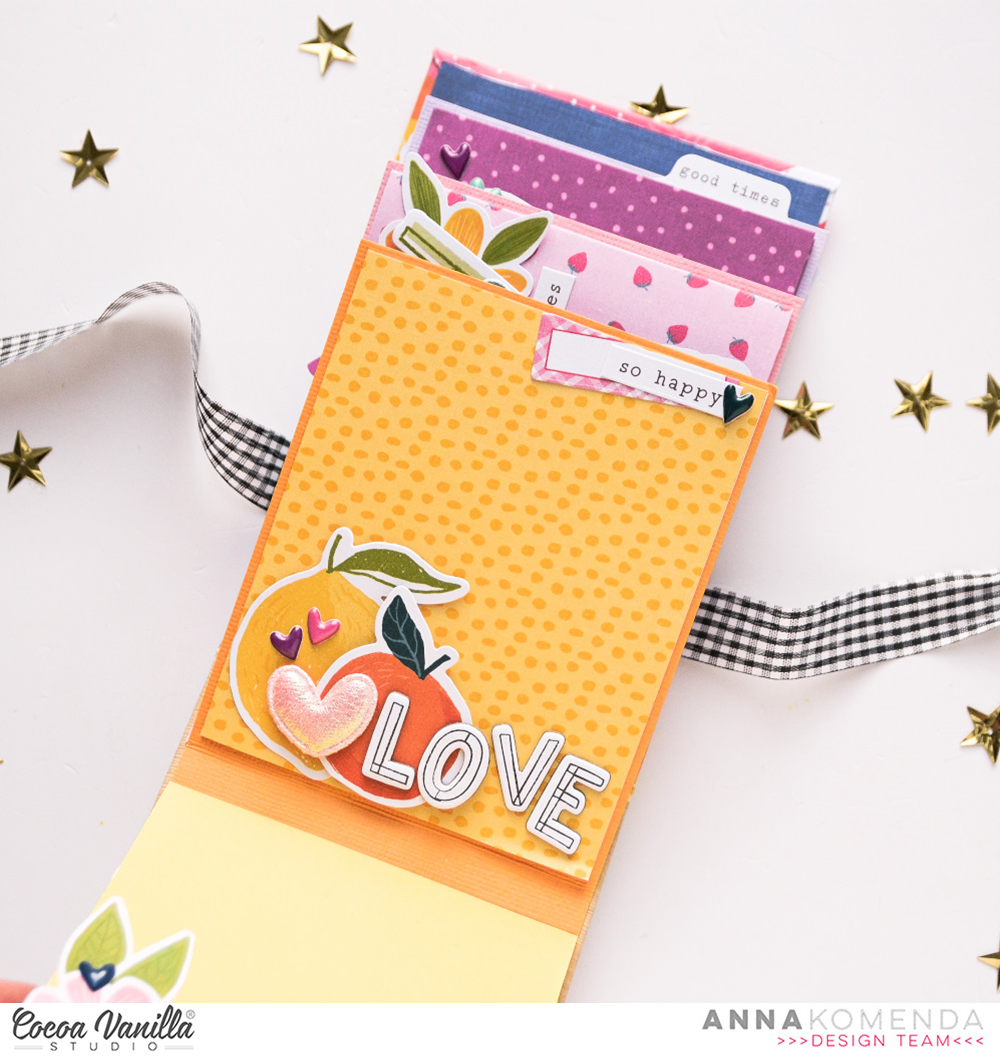
To decorate the pages, I reached for almost all of the embellishments from this collection. I used Accesory stickers, Die cuts ephemera, Floral ephemera, Chipboard titles, Puffy stickers and Puffy hearts. I only added the glue on the edges of the embellishments so you can still tuck the photo behind it!
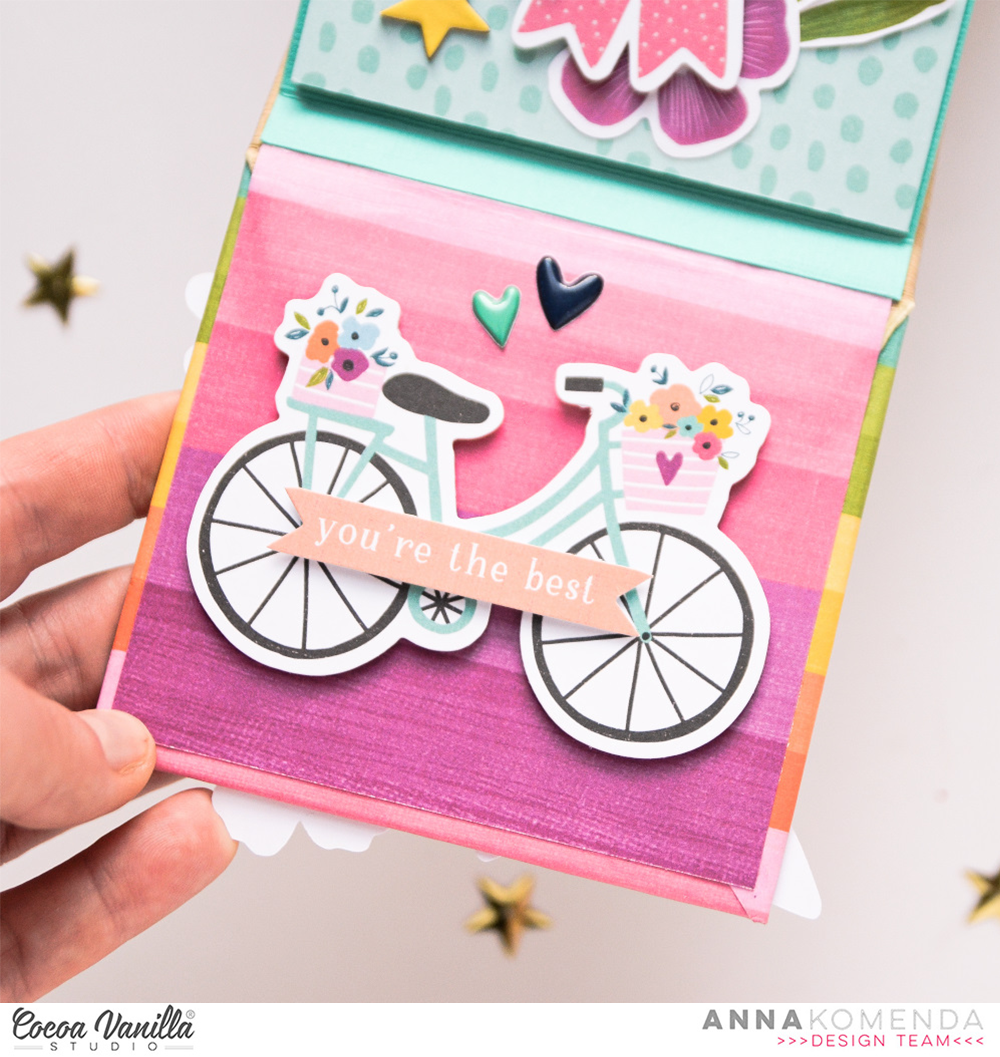
I also added some embellishments on the back of each page, the way you can look at it without turning the album upside down. As I mentioned each page has some flap or pocket for more room for photos. It was hard to photograph them so you need to believe me they are there.
Here are all the album pages I created:
And that is all! I know it was a lot of photos but it was hard to choose only few pages to showcase. I hope you like this mini album.
That is all for today! We will see each other in September and I will for sure have a project made with brand new CVS baby! Can’t wait to dive in. Thank you so much for spending your precious time with me.
XO Anna
Hello Paperlovers,
Welcome to the Cocoa Vanilla Studio blog. It’s Josefine here with a new mixed media scrapbook layout, and I’m using the beautiful “Storyteller” collection. I’m starting off by creating a mixed media background on my white cardstock paper. For this, I’m using distress oxide in the shade “faded jeans” and a sponge. I apply some distress oxide onto a craft mat and dab the ink onto the white cardstock paper by using a sponge. I repeat this process several times until I’m happy with the size of the ink splatters. I let it air dry, and meanwhile, I’m cutting out my title using my electric cutting machine, the “Cricut.”
I’ve chosen to cut the cutfile out of black cardstock. The cutfile “Class of 2023” is from the Cricut store. I place the cutfile on top of the blue mixed media background. The contrast between black and blue gives it an elegant touch, and it beautifully complements the colors of the Storyteller collection.
I place the photo of my daughter, who just graduated, on top of the cutfile. To add more contrast against the black cutfile, I decide to cut some patterned paper to size and place it behind the photo. I love searching for the perfect die-cuts and creating clusters on my layouts.
I choose various die-cut flowers, figures, labels, and puffy stickers to embellish my layout. The Cocoa Vanilla Studio collections are so comprehensive and offer countless possibilities to create various styles. I also decide to add some splatters of white gesso for a festive vibe. Underneath the photo, I cluster a label and a photo camera die-cut, connected together with dark blue floss. I absolutely love little details.
My layout is complete, and I’m really happy how it turned out. The Storyteller collection truly tells the story of this memorable day that I’ll never forget. I hope I’ve been able to inspire you with this layout and look forward to seeing you again next time with fresh inspiration. Wishing you a wonderful and creative day.
XoXo, Jo
Hey Scrappy friends! It’s Michelle here today with a new layout share for you all. I think this might be the last I share with the amazing Happy Days Collection for a little while as I just received a fresh box of the NEW collection Heart & Home and oh my is it stunning. But first, lets take a walk through this fun creation.
We recently had a family celebration of 50 years marriage for my partners parents, and what better way to celebrate than a family day out on a steam train ride. The kids (both young and old) all had the best fun hanging their heads out the windows as we rolled along the seaside
I had a couple of photos that I wanted to use to document this special occasion, so I thought a “rough” grid design would work for the base with lots of layers and different sized squares of pattern papers. I used a mix of both 12×12 and A5 pattern papers from the collection and cut them into 4×4, 3×3 & 2×2 inch size pieces to layer together. I added machine stitching around the edges for extra detail and left the strings loose for extra texture on the page.
I grouped photos together and layered one over the top of the other to continue the layered effect I was going for with the pattern paper
I added pieces of ephemera, accessory word stickers, chipboard pieces and puffy stickers/heart to the photo stacks to create interest in these areas
I created my usual floral clusters diagonally across from each other by fussy cutting florals from both 12×12 & A5 sizes of the LUSH BLOOMS paper then grouping them together with cut apart pieces from the FEEL GOOD paper
To create the title I’ve mixed letters from the CHIPBOARD TITLES pack to create my own words, and added a words strip from the FEEL GOOD paper above.
Lastly I added a few splatters of gold ink and some tiny puffy stickers in both hearts and dots to finish off the layout
I’m really happy with how quickly it all came together, with the fussy cutting being the most time consuming process of it all.
Well thats all from me today, thanks so much for stopping by! Can’t wait to see the new collection start appearing online within the next couple of weeks, so be sure to keep your eyes peeled for inspiration from the team in the coming days.
Until next time, Happy Scrapping!
Michelle x