VERY MERRY | MERRY AND BRIGHT | GWEN WRUCK
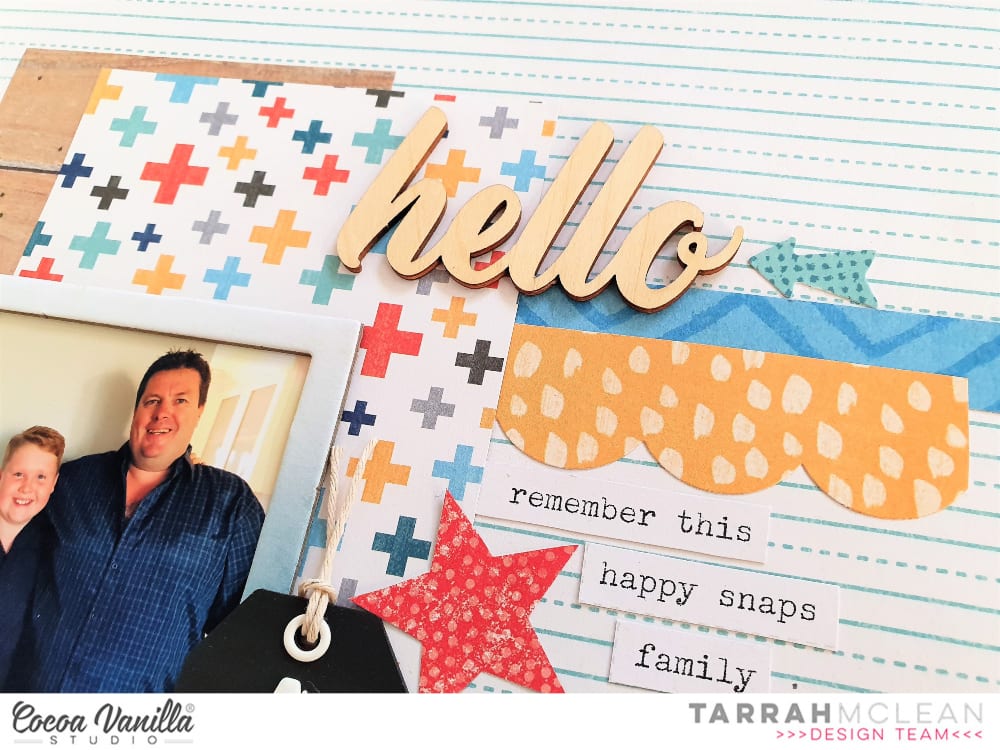
Hi Creative friends, Gwen with you on the blog today. For today’s share, I’m working with this sweet picture of Miss C wayyy too excited about Christmas M&M’s. On the blog this week the Design Team have been challenged to mix an older collection with a new one, so I’ve decided to mix the new Christmas collection (Merry & Bright) with Tis the Season. I just love how these two collections came together.

The design for my page is a central one which started with this title cut file by CUT to YOU. I’ve positioned my photo on top taking care to ensure everything is nicely centred.
Then, working with the larger ephemera pieces first, created three embellishment clusters, one in the top left hand corner of the photo, one in the bottom right hand corner of the photo and one centred, at the bottom of the page. I’ve started with the large Santa die-cut element from the ‘Ephemera Pack’ and mixed and matched ephemera pieces from both collections.

Here you can see the die cut piece ’25’ from the ‘Tis the Season collection’, sitting next to the Santa and Holly elements from the ‘Merry & Bright’ collection. I just love how I can use up those leftover pieces of the older collection and give it a fresh new look with the new one.

In the top and bottom clusters, I’ve also added in two of the gold ‘Puffy Stars’ from the ‘Merry & Bright’ collection. These are a great textured piece to add to a layout and are the perfect shade of gold.

You can also see here that I’ve added in a ‘Flair’ from the ‘Flair pack’ as well as some Enamel Dots, these are from the ‘Tis the Season’ collection.

I’ve also made a YouTube process video which you can watch below.
I hope you have enjoyed seeing how this page came together. Be sure to join the Cocoa Vanilla Studio Facebook group to see even more inspiration and ideas for using this collection.
Until next time,
Gwen
xo


 I don’t have much of the traditional collection left now but I am so happy to be able to get everything I need in digital form! I will never run out again! If your stash is getting low of
  I chose a photo of my youngest taken on Christmas Day when he was about 3 weeks old, he just turned 9 yesterday so the photo is quite old but its one of my favourites! I changed the colour of the photo to a soft black and white as the colours in the photo would have clashed with the soft colours in the collection. Underneath the photo I layered a small paper doily and a smaller piece of the red and white stripe paper to the right of the photo. I also layered a wood veneer frame on top of the photo, I like how this draws your eye to the photo. I popped up the photo using craft foam and then placed embellishments around the photo. The ticket that says ‘Child’ die-cut definitely had to be added, it was perfect tucked at the bottom of my photo.
 I used accessory stickers, enamel dots, die-cuts, wood veneer, sequins and a bitty bow to embellish. I have tons of the sequins left, I love the gold stars so I scattered a few of those around to add some sparkle. I placed the white bitty bow at the base of the tree to separate the tree from the pot. To finish the page, I added the date stamp of when the photo was taken. I love how my page turned out even with only minimal pieces from the
 I started my page by taking a sheet of white cardstock and adding a piece of vellum over the top to mute the white a little bit, as I had lots of the sequins left from the
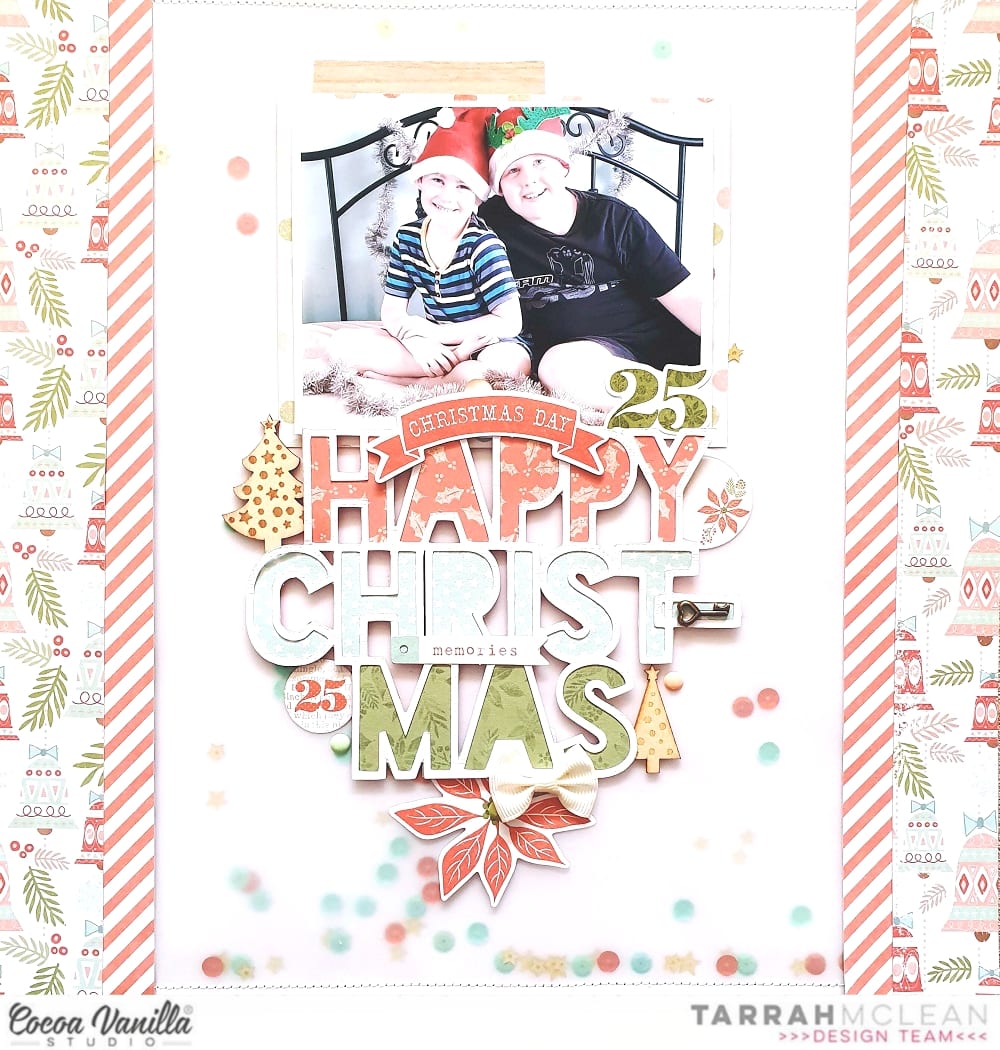
  I took two of the 12 x 12 papers and cut some vertical strips from them and placed them down each side of the layout. then chose a gorgeous cut file title design by Cut To You and added some of the patterned papers behind each of the words. I added craft foam to the underneath and placed it in the centre of my page. I also popped up the photo of my sons on Christmas Day with craft foam so that it was at the same level as the title on my page. I love the shadows and dimension this creates on my page.
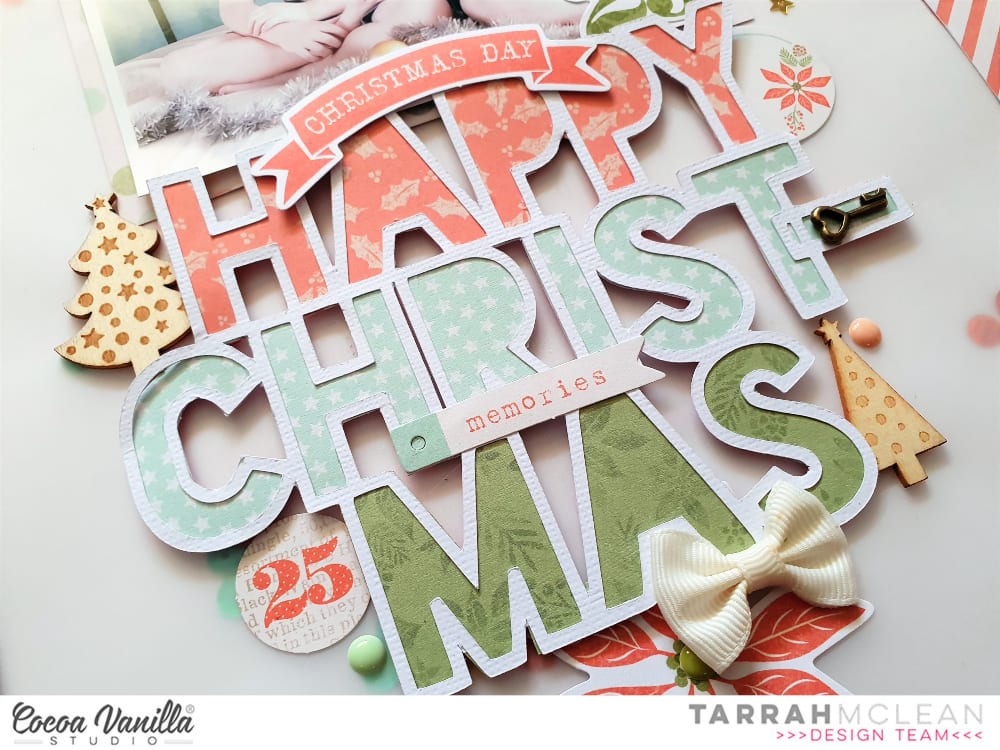
 I then began to embellish my page using some of the accessory stickers (that are still available in the store) some of the die-cuts, wood veneers and of course a bitty bow and the tiny metal key! I only had 1 of the poinsettia flowers in the die-cut pack left so I added just the one to the very bottom of the title and layered the bow over the top. Lastly I added some of the enamel dots from the Tis The Season collection.
  Have you got any of the