Hello Lovely | More Than Words | Kylie Kingham.
Hey there friends! It’s Kylie back with you today for ‘Throwback Thursday’, where I have created a layout featuring a past collection. It was and still is…. one of my favourite collections of all time- ‘More Than Words’. Just when I was thinking my stash was pretty well done, I was able to create yet another layout design!

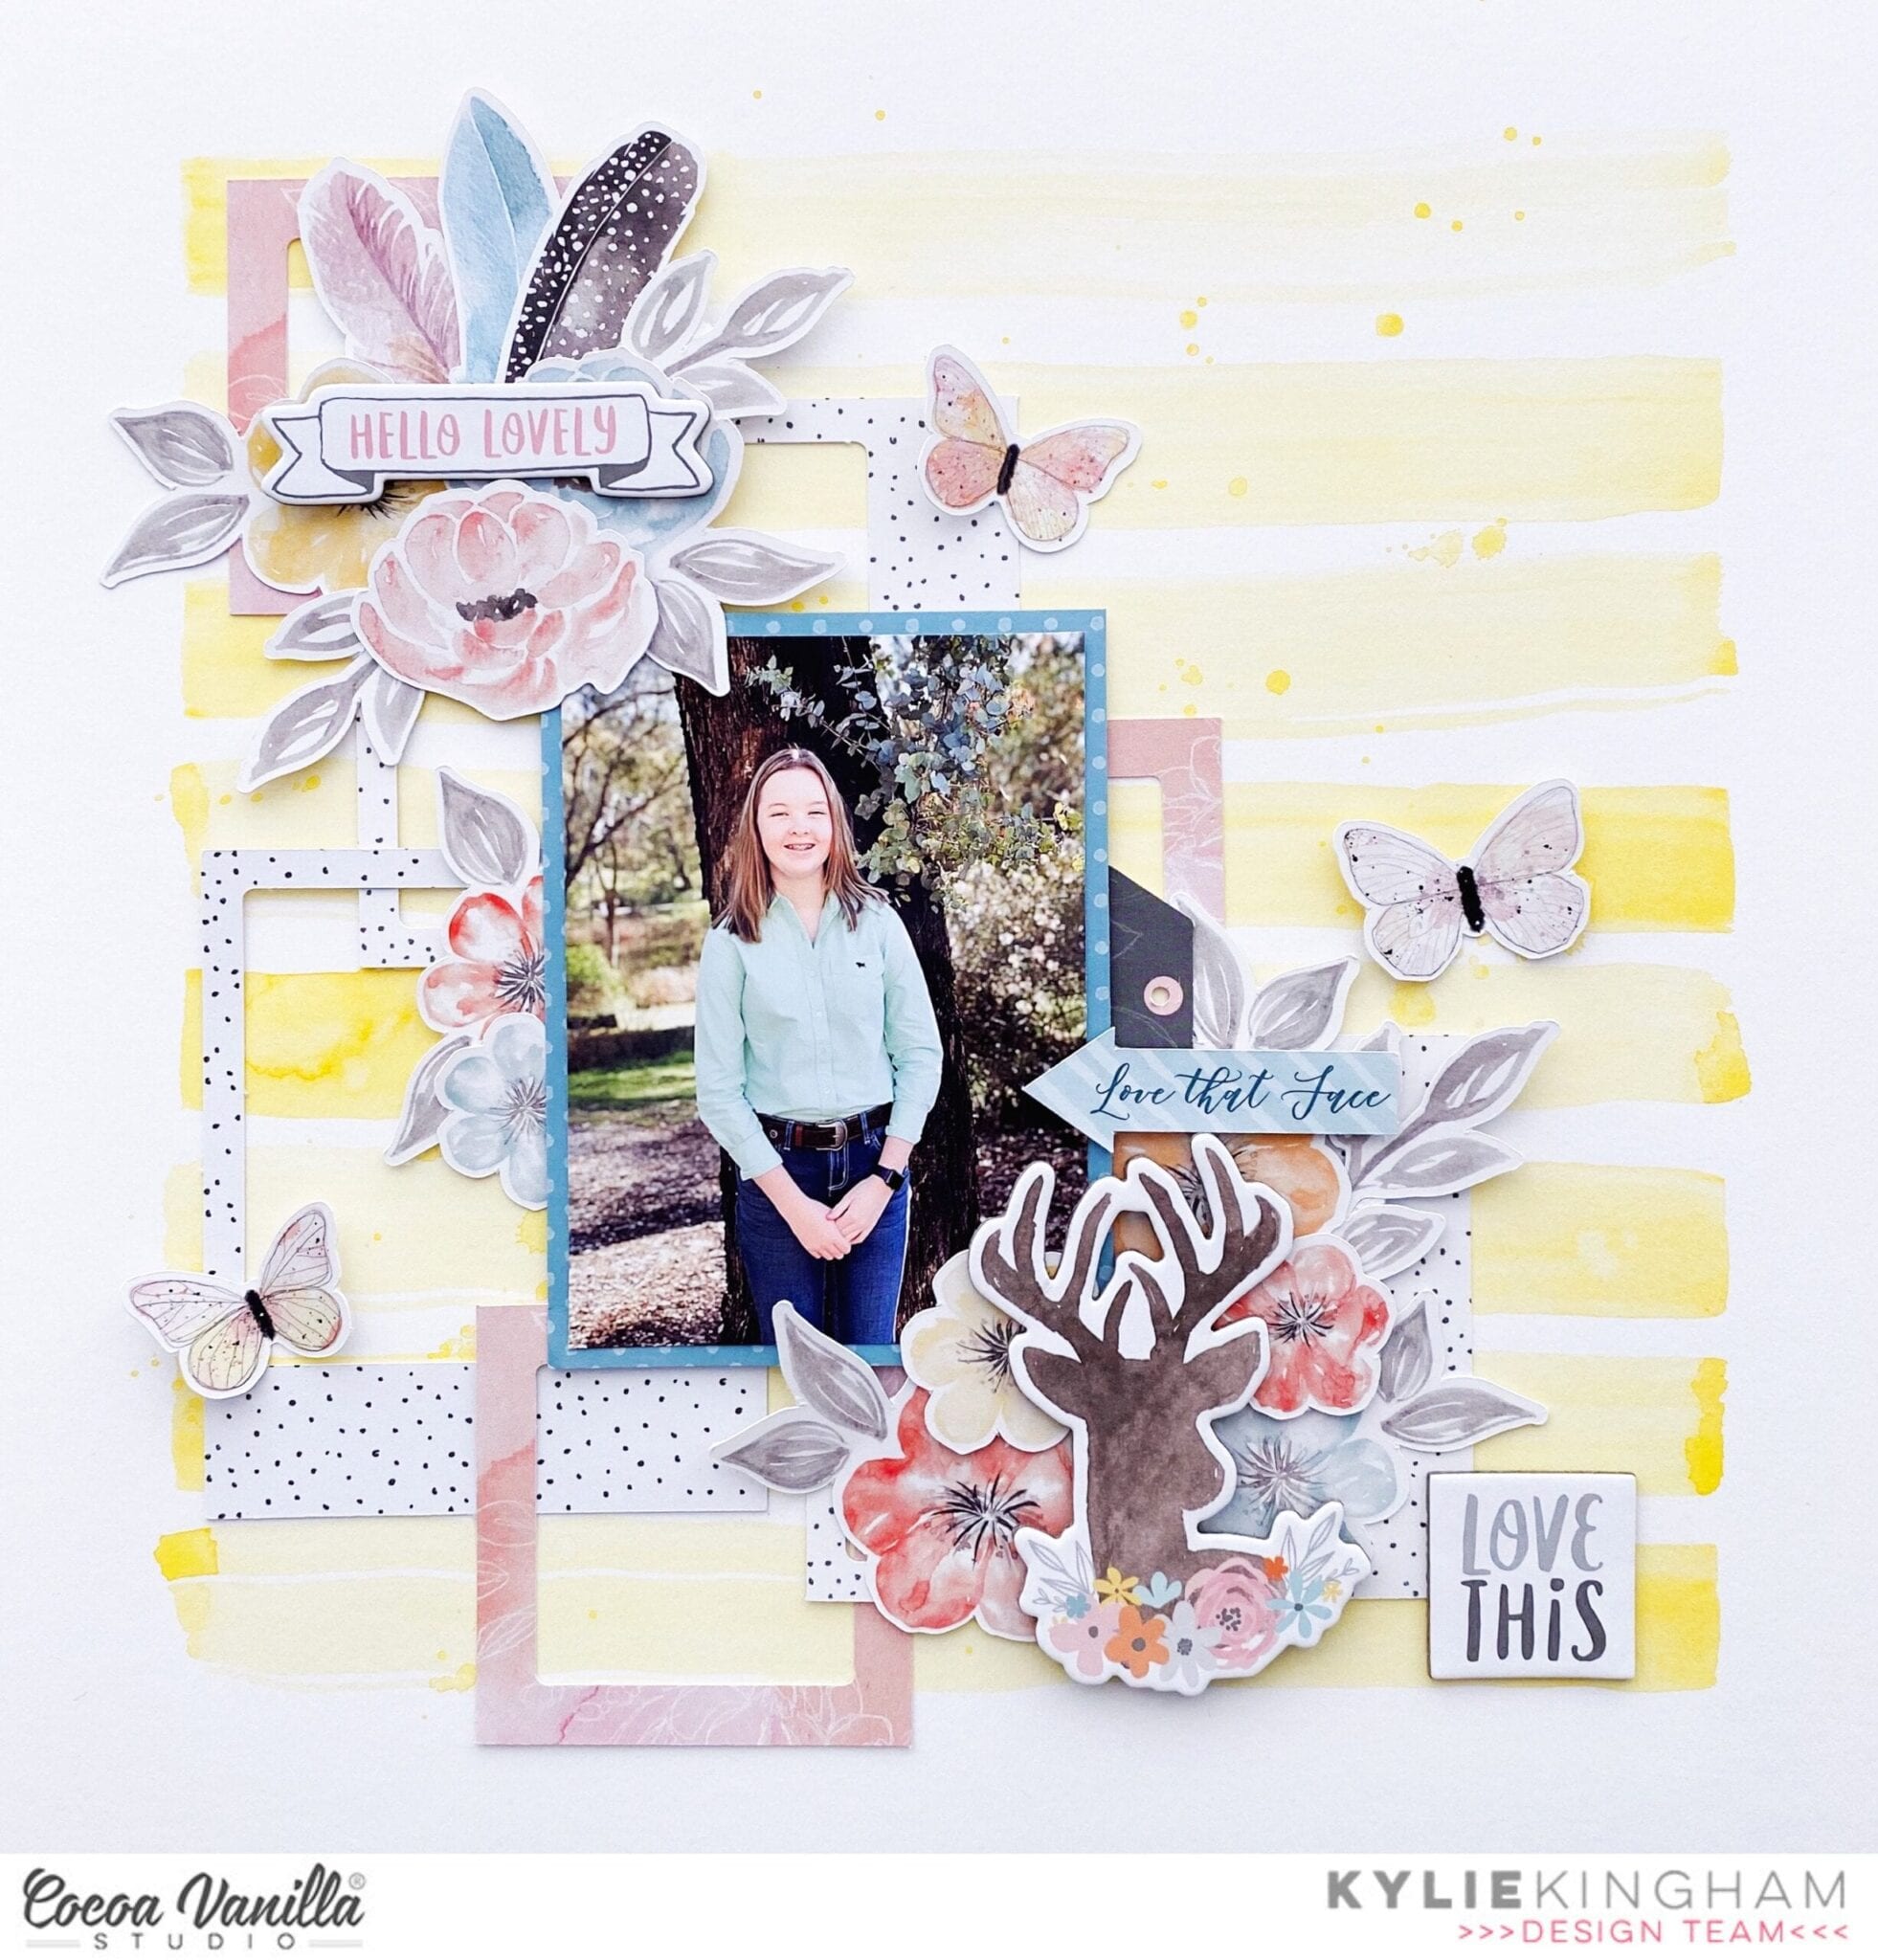
I selected a white piece of card stock for my background and added some simple watercolour stripes and splashes in yellow. Going through my pile of embellishments, I had noticed that I had quite a few of the ‘frame’ die cuts. Once my paint had dried I began layering the frames over and under each other for a fun background detail.
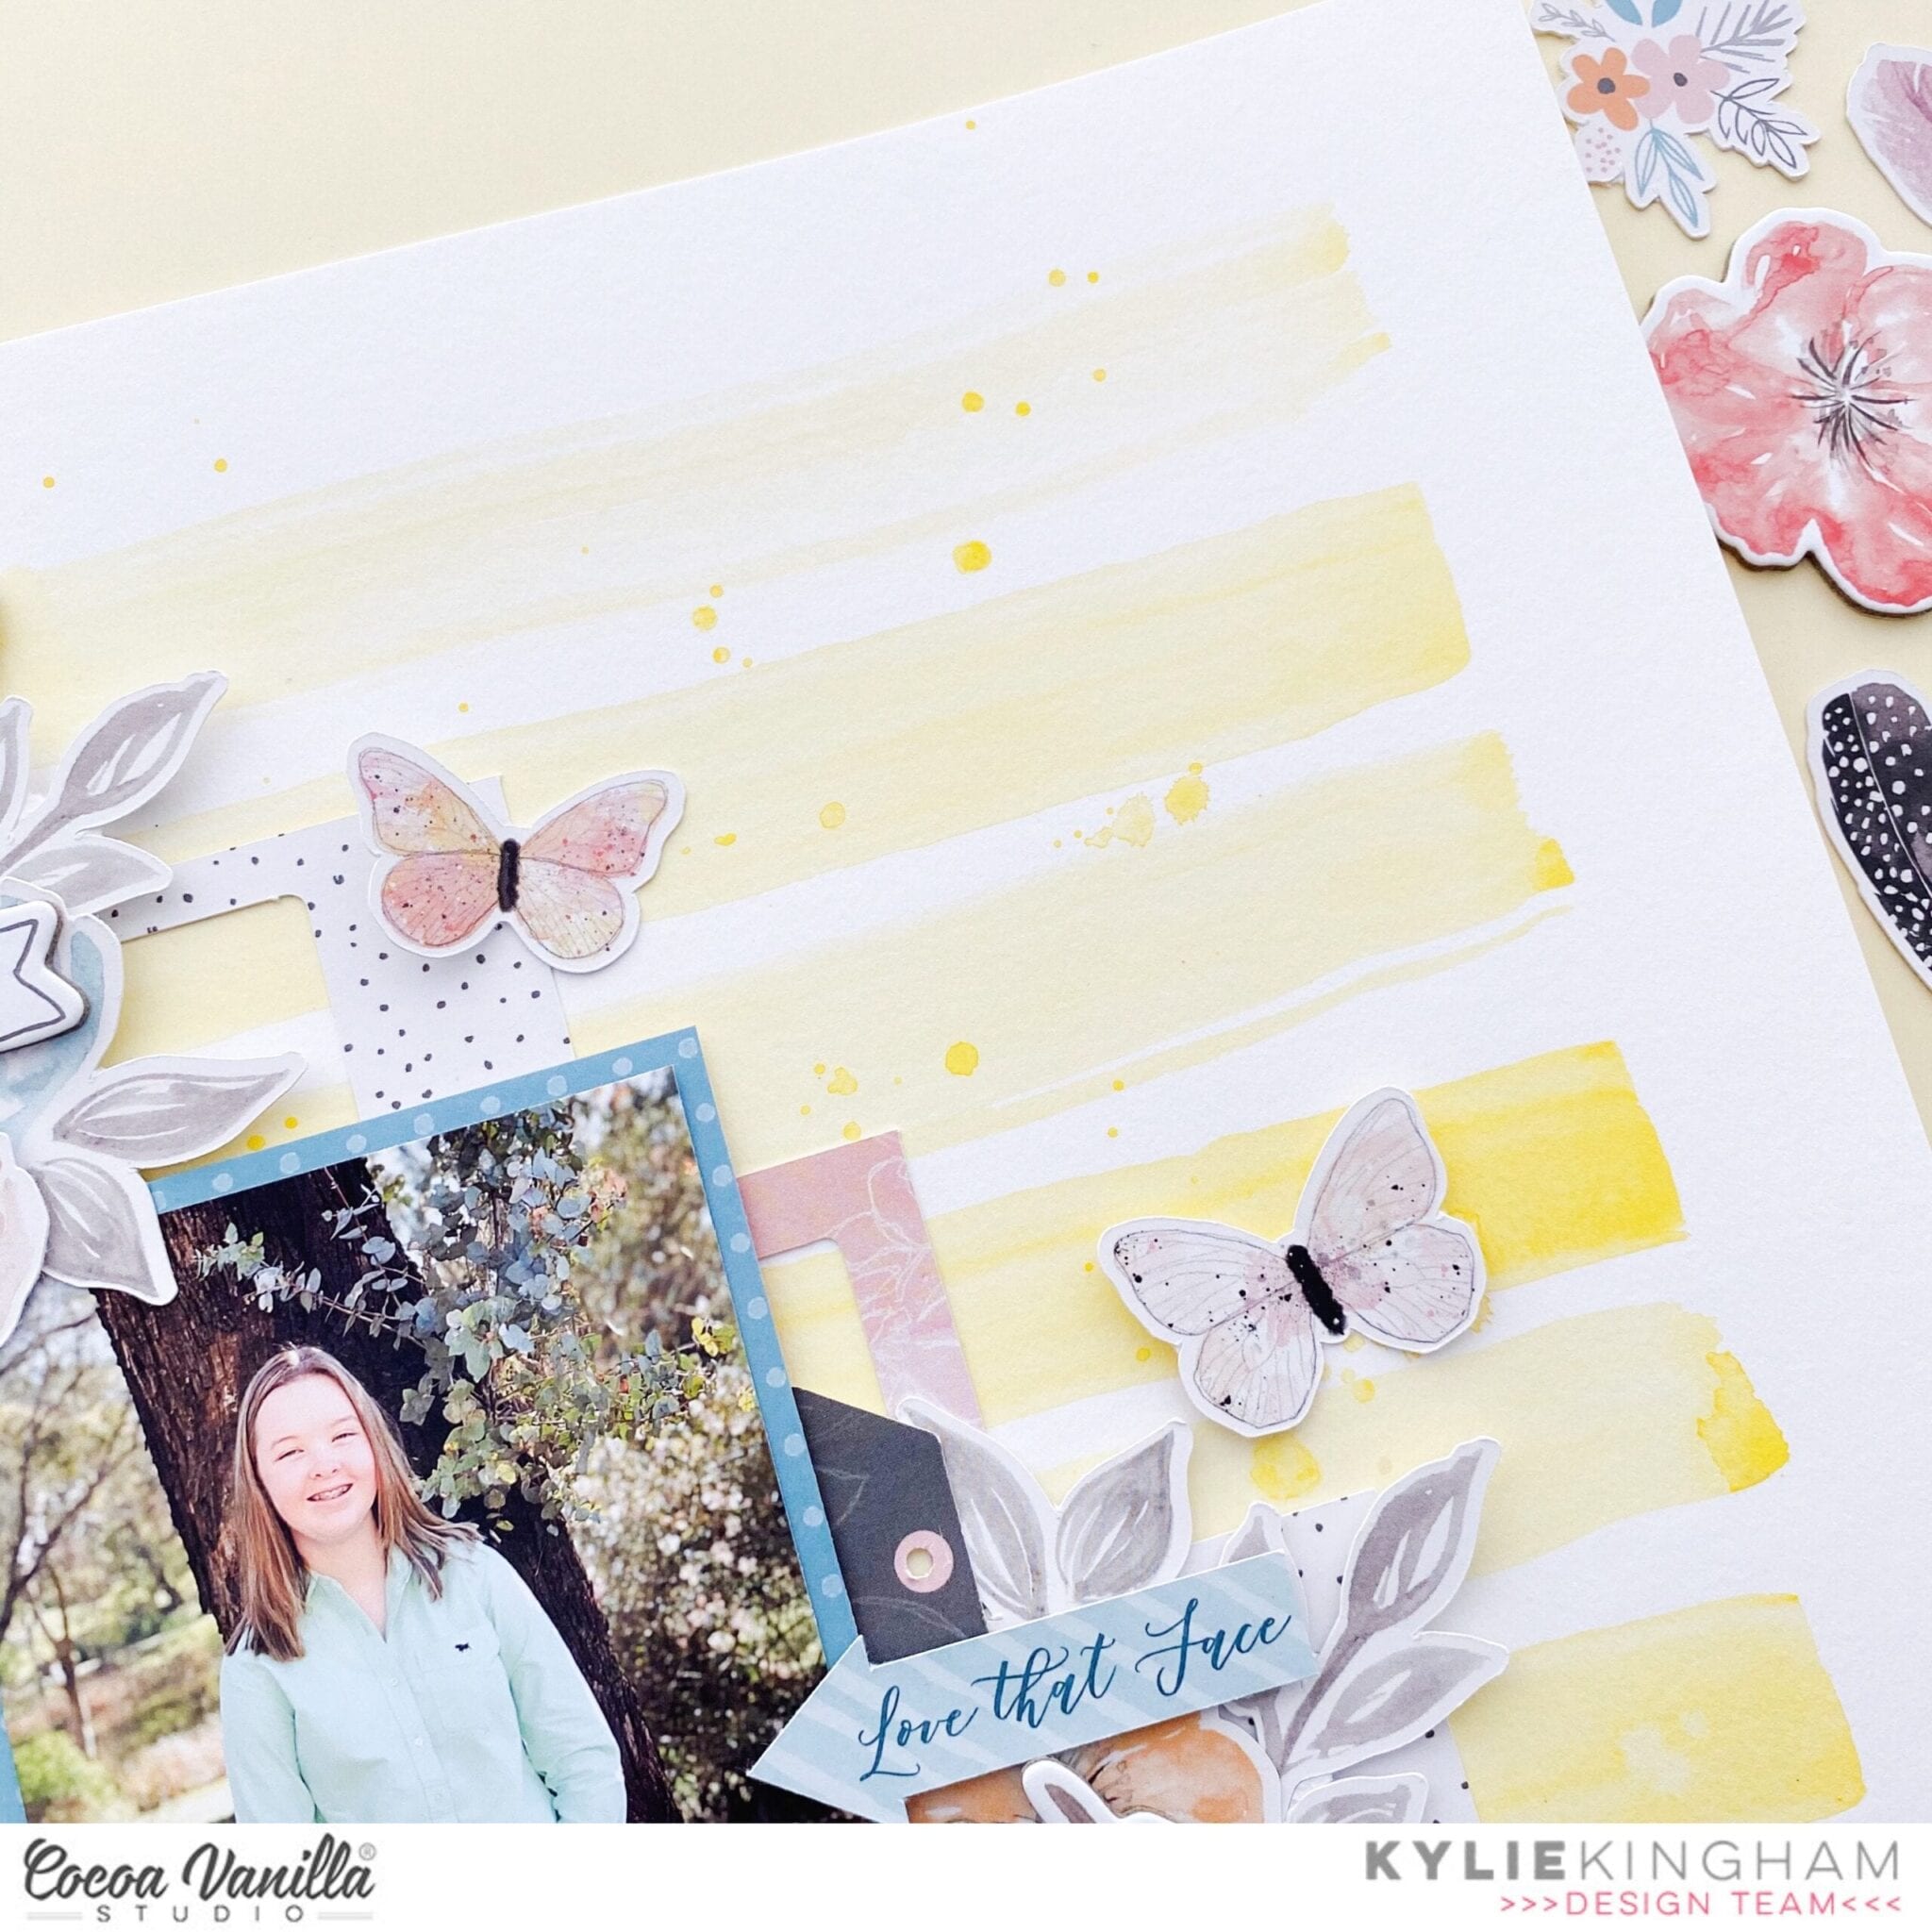

My photo was trimmed down to approximately 3″x 4″ and backed with some of the ‘COLLAGE’ paper before being adhered to the centre of my page with foam tape. Working on diagonals, I began layering elements from the chipboard stickers and die cut pack. Some were added with foam adhesive to give my page more dimension. I had been hoarding the gorgeous Deer chipboard sticker for so long because I love it so much. Now it is finally on a layout!
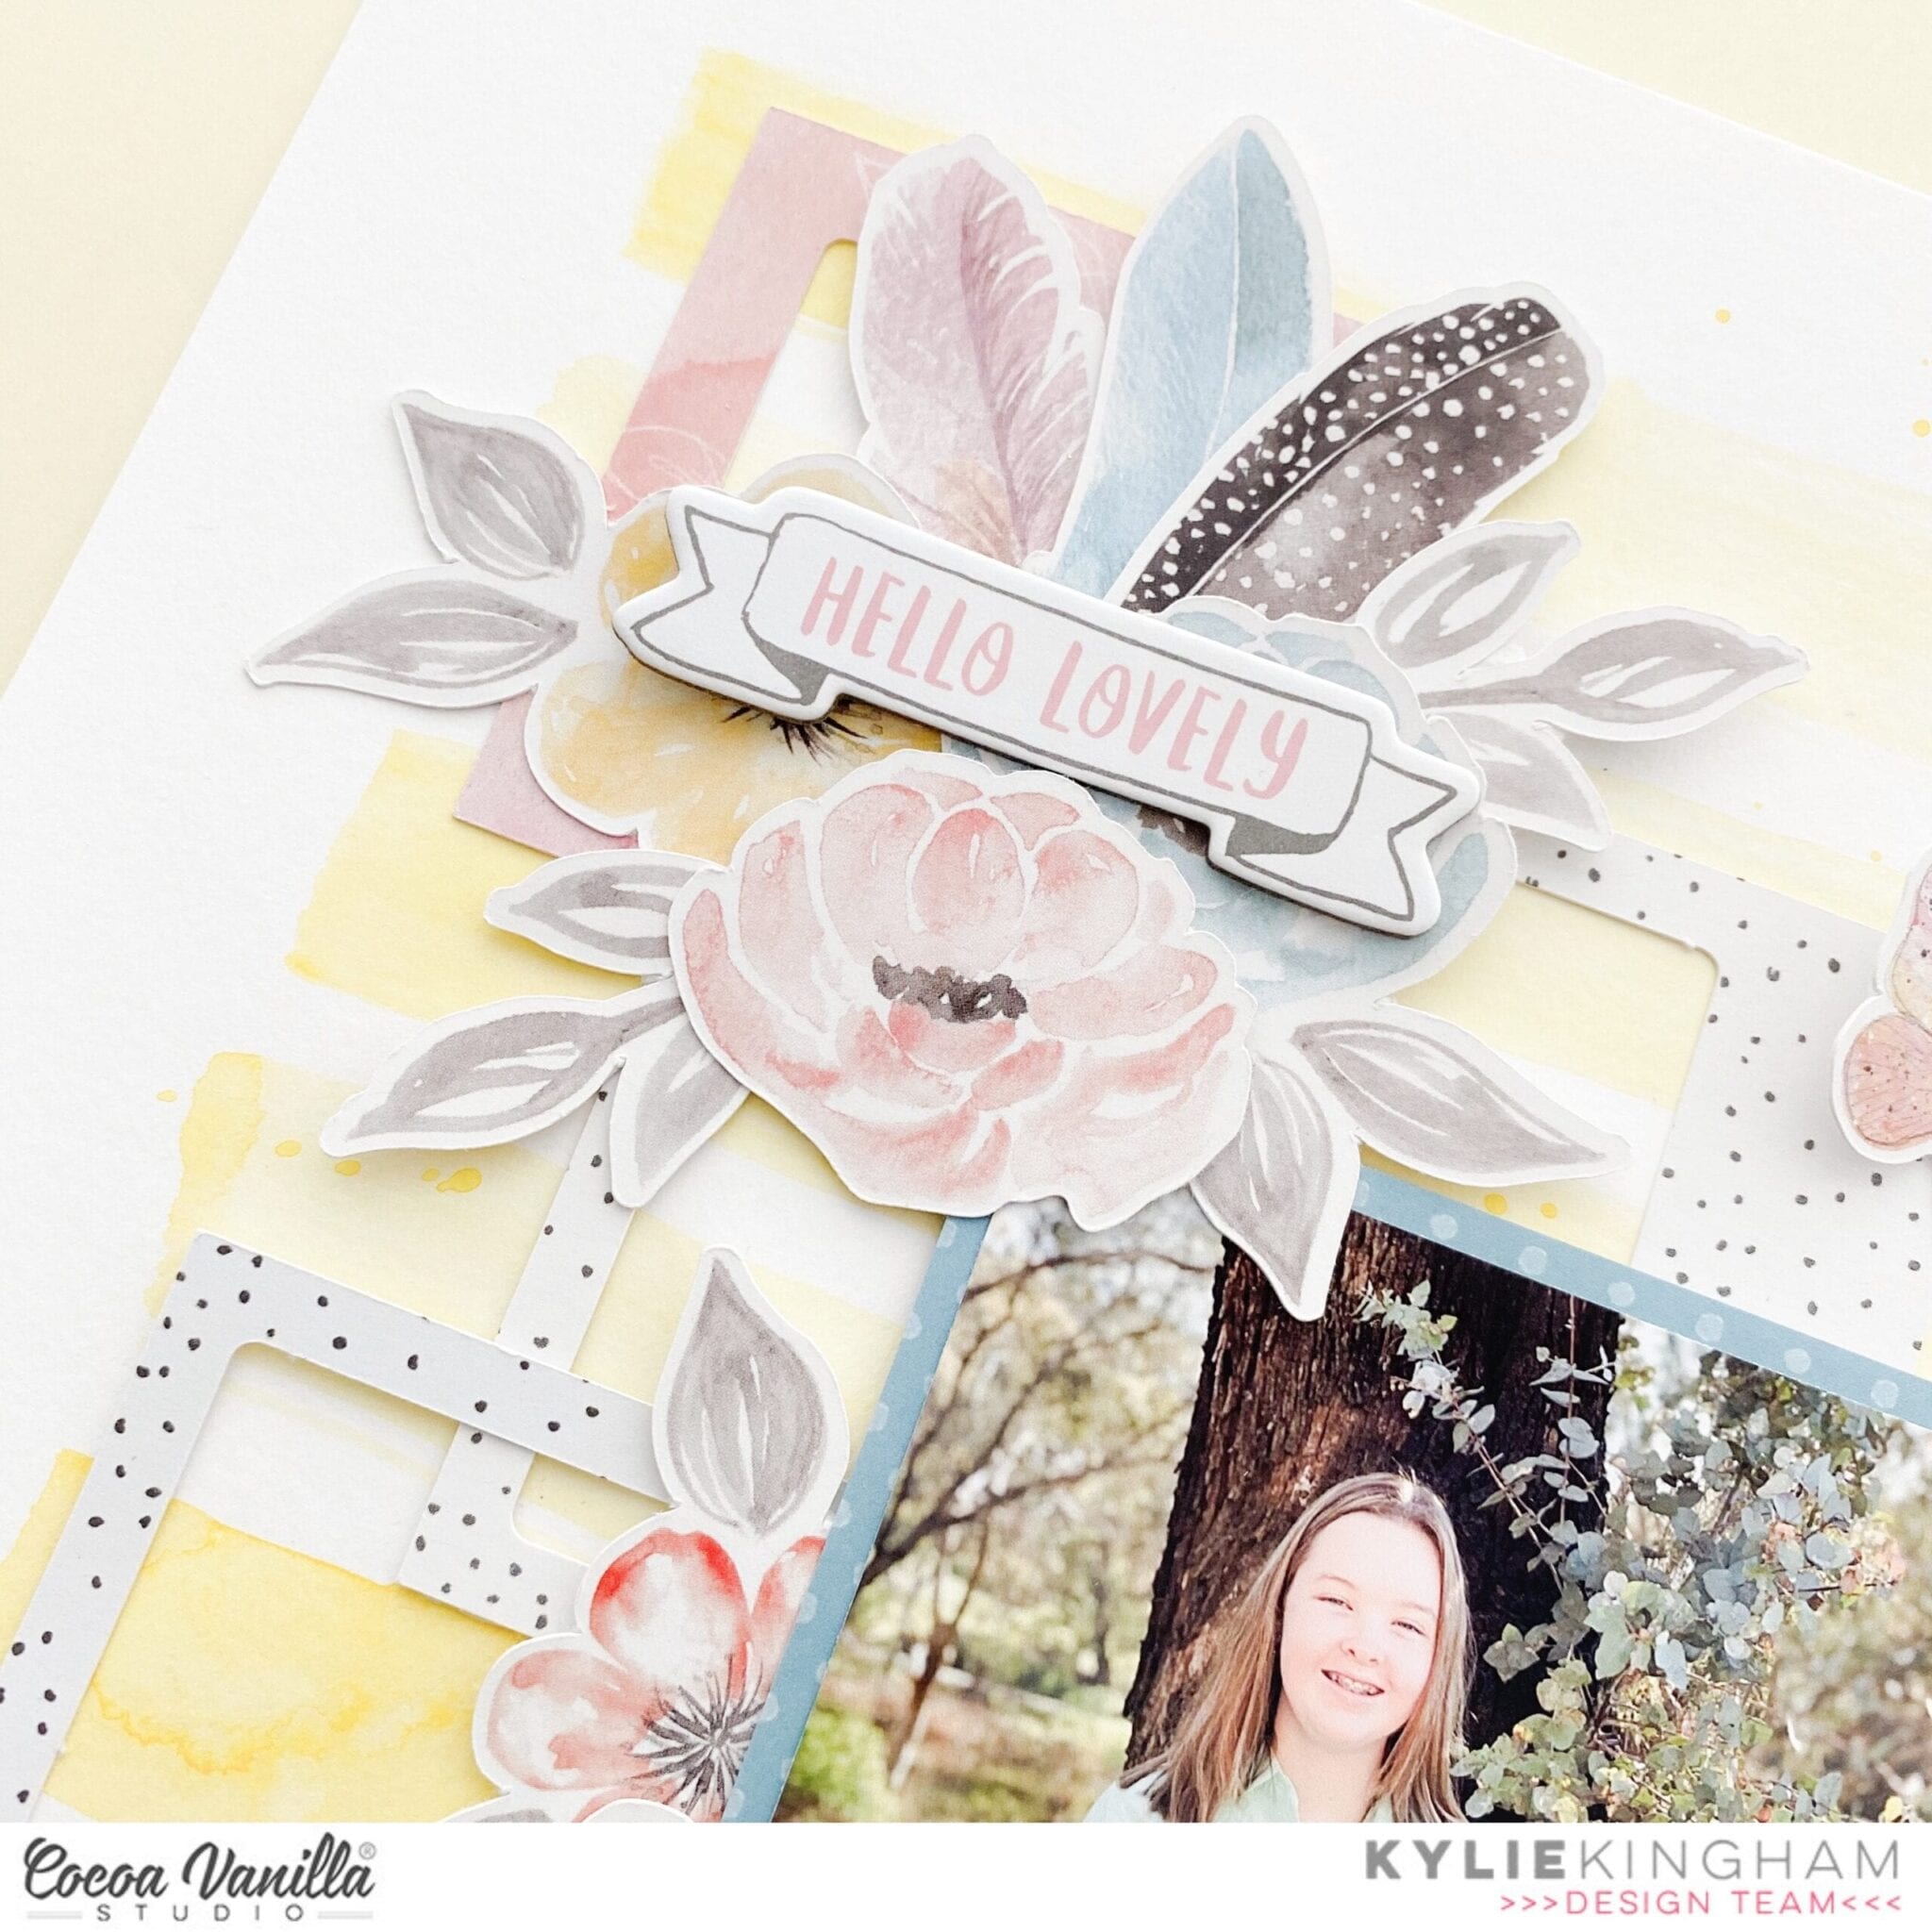

Sometimes when I complete a layout I am often left feeling it needs a little ‘extra’ something. That is how I felt with this design, so I added several Butterfly die cuts on various angles across my page to bring balance to my completed works.
Thanks so much for stopping by today. I hope my layout encourages you a little to dig into your own stash of supplies to have fun creating something special! Until next time,
Kylie.


 I love that pop of aqua blue that the title brings to the page – I am so added some fussy cut stars and the banner ‘eat sleep and be rad’ – another cute element that compliments the rest of the layout design.


 Instead of my go to white cardstock I used the beautiful and subtle grey white washed wood grain paper Artisan. I wanted a real pop of colour so used the bright pink paper
  I added my photo off centre with foam tape and finished off with a bow from
  I have used two different cut files from the Silhouette Design store to create my layered flowers but for those who do not have a cutting machine use a hand punch, punching at least 3 and then layer with foam tape. If you want to recreate these centres, they are super easy! Cut a 12 inch strip at 1/2 an inch. fringe cut with a pair of scissors and then roll as you would any rolled flowers. Once the glue has dried then push outwards all the way around, then glue to the centre of your flowers. I have used
  You will see that I then tucked in-between the flowers fussy cut butterflies, some die cut leaves and a sentiment from the accessory stickers.
 I then created my title using
  I love using word and phrase sentiments from the Accessory Stickers sheets and you can see I added some more under my photo and under my large title.
 And there you have it, I love how this turned out! A great colour palette even though I have used several different collections. Don’t be put off because of the flowers on this layout, you can make. beautiful one’s too, time to blow the dust off those punches!
 I chose the
  My title is made up of the chipboard ‘Moments’ word from the chipboard elements pack and also the word ‘Sweet’ from the black chipboard titles pack. I placed both of these on the left of my photo, I like how they look overlapping the scalloped papers underneath. I added some of the floral cluster die-cuts around the page also, I like how they add some more colour and another element to the page.


 I started my page by taking a sheet of white cardstock and adding a piece of vellum over the top to mute the white a little bit, as I had lots of the sequins left from the
  I took two of the 12 x 12 papers and cut some vertical strips from them and placed them down each side of the layout. then chose a gorgeous cut file title design by Cut To You and added some of the patterned papers behind each of the words. I added craft foam to the underneath and placed it in the centre of my page. I also popped up the photo of my sons on Christmas Day with craft foam so that it was at the same level as the title on my page. I love the shadows and dimension this creates on my page.
 I then began to embellish my page using some of the accessory stickers (that are still available in the store) some of the die-cuts, wood veneers and of course a bitty bow and the tiny metal key! I only had 1 of the poinsettia flowers in the die-cut pack left so I added just the one to the very bottom of the title and layered the bow over the top. Lastly I added some of the enamel dots from the Tis The Season collection.
  Have you got any of the