Hey Crafty friends, its Michelle here today with a look back at my favourite layouts created for Cocoa Vanilla Studio this past year. I think in total I’ve made 30+ creations using the wonderful collections of CVS this year, so it was a little tricky to narrow it down to just a few favourites, but here we go..
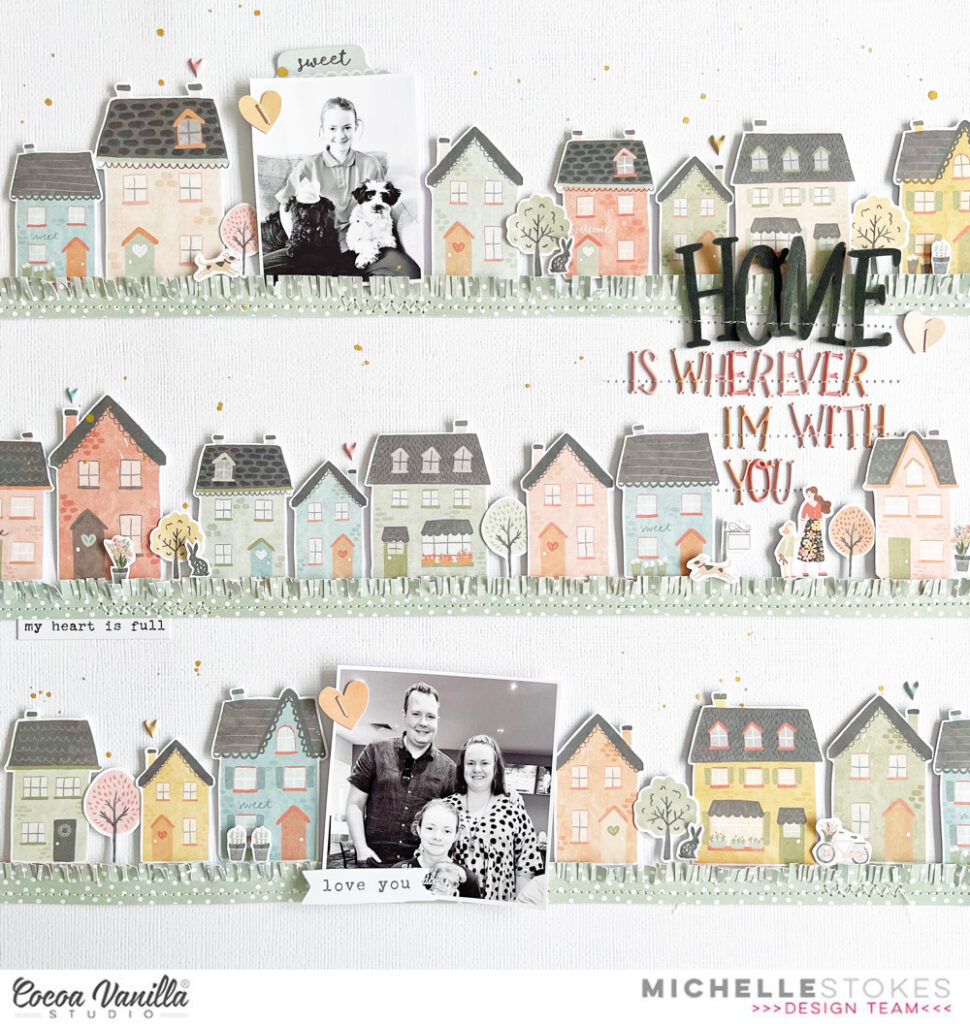
Lets begin with this magical village creation from March using TheseDaysCollection
I loved creating the rows of houses to build a village. All fussy cut from the Neighbourhood paper. SO much fun!
Next up was this beauty, created back in February using the SunkissedCollection and inspired by that months Mood Board Challenge. The bright colours of this collection are still by far my most favourite of all time.
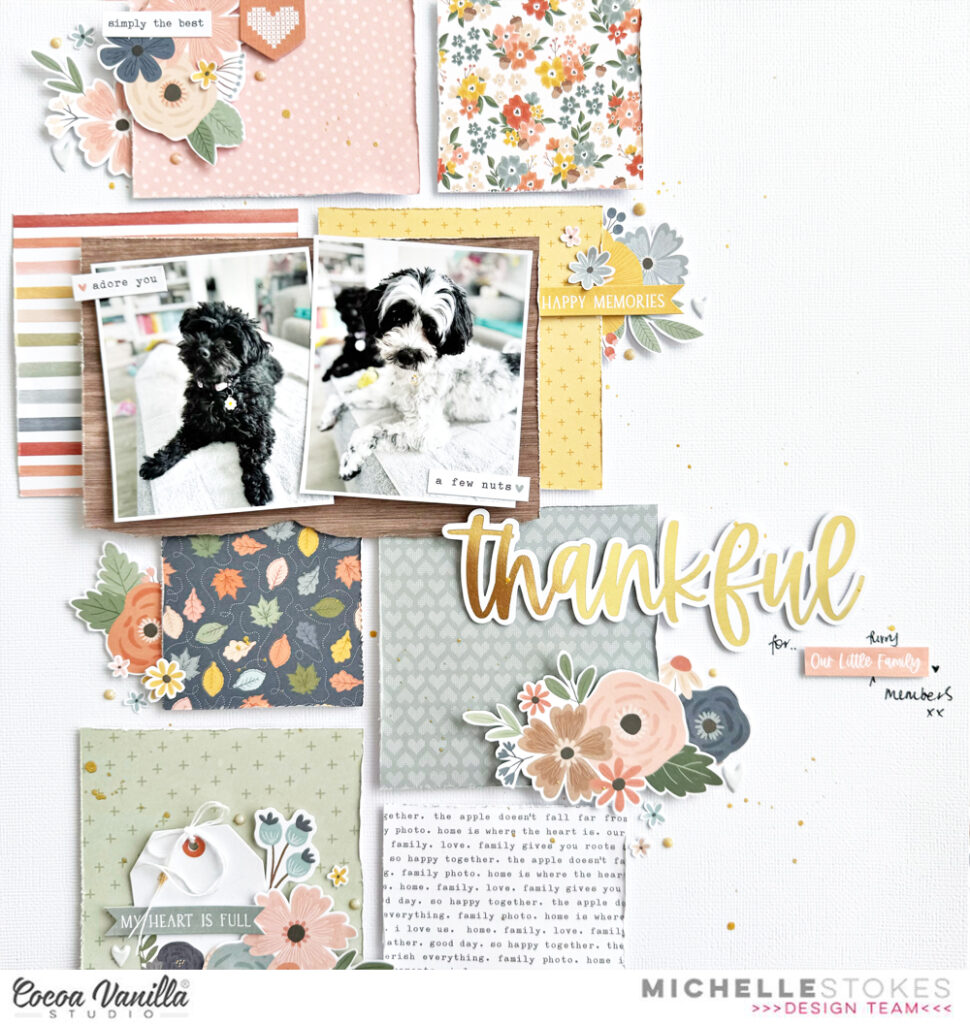
Another rainbow assortment of patterns and colour created in June using the HappyDaysCollection. Love me some colour blocking (if thats what you call it) on a layout. Love how this all came together in one magical colour explosion
Lastly one of my more recent layouts in November using the Heart & HomeCollection and our sweet fur babies. Another rainbow assortment of patterns and colour, but a little less in your face. The perfect mix of pattern and florals with a mixed font title to finish it off.
Well friends thats all from me today. I hope you’ve enjoyed seeing my favourites from the past year, let me know in the comments which one was your fave from the many I’ve shared with you all.
Until next time, Have a safe and fun end to the festive season, and Best Wishes to you for an even happier New Year. Thanks for all the love throughout the years, can’t wait to see what collections we get to play with next year!
Firstly I wish you all a Happy Christmas and a New Year. This year went in a blink of an eye!
I went back through the layouts I have made and have chosen four of my favs I created using all things Cocoa Vanilla Studio!
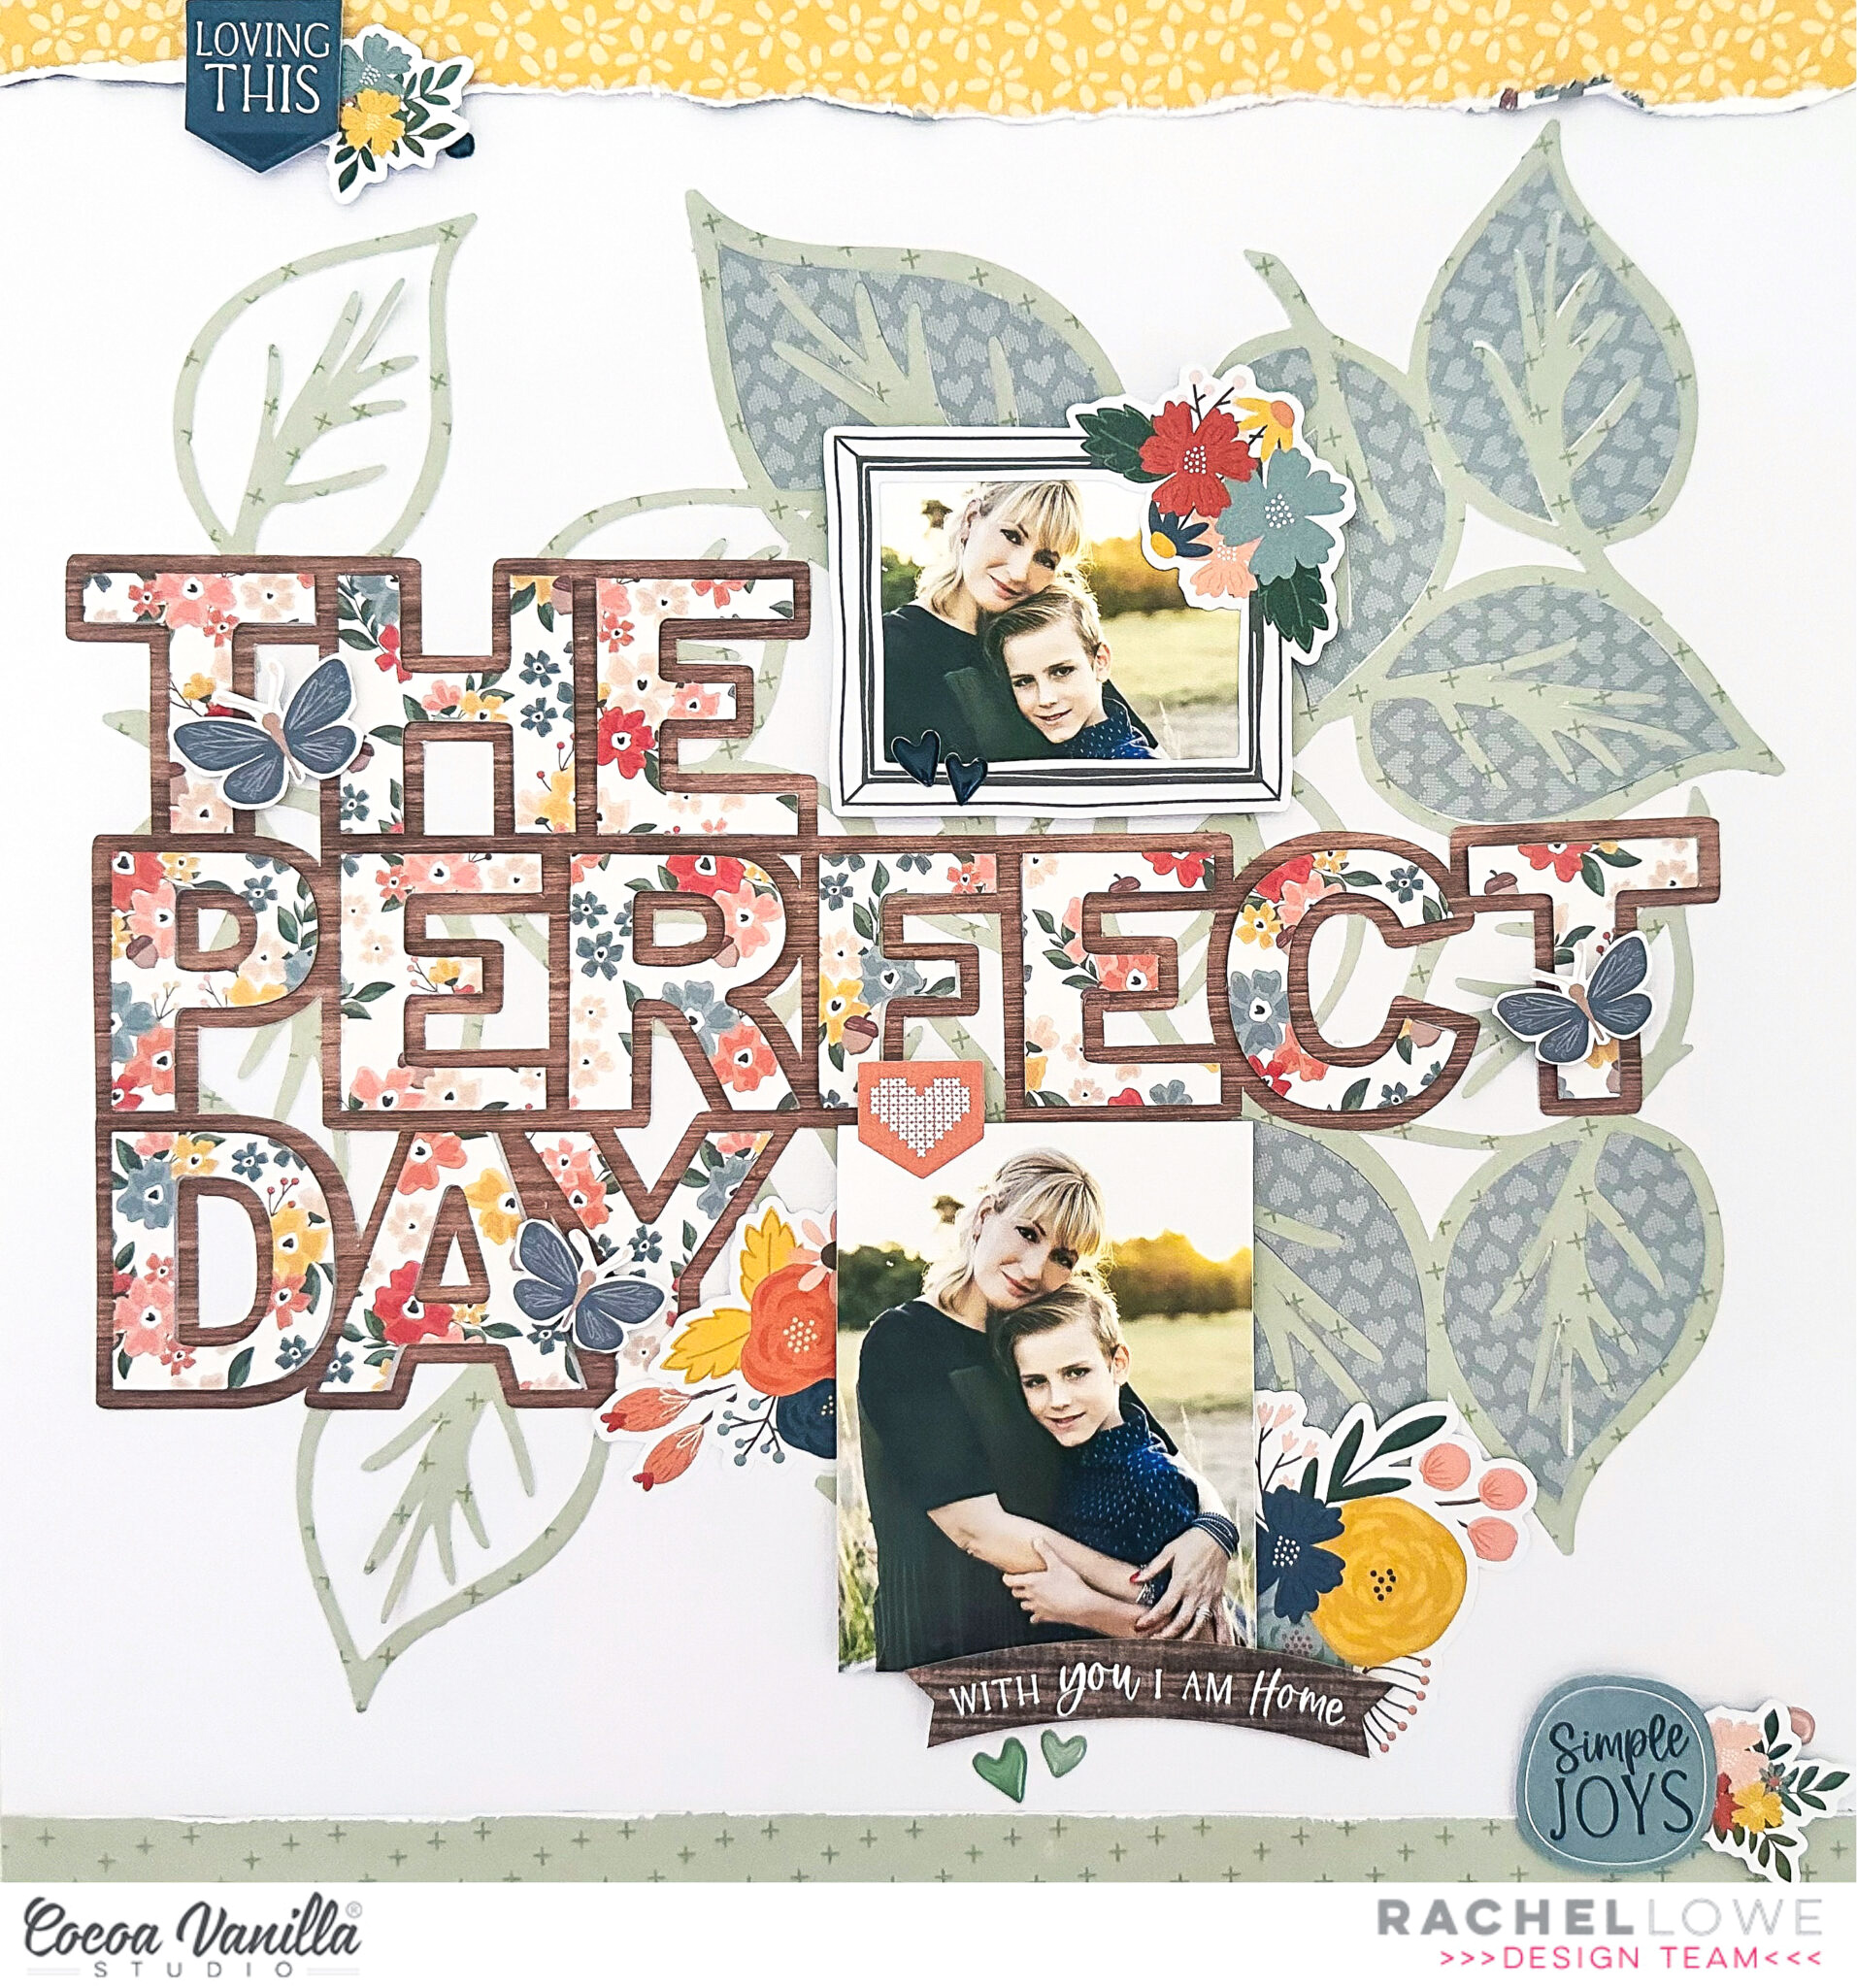
Heart and Home collection to me was all about Autumn days and family. This layout features my fav photos of my youngest boy and I. As you know I love adding cut files to my layouts and here I used two so add texture and layers.
These Days collection is such a pretty collection and can be used for so many themes. It’s not often that I do mixed media but as here I used several patterned papers I needed to add white and so it wasn’t so stark I add a blue paint wish to it.
Happy Days collection is bright and beautiful. I loved the many colours of the collection. This is a very ‘busy’ layout for me but I love how it came together and everything about this layout says ‘HAPPY’.
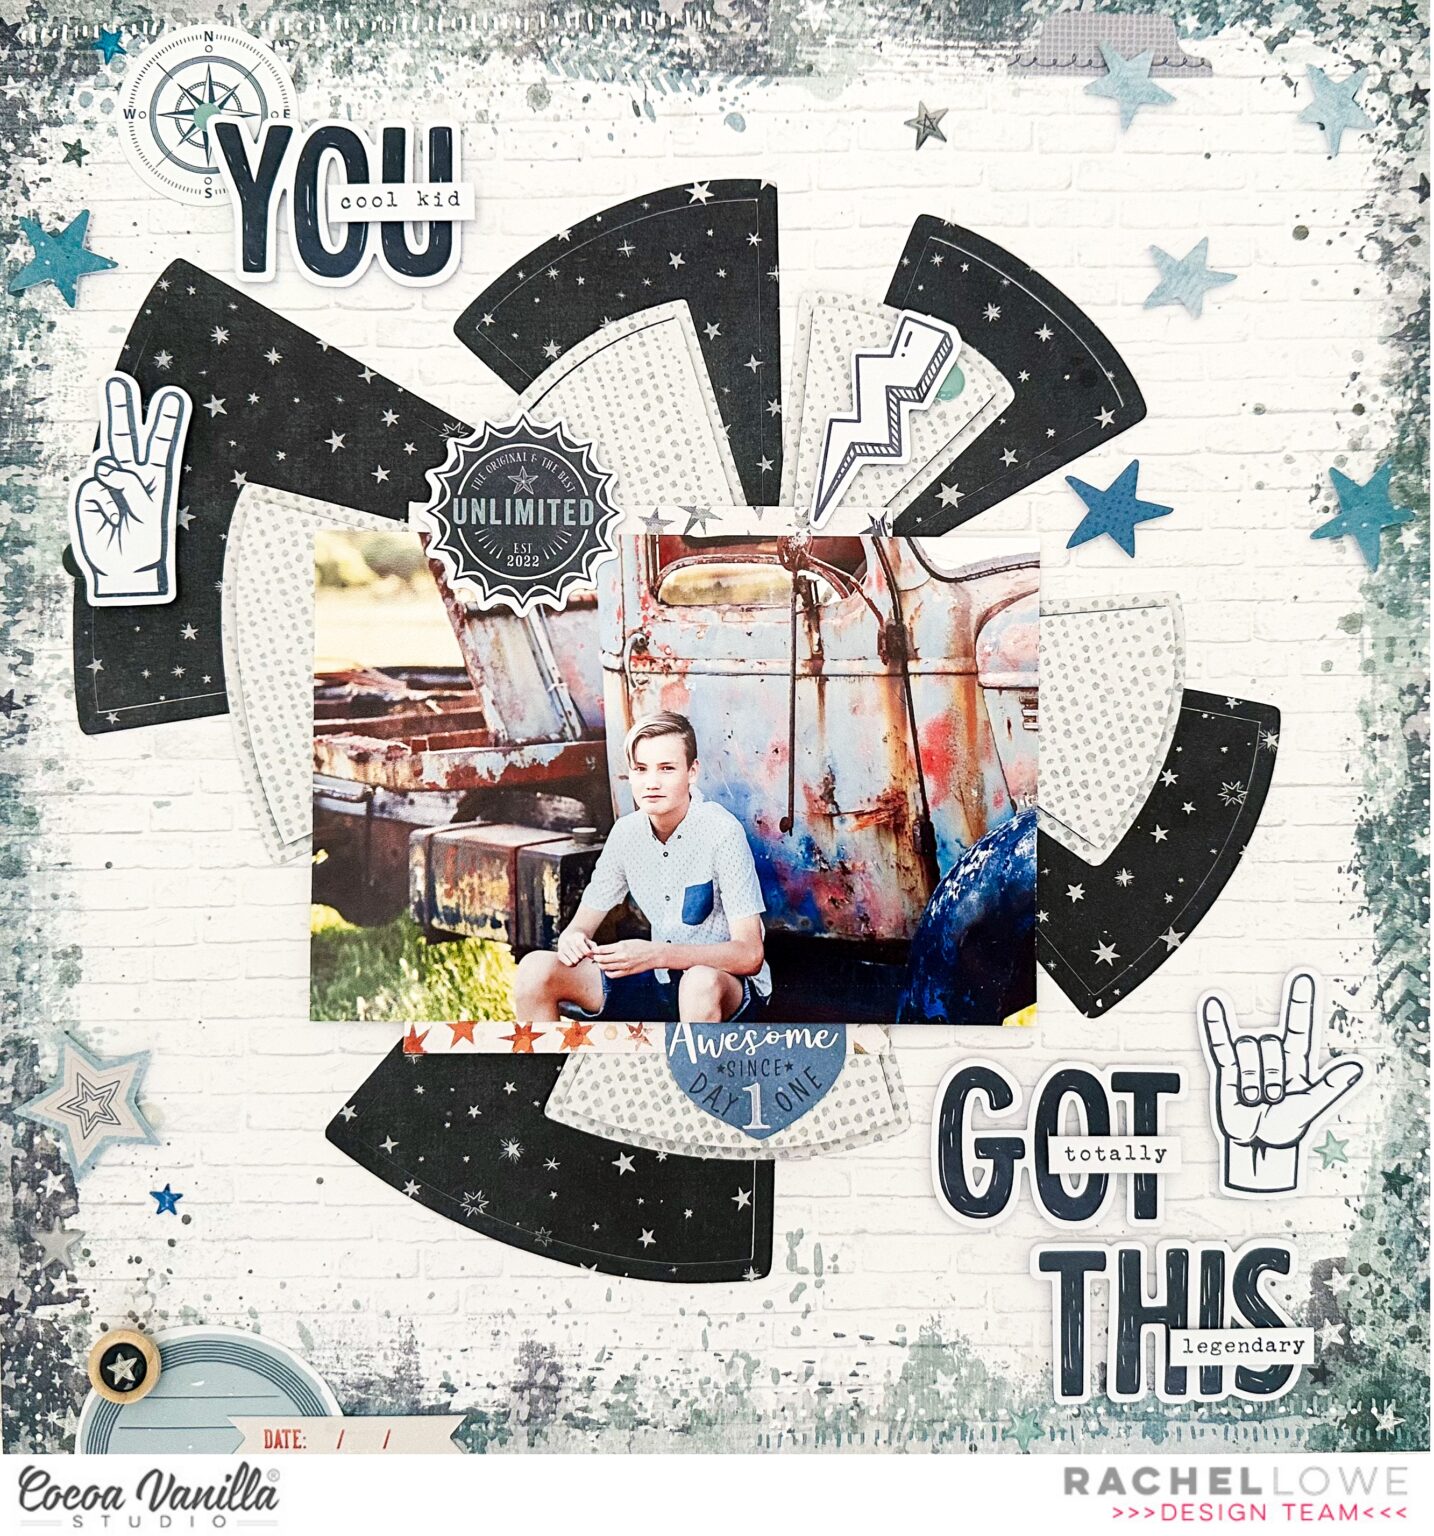
This was a throw back Thursday layout I created this year and having three sons I just can’t go by a fab boy collection and No Limits is that. How awesome is this pie graph cut file! I cut two at different sizes and then layered, love the effect of the light against the dark paper.
Thank you for all your love on social media and also sharing your wonderful layouts!
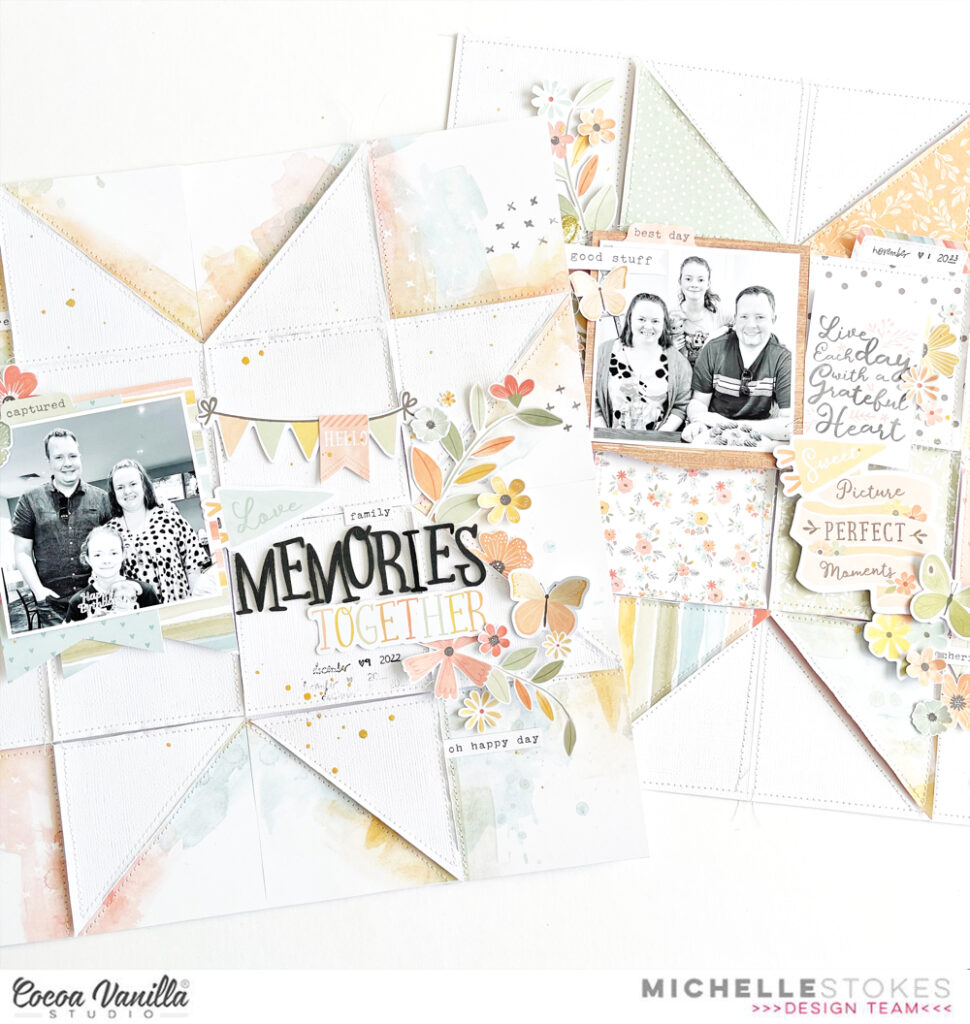
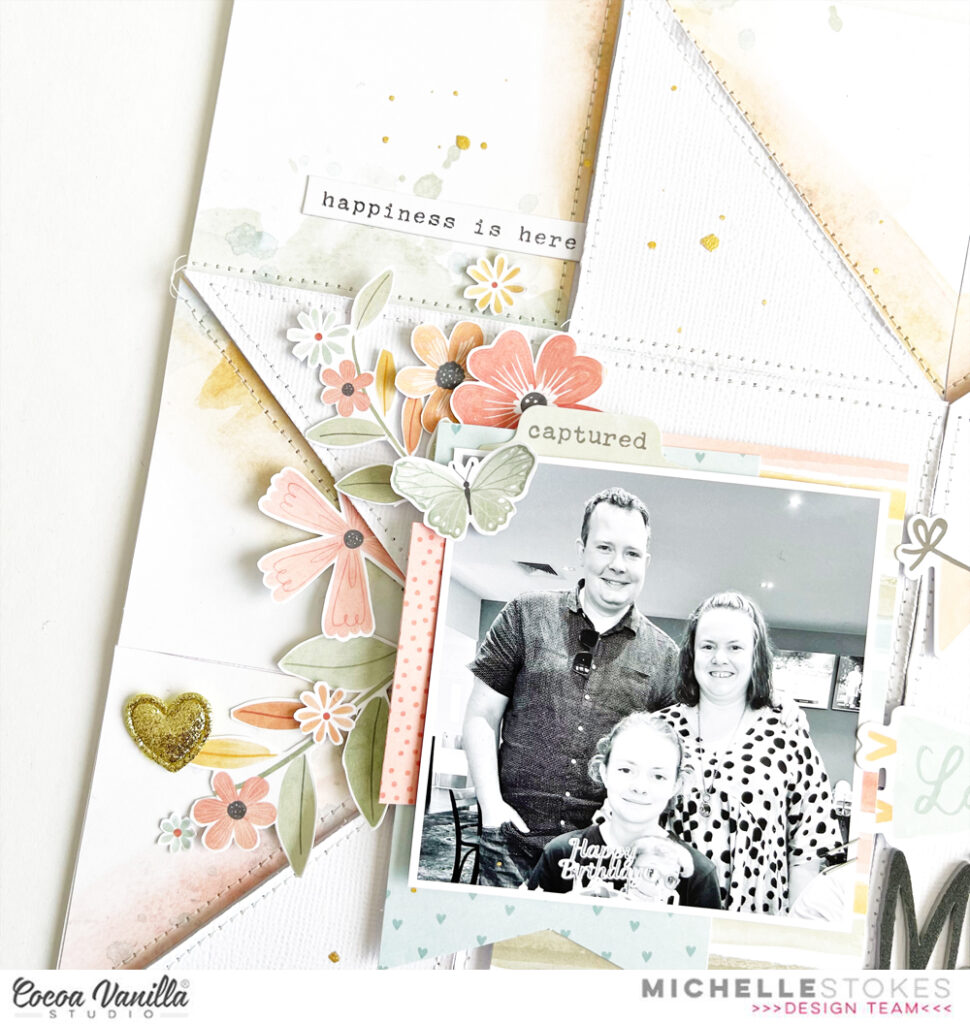
Hey Hey! It’s Michelle back here with you today and I’ve got a fun creative share for you all. It’s Throwback Thursday today, the day where we throw it back to an old collection from our stash and make something magical. I chose to deep dive back into the These Days collection and came up with 2 layouts using the same design, inspired by quilt blocks.
I’ve been a little obsessed with watching quilting videos of late, and I knew that I should be able to incorporate a quilt block design into a layout, but I never thought they would come together this easy. With a few creative cuts of the 12×12 and A5 papers, I had the backgrounds together in no time at all and ready to document a few recent family photos.
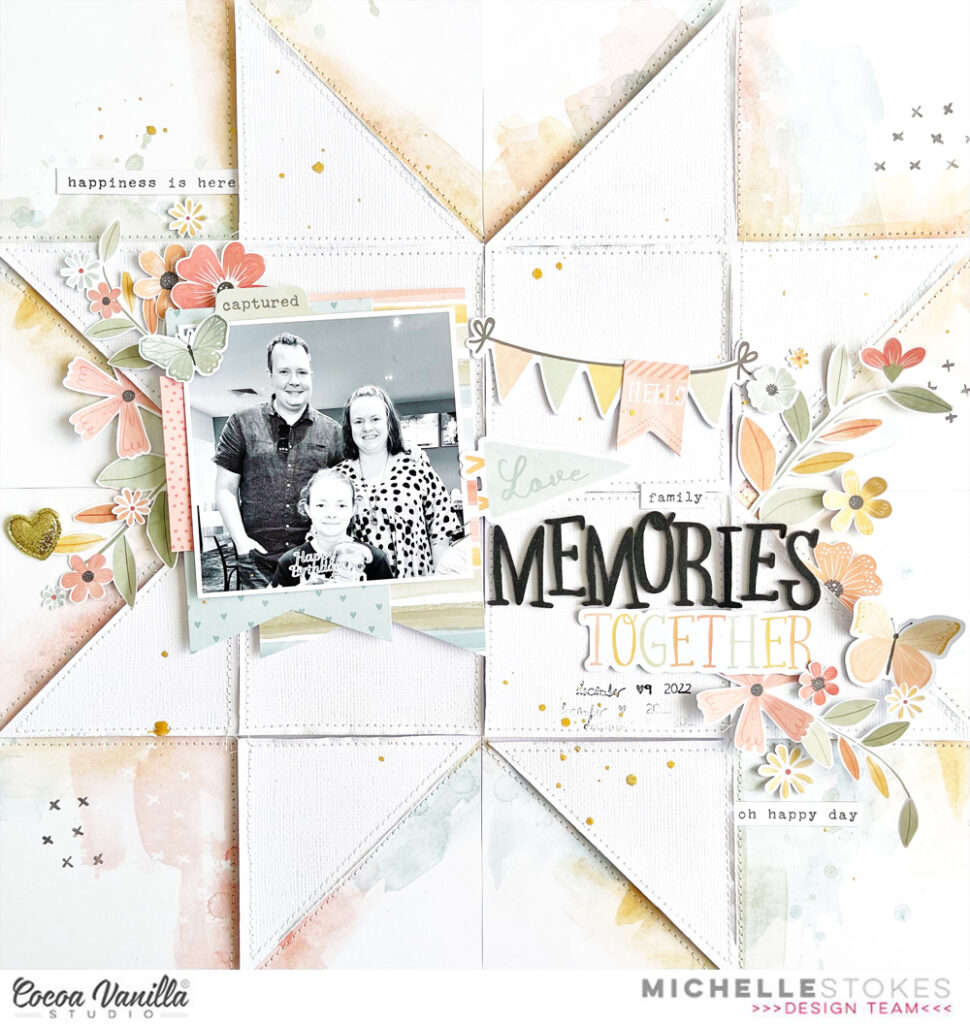
First up is the white star background using white cardstock for the star pieces, and the DAYBREAK paper pieced around the edges of the star for a mixed media effect. I machine stitched around all pieces for added detail.
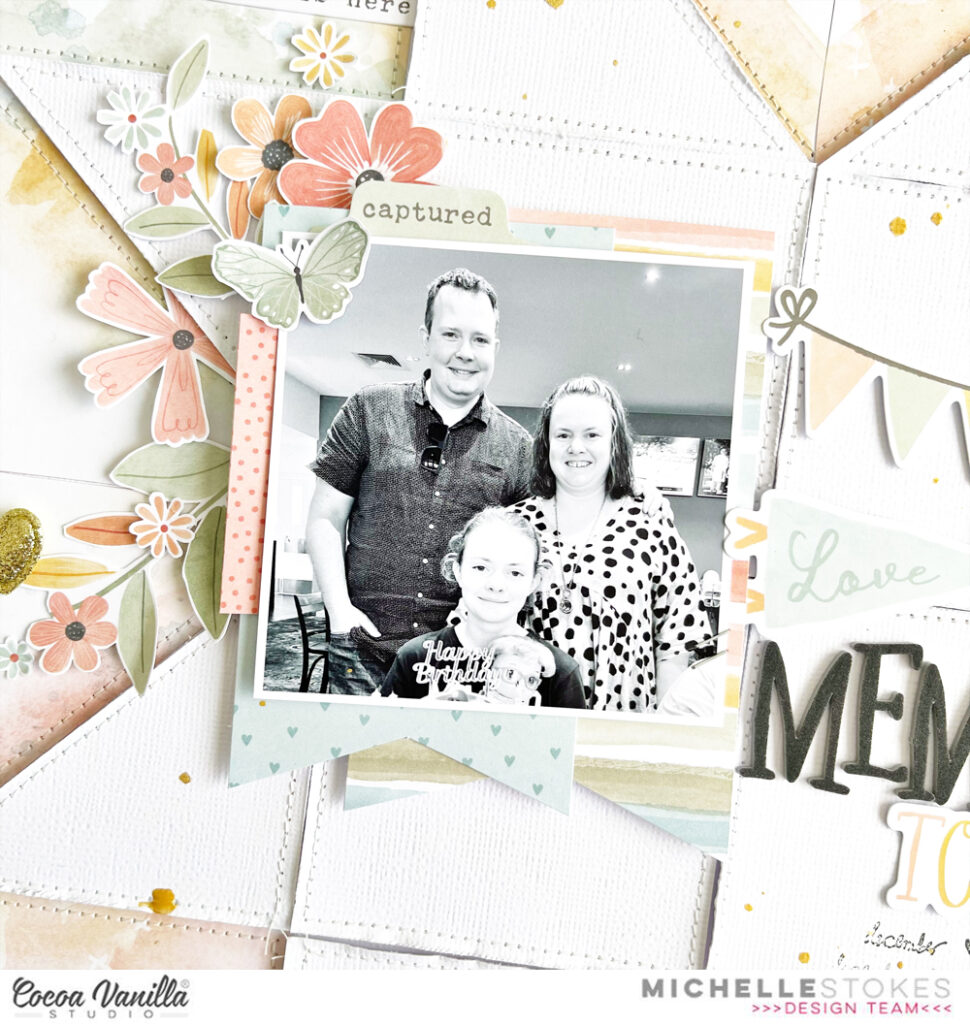
I layered scraps of A5 papers behind the photo and adhered 0n to the background using foam pieces for dimension. This helps when tucking florals in underneath to give a deeper layered effect.
I used fussy cut florals from the HOME GROWN paper in both 12×12 and A5 paper sizes for the clusters on both layouts with the addition of butterflies from the TAKE FLIGHT papers and a Gold Glitter heart
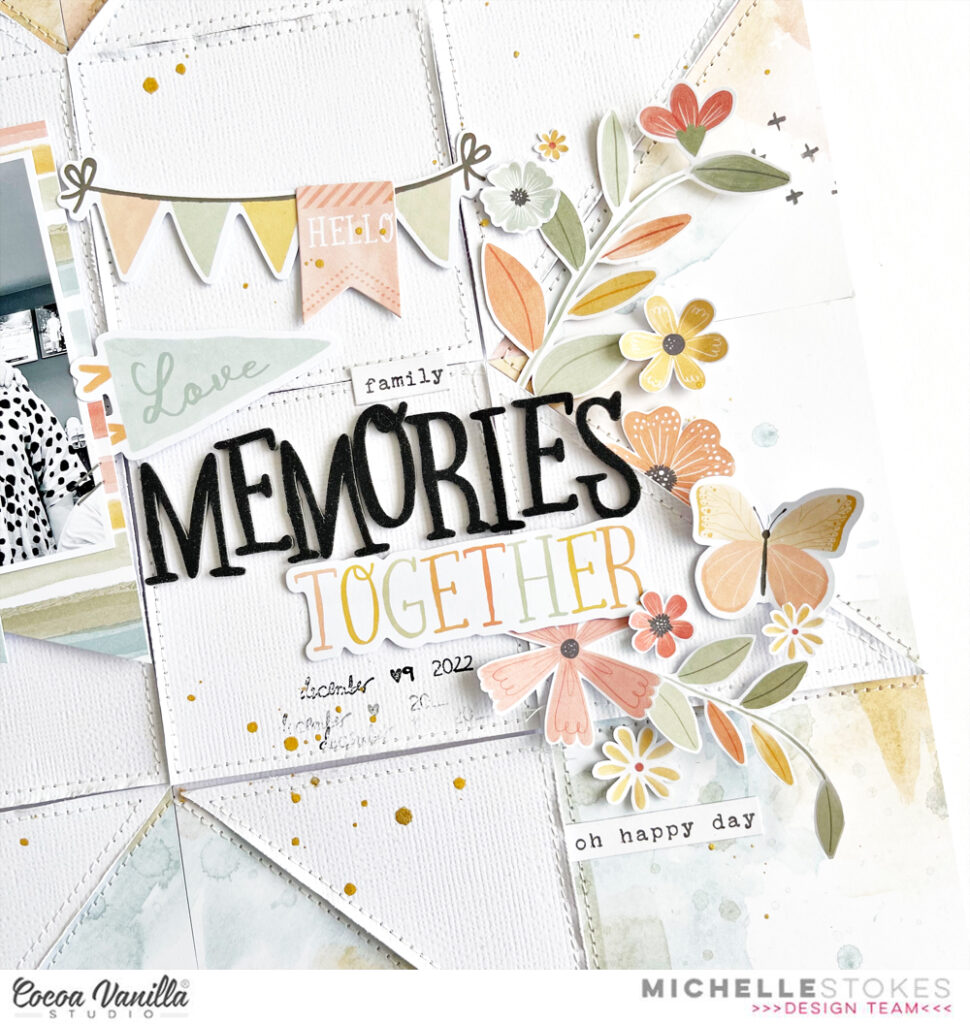
I used a mix of ephemera pieces, stickers and Foam title stickers to create the title of this layout, mixing in more fussy cut florals to the sides to balance the layout with colours and pretty elements
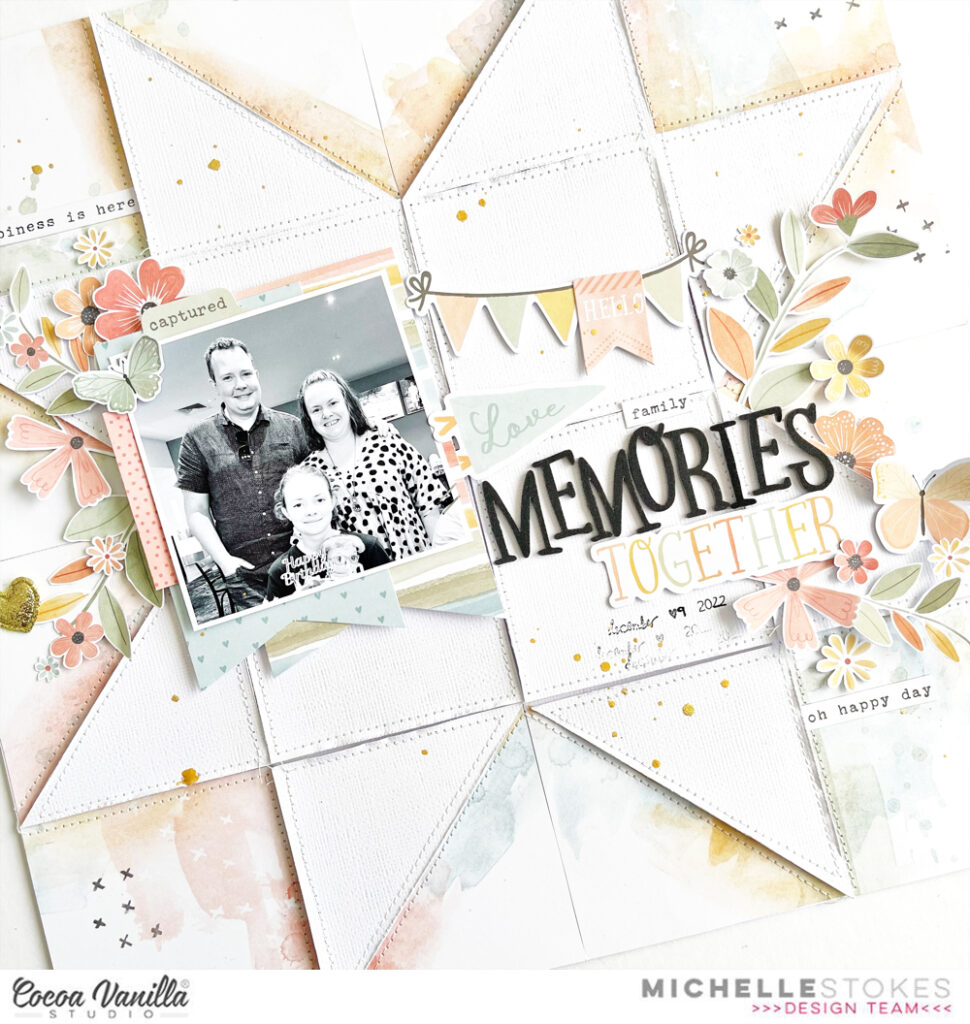
I really like how this layout came together, so much so that I ended up creating the 2nd layout, this time switching the pattern papers up to be a complimentary mix for the star design and the white cardstock as the edges.
Most of the patterns used for this came from the A5 paper stack, including the piece under the photo and the mini journal sentiment card to the right.
I used all the same elements on this layout as I did the previous, just mixed it up in a different way
The title for this is made up of ephemera pieces “Sweet Picture Perfect Moments” that Ive adhered to the page using foam tape to give it a little pop of dimension. Yes I use this word alot haha its the only way I know to explain what foam tape does lol
Well friends thats all from me today. Thanks so much for stopping by to see my creations. I cant wait to come back in a couple weeks and share my next layout using the amazing NEW Happy Days Collection.
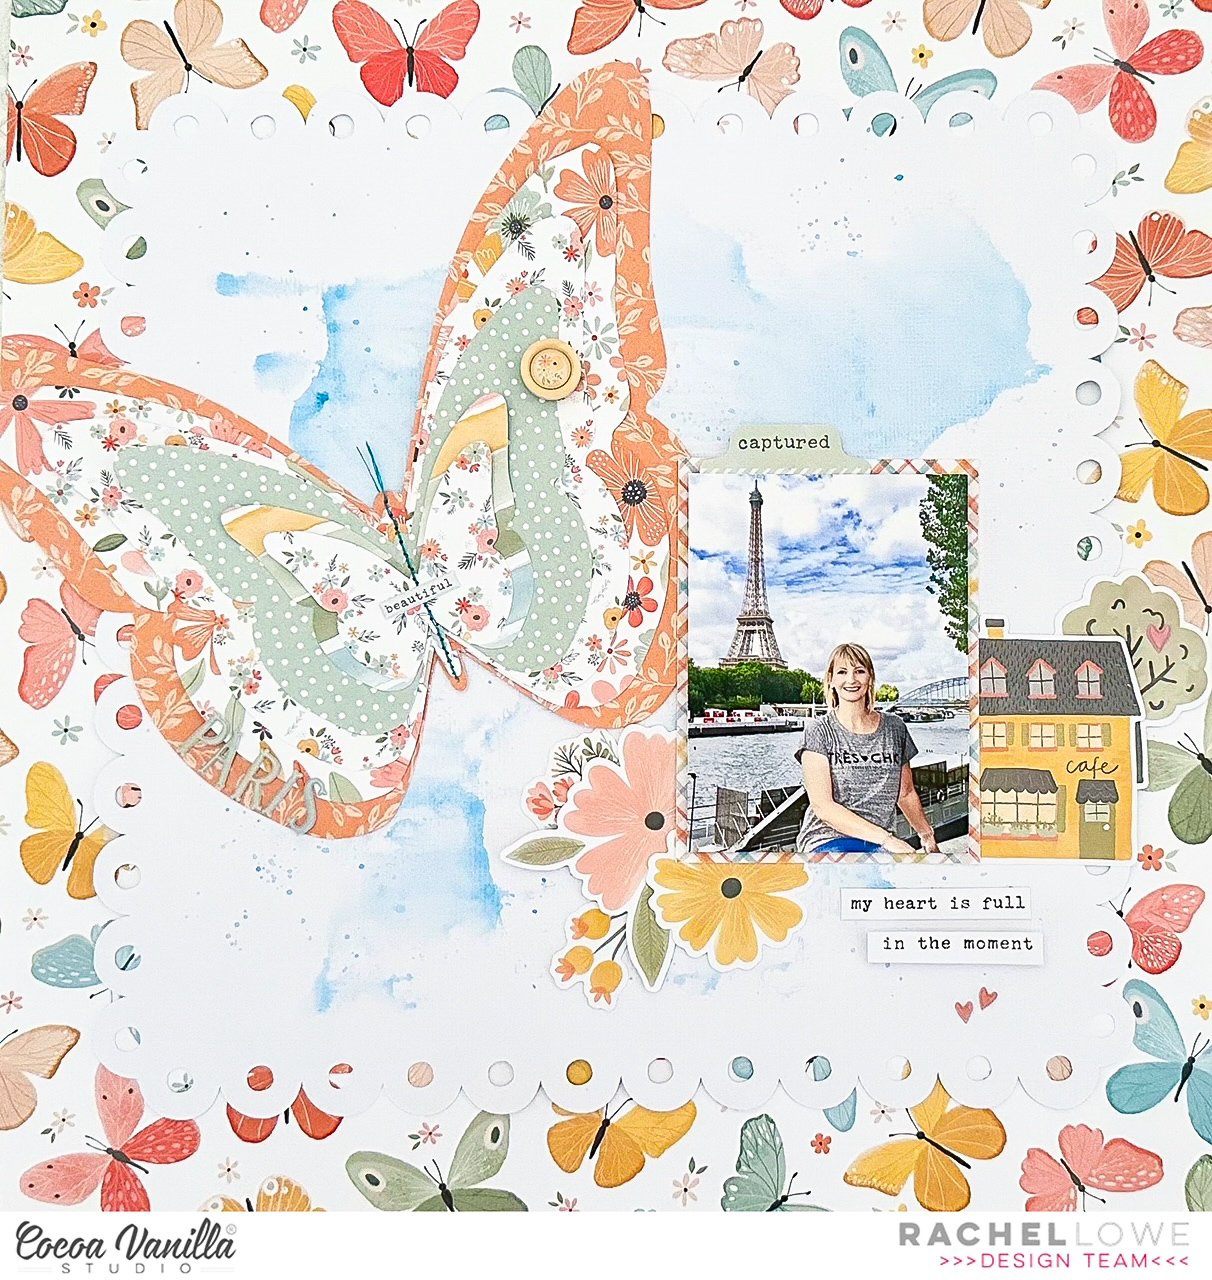
Today I have a layout to share using the beautiful These Days collection. I am a little sad as this is the last of it but on a positive note I have the new Happy Days collection to start creating with (happy dance).
As I only had the butterfly 12×12 paper left I decided to use it as my base paper but adding a white scalloped square to the middle with a blue colour wash to add contrast. Using a cut file I cut 5 butterflies to layer them for dimension. I used my sewing machine to add stitching down the centre.
I next added my 3×4 inch photo of me hanging out in Paris as you do lol! Which I matted and used foam tape to add. My photo is where I added a larger embellishment cluster. I cafe die cut reminded me of Paris so it had to be added to my cluster, I added a tree die cut behind it and then used phrase sentiments from the accessory sticker sheet to journal.
On the opposite side I created a floral cluster and finished off my adding a die cut tab at the top of my photo and a puffy heart sticker on the tree.
I added of the wood epoxy buttons on the butterfly wing. I then used the puffy stickers alphas to add Paris to the other butterfly wing. This layout is simple and quick to put together but the butterfly paper, mixed media background and layered butterfly cut file give it lots of visual impact.
There are some These Days product left in the CVS shop.
Thank you for stopping by and I look forward to sharing my first layout using Happy Days!
I cut two strips of the “Take Flight” polka dot paper and placed them on the top and bottom part of a 12×12 thick white cardstock. I added some stitching with yellow thread and white embroidery floss.
I used a precious photo of me and my son Gabriel. I mounted it on tissue paper and foam adhesive, and centered it on the page.
I fussy cut three frames out of the “Wall of Fame” paper that I placed around the photo, and decorated them with Die Cut Ephemeras, stickers and fussy cut flowers.
I created my title with a mix of alpha dies from my stash and some Foam Title Stickers from the collection.
I placed a few phrases from the Accessory Stickers sheet, and scattered a few butterflies as the finishing touch.
Here are more close-ups:
I am so happy with the result and hope you like it too!
Hello Hello, it’s Michelle here today with a fun gift tag project to share with you all. After a few years of minor easter celebrations due to Covid (and another thats about to be spent in ISO again) I was lacking in photos to scrap so I made these cute little gift tags to add to our family Easter presents.
I’ve used the These Days collection, some cute bunny cut files from the silhouette store and a couple of mini paper treat bags that I made and now they’re ready for gifting to our loved ones when were well enough to see them.
I used papers from the A5 paper stack to create the Bunnies and the strips layered behind. I mixed up the patterns to create some really pretty bundles then tied string bows around the necks. I couldn’t not add some fussy cut flowers which I adhered using glue dots, then stapled on the pom pom trim and the Hip Hop Happy Easter tags into place.
Here’s a close up of each
So cute! I might have to make some more so that I can keep one for myself.
Once these were made I worked on creating some mini treat bags. I searched the inter webs high and low, but I couldn’t find a pattern or tutorial anywhere for the type of bag I wanted to use so I just winged it with some rough measurements and so far they’ve not fallen apart. They came together really well once I tied the tags onto them
I made 4 of these little bags using pieces of 12×12 cardstock that I cut down to an 8x12inch piece. I used my scoring blade in my paper trimmer to score lines to assist in folding and gluing together then added the bunny tags using some white ribbon that I had in my stash. I’ll work on making a tutorial for how I made them if anyone is interested, just leave me a comment below.
The other 2 tags I added to some larger white paper bags for the smaller kids in the family
You can find bags like these in Art n Craft stores, or even discount stores in packs of different colours. They’re the perfect size for small gifts
Well friends thats all from me today, thanks so much for stopping by. I hope you’ve enjoyed seeing this quick little gift tag idea, it really was a lot of fun to create.
Hello CVS friends! Today I have a layout created using the beautiful These Days collection.
My envelope with hearts cut file is from the Silhouette Design Store, this cut file provides a novel way to include your photo and a journal block.
I created a water colour wash on my background page, mixing up a peach/apricot colour. A great technique to use when you have chosen a patterned background photo. I also tore three edges of my base paper and then backed with a blue paper from the A5 paper pad. I next added my cut file cut in white cardstock.
I used the small floral paper for the actual envelope and then a mix of the two peach coloured papers from the A5 pad. I added these papers with foam tape to create dimension. I also cut a few extra hearts to double layer several of them.
I next added my 3×4 inch portrait photo. I fussy cut the journal block from one of the Pocket Cards and used the word stickers from the Accessory Sticker Sheet.
I created a floral cluster to the right side of the envelope, slightly tucking under the envelope.
I created an embellishment cluster below the floral cluster, adding the books die cut and cup from the Die Cut Ephemera pack, fishing off with another cup from the Clear Sticker Sheet.
I added a smaller embellishment cluster to the left of the envelope cut file, layering and using the Wood Epoxy Buttons to add dimension. I finished off my layout adding a small floral cluster to the top of my photo and a butterfly because I just can’t do a layout without a butterfly somewhere on it!
This layout is quite busy for me but I really wanted to challenge myself by using a patterned background paper instead of my standard white.
Thank you for stopping by and later in the month I have another layout using These Days collection, sadly using the last of what I have.
Hello Cocoa Vanilla fans. It’s Anna here with another (and probably my last ever) inspiration made with wonderful “These days” collection. Using whatever I have left from this line I created a mini album. This is my favorite way of “killing” the collection as it uses up the most of papers and random embellishements. I am left with wonderful album, ready to add the photos or be given as a handmade gift.
Album itself measures about 12*17 cm and can acommodate 10*15 cm vertical photos and some smaller ones. I made my album base from scratch adding five main pages inside. Cover is a combination of pattern papers and a piece of a false leather with wooden pattern to strengthen up this area, as paper may crack in time from opening and closing the album. I also added a row of paper flowers from Flower ephemera Pack as a decoration of the cover. This collection has a strong “family bonding” theme so I decided to dedicate it for all the moments spend together, hence the FAMILY TIME MEMORIES title. It’s a combination of black Foam Title Sticker and Accessory Sticker.
Inner part of front cover is decorated with two 3*4 cards from Pocket Cards set. I used up a lot of them while making this album. They are great for journaling but also for fussy cutting some extra elements for decorating pages. Doodly frames from Ephemera pack from the first page are mounted with a piece of foam tape and you can slip photo under each of them.
I like adding extra flaps, pockets and inserts to my album and each page has some interactive elements. They are hard to be shown on photos, but believe me – they are there. Thanks to that, album can hold many, many photos. Most of the decorative elements are placed in the cornes with glue added only near the corner so you can tuck the photos behind them too!
Each page is also a pocket with even more space for extra photos or hidden journaling. I also added a waterfall page, that will be perfect for adding multiply smaller, horizontal pictures. You can fit even 14 of them on a single page! I decorated the flaps using all sort of embellishments: Accessory stickers, Ephemera pieces, Flower ephemera, Clear stickers and Puffy stickers.
For decorating my pages I not only used 12*12 papers but also almost the whole 6*8 paper stack that I had left. I also turned some of the paper scraps into smaller tags and pocket fillers so nothing was going to be wasted!
As a page bases I used regular kraft cardstock that corresponds really well with “These days” collection. Whenever I can, I always prefer kraft cardstock over white one while making albums. It seems so decorative by itself and it makes embellishments pop more.
I turned my last page into a big pocket for extra keepsakes and photos so whoever will be using this album in the future will have even more possibilities to customize it.
After finishing this project I could throw away few empty sheets of stickers and other empty packs. I don’t know why but it’s such a pleasure for me to use up something to the very last bit. Do you feel similar finishing an embellishment pack or it’s only me?
There are still many elements from THESE DAYS collection waiting for you in CVS Store in a crazy low prices! Grab them quickly because when they are gone, they are gone forever!
Thank you so much for sticking out with me and see you in April!
Hi everyone, its Melissa here and I’m back today with another layout that I created with the beautiful These Days collection. This collection is still on sale over in the shop, so make sure you head on over and purchase it before its gone! I was in the mood for creating with circles and I created all of these circles using my Cricut Design Space. If you don’t have an electronic die cutting machine you could use a manual die cutting machine, a circle cutter or you could trace around circular items.
This photo is of my eldest daughter in my husband’s relatives pool in January during our summer. The back ground paper is Daybreak and is so beautiful with all of the mixed media-look background. The majority of patterned paper circles were cut from the A5 Paper Stack, and I distressed all of the edges. I stuck some flat to the paper, and placed others on dimensional foam for interest.
Hey Everyone, It’s Michelle here today with a little scrappy inspiration featuring the These Days Collection. I made both a layout and a couple of cards that can be shown off in a frame as part of your home decor so I think thats a win for today. Lets take a walk through how it all came together..
First up we will start with the layout. I fell in love with the little village of houses on the Neighbourhood paper the minute I saw it, but could never think of the right way to show them off. That was until recently when I had an idea to fussy cut them all out and line them up with some ‘grass’ and other bits to make one of the cutest layouts I think I’ve ever made.
I chopped my white cardstock into 3 even strips that I could line the houses up on, then sewed strips of the green and white spotted paper ‘Family Ties‘ to create the grass. I used a pair of herb shredder scissors that are pretty much the same as a pair of fringing scissors, I just felt these scissors would be better suited to my craft room than left in the trusty kitchen gadget draw haha.
I added machine stitching to each green strip then fluffed up the grass and added all the tiny houses to the rows.
I even added in a couple of trees, some mini potted plants, happy dogs and rabbits, some of the little people and a bike. Sweet tiny details that really made the layout come together.
Once I had the rows of houses sorted out and adhered with foam, I glued the 3 white cardstock strips onto a second piece of white cardstock, spacing them out evenly down the page, then I moved on to creating a mixed title
I used both the foam title stickers and mini alphabet stickers to combine together in a mixed font title. I sewed through all the pieces to keep them in place as I’d moved them around that many times to find the right place that they had lost their stickiness.
Next up I added my photos to the layout. I chose 2 family photos that worked with the title that I had created and printed them out in black and white so they didn’t clash with all the pretty house colours. I tucked the photos in the gaps I created between a few of the houses in 2 of the rows and popped them up slightly using foam behind them.
It may have taken many tries to get this recent family photo, with plenty of giggles in between.
I used some of the sweet little puffy heart stickers from the puffy stickers pack to create little puffs of smoke from a couple of the chimneys
Then splattered the white space with gold ink to create a star like sky, even though I haven’t used a dark background.
I really enjoyed creating this little village, so much so that I don’t think its going to be added to an album any time soon, I think it deserves to be out on show in a shadowbox frame for all to enjoy.
Speaking of enjoying crafty things, I had a couple of little houses left over that I thought I would make a couple of cards that can be interchanged in a frame and kept out on display in our living room.
I used all the same elements for these that I did in the layout, just in a 4x6inch size. Going to have a hard time switching them around that I might need a second frame to add to a different area of the house and make use of both cards at the same time.
Well friends, Thank you so much for stopping by to check out my creations using the These Days Collection. Be sure to check out the shop for the epic sale on this very collection, then we can all have little villages on layouts! If you do recreate this layout for your own family, please share it with us in the Facebook Community Group so that I can see how yours came together. I love seeing layouts that have been inspired by my own.


 Inner part of front cover is decorated with two 3*4 cards from


