Best | Boys Rule collection | Tarrah McLean
Hi everyone! It’s Tarrah McLean back with you today to share a layout I created inspired by one of our fellow Cocoa Vanilla fans layouts!

All this week the design team are choosing a fellow Cocoa Vanilla fan’s layout to scraplift from the International Scrapbooking Day challenges. I chose Gayle Selman’s awesome layout from Anna’s monochromatic challenge below…

To replicate Gayle’s layout, I started out by adding some blue distress oxide ink to white cardstock. I then added some black splatters of mist. Once dry, I then got a few stamps with some black ink and stamped them just like Gayle did. I don’t do mixed media all that often so when I get the opportunity to add a little bit!

I then added some paper strips from the Boys Rule 6′ x 8′ paper pad and also punched some stars with a few star punches. Underneath my photo, I layered one of the chipboard frames and used craft foam to pop up my photo. My photo is of my boys goofing around for the camera!

I added a small cluster of embellishments in the top right corner including a chipboard phrase, a rubber charm, and some stars. My title is one of the chipboard titles, I added one of the flairs above the title and lastly I added some phrase and clear stickers.

I love how my layout turned out and I hope you think it does Gayle’s layout justice!
Thanks so much for stopping by today!
Happy creating!
Tarrah x
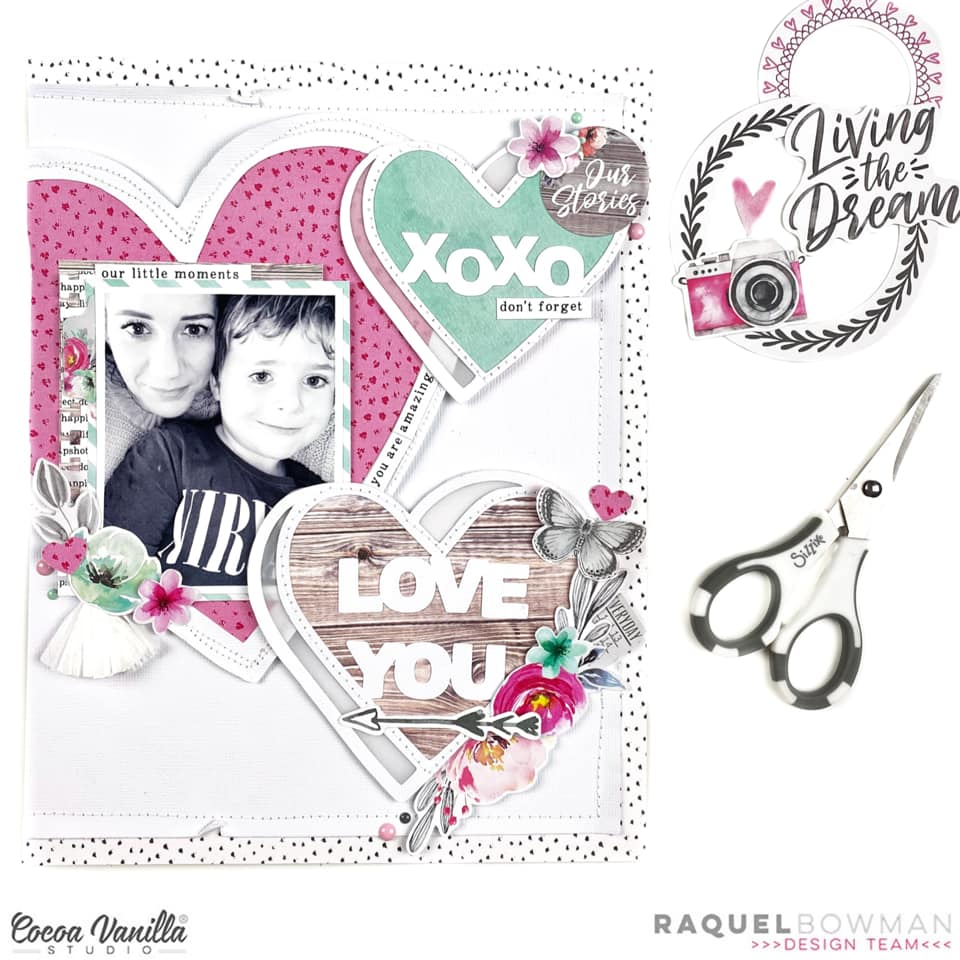


 I found a really lovely cut file designed by fellow team member Gwen from Cut To You, I cut it out from white cardstock and then backed the hearts at the top of the cut file with the pink side of the
  I chose the ‘B’ side of the
 I tucked in one of the cute die-cut frames from the die-cut ephemera pack into the top of my photo, I then took one of the paint strip clear stickers and added it to white cardstock, I then fussy cut it out and tucked it into the right side of my photo. I also added one of the cute flair buttons here. The jar and flower chipboard piece fit perfectly there just above the ‘You’ in the cut file, I love how this looks here. I also tucked in one of the floral die-cuts to the left of the jar to bring in some more of the florals to the page. I also added a few chipboard hearts and also a clear sticker heart too. Lastly I added some of the accessory word and phrase stickers and the date stamp to finish off!
 I chose the
  My title is made up of the chipboard ‘Moments’ word from the chipboard elements pack and also the word ‘Sweet’ from the black chipboard titles pack. I placed both of these on the left of my photo, I like how they look overlapping the scalloped papers underneath. I added some of the floral cluster die-cuts around the page also, I like how they add some more colour and another element to the page.


 I love the star die-cuts in the ephemera pack, I added the grey ones in 3 places to create a visual triangle on my page. I like how this takes your eye around the page. In between 2 of the stars I added some of the clear sticker stars, I like how this adds a bit more impact to the die-cut ones.
 Inside the large grey star, I added one of the large circle Authentic die-cuts, I used craft foam underneath it to raise it up, I like how it gives it shadow and dimension. I also added the ‘Epic’ die-cut title below my photo, this became my title for my page. The flairs are awesome in this collection so I added the ‘Let’s Go’ one on this page since the photo is my son getting into the car! I also added the ‘Admit One Adventure Pass’ ticket just above the flair also.

 My title is one of the awesome cardstock titles and I added foam dots under this to pop it up at the bottom of my photo, I also layered one of the accessory phrase stickers over the top of the title. I absolutely adore that bear face die-cut so that had to make it on to this page! He looks super cute just above the title on the left overlapping on to my photo. Some more die-cuts were added including the mountains, the stars, hot air balloon, Limited Edition ticket, compass and Stay Wild banner at the top. Some of the stars are popped up using foam dots, I love how this creates shadows and height on my page.

 One of my favourite papers from the collection is the rainbow one called ‘Wild One’, I love how it is in a diagonal design! I trimmed it down slightly and added it to the ‘Explorer’ paper, I like the navy as a mat for the page. I then cut out a diagonal triangle cut file design from The Cut Shoppe from white cardstock and placed it over the top of the paper. I love how the white breaks up some of the rainbow paper. I machine stitched around the outside edge of the layout.
 The large stars in the ephemera pack have a line drawn on them so they were perfect to machine stitch, see the detail on 2 of the larger stars in the photo below. I matted my photo using the wood grain frame die-cut and one of the small cut out papers from the ‘Total Legend’ paper, I also stapled one of banner die-cuts to the top left corner of my photo. I adhered the largest star in the top left corner and the smaller one in the bottom right corner and then adhered my photo over the top.
 The Die-Cut title pack are awesome and I love the font of these! I chose the words ‘Cool Dude’ for my title and popped it up with pop dots underneath and placed to the right of my photo. I took lots of the coloured stars from the die-cut pack and popped them up in rainbow fashion like the paper. I love the height and shadows this creates! I also added one of the awesome flair buttons with the star on it to the right of the ‘Cool’ word in my title. Lastly I added a few of the clear stickers, accessory stickers and enamel dots to finish my layout.


