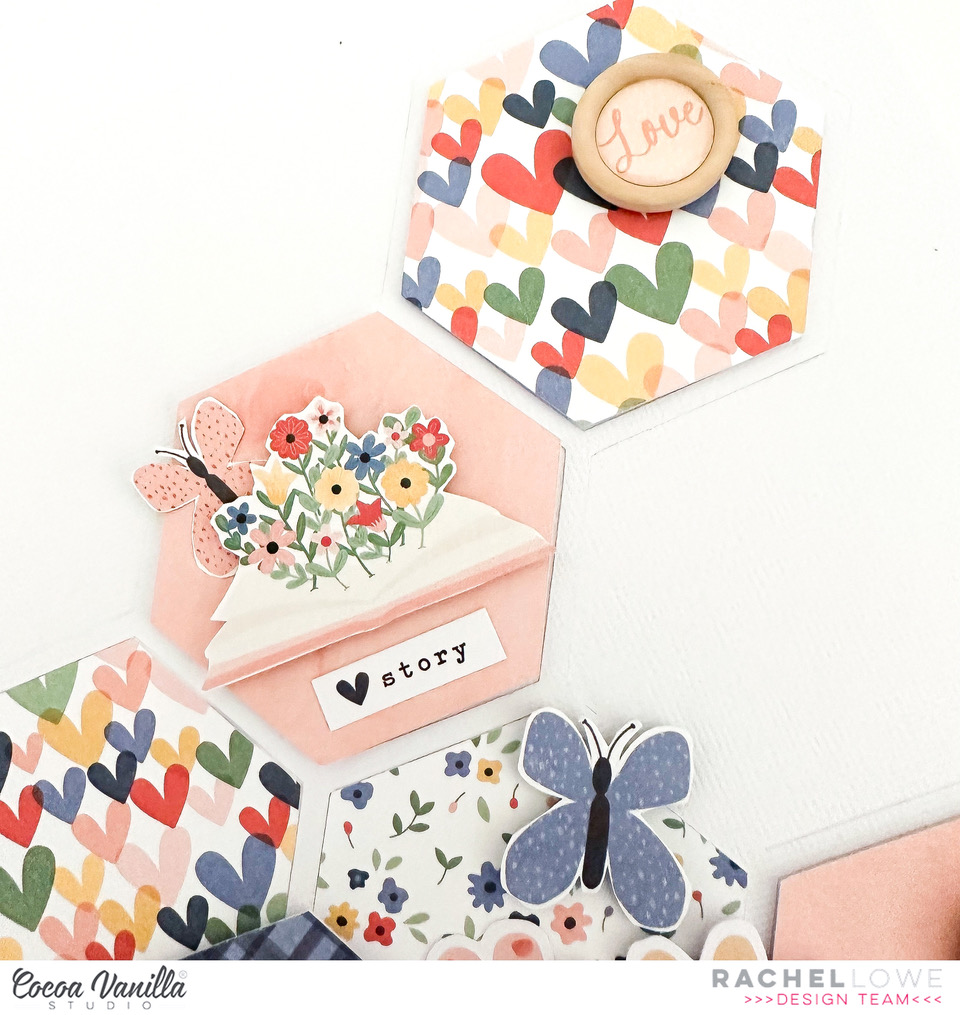
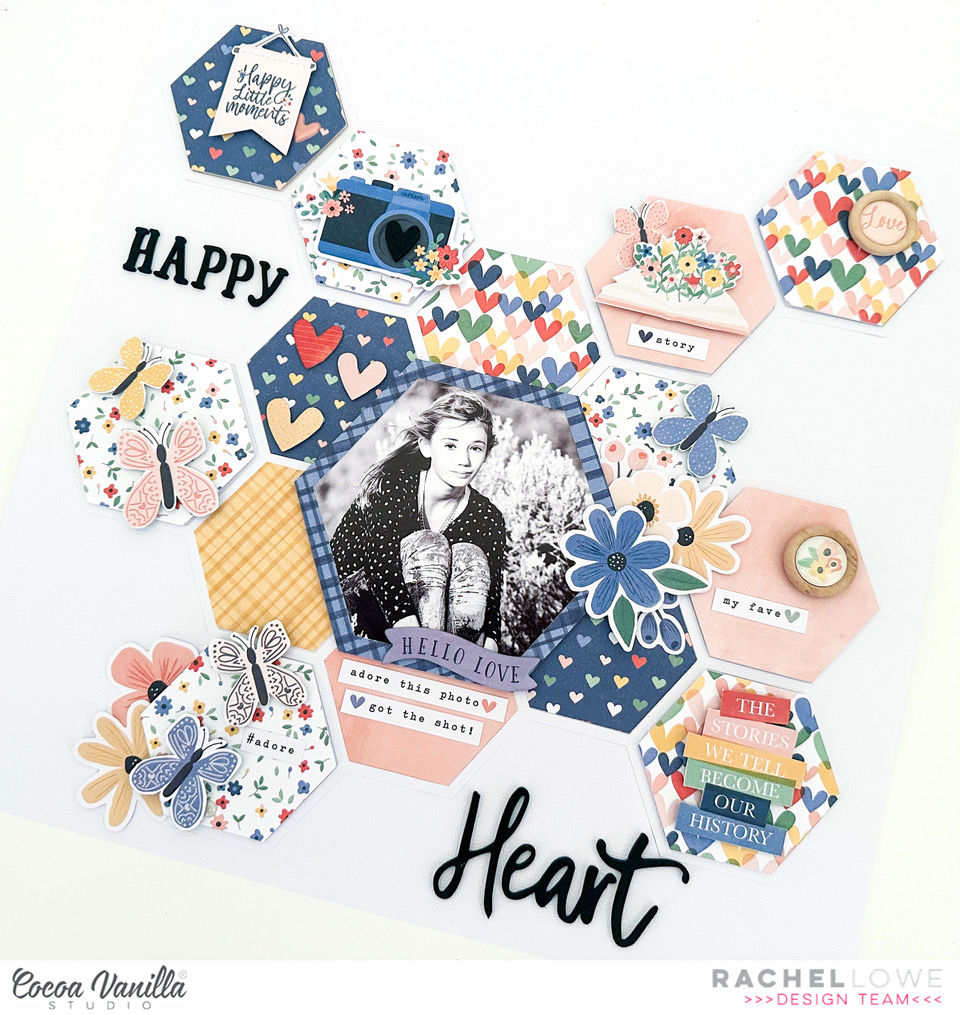
Hello CVS friends! Today I am sharing a grid type layout using hexagons. I am using the beautiful Storyteller collection.
I have used a hexagon cut file from the Silhouette design store which I cut in white. I used the A5 paper pad to paper piece the hexagons, I love how you have smaller print designs in the paper pad and it saves your 12×12 paper for larger projects. I also fussy cut some elements from the project life cards.
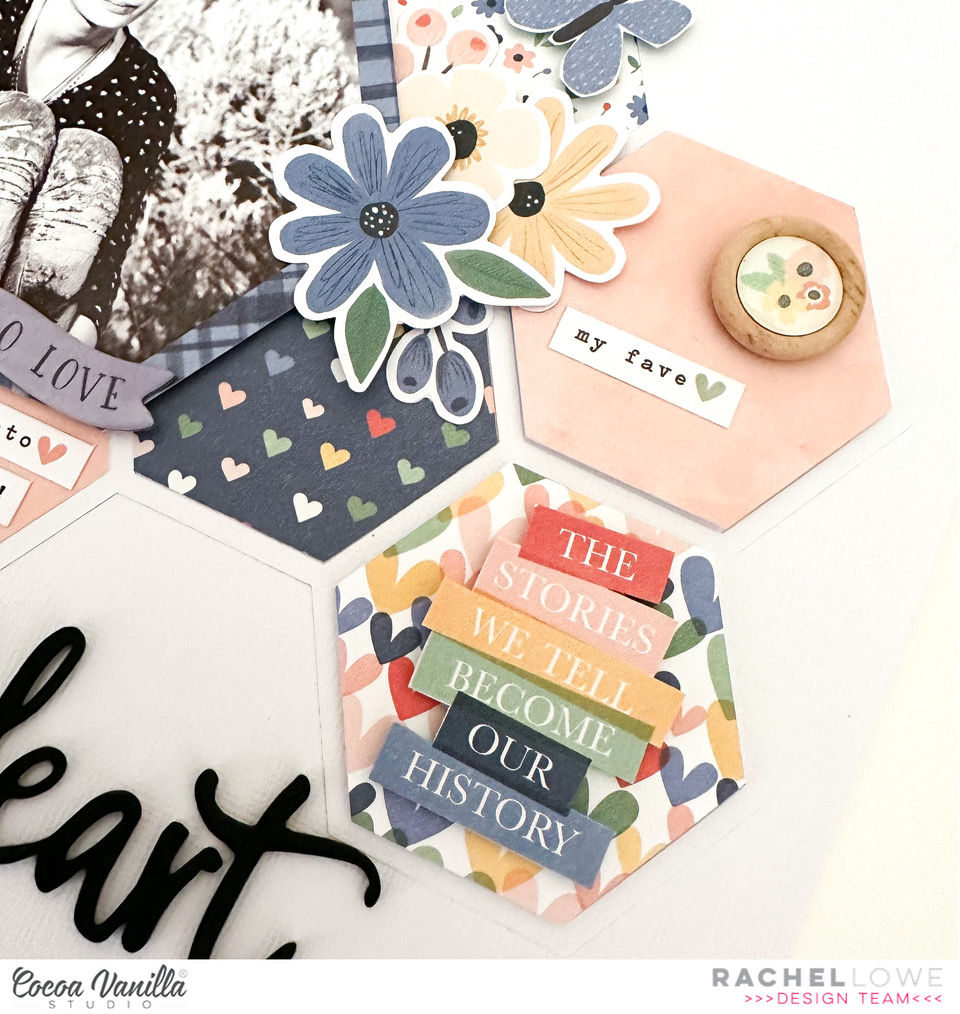
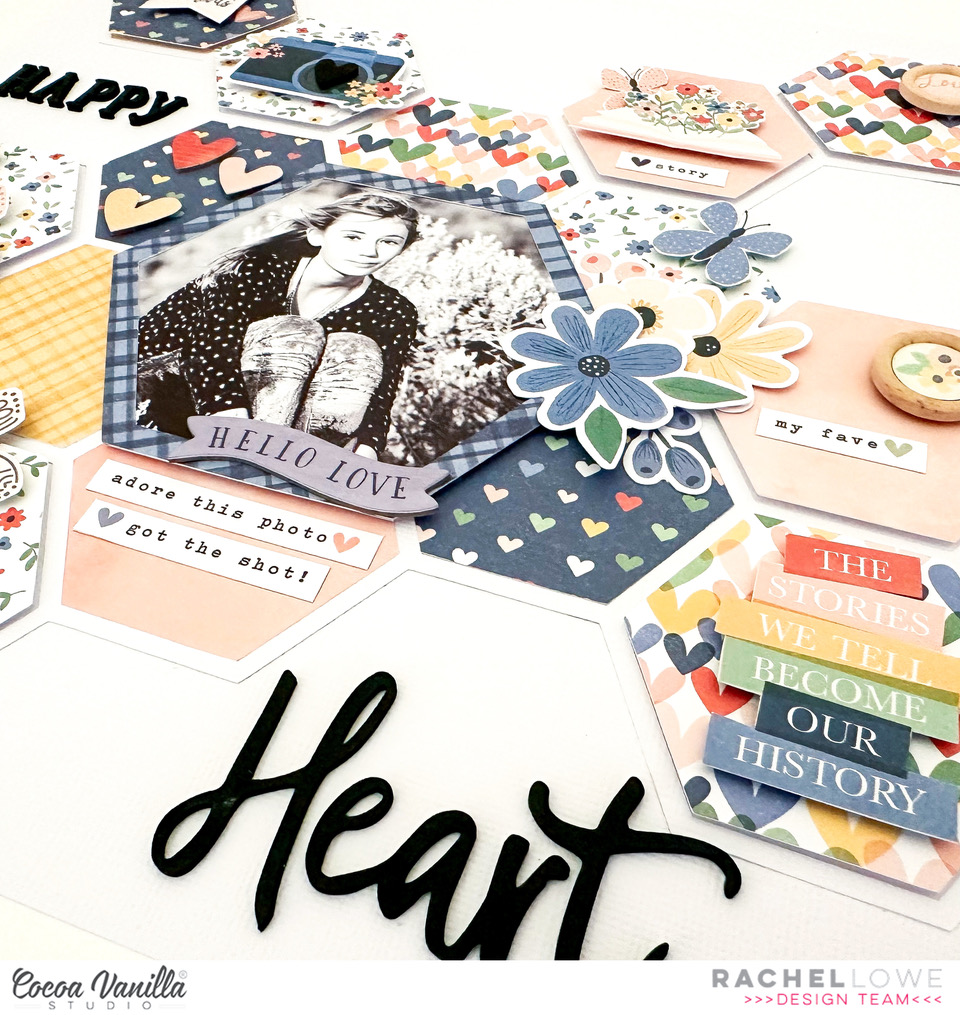
I created embellishment clusters on the hexagons using them as a grid. I used foam tape to add many of the embellishments as it adds dimension. Using different embellishment types such as floral ephemera, wood epoxy buttons and accessory stickers adds texture.
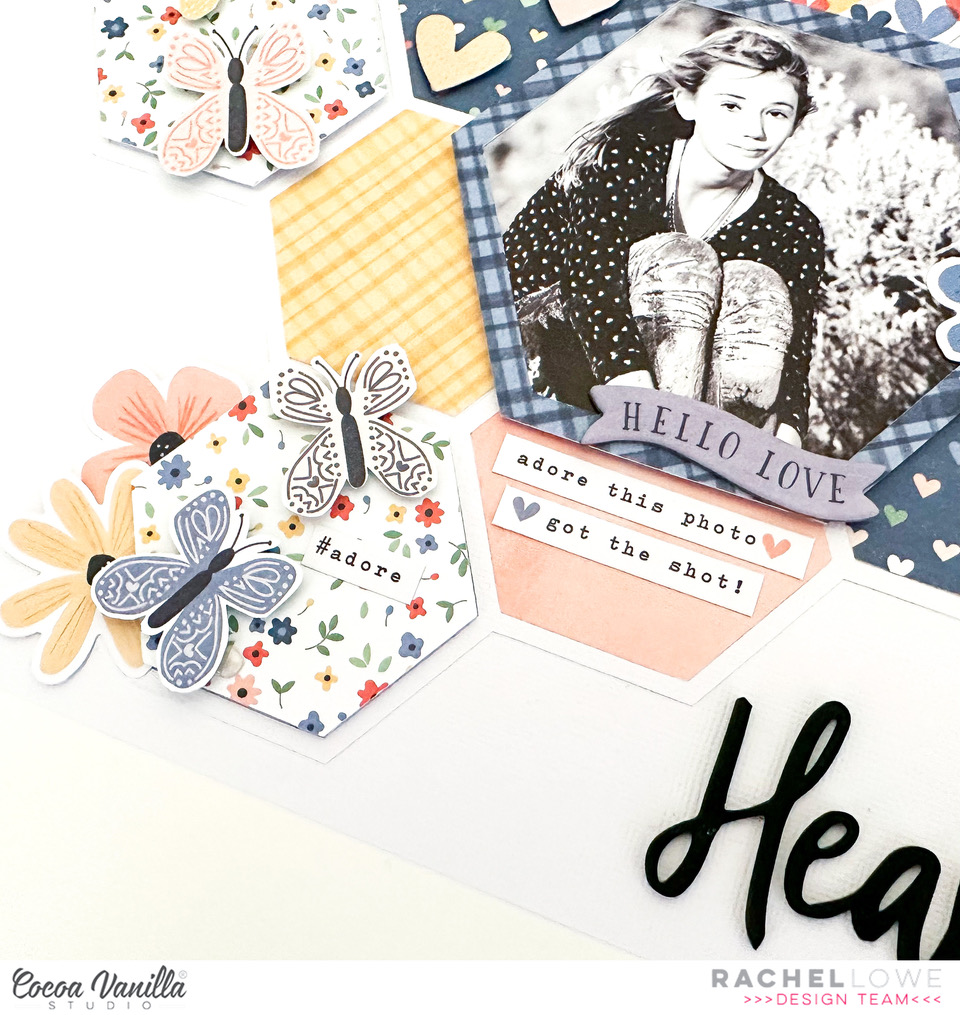
I love using the word and phrase sentiments from the accessory stickers as my journaling. I fussy cut some butterflies and added over my page. I decided to cut my photo as a hexagon also and matted it so it would contrast against the smaller hexagons. I then created a floral cluster over and under my photo.
This photo shows the visual impact using foam tape and different textures on your layout can make, it really does stop it look ‘flat’. Also layering is a key, layering under and over.
Lastly I used the foam title stickers to create my title, the black foam is a wonderful contrast against a white background. A simple layout that was fun to put together!
Thank you for stopping by and see you again later in the month.
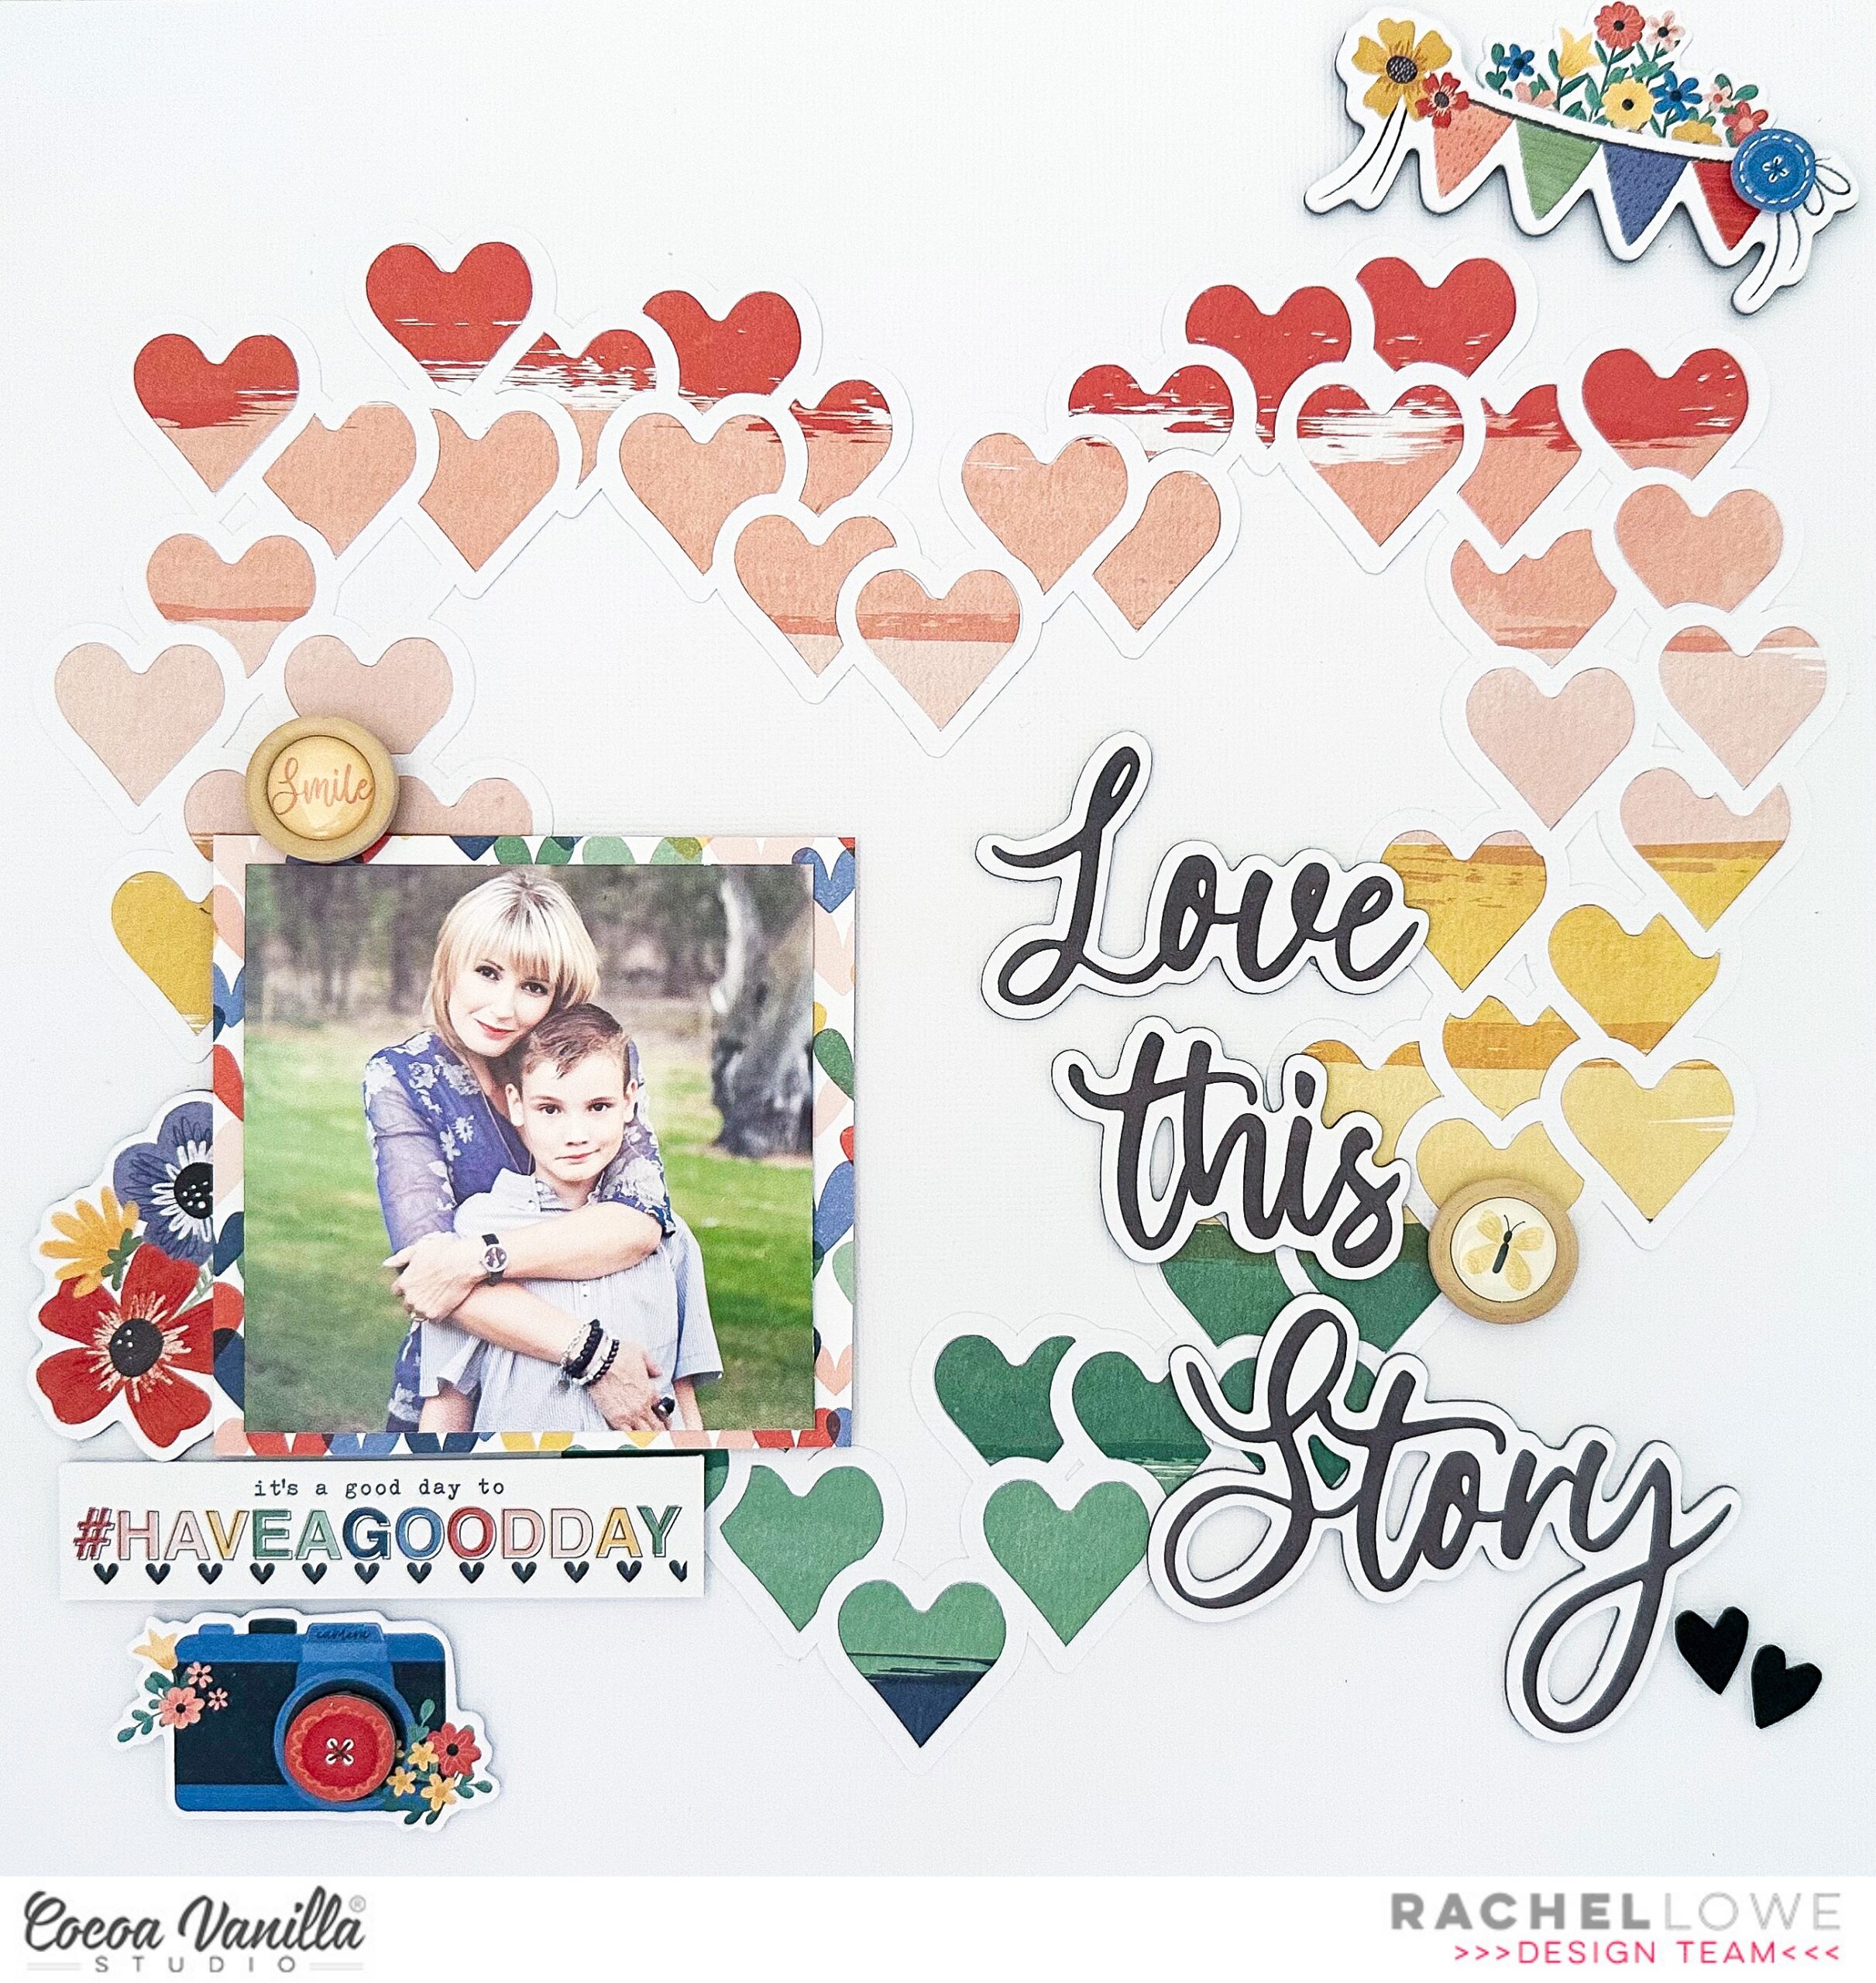
Hello CVS friends. I am still crushing on the beautiful Storyteller collection! I love its versatility and that it works with most scrapbooking themes. Today I am sharing a layout of my middle boy and I.
I have used a free cut file by Paige Evans, love this heart so much. The striped paper is perfect to fill these hearts as you get the multi coloured effect. Once I had paper pieced the heart cut file I placed my photo so I could my way from there.
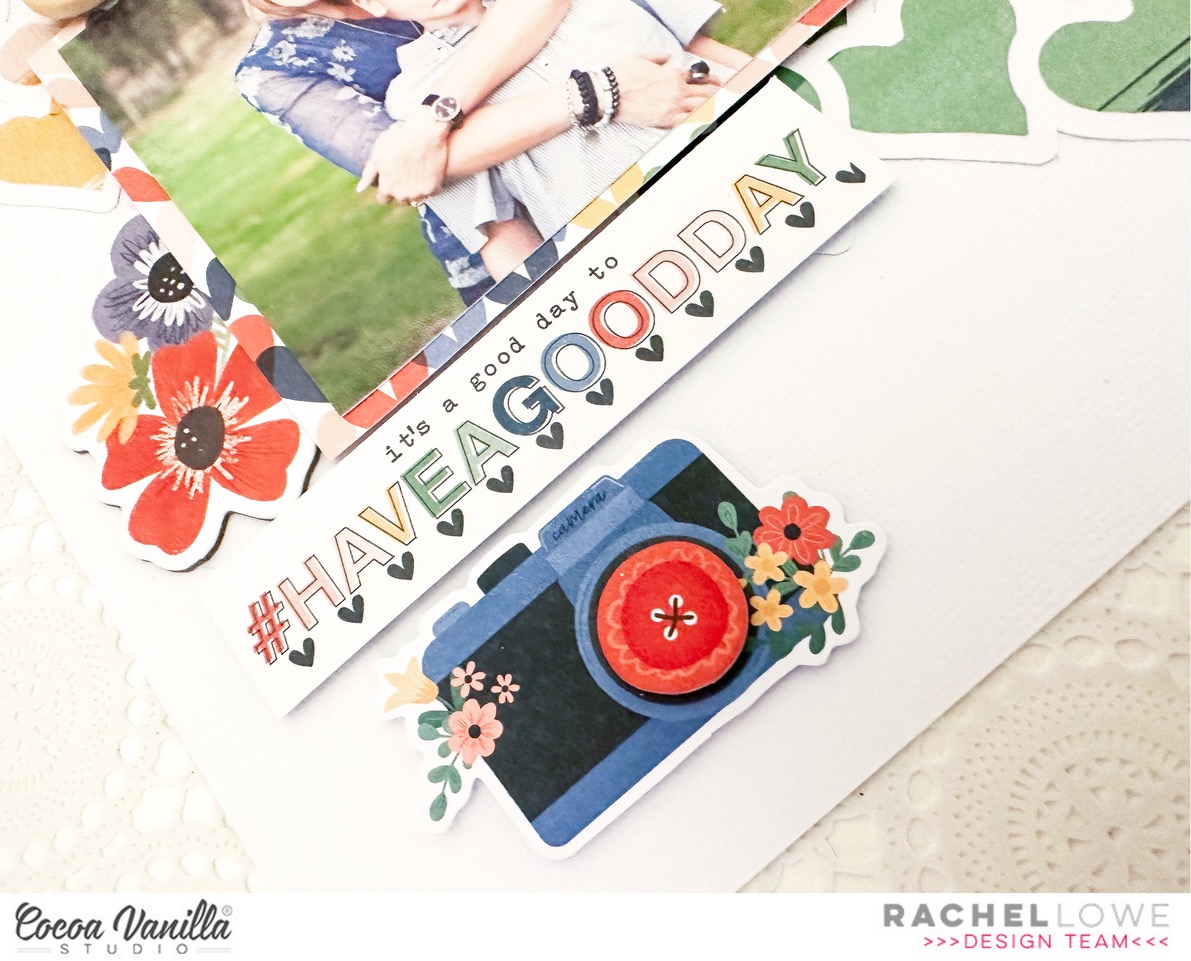
I used the heart paper from the A5 paper stack and added with foam tape. Next I used a chipboard floral bunch from the chipboard sticker sheet and tucked under the left side of my photo. I chose a sentiment phrase die cut from the die cut ephemera pack and directly under my photo with foam tape. To finish off I added a camera die cut and added a die cut button to the lens.
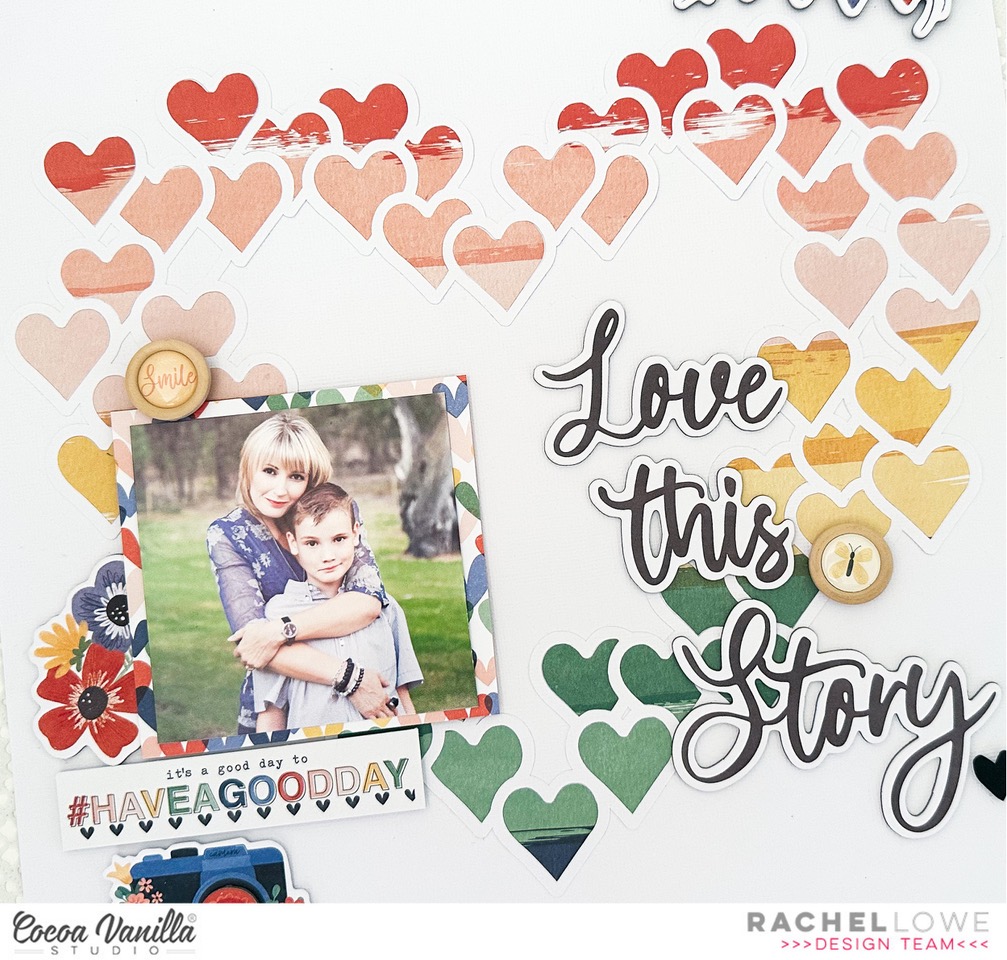
I used the chipboard title and added to the right of my photo slightly over the hearts cut file. To keep to the rule of three I added a butterfly wood epoxy button and two black foam hearts from the foam title stickers.
To add visual interest I added a chipboard banner and tucked a small floral die cut under it and then added a die cut button with foam tape.
This layout is simple but colourful! With these colours it makes it super easy to add coloured photos.
As always thanks for stopping by and see you again soon! Happy scrapping.
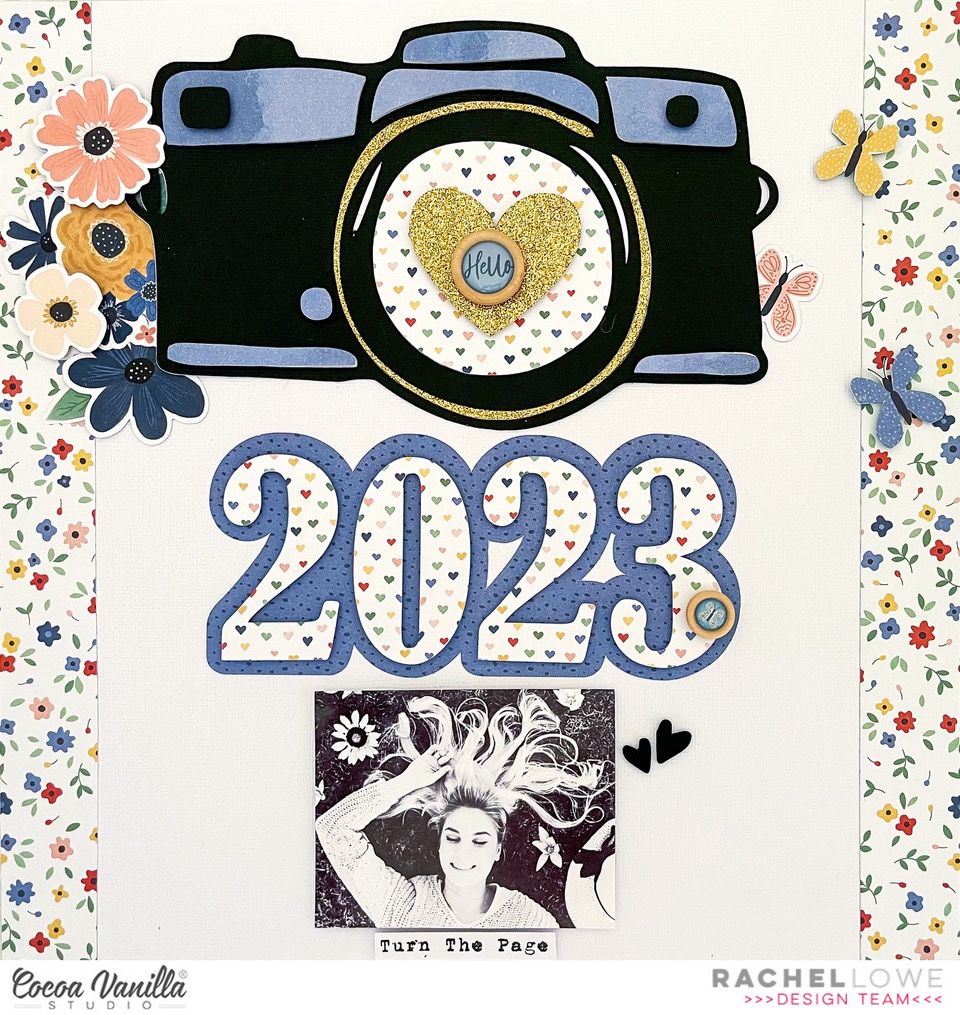
Happy New Year CVS friends! I am starting off the creative year with a layout welcoming 2023. I have used the beautiful Storyteller collection.
The camera and 2023 are cut files available from the Silhouette Design store. I have used the A5 paper pad for all the paper piecing of the cut files and Ditsy Daisy 12×12 paper for the side border strips.
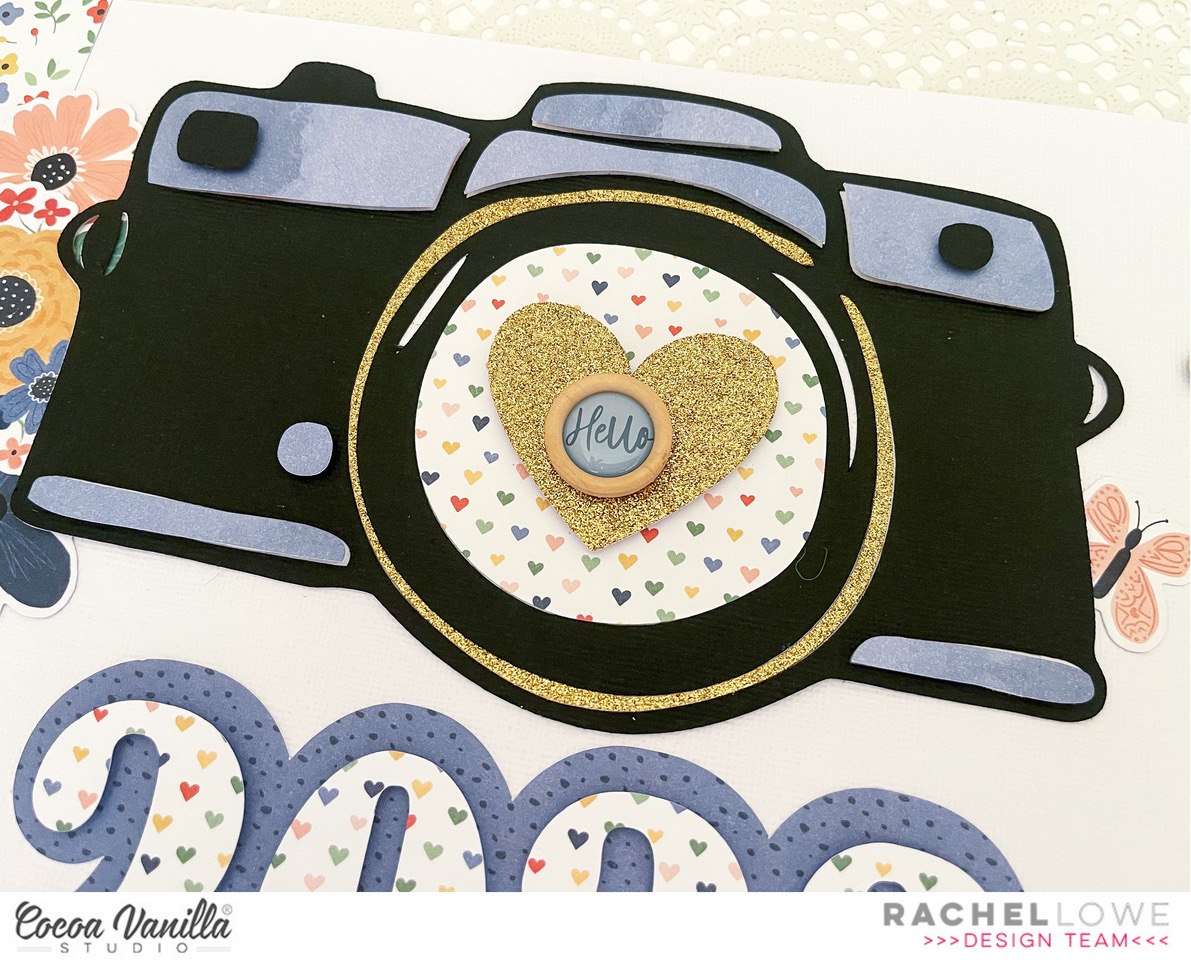
I added some gold glitter cardstock to my camera and finished off by adding a wood epoxy button which creates the first word of my title.
I then created a floral cluster to the left of the camera, tucking some under the camera and foamed taped some over the top to create dimension. These blooms are from the Floral die cut ephemera.
To balance the top part of my page I added some die cuts and fussy cut butterflies to the right of the camera, again I added some with foam tape to add dimension.
So the 2023 stood out I used a dark outer and light floral for numbers, I added these with foam tape so they didn’t appear flat. I add a small cute butterfly wood epoxy button to finish the 2023 title off.
once I added my photo I used an Accessory Sticker phrase sentiment ‘turn the page’, perfect for the theme of my layout. I added some hearts from the foam title stickers which add a contrast.
A fun layout to kick off 2023 and an opportunity to scrap a photo of you!
Thank you for stopping by today and see you again later in the month.
Hello scrappy friends! Today I have a 8.5×11 inch layout using the beautiful Storyteller collection with a focus on the floral die cut ephemera.
I found this lovely hanging basket cut file by Paige Evans (Silhouette design store) and knew it would be perfect to fill with the floral die cuts. I firstly cut it as a whole using the Cross it off paper (wood grain side). I then cut it whole again in white cardstock. I then cut off the hanging leaves in the wood grain and added the white cardstock ones. I paper backed the basket with a blue paper piece from the A5 paper pad.
I used Spring Fling paper to add a border to my white cardstock (floral side). I next used wet glue to adhere the hanging basket cut file. I decided on a 3×3 inch photo and as a guide placed where I wanted it and started adding floral die cuts over the cut file florals. I arranged them until I was happy and ensuring they also gave the effect of hanging over the basket.
I added some centres to flowers using the Puffy stickers to add dimension. Lastly I added some green leaves in amongst the white leaves for contrast.
I added my photo with foam tape and then set about to embellish using the die cut ephemera, accessory stickers and chipboard embellishments. And lastly I added a butterfly wood epoxy button.
This turned out so pretty and would suite a variety of scrapbooking themes.
Thank you for stopping by today and have a fab week!
Hello CVS crafty friends! I have another spring themed layout to share this month. This time it is all about Paris in Spring featuring a photo of my daughter strolling in Paris. I have use the beautiful Storyteller collection.
I found a pretty floral frame cut file from the Silhouette Design store. I cut the floral piece using Little Love paper and paper backed them using Ditsy Daisy paper. I next added a bright blue water colour wash to my white card stock base. I then added the floral frame. I added some floral sprigs and leaves from the Floral diecut ephemera pack.
I next added my title. I used a mix of the Foam Title stickers and Accessory Sticker sheet. I then added a die cut camera and die cut butterflies, which I added with foam tape.
I added my 6×4 inch landscape photo which I matted on a blue paper piece from the A5 paper pad. I love the quote ‘the story behind the photo’ and the size perfect to fit under my photo with foam tape. I added one of the phrase sentiment die cuts to the top of my photo ‘love this’.
I went back and added centres to the floral die cut, some I cut from paper and others I added Wood EpoxyButtons which adds dimension.
I love the mix of blue and yellow and with small pops of other colours and use of a small floral print finished of with a black title, so eye catching. Definitely Spring vibes here!
Thank you for stopping by today and I hope you all have a wonderful week with lots of time to create!
It’s Tarrah McLean back here on the Cocoa Vanilla Studio blog with you and today I am sharing a new scrapbook layout featuring the stunning Storyteller collection.
I think this is now my 8th layout created using this gorgeous collection! Do you have this collection yet?
I am documenting 2x photos of myself with some of my fun girlfriends, choosing to create a grid style design.
I first pulled out all the horizontal pocket cards that would suit the way I wanted my photos placed, I mixed them up and layered some underneath others and also layered some of them under my photos too, Once I was happy with how they looked, I took a piece of plain white cardstock and adhered them all down staying with that grid style. I was so happy that the pocket card that reads ‘It’s A Good Day to Have a Good Day’ was a horizontal style one as I wanted to use the ‘Together’ word from the foam title stickers, it was perfect to place on that pocket card!
I could not leave the pocket cards blank so I added some embellishments to them all. On the title card, I added a chipboard heart from the Chipboard stickers, a puffy heart sticker from the puffy stickers and a journal sticker from the Accessory Sticker sheet, I stamped the date on the small journal sticker. The pocket card to the right of the title one I added a chipboard piece, 2x banner die-cuts and a puffy heart sticker to the banner piece, I also stapled the banner die-cuts using my tiny attacher.
On the pocket card below the title I added an accessory sticker and adhered a camera ephemera piece over the top using craft foam. I also tucked in a floral die-cut here from the floral ephemera pack. On top of the camera, I adhered one of the super cute wood epoxy buttons. The pocket card above the title I added a chipboard banner piece and a chipboard heart and created a small cluster of flowers and leaves from the floral ephemera pack, I popped up some of the flowers using craft foam and left some without, I like the different heights and dimension this gives my page.
It’s fun to treat each pocket card almost like its only little scrapbook layout! On the top photo one, I stapled a banner sticker from the Accessory Sticker sheet in the top right corner, using my tiny attacher. Doing this is a great way to disguise something you make not like in your photo, treat it as an embellishment opportunity and cover it up as I have in the corner of my photo! In the bottom photo, I added a phrase sticker from the Accessory Sticker sheet to the top of the photo and created another cluster of flowers using florals from the floral ephemera pack, this helps to balance with the cluster I created in top left corner.
Thank you so much for stopping by the Cocoa Vanilla blog today! I love how my layout turned out and I hope you enjoyed reading how I created it!
Make sure to keep an eye on the Cocoa Vanilla online store as the Storyteller collection should be in store really soon!
Hello crafty friends, today I have another layout based on a sketch. I have used a Page Maps sketch and agin I have gone with a 8.5×11 inch layout. I have gone bright and bold using the new gorgeous Storyteller collection.
I chose a strong background for this layout and I must admit usually I avoid stripes but the Brighter Days paper is wonderful with its large brushstroke strips broken with a little white. I need to use a white based paper next to provide a contrast, I have used the Oh My Heart paper. Before adhering this I added the smaller paper strips at the top and bottom. To be honest I just used some left over paper strips from the A5 paper pad.
Instead of creating a large title as the sketch shows, I chose one of the Pocket Cards, which still is my title but it adds another pretty paper layer. I added some of the heart puffy stickers over the printed hearts to add some definition and dimension to the pocket card.
I used two of the floral pocket cards to mat my photos, one larger floral print and one smaller. I added my photos with foam tape for dimension. I have used the same photo of my daughter and I, the colour one I cropped so our faces were more the focus and the other I converted to black and white.
Next was to add some embellishment clusters. Where the sketch has banners I added a floral bunch using the Floral Die Cut Ephemera, adding the circle puffy stickers to the centres of the flowers.
To the lower right of the layout I created a pretty embellishment cluster using the Die Cut Ephemera pack. Lastly I went back and added some tabs above and under my photos and a Wood Epoxy Button.
And there you have it, I love this sketch and next time I will try a 12×12 layout.
When your mojo is just not working always go to a sketch to kick things off, Often when I am having one of those days I often scrap lift my own layouts or use a sketch.
Thanks for stopping by today and have a wonderful and crafty week.
Hello CVS friends! I love a good sketch and this month my layouts will be based on sketches. I love this sketch my Ashley Horton who Kindly allowed me to use. I decided to create a 8.5 x 11 inch size to mix things up!
Of course I have used the gorgeous Storyteller collection. I chose a white background knowing I was going to add a yellow watercolour effect on the background. I firstly cut a circle (approx 5×5 inches) using the FlyAway paper. I draw a circle with a pencil so I would know where to add the watercolour paint. Once I had done this I added some splatters and inked the edge of my page also in yellow (which doesn’t show well in my photo but it defines the edges).
I next cut varying sizes of hearts using the A5 paper pad. In using the A5 papers means you get to have smaller prints of elements, like the florals which are perfect for smaller embellishments and pages. I layered my hearts using the sketch as my guide. Some I used foam tape to add dimension. I then added word/phrase sentiments from the Accessory sticker sheet. I also added some tiny hearts from the Die CutEphemera pack.
Instead of using two smaller photos I used a larger landscape photo, matting it on Oh My Heart paper. I added a sentiment banner under but slightly over my photo.
On a 8.5 x 11 inch layout you need to be mindful not to over do it with embellishments as your page can end up looking too ‘busy’. I created one larger embellishment cluster at the top pf my page but incorporating the larger heart. I added the camera die cut with foam tape and then tucked under some flowers from the FloralDie Cut Ephemera pack and finishing off with a Wood Epoxy Button.
You can see on the photo below the yellow ink I used around the edge of my white base paper. Lastly I added some die cut butterflies with foam tape to add more dimension.
A sketch just makes putting a layout together fun and easy, and of course you always creative licence if you want to change things a little.
Thank you for stopping by and if you like this layout/sketch you could create your own take and make it a 12×12 if that suites, just post it on the CVS Community FB page and tag me!
Hello CVS friends! I wish I would journal more on my layouts, using my own handwriting but I struggle and therefore using other means to journal. Today I am sharing a rainbow fun layout when I have used Storyteller collection and the accessory stickers to add my journalling.
This double rainbow cut file is from the Silhouette Design store.
I have used the curve of the rainbow cut file to add my accessory stickers/journalling. I chose my phrases and then cut them as I needed to fit the curve. I know this is cheating but it does look good!!! I used Oh MyHeart paper, using both sides to create my rainbow. You will see that I have used foam tape on some of the rainbow pieces so it didn’t look ‘flat’. Once I had done this I added accessory stickers on thee top curve to create my journalling. I chose a patterned background paper using Little Love paper.
Here I added the Storyteller puffy sticker hearts adding them to the hearts on the paper pieces of the rainbow. On the top rainbow I added a butterfly Wood Epoxy Button. Adding these embellishments prevents your layout looking ‘flat’ and adds texture.
I used Ditsy Daisy paper for my title HAPPY. I also added some of the letters with foam tape. I used the smaller pattern of this paper from the A5 paper pad which is perfect when you are creating smaller elements.
I created a small floral embellishment cluster using the floral die cut ephemera pack, just because I like flowers really but keeping in mind this layout is ‘busy’ in patterns and colours so not wanting to over do it.
I matted my 4×4 inch photo and added to the lower right of my page with foam tape, tucking under a banner tab to the top and then a phrase sentiment from the die cut ephemera under my photo. A black and white photo against these colours/patterns really pops.
This is a simple but fun layout to create. I love the font of the accessory sticker words/phrases and they really do work well on this layout as my storytelling of my photo.
As always thank you for stopping by today and look forward to sharing my next layout with you in September.
It’s Tarrah back with you and today I am sharing a new scrapbook layout featuring the stunning NEW Storyteller collection!
For this week I was given the brief of focusing on the wood epoxy buttons in the Storyteller collection! How can you go past these cute embellishments? These are great little additions to any project, providing beautiful dimension and texture!
I recently went away on a little weekend getaway and there was a lovely fireplace inside the cabin we stayed in, I took a couple of selfies in front of the fire as it was so cozy!
I chose the ‘B’ side of the beautiful Spring Fling paper for my background, trimming it down slightly and adhering it a piece of plain white cardstock, I printed my photo in black and white and distressed the edges of the photo, I then pulled out one of the pocket cards and layered it under my photo. I popped the photo up from the pocket card using craft foam, I love the dimension this creates on my layout. On the photo, I stapled a banner sticker from the accessory sticker sheet and to the right of the photo I also adhered a tab from the ephemera pack.
For my main design element I decided on a circle design, and since the gorgeous wood epoxy buttons are the feature, it allowed me to add lots to the centres of the circles!
I took my circle punches and the A5 paper stack and punched out a few circles from the papers in different sizes, I then layered them together to create 5 layered circles……I distressed the edges of all of the circles and added craft foam in between each layer to add dimension and texture.
I then took a wood epoxy button and added one to the centre of each of the layered circles I created. Once the layered circles were completed, I arranged them on my page how I liked them. I adhered them down, leaving some space at the bottom at the bottom to add a title and some more embellishments. I adhered the gorgeous rainbow banner from the ephemera pack below my photo and popped up the circle die-cut on the right of the photo. On the left of the photo, I just had to add the circle sticker from the accessory sticker sheetthat says. ‘But First, Let Me Take a Selfie. I added pop dots to the left edge of this piece and placed it overlapping the photo slightly.
I chose the title ‘So Happy’ from the awesome foam title stickers from the collection and placed the title below my photo and also took some phrase stickers from the accessory stickers and added these below the title and above my photo too. To balance out the other side of the page, I adhered the shorter rainbow banner die-cut from the ephemera pack. I also adhered the camera chipboard piece using craft foam to add dimension and adhered another of the wood epoxy buttons in the centre of the camera.
To help fill in some of the spaces between the circles, I bought in some of the smaller embellishments. I added some of the button die-cuts, some puffy stickers, accessory stickers, foam black hearts and even more wood epoxy buttons too. I added two of the black foam hearts to create the all important visual triangle on my page, strategically placing the hearts in places to draw your eye around the layout. Lastly I sprinkled some white mist and stamped the date stamp.
Thank you so much for stopping by the Cocoa Vanilla blogtoday! I had so much fun creating this layout and focusing on the super cute wood epoxy buttons! I hope you enjoyed reading how I created it. Make sure to ask your retail store for the gorgeous Storyteller collection…you absolutely NEED this in your life!