Life’s a climb but the view is great | No Limits | Josefine vd Hoeven

Hello Paperlovers, Welcome to the Cocoa Vanilla blog today! Great to see you again on the blog where I explain more about my layout that I created with the amazing collection “No Limits“I love creating a background with ink. You can use almost any stamp ink for this technique. I often use Distress Oxide for mixed media background. For this mixed media background I used three different colors. I took a kitchen sponge and moisten the sponge. Then I applied the ink with a stamping motion to the white cardstock. I repeat this technique just as many times until I am happy with the mixed media background. For some extra demension, I applied a few splatters and used a water color brush.

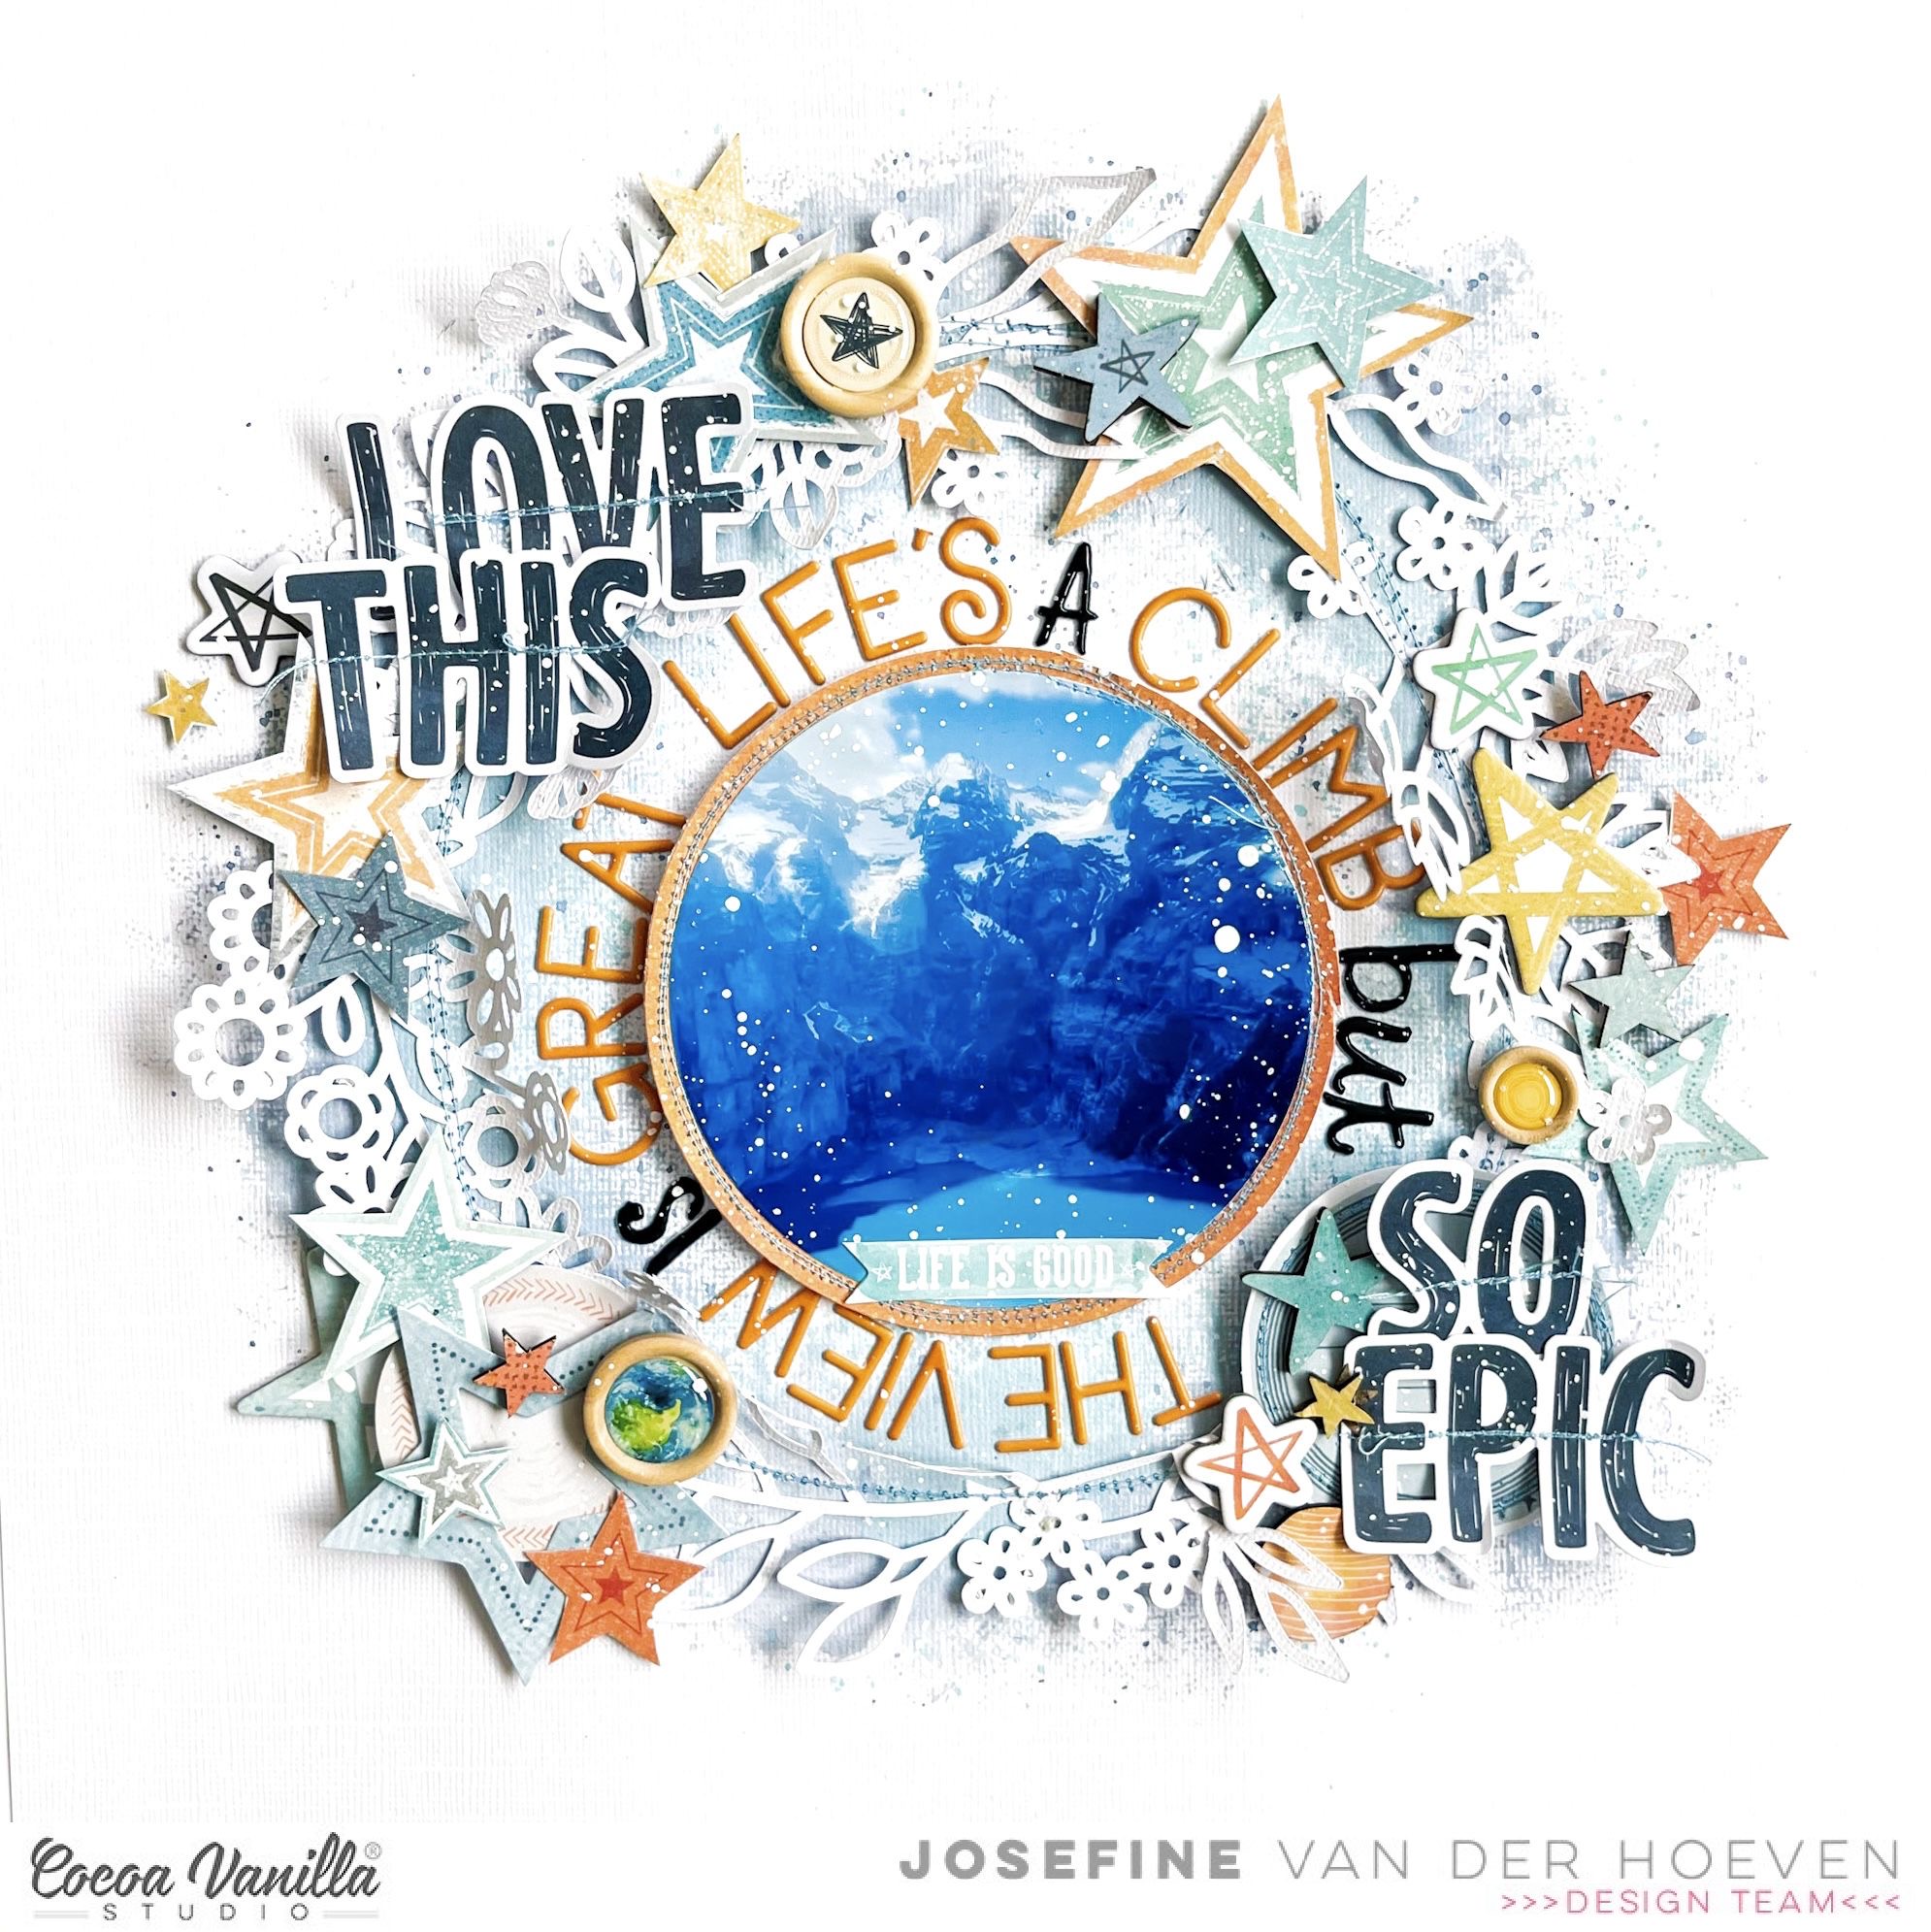
I have used a cutfile by Paige Evans. I really love this gorgeous wreath so much. With my sewing machine I stitch the cutfile on top of the mixed media background circle.
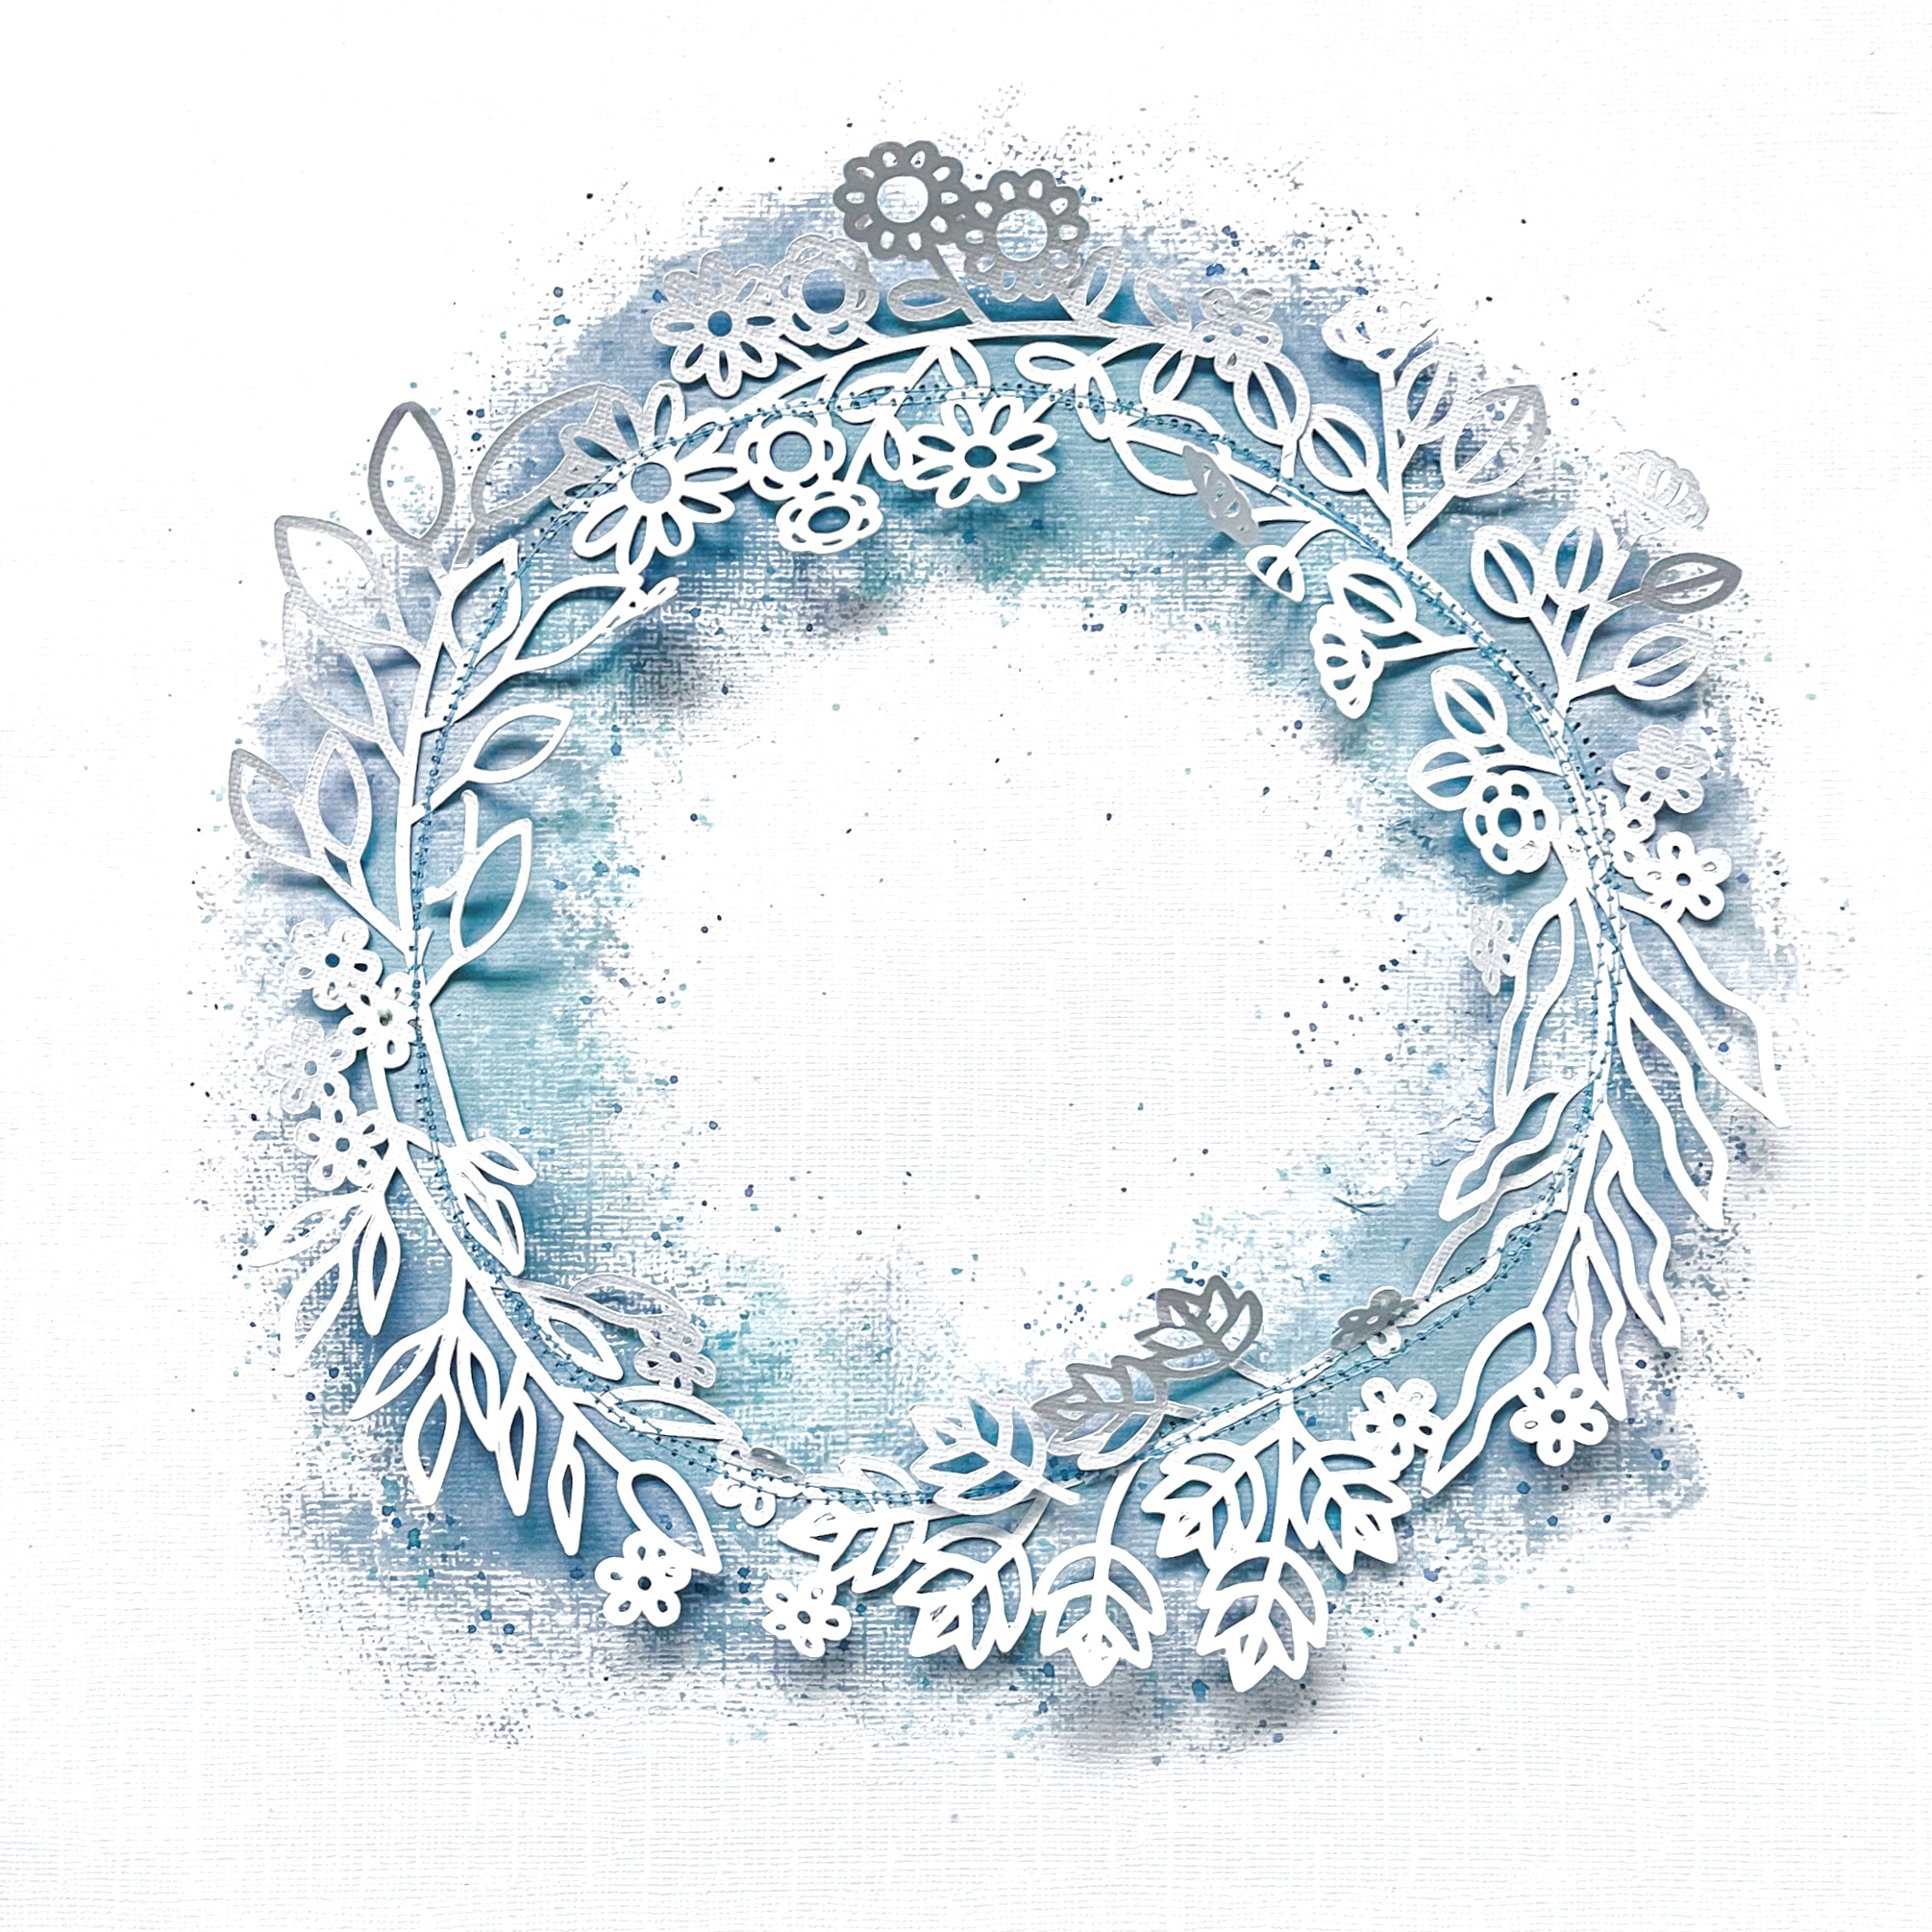
I decorate the wreath cutfile with die-cuts, wooden buttons, word die-cuts and stars. I find decorating my layout to be one of the most fun things to do. I add a light blue stitch border to the large word die-cuts. I love stitching details in my projects and use my sewing machine quite a lot.

I cut the picture of the beautiful glaciers we went to last summer into a circle. I also choose orange patterned paper cut it into a circle and place it behind the photo. Then I add a stitch border to the circle edge.
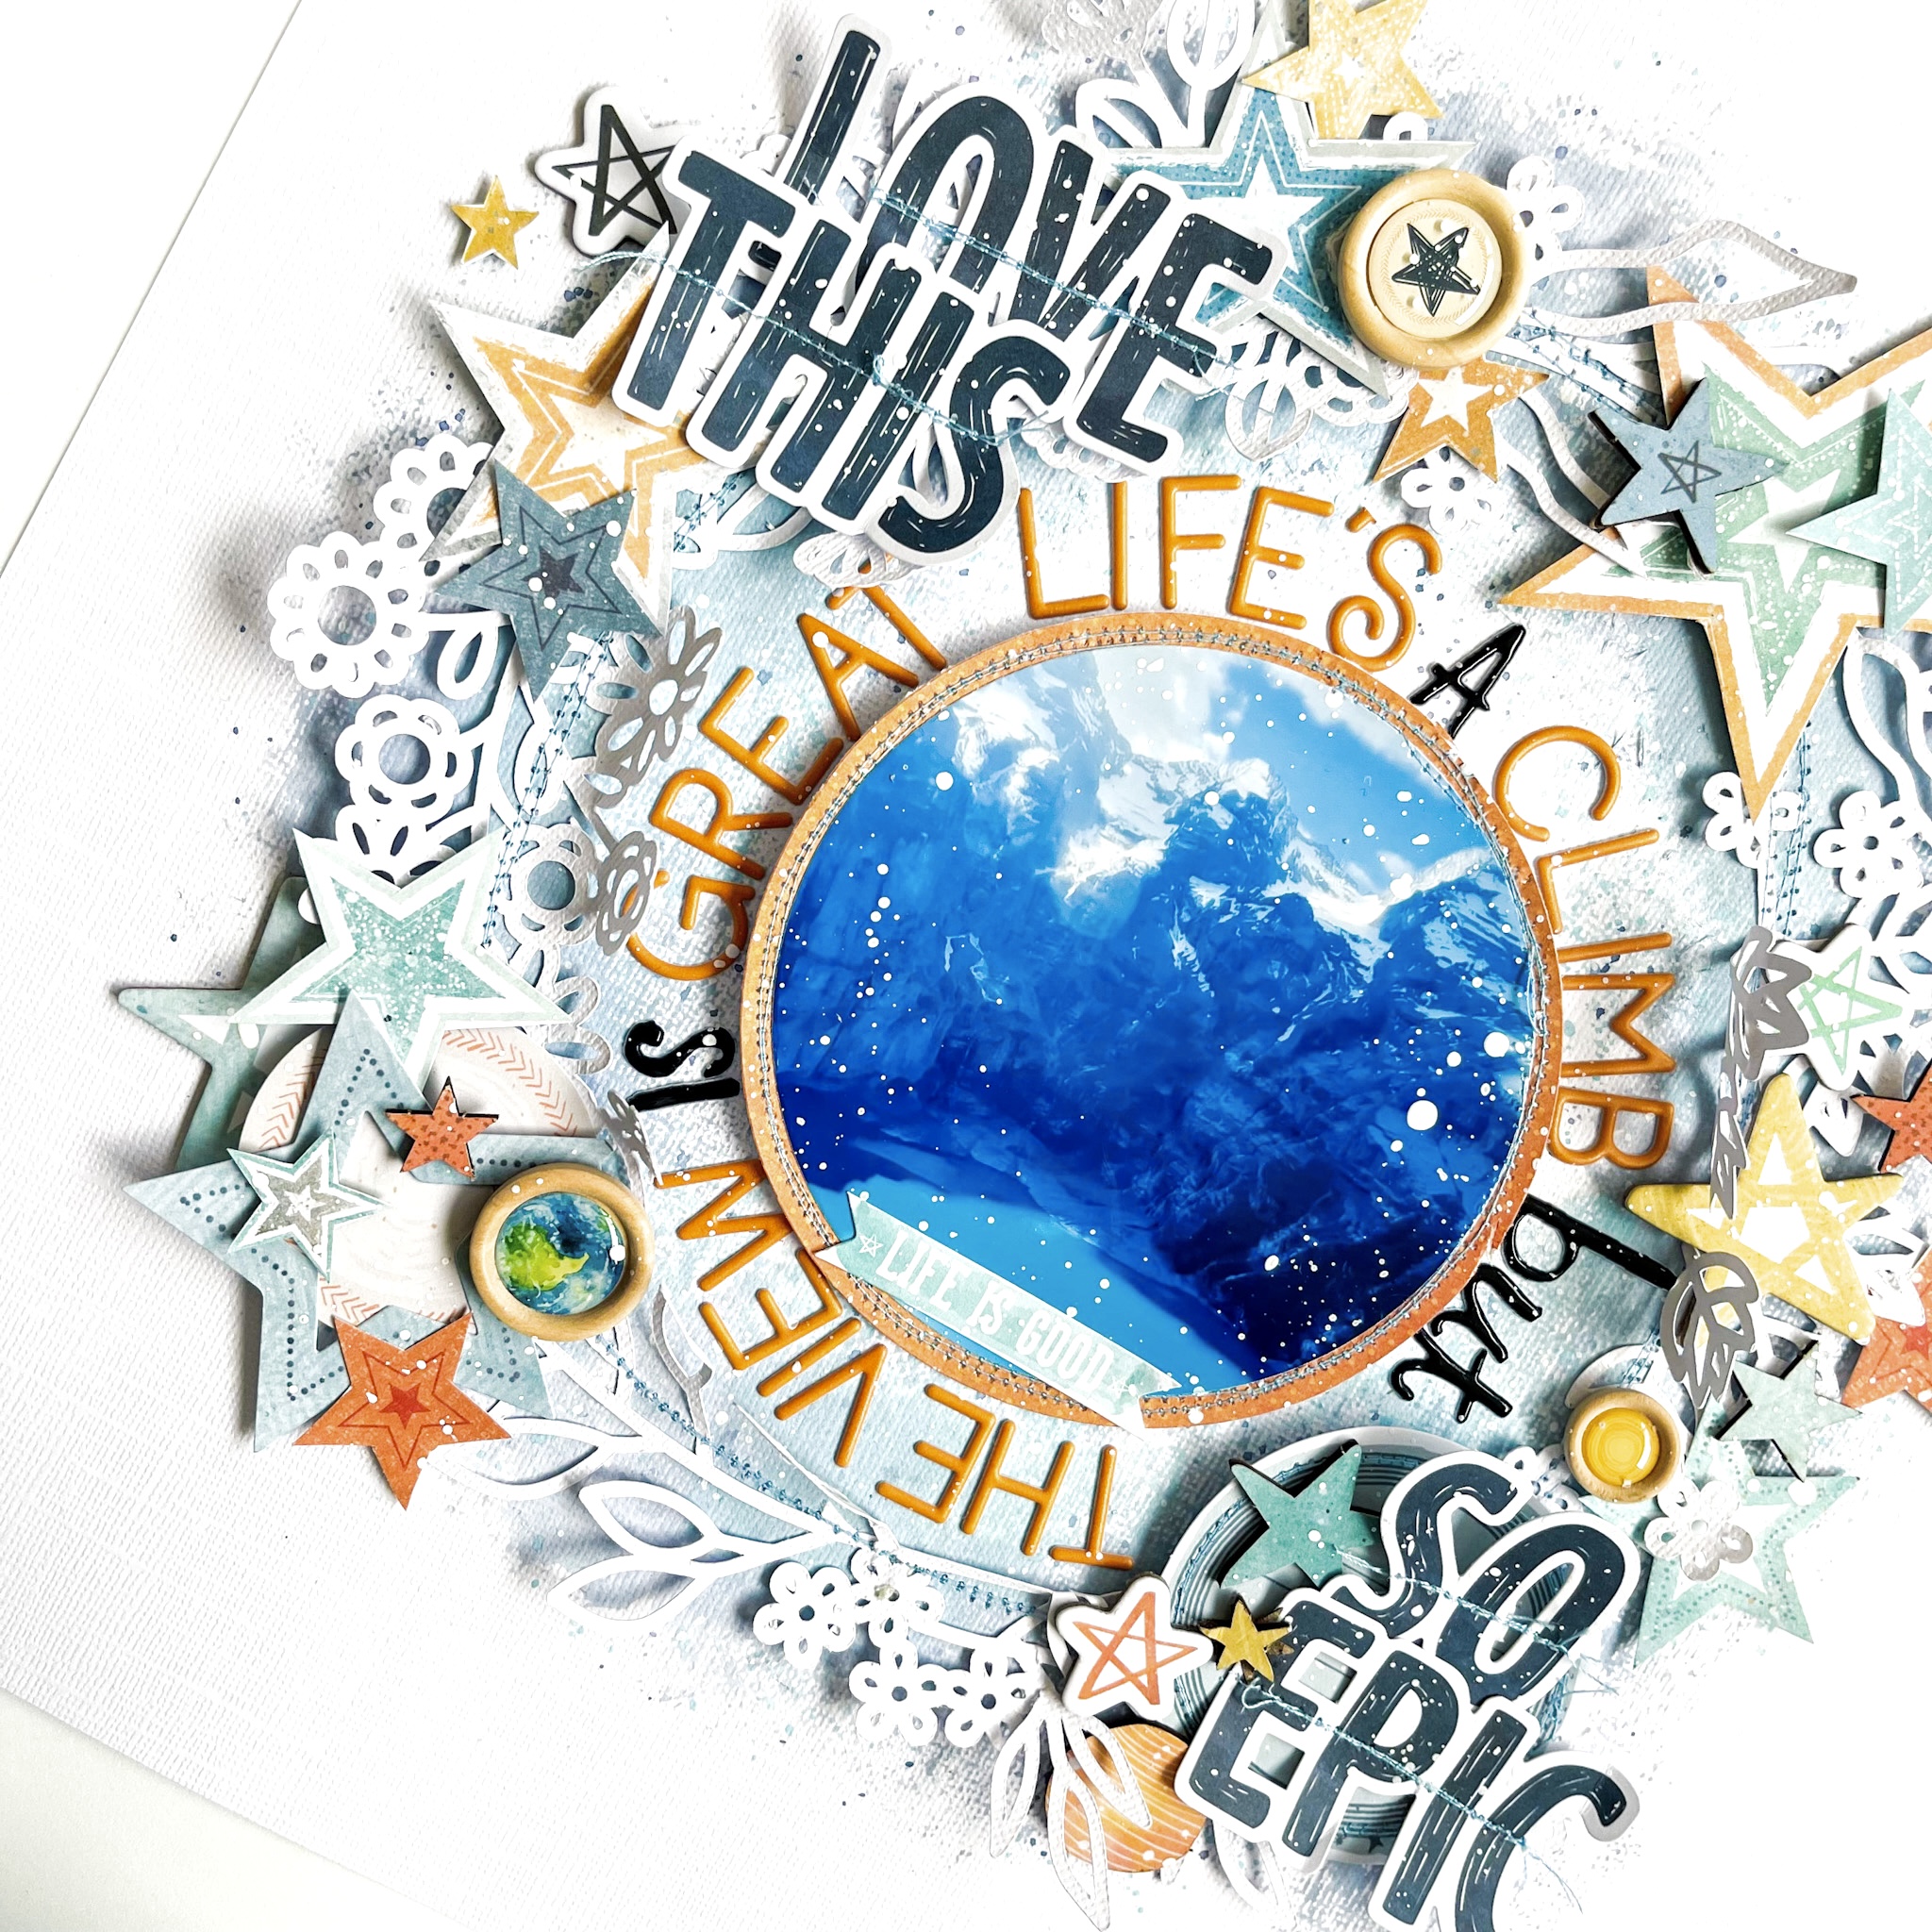
For the title I chose different alphabet sets and created a title around the photo. When I make long titles I usually choose a circle so you have all the space you need.
Happy crafting and have fun!
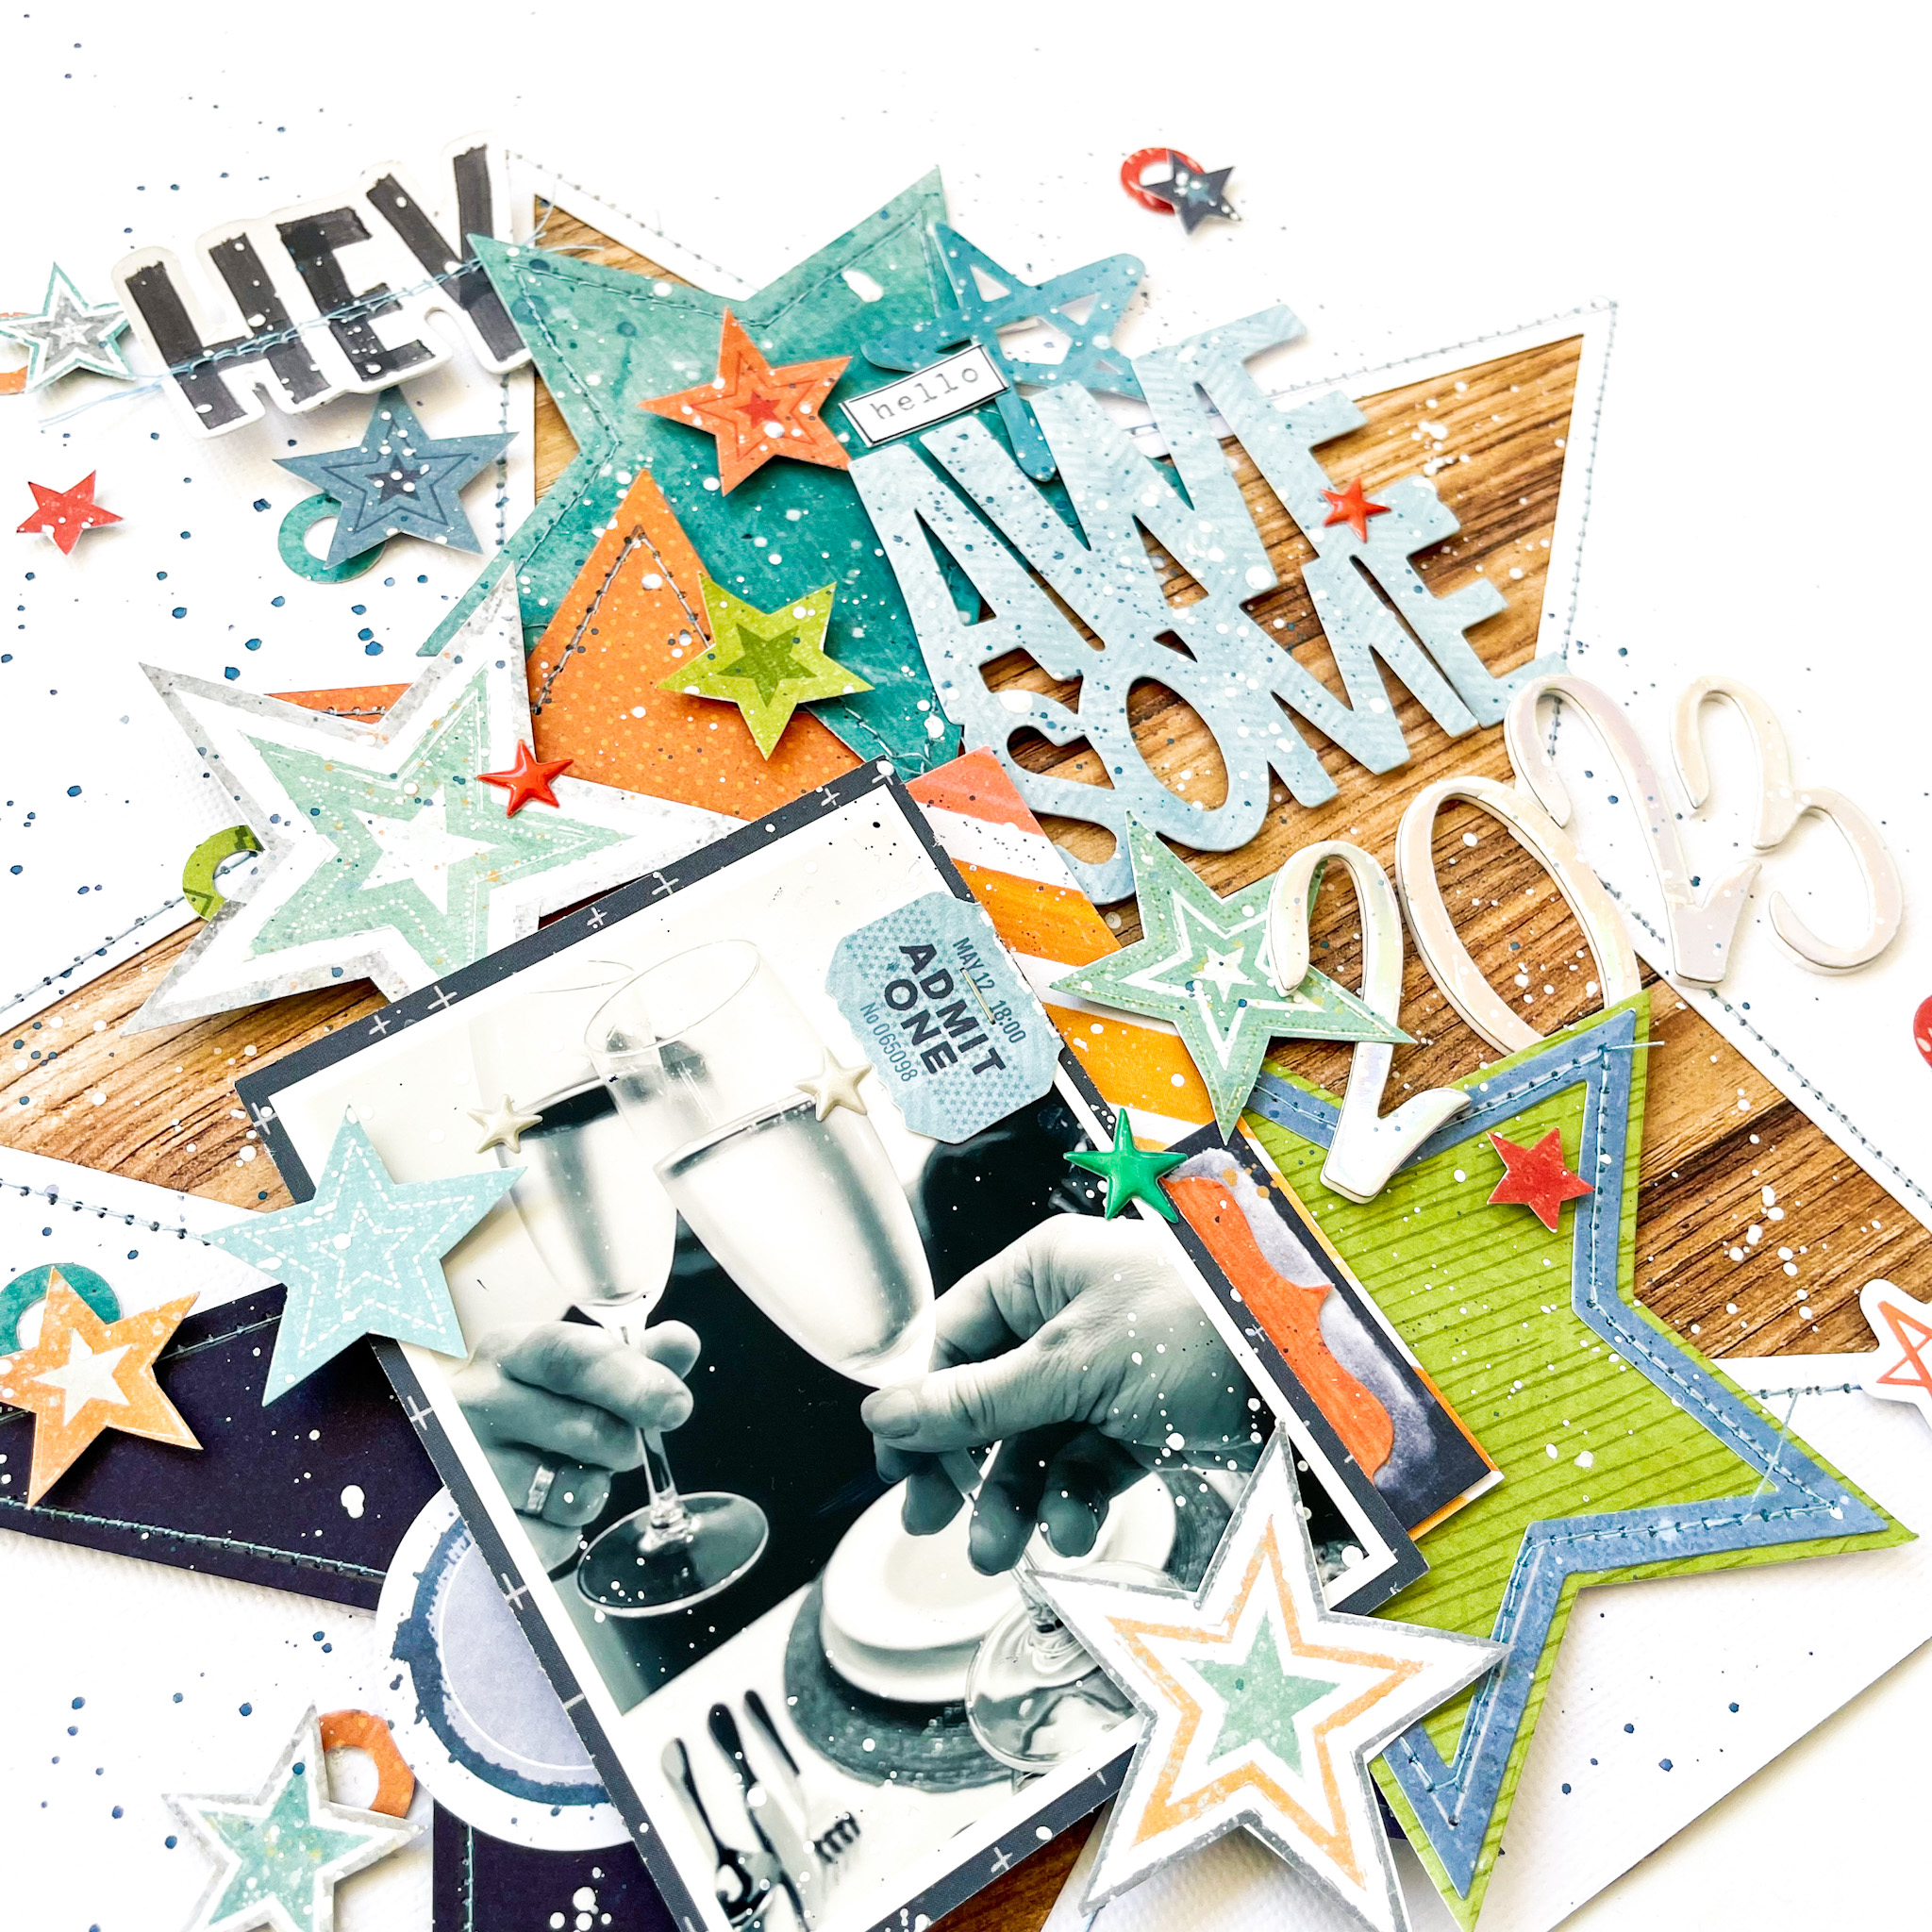
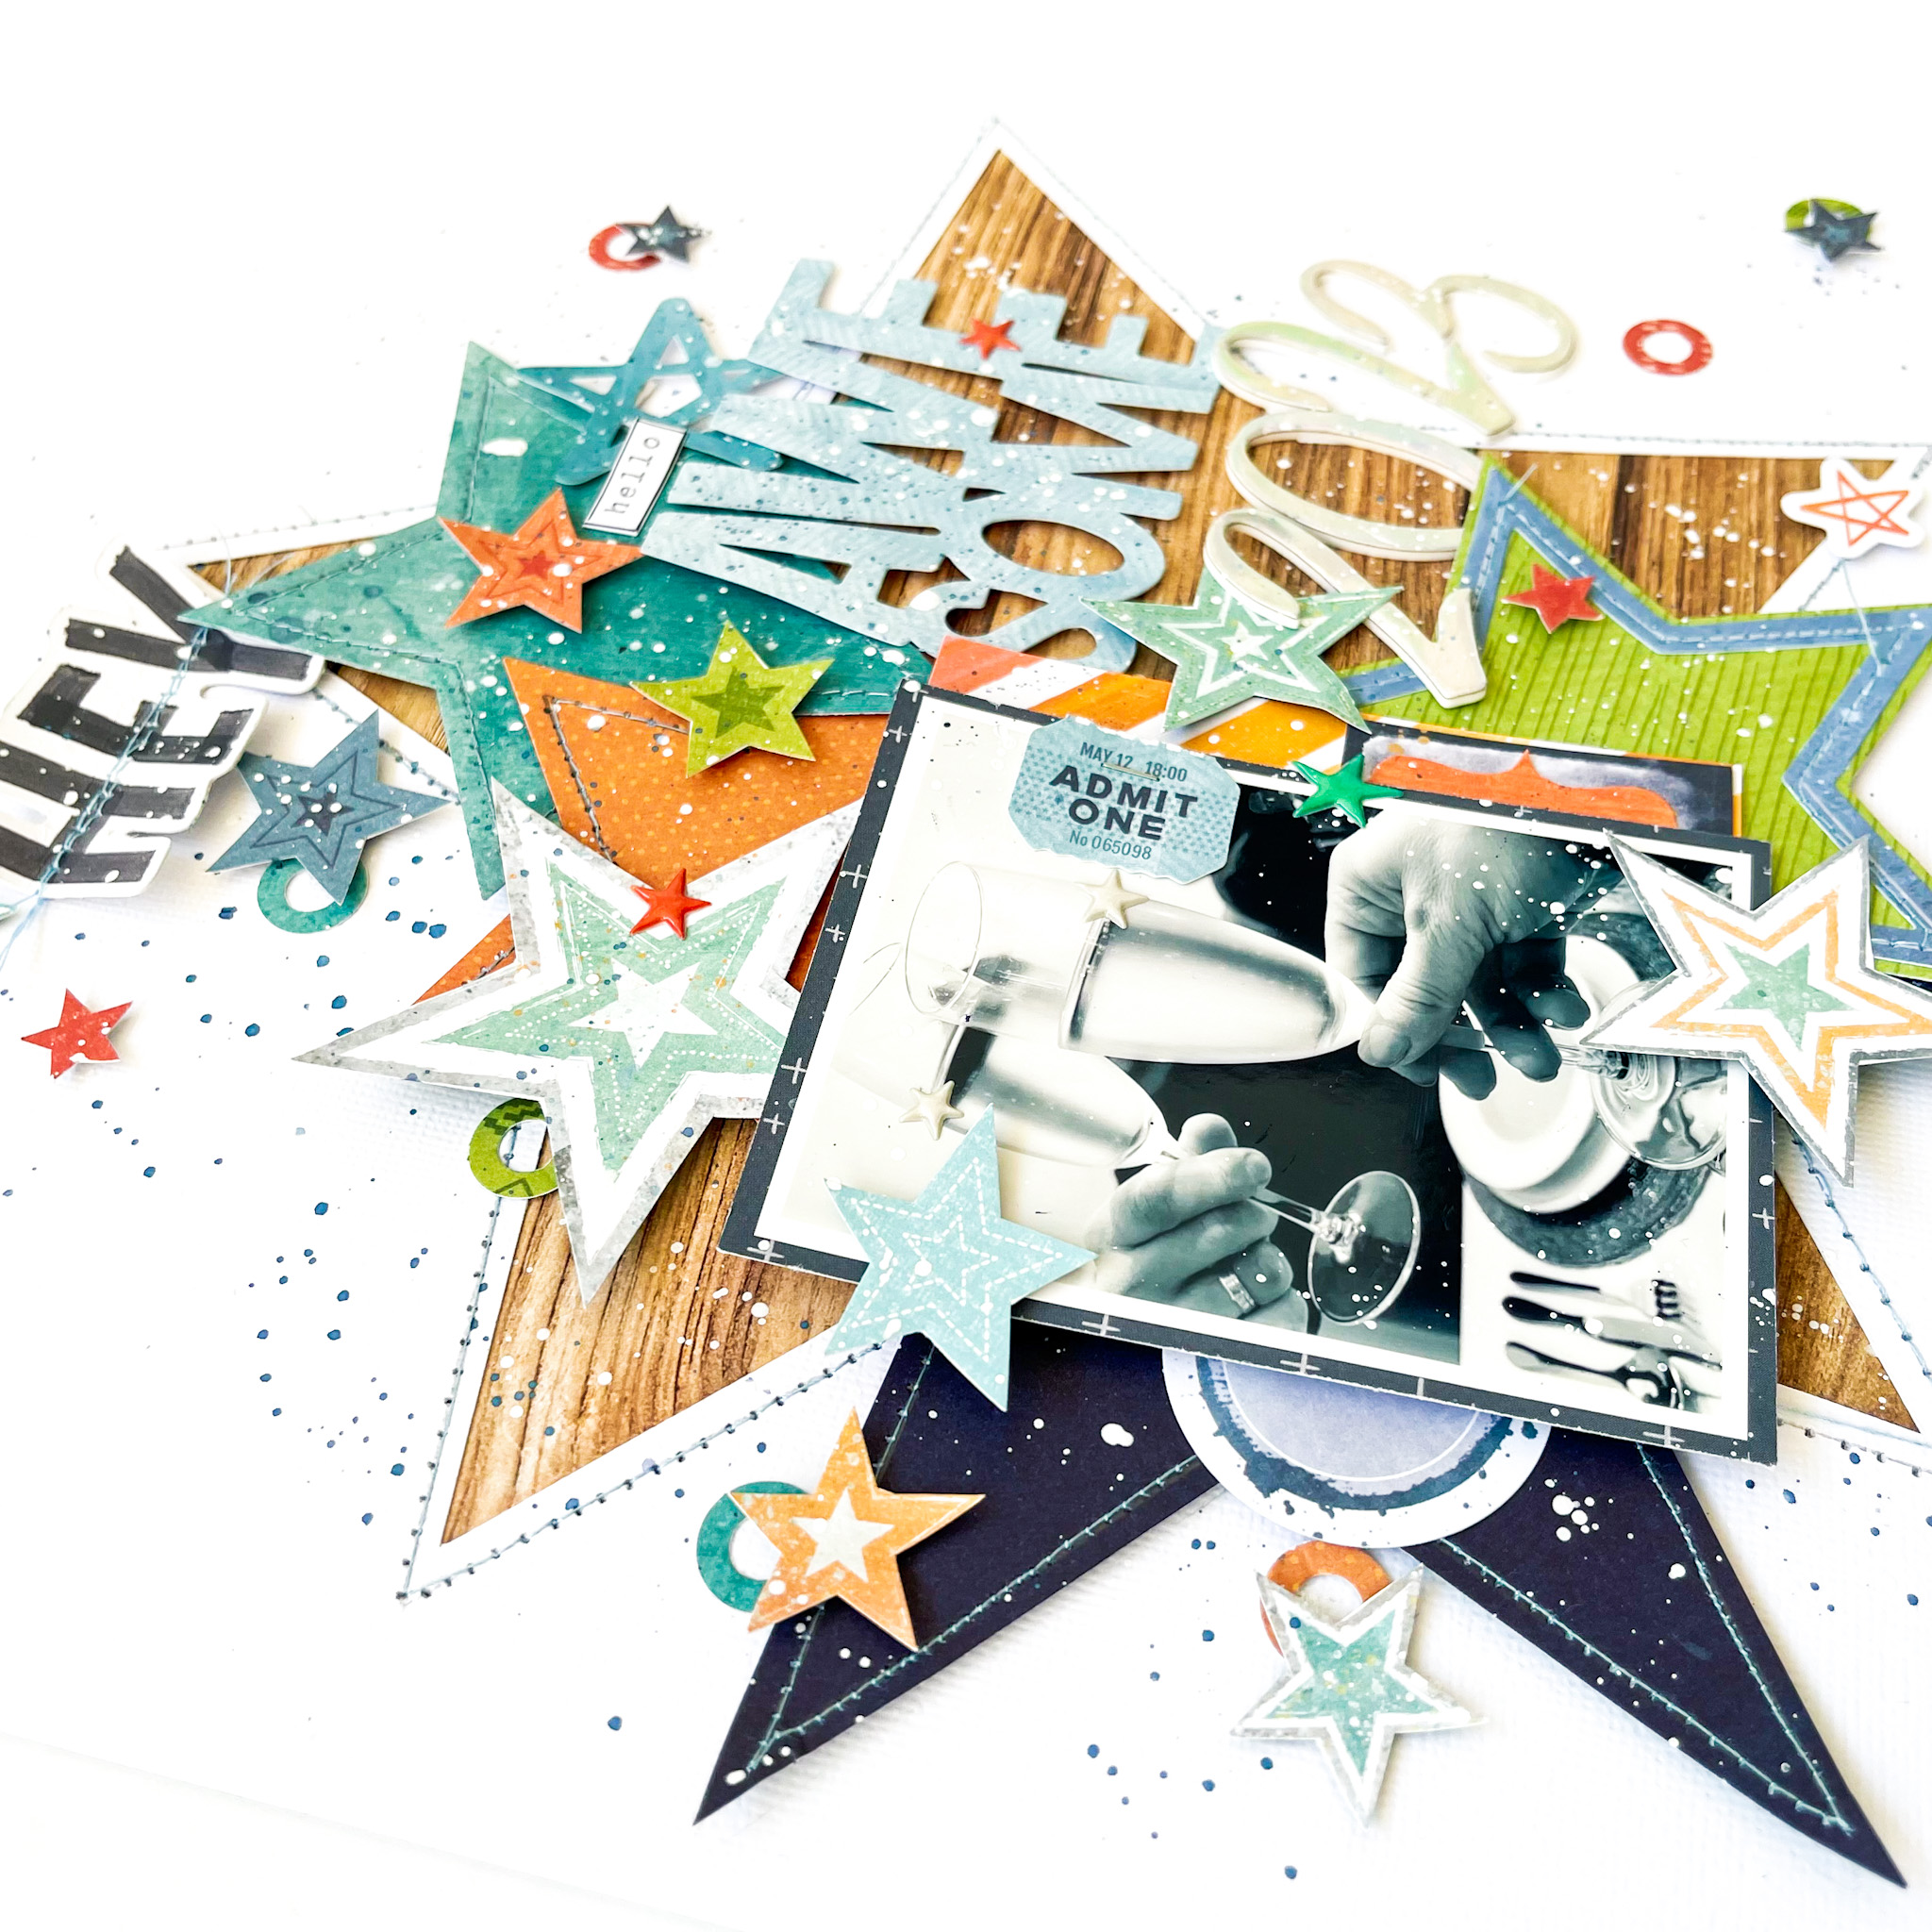
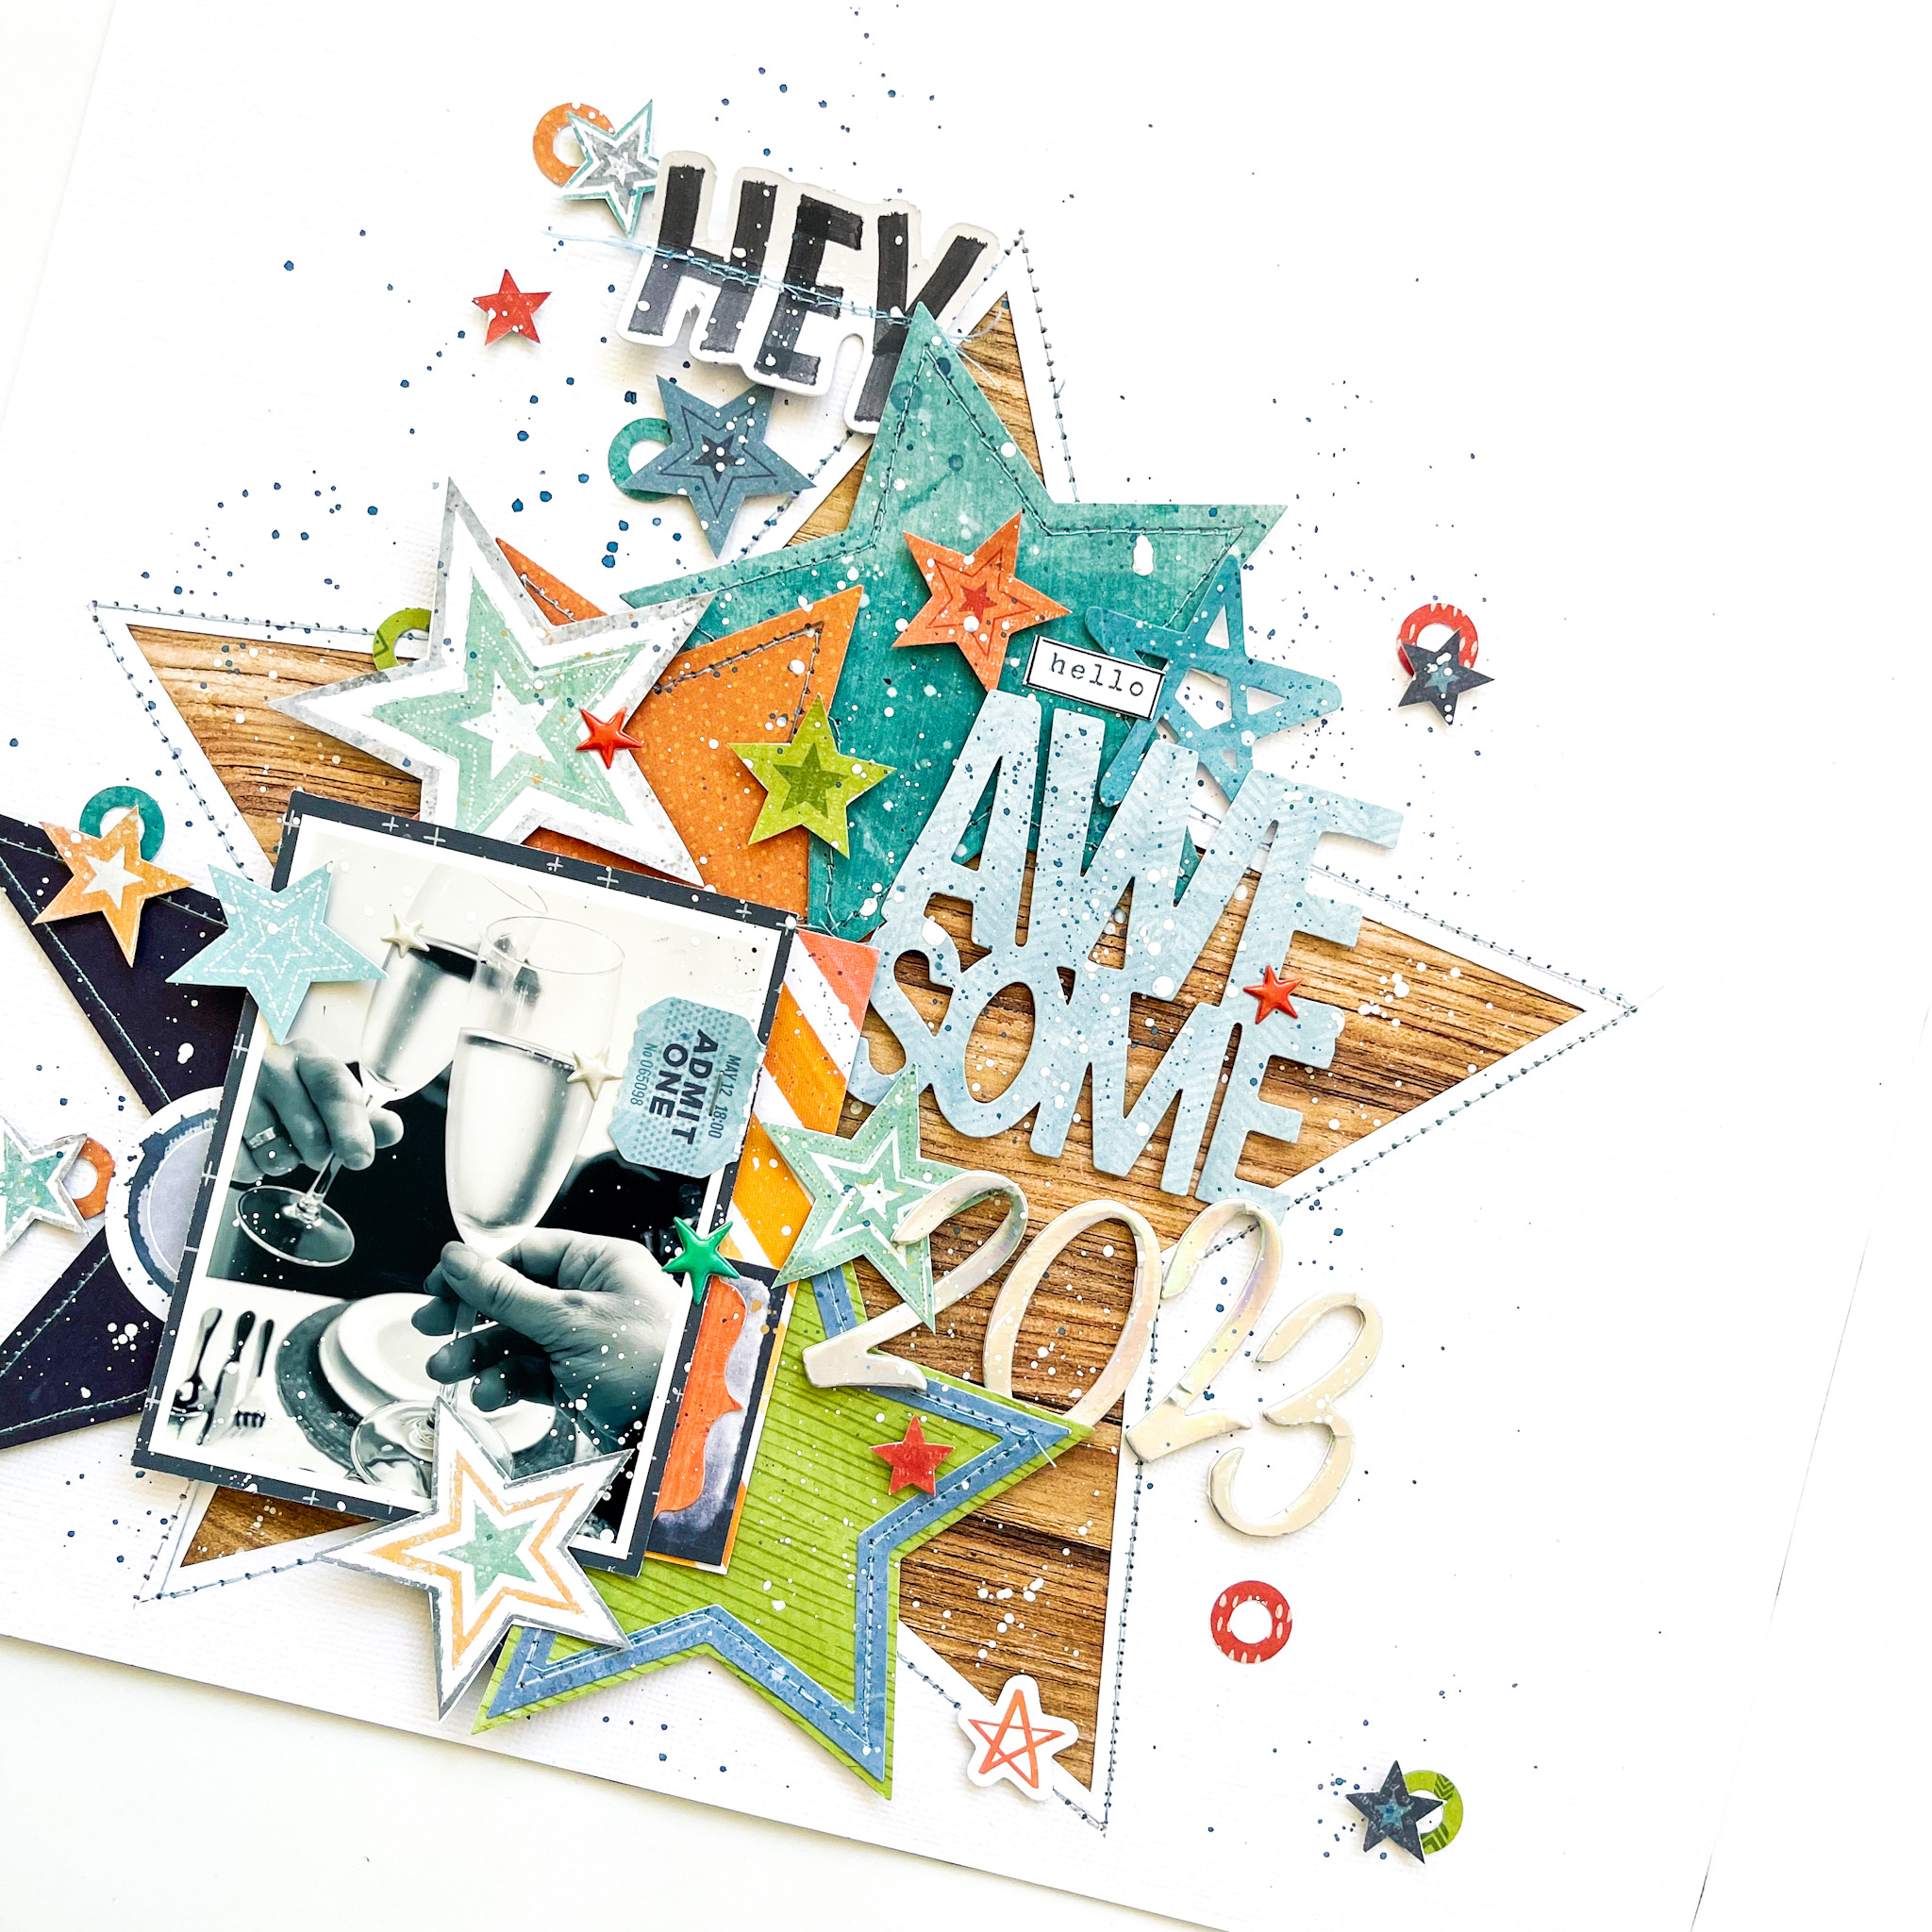
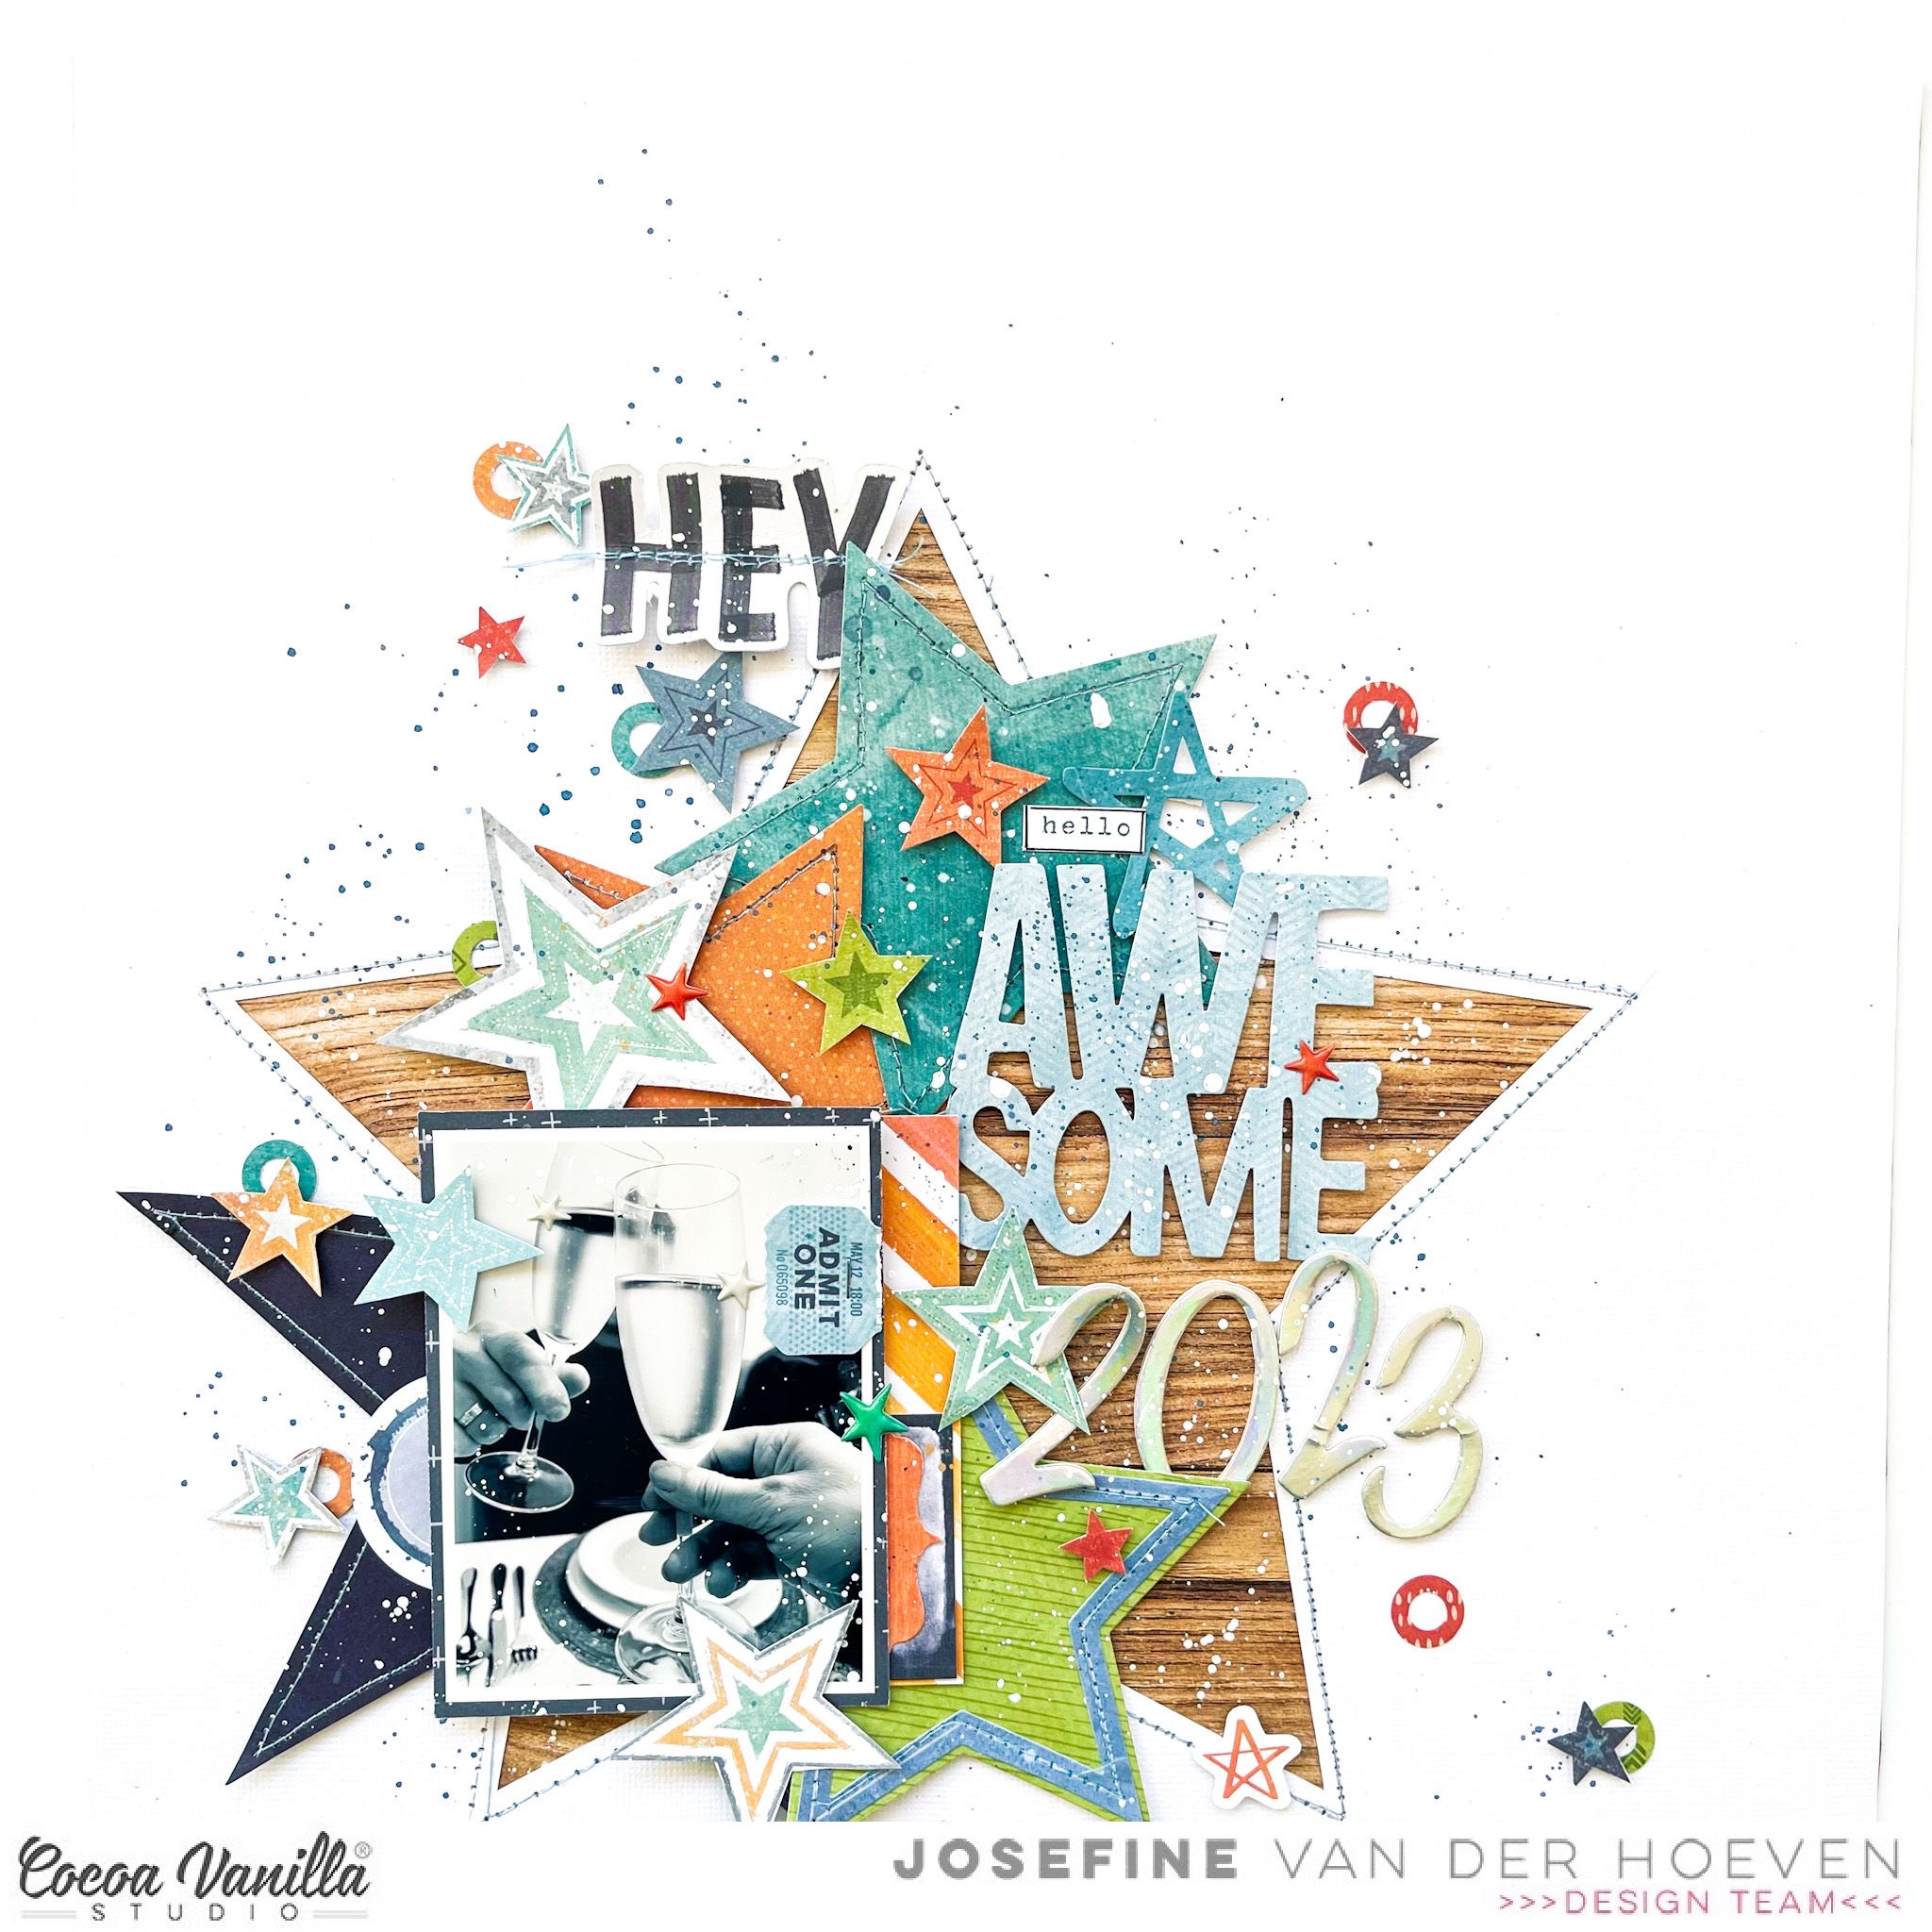
 One of my absolutely favorite collections is “No Limits” and I think this collection is perfect for a Happy New Year scrapbook layout.
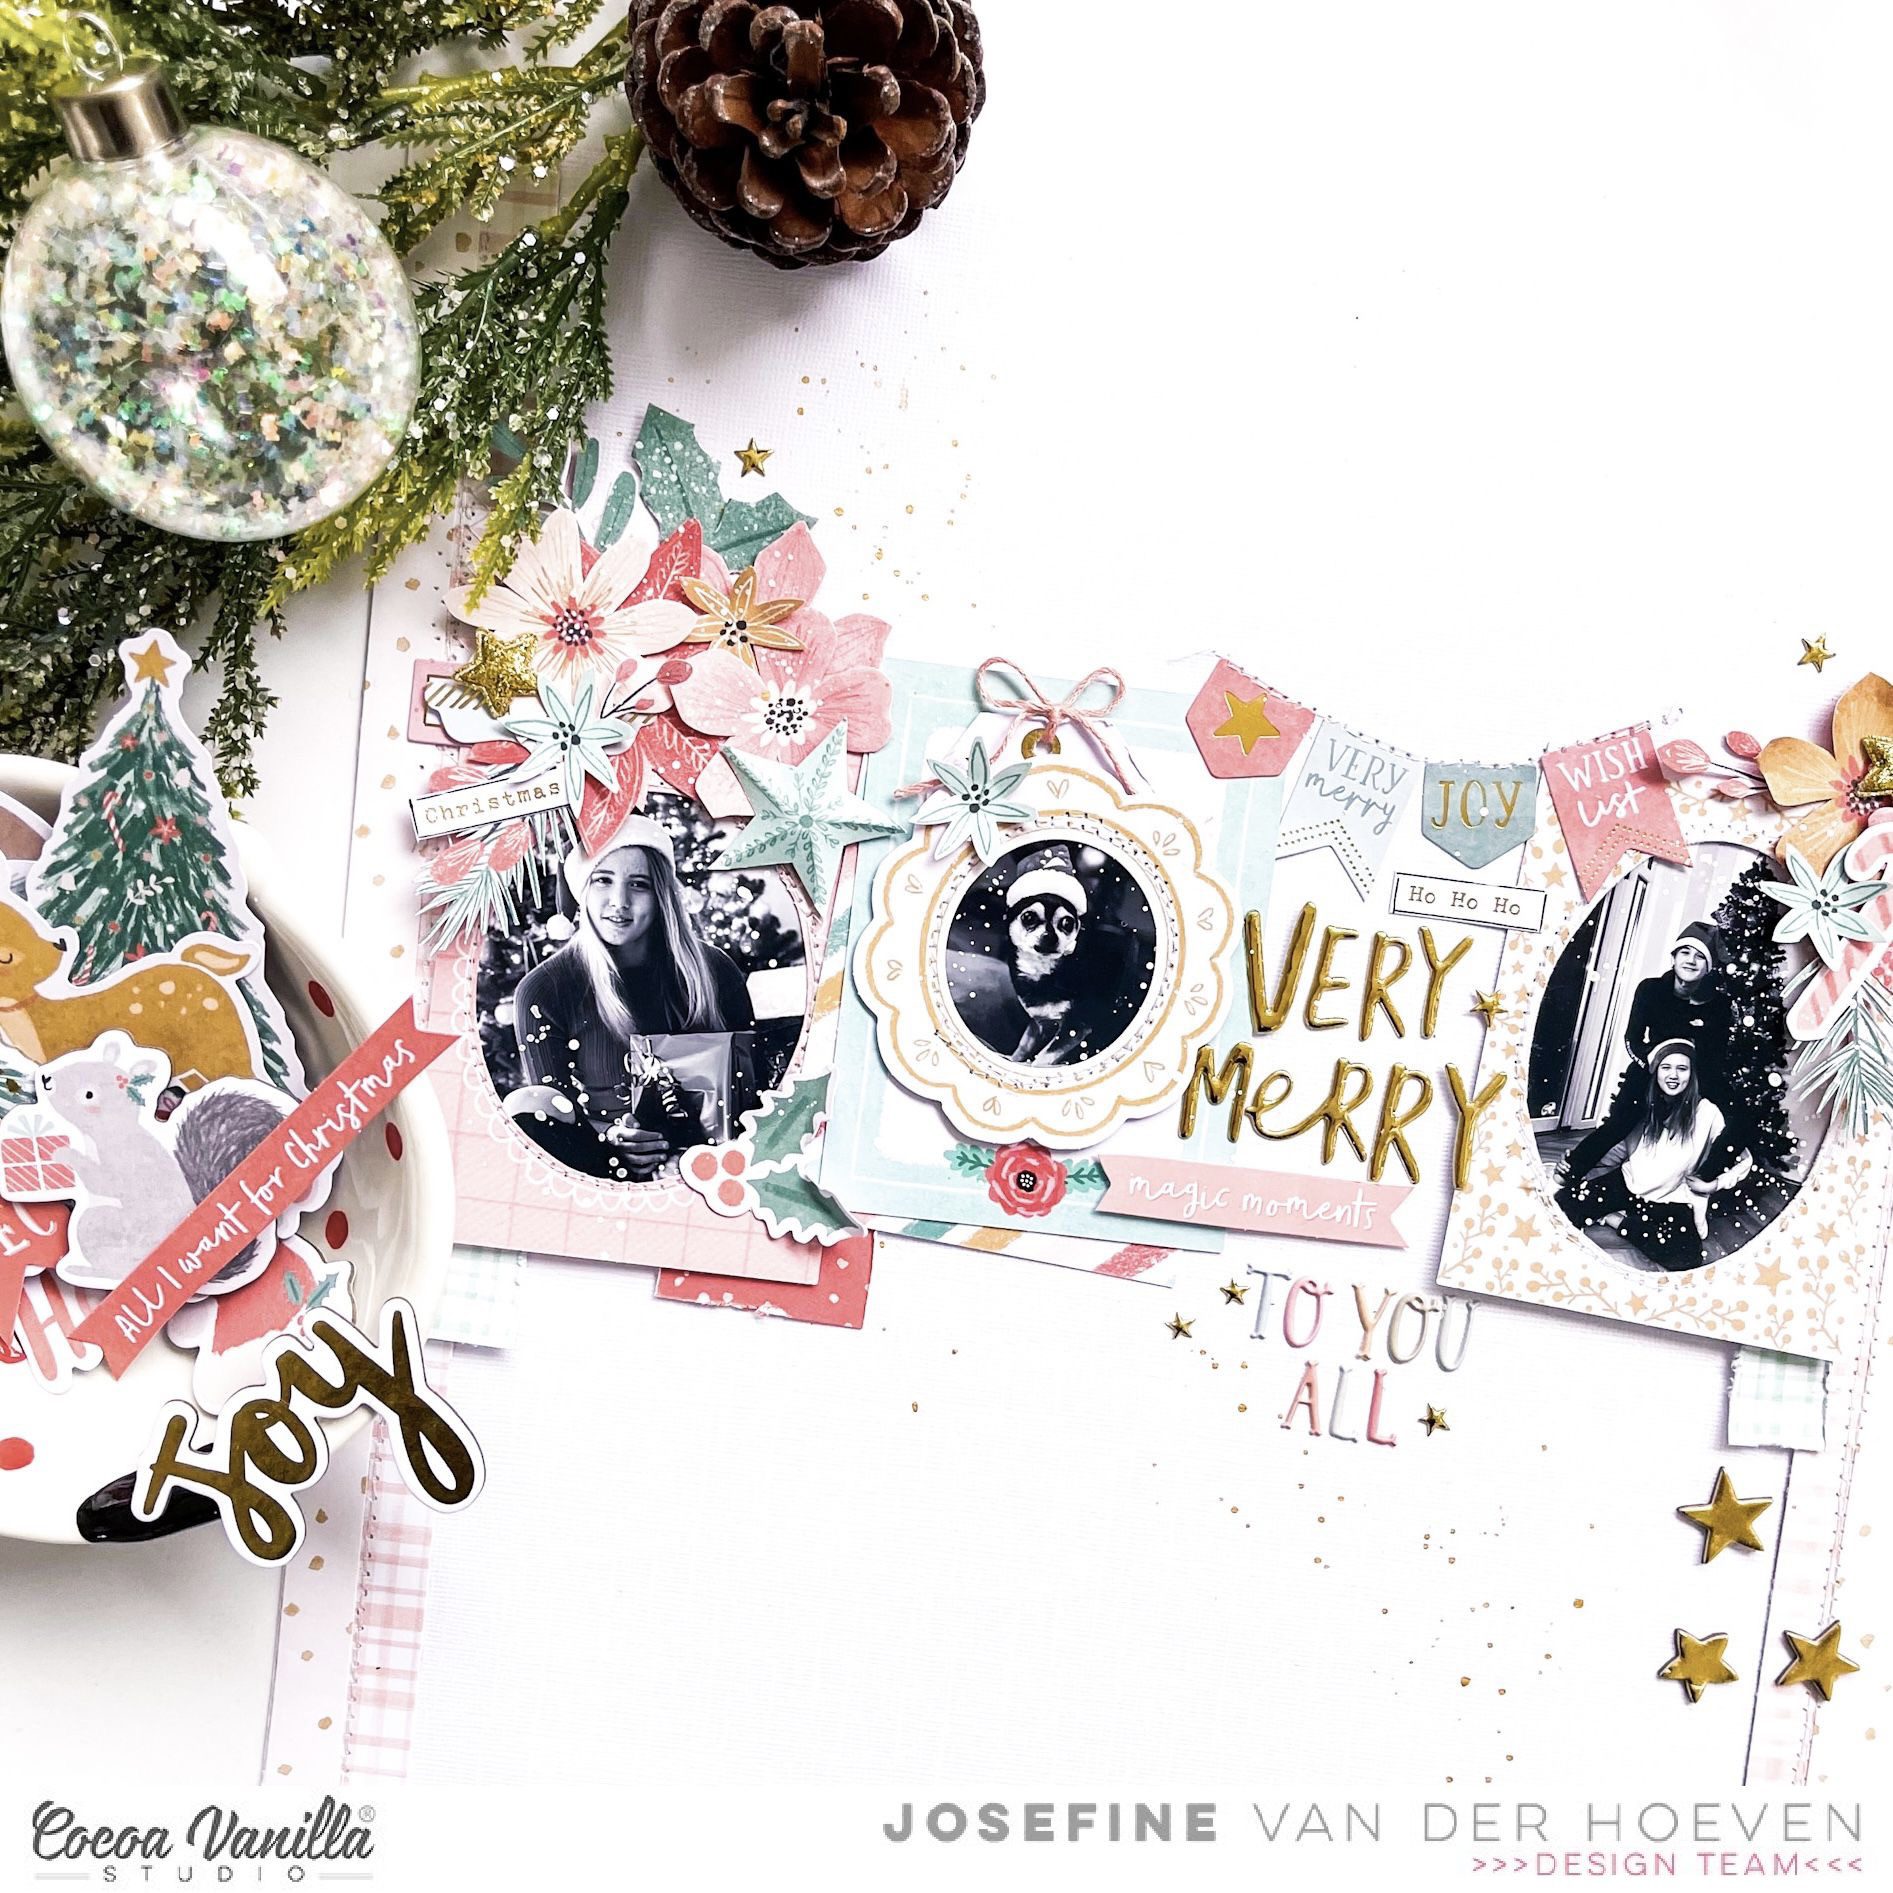

 I cut frames from the pocketpage cards and place the black and white photos behind them. I add white sewing thread to the edges of the frames. Behind the middle picture I place a tag with a pink bow made of embroidery thread. I place the four pocketpage cards playfully on my layout just as Michelle did on her layout.


 I took a 12×12 watercolor paper and choose three pink colors of distress oxide to work with. The colors I used are, picked raspberry, kitch flamingo and spun sugar. I placed an ink pad on my white background and make a horizontal line. I do this with all the three different ink pads. Then I take a medium watercolor brush and blend the colors with each other by using a little bit of water. I splash some more with the colors by using my watercolor brush and then let the background dry by air. By splashing with water on your distress oxide and dabbing it dry with a piece of kitchen paper you create a super cool watercolor effect.


 I fussy cut several stars from the pattern paper “Nebula” from the No Limits collection. I attached the stars with 3D tape. I like the way the stars. stand out a little from the background. I mix the white gesso with water and with a thin brush I make white gesso splatters on my layout. The little puffy stars are adorable and great to combine on this layout.


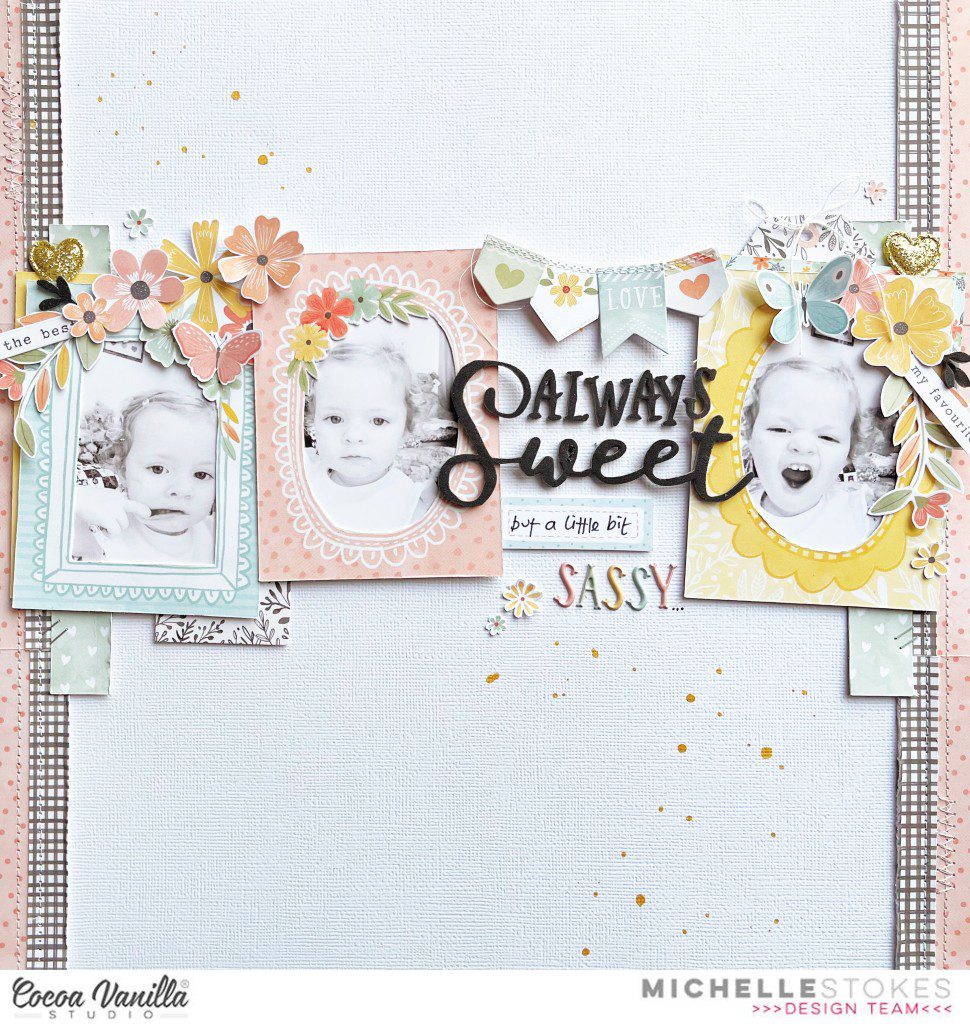
 For the title of this layout called “You’re Awesome & the best my Sweet Boy” I use the chipboard alphas set and an alphas set from my own stash. I really enjoy using different alphas sets for my scrapbook titles. It really gives a playful effect which I love.

 I hope I was able to inspire you today with this boys layout and I challenge you to also design a layout with the awesome chipboard die-cuts from Cocoa Vanilla! Can’t wait to admire your beautiful inspiration on social! I want to thank you for stopping by the blog today and wish you lots of fun! XoXo Jo.


 I grab a 12×12 white cardstock paper and choose the colors of Distress Oxide I want to use. The colors I chose are, antique linen, fossilized amber, worn lipstick and spiced marmalade. I start by blending the Distress Oxides and use my blending tools. I start with the color antique linen. Then fossilized amber, spiced marmalade and lastly worn lipstick. I gently blend the colors together and the soft tones in my background come more and more to life. I splash some more with the different colors of distress oxides. Now it’s time to decorate my layout with the awesome collection “These Days” and the cute picture of my son.
 I used different metal dies sets for the leaves and twigs. Some leaves I stitch with gold and white sewing thread. I like lots of little different details in my layouts. I select several die-cuts and along with the leaves and twigs I make clusters on both sides of the hexagons. I use the cute wooden buttons as additional decoration.

