Hi Cocoa Vanilla Studio fans! Danni here with another layout featuring the fabulous new No Limits collection.
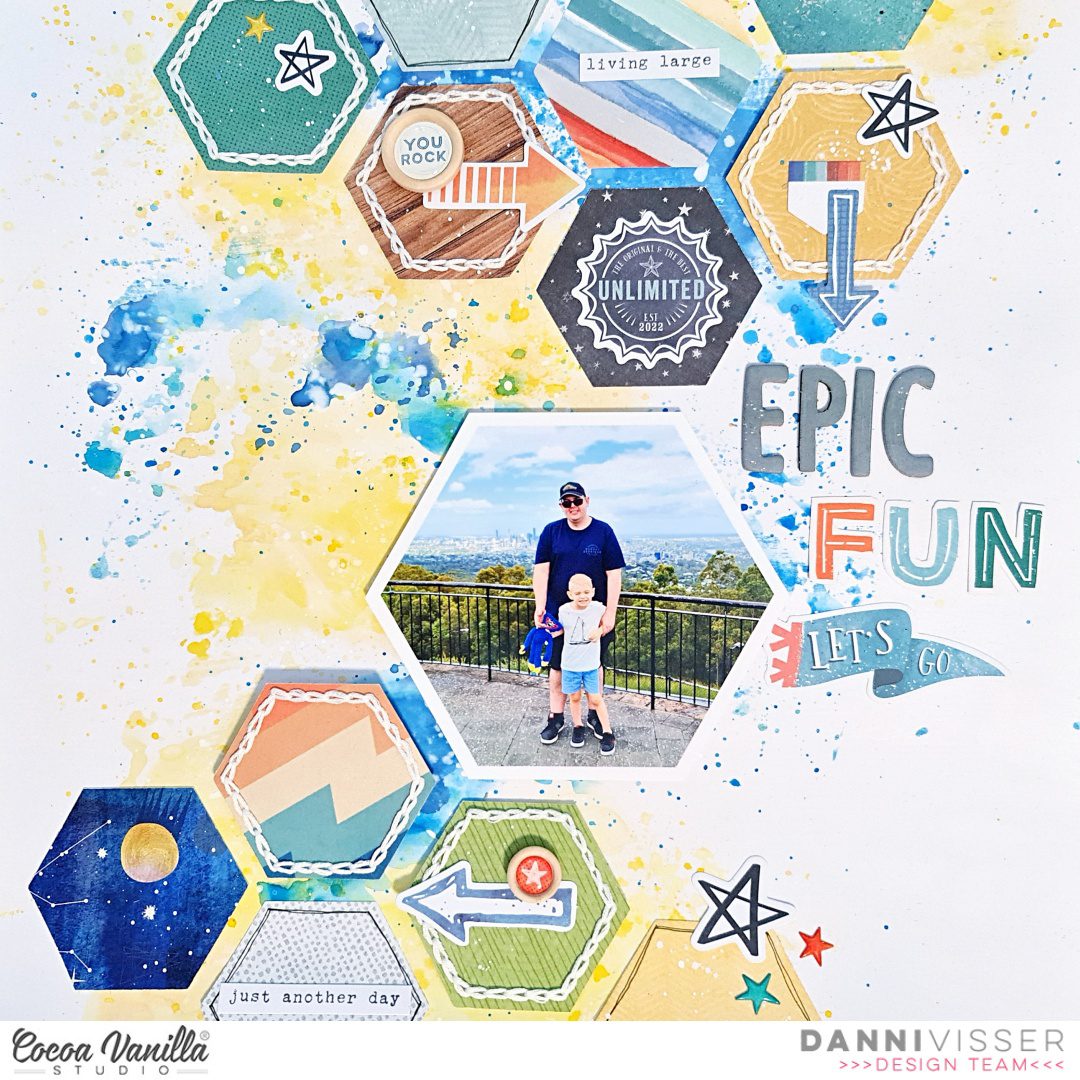
This time I chose to use the A5 paper stack and my hexagon punch to play with some geometric patterns. I punched out a handful of hexagons from my favourite papers.
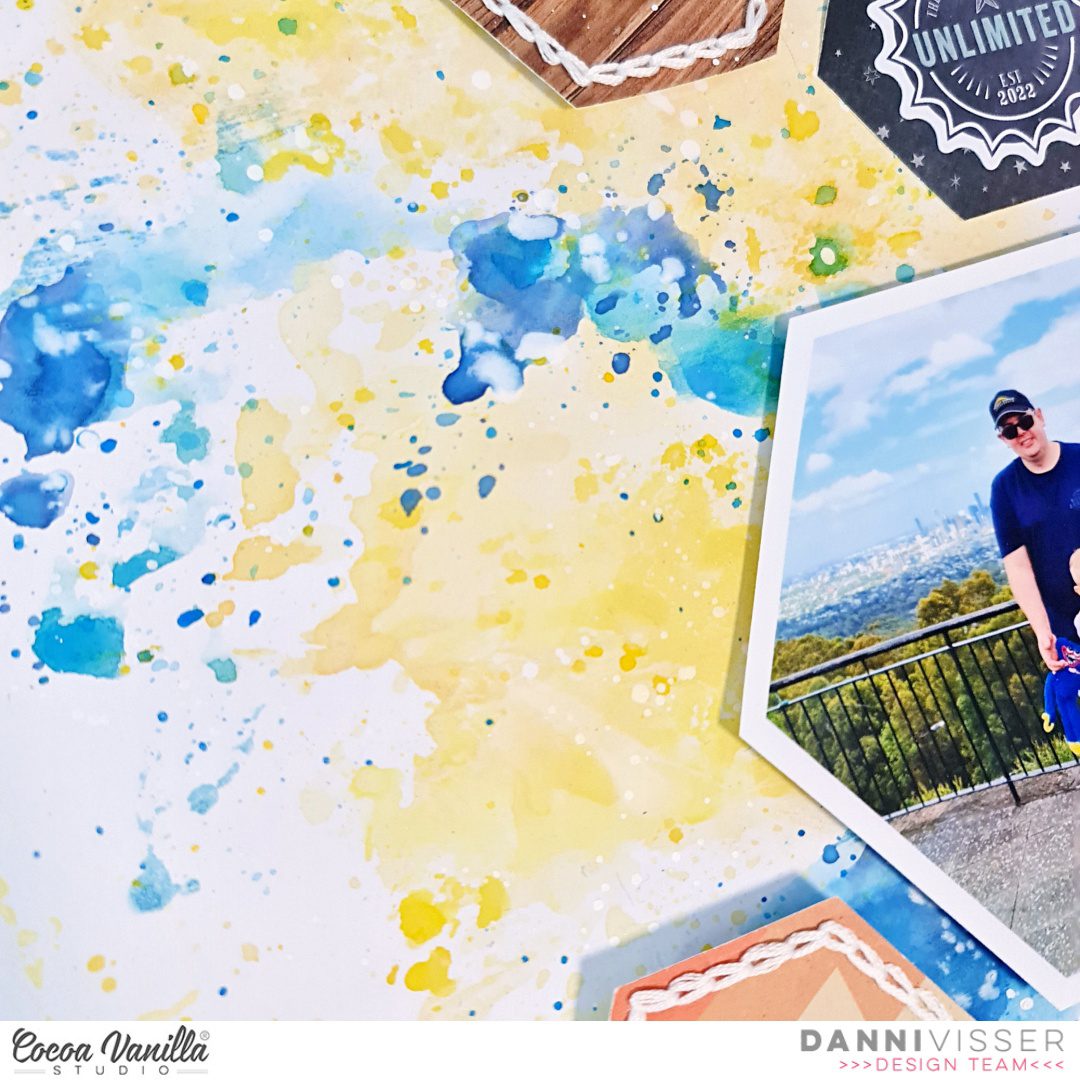
I started with white card stock as a base and added some clear gesso to prep the paper for some wet mixed media painting. Once that dried, I added some colour with some hybrid inks, watercolours and white acrylic ink.
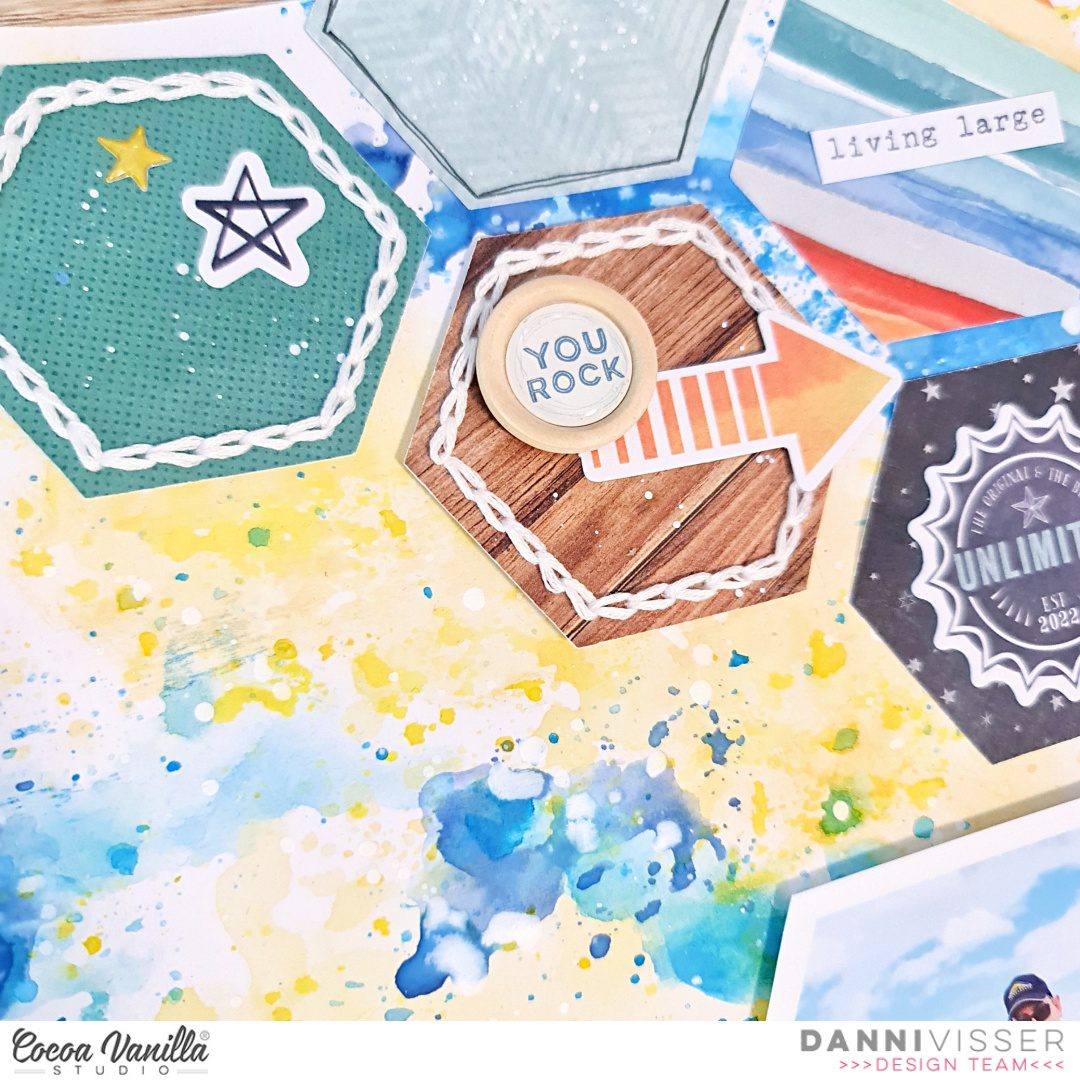
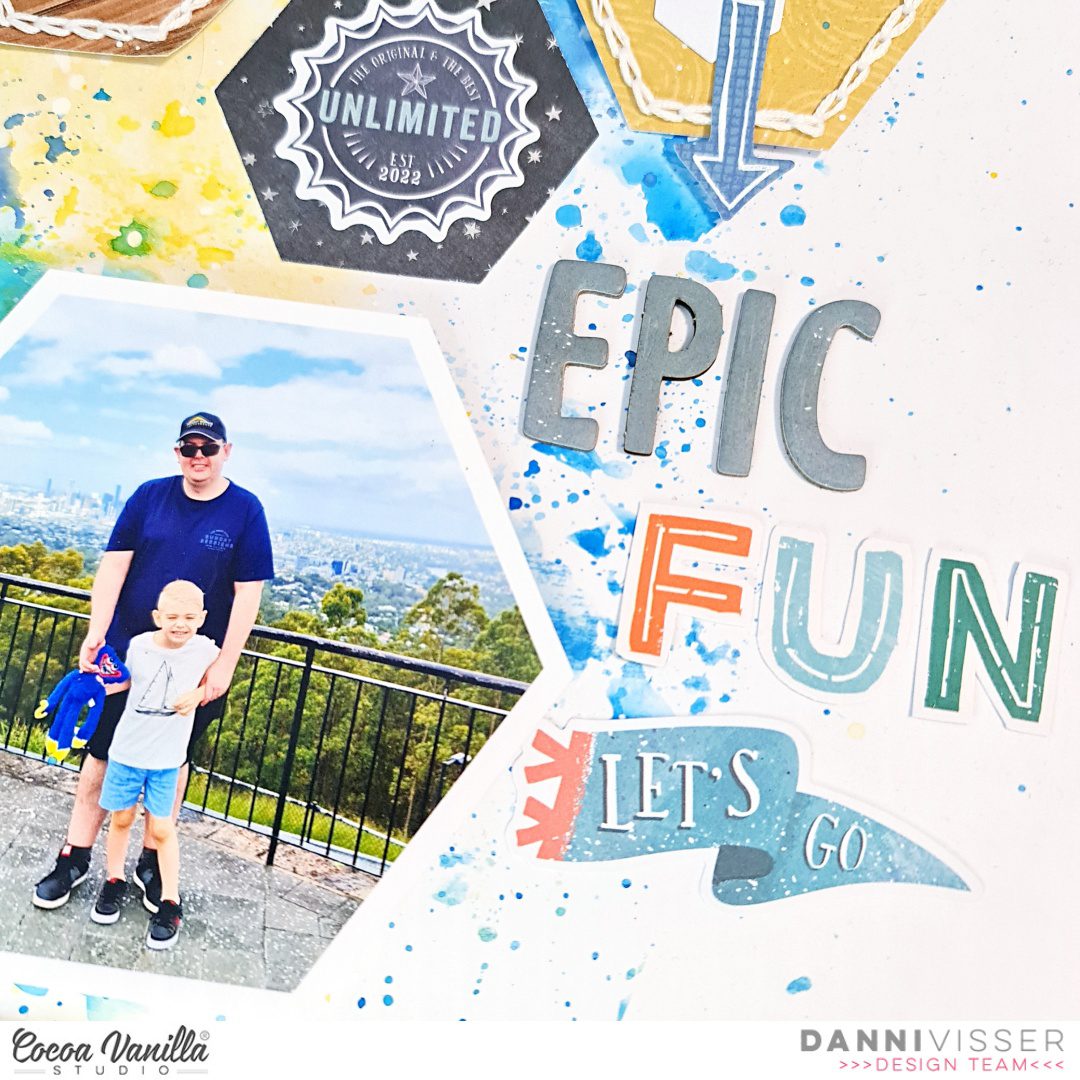
Next, I took my punched hexagons and added some extra detail with fineliner pens and some hand-stitched chain stitch around the edges. I arranged them at the top and bottom of the page. I printed my photo in a hexagon as well using photoshop. The photo went right in the centre of the page, popped up on dimensional foam.
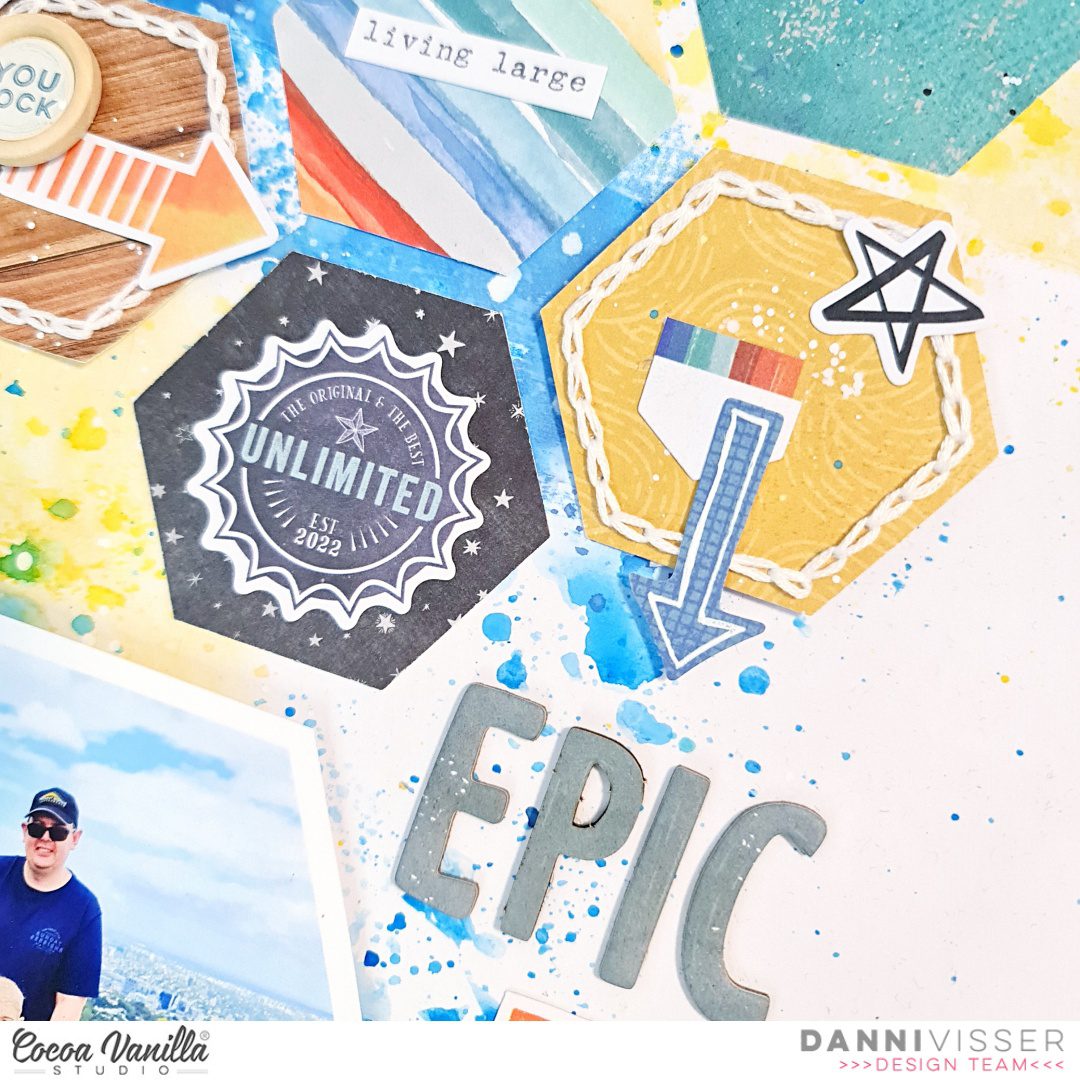
For my title I took the ‘Epic’ piece from the chipboard stickers, then finished it off by fussy cutting the word ‘Fun’ from one of the pocket cards. I love adapting these little cards for fun titles!
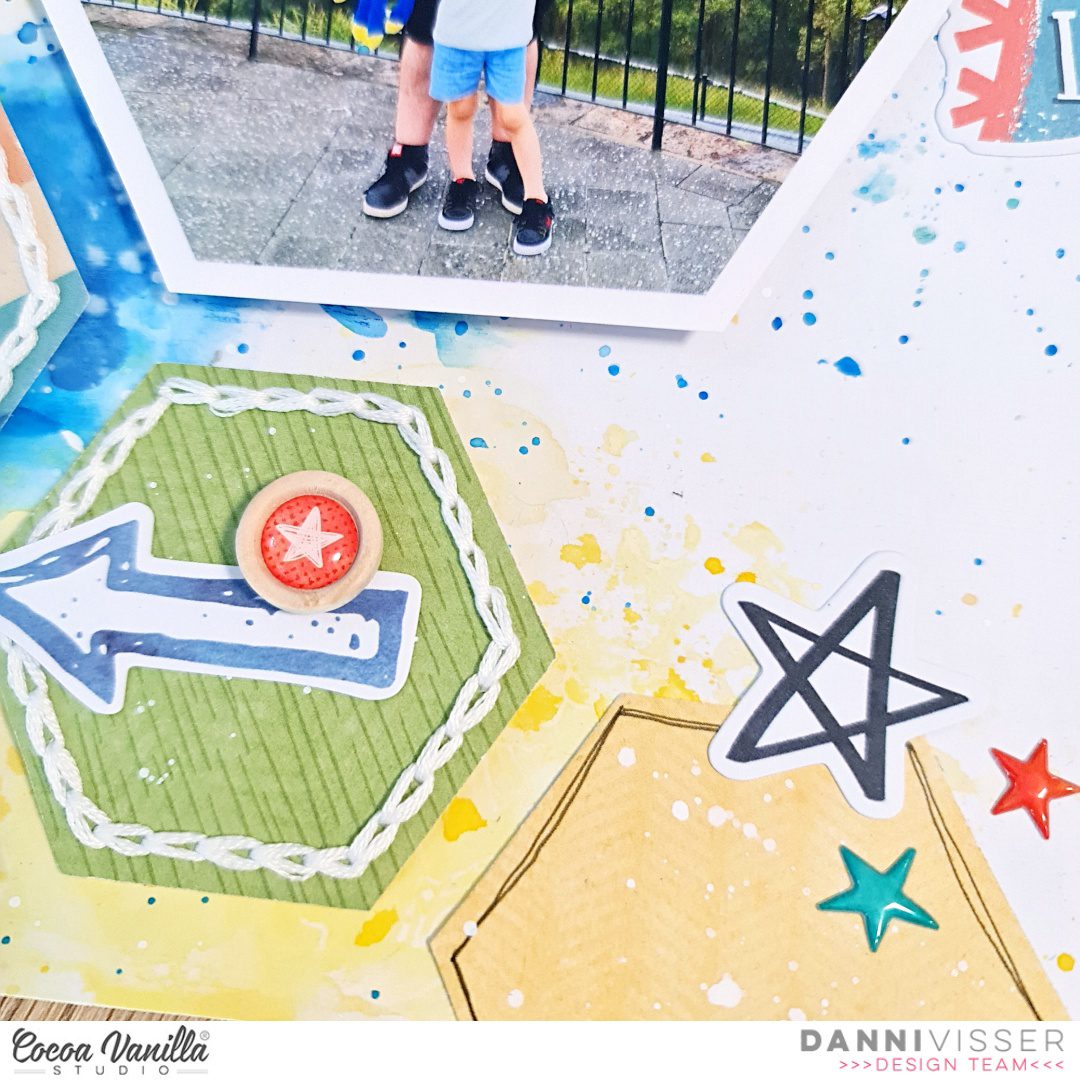
To embellish I took a handful of the die cut ephemera and sprinkled them around on top of the hexagons. I followed this with details from the wood buttons and the tiny puffy stickers, plus some tiny words from the accessory stickers.
I love how fun and colourful this one turned out to be! There is a process video linked below on the Cocoa Vanilla Studio YouTube channel if you would like to watch the layout come together. Happy scrapping!
Hello everyone! Today I have another layout made with brand new “No limits” collection. I once again reached out for the photo of my dog son and sent hit to the outer space. Idea for this page was maturing in my head since the day I got the collection. It’s filled with stars and fun cosmos related patterns so I though this kind of page is a “must do”. I didn’t have any specific picture so I had to improvise. This is the kind of page you make just for fun and to turn the idea into a project. Best part is everyone can recreate it becasue there are no special tools required like digital die cutting machine. I am a big fan of my Silhouette Cameo but I know not everyone has one and can be frustrated that some designes require this expensive equipment. That’s why I decided to make this page with handmade rocket. You can of course use cut file to recreate it but you don’t need to.
I cut every element of this page by hand with just a scissors and without any precise measuring and drawing skills. I started with printing my photo and cutting it into circle to establish the size of the rocket. Then I mixed several patterns from A5 Paper Stack and “Spark” paper to create a rocket. I was using one of the rockets from Die Cut Pack as a reference. It’s made out if basic geometrical figures cut by hand. They are not even, lines are wonky, but this is exactly what I was aiming at. After the rocket was finished I took my sewing machine and added some stitching of the edges for even more texture. You can replace them by fals stitches made with white gel pen.
I ended up cutting my dog out of the background and placing him in the round frame backed with piece of acetate creating a rocket window. I decided that the background in the photo was just too distracting. Word “epic” from Chipboard Stickers Pad became the name of the spaceship.
“Eclipse” paper is a perfect background for the outer space adventure! I places my rocket over it and added few wonky planets cut by hand here and there. Next step was to add title. It’s made with a set of Thickers in matching colors. My doggo is for sure out of this world! You can also add some other “space” related titles like “Take me to the moon”, “You are my moon, my sun and all of the stars” and probably few more. I finished my composition by adding few stars from Die Cut pack along and super cute puffy stars and planets from Puffy Stickers pack. Three wooden buttons add great texture. White splatters create make it all look even more like a space.
If you want to learn how this page was made, I recorded a process video for you!
I hope you will enjoy watching my Laika in the rocket.
That is all for today. Thank you so much for staying with me and see in again in two weeks!
Welcome and so happy to see you on the Cocoa Vanilla blog today! It’s Josefine here and I’m sharing a new layout with you today. I got to work with the amazing collection “No Limits. I am so surprised by this stunning boys collection. I really love the color combinations and the cool vibe!
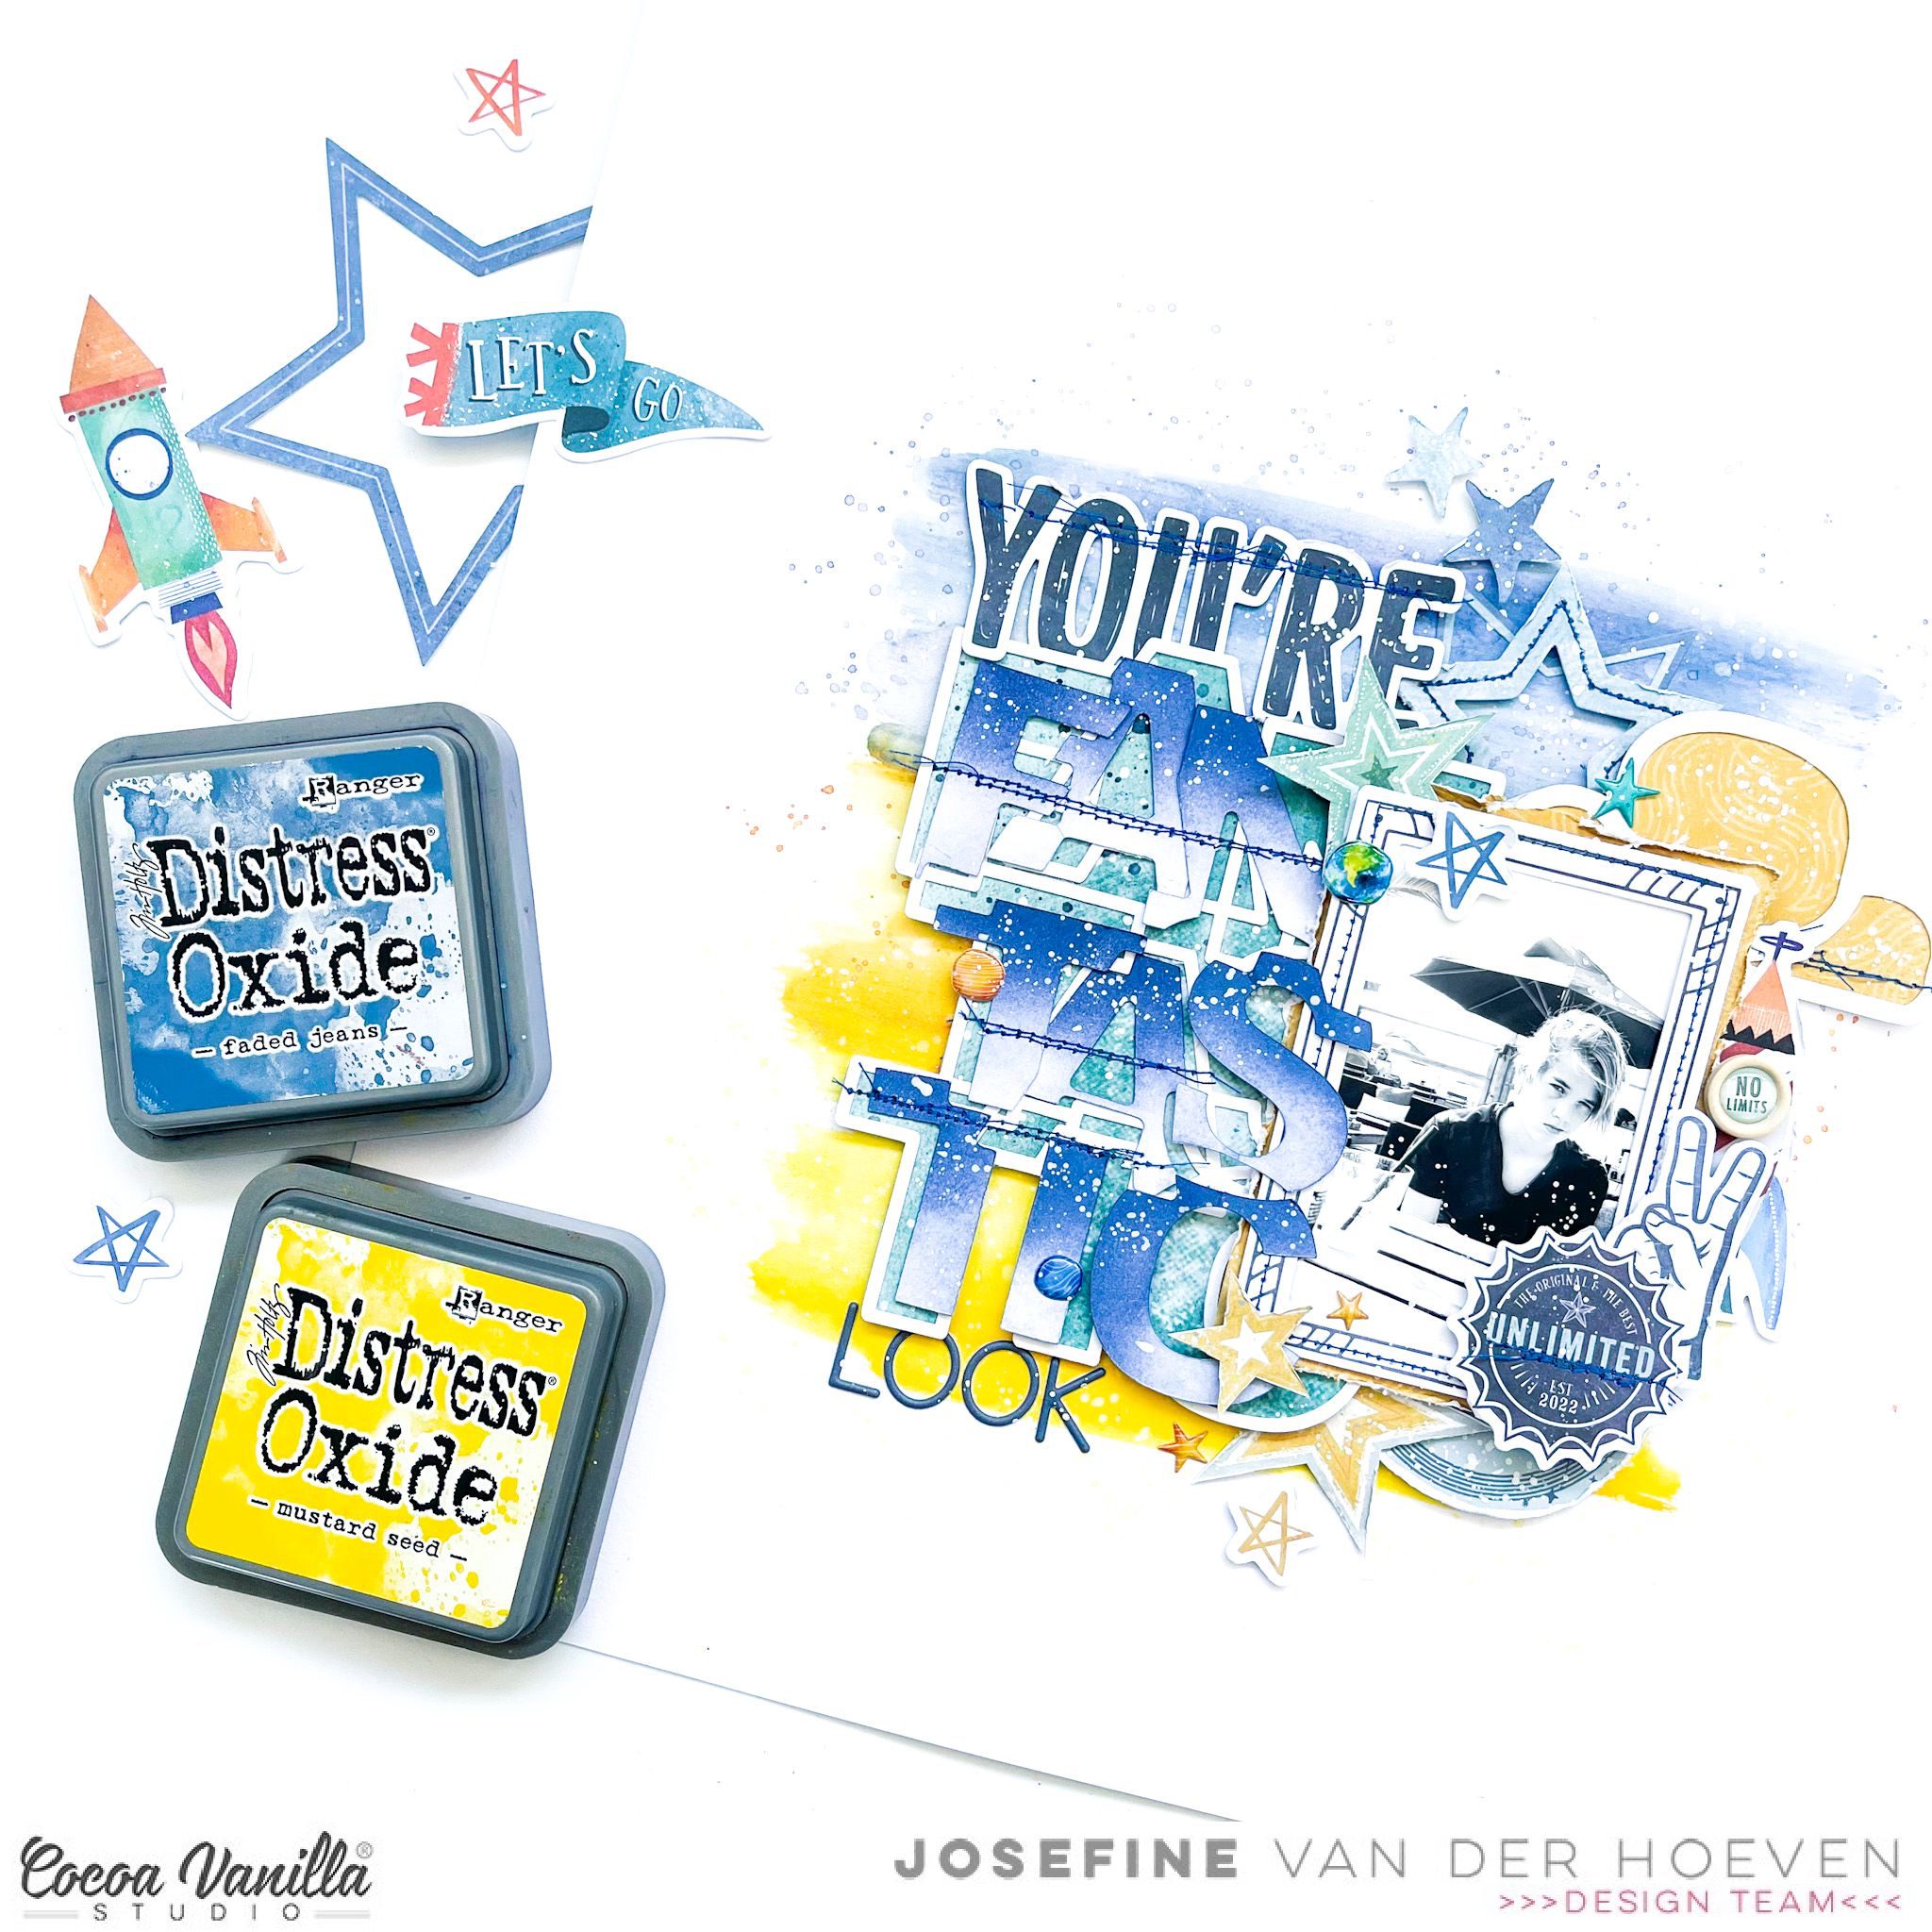
I grab a 12×12 watercolor paper and choose three colors of distress oxide. The colors I used are, faded jeans, mustard seed and spiced marmalade. I placed an ink pad on my white background and make a horizontal line. I do this with all three colors. Then I take a brush and blend the colors with each other. I splash some more with the colors and water and then let it dry by air. By splashing with water and then dabbing it dry with a piece of kitchen paper you create a cool water color effect.
I use a cutfile by Paige Evans called “Fantastic” as part of my title. I cut out the cutfile with my Cricut Maker and backed it with design paper. I color the alphas with the distress oxide “faded jeans” and then I stitch them with blue sewing thread on my cutfile. The stitch details give my layout more dimensions.
I use a cutfile by Paige Evans called “Fantastic” as part of my title. I cut out the cutfile with my Cricut Maker and backed it with design paper. I color the alphas with the distress oxide “faded jeans” and then I stitch them with blue sewing thread on my cutfile. The stitch details give my layout more dimensions.
I cut pattern paper to size and placed it behind the photo of my son with his cool looking face. On top of the photo, I placed a frame from the Die-cuts elements figures. I select some more figures and make a cluster on the right side of the photo. Some die-cuts I give a blue stitching details.
I cut a few more stars from the fabulous pattern paper and spread them around the layout. I use another second cutfile from Paige Evans “Clouds” and use one cloud I back it with pattern paper, stitch some details with the blue sewing thread and place it behind the picture. I placed a few more puffy stars and planets here and there and finally I give my layout some white splatter with white gesso.
I hope I was able to inspire you with this boys layout and give you some new ideas. Of course, I hope to see you back here on the blog next time with a new project! Can’t wait to see your beautiful projects on the Cocoa Vanilla FB groep! I wish you a very happy and crafty day friends!
Hello scrappy friends! It’s Kylie with you today and I am SO excited because I am sharing my very first layout created with the new ‘NO LIMITS” collection. I have always been a HUGE fan of all of Zoe’s boy themed collections and this one is of no exception! Love it. I was really inspired by the cute rocket ships in the ephemera pack which reminded me that I had a perfect photo I could scrap with this theme. A fun Rocket cut file by Cut To You was my centrepiece and I wanted to combine lots of colour.
The STARDUST paper was selected as my main background page and since I’m always obsessed with wood grain papers, I chose the BIG BANG paper to create a frame. This was done by cutting it down to 11″x 11″ and removing the centre with my trimming board, leaving a 1″ wide border.It was adhered centred on my page and I then added a 8″x 8″ square of LATITUDE paper.
The A5 paper stack is always my go-to when backing cut files. I prefer to use the smaller sheets rather than cut into my 12″x 12″ papers. Once I had backed my cute rocket, it was adhered to the background with foam adhesive squares.
I cut a 4.25″x 4.25″ photo mat from a piece of paper from the A5 paper stack. My photo was trimmed down to 4″x 4″ before being adhered over the photo mat and onto my layout. I was particularly drawn to the chipboard stickers for this page and added the ‘YOU’RE AWESOME’ sticker title below my photo as well as a few stars for balance. To finish my page I added some sub-quote phrases from the sticker sheet too.
Thanks so much for stopping by the blog today and seeing my first layout created with the ‘NO LIMITS’ collection. I hope you liked it!
It’s Tarrah back with you today to share my second layout using the awesome, new No Limits collection! I absolutely LOVE the dark papers in this collection, I love how the white cardstock cut file really pops against the dark paper.
The cut file I have used is from CUT to YOU, I cut it out of white cardstock and backed the ‘World’ word with one of the multi stripe rainbow papers from the A5 paper stack. The reason I picked the multi stripe rainbow paper was so there was some colours added amongst the white and the dark. Once the word was backed I added craft foam underneath the entire cut file and adhered it to the background paper. For the thin words, I did have to add super small pieces of craft foam so that it was not visible on the layout. It really helps to create a page when you add title cut files, it more or less helps determine where everything else can go on the layout.
The photo I am documenting is of myself and my family printed in black and white so that it matched the page perfectly. I layered one of the 3′ x 4′ journaling cards underneath and also one of the die-cut tags from the ephemera pack, I added some craft foam underneath the photo and placed it to the right of the ‘You Are My’ on the cut file. I added some twine in the hole at the top of the tag. At the bottom right corner, I created a small cluster of embellishments here to create a visual triangle with the other 2 clusters I also added to the page. This cluster consists of the circle journal spot die-cut, an arrow die-cut and a star die-cut. I also added one of the gorgeous wood epoxy buttons and a star puffy sticker too. I stamped the date stamp also. Up in the top right corner of my photo I placed a phrase Accessory sticker. I added a few more of the Accessory stickers around the page to help tell my story as well.
To the left of the word ‘World’ I created another embellishment cluster, this time placing a globe die-cut using foam tape, another star die-cut and a star puffy sticker too. Below the cut file, I also placed the ‘The Original + The Best’ die-cut piece and some more stars in both chipboard form and puffy sticker form. Above the cut file title I added the third cluster of embellishments that included some die-cuts, some chipboard and puffy sticker stars and a couple more phrase stickers from the Accessory Sticker sheet.
Above my photo I tucked in one of the large die-cut stars and added one of the chipboard stars in the centre. Once I have added all of the embellishments I think my page needs, I take a step back and give my page a look from a few different angles to make sure I am happy with it, this is when I might opt for another small embellishment in a particular spot or I think about what else my page may need. I usually do not go too over board though and in this case it was a matter of sprinkling some white mist to finish off.
Thank you so much for stopping by the Cocoa Vanilla Studio blog today! I hope you enjoyed my layout as much as I enjoyed creating it?!
Make sure you get your hands on this amazing collection for yourself to create with!
I used the beautiful DayDream collection for this sweet page of my dog Fiona sleeping like an angel!
I had the idea of creating mini envelopes with my Cutting Machine in different patterned papers from the 6×8 Paper Stack. I adhered small Velcro pieces to the second and third envelope so that they could open and close easily. I let the top one open and placed a tag with my journaling in it. I added a Puffy Heart on the other two.
My background paper is the gorgeous Over The Rainbow patterned paper.
I teared a big chunk of thick white cardstock for the center of the page and two strips of the Happy Place paper beneath it.
I mounted my photo on foam adhesive and created a beautiful floral cluster on the bottom of the photo and envelopes. The flowers are from the Die Cut Ephemera pack, and cut out of the Garden Variety paper.
I added a Flair Button and fussy cut butterflies from the All Aflutter paper.
A big hello to all of you!
It’s Lina here and today I am sharing my first post and layout with Cocoa Vanilla Studio! I am so happy to be back designing for them, it’s (almost) like I never left! I had the pleasure of working with the brand new No Limits collection to document a set of photos of my adorable nephew.
You can find the entire process video HERE
I thought it would be fun to get inky and add some watercolour in the background. I used the Universal patterned paper as my base and worked from there adding bright blue paint and then muted it in certain places with white paint to add dimension and movement. I felt like the page needed to be grounded a bit after the watercolour so I added the Latitude patterned paper to add balance. I really enjoyed the combination of the two patterned papers layered together and feel they worked well with each other.
As my title, I used a cut file and backed it with papers from the A5 Paper Stack. The A5 Paper Stack is absolutely perfect for paper piecing in this case as I did not have to cut into entire 12×12 sheets of patterned paper and could continue to hoard the pretties ;)
Next, I played to my hearts content with all the fun and fresh embellishments. I used a combination of the Chipboard Stickers, Accessory Stickers, and the Die Cut Ephemera. And, for good measure, the Wood Buttons. I always love to make a little nest of thread and in this case gold metallic thread, for the wood button to sit in.
Lastly, a loving sprinkling of metallic gold paint for good measure and the layout is complete!
I hope you enjoyed my layout (and process video) today! I’m happy to be back on the Design Team and am excited to get started on the next layouts with this new No Limits collection. It’s surely a fantastic collection to have in a papercrafter’s repetoire.
Thanks a bunch for stopping by today!
xoLina
Hi Cocoa Vanilla Studio fans! Danni here sharing my first layout using the incredible new No Limits collection! How excited are we all about this amazing new papercrafting goodies? I couldn’t wait to get stuck in to creating with them.
I was drawn immediately to the solar system inspired pattern on Orbit 12×12 patterned paper and thought it would be perfect for this photo of my son at the playground. I started by using a combination of rhinestones and dimensional paint drops to enhance the pattern already on the paper. I also decided to add a ring of French knots using embroidery thread for extra texture.
I trimmed my photo to fit within the centre of the pattern, then adhered it using dimensional foam for added height. I used some of the star shapes from the die cut ephemera to embellish around my photo.
To embellish around my page I used the little stars and planets already printed on the Orbit 12×12 patterned paper, simply placing my embellishments over the top. This kept the amazing original design while adding height and extra visual interest with varied textures. I used some of the stars and planet shapes from the chipboard stickers as well as the gorgeously glossy puffy stickers.
I just had to use some of the adorable wood epoxy buttons, so I placed three of the tiny ones amongst my little star clusters. So cute!
For my title I used the die cut titles to spell out Cool Kid, then cut the individual letters apart so I could curve them around the top of my photo. I love how customizable these titles are!
To finish the layout off I added the date in grey ink, using my roller date stamp onto a circular label from the accessory stickers. I added this near the bottom of the layout into one of my little clusters. I love how this turned out! Working with the pattern of the paper really made for an effective background. I hope you like it too! There is a process video linked below on the Cocoa Vanilla Studio YouTube channel if you would like to watch the layout come together. Happy scrapping!
Hello everyone. Quess what? Post did excellent job this time and I already got a box filled with fantastic and brand new “No limits” collection. And this means I can share with you my first page made with this line. You all know I am a mom of two girls so I prefer more feminine designs but this collection is so much more than regular boy line. Starting with colorful and super fun patterns that are very versatile, through amazing sorf of embellishments (I am still gazing upon new puffy stickers!), ending with stars and rockets! Who doesn’t like rockets? My beagle puppy will for sure be a main star of layouts made with “No limits”. My first page is also about him! I need to start with explanation what sort of trouble maker he is. If something is left on the ground – it’s his. If it’s made of paper – it’s his. If it’s food – it’s his. If he is not allowed to take it – he doesn’t care. He especially loves tearing apart cardboard boxes and this is something I allow him to do, to make him busy for a while. And where you can find most boxes in our house? In my scraproom of course (all of them from my DT parcels of course – this is the official version). So my scraproom’s floor is usually covered with pieces of cardboard and looks like is was hit by tornado.
As always with new collections I had hard time deciding which papers to use first. I decided to combine blue side of “Stardust” pattern with part of super fun “Orbit” paper. I cut out part of it creating a circle. Center part of it was a perfect spot for my photos.
To make my pictures pop, I backed them with pieces of orange “Spark” paper and mustard yellow “Latitude”. Next step was to add a lot of machine stitching bot on the white part and blue part. I used white thread so it’s not that visible but it adds nice texture. Some of the stitching is highlighted with white pen too.
If you wonder where the alphabet I used comes from as it wasn’t one included into this line, I will tell you my secret! I cut out the letters from Title die cuts! I never use them up to the very last as there are so many of words in each pack, so I decided to cut them into single letters. This way I got a font with a perfect style and color, matching the papers perfectly.
I finished my composition adding few elements from Die cut ephemera pack and some stickerd from Cardboard stickers sheet. Did I mentioned how much I love them? Final step was to scatter around some super cute stars and planets from Puffy stickers pack and three Wooden epoxy buttons. This is how Filut became Master of disaster! He is lucky he is so cute so it’s easy to forgive him.
That it all for today but be prepared for more “No limits” projects in near future! I have plenty of ideas, not only for pages!
Thank you so much for stepping by and see you in two weeks!
Hey y’all! Laura Alberts here with a bold background for this layout using the gorgeous Sunkissed collection and a fabulous cut file from Liz Longest Designs. Just like I prepare all of the new collections, I fussy cut a full page of these absolutely stunning florals from the Growing Wild patterned paper. Using the beautiful greens from the Good Vibrations patterned paper to back this cut file, I added a bit more color to this already bright and lovely background. Layering those fussy cut florals on top of the these cut file leaves was such a fun and easy way to tone down the vibrancy of the background.
I created several embellishment clusters on this background with a special surprise hidden inside, rainbows! While normally, rainbows aren’t the first icon I think to include in my floral clusters, on this page, it felt perfect! These sweet little rainbows blended in perfectly with the colour scheme! I fussy cut these rainbows from the Fun In The Sun cut apart sheet and just added them in with my ephemera. I even added little flourishes left over on the glitter titles around the clusters for a special detail.
My favourite part is adding these tiny details though! I created tiny clusters with ephemera hearts and puffy heart stickers as well as adding wood epoxy buttons to some of the my larger floral clusters. These scattering bits give so much interest to my clusters and a bit of texture too. I love when my layouts have more than paper elements on them, so these additions really stand out!
I hope that my bold and beautiful layout inspires you to reach for these colourful patterned papers and use them in a new way. If you’d like to see how this layout came together, watch the process video below!
 Hey crafty Paperlovers,
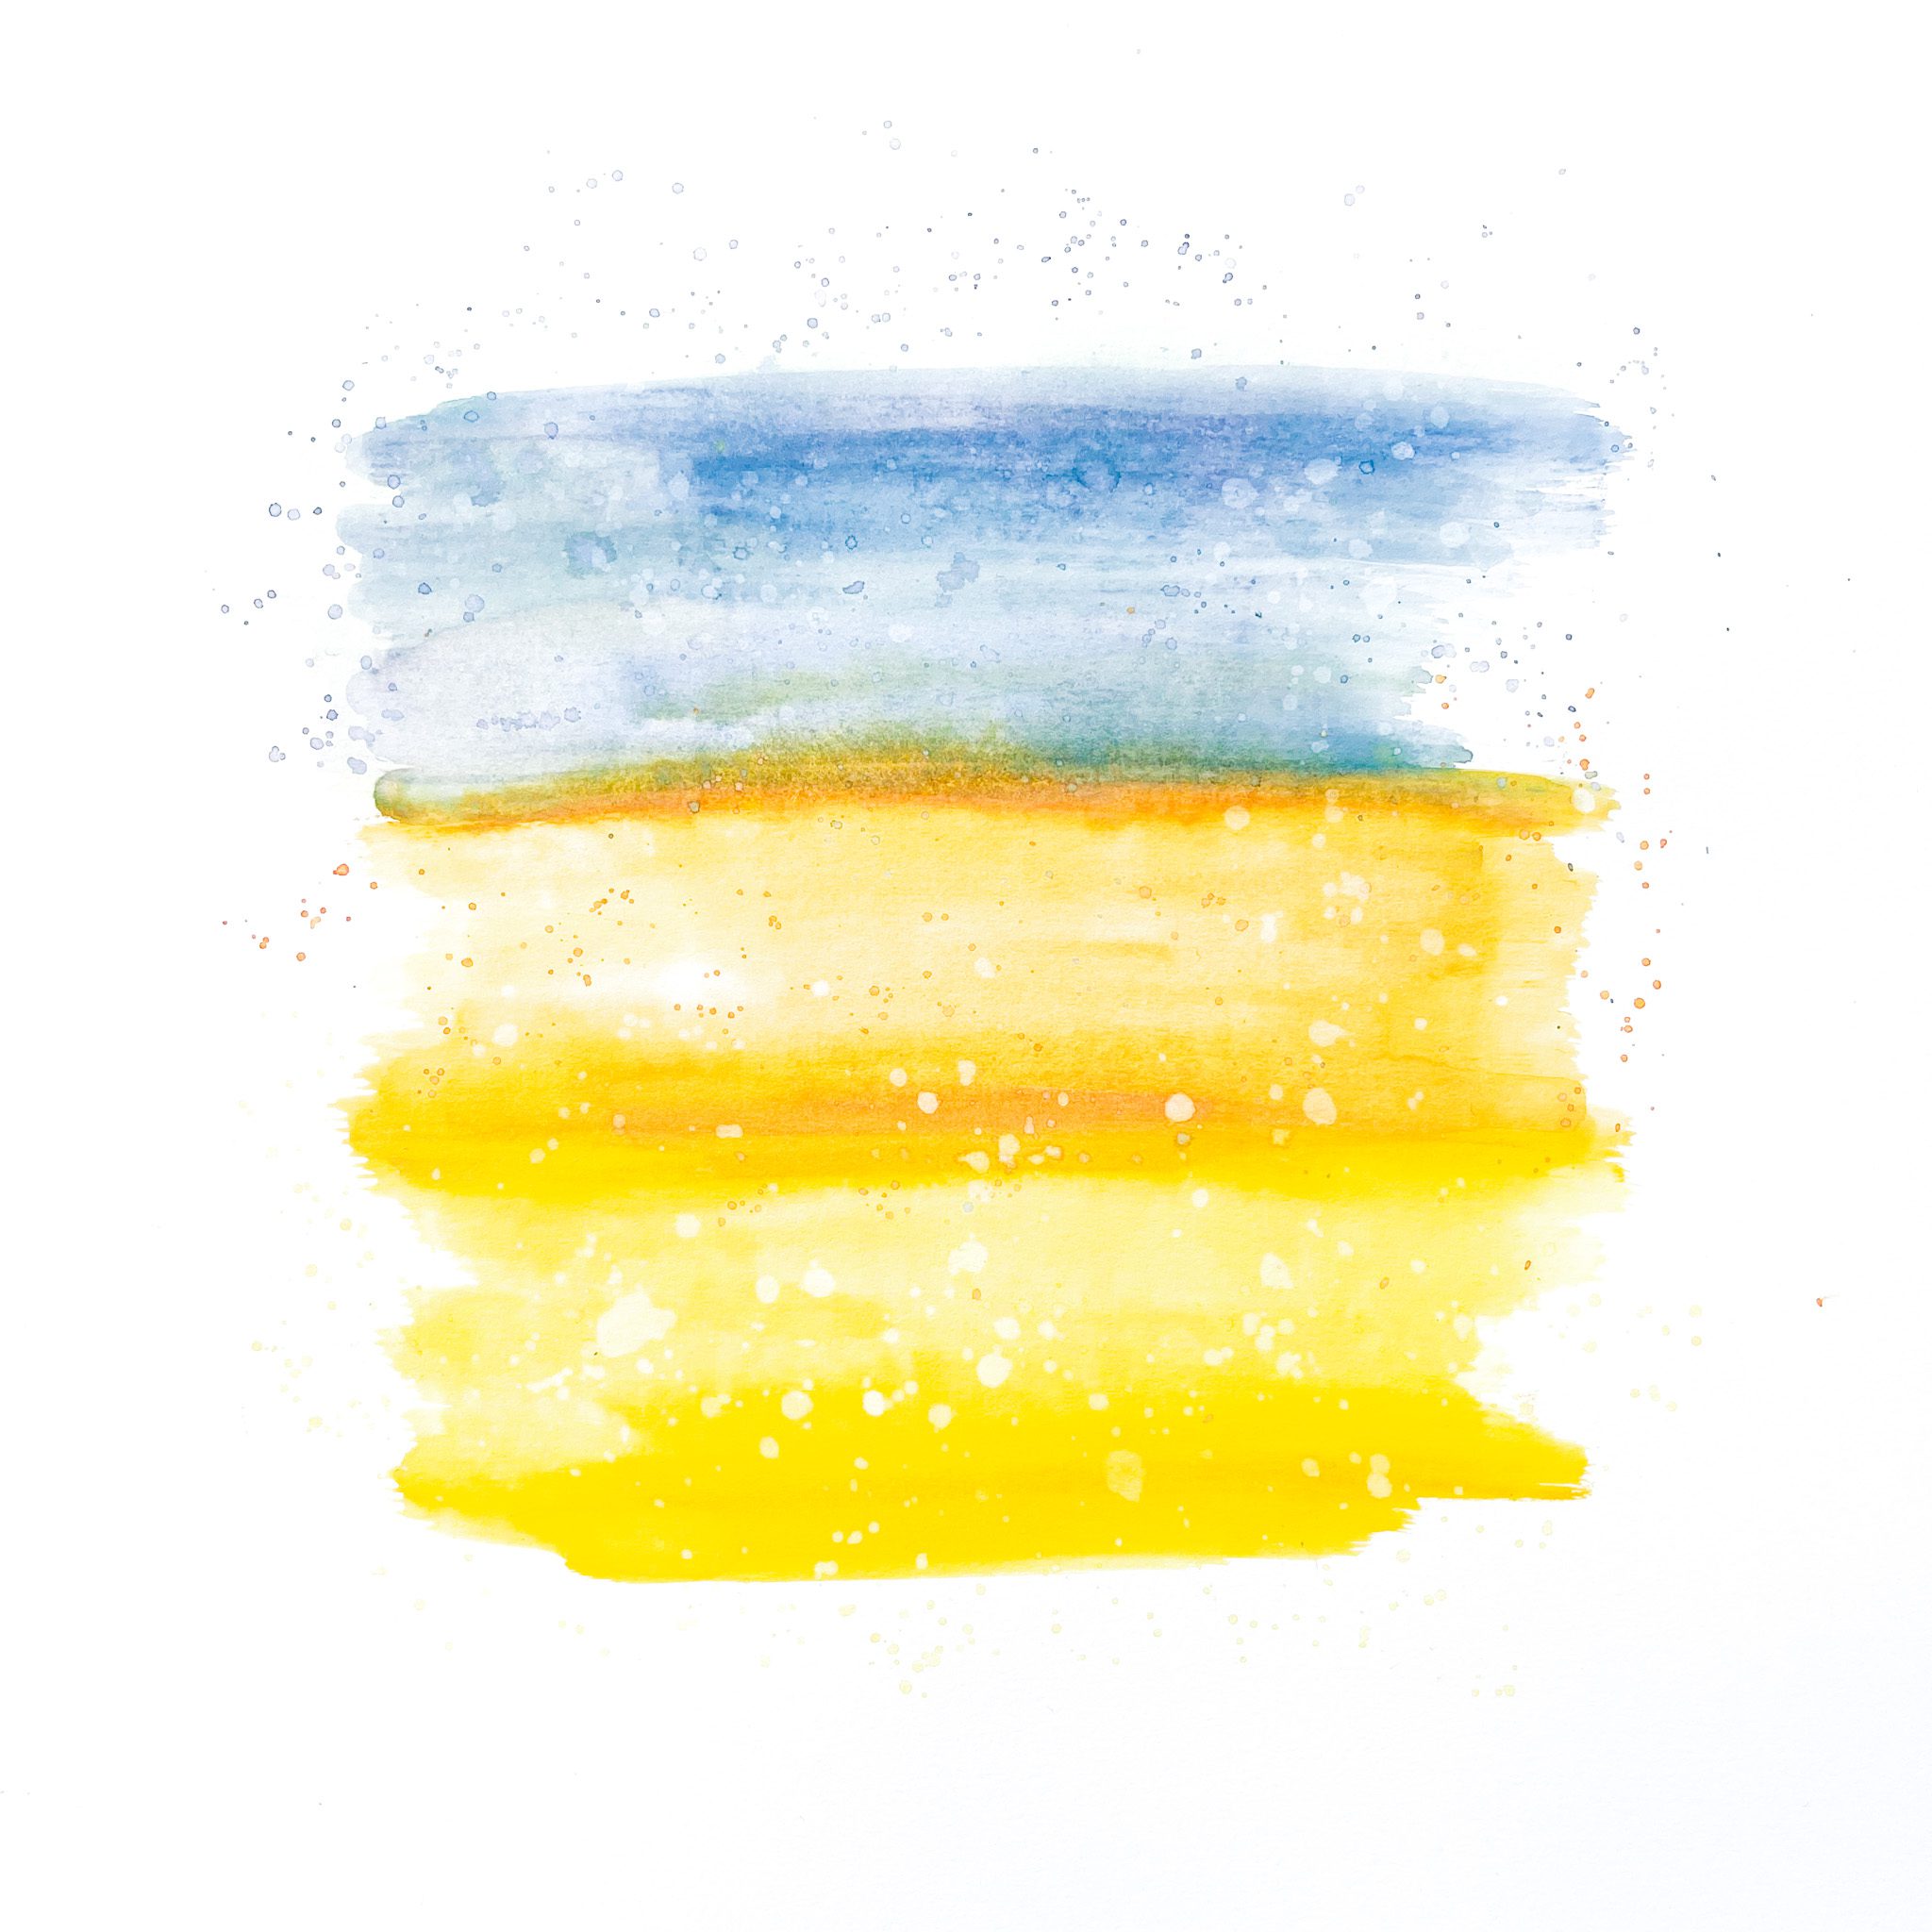
 I use a cutfile by Paige Evans called “Fantastic” as part of my title. I cut out the cutfile with my Cricut Maker and backed it with design paper. I color the alphas with the distress oxide “faded jeans” and then I stitch them with blue sewing thread on my cutfile. The stitch details give my layout more dimensions.
 I cut a few more stars from the fabulous pattern paper and spread them around the layout. I use another second cutfile from Paige Evans “Clouds” and use one cloud I back it with pattern paper, stitch some details with the blue sewing thread and place it behind the picture. I placed a few more puffy stars and planets here and there and finally I give my layout some white splatter with white gesso.


