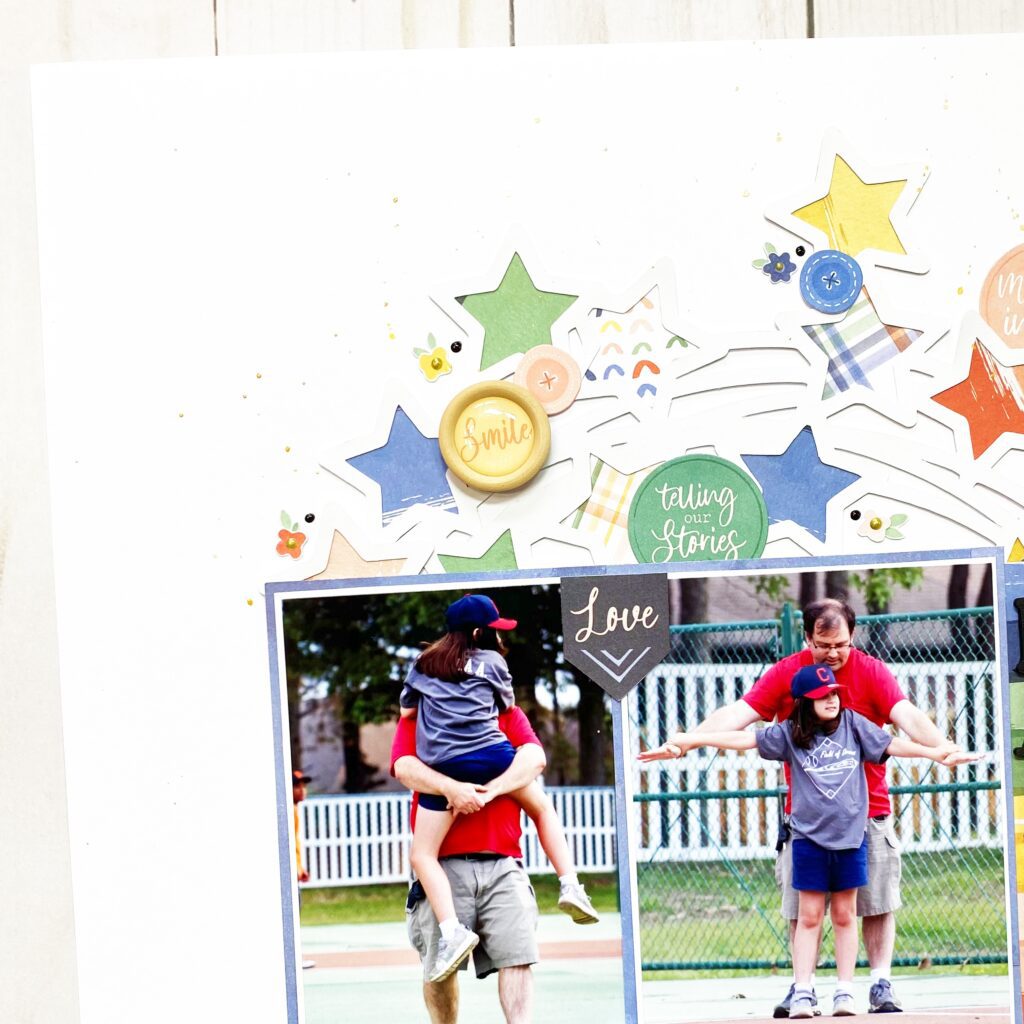
Hey y’all! Laura Alberts back again with another t-ball layout featuring my daughter and my husband. The colors in her uniform were just perfect for the Storyteller collection and I loved the idea of taking a very different spin on my last layout. In this one, I still used a small section of that Paige Taylor Evans star wreath cut file, but this time layered it in the background at the top of the page. Backing it with papers from the A5 paper stack for a splash of fun colors, this cut file really pops!
To give the appearance of dimension, I layered icon ephemera buttons on top and larger circle pieces underneath of the the cut file. These darling little flowers that I fussy cut from the Fly Away patterned paper are the perfect details to add around my clusters. With epoxy wood buttons for a decidedly non-paper addition, the clusters have texture too!
Adding in a cut apart piece and word phrases to match those details on the first half of this spread, I squeezed in so many words that truly capture the feeling of this moment. I kept my title small on this one, using the foam word “Happy” to keep it simple. Finishing it off with a frame to house my journaling and a camera from the icon ephemera, this layout is complete!
I hope this layout inspires you to scrap a wide variety of photos with this beautiful collection! If you’d like to see how “Happy” came together, check out the process video below.
Hello Cocoa Vanilla fans! It’s Kylie back with you today with another layout to share! My assignment for today was to create a layout using this months mood board as inspiration. In case you haven’t seen the mood board as yet, here is a little sneak peep-
I love that it has a ‘Boho’ vibe and I was instantly drawn to the floral elements and the lace doilies. The new ‘Storyteller’ collection was the perfect colour palette and these were all the elements that I based my layout around today.
(Don’t forget you can create a layout using the mood board as your inspiration and upload it to the monthly album in the Cocoa Vanilla Community FB group for a chance to win a $25 online CVS store voucher!)
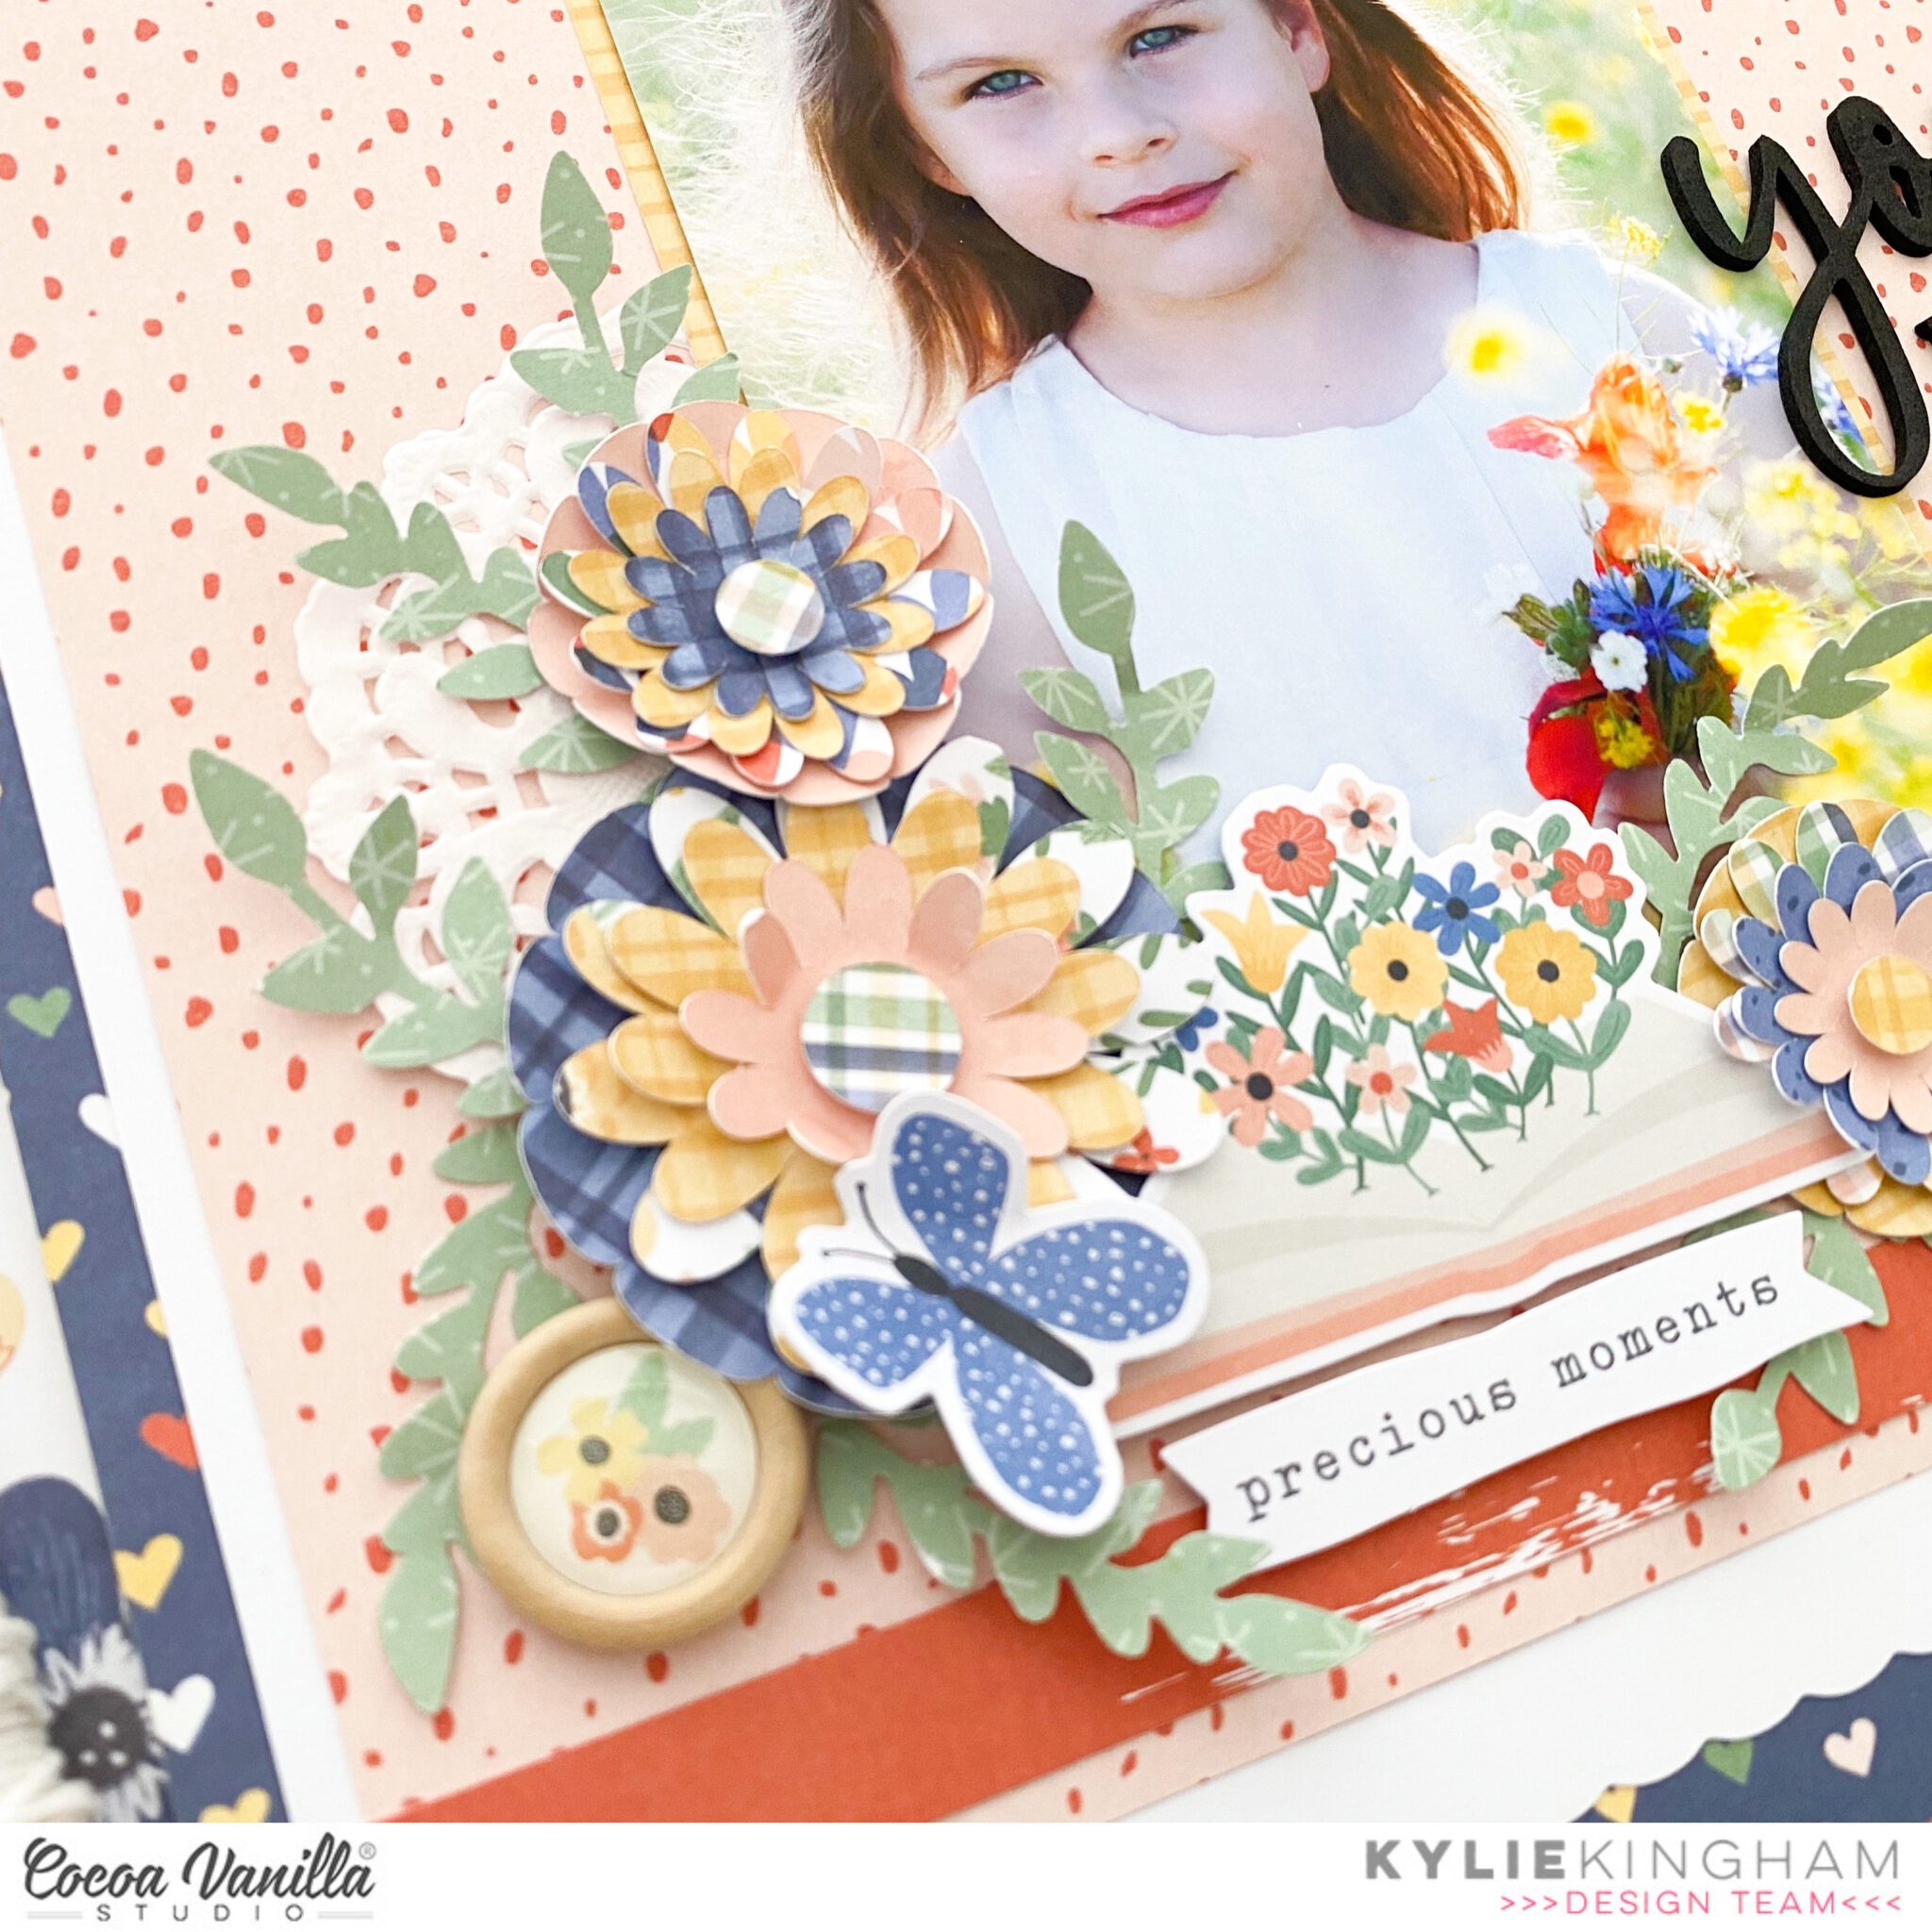
Recently I fell down the rabbit hole of searching for ‘layered flowers’ in the Silhouette Design Store. I found some lovely blooms in my search that I wanted to add to todays layout. I made sure to resize some of them to make them a smaller finished flower and used my A5 paper pack to select each of the 5 layers that feature in each bloom. Once cut, I turned the edges up a little on each layer before adhering them together. I used a foam square to add the centre to each flower. I had a lovely leaf punch in my craft stash that I used to punch some foliage.
The ‘LITTLE LOVE’ paper was selected as my main background to which I added a 10″x 11.5″ piece of white cardstock that I had used a decorative blade to cut the top and bottom edge. Once these two layers were adhered together I added a third, using a 11″x 9″ piece of ‘Oh My Heart’ paper. To finish my background I added two 1/2″x 12″ wide strips of the ‘BRIGHTER DAYS’ paper to the top and bottom. I made sure to cut into the red strip of this paper to really add a colourful punch to my page.
I used a 4″x 6″ sized photo for my layout and backed it with a 4.25″x 6.25″ photo mat cut from one of the A5 papers. Once it was in place I added a paper doily from my craft stash and begun layering my flowers in place. By using different sized flowers helps to create a more balanced result.
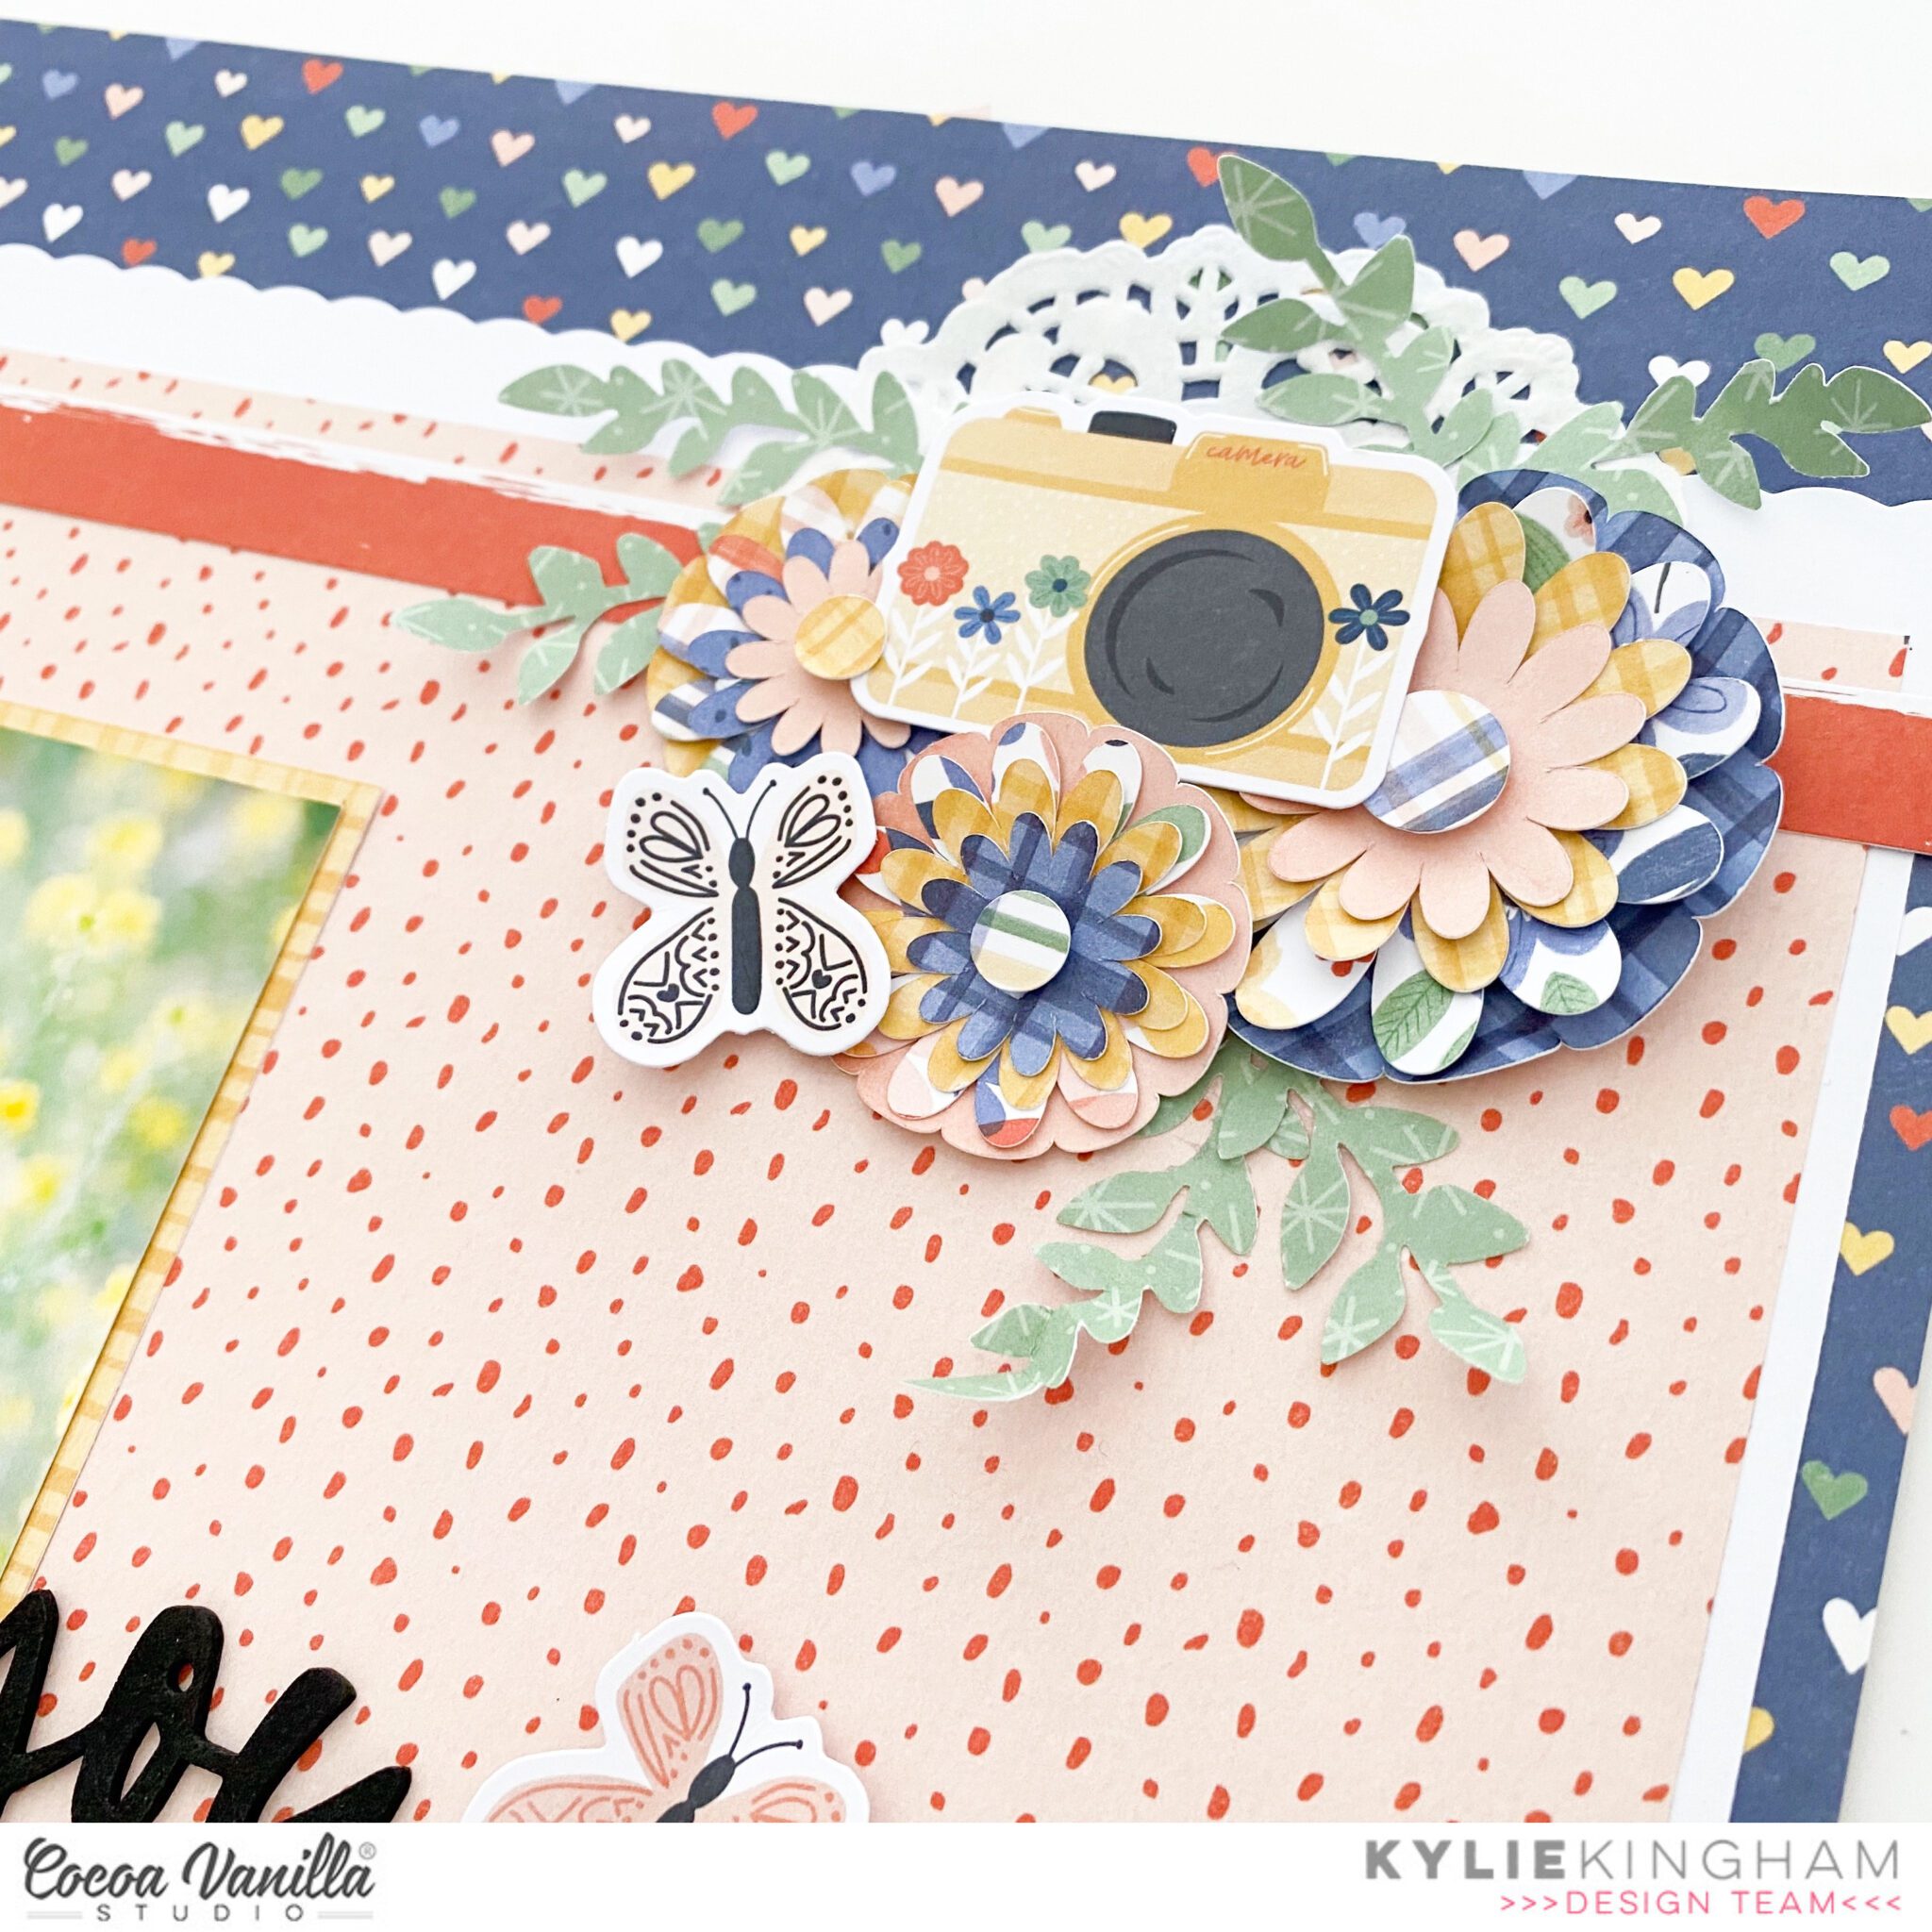
For balance and to break the open space of my background, I added a second embellishment cluster to the top right corner of the page. I also used another small paper doily to back everything.
Using the FOAM TITLE STICKERS, I was able to create a large title to suit my page. I placed this to the right side of my photo and finished off my page with some extra ephemera from the die cut packs.
Thanks so much for checking out my layout today. I hope you have a go creating a page using the mood board for inspiration too!
It’s Tarrah back with you and today I am sharing a new scrapbook layout featuring the stunning NEW Storyteller collection!
For this week I was given the brief of focusing on the wood epoxy buttons in the Storyteller collection! How can you go past these cute embellishments? These are great little additions to any project, providing beautiful dimension and texture!
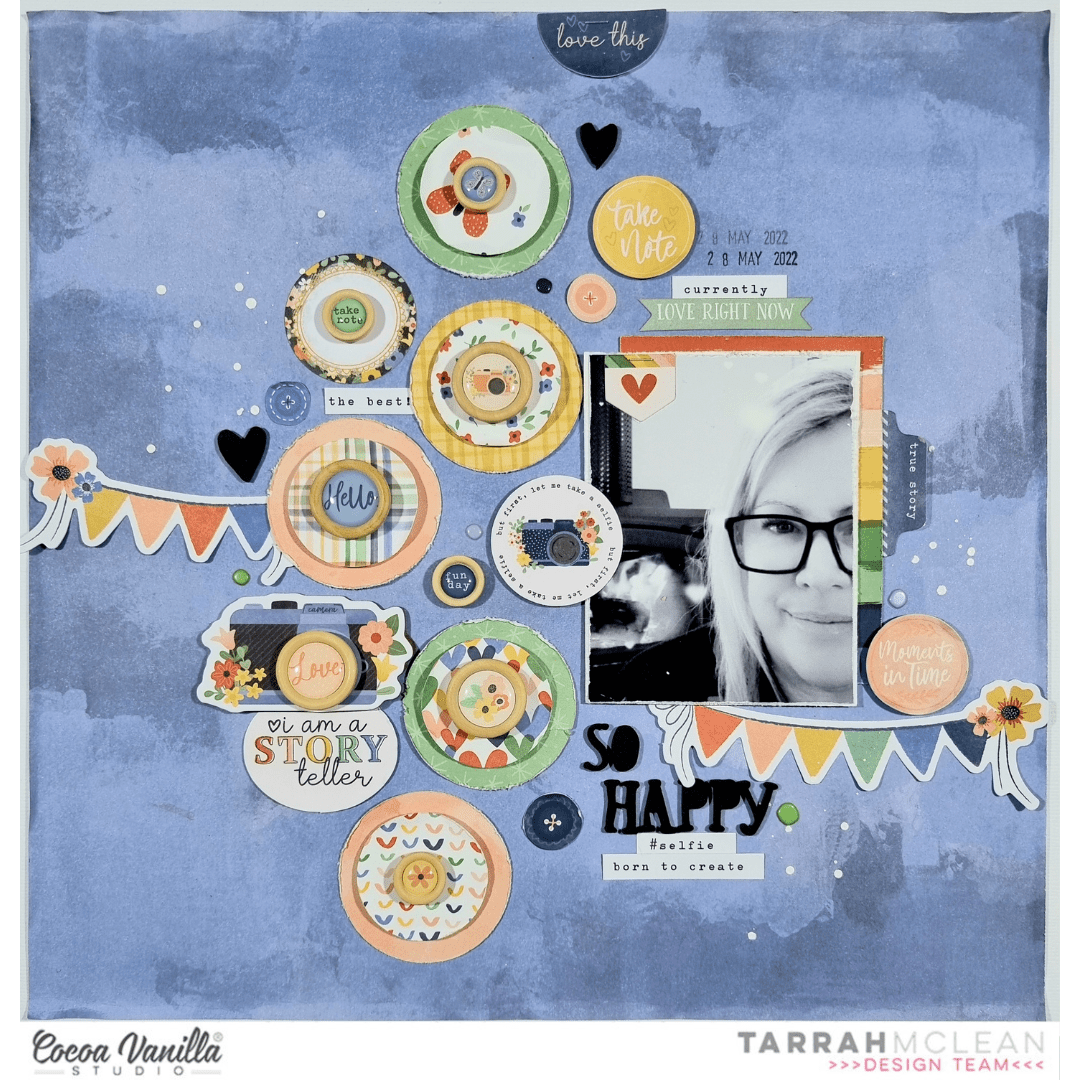
I recently went away on a little weekend getaway and there was a lovely fireplace inside the cabin we stayed in, I took a couple of selfies in front of the fire as it was so cozy!
I chose the ‘B’ side of the beautiful Spring Fling paper for my background, trimming it down slightly and adhering it a piece of plain white cardstock, I printed my photo in black and white and distressed the edges of the photo, I then pulled out one of the pocket cards and layered it under my photo. I popped the photo up from the pocket card using craft foam, I love the dimension this creates on my layout. On the photo, I stapled a banner sticker from the accessory sticker sheet and to the right of the photo I also adhered a tab from the ephemera pack.
For my main design element I decided on a circle design, and since the gorgeous wood epoxy buttons are the feature, it allowed me to add lots to the centres of the circles!
I took my circle punches and the A5 paper stack and punched out a few circles from the papers in different sizes, I then layered them together to create 5 layered circles……I distressed the edges of all of the circles and added craft foam in between each layer to add dimension and texture.
I then took a wood epoxy button and added one to the centre of each of the layered circles I created. Once the layered circles were completed, I arranged them on my page how I liked them. I adhered them down, leaving some space at the bottom at the bottom to add a title and some more embellishments. I adhered the gorgeous rainbow banner from the ephemera pack below my photo and popped up the circle die-cut on the right of the photo. On the left of the photo, I just had to add the circle sticker from the accessory sticker sheetthat says. ‘But First, Let Me Take a Selfie. I added pop dots to the left edge of this piece and placed it overlapping the photo slightly.
I chose the title ‘So Happy’ from the awesome foam title stickers from the collection and placed the title below my photo and also took some phrase stickers from the accessory stickers and added these below the title and above my photo too. To balance out the other side of the page, I adhered the shorter rainbow banner die-cut from the ephemera pack. I also adhered the camera chipboard piece using craft foam to add dimension and adhered another of the wood epoxy buttons in the centre of the camera.
To help fill in some of the spaces between the circles, I bought in some of the smaller embellishments. I added some of the button die-cuts, some puffy stickers, accessory stickers, foam black hearts and even more wood epoxy buttons too. I added two of the black foam hearts to create the all important visual triangle on my page, strategically placing the hearts in places to draw your eye around the layout. Lastly I sprinkled some white mist and stamped the date stamp.
Thank you so much for stopping by the Cocoa Vanilla blogtoday! I had so much fun creating this layout and focusing on the super cute wood epoxy buttons! I hope you enjoyed reading how I created it. Make sure to ask your retail store for the gorgeous Storyteller collection…you absolutely NEED this in your life!
It’s Sophie on the blog today for Throwback Thursday!
I used the Legendary collection for this page!
I wanted to document a little fishing trip that my son had a few weeks ago. I had the idea to use cute fish cut files from Just Nick Studio to help me with my theme.
I started with a thick white 8,5×11” cardstock and used many mixed media products to create beautiful shades of blue to mimic the sea. I backed the fish cut files with different patterned papers from the Legendary collection, mounted them on foam adhesive and placed them on my blue mixed media background.
I machine stitched around the edges of the 8,5×11 cardstock and backed it with a green cardstock before adhering it to the beautiful “Wild One” rainbow paper.
I added a few layers of papers and tissue paper behind my photo and placed it on the right side of the layout.
My title comes from the Legendary Die Cut Titles, mixed with some letters stamped with an alphabet stamp from my stash.
I decorated the page with a few embellishments from the Legendary Die Cut Ephemera pack, a flair button, plenty of white acrylic splatters and some sequins from my stash.
Here are more close-ups:
I adore this masculine yet very colorful page! I hope you do too!
Hello crafty friends,
Lina here today on the blog and I am sharing my latest layout. This creation features the ever beautiful, Bohemian Dream with it’s rich hues of purples, blues and pinks. One of my all time favourite collections to work with because of all it’s whimsical additions such as butterflies, feathers and florals.
This layout all began with first choosing the photo and in this case I used this sweet photo of my eldest daughter holding a bouquet of wild daisies she picked herself. In this photo, she is wearing a light purple shirt and I wanted to play off of that. Bohemian Dream was the obvious choice for me. Then after knowing what photo I was going to use, I opened up my Silhouette Studio and created this cut file with some simple fonts from my computer. I welded the two fonts and then outlined them. The lining is plain white cardstock and I used the paper Dreamer, a glorious purple ombre, to cut the internal title for layering. I popped the title up on dimensional foam.
Next, I used two photos, one in black and white and one in colour, layering the colour on top. I matted both photos and tucked some patterned papers in and behind both photos using the 6×6 paper pad. Both the photos and the cut file are layered on the wonderful background paper called Abstract. It’s another purple ombre with a cool mandala-ish pattern.
For the embellishing, I used florals from the Die Cut Ephemera package and created a visual triangle, making three separate clusters. I also used a woodgrain chipboard frame from the Chipboard Stickers and tucked it in behind the florals and on top of the photos. I just love the look of the negative space of the frame. I also used some small type phrases from the Accessory Stickers to add some additional sentiments.
Lastly, I added pieces from the Vellum Accents package, both some foliage and butterflies. For the butterflies, I used the black and white ones and added a drop of glue to only the centers and folded up the wings so that they looked like they were in flight. This layout came together pretty quickly for me thanks to the use of a large cut file and double photos.
I hope you enjoyed this layout today and will join me back again soon. Have a great day!
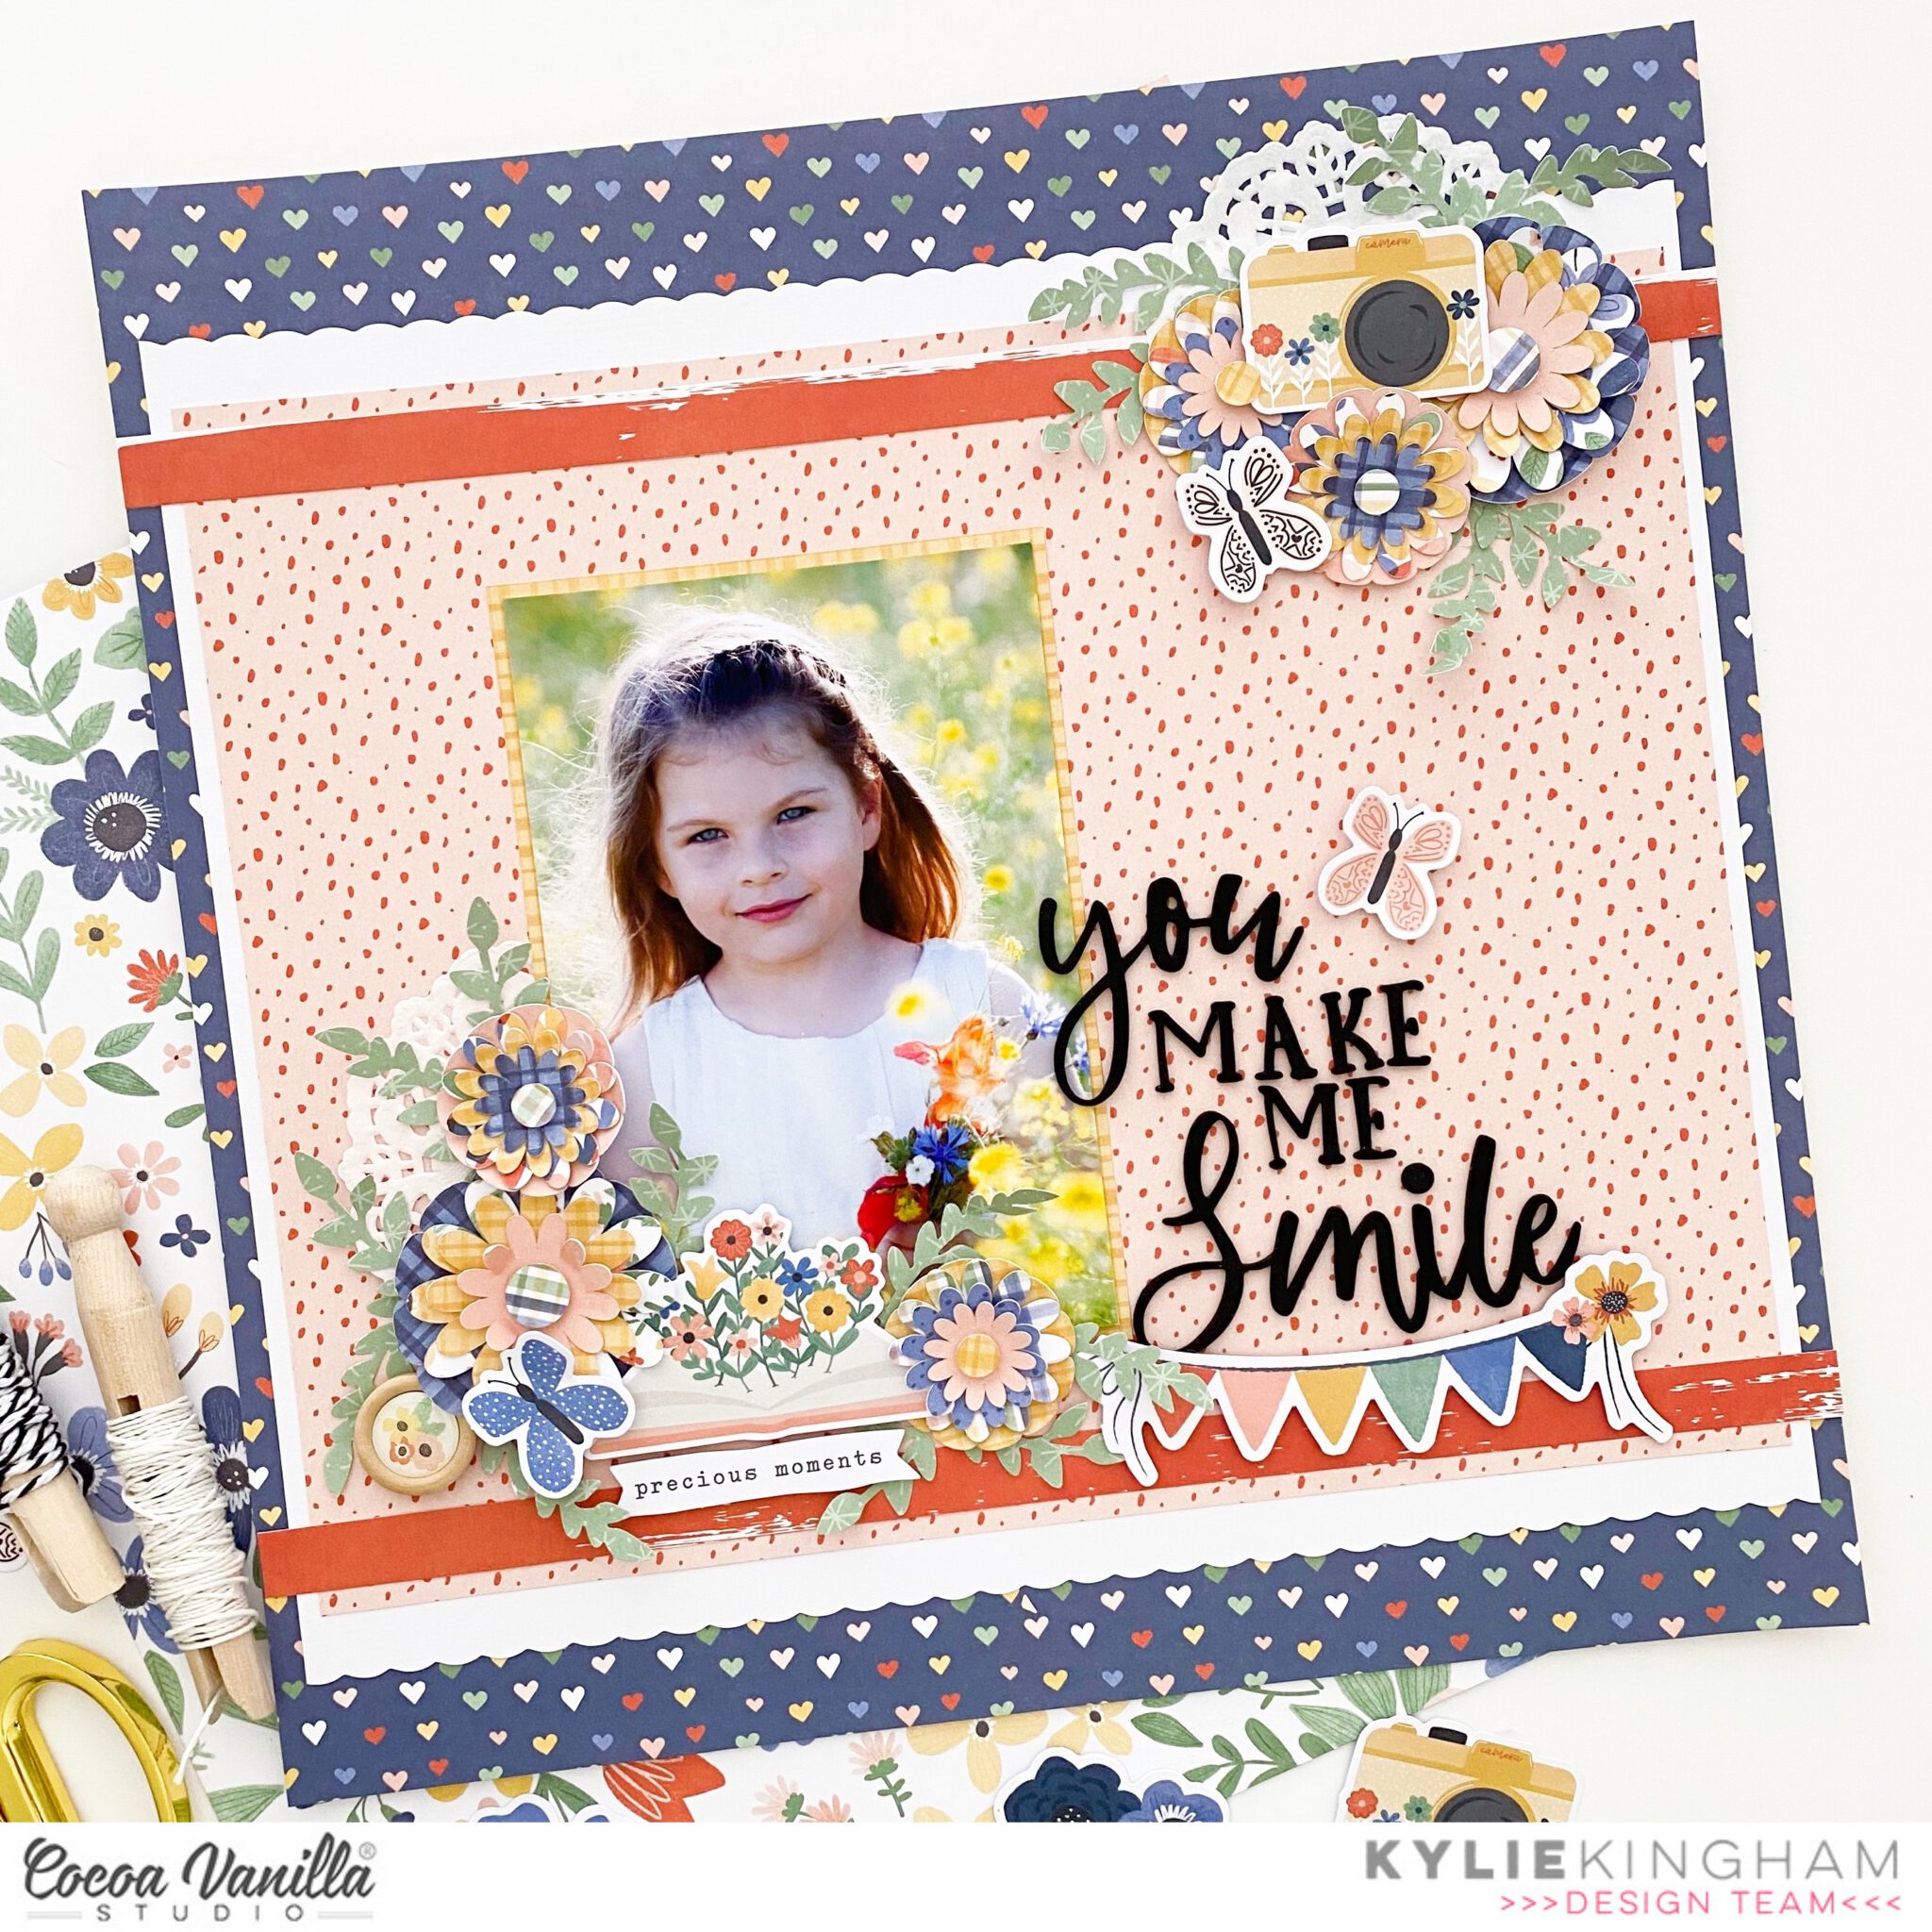
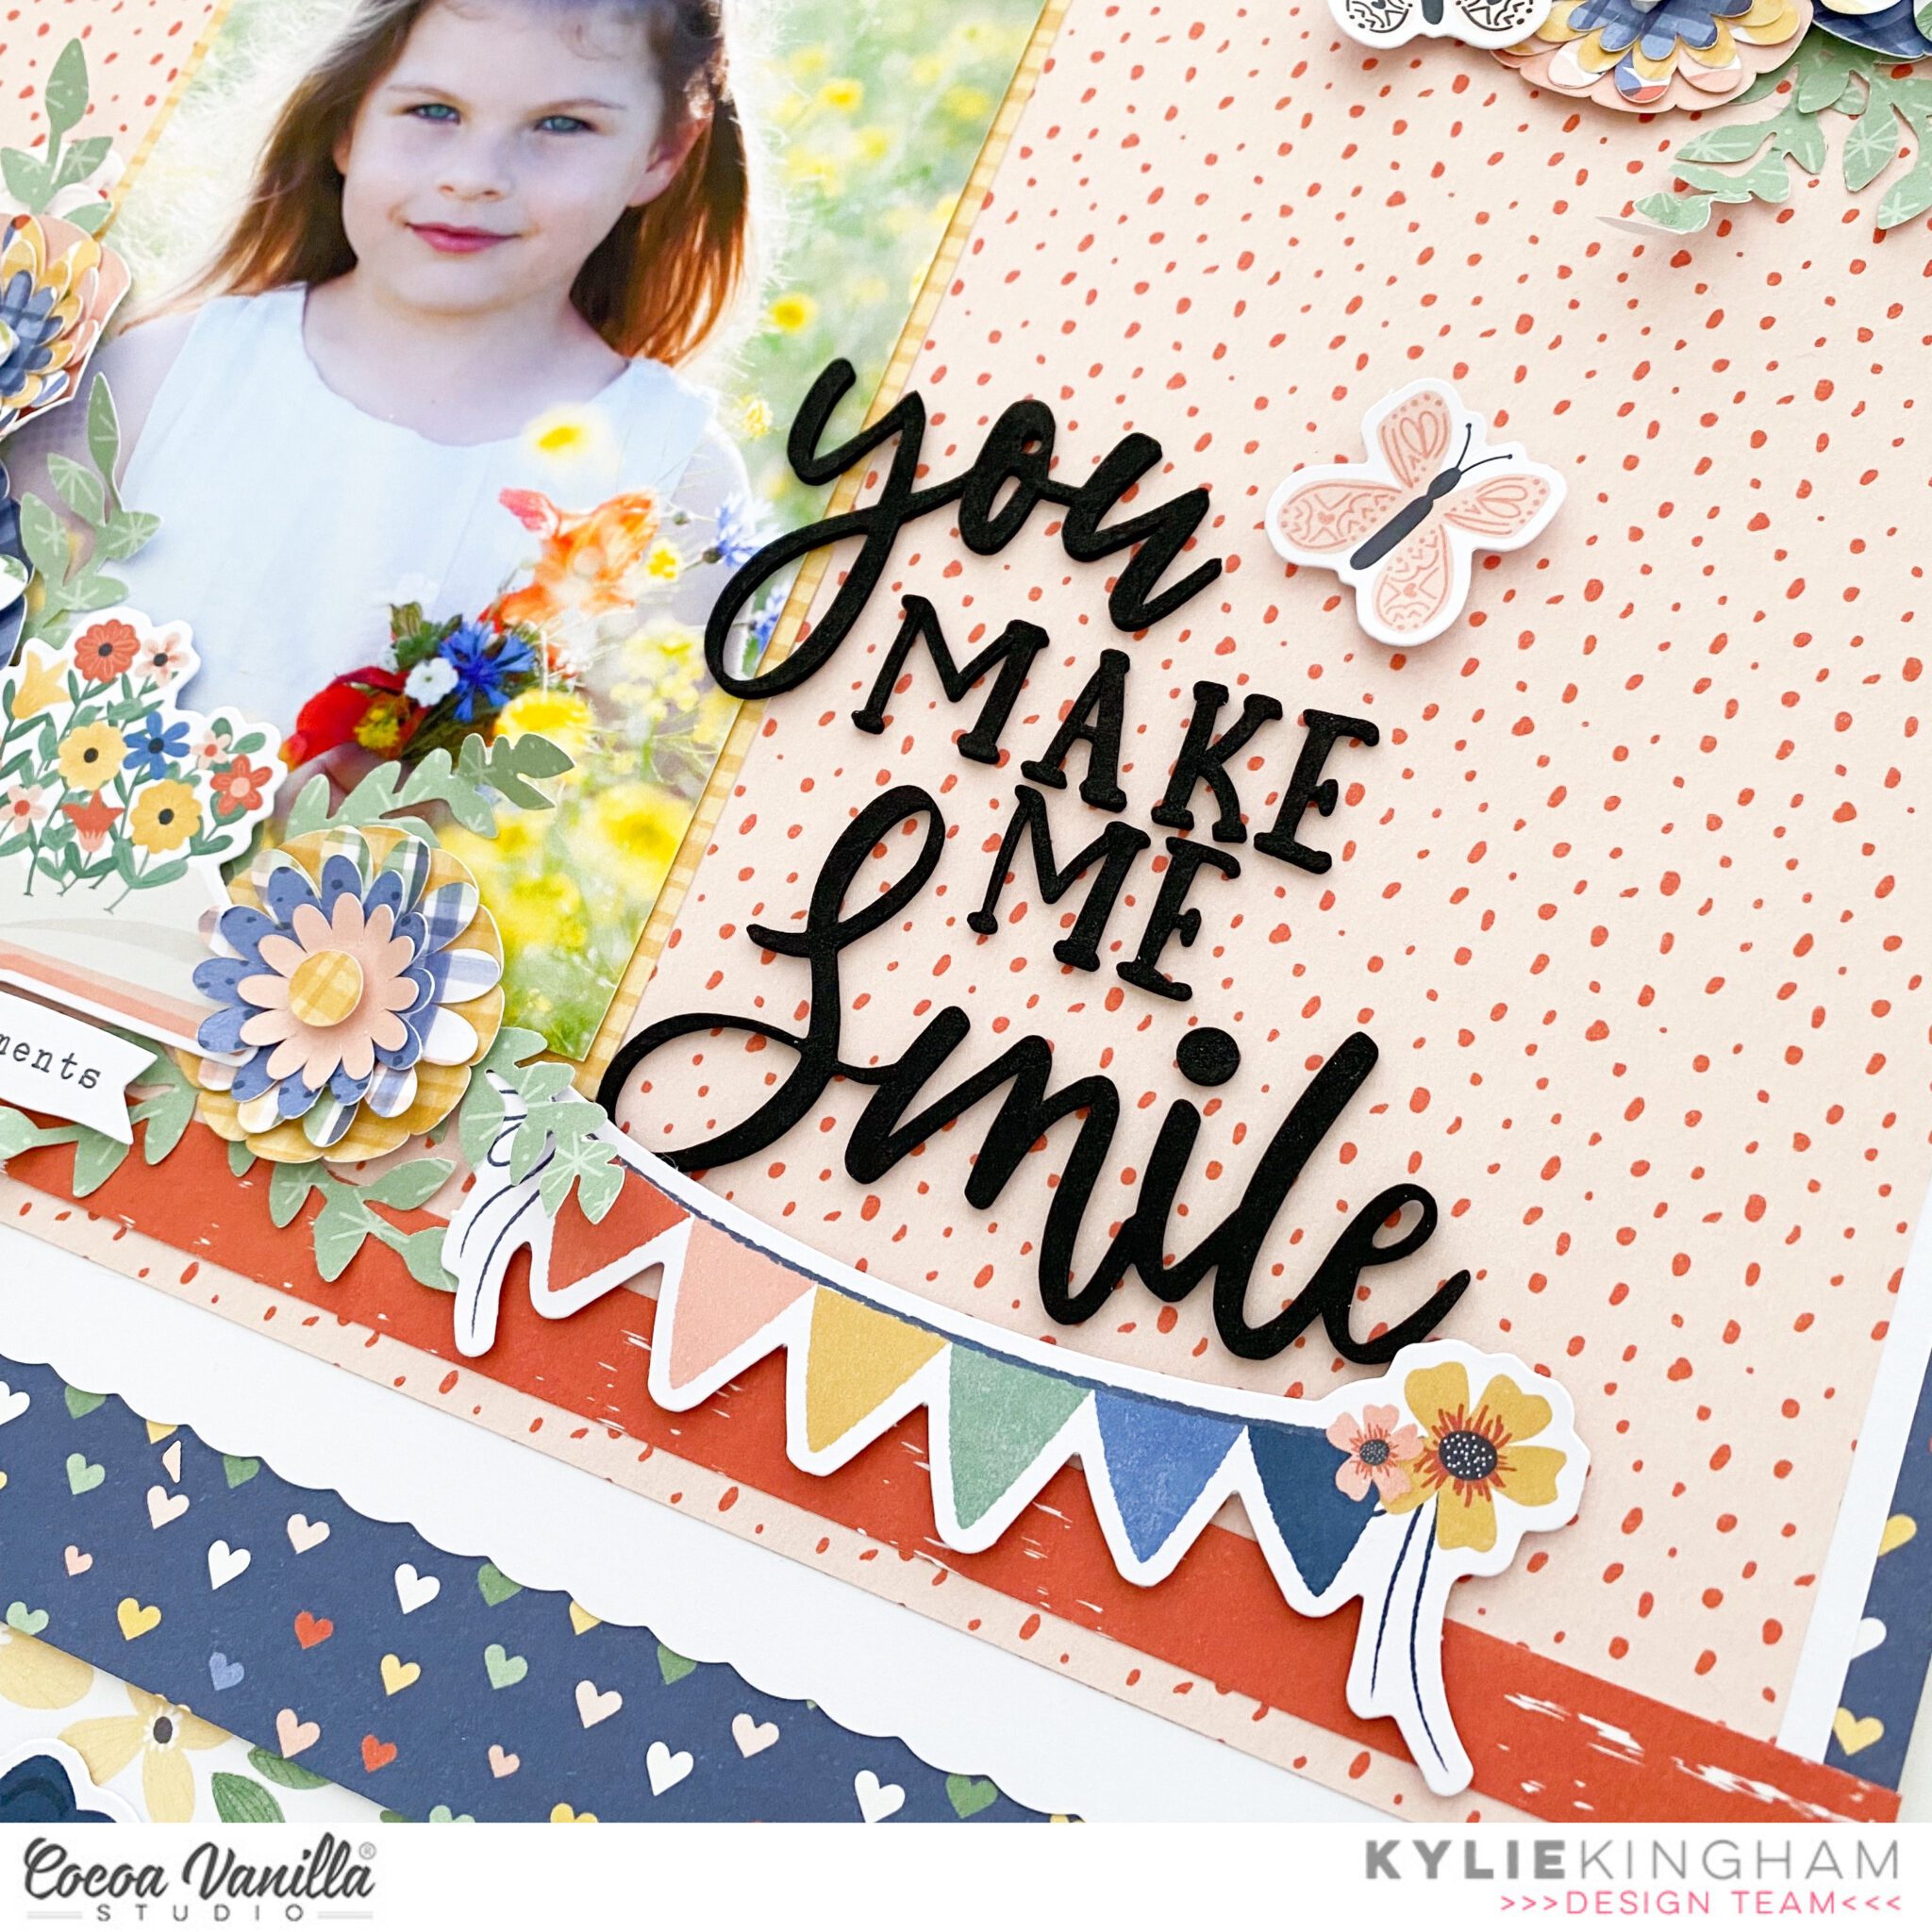
Hey y’all! Laura Alberts back again with a fun baseball layout using the gorgeous new Storyteller collection. This beautiful Spring Fling patterned paper with a mixed media vibe was perfect for these sweet photos of my youngest at her t-ball game. Using a star wreath cut file from Paige Taylor Evans, I backed it with paper from the A5 paper stack. The title in the center of the wreath is from the Foam Title Stickers.
These word phrases are fussy cut from the cut apart sheet in the A5 paper stack. Loved layering these up on my photos in place of journaling! The sweet little buttons are from the icon ephemera pack and the expoxy wood buttons layered over them perfectly! Loved all the layering with this layout.
One of my favourite details on this layout are the tiny little flowers that I fussy cut from the gorgeous Fly Away patterned paper. These little details add such a lovely touch of whimsy to the layout and softens the overall effect of a largely geometric design. Finishing it off with black Nuvo drops and gold ink spray splatter.
I hope this layout inspires you to try layering your embellishments over the edges of your photos. It’s such a fun technique! To see how ‘Make Me Smile’ came together, check out the process video below:
Hello everyone. It’s Anna here with my first ever project made with BRAND NEW “Storyteller” collection. I know you have already seen few amazing projects from other DT girls, as I am the last one to put my hands on new stuff due to the distance between me and Australia, so the bar is lifted high. First project with new line always stresses me with so many choices I can make and so many ideas bubbling in my head. That’s why I usually like to keep is simple, to get to know the papers and embellishments better. I had one not so pretty photo in mind to scrapbook a story behind it.
When I was shopping recently I found a bag of bear shaped treats that I haven’t seen for ages in shops. It was like a time travel, thirty years back, to my childhood. It was the time when shelves in Polish shops were empty and there was not much choice when it comes to candies and other treats. However, my dad, after every paycheck, was bringing home those waffle bears with meringue filling. I remember loving the super sweet taste and creemy texture (cakes were not a thing back then too). Years passed by and more and more candies started appearing in shops, including all the chocolate bars, cookies, fancy chocolates and bears dissapeared as they were no longer manufactured. They became blurred memories of an early childhood years. Can you imagine my surprise when I found them in my local shop after all those years? I sure bough them and brought them home with me. However my kids, spoiled with all the candies in the world, didn’t appreciate this simple treat (neither did I :) ). It wonders me how one little candy can trigger all those wonderful memories and flood the heart with warm and fuzzy feelings.
Now, when you know all the story behing the photo, it’s time to tell you a different kind of story – how this page came together. It all started with paper called “Cross if off”. I love this kind of simple backgrounds, that are a perfect base for any layout. Combination of white and colorful crosses will match any photo and any theme. Inspired by those tiny crosses, I wanted to add more of them to my page. I cut a paper called “Brighter days” into colorful strips and turned them into the crosses of different sizes. The process is very simple – just glue together two strips of paper of the same lenght.
Colorful cosses are very eyecatching so I didn’t want to distract the eye with a lot of embellishments. I chose few, little hearts from the ephemera pack, yellow camera placed next to the photo and few wooden buttons here and there. I also added tab sticker with word “documented” over the title. Super cute round puffy stickers were the perfect finshing touch.
I usually do not add journaling to my pages but this time I wanted to mention how important those treats were to me so I wrote my thoughts directly on the background. I didn’t like how it looked, so I wrote it again on the piece of 3*4 pocket card from pocket cards pack and glue it on top of the failed journaling. Honestly, I didn’t like this solution either (I wish I just added journaling on the back of the layout as usual) but there was nothing I could do with it anymore. I also noticed that all of my date stamps finish in 2021… It reminded me I have been scrapbooking for so long already :)
That’s it. My first page is with beautiful “Storyteller” collection is finished and I am already working on a mini album. I hope I will be able to share it with you in two weeks. Thank you so much for staying with me.
Hello friends! It’s Kylie back with you and I am SO excited to share my very first layout created with the new ‘Storyteller’ collection. I’m SO in love with all the prints and florals…So very yummy! Lately I have been trying to incorporate more than one photo to a page so that was the main inspiration for my design today. I decided to use a good old fashioned grid format, showcasing three photos as well as an embellishment square.
I layered several papers together to create the background. First I trimmed 2cm from the top and one side of the CROSS IT OFF paper and adhered it over the DITSY DAISY paper. Next I trimmed 2.5cm off the top and one side of the STORY TIME paper before adhering it as my main background. (**To conserve paper you could remover the centre from the first two layers.)
Using some of the papers from the A5 paper stack I cut a double photo mat. The first sized square was 4.25″x 4.25″ and the second was 4″x 4″. My photos were trimmed down to 3.75″x 3.75″ and adhered centred over the mats in place. These measurements ensured I had a lovely even and neat sized border frame to surround each photo.
The FLORAL EPHEMERA pack is one of my most favourite items and I loved creating a little ‘title’ square to embellish with them. I did turn up the petals a little on each bloom as well as any foliage, before layering them into the square. I used foam squares to stick some in place to create varying height and added dimension. To complete the page I created a title from the FOAM TITLES STICKERS and I couldn’t resist adding some smaller ephemera layered to the photo squares to bring a feeling of balance to the overall page.
Thanks for stopping by the blog today! I hope you enjoyed seeing what I have been creating with the new ‘Storyteller’ collection.
It’s Tarrah back with you and today I am sharing another layout featuring the stunning new Storyteller collection! This collection is absolutely gorgeous and so versatile for any themed projects and layouts you want to document your memories.
For my layout today, I am documenting a photo of my Mum and myself from a recent lunch out together.
I started by cutting out a free cut file design from Paper Issues from white cardstock and then got busy backing the hearts in the cut file with the beautiful heart and navy papers from the A5 paper stack. Once the cut file was all backed, I added craft foam underneath the cut file and adhered it to the centre of the gorgeous 12′ x 12′ wood grain patterned paper. I love the shadows and dimension this adds to my layout. I did trim down the wood grain paper a little bit and matted it with the 12′ x 12′ small floral paper. I machine stitched a border around the edge using my sewing machine with white thread.
I decided to place my photo over towards the right of the page so as not to cover up too much of the hearts in the cut file design. I chose 2 more of the papers from the A5 paper stack and trimmed them to layer under my photo. I also slightly distressed the edges of the papers, I like how this adds a little more interest and texture to my layout. I also added one of the small banner stickers from the Accessory Sticker sheet to the top left corner of my photo. I also tucked in one of the tab stickers above the photo too. I created a cluster of embellishments in the bottom right corner of the photo and could not go past the ‘Special To Me’ banner piece from the ephemera pack. I added foam tape under this piece and placed it under my photo. I also added a chipboard button, heart and floral die-cuts and a couple of stickers here as well.
To the left of my photo, I added the cute camera die-cut from the ephemera pack and placed one of the gorgeous wood epoxy buttons on top. Above the camera I also added some of the phrase and word stickers from the Accessory Sticker Sheet. Below the camera die-cut I added my title which is made up of the foam title stickers. Below the title I added a die-cut butterfly and another chipboard button. You will notice in between the hearts in the cut file that I added some of the super cute enamel hearts randomly. This was mainly to enhance the heart design of the page. I love how this looks.
In the top left corner I added another cluster of embellishments here also, this cluster consists of one of the gorgeous floral die-cuts, a chipboard button and a butterfly die-cut. I added this cluster to help balance out the cluster I added in the bottom right area of the page. This helps with the flow of the page and draws the viewers eye in. With almost all of my pages, I start out adding all of the largest elements like my photo, the title and any larger embellishments. I then move to adding some smaller embellishments and then the smaller things to finish off the page. Once I had finished embellishing my page, I added some sprinkles of white mist and stamped the date stamp as well.
Thank you so much for stopping by the Cocoa Vanilla blogtoday! I had so much fun creating this layout, I hope you enjoyed reading how I created it. Make sure to ask your retail store for the gorgeous Storyteller collection…you absolutely NEED this in your life!
It’s Sophie here and I am so excited to share my very first page created with the brand-new Storyteller collection!!
Where to start?? I am sure you know the feeling of wanting to hoard every little thing of a new collection and having a hard time choosing and actually using some of the beautiful goodies from it… Well, it definitely was a struggle for me here!!
I used the striped paper from the A5 Paper Stack and used a piece of it on the upper and lower part of the page. I cut between the colored stripes and curled some in different lengths on the top part of the page, and applied watercolor paint on thick white cardstock in different colors matching the stripes just underneath them.
I created a zigzag stitch in matching colors for the lower strip of striped paper.
I centered two photos on my page, a little bit crocked, and mounted on tissue paper and foam adhesive.
I used a Die Cut Ephemera for my title and a cute little banner above the photos.
I created clusters of flowers, most of which were fussy cut out of the A5 floral patterned paper.
Finally, I used beautiful Die Cut Ephemera butterflies and made them fly around my page, and placed a few Wood Epoxy Buttons as the finishing touch.
Here are more close-ups:
I am sure that you fell in love with this gorgeous collection just like I did!
Please share all your creations on the Cocoa Vanilla Facebook group!