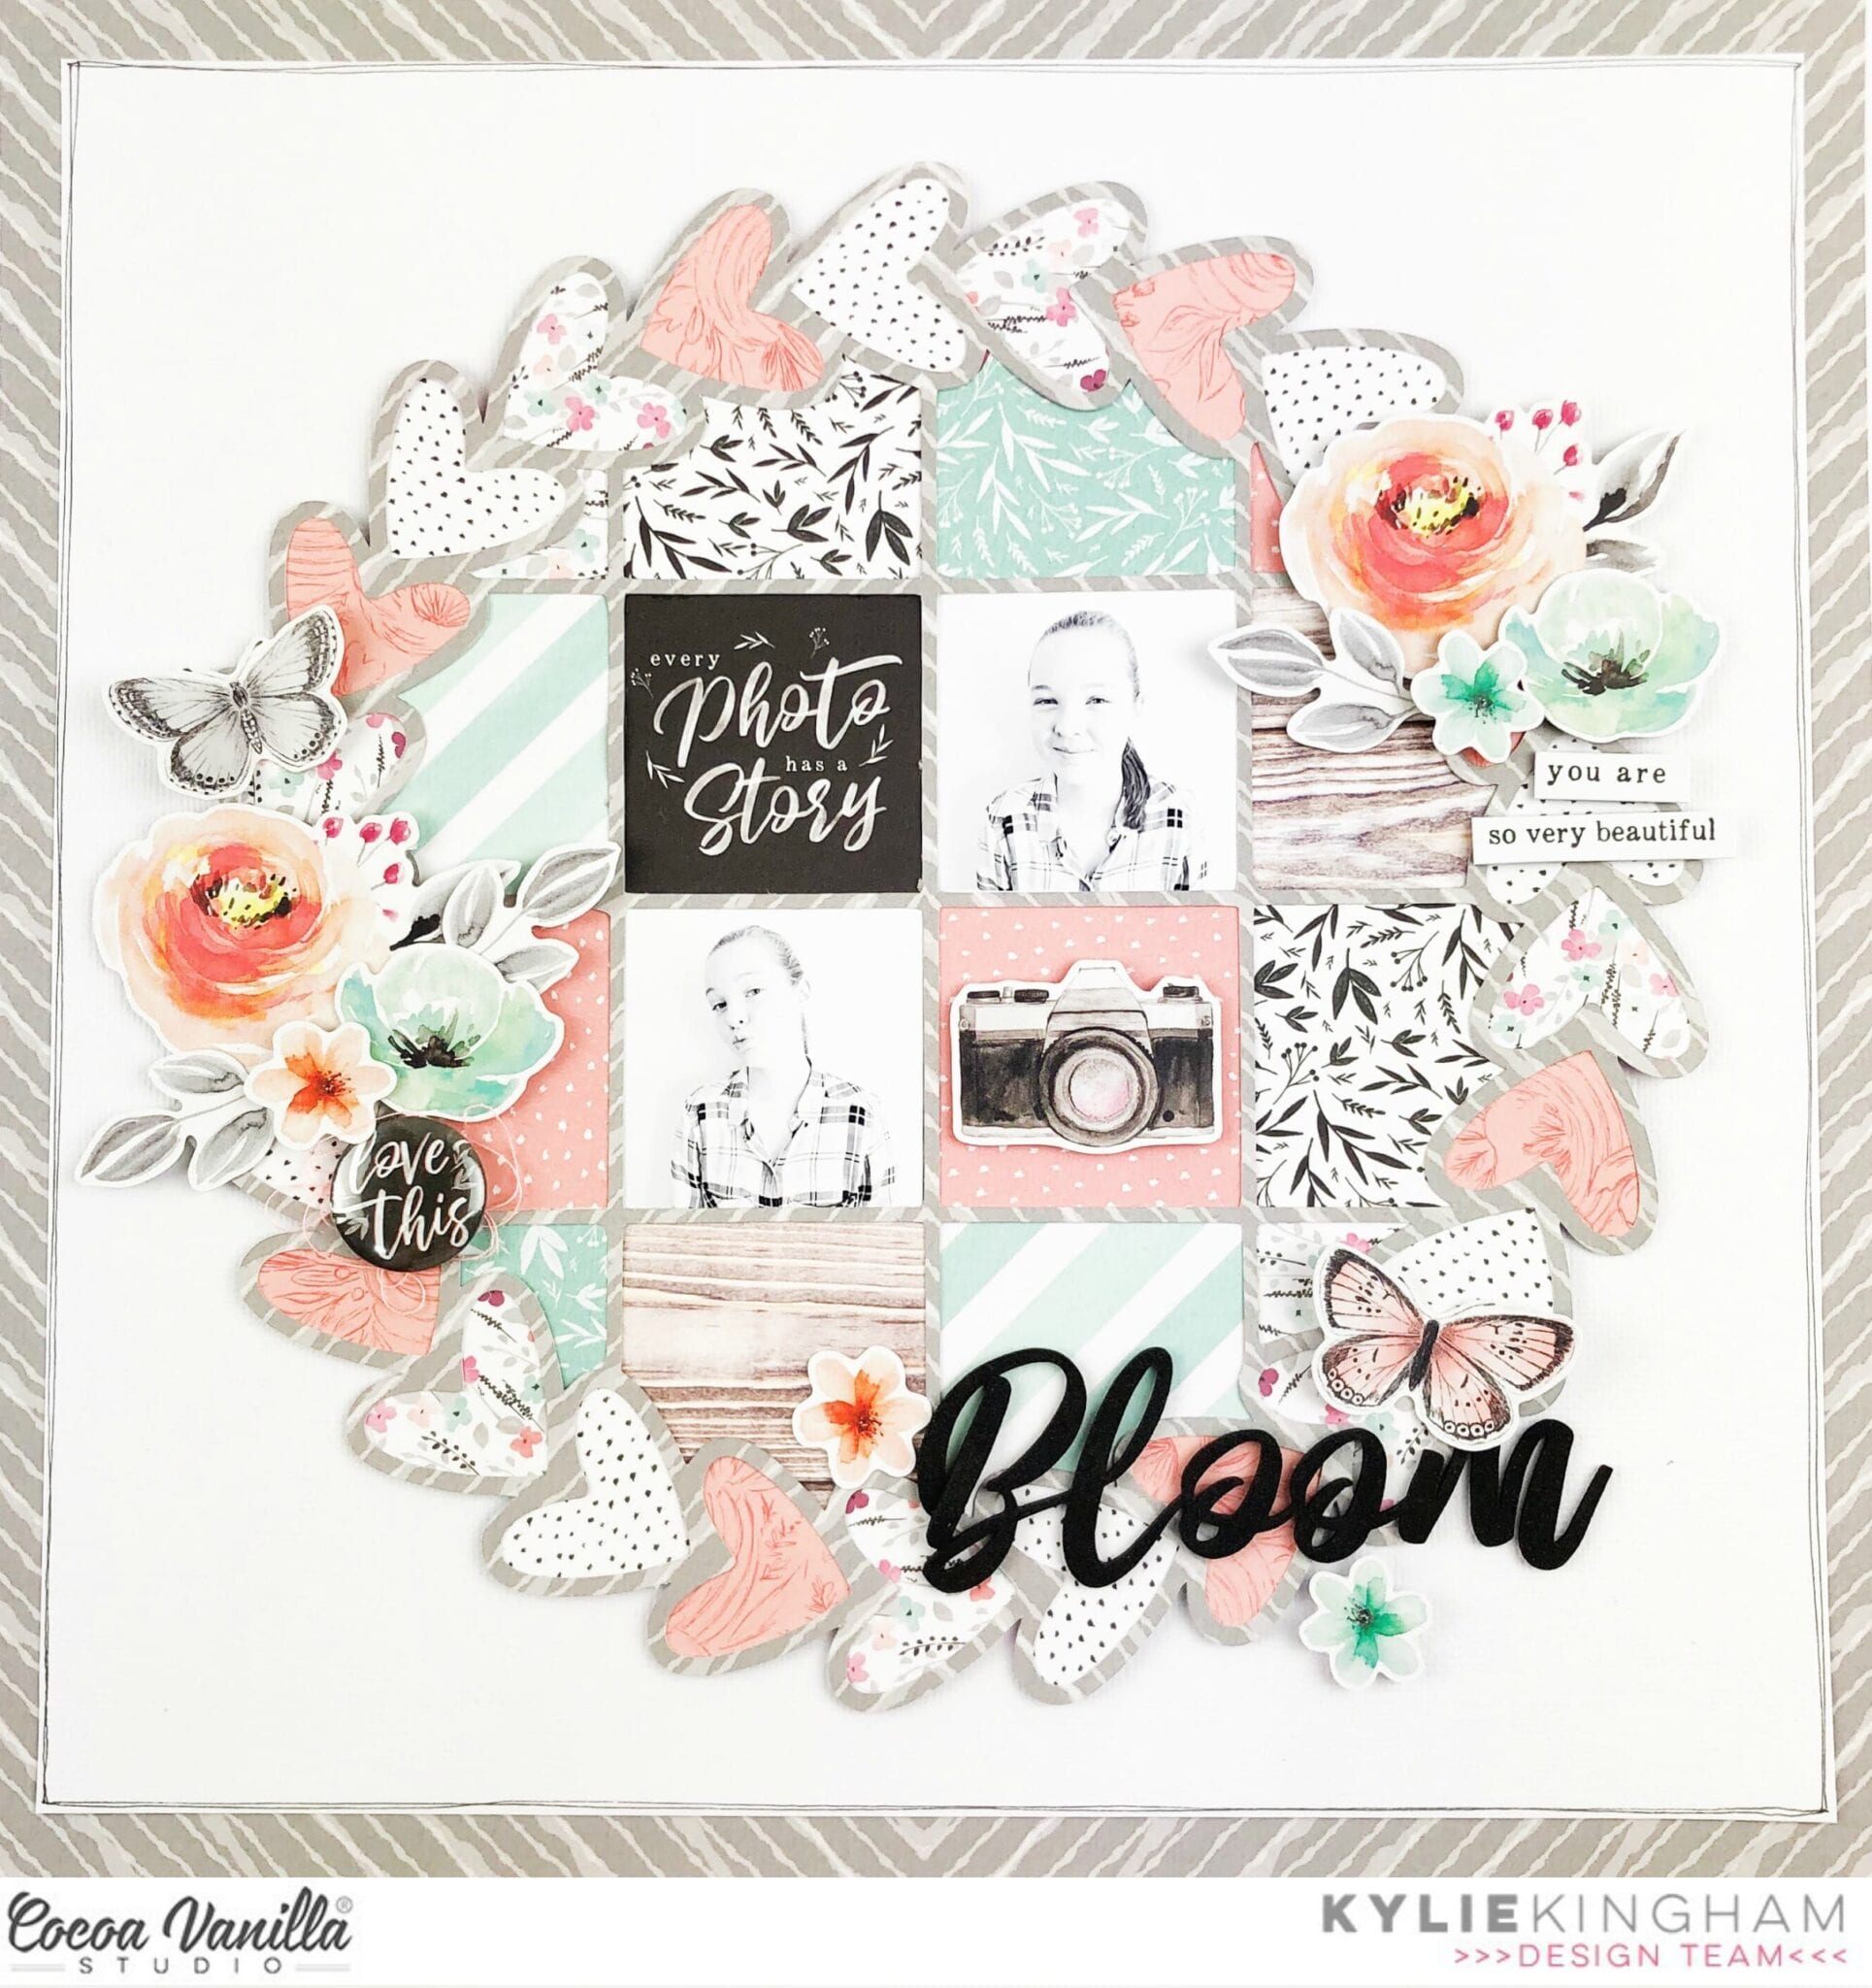
Bloom | Unforgettable Collection | Kylie Kingham
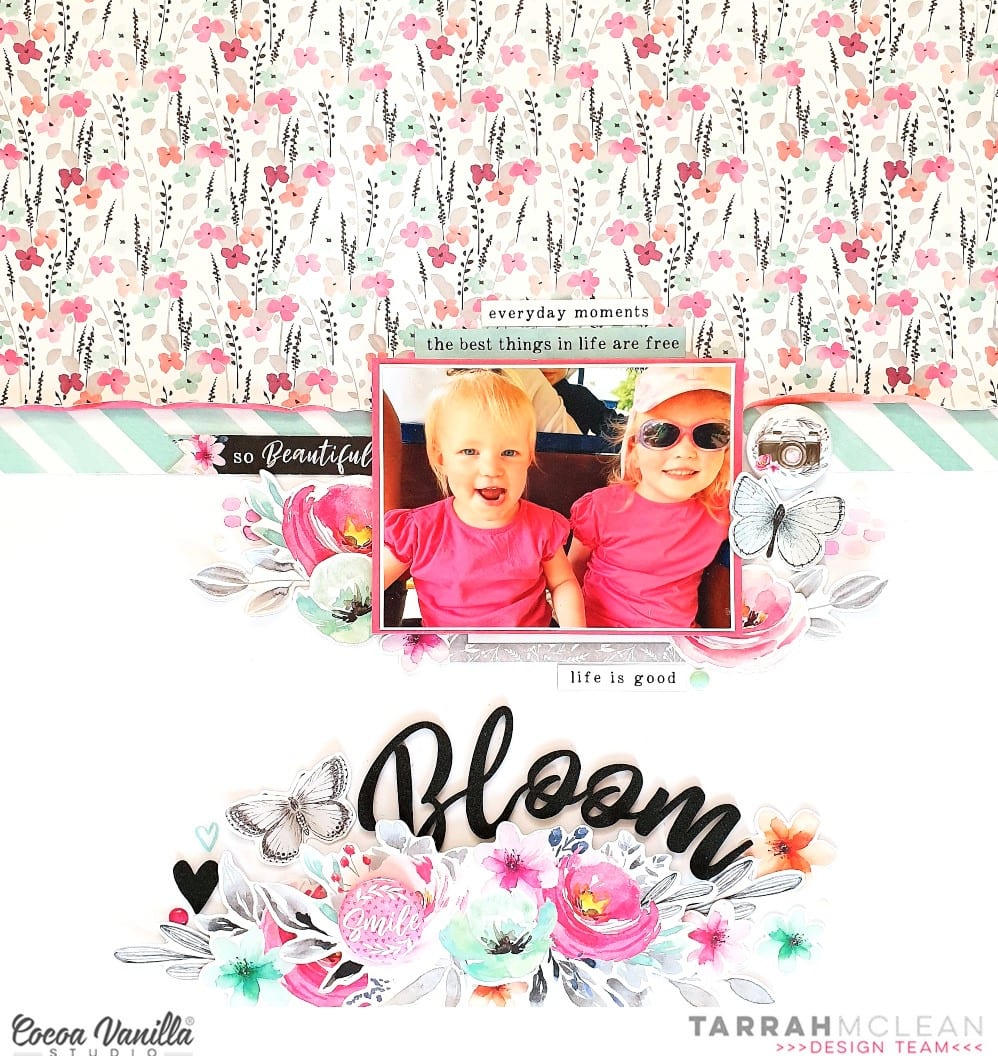
Hello sweet friends it’s Kylie back with you today with a new layout, featuring the gorgeous ‘Unforgettable’ collection. When I first received this beautiful new range I straight away saw you could have varying colour way options for a project. I love pinks and mauve’s but for today’s layout I went through and pulled out different grey apricot and mint green elements. I also added some bold black embellishments too!
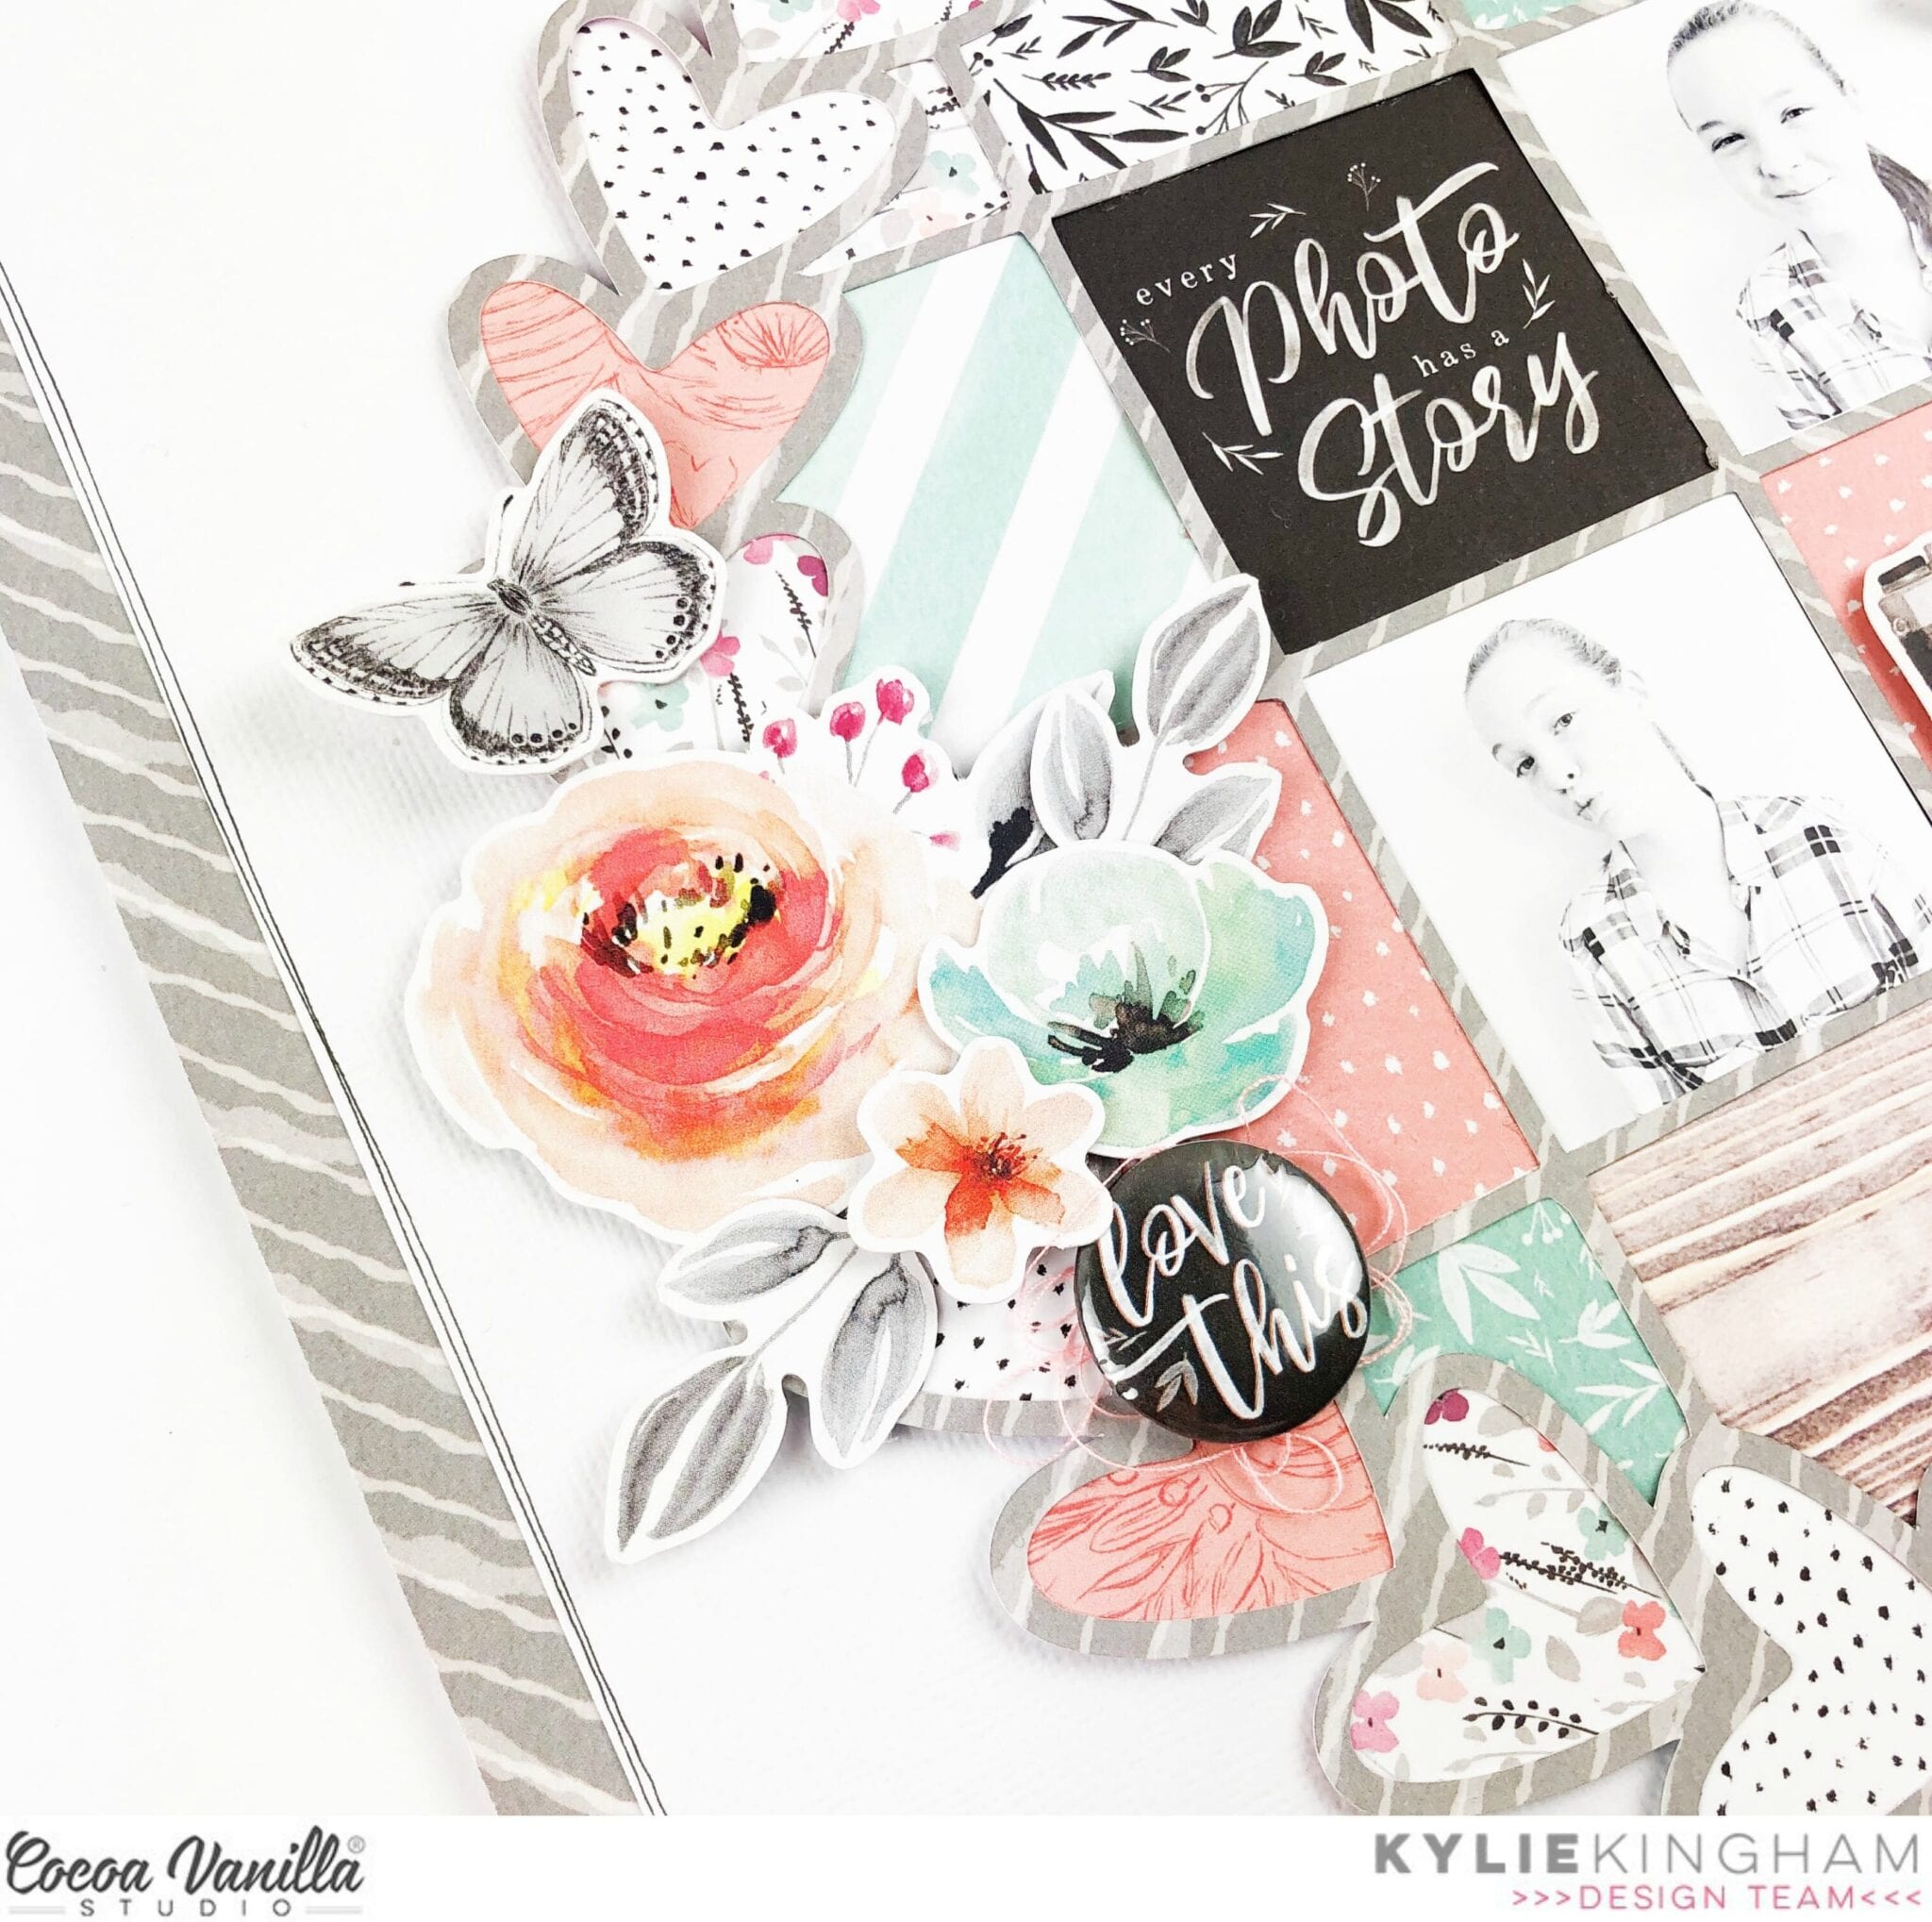
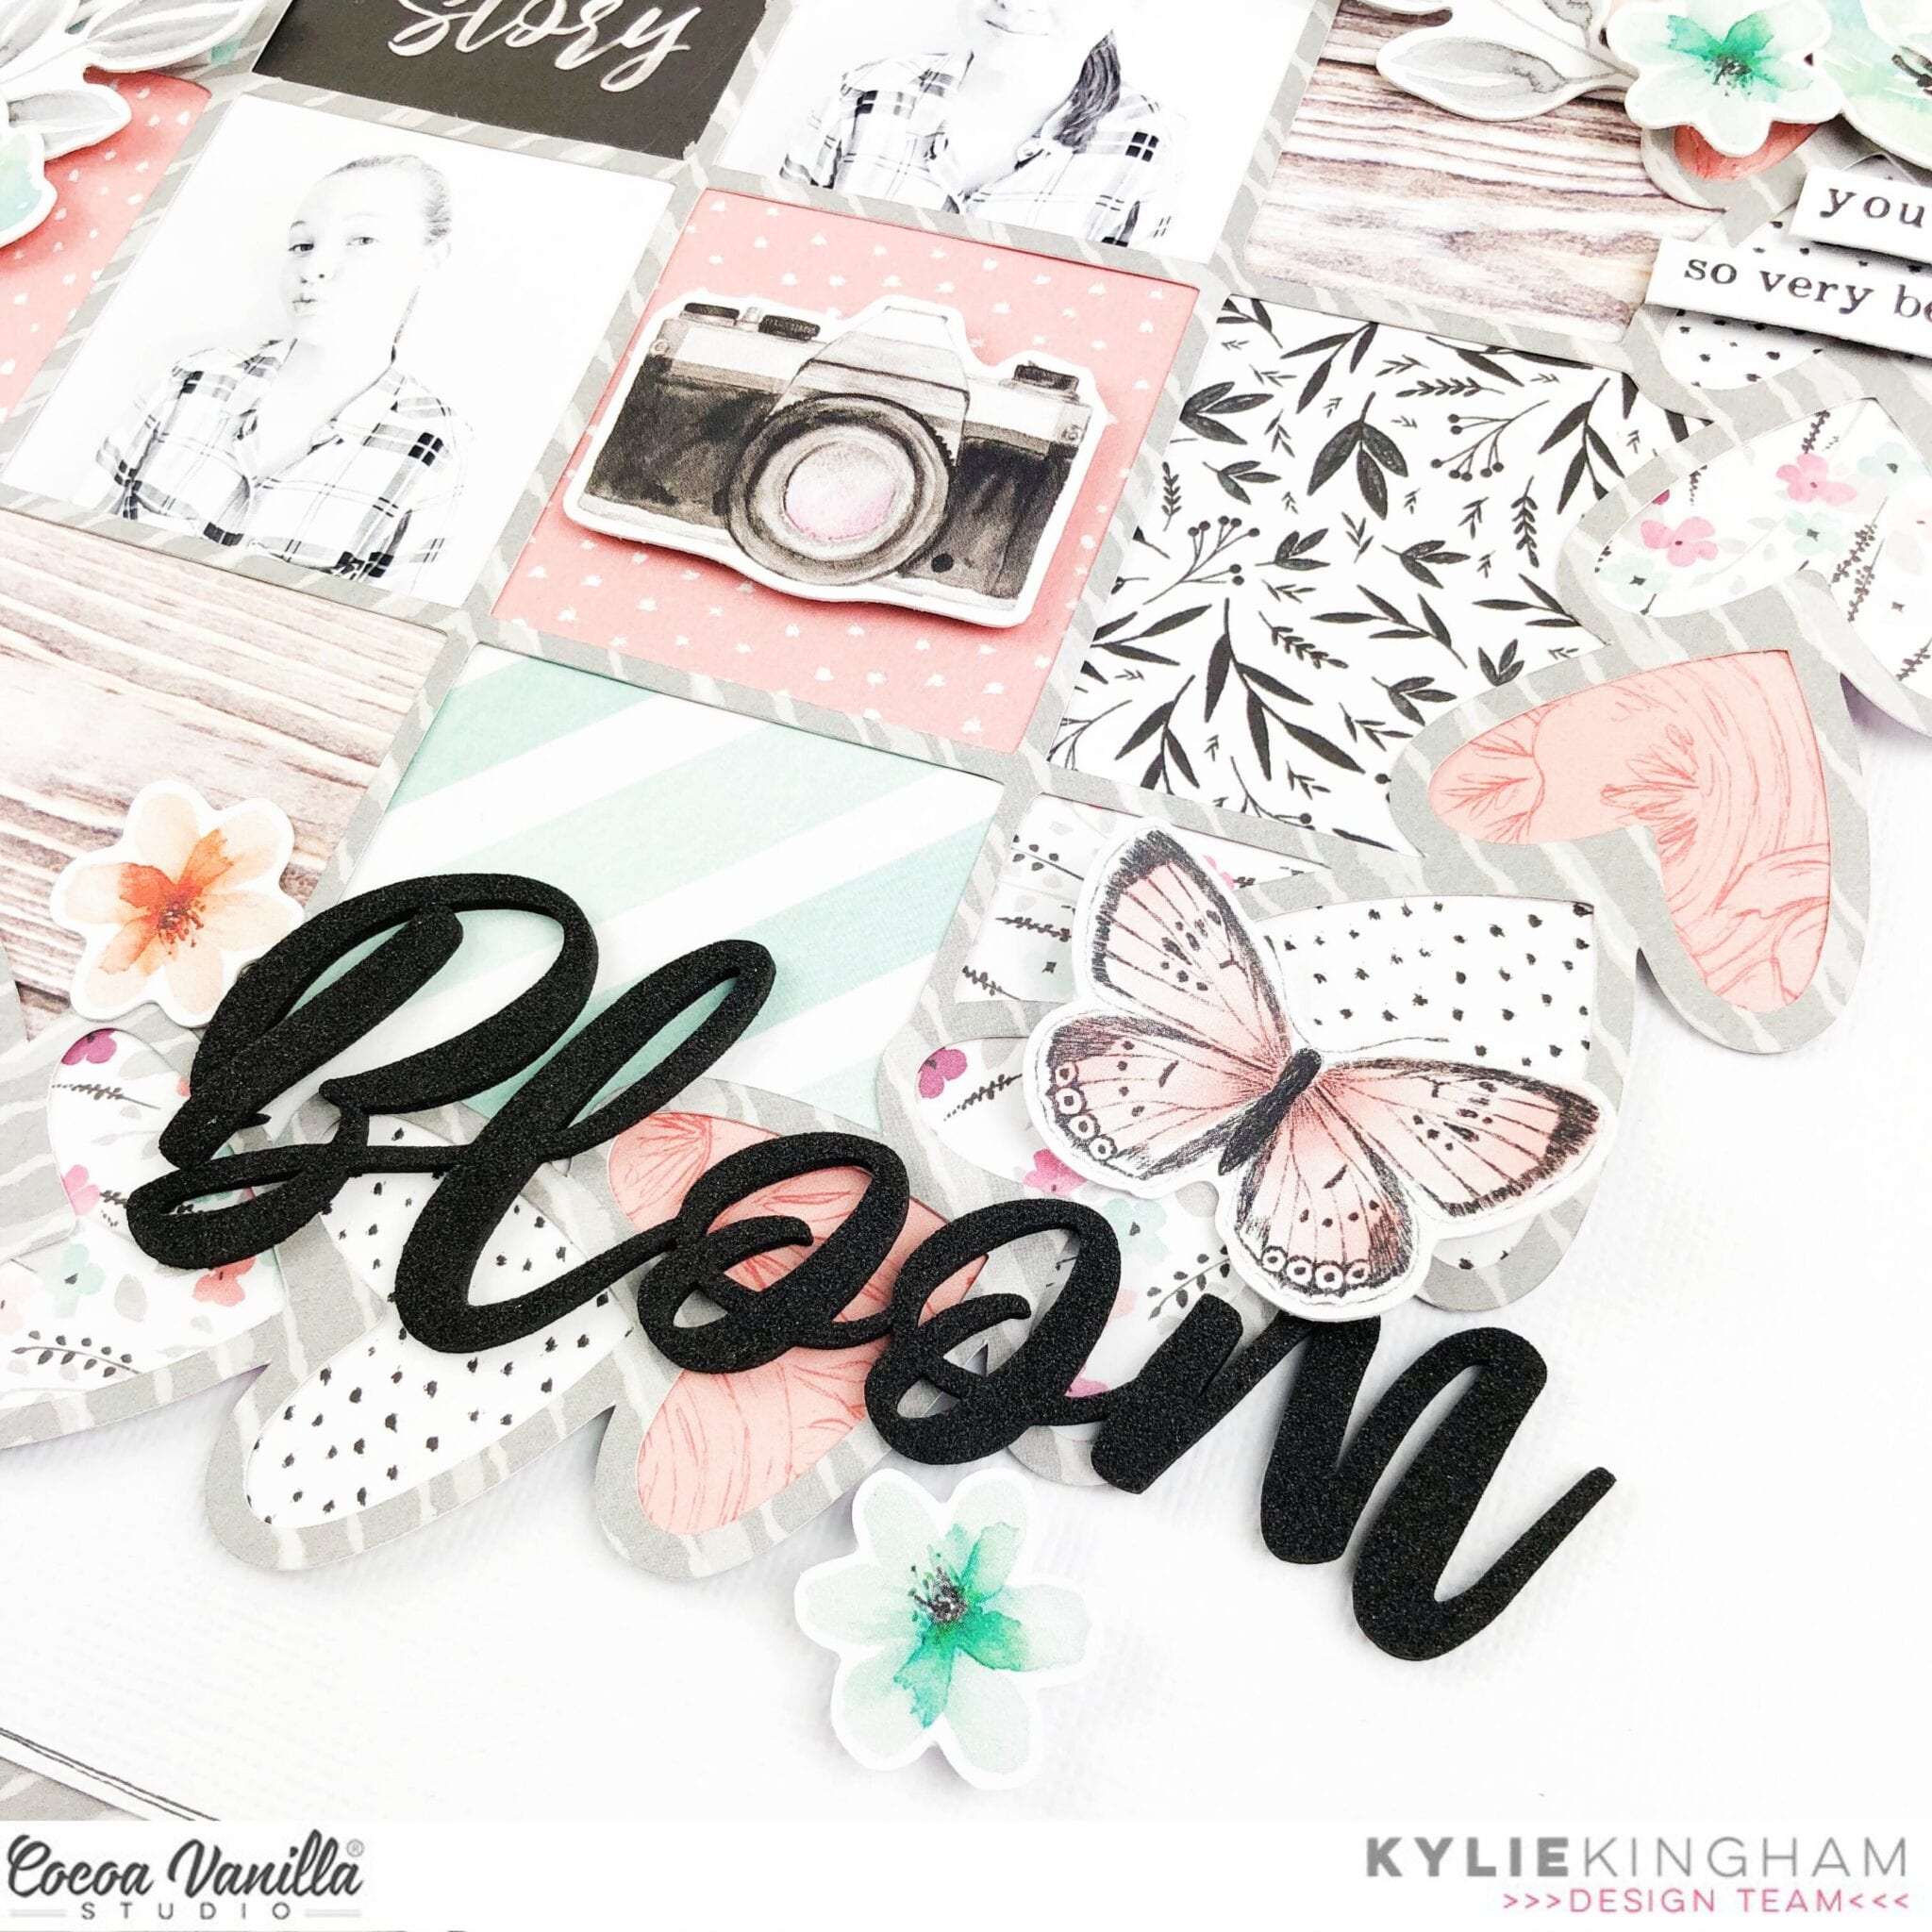
For my border piece I selected the GLORIOUS paper and decided that I would also use it to cut my cut file from. I selected a heart wreath with a square sectioned centre for my cut file, designed by The Cut Shoppe. Using the muted soft colours I had selected from the papers I alternated each heart as well as the squares. I chose a cute phrase from the 6 x 8″ paper stack which once trimmed down fitted perfectly in one square.
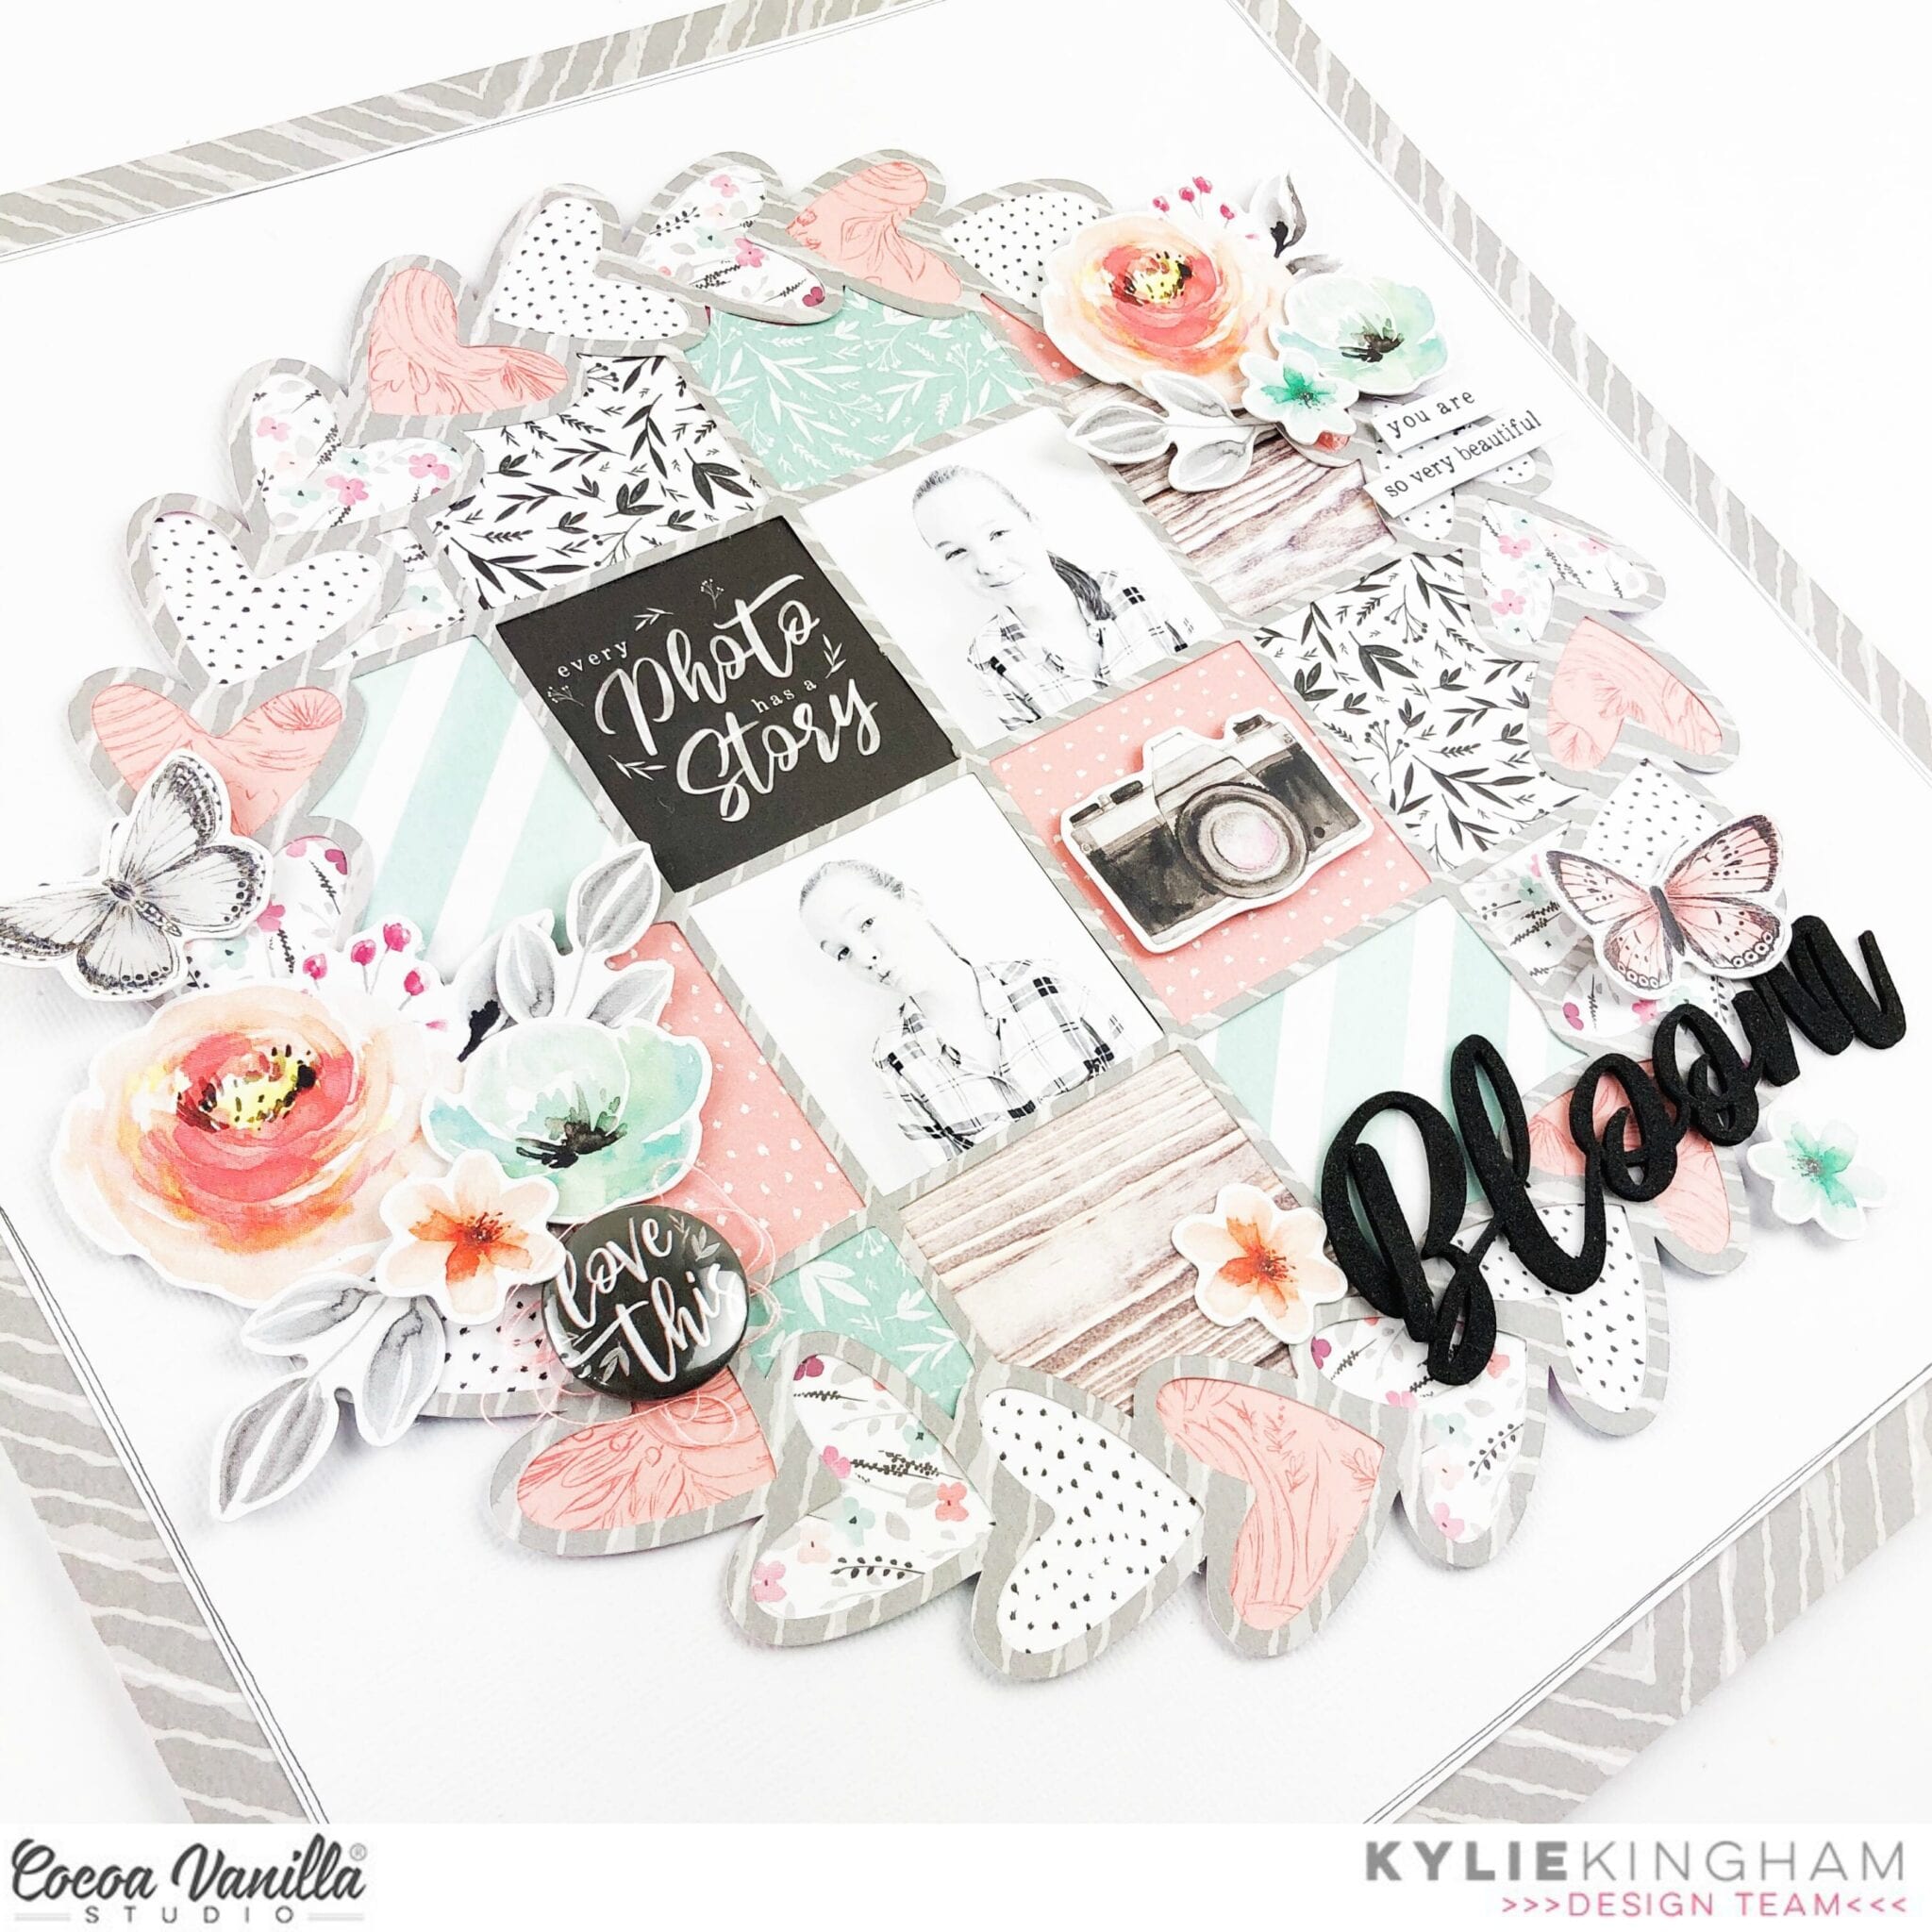
I added some foam to the back of my completed cut file before adhering to my background page. A freehand border was added around the edge with a fine tip black pen.
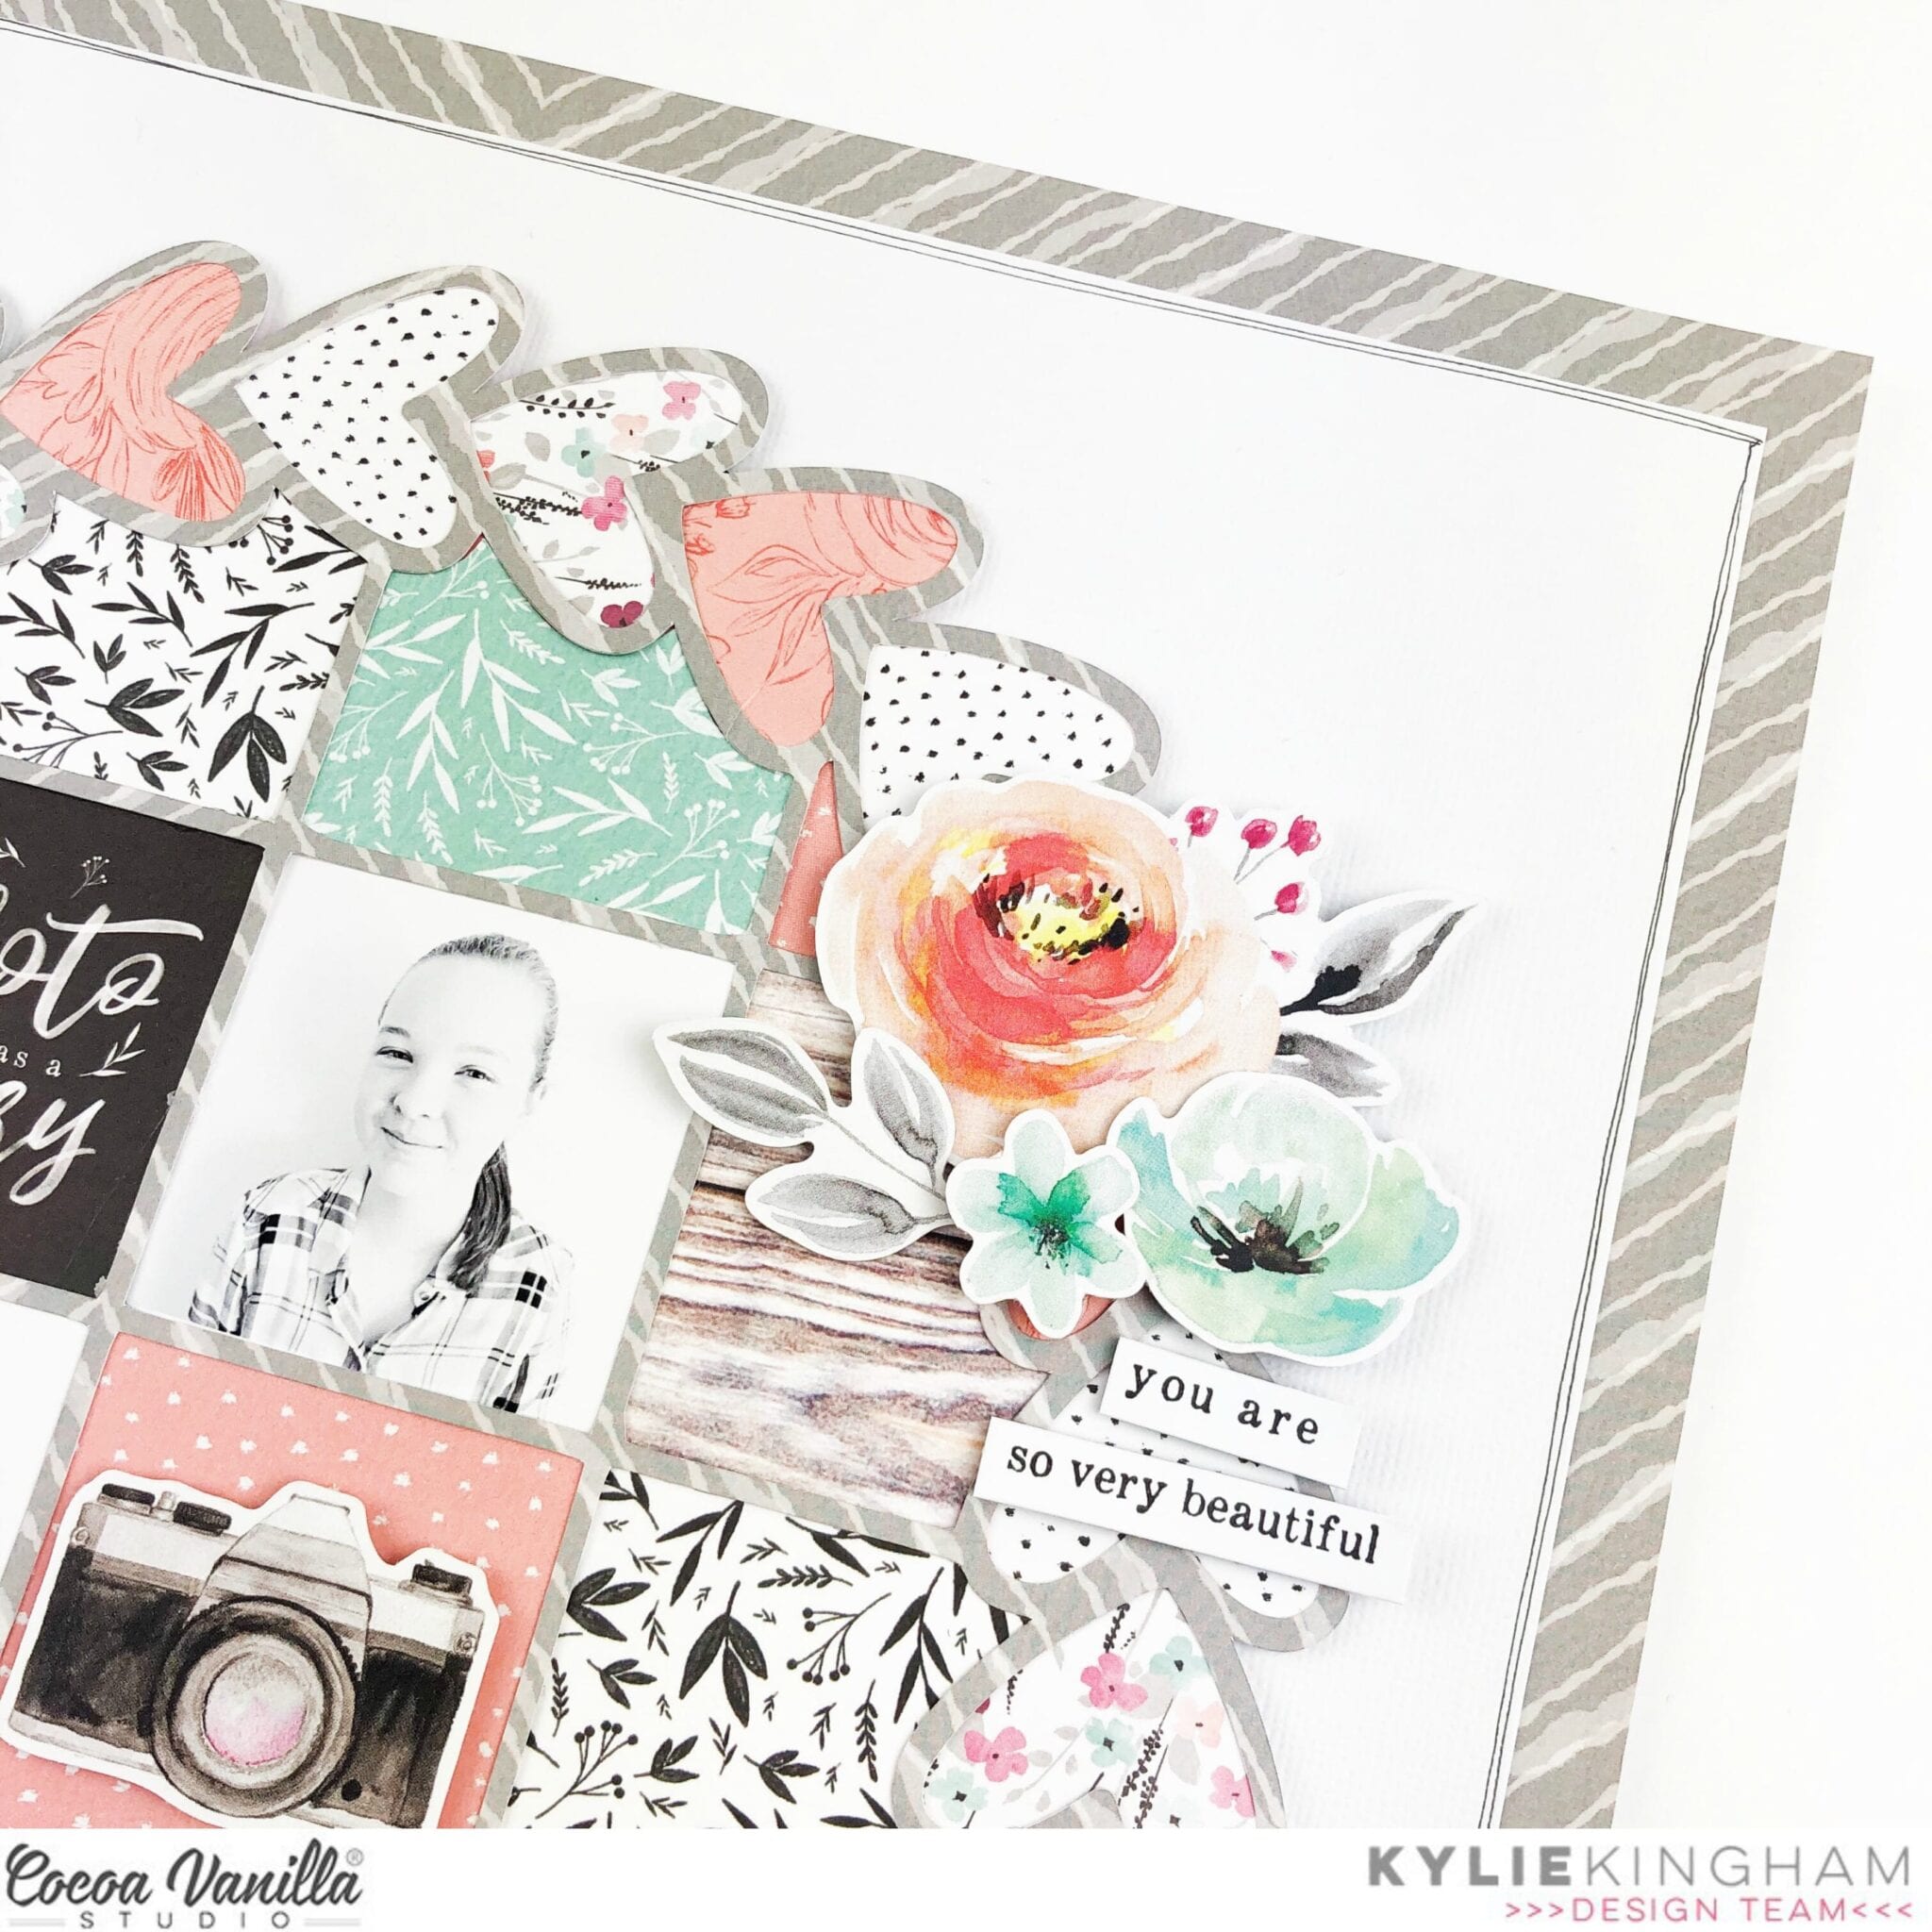
As always the floral die cuts are simply divine and always my favourite! I added some neat clusters at opposite sides of my heart for balance. I also used some cotton from my stash to back behind one of the button flairs.
To complete my layout I chose a title from the foam title stickers to add to the lower edge of my heart.
Thanks for dropping by the blog today and seeing my new layout. I hope it gives you some inspiration for some of your own projects!
Until next time,
Kylie.


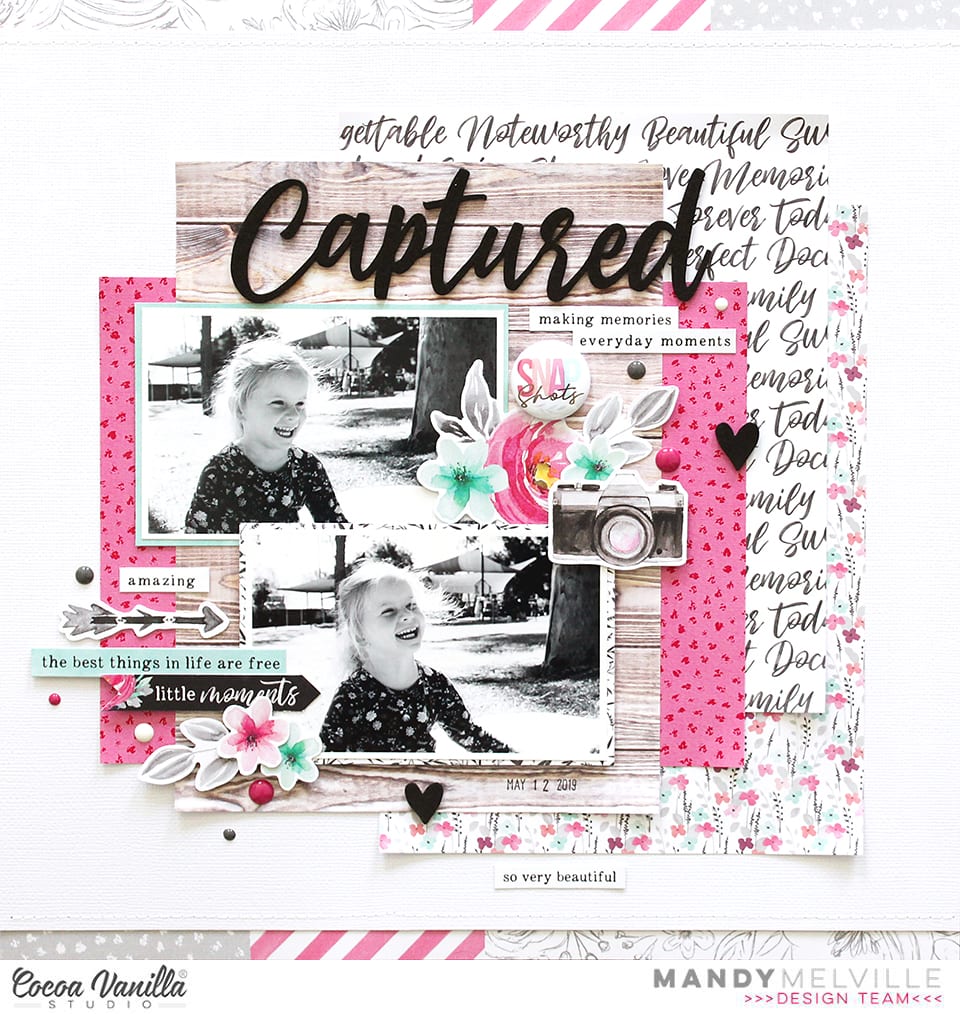
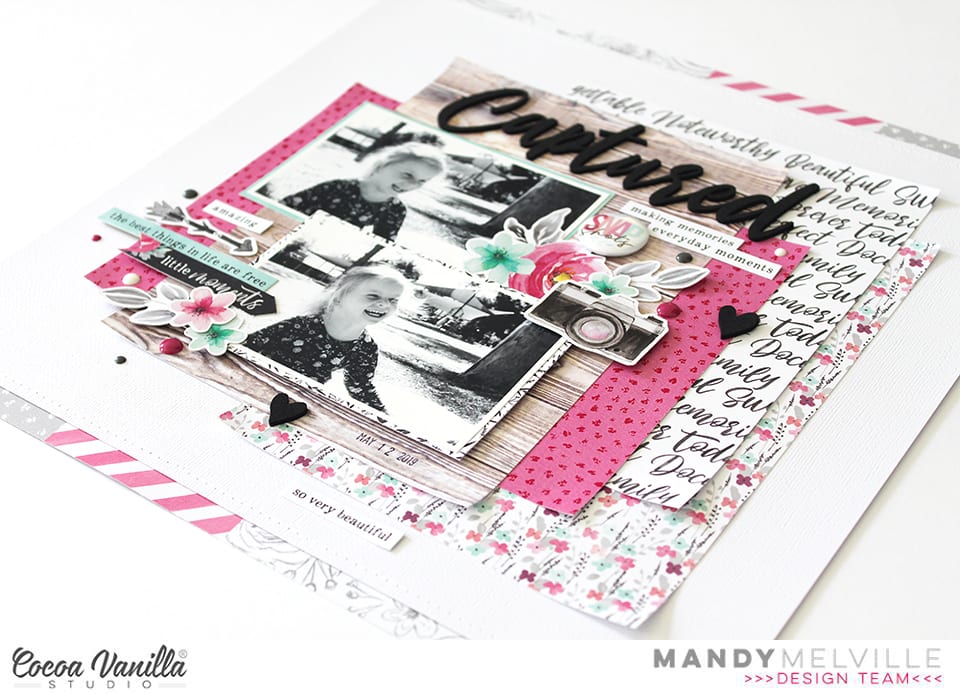
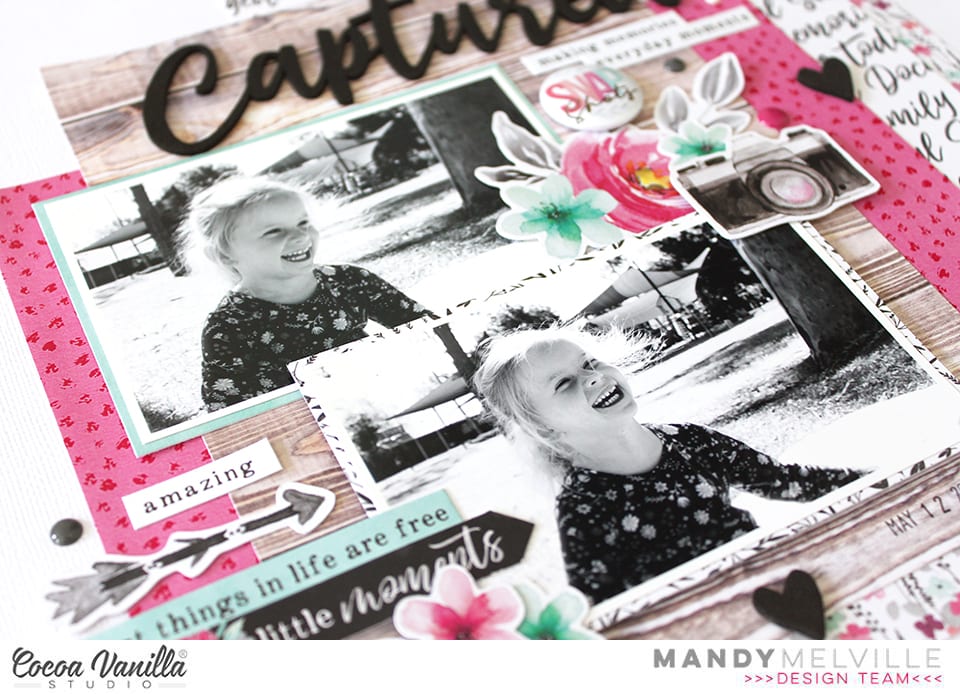


 I decided to cut a strip of the stripe side of the ‘Sprightly’ paper and placed it vertically down a plain white cardstock background. I then trimmed the white cardstock down so that I could use the pink side of the ‘Unscripted’ paper as a border. I added some machine stitching down each side of the vertical strip. I added some layers under my photo including the floral paper from the ‘Pretty Bits’ paper and one of the die-cut frames, I popped these all up using craft foam.
  I tucked in one of the tab stickers both at the top and bottom of my photo from the Accessory sticker sheet. As you can see in the detail photo above, I used some of the gorgeous new foam words as my title! They are gorgeous and aren’t too sticky, perfect if you aren’t sure of placement, they are easily repositionable which is very handy for me! I also added one of the gorgeous bows and a few other embellishments finish off this side of the layout.
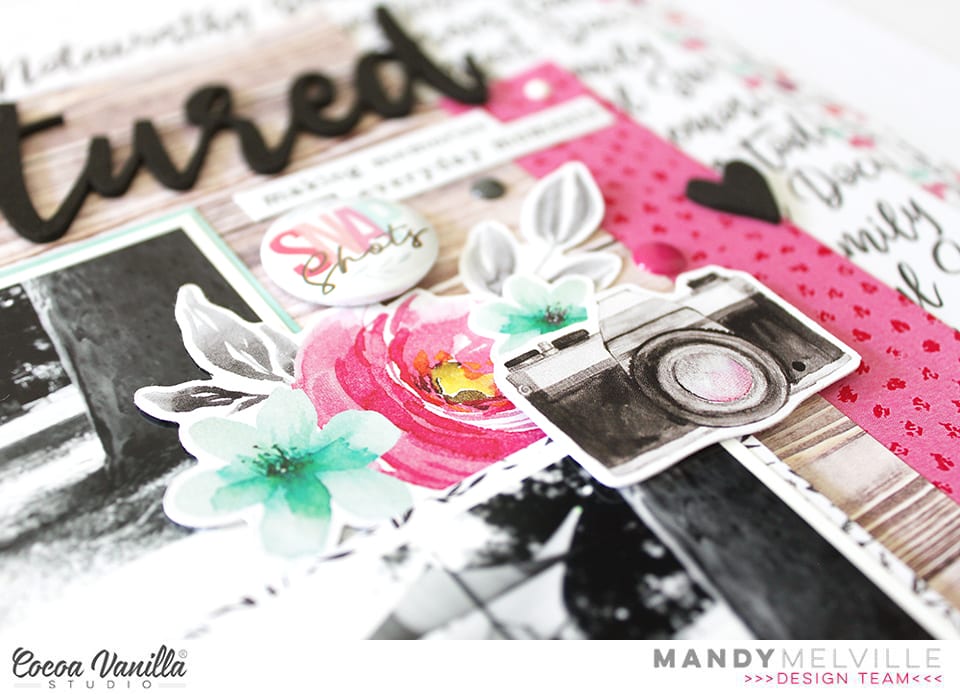
 On the left hand side, I added one of the cute banner stickers and tucked in some of the gorgeous floral die-cuts. I also layered one of the flair buttons to the top of one of the florals. A few other small embellishments like the clear stickers and enamel dots finish off this side. One thing I wanted to point out in the floral die-cuts is that gorgeous texture you can see in the detail photo below. I just love that not only are there beautiful colours in this collection but the texture is awesome too.


 I matted my photo with one of the papers from the Free Spirit collection and also layered another one above to replace the 2nd photo as I mentioned earlier. I also added some of the journal spots as a layering piece. I added one of the scalloped border stickers above the photo of my sister and I also added a few embellishments to this area also. I fussy cut the ‘You and Me’ title from one of the journal cards included on one of the papers from the Free Spirit collection and positioned it where the sketch suggested.
  I cut out the pink phrase ‘Hello Happiness’ and added that tucked in under my photo and also layered the ‘Wonderful’ die-cut phrases over the photo also. One of the cute flair buttons and a die-cut heart were added to the left of the photo. On the sketch, the suggestion is to place a large embellishment like a jar of flowers, I added one of the floral stickers from the accessory sticker sheet here instead and I really like how it looks.
  Lastly I added the die cut banner popped up using pop dots to the top left corner touching the machine stitching, I also sprinkled some white sequins around and some navy Heidi shine mist. The date stamp was the very last thing added and that completes my layout.


