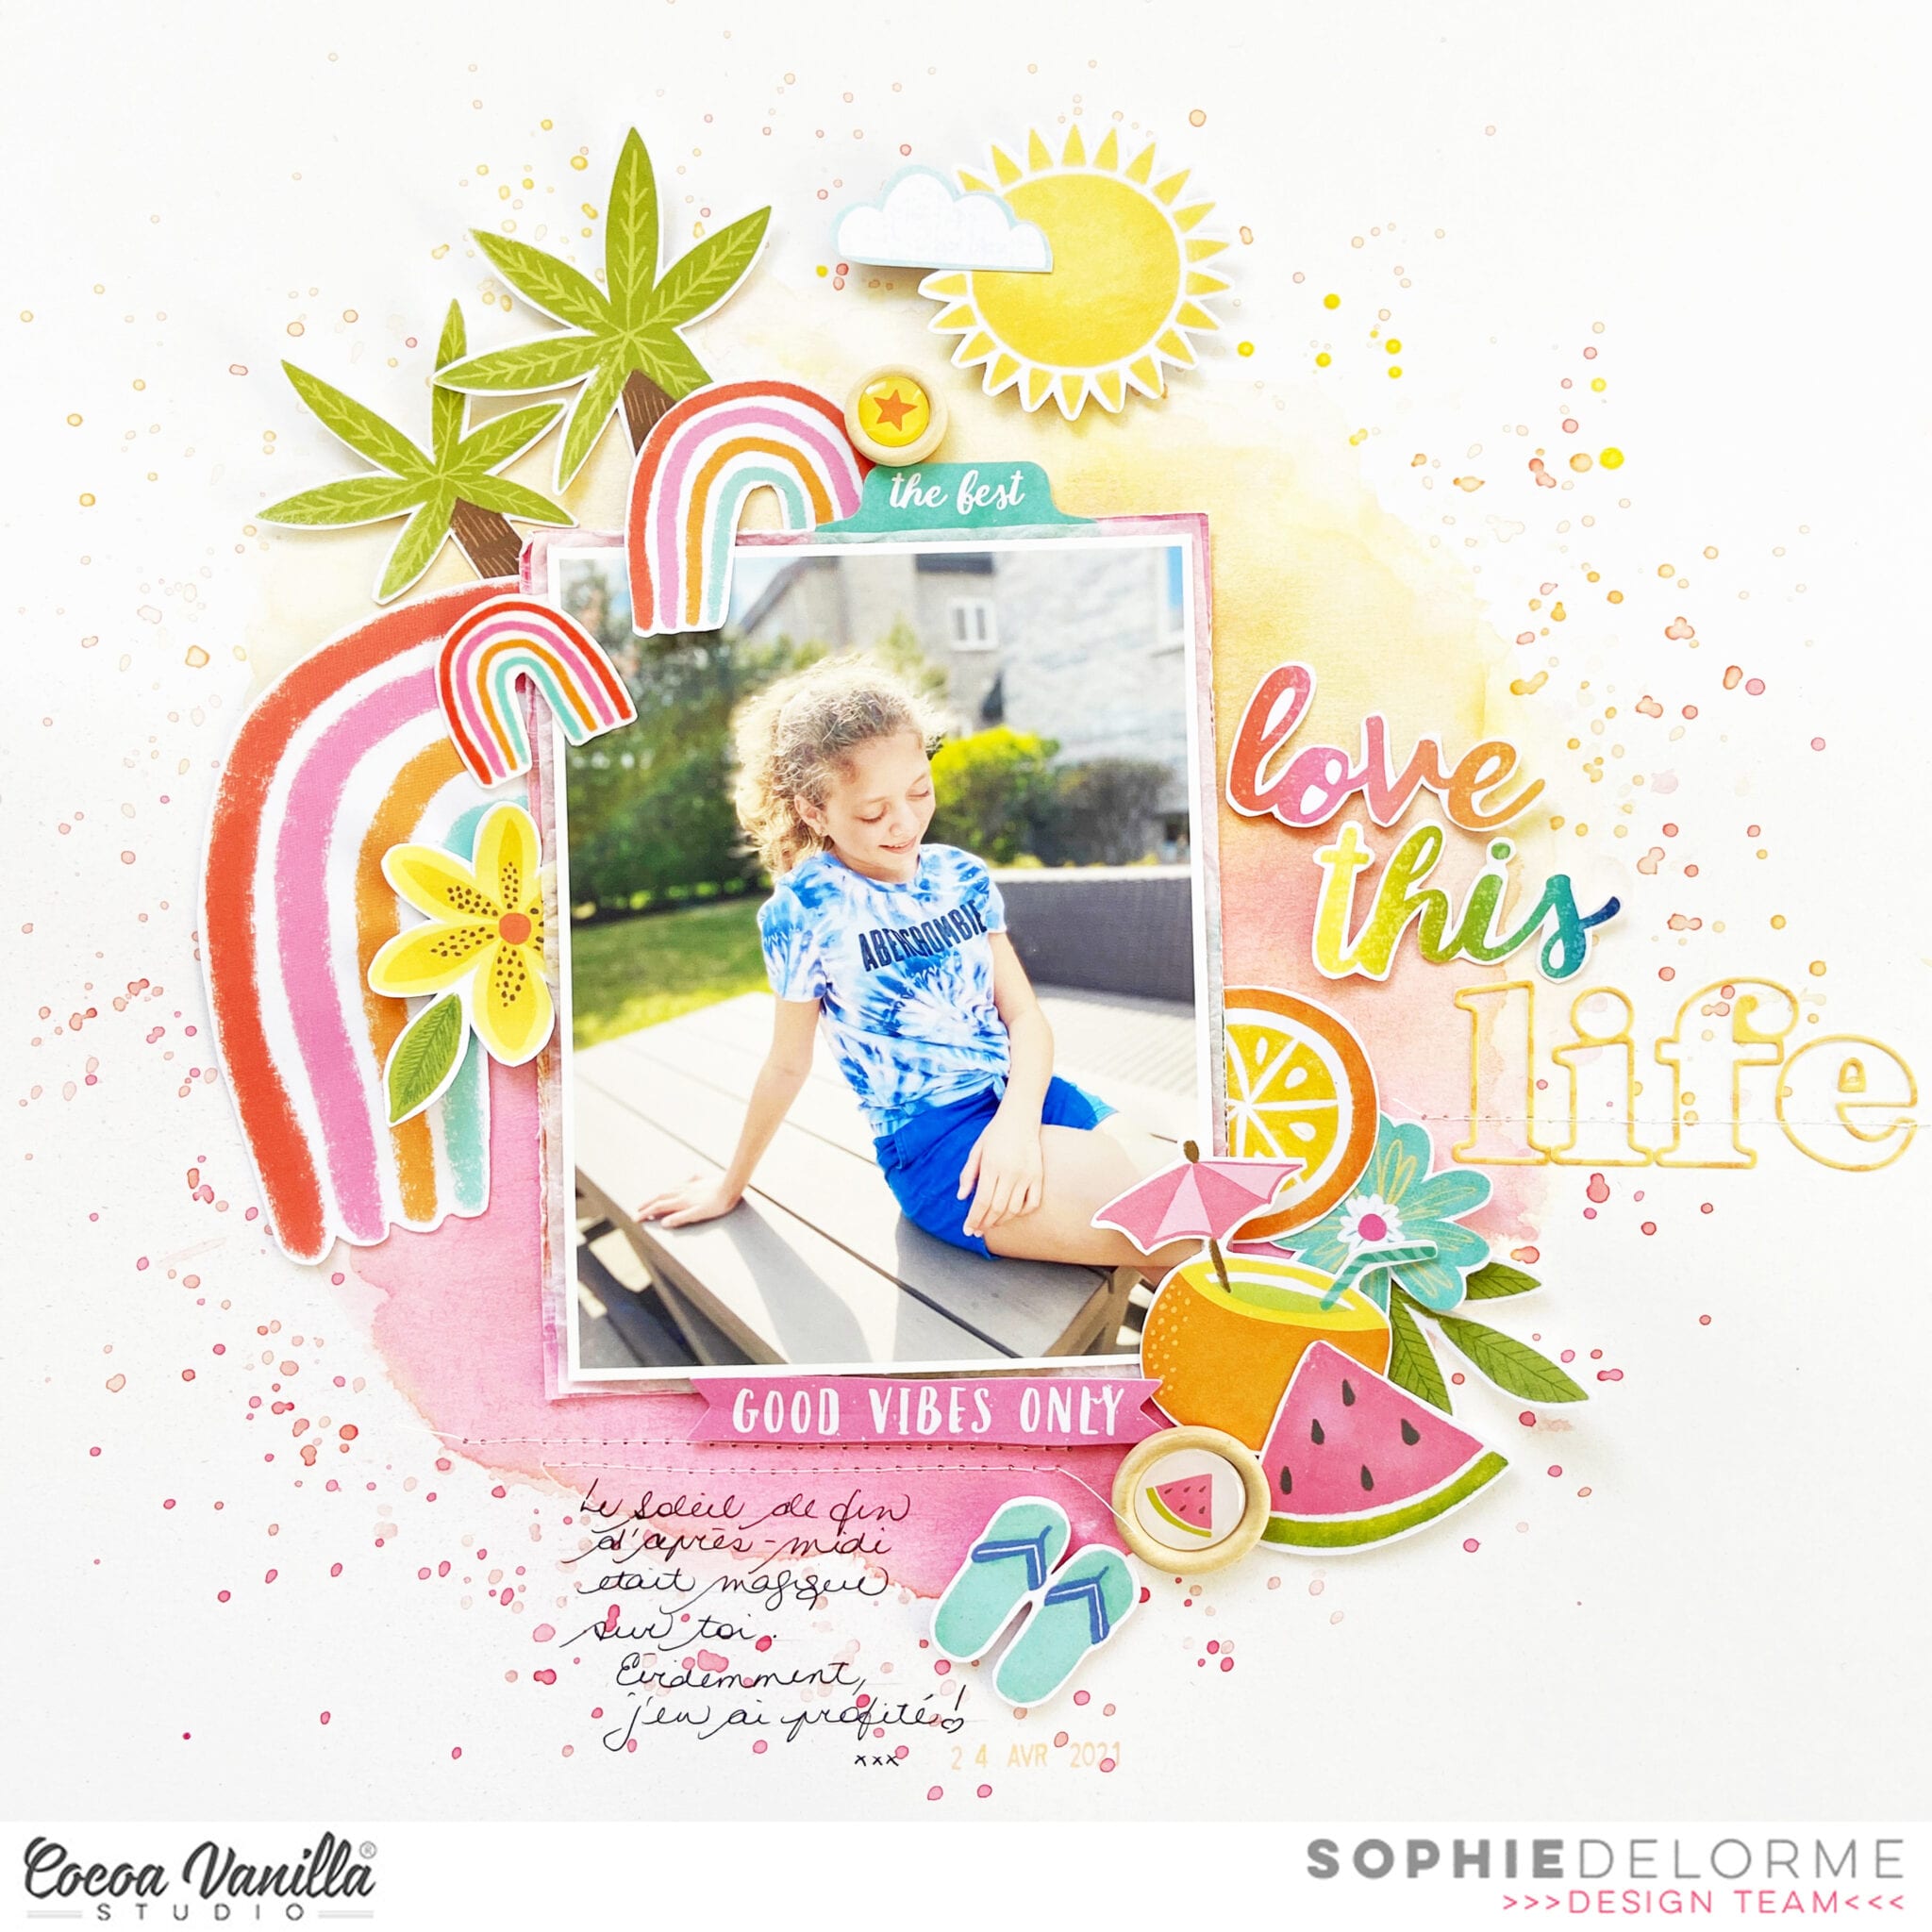
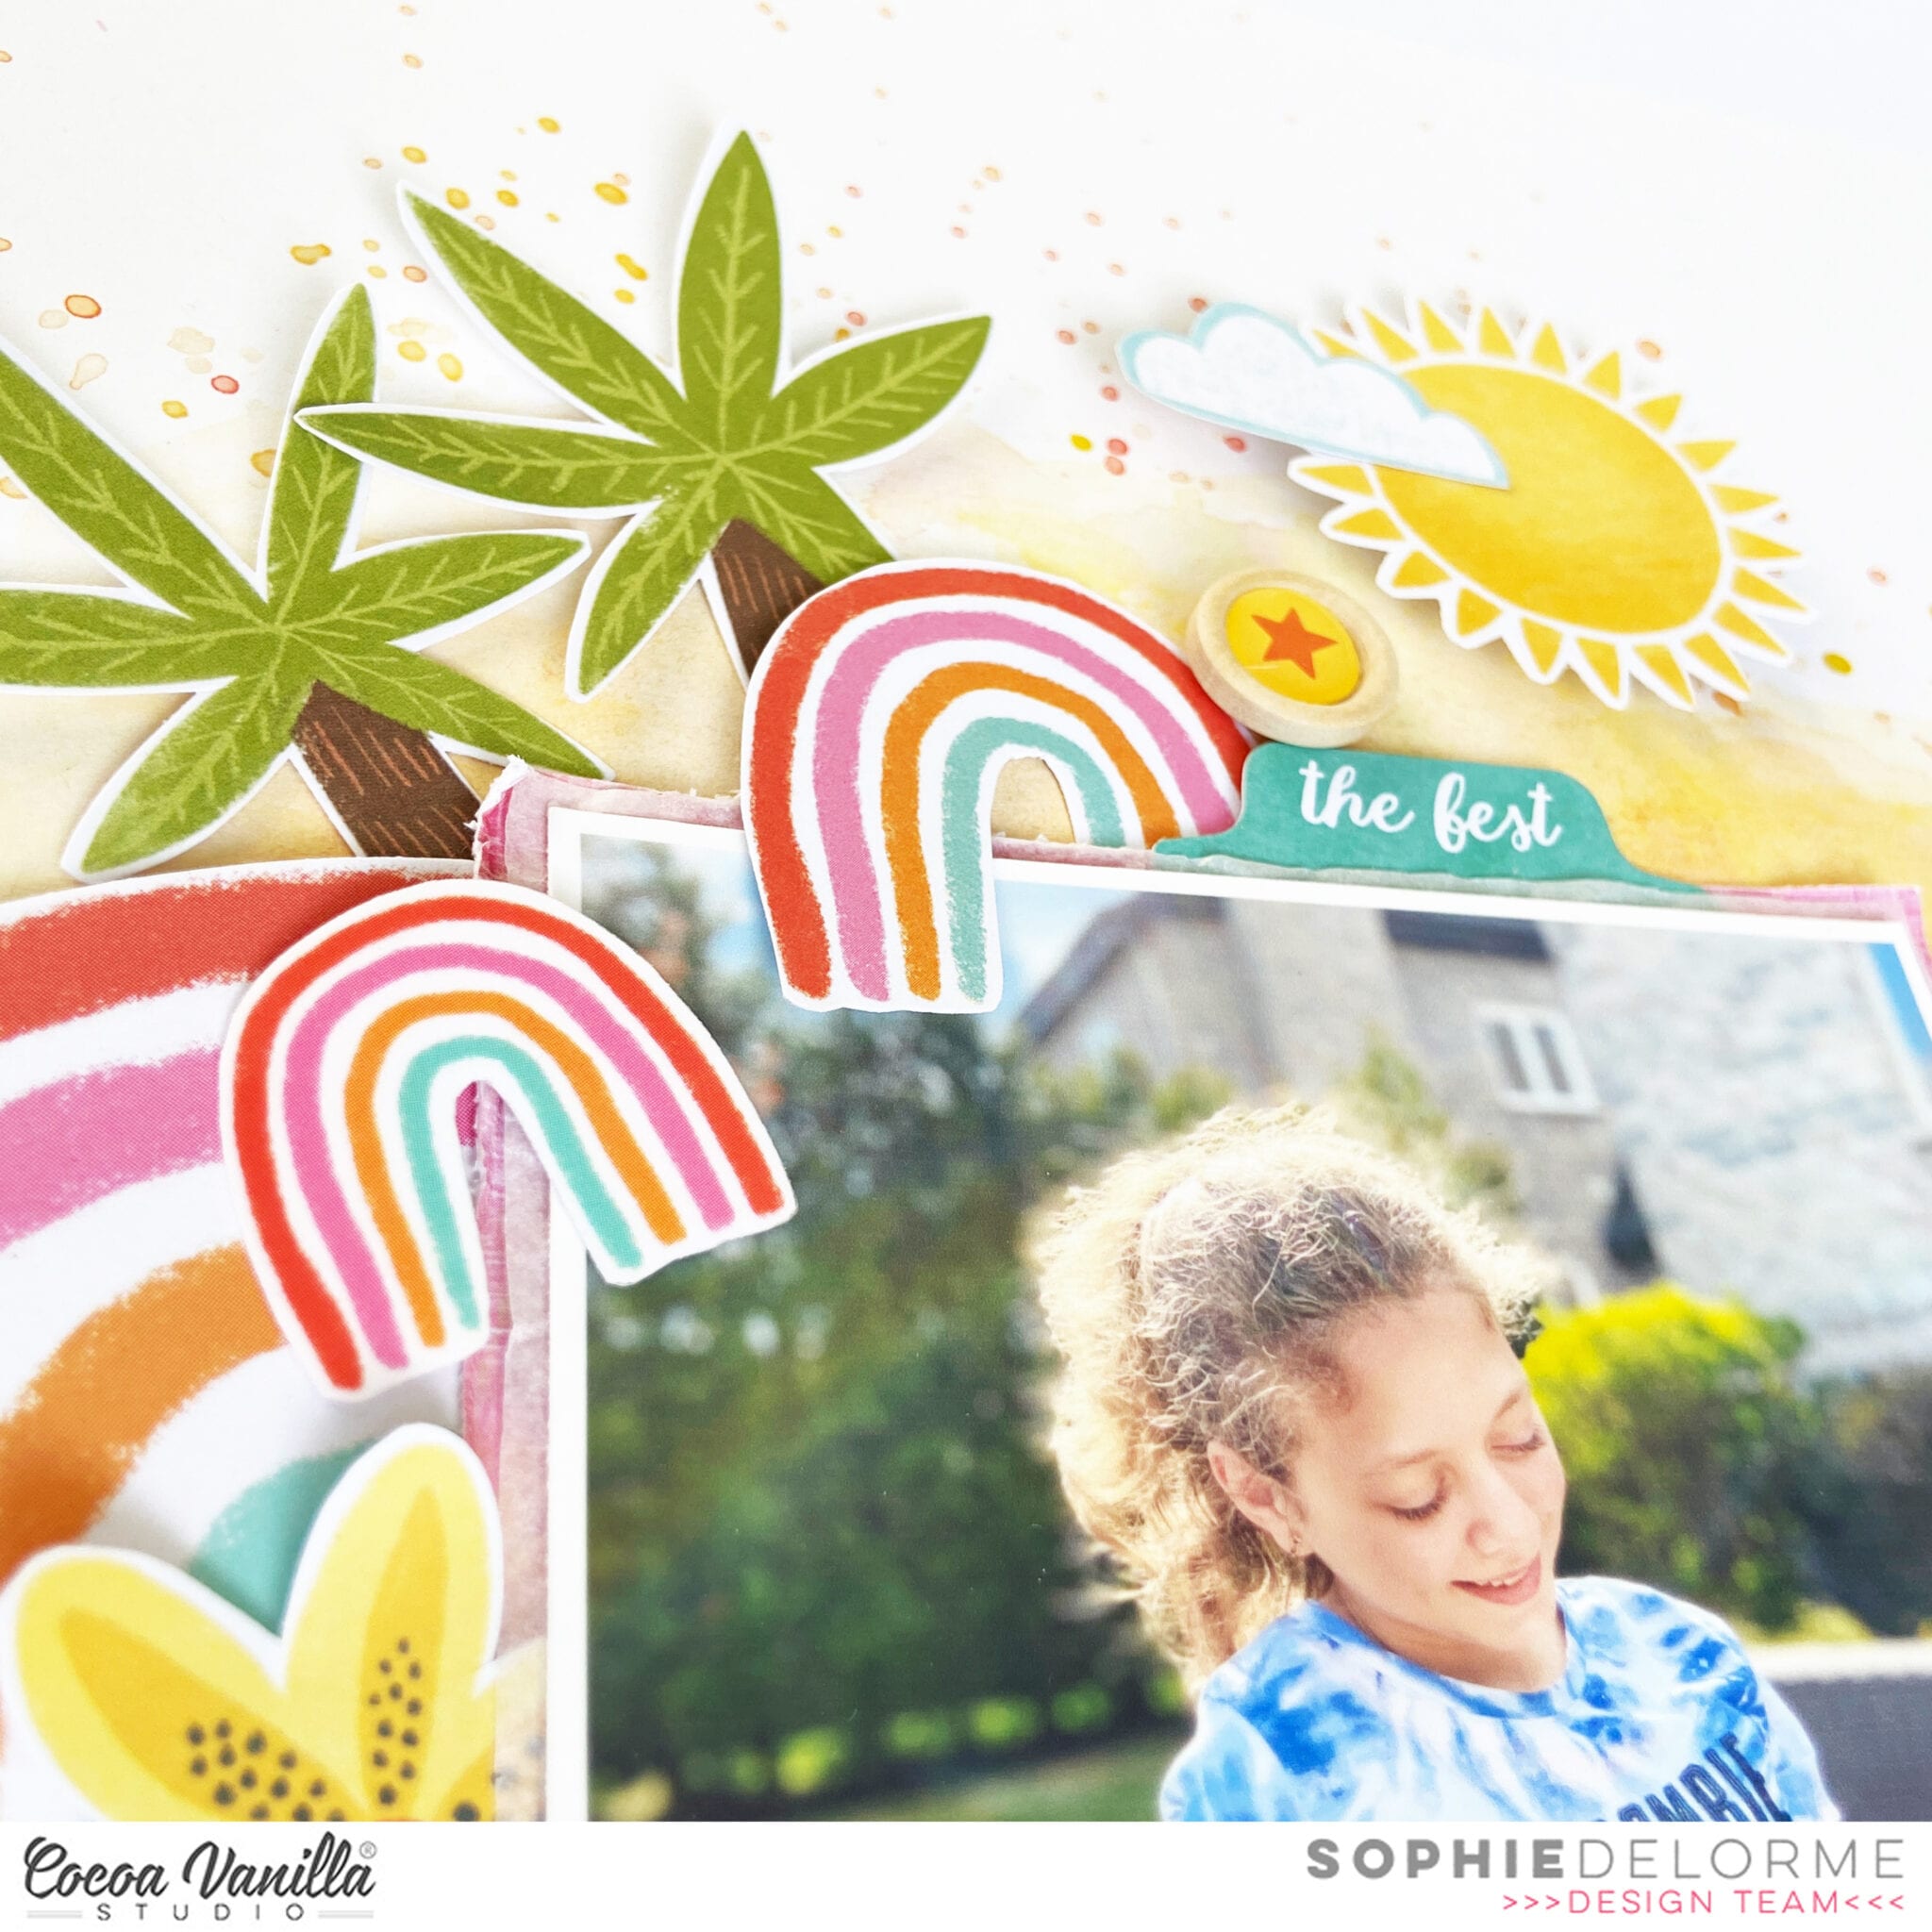
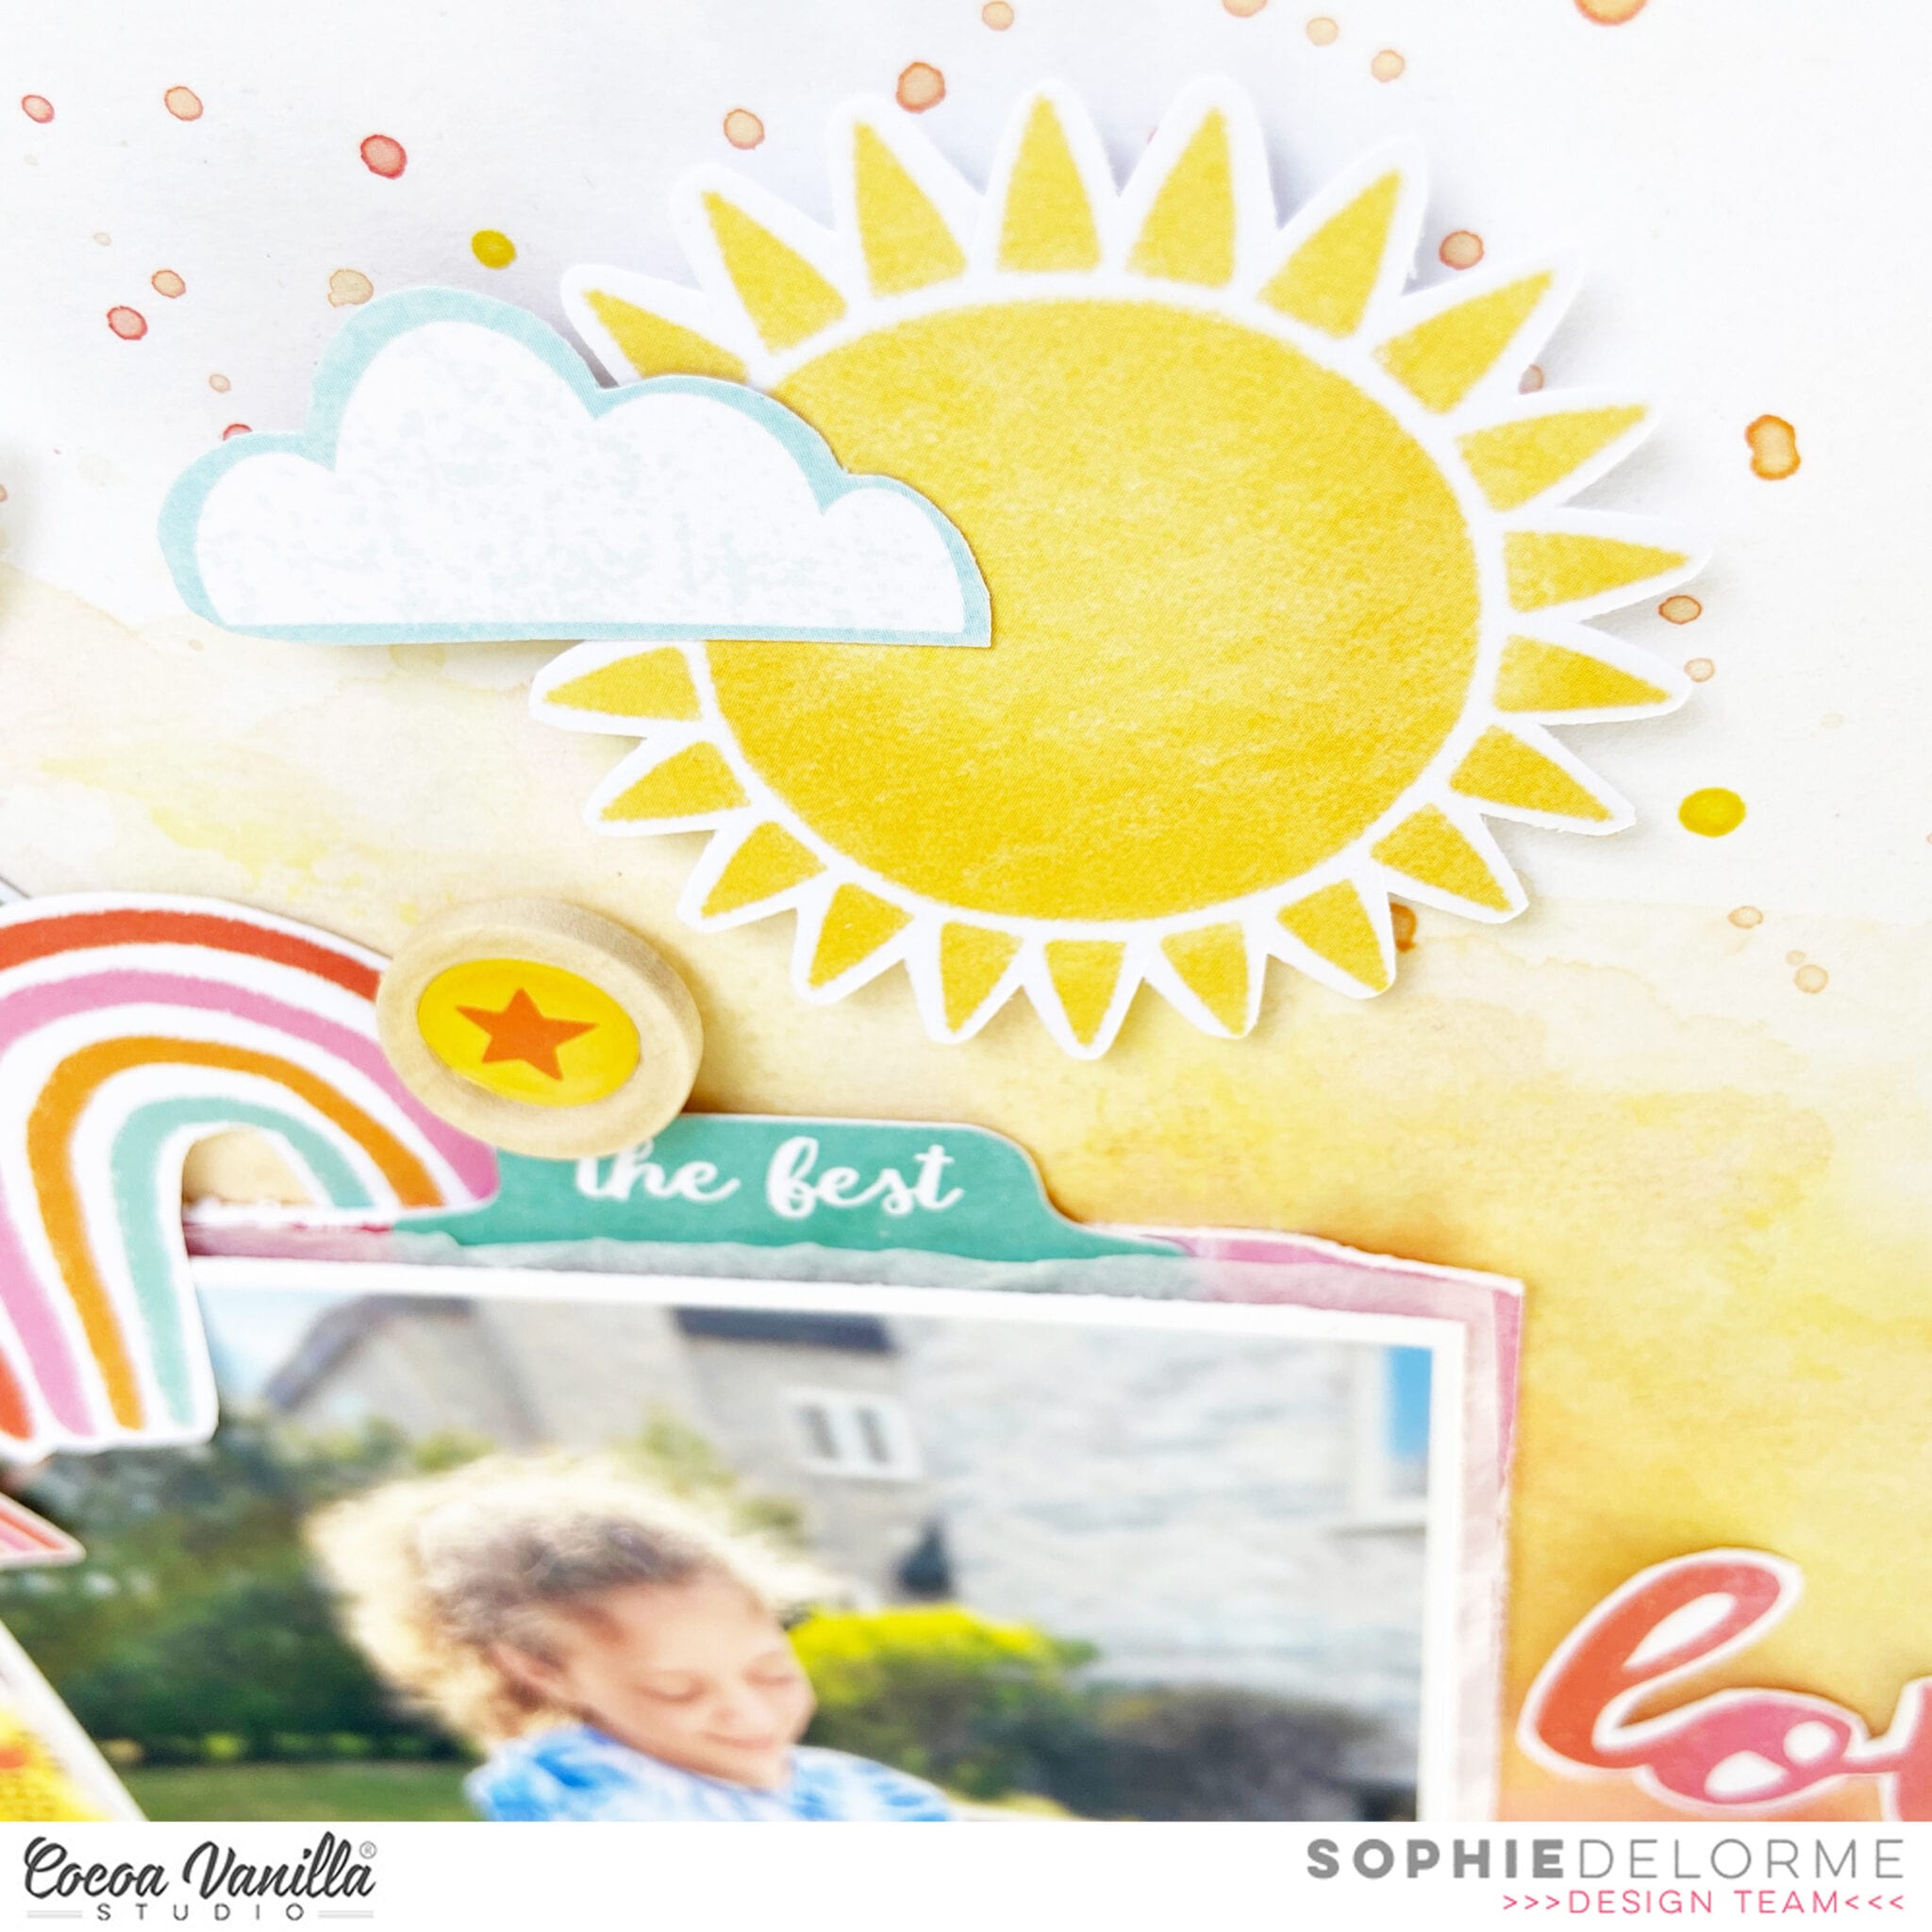
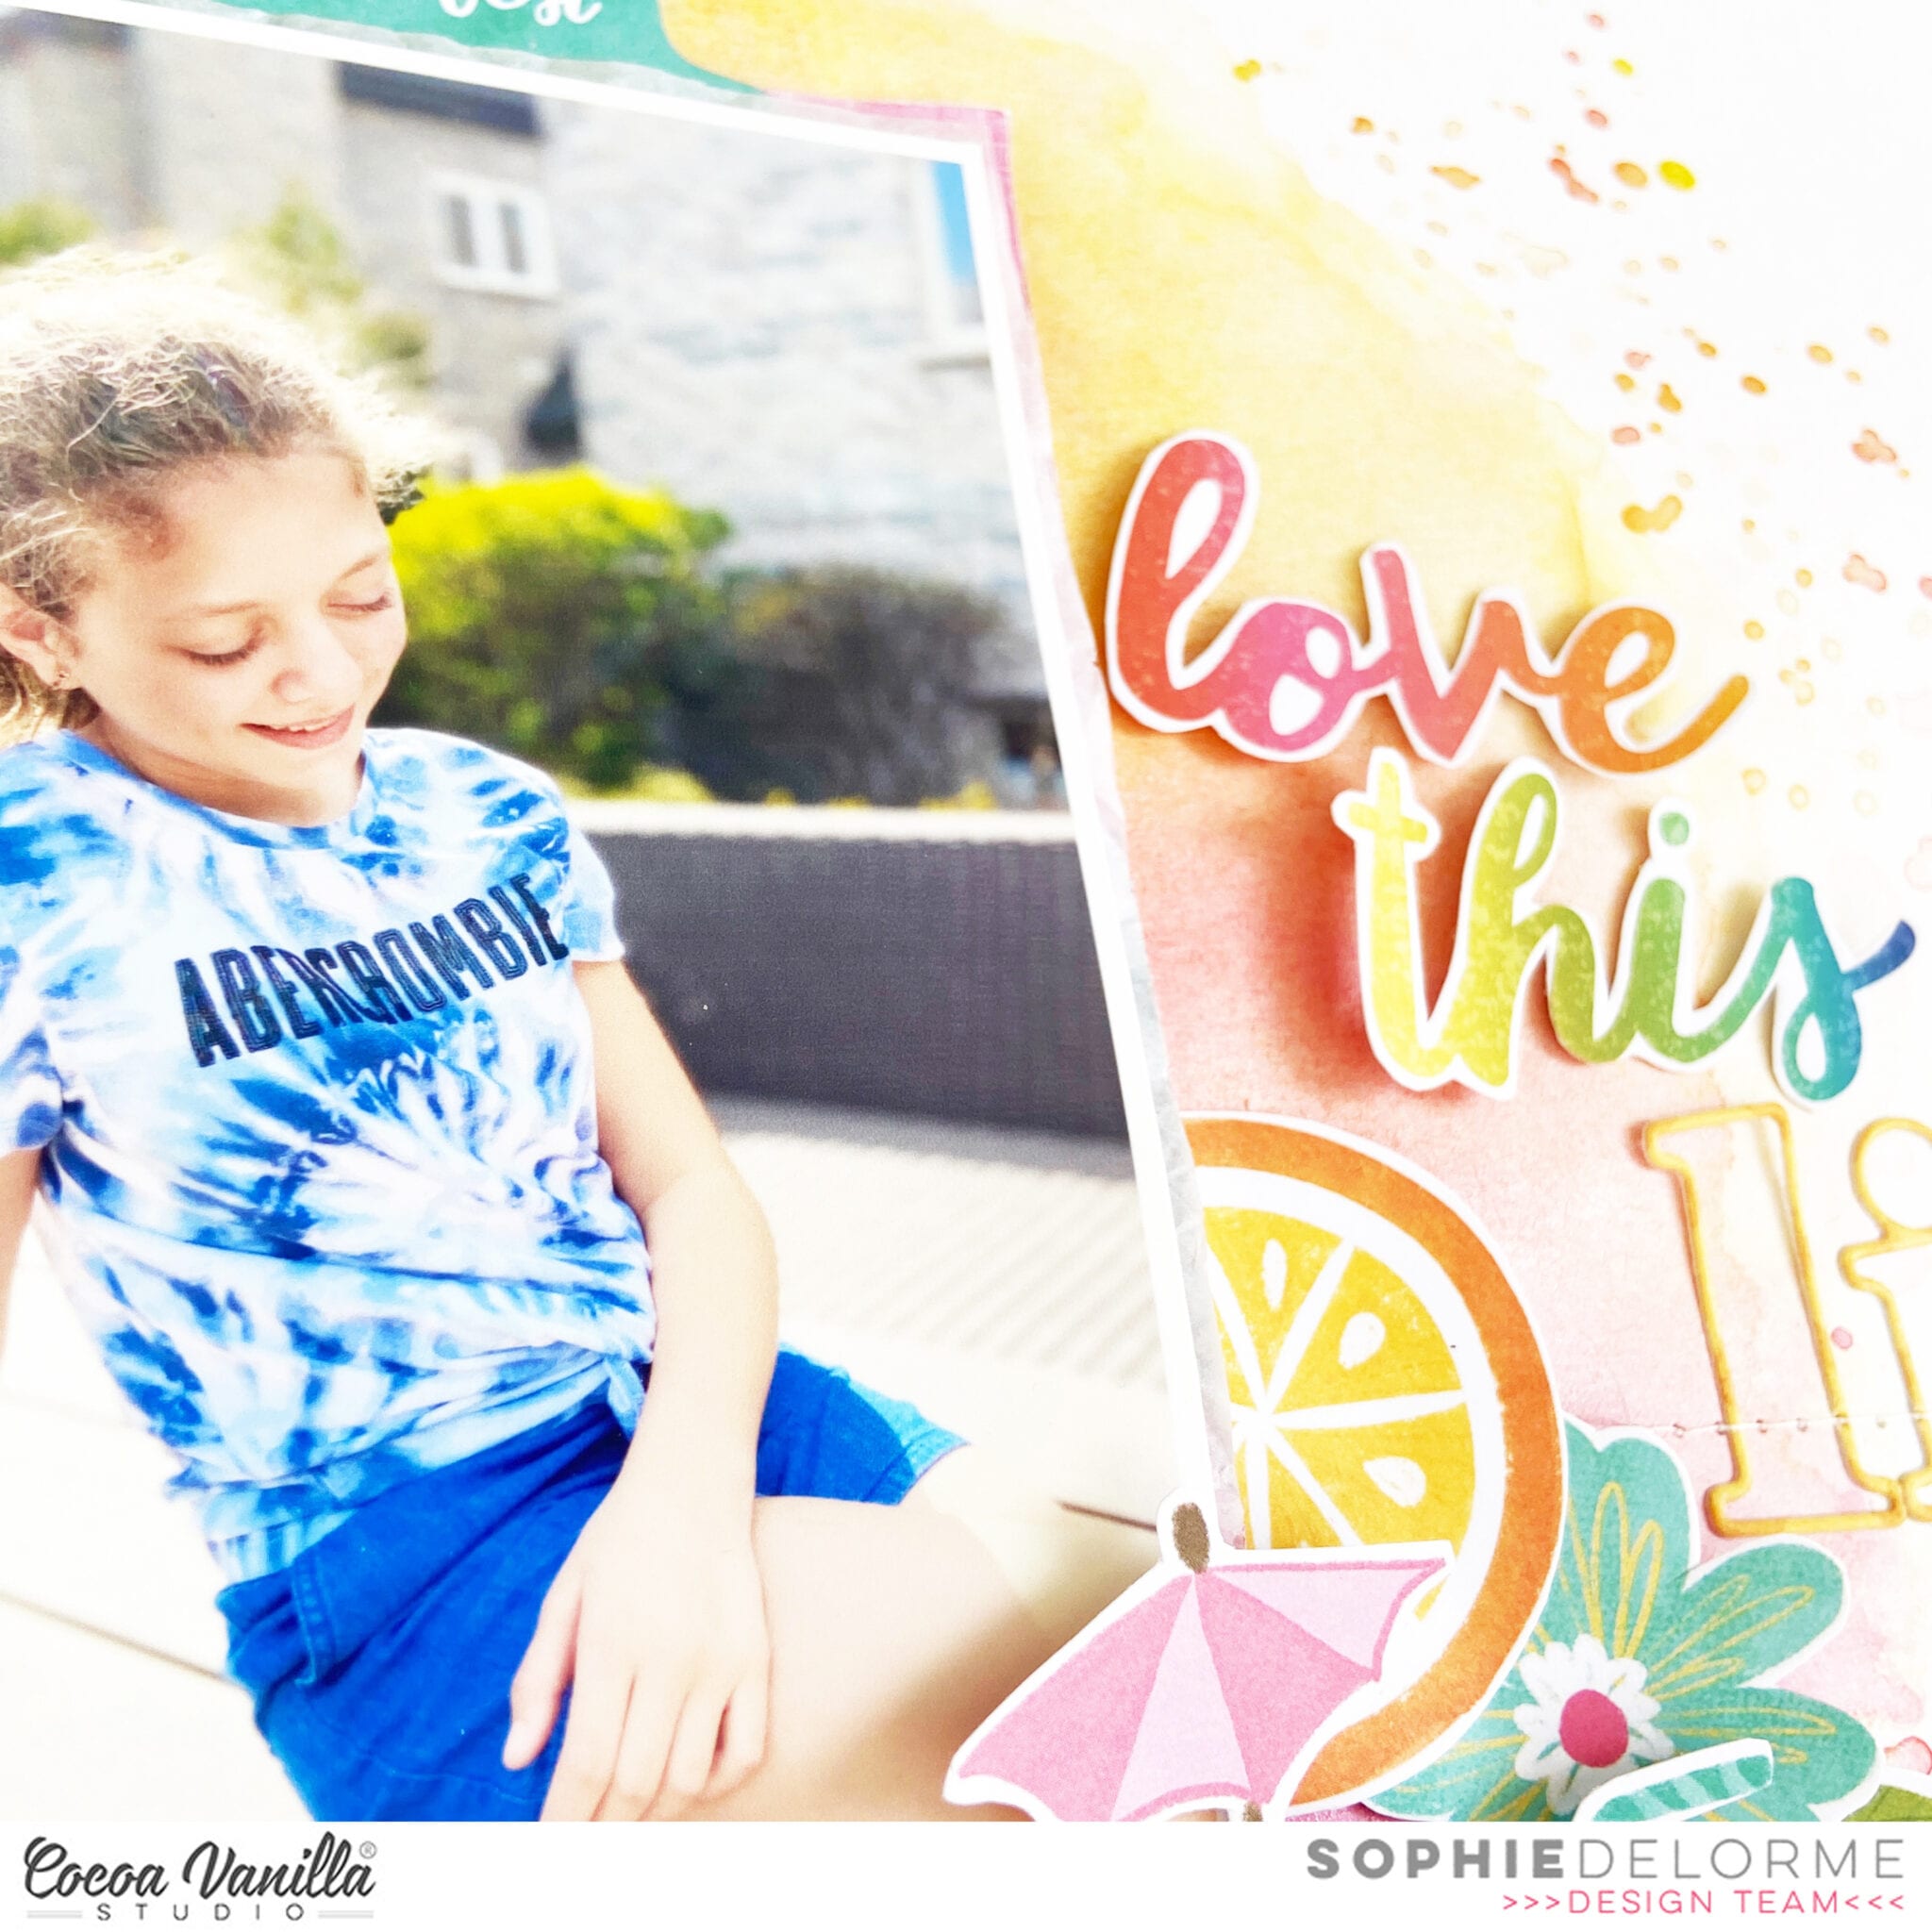
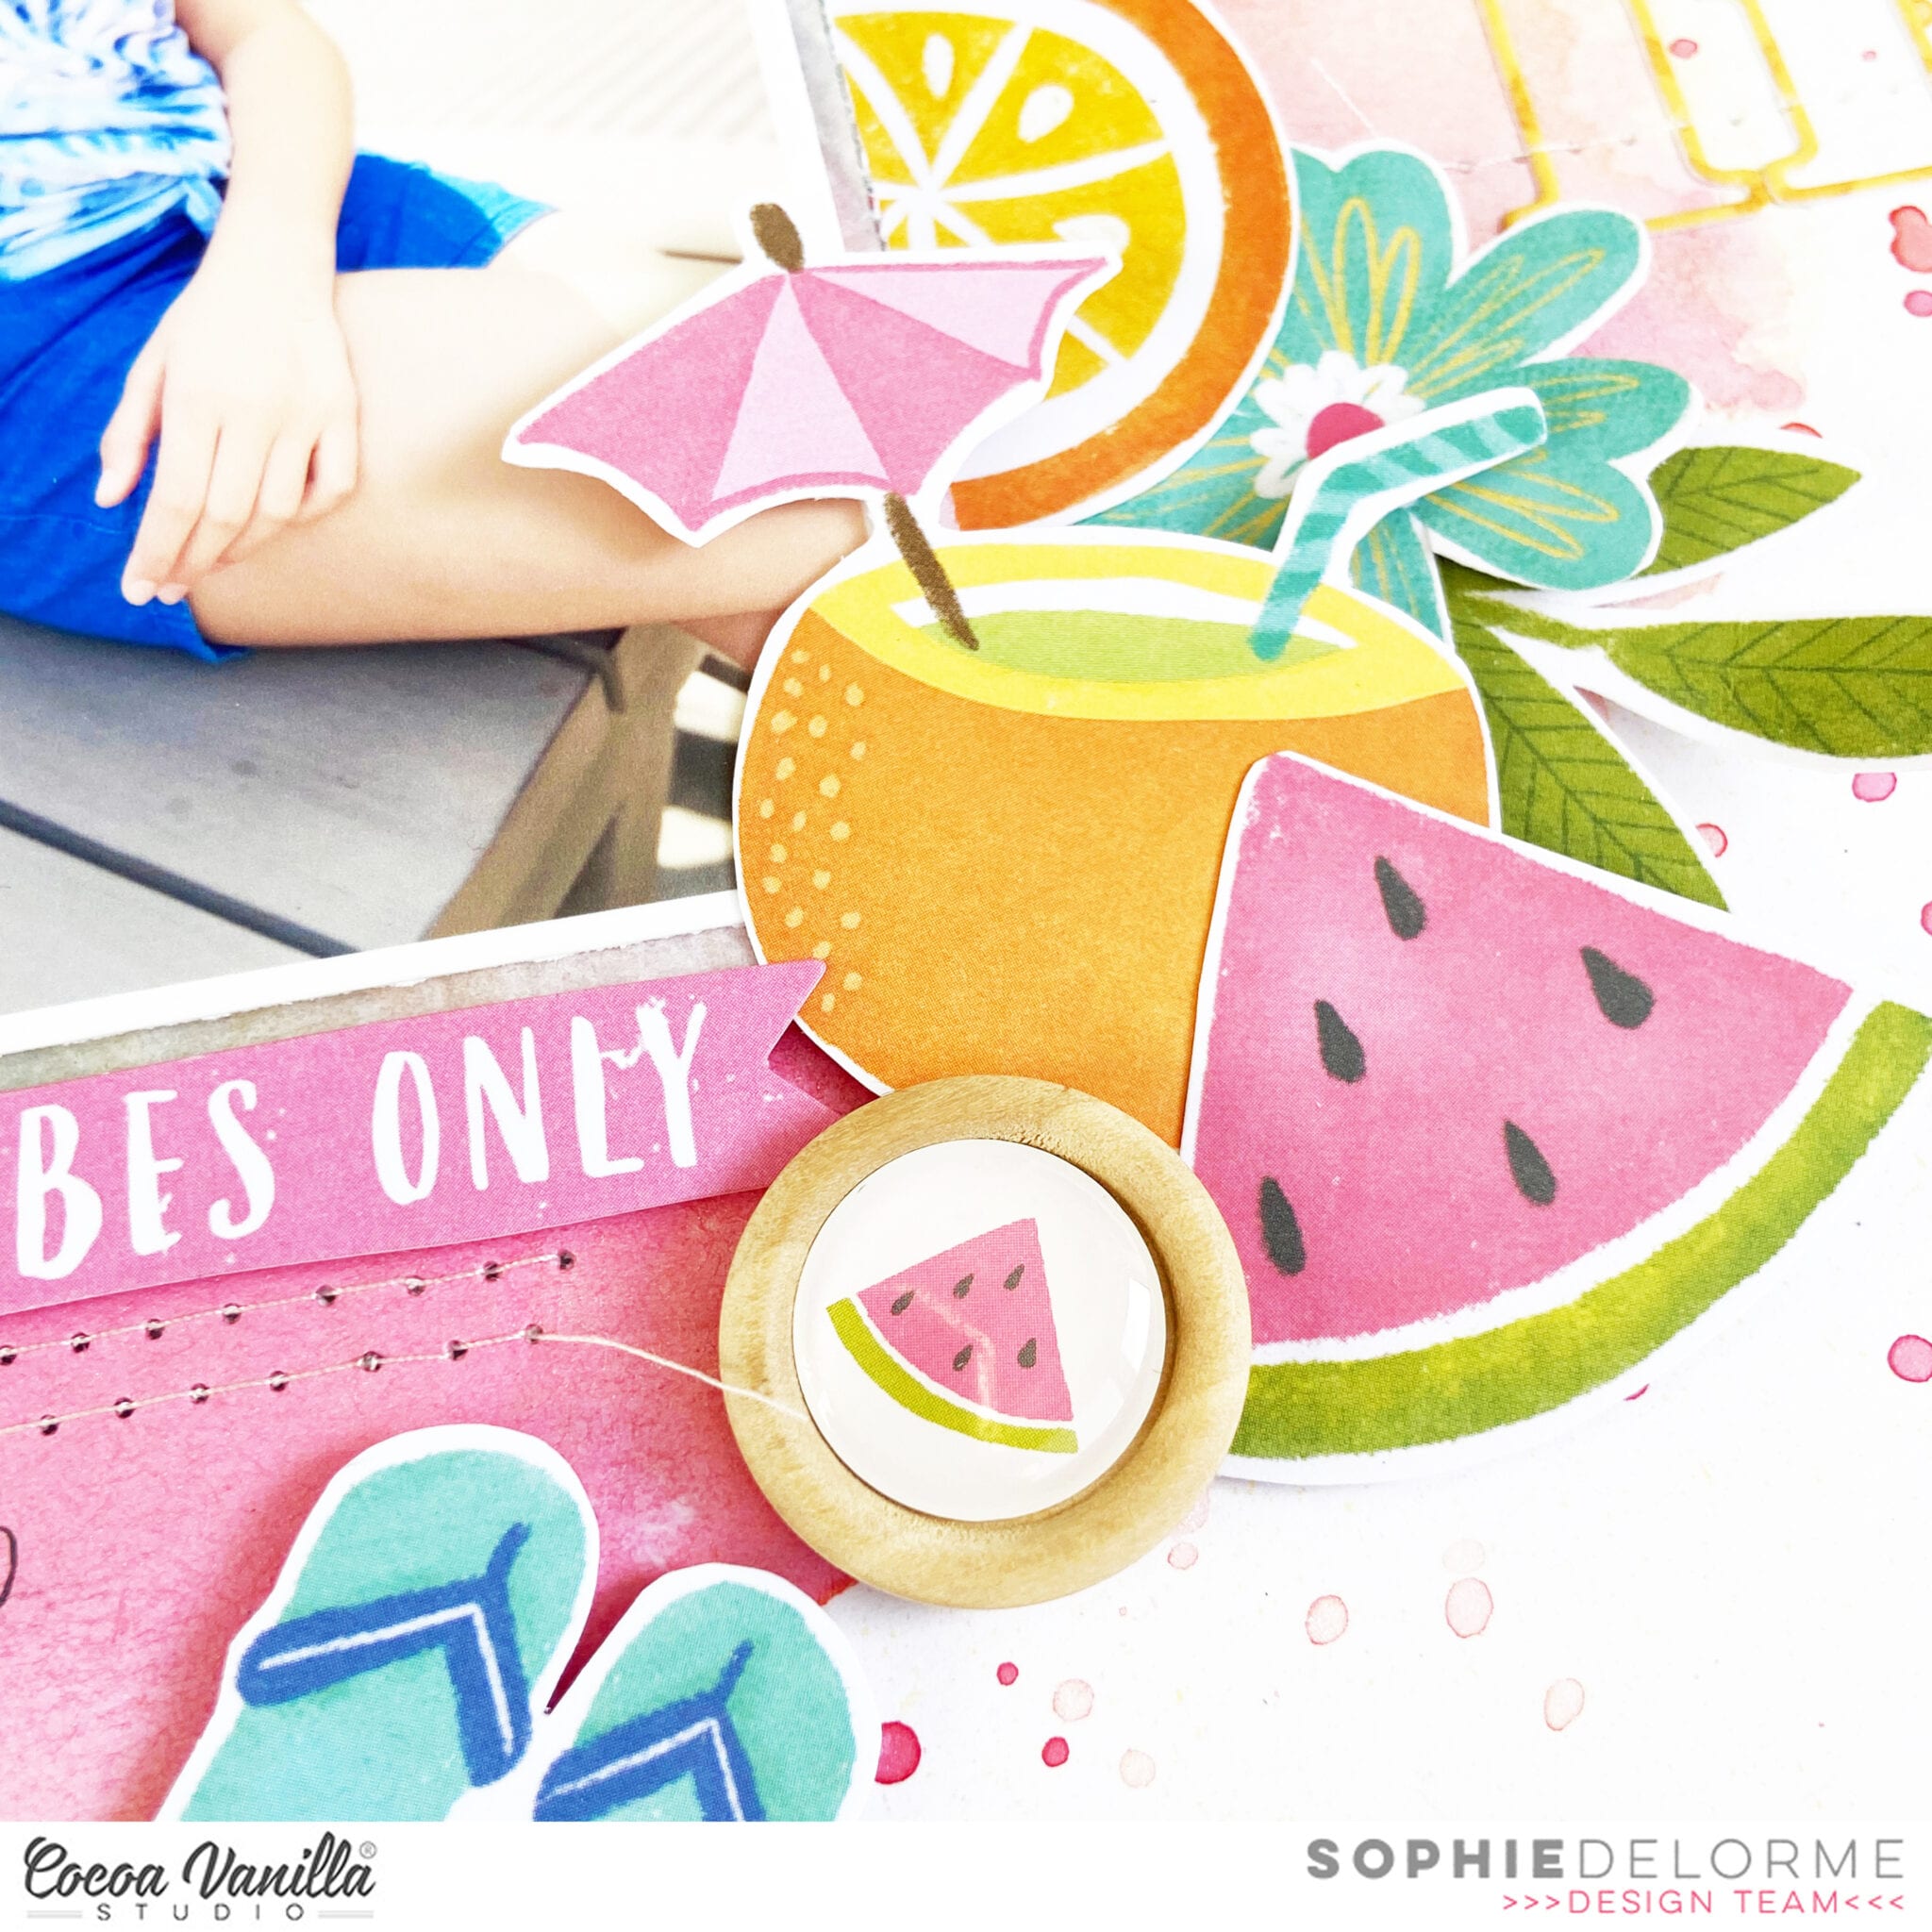
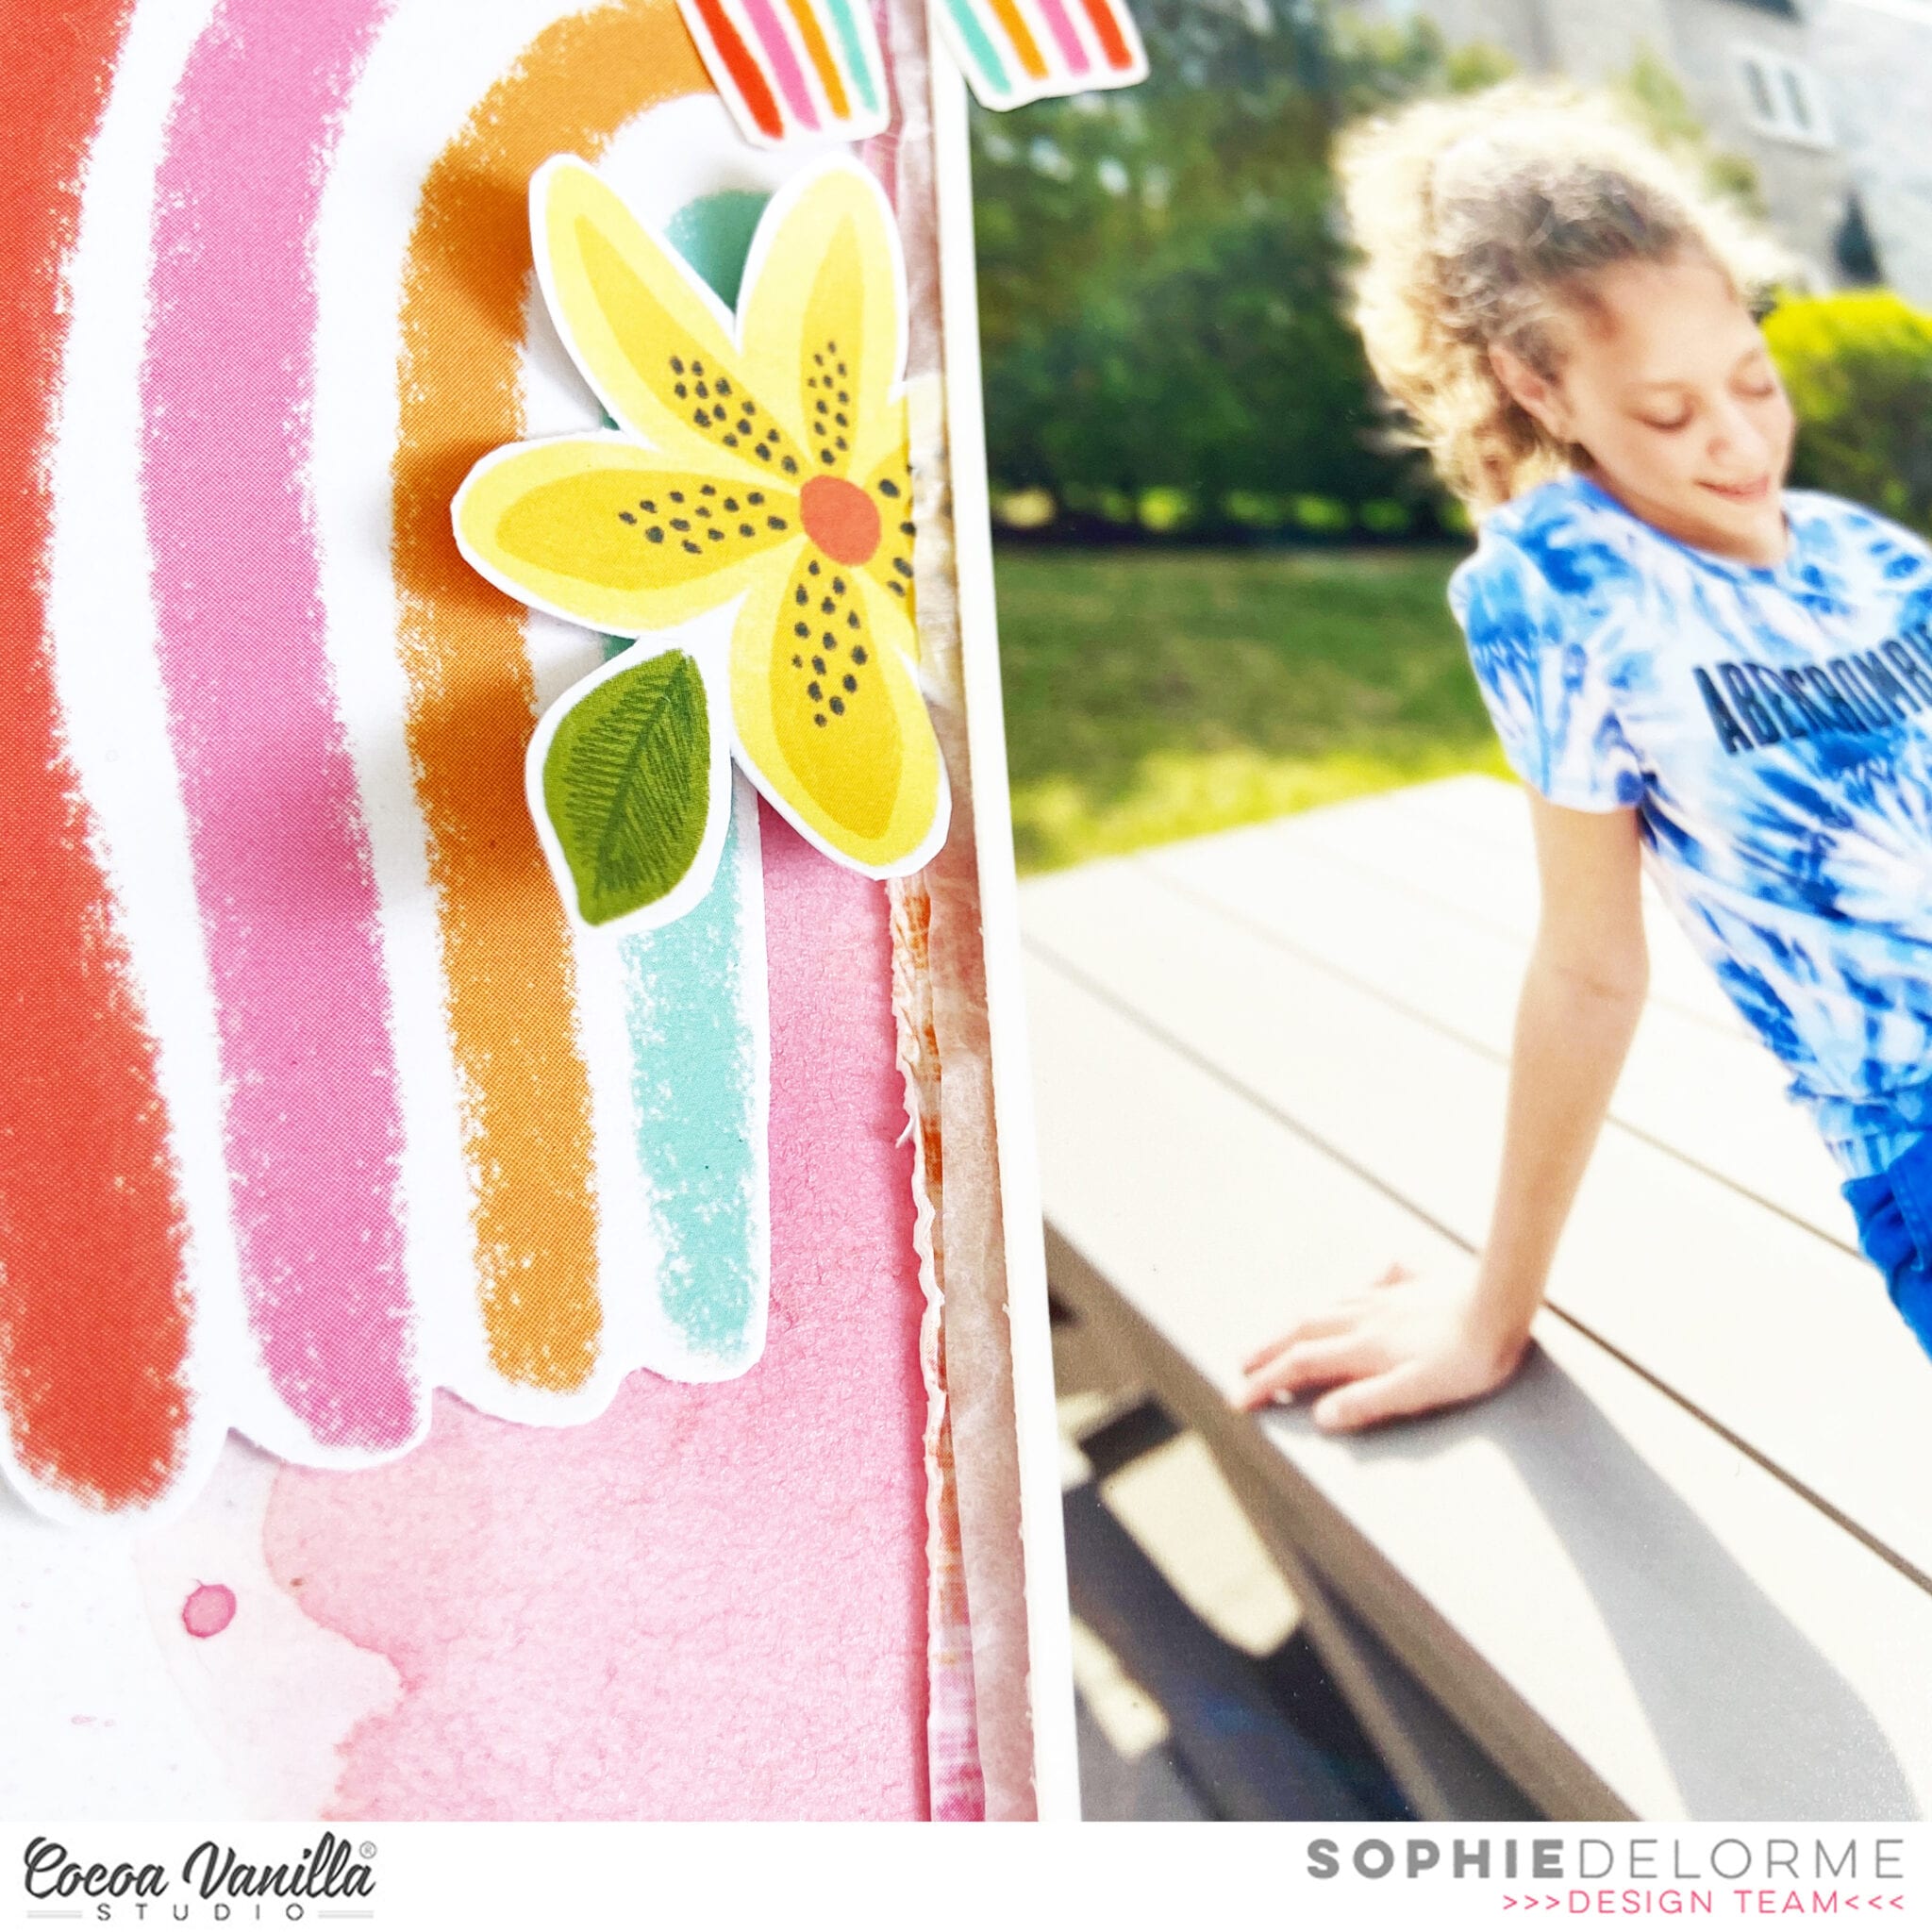
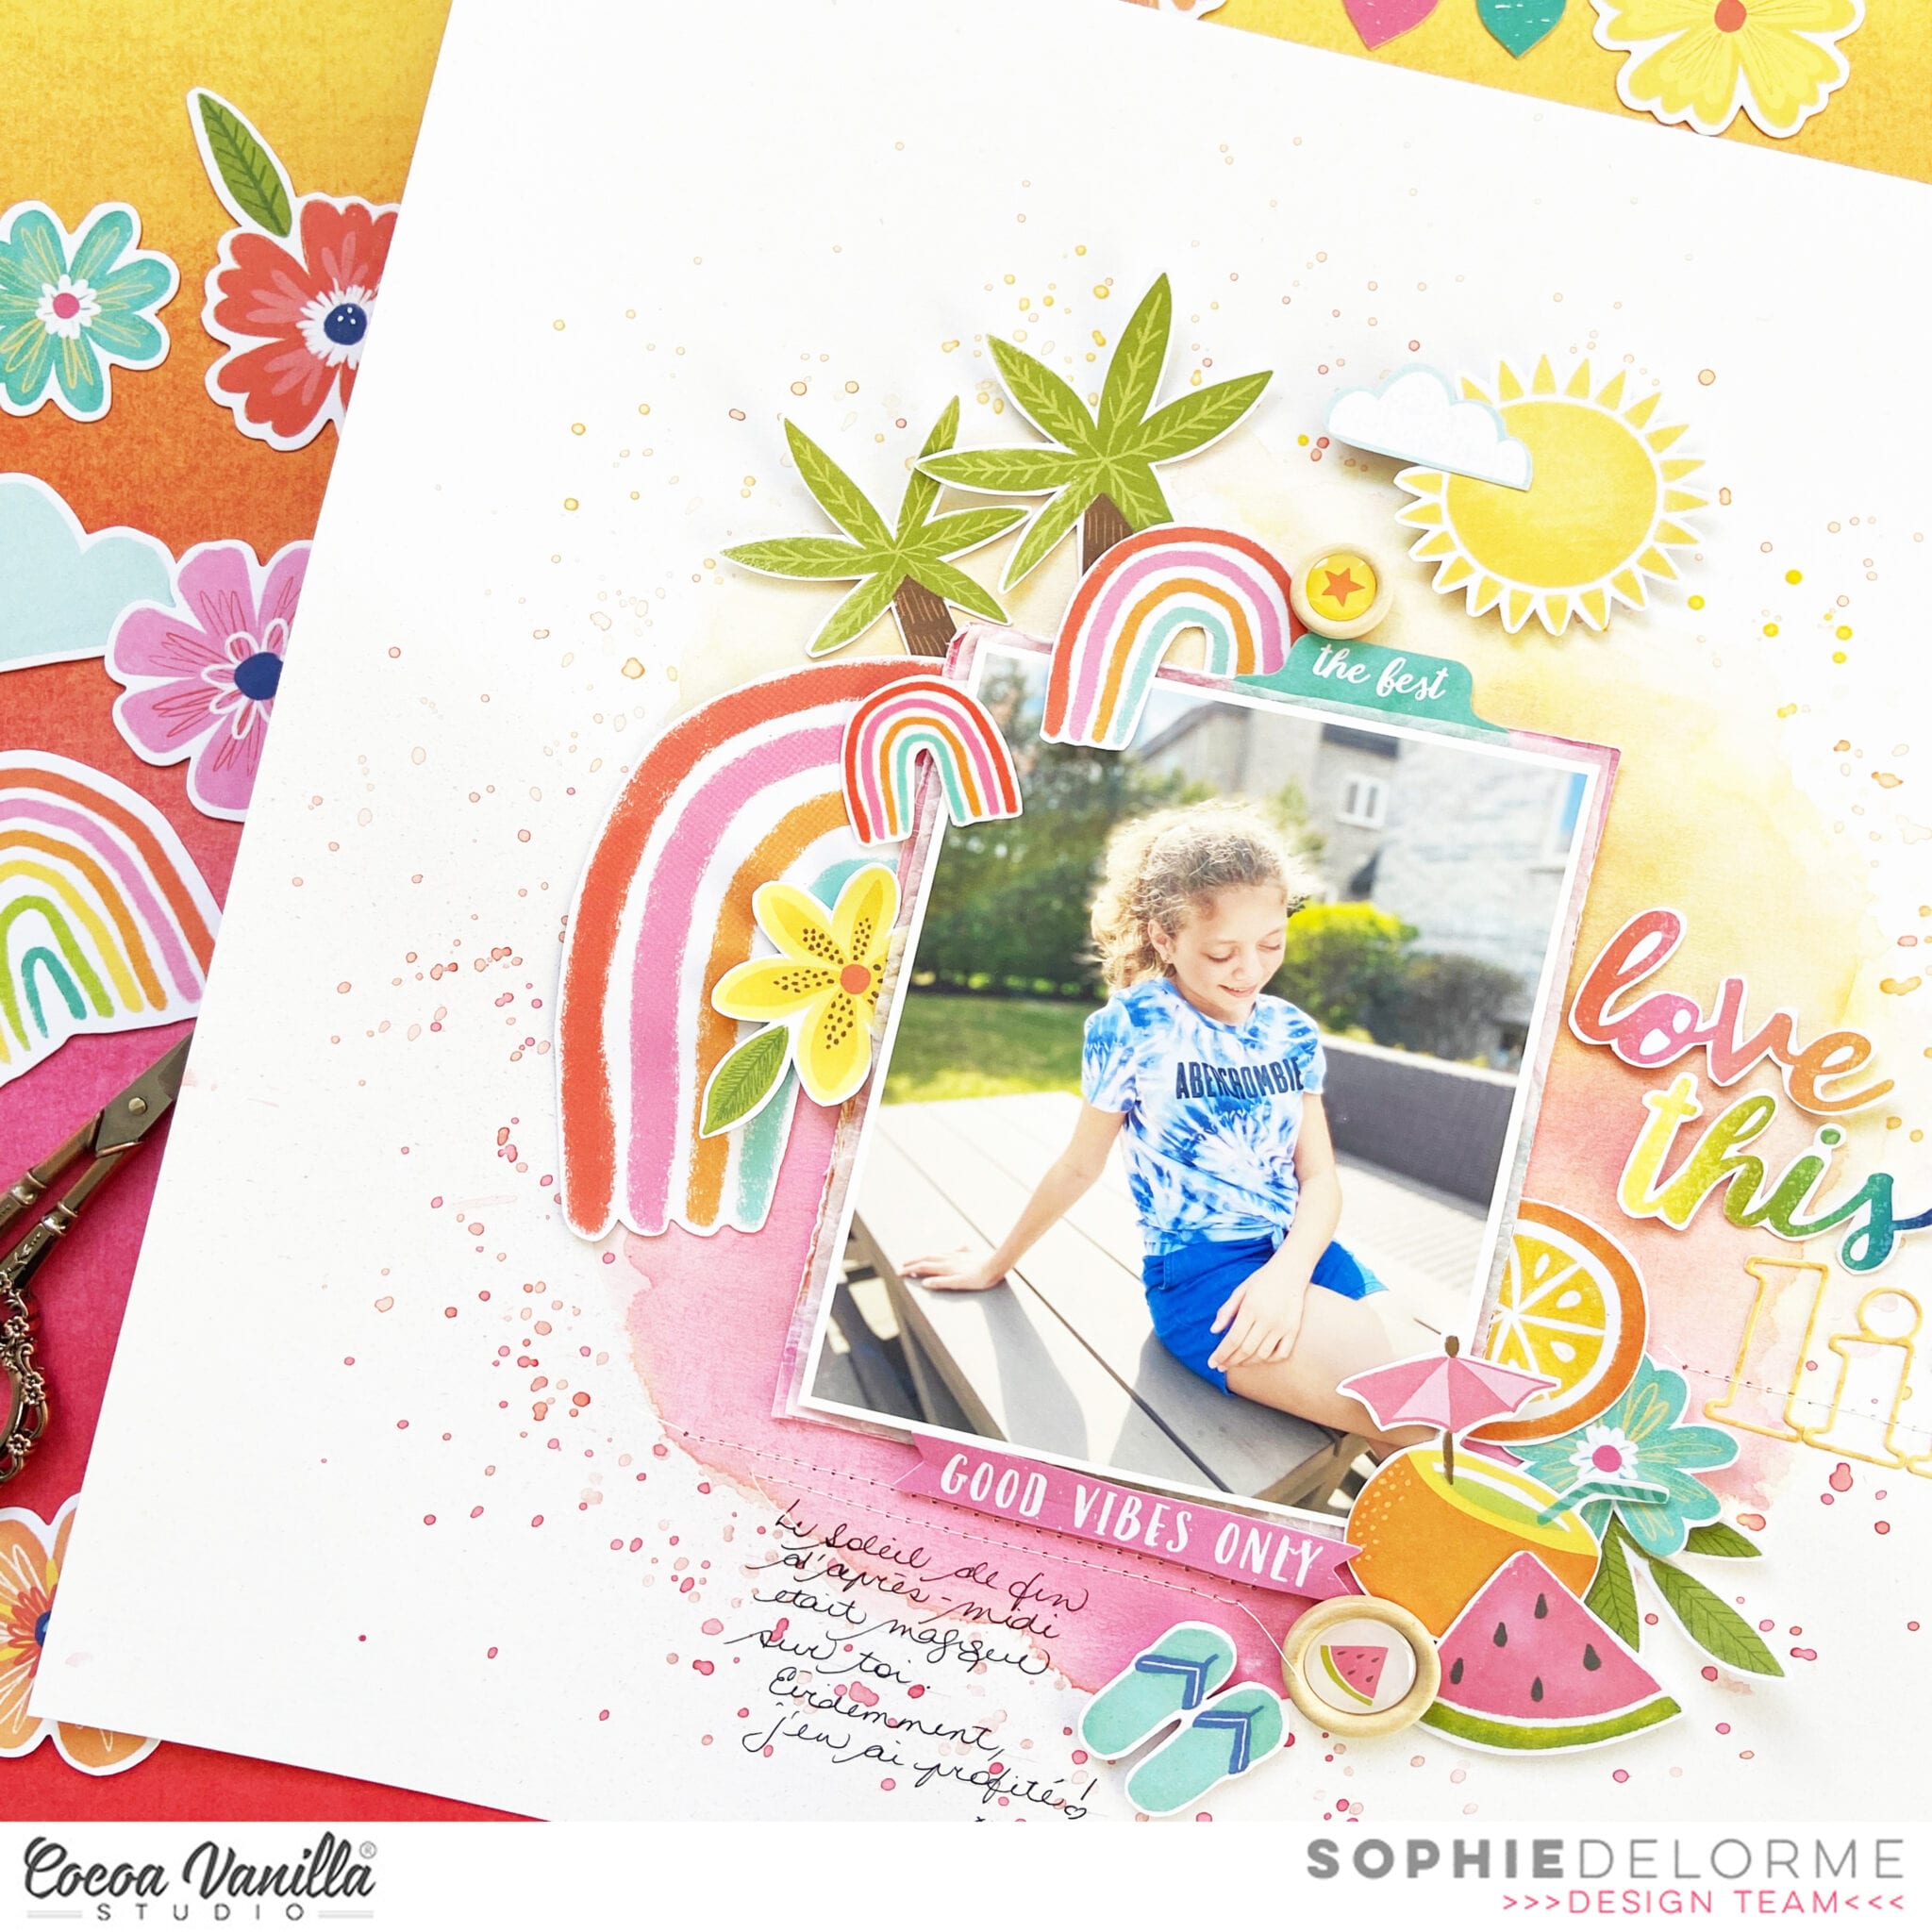
I started by creating a mixed media background. I used thick white cardstock, added a lot of water and sprayed a few different Shimmerz paints (mostly Mustard Seed and Sweet Heart Vibez). I let the colors run and blend on the cardstock and also added a few splatters with a brush. I let it dry completely.
It’s Mandy Melville, and I’m so thrilled to be back here on the CVS blog for the first time in over a year to share some inspiration with you all! Unfortunately I had to take a break from my design team commitments over the past little while due to increased work commitments, but when I was invited to re-join the amazing CVS Design Team recently, of course I couldn’t say no! I love being able to share these gorgeous products with you all!
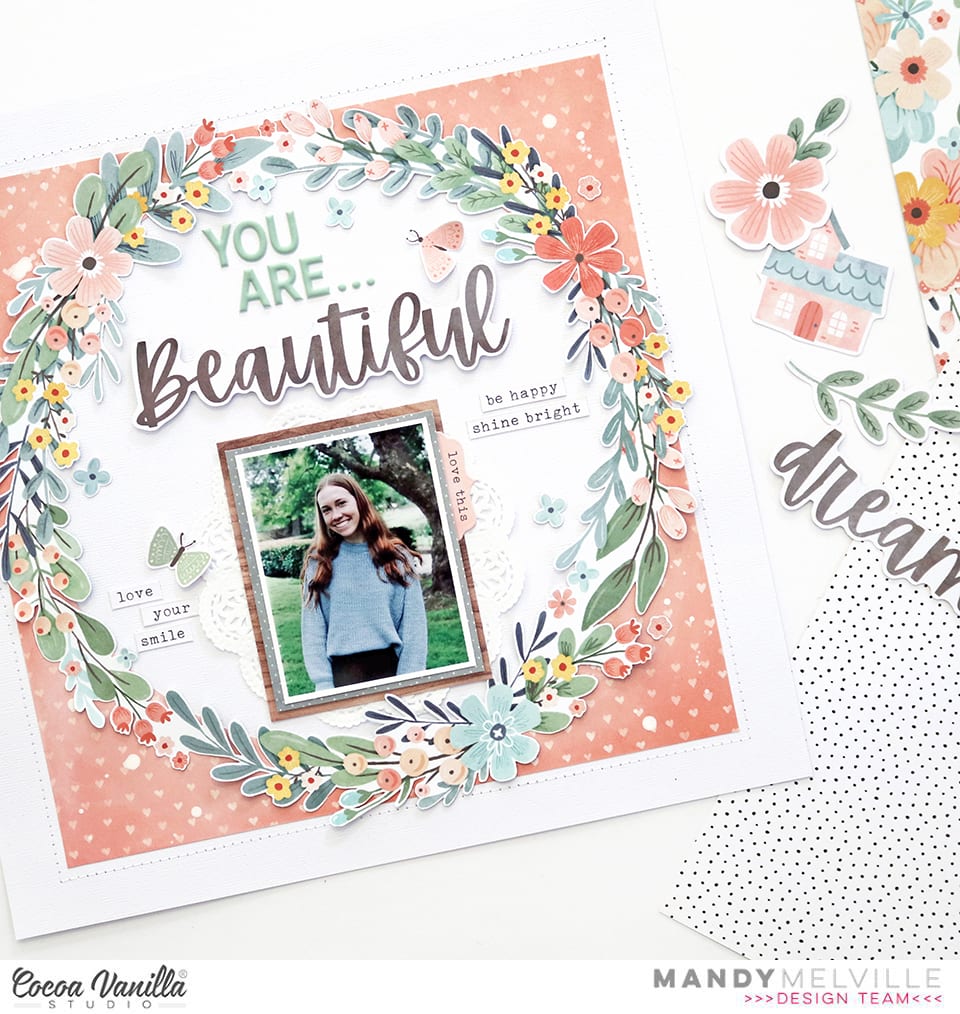
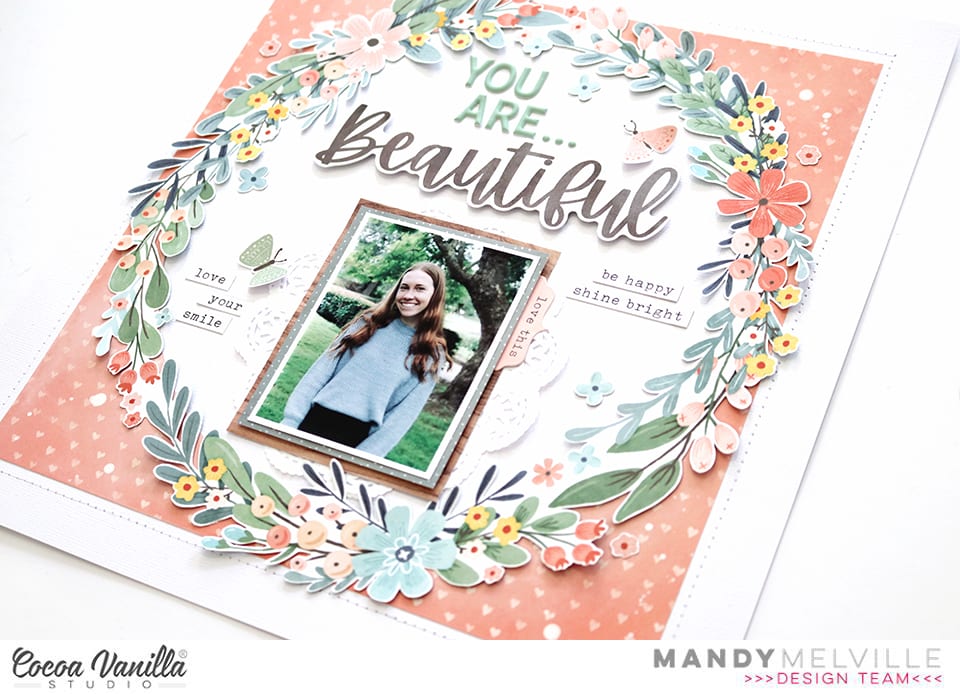
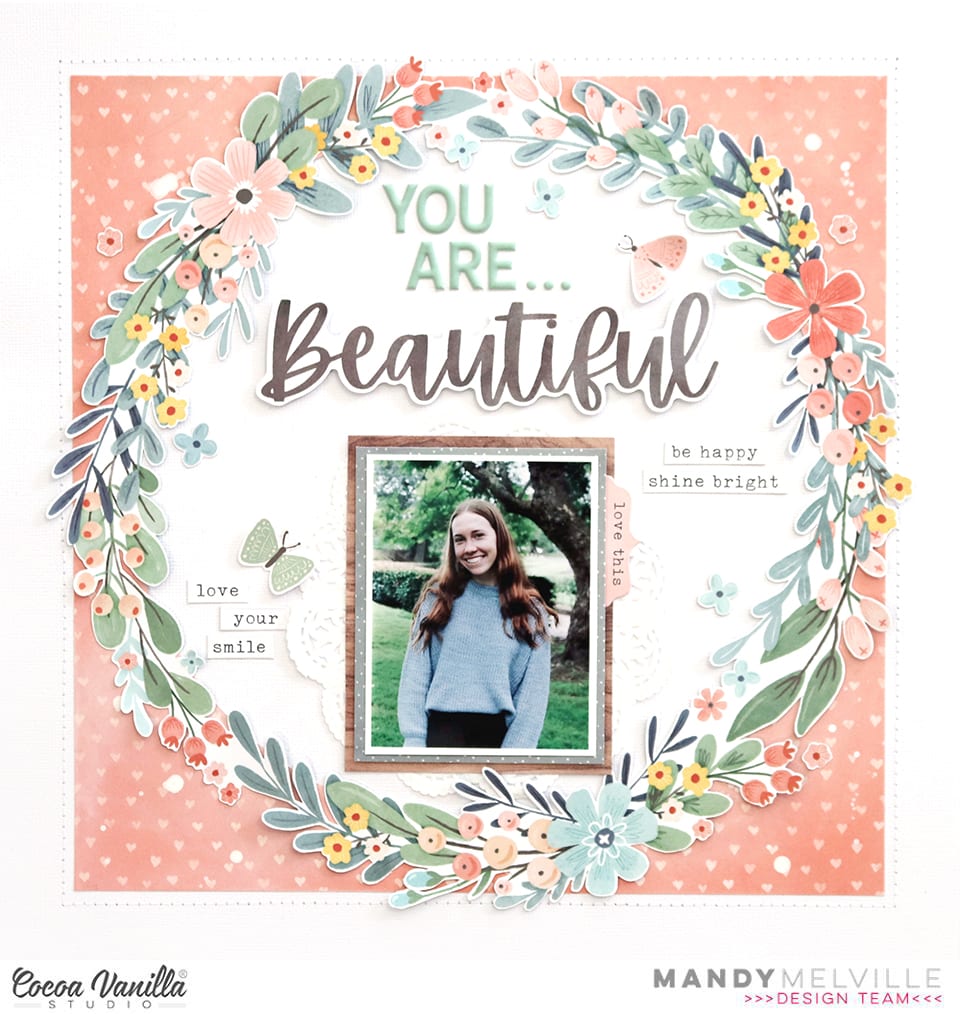
For my first layout share, I chose to use the absolutely stunning Daydream collection! If I had to pick a favourite scrapbook collection of all-time, it wouldn’t be an easy choice, but I think this collection might just be it! The gorgeous colours and the beautiful florals make it such an enjoyable and easy collection to create with! It was so perfect for documenting this lovely photo that I took of my eldest daughter Abi recently.
I’ve been hoarding the lovely Daisy Dayspatterned paper since I first got this collection, but I decided that it was time to finally use it! If you’re familiar with my scrapbooking style, you’ll know that I LOVE fussy cutting, especially floral elements! So of course I couldn’t resist fussy cutting that beautiful floral wreath to use as the main element on my layout.
I started my layout layout off with a sheet of American Crafts white textured cardstock as my background, which you can now purchase from the Cocoa Vanilla Studio store! I then cut a 10 inch square out of the heart print All Aflutter patterned paper, and I cut a circle out of the middle of the paper about 8 3/4 inches in diameter. I adhered this patterned paper to my white cardstock, and added some machine stitching around the outside of it to give the page some additional texture. I also smudged some white gesso onto it to fade out the colour just a little bit, as well as a few white splatters. I then layered the fussy cut wreath on top, just adding glue randomly to allow some of the leaves and flowers to lift freely off the page.
For my title, I combined some alphabet stickers from my stash with the word ‘beautiful’ from the Die Cut Titlespack. I love these beautiful scripty die cut words, and they make adding a title to your layouts so easy! I adhered it using foam tape for extra dimension, (which you might know is another thing that I love to add on my pages!)
I double matted my photo using one of the papers from the A5 Paper Stack, as well as the woodgrain polaroid frame from the Die Cut Ephemera pack. I also included a doily from my stash in my photo layers which adds some extra detail and texture. Under the right hand side of the photo I tucked a tab from the Accessory Sticker Sheet.
Next I added a couple of little butterflies that I fussy cut out of the All Aflutter paper from the A5 Paper Stack, as well as some tiny flowers that I cut out of the Garden Variety paper. I finished the layout off with a few little phrase stickers from the Accessory Sticker Sheet, which added the perfect sentiments to my layout about my beautiful girl.
Thanks so much for stopping by today! I hope that you enjoyed taking a look at my layout, and that you’ve found some inspiration. I look forward to sharing with you again here later in month. Until then, happy scrapping!
Hello scrappy people! It’s Anna here with my newest page made with gorgeous “Sunkissed” collection. This time I used this line to scrapbook some travel related photos from our trip to Carnac menhirs. It was really hot day and there was almost no shadow on the site. Really hard conditions to appreciate neolithic stones but we managed to survive :) “Sunkissed” is filled with summer related items mostly but you can use for more travel vibe pages too. I benefited from colorful paper patterns by backing the cut file filled with words about travelling. With such a colorful bakcground, you didn’t need much of embellishing!
I started with putting my digital die cutting machine in use after few months of break. I forgot how fun is it to incorporate this kind of elements into the pages. Backing the words with various pattern papers like: “Growing wild“, “Sunny days“, “Just chillin“, “Fun in the sun“, “Feelin fine“, “Bright side” and paper stack went pretty quick. Harder part was deciding where I want my photos to be places. Whole paper is filled with titles so I knew I need to cover some of them.
I managed to squeeze the photos on top of one bigger word having the rest of them visible and easy to read. I added few smaller elements from ephemera pack around the pictures, with a small individual title on top of them. As this is more travel than summer themed page I only picked more generic ones, skipping beach items and exotic drinks :)
I filled empty spots between the words using clear stickers like colorful arrows and paint strokes. They work perfectly with white background. I also added few puffy stickers here and there and my favorite wooden buttons. Colorful pattern papers are the main star of the page and I didn’t want to overshadow them.
I just love the final result and possibilities “Sunkissed” collection gives. I love squeezing out as much as possible from the papers themselves and those simple and fun patters are just perfect. White background makes them really pop.
I am sure it’s not my last word when it comes to this amazing, colorful collection. I still have so many ideas! Thank you so much for stopping by and see you in June!
Hey y’all! Laura back again with a very subtly sweet layout for Throwback Thursday! I dug deep into my stash for the Love Always collection from 2016 and it is divine. Using a soft, pink watercolor pattern paper as my background, I layered two small and one large strip of paper as a foundation for my photos. Once in place, I challenged myself to use as many pieces of wood veneer as possible from the embellishment pack without overwhelming the page. Starting at the top with a large banner piece, a leaf cluster in the middle, two banners at the bottom, and one more heart on the far left squeezed in amidst this low-key design.
I added a long multi-word title to the left of my photo using the alphas from the Love Always collection pack and popped them up onto strips of foam. I layered a banner ephemera piece across two hearts in between my two photos to create a focal point nice and close to them. For a whimsical touch, I added three butterflies around the page and dotted Nuvo Drops behind them to create flight trails.
As a finishing touch, I splattered with metallic watercolor paint in silver and quickly discovered that a little bit of splatter can go a bit wild in the process! It works beautifully for filling empty areas on the page, however, and accenting the clusters of embellishments. My journaling centers around the special bond my mother-in-law and my youngest daughter have, these moments are so precious!
I hope this layout inspires you to try a subtle color palette for your next layout! To see how “Love When It’s Just Mimi & Me” came together, check out the process video below!
Hello friends. It’s Kylie here with a new and fun Summery themed layout to share. I wanted to create a page design with loads of colour, colour, and more COLOUR! The new SUNKISSED collection was of course perfect for what I had in mind. I’m still smitten with all those florals and bright colours that feature in this range and I love how the colours really pop over a white background, which is what I selected for this layout.
For my background I chose the GROWING WILD paper. I trimmed a 1cm edge off each side of white cardstock which was adhered centred over the top to form a colourful border. Using my Silhouette I cut three scalloped circles using a simple cut file from the Silhouette files, all at different sizes. These were then layered over each other using foam adhesive squares, so that they had a little space in between each layer for adding embellishments.
Using the Floral Ephemera, I tucked neat little clusters of blooms in between each layer of the circles. I made sure to mirror each cluster to give an overall even balance to my layout. My photos were printed at 3″x 4″ and 2.75″x 2″ in colour before I adhered them layered over each other to the right of my scalloped circles. Summer themed die cuts from the Ephemera pack were then added in support of my theme.
To complete my page I added some of the gorgeous gold glitter phrase stickers as a title. I adhered them following the curve of my circles to the left of my photos. They’re so sparkly!!
Thanks so much for stopping by the blog today. I hope my layout has given you a little inspiration for your own creating. Take care!
It’s Tarrah back with you and today I am sharing a layout inspired by the awesome Grab 5 challenge from interNational Scrapbook Day set by fellow designer Michelle Stokes. I created my layout with the gorgeous new Sunkissed collection and documented a beautiful photo of my eldest niece.
The Grab 5 challenge needed to include:
Patterned Papers
Stitching
Something Gold
Stickers
Ink splatters/sprinkle
Patterned papers – I used a patterned paper as the background at the back of my page, the wreath is cut out from patterned paper and there is also patterned paper behind my photo. Stitching – I have stitched the wreath down with machine stitching. Something Gold is the foam gold glitter hearts. Stickers – I have added accessory stickers, puffy stickers and clear stickers and Ink Splatters I have added in gold.
I took theFeeling Fine patterned paper and cut out the gorgeous wreath from the Happiness set of free cut files. I love how the pink side of the Feeling Fine paper pops against the white of the cardstock. I then machine stitched the wreath and took a pack of the stunning floral ephemera and arranged lots of these around the wreath, I bent up some of the leaves and florals for some dimension. I trimmed down the cardstock to measure roughly 11′ x 11′ and matted the cardstock to another piece of the Feeling Fine patterned paper.
The Love You title is a cut file from the freeUnforgettable set, I cut this one out from white cardstock and then hand painted the just the bottom section with some watercolour paints. I placed my photo and the layers over to the right of the wreath and added the title to the bottom left corner of the photo. I popped the title up using foam dots, I love the dimension the title gives on my page. Some of the embellishments I added to this layout include some stickers, some heart die-cuts and some gold foam hearts.
I added some journalling to one of the cards from the Fun in the Sun paper I then tucked it into the left side of the photo. Lastly I added some sprinkles of gold Heidi shine and stamped the date stamp of the date the photo was taken.