Hey y’all! Laura Alberts here with a sweet Christmas layout using the gorgeous new Joyful collection. I fussy cut this stunning wreath from the Holly Days patterned paper and backed it onto the Feeling Festive paper. I love the way these little dots give the appearance of confetti bursting around the wreath! In addition to giving this wreath a 3D look by backing it on a different patterned paper, this fussy cut background brings the attention straight in to the photos.
For my title, I used the gold puffy words from the Joyful collection to add a simple ‘Together’ to the top of the wreath and drew my journaling lines underneath. This filled in the open white space above my photos and gave it a purpose. To add details to the wreath itself, I added gold Nuvo drops in the centers and white Nuvo drops around the outside. These tiny gold stars from the puffy words sheet were the perfect scattering bits to finish off this page!
Along the bottom of my photos, I added a swag of florals that I fussy cut from the Tis the Season patterned paper. This covered the connection between the photos and the bottom of the wreath and helped them blend more seamlessly together. My favourite part though was adding these puffy gold fabric stars around the wreath. These are such a beautiful touch to this collection!
If you’d like to see how ‘Together’ was created, be sure to check out the process video below! I hope you will give fussy cutting a try and see how you can elevate your scrapping with your scissors!
Hello everyone. It’s Anna here with my last page in 2021! Staying in christmas mood I scrapbooked fresh from the oven photo of my girls under the christmas tree. I took it on Christmas Eve, that is the most celebrated day of christmas in Poland. We eat special supper that day and Star is bringing gifts to everyone, who was nice. If you thought it’s time to hide your christmas papers and collections until next year, hold your horses!!! Use them to make few pages with new photos and all the memories, that are still fresh in your head. Write everything down to read it next year. I don’t like adding journaling to my pages, where it’s visible so I usually write few words on the back of the layout. “Joyful” collection is just perfect for all the christmas photos – so cute, fresh and modern.
This layout was inspired by all the gifts under the chtistmas tree. I looked at them and thought it would be fun to mimic boxes on page and add photo as a gift tag. I went through the “Joyful” pattern papers and choose two that look like a wrapping paper: “Advent” and “Feeling festive“. I also added strips of red “Tis the season” as a ribbon with a dimensional bow. Smaller gift is decorated with strips of mint paper from A5 paper stack. My background paper is a little more busy. I decided to use “Making spirits bright” with super fun stars.
I printed my photo vertically and trimmed it to the size of rectangle, cutting of two corners with my tag corner punch. You can also use dies to cut this shape or just scissors. Next step was to make a hole and add circle of pattern paper as a decorative element. My photo tag was ready. Just make sure, that you picked the right photo that can be trimmed down to this quite narrow shape. You don’t want to cut off piece of head or whole arm of the person on the picture.
I decorated the photo and area around it using golden phrase stickers, chipboard stickers and few elements from ephemera pack. I didn’t want to overdo it so it still looks like a gift wrapping. Tag seems like hanging loose but I glued it down to the background so it won’t be destroyed while storing in the pile later.
I also added smaller tag to the other gift, this time without any photo on it. They are both decorated with bows that I made with strips of paper. You can use proper die if you have one but I was just too lazy to reach for it. I trimmed my bows with the scissors without measuring anything, trying to keepmthem simple. You can replace the paper with actual ribbon and make real bows with it. They will be harder to destroy while storing the layout.
I finished my page adding few stars fussy cut from “Making spirits bright” paper mixing them with gold glitter puffy stars. Thay are so cute and can be used whole year round, not only for christmas projects. This page came together pretty quickly thanks to my inspiration, found under the christmas tree. I had a vision in my head and just went with it.
You can easily recreate this page as a birthday one too! Just change patters and embellishments. You can add more gifts and more photos as a tags if you shrink them.
That is all for today and for this year. Thank you for stopping by and see you in 2022!
Hello Paperlovers, Welcome to the Cocoa Vanilla blog today! It’s Josefine here….Have you had a nice Christmas and enjoyed the family moments together. Today I have a new Christmas themed layout for you. I think the Joyful collection is really a great Christmas collection. The soft but also some brighter colors make this collection beautiful.
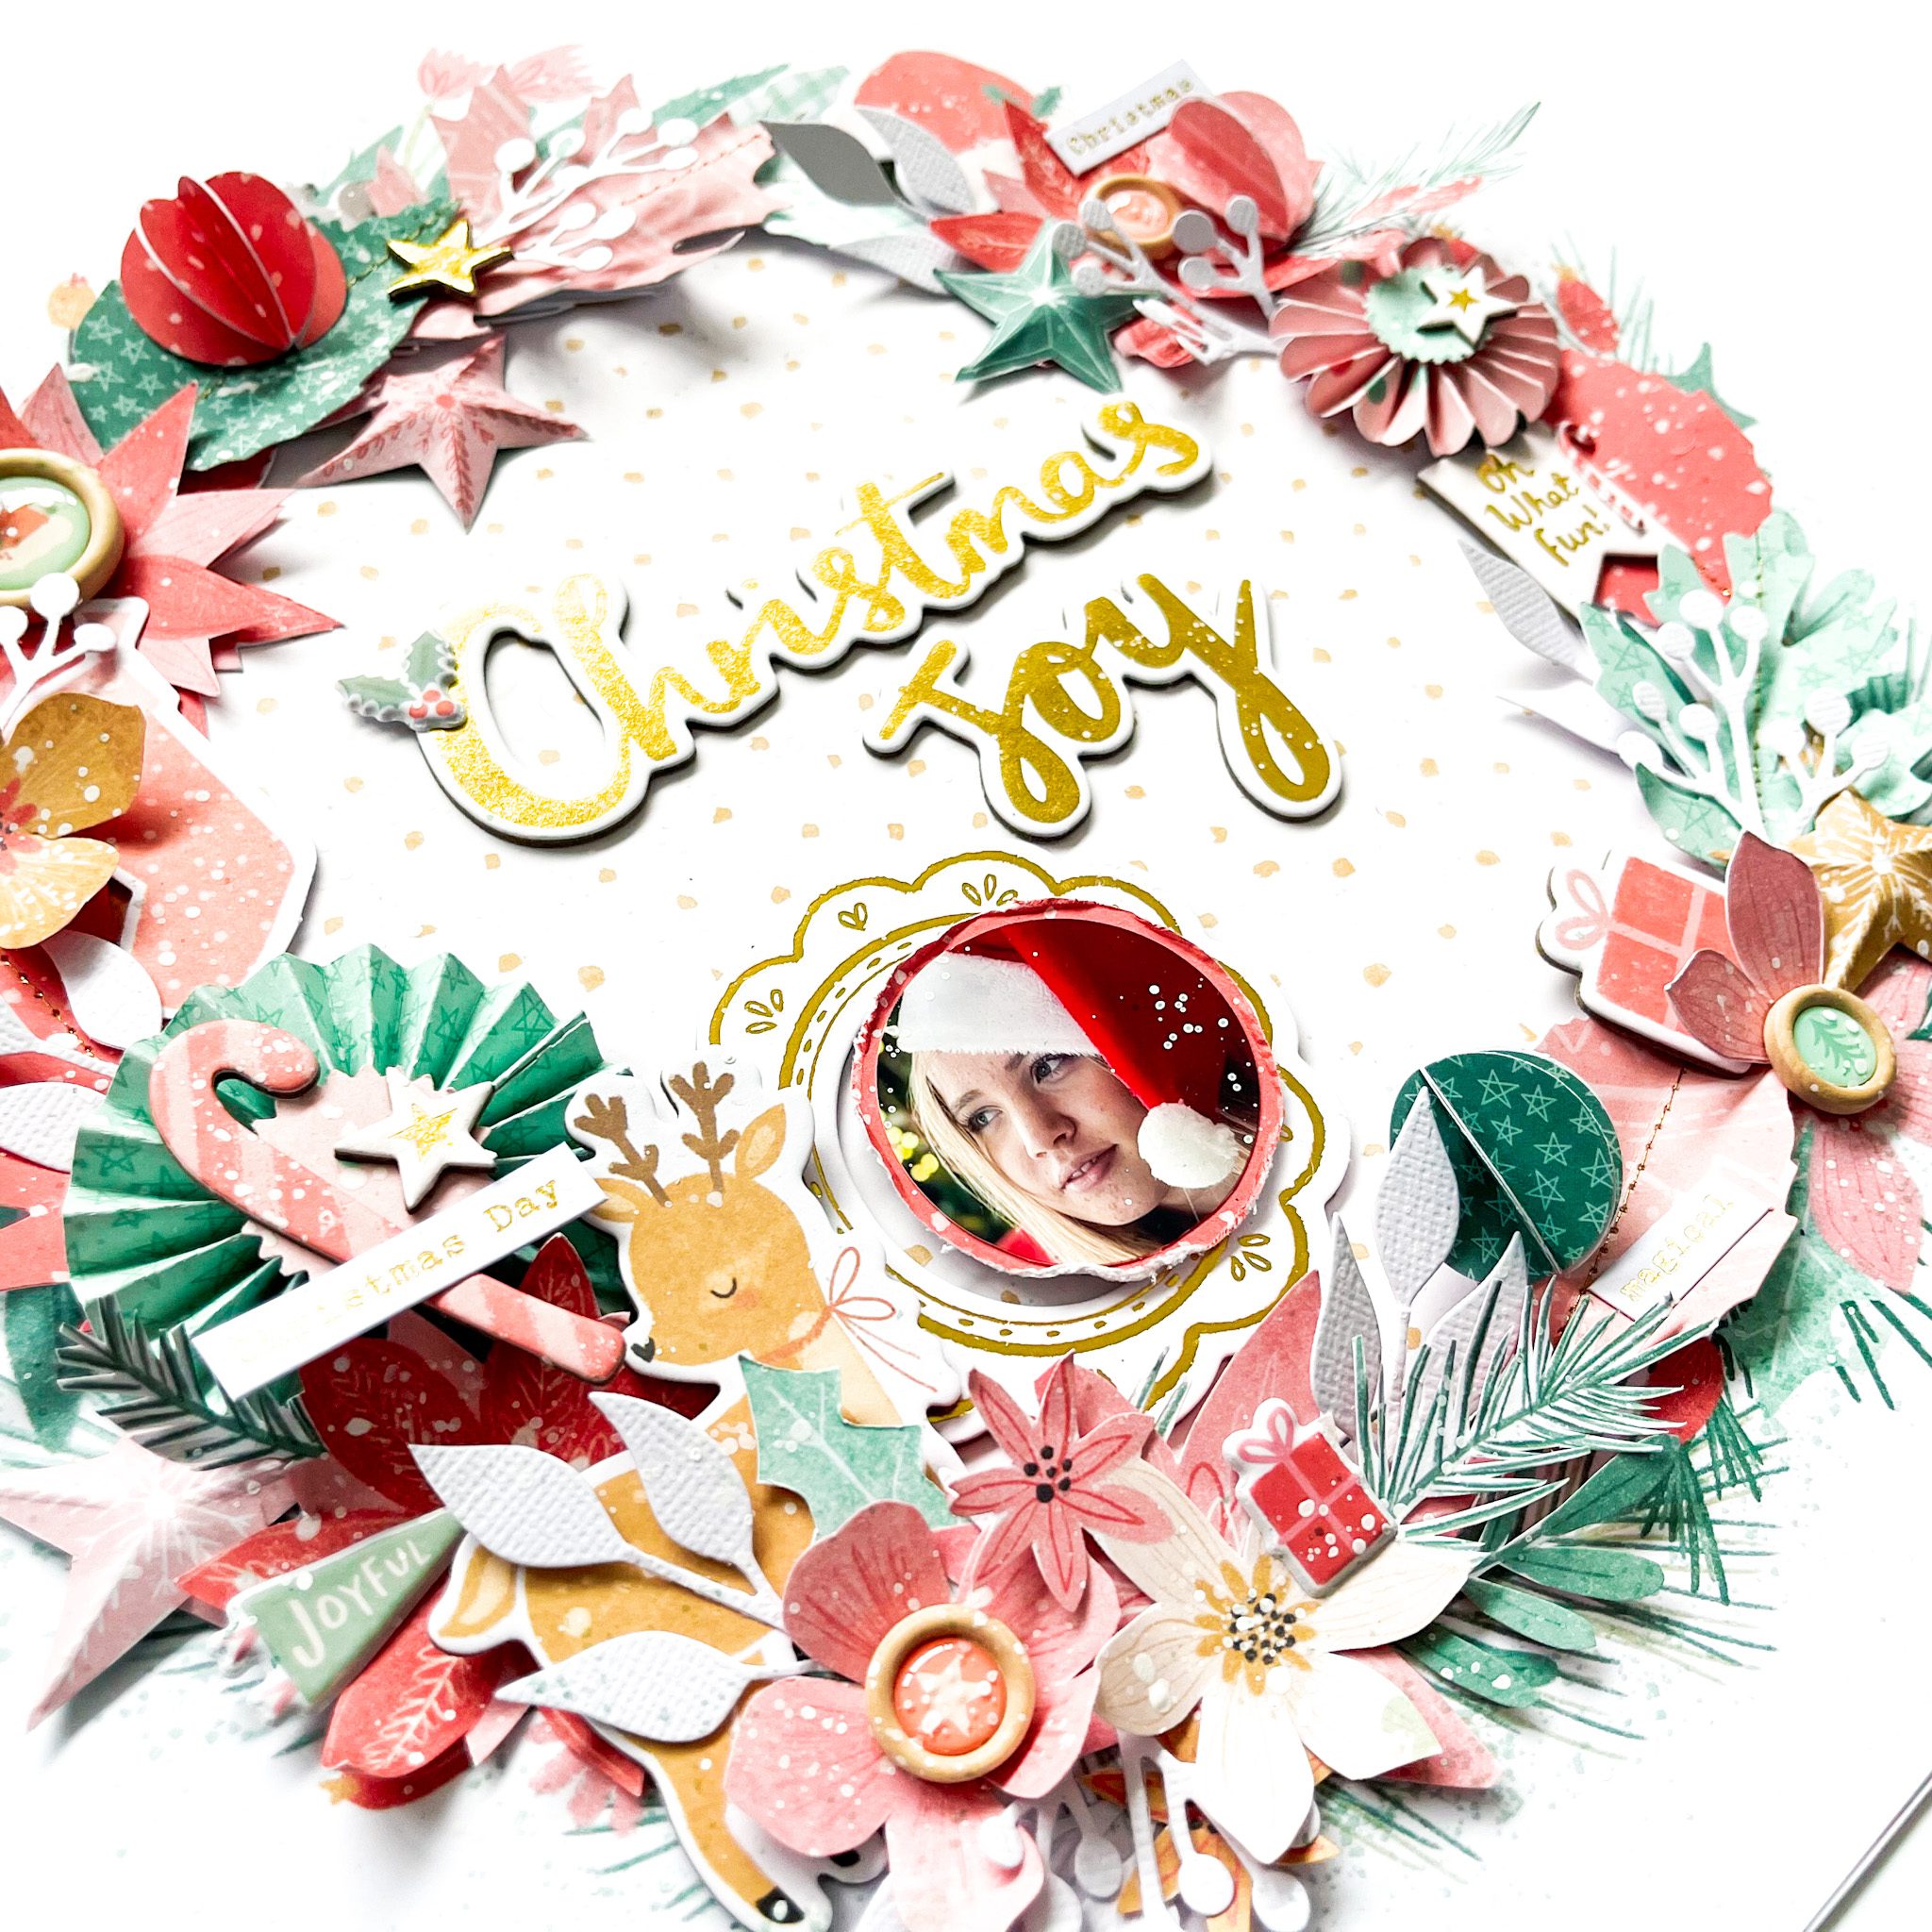
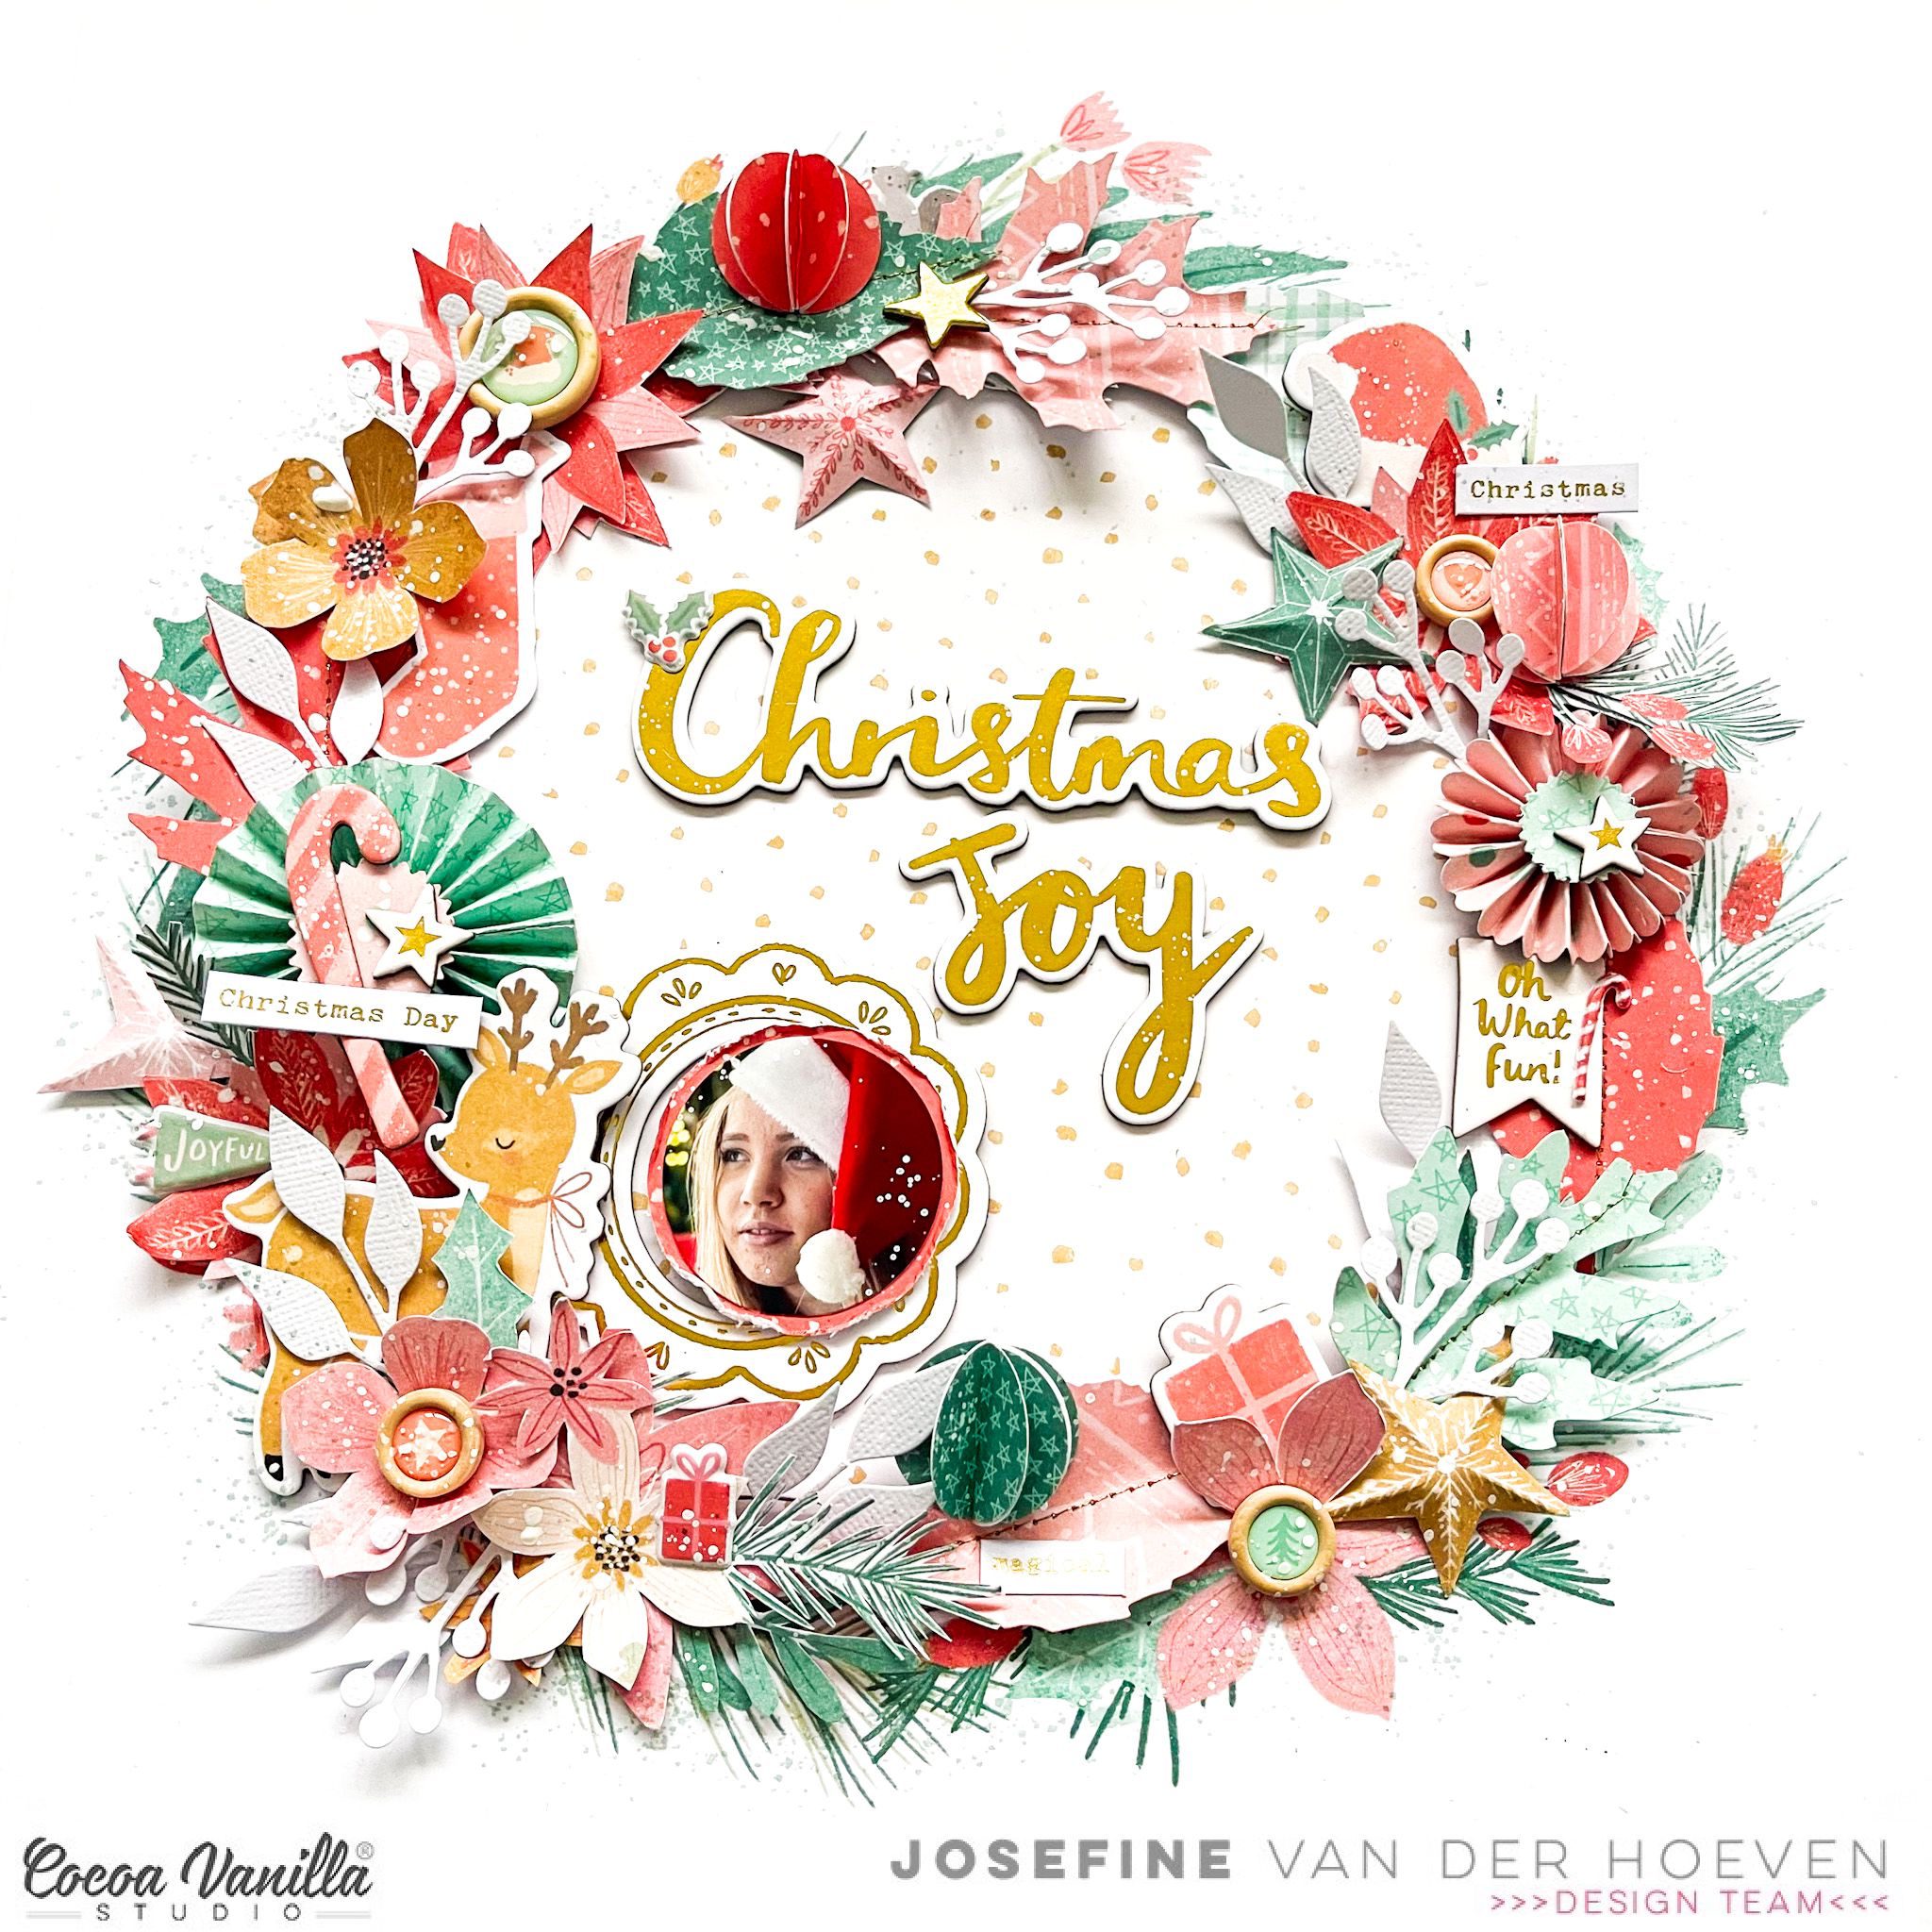
I used the beautiful designer paper with the Christmas wreath for this layout. Love, love, love the beautiful wreath design and also so easy to use with all the great embellishments. I cut the center and glued a design paper behind it with golden dots.
I made two rosettes from the beautiful design papers. I punched out several leaves and stitched them with gold thread. I put everything in a wreath on the design paper and used adhesive tape and 3D foam. This way I create different layers. I cut different flowers from the design paper and put them between the leaves. I used die-cuts, stars, chipboard figures and puffy stickers to decorate my layout.
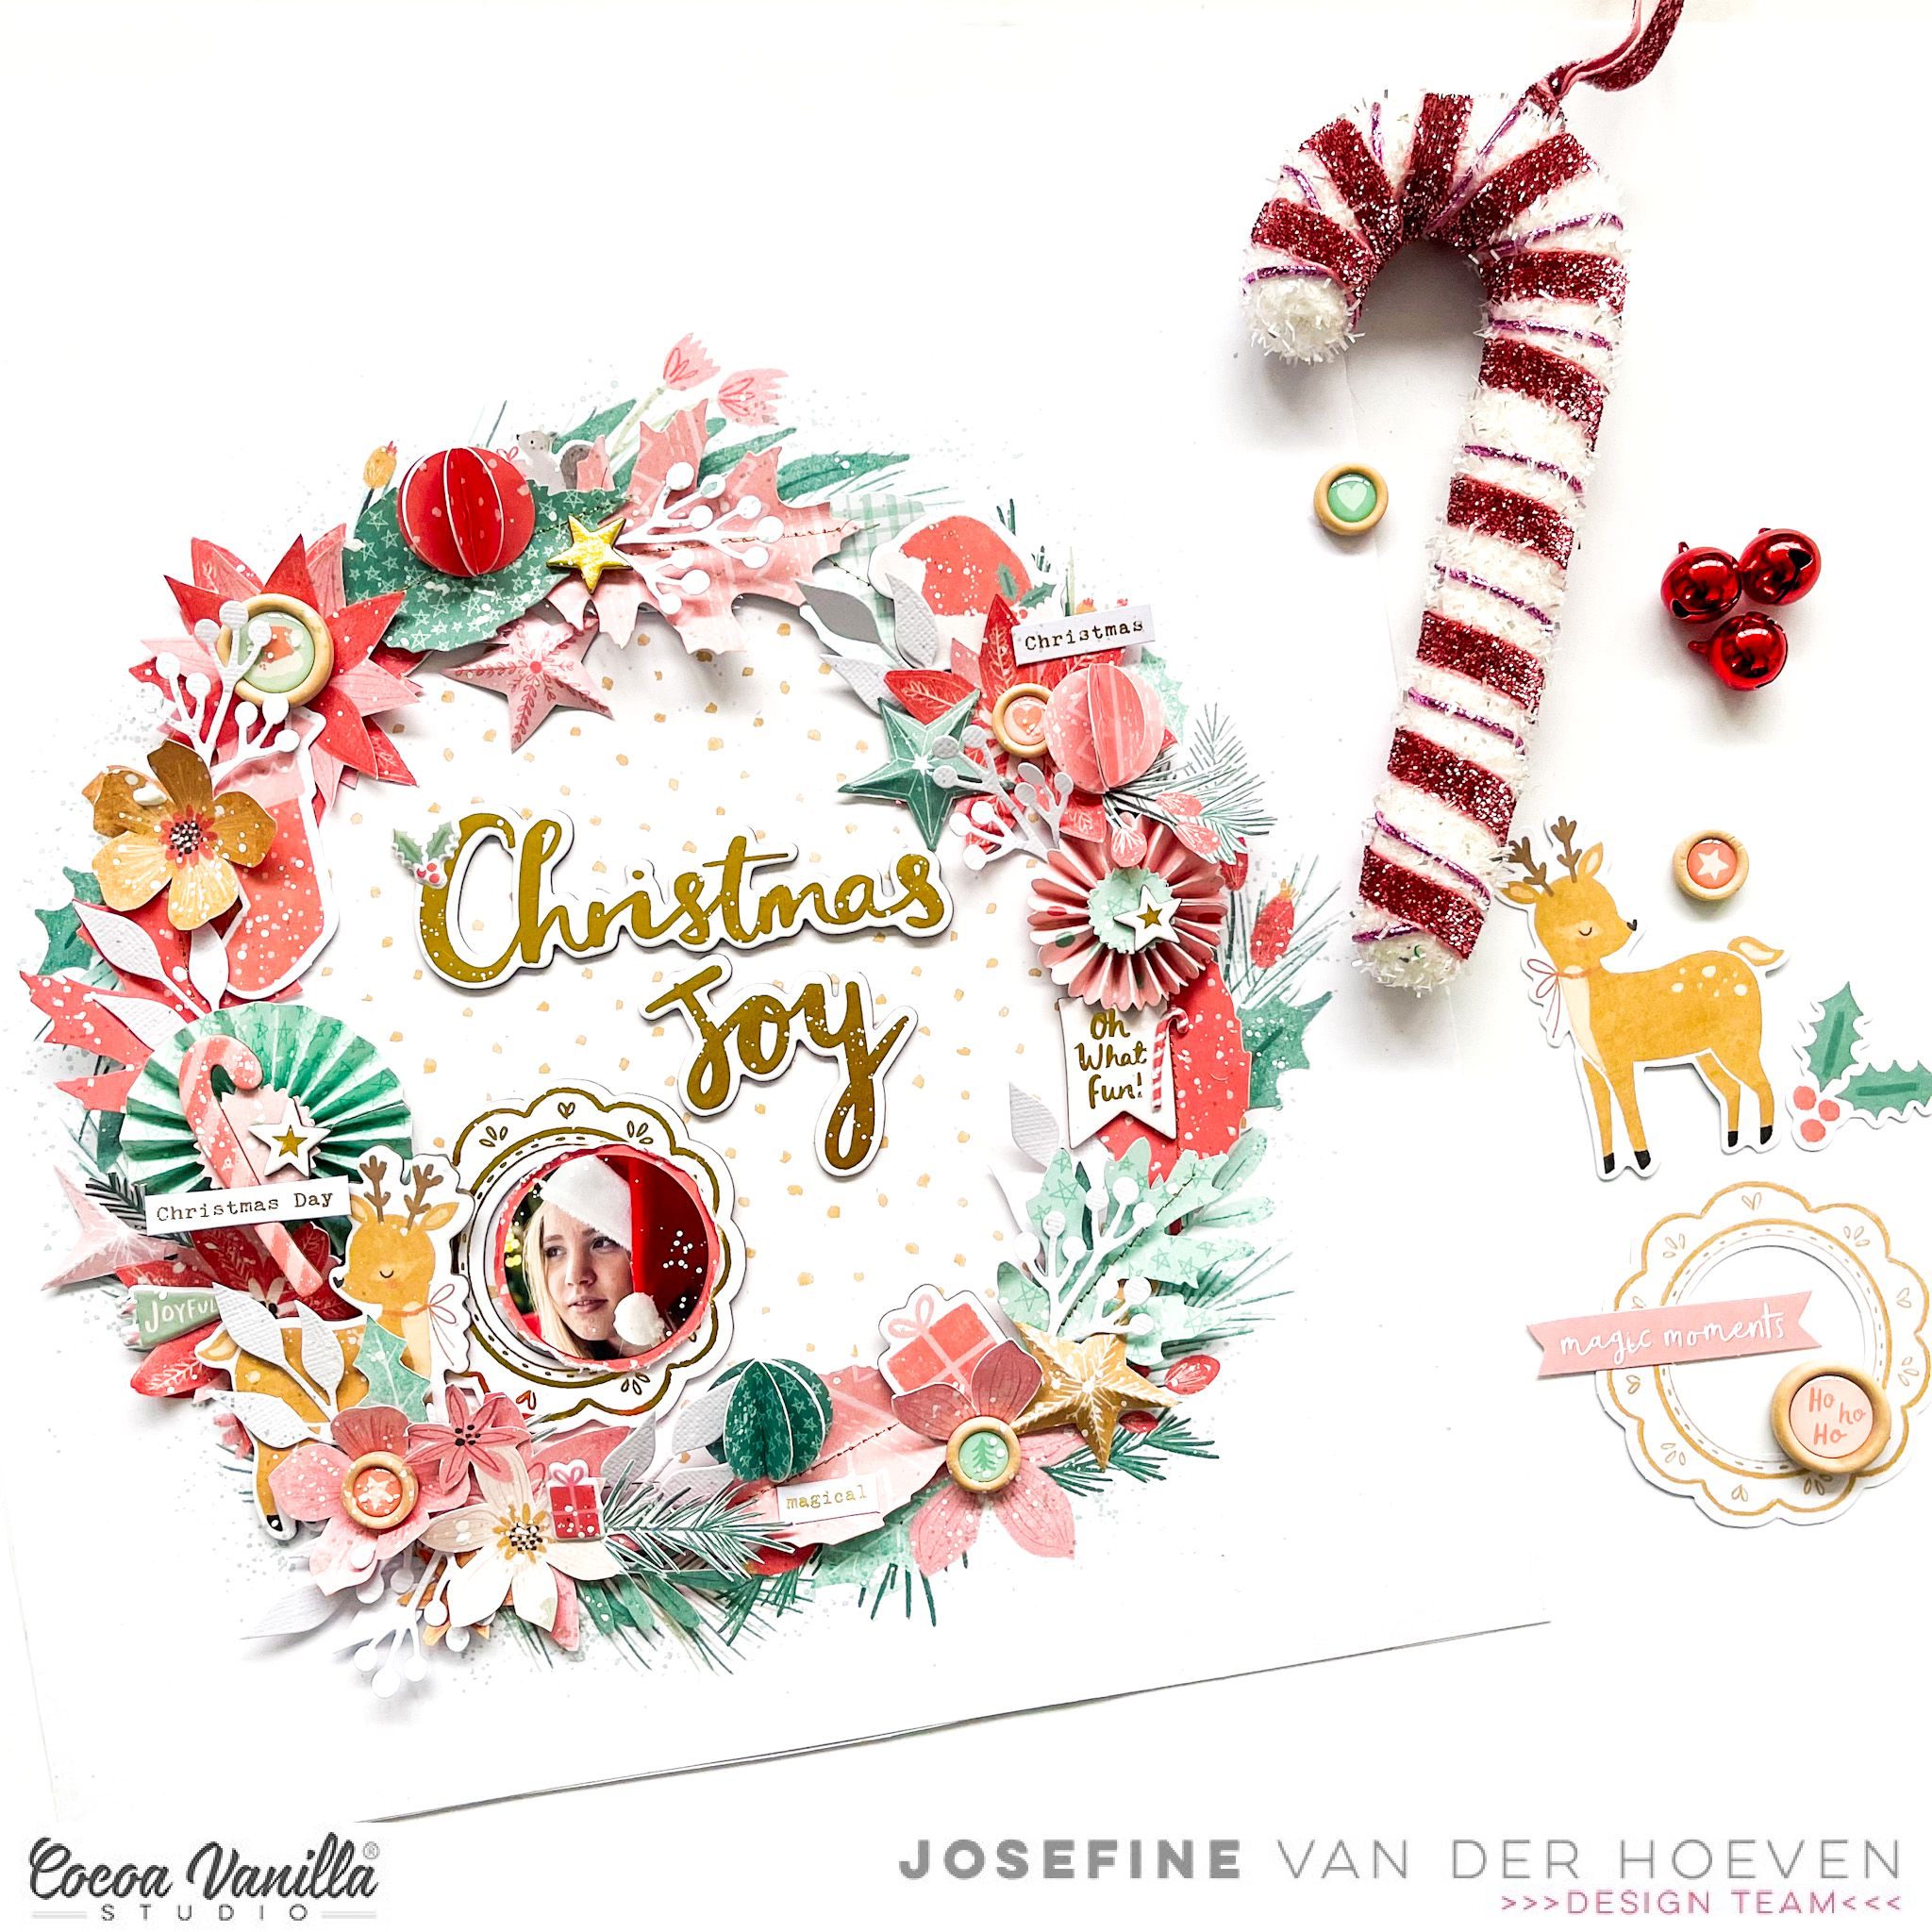
I cut the photo of my daughter during the holidays into a circle and placed it on top of the chipboard frame. Have you spotted the sweet little deer, what a cutie. I punched some white branches from white cardstock and placed them in between all the gorgeous embellishments.
For the title, I used the gold chipboard words Christmas and Joy. Perfect for this Christmas layout. I splash with white acrylic paint for a snow effect. I fold three 3D Christmas baubles by using 1 inch punch and placed them between the leaves and flowers. I am happy with the result of this layout. Simple, easy but with a cool Christmas result. I hope I was able to inspire you during the holidays. I want to thank you for visiting the blog today and hope to see you here again next time with a new project! I wish you happy days and see you soon!
XoXo, Jo
Hello friends! It’s Kylie back with you today and I have another layout to share featuring the new ‘Joyful’ collection. I wanted to create a layout for the festive season based on lots of colour and dimension on the page. Since the papers of the ‘Joyful’ collection have the most beautiful colour palette I knew I could achieve this quite easily.
Using a ruler I began tearing strips of paper from many of the different designs. They were all torn at different widths and lengths and once I had a good selection I began layering them over the FEELING FESTIVE paper which would be my background page. I made sure to use the longer and wider pieces through the centre of the page, moving out to the shorter and more narrow. Once I was happy with the placement of each strip I used my fingers to fold and distress the edges a little further.
My photo was trimmed to measure 4.75″x 3.75″ and was adhered to a photo mat I cut from paper to measure 5″x4″. Once I had adhered it into place over the background I was able to embellish with some of the gorgeous die cuts. I created a title using the chipboard stickers placed over the lower portion of my photo.
This type of layout was really quick to create and would be a great way to use up a lot of left over strips pf paper. It would also be a great option for a double page layout.
Thanks for stopping by today. Wishing you and your families a wonderful festive season.
It’s Tarrah back with you today, I hope you are not going to crazy in this busy time of year and that you are getting some time to relax and enjoy your family or perhaps some crafting time?
I am very excited to be sharing a new layout with you featuring the gorgeous Joyful collection.
I decided to create a layout with some clusters built up at the top and bottom of my page, the bottom cluster includes the photo of my beautiful nieces dressed in their Christmas jumpers (they live in England) to go to school recently. They are so adorable and this photo had perfect colours to match with the Joyful collection. I placed my title, made up of the gold title puffy stickers, in the centre of the page to balance out the top and bottom clusters.
On the right of my photo, I just had to add the super cute bear die-cut from the Ephemera pack! He is just gorgeous and it suits the page so well, looking as though he is cuddling up next to the girls. Under the photo, I layered the oval frame die-cut and placed one of the small puffy stickers at the top of the photo. To the left of the photo I added the tag die-cut and the super cute rabbit die-cut too. At the top I added some more tags with twine through the holes.
Some of the smaller embellishments I added were some of the gorgeous wood epoxy buttons and some of the chipboard icons. I also popped up some of the star die-cuts with foam tape and scattered these down the page to tie in the top and bottom clusters together. Lastly I stamped the date stamp and sprinkled some gold mist around my page.
Thanks for stopping by the Cocoa Vanilla blog today! I hope you enjoyed my layout as much as I enjoyed creating it?!
Check out the Cocoa Vanilla store if you would like to purchase the gorgeous Joyful collection!
Happy creating and wishing you all a very Merry Christmas from my family to yours.
It’s Sophie with you today ! It’s almost Christmas !! Who’s ready ??! Who’s been baking like crazy ??!
I have and like every year around Christmas, we prepare tons of different deserts and cookies and pastries ! I had to highlight that on a layout !
I used the beautiful Joyful collection for this page.
I started by creating a soft mixed media background on thick white cardstock on the upper side of the page, where I planned to put my big title.
I bought this title cut file from the Silhouette Store. It’s designed by SAS Creative. I cut the three words on different patterned papers from the A5 Paper Stack. I also did an offset cut on white cardstock to back each letter, and mounted them on adhesive foam before adhering them to the layout.
I teared a big chunk of the “Very Merry” patterned paper that I placed at the bottom of the page to ground my photo.
I embellished around it with beautiful elements from the Joyful Die Cut Ephemera Pack and fussy cut flowers and wreaths from the “’Tis The Season” and “Very Merry” patterned papers.
I fussy cut numerous stars out of the “Making Spirits Bright” paper that I placed around the title, and added a few Wood Buttons as the finishing touch.
Here are more close-ups:
I hope this inspires you ! I wish you a wonderful Holiday Season, with lots of good times with your loved ones !
Mandy here today to share some more inspiration featuring the gorgeous new Joyfulcollection! I’m absolutely loving using this collection to document some fun festive photos from Christmas last year, and on this layout I chose to scrapbook a beautiful photo of my girls on the day we decorated our tree.
I decided on using the Deck the Halls paper as the background for my layout, and I trimmed it down so that I could matt it with the gorgeous Tis the Seasonpaper. I framed it with both the red and the floral side of the paper. The colours in this collection are so fresh and pretty, and I wanted to feature lots of those beautiful colours and patterns on this page.
Next I chose a few patterned papers from the A5 Paper Stack, and I layered them together to create a matt for for my photo to sit on. I outlined the pink paper with a white gel pen to give it some extra definition. I also matted my photo with a couple of the A5 papers, and then I adhered it with craft foam.
Of course I couldn’t resist fussy cutting some of those stunning florals on the Tis the Season paper! I created an embellishment cluster on the bottom left hand corner of the photo using the florals, and I also tucked in the sweetest little Chipboard bird, and a Wood Epoxy Button.
I created a second cluster of embellishments to the right of the photo. In this cluster I included another fussy cut floral, as well as a few Die Cuts, and another Wood Epoxy Button. I just love the adorable little woodland creatures in this collection! I also added a Chipboard banner on the top right hand corner of the photo. The gold foiling on the stickers in this collection adds such a nice touch to Christmas projects!
For my title I combined a couple of the little word stickers from the Accessory Sticker sheet with the ‘Jolly’ Die Cut, to create the phrase ‘Holly Jolly Christmas’. I added this along the bottom of my photo. To finish the layout off I sprinkled around some gold stars from the Puffy Gold Title Stickers.
Thank you so much for joining me here on the blog today! I hope that you’ve been inspired to get those festive photos scrapped using this beautiful collection!
I’d like to take this opportunity to wish you and your family a wonderful Christmas and New Year, and I will see you back here on the blog in 2022!
Hi y’all! Laura Alberts here with a patterned paper background for Throwback Thursday! I dug deep into my stash for the oldest Cocoa Vanilla Studio collection I own. Using the last scraps of Hello Sunshine for this one including my last full 12×12 piece of paper. My favourite parts of this collection are the denim patterns and florals, so I used them on nearly every layout. It’s such a cool mix of designs! I used a set of cut files from Liz Longest Designs and filled them with the scraps.
I fussy cut these florals from one of the patterned papers and layered them in large clusters behind either side of my photos to keep the focus in the center. Adding Nuvo drops in the centers gives them a more 3-D appearance and a little sparkle! I tucked in some of the Endless Summer enamel shapes amidst the florals for more texture and then two layered butterflies from the Endless Summer ephemera pack at the corners of my photo. Mixing these collections together has helped me finish both off this year!
The details on these alphas are brilliant and I have stretched these so far with this collection! Loving the denim-like texture and stitching, so I popped them up with foam strips to give them added depth. Instead of journaling, I used the word strips that I fussy cut from a patterned paper to create a staggered list of the phrases that fit this moment. It reads like a stream of consciousness perspective and I love that!
I hope this layout inspires you to use up some scraps too! If you’d like to see how Explore came together, check out the process video below.
Hi Cocoa Vanilla Studio fans! Danni here with another layout using the incredible new Joyful collection to document a treasured holiday memory. I love how the soft colours in this collection highlight the bright reds in my photo without competing with it as the main focus of the layout.
I started by using some of the smaller patterned papers in the A5 paper stack to back the candy cane cutfile by COAPA Cutfiles. I chose pink and white for the candy cane, red and green for the holly and that gorgeous mustard for the bow. I cut the cutfile in black cardstock to help it pop against the soft pastel colours. I also went ahead and matted my photo using the A5 paper stack papers.
I chose the gorgeous soft pink plaid pattern of the Advent 12×12 patterned paper as my background. I love how the subtle pattern adds interest while the soft colour prevents the background from being too busy. I added some additional details to the background with delicate green, pink and mustard ink splatters.
Once I had my photo and cutfile positioned on the page, I could go ahead and incorporate all the smaller elements. I couldn’t resist using the ‘Hey Santa’ title from the puffy gold title stickers for this photo – it was simply perfect! I added a couple of the small phrases from the accessory stickers below my title in place of journaling.
I created three small embellishment clusters around my layout to draw the eye around the page. I started with pieces from the chipboard stickers to begin building my clusters because I wanted to include a chipboard candy cane in two of the clusters to mirror my cutfile. I built up my clusters using a combination of presents, leaves and little animals from the die cut ephemera as well as the puffy stickers. To finish my clusters I added a wood button and some coiled gold thread to each one.
To tie in the black of the cutfile to the rest of the layout, I used a black pen to outline some of the die cut ephemera pieces and to add a sketchy border around the outside of the layout. As a finishing touch I added a sprinkling of shiny gold stars from the puffy gold title stickers randomly around each of my embellishment clusters.
I hope you enjoyed joining me today! I absolutely adore how this layout turned out. There is a process video on the Cocoa Vanilla Studio YouTube channel linked below if you would like to watch the layout come together. Thank you so much for reading and happy scrapping!
Hello, hello. Do you feel the christmas spirit already? My christmas tree and decorations are already up and we had snowfall few days ago so world outside the window is all white and clean. Let’s hope it will stay that way for next two weeks. I still need to wrap the presents and bake gingerbreads with kids. Before new batch of christmas photos will arrive, I am reaching out to the last year pictures to scrapbook them with the brand new “Joyful” collection. I only made one page so far with it, so it’s still quite new to me.
I printed myself two photos of my girls posing next to the christmas tree. I was staring at them, thinking how can I build my page when revelation striked! I will make a christmas tree to match the photos! I started with cutting it from “Making spirits bright” paper into triangular shapes and adding fringe to them. I didn’t measured anything and free cut everything with pair of scissors. My tree has 6 layers, one slightly smaller than another.
“Desk the halls” paper turned out to be a perfect background for my composition. It’s not only decorated with tiny trees but also is not busy and doesn’t draw attention from the main composition. While I as putting my tree together, I added a layer of foam tape under each triangle to make it more dimensional. I decorated everything with tiny stars that I found in ephemera pack and on chipboard stickers sheet. I also hanged some candy canes to make it even more festive and cute.
Bottom part of the tree is decorated with a gifts because this is where they usually magically appear brought by Santa. They are a mix of paper ones from ephemera pack and thicker, chipboard presents from chipboard sticker sheet. Did I mentioned this is my favorite product from this collection? They are just too perfect and too cute with their golden foiling. There is also little fox watching over the presents.
My photos are overlapping the tree a bit so it’s a natural continuation with the tree from the pictures. I added few smaller inscriptions here and there as a decorations. You can also find two more critters on the page – squirell and little bird. They create visual triangle on the layout. My title is also made with bits and pieces from ephemera pack but you can choose from many more words and phrases from golden puffy title stickers. I added a lot of dimension to my page and most of the elements are raised above the level of base paper.
I finished my project by adding three woodies (they also create a visual triangle) and some gold and red splatters. The page was done and I already cleared my desk but I felt like it was still missing something. I came back to finish it later with red stitching around the layout, that created sort of the frame. this stronger accent making it more expressive.
I love how this page turned out and I love this christmas tree idea. I will for sure recreate it in a smaller scale on cards. Yep… I still haven’t made them and didn’t mailed them. Fingers crossed Polish Post will act quickly and deliver them all on time.
That is all for today. Thank you so much for stopping by and see you again at the end of December. I will come back after Christmas so I wanted to wish you all wonderful time with your family and friends however you celebrate it.


 I used the beautiful designer paper with the Christmas wreath for this layout. Love, love, love the beautiful wreath design and also so easy to use with all the great embellishments. I cut the center and glued a design paper behind it with golden dots.
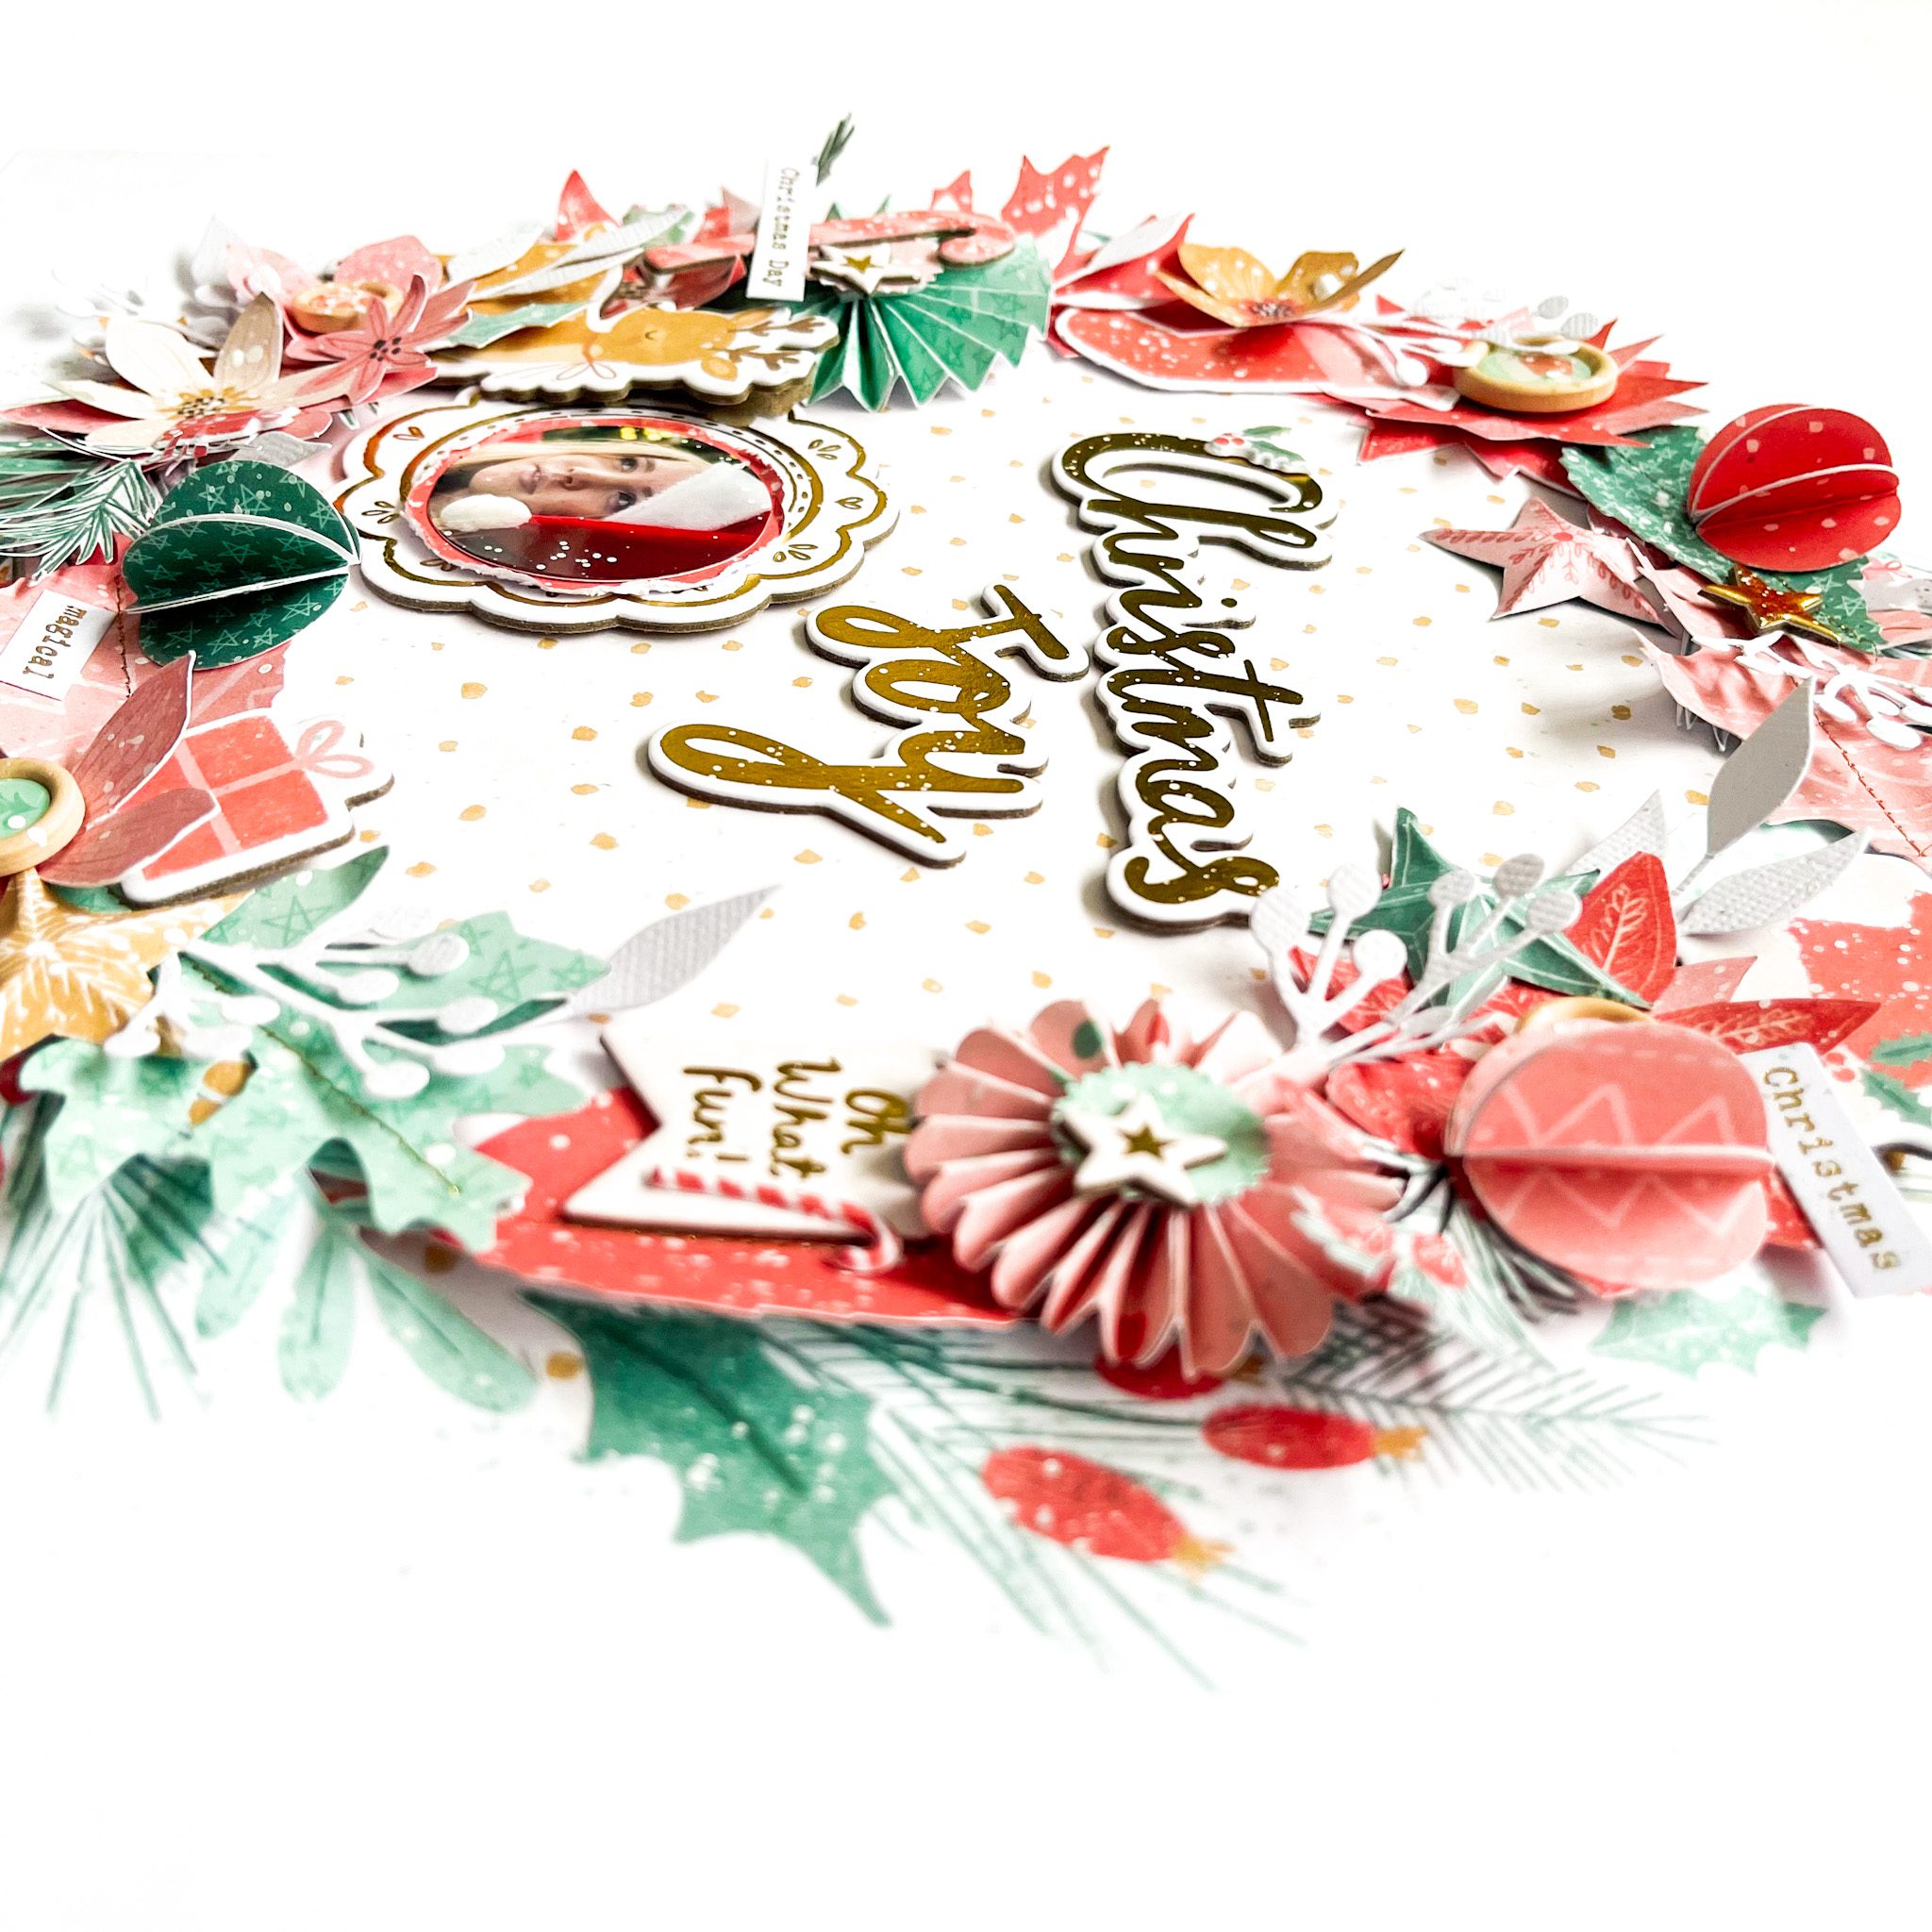 I made two rosettes from the beautiful design papers. I punched out several leaves and stitched them with gold thread. I put everything in a wreath on the design paper and used adhesive tape and 3D foam. This way I create different layers. I cut different flowers from the design paper and put them between the leaves. I used die-cuts, stars, chipboard figures and puffy stickers to decorate my layout.