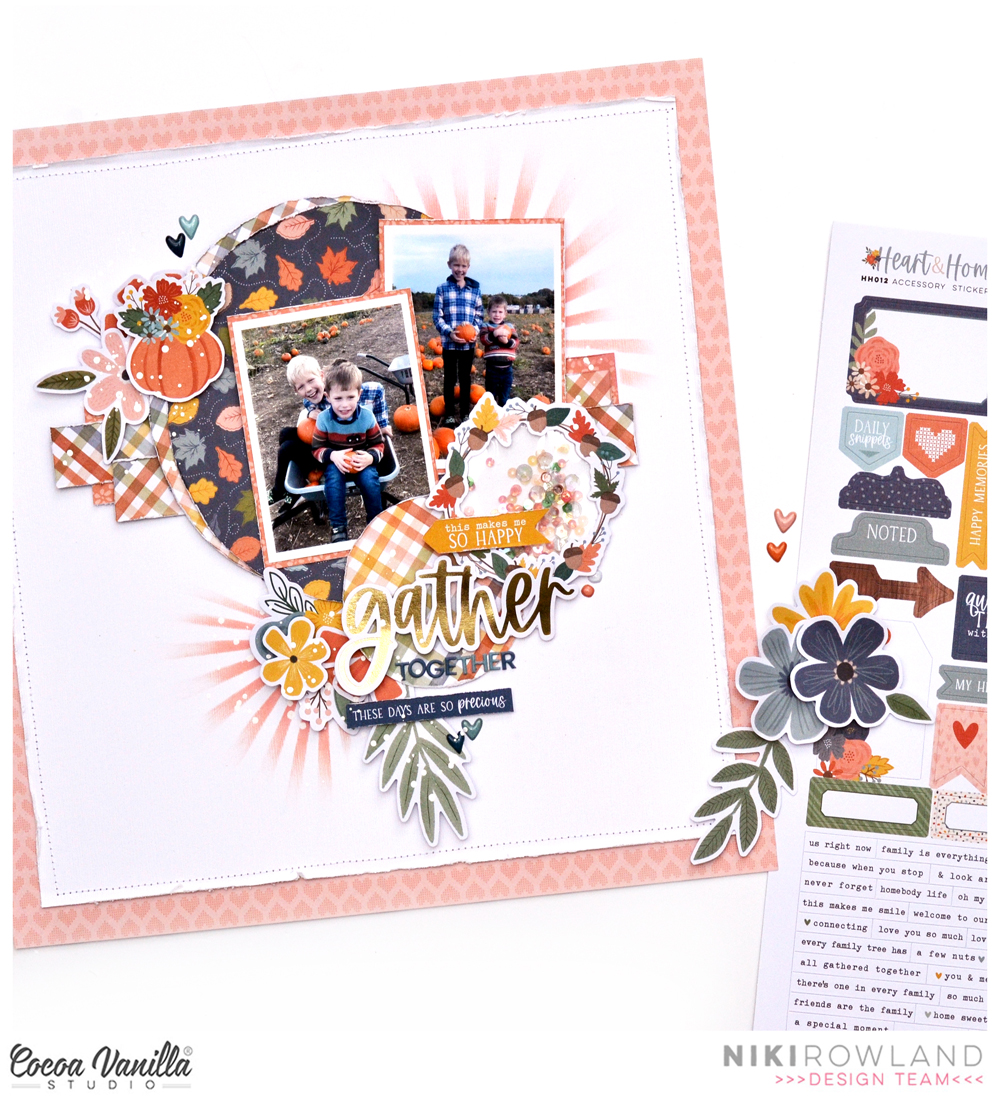
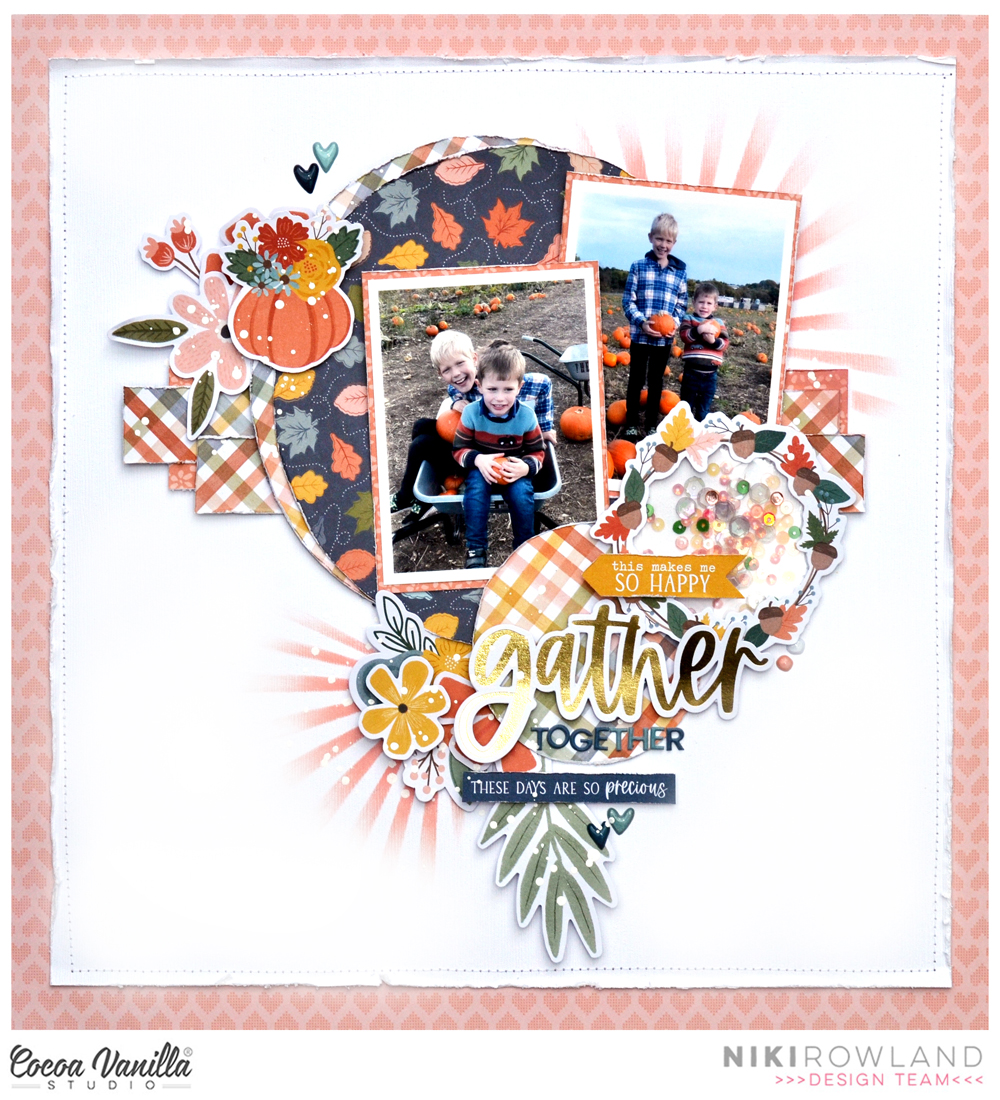
Hi everyone, this is Niki (@nikiclairecreates) and on this scrapbook layout I have used the new beautiful Heart & Home collection to create a design with circles, stencilling and a cute little sequin shaker pocket out of a piece of ephemera. There is a process video for this layout which can be found lower down.
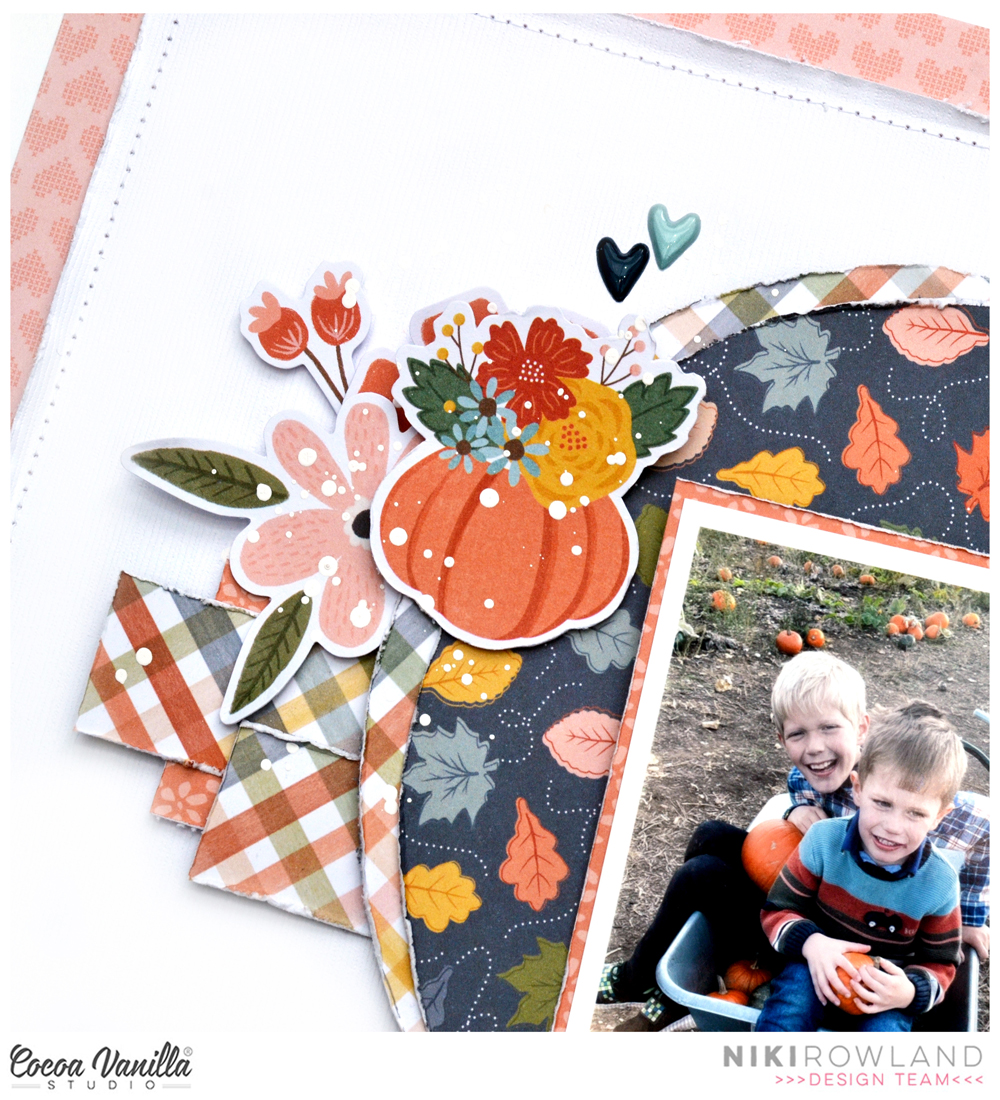
I started with the beautiful Flurry paper which is dark blue with multicoloured leaves on one side, and has a multicoloured check on the other side. Of course I loved both sides! I cut some circles and positioned these onto a white background together with some patterned paper stripes too.
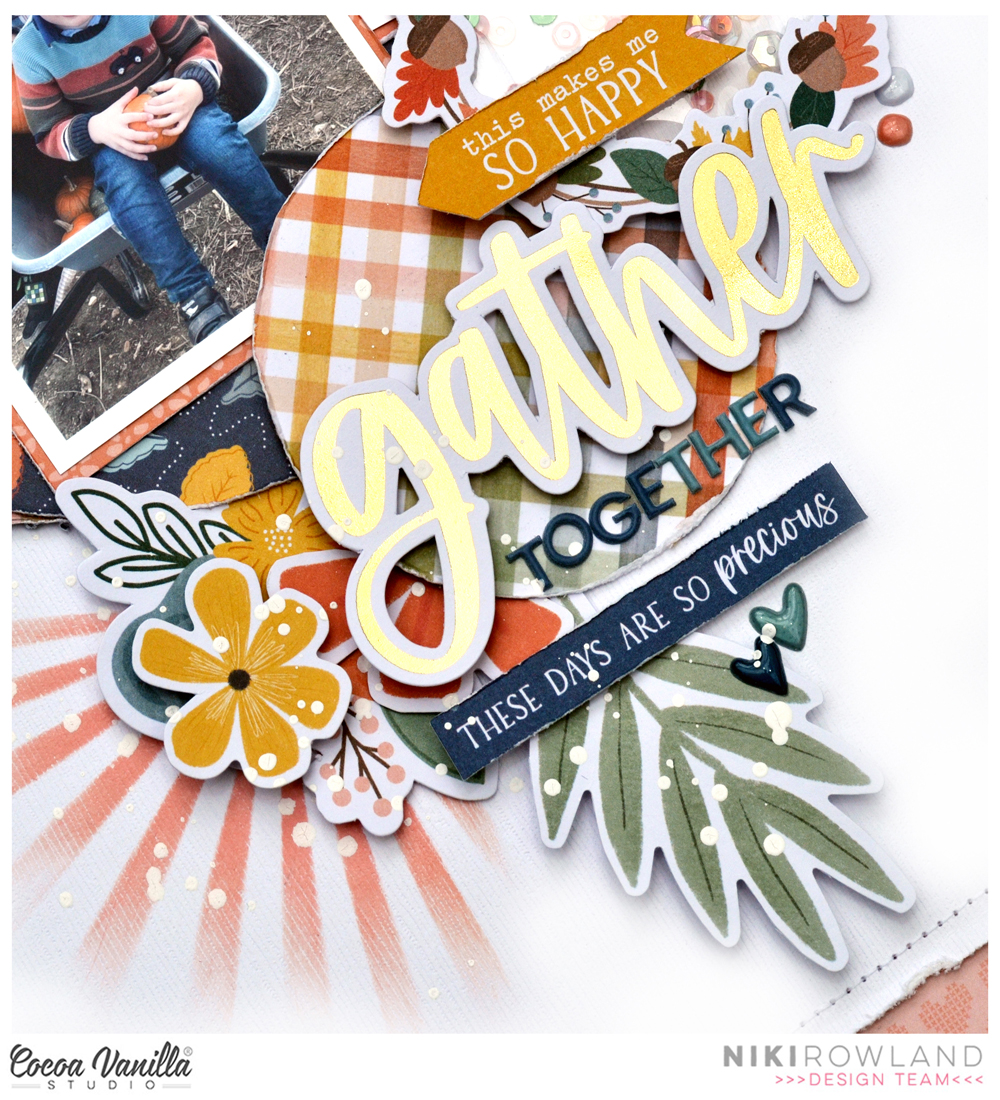
I made a sequin shaker pocket out of the wreath from the Die Cut Ephemera. I cut a piece of white card to back the wreath with, and cut a piece of acetate the same size. I then machine stitched the two pieces together trapping some sequins inside. I then added the wreath ephemera on top of the sequin pocket – it looks so cute!
I embellished the layout with Floral Ephemera and also added a small amount of stencilling around my circles and photos using a sun beam style stencil.
For my title I used one of the gorgeous Gold Titles ‘gather’ and then added the word ‘together’ using the Mini Puffy Alphabet Stickers.
I finished off with puffy heart stickers and splatters of white paint!
Thank you so much for joining me today and happy scrapping
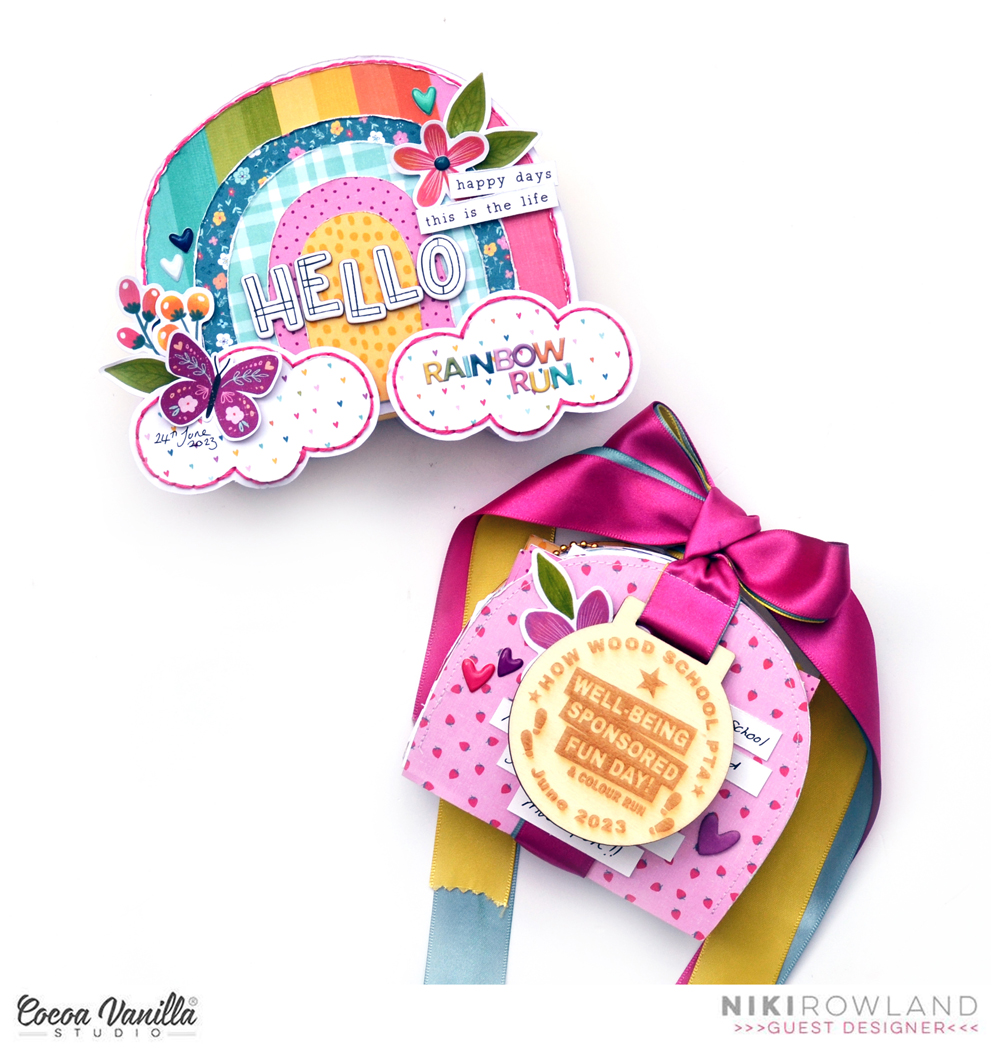
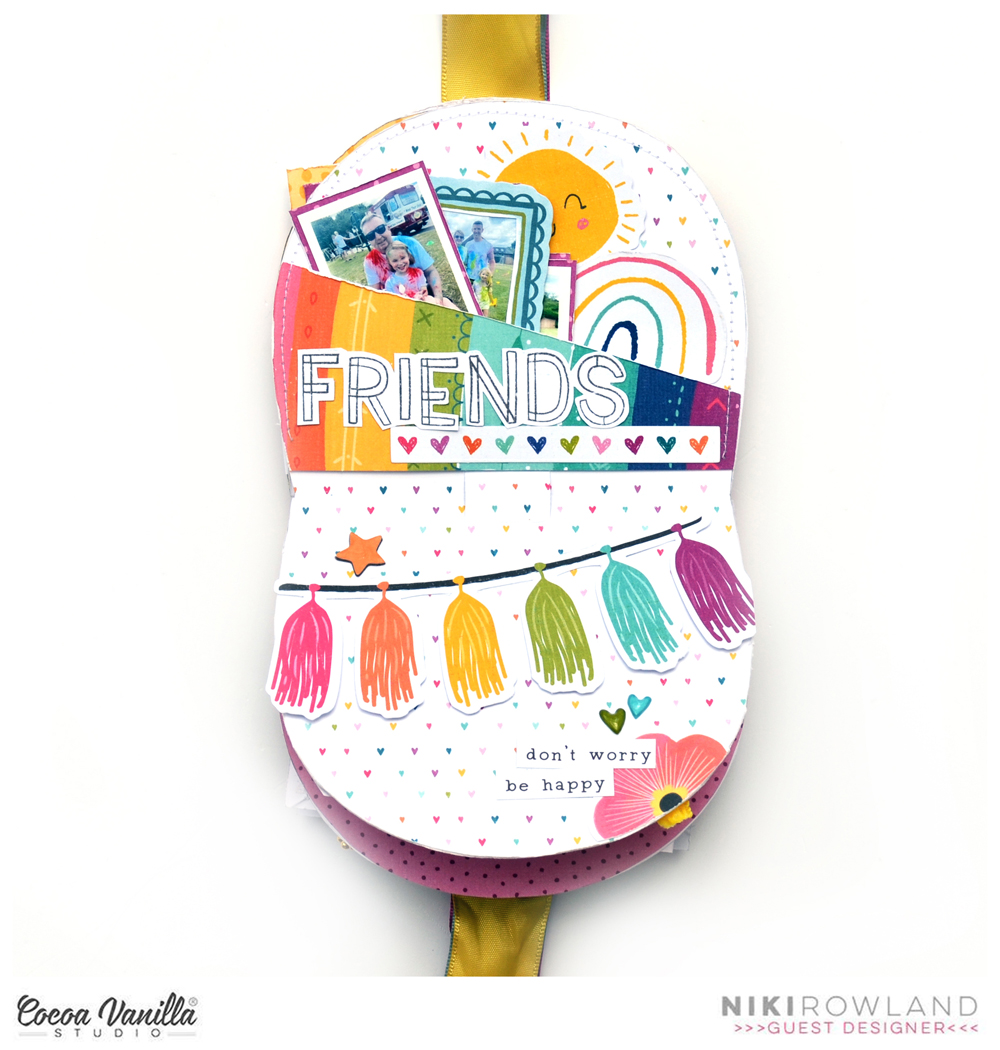
Hey everyone! This is Niki (@nikiclairecreates) and I’m excited to be back with another project and process video Guest Designing for Cocoa Vanilla Studio! This time I have made a mini album. It is a box in the shape of a rainbow, with an arch shaped mini album inside!
To make the box, I started with the front and back covers. I hand drew a rainbow onto a piece of scrap cardstock and cut it out and then used this as a template. I traced around it onto lots of different papers from the A5 paper stack and cut them all out, then distressed the edges and layered them all together. I then mounted this onto a piece of white card and cut out leaving a white border. I added pink hand stitching around the edge using embroidery thread I did all this twice so I had identical rainbows, one for the front of the box and one for the back.
To make the clouds I did the same: hand-drew a cloud onto a piece of scrap cardstock and cut it out to use as a template. I drew around it onto that super-cute ditsy heart print which I cut out and mounted onto white card. I added pick stitching around all of the clouds, then added them to my rainbows.
To make the inside part of the box, I used yellow cardstock to make an insert. I make these really simple, just two pieces of cardstock cut and folded – you can see more details on the process video.
With the box assembled, I moved on to making the mini album itself. I again created a template from white cardstock for the pages and cut that out. I then used this as a template for all pages. I drew them onto more papers from the A5 Paper Stack and cut them out. I then stuck them all together, back to back, to make a super-easy album, which I secured around the outside with ribbon.
I embellished the front of the box with a Chipboard Title, a few pieces of Floral Ephemera, a fussy cut butterfly and some phrase stickers. I also added the title ‘Rainbow Run’ using those adorable Mini Puffy Alphabet Stickers, to one of the clouds.
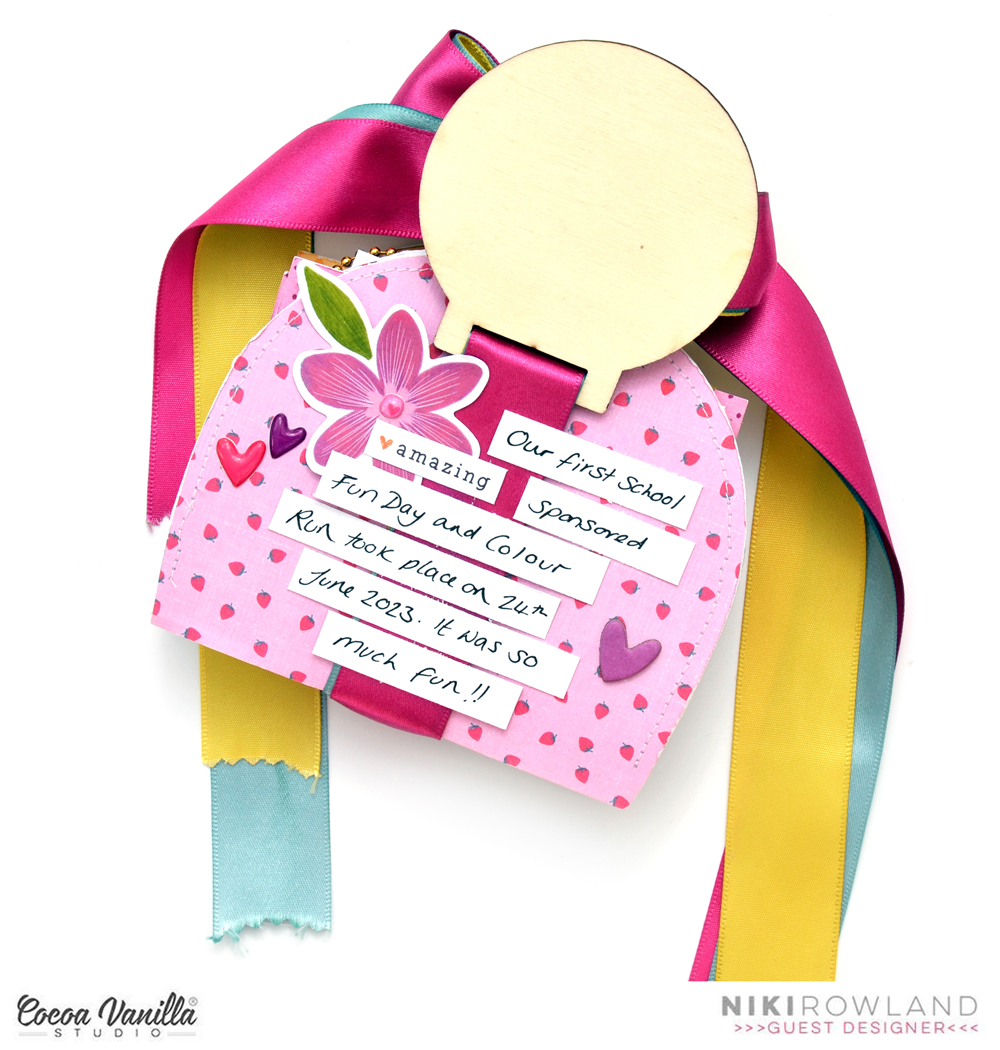
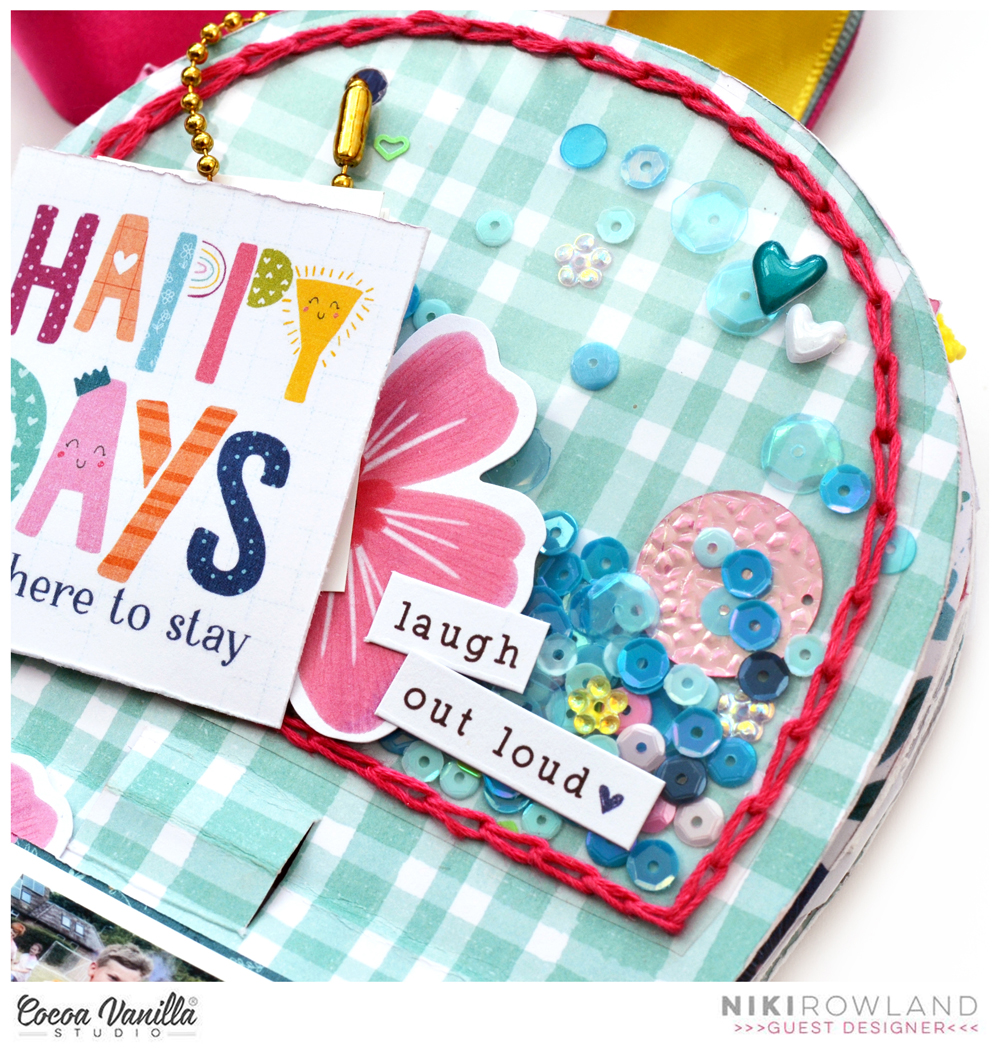
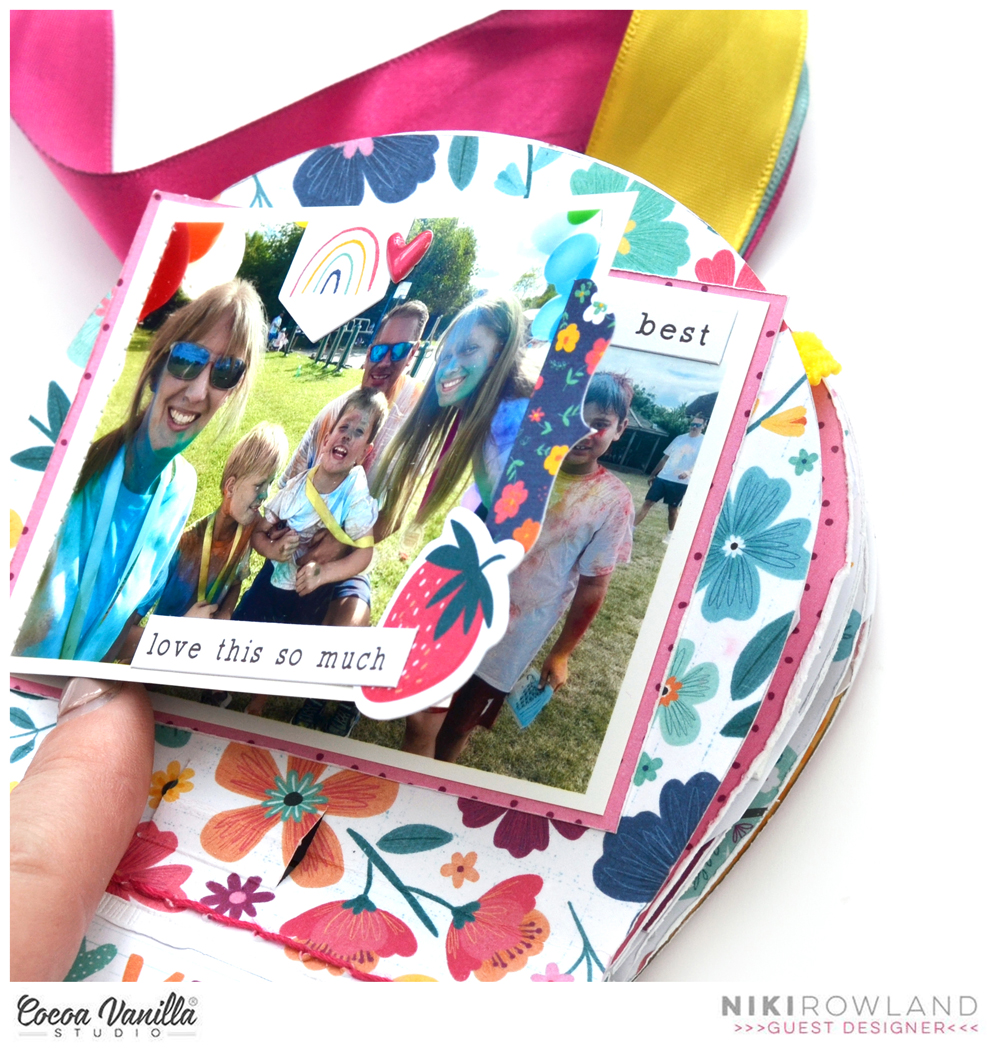
To embellish the album itself, I wanted to include the wooden medal from the Rainbow Run (this mini album is all about a sponsored run I took part in) and the actual ribbons from the medals at the event. I managed to incorporate those onto the front page and the ribbons are what tie the album together I think it’s really great to include momentums like that within albums if possible and these were perfect!
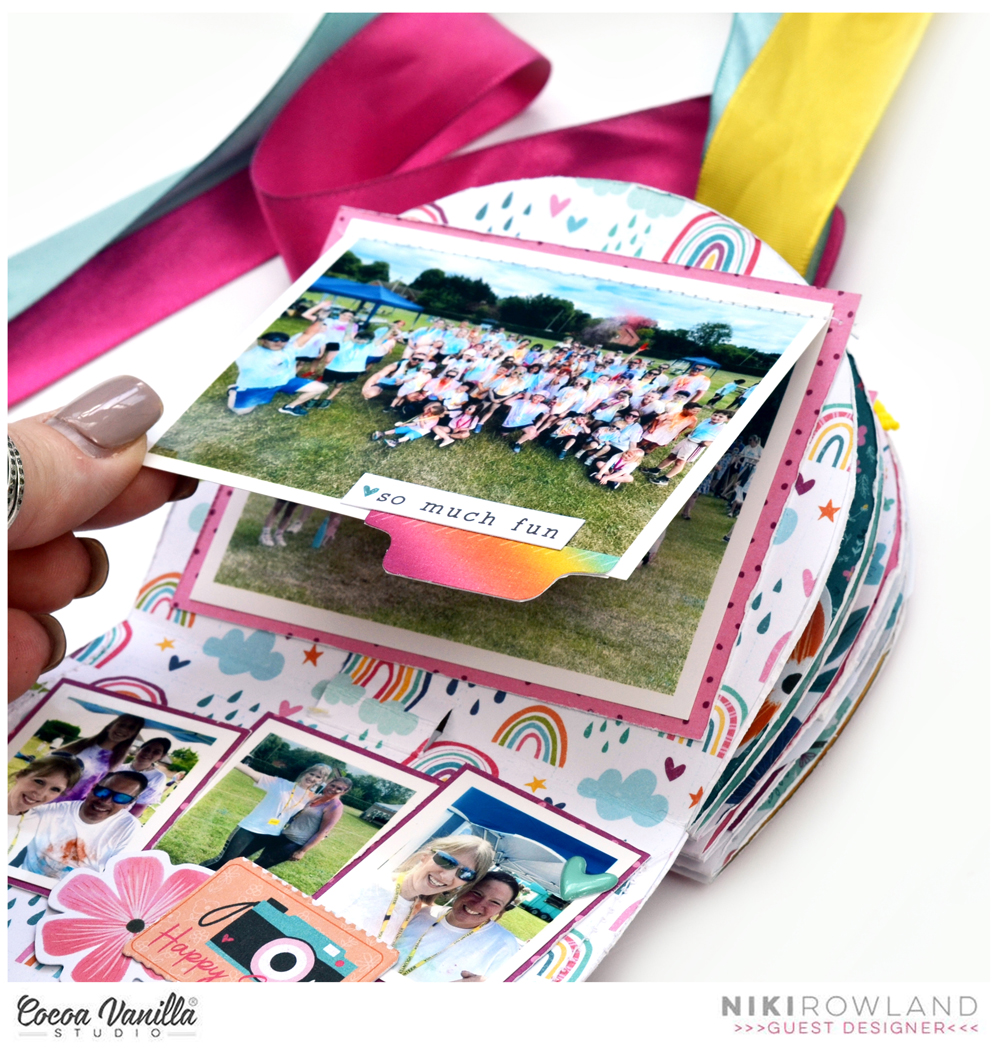
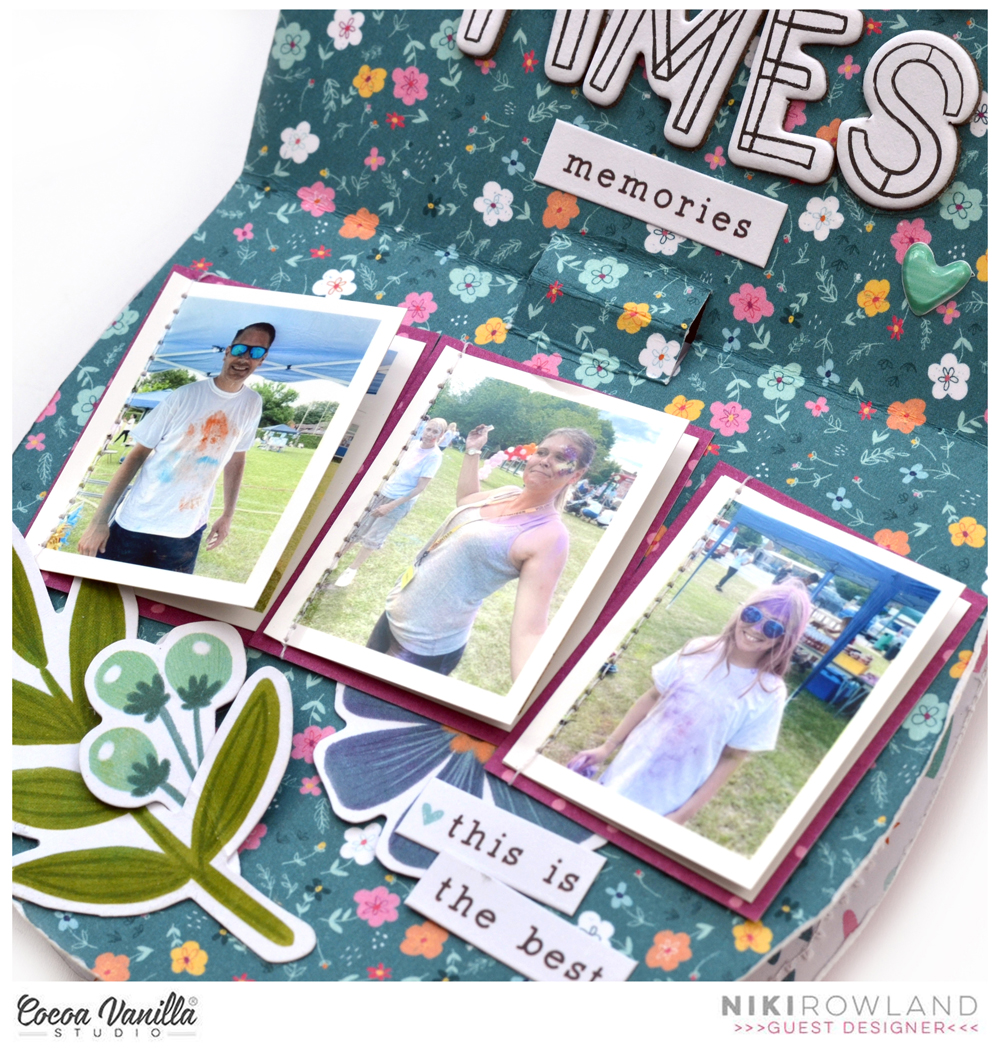
The album itself is quite interactive – I have 40 photos to include, so it had to be! Some pages have photos that flip up or flip out, there is a ball-chain containing 11 photos, there is also a pocket page. On one of the pages, I made a shaker pocket: I cut a piece of acetate to the same size as the page, pierced holes all the way around the edge and chain stitched with the same pink thread used for the album covers, trapping the sequins inside. I love how this looks!
I used more papers from the A5 paper stack throughout the album to decorate the pages and mount my photos. I’ve also used lots of Floral Ephemera,Phrase Stickers and several of the puffy heart stitchers throughout the album. I also used some of the other Chipboard Titles to make feature pages.
I absolutely love how this turned out, it is just adorable and so pretty to look at and I had the perfect photos for a rainbow album! I really hope you have enjoyed it too. I have made a process video of this mini album, which includes a flip through too, you can watch it here: https://youtu.be/jvOZK-Qy43o . Thank you so much Cocoa Vanilla Studio for having me as a Guest Designer, I have loved it!
Hello again everyone! This is Niki (@nikiclairecreates) and I’m so excited to be back sharing my third layout as a Guest Designer today using Happy Days!
For this layout I wanted to feature the Specialty paper which consists of beautiful foiled gold frames on white card. Inside all the frames are also gold foiled icons – all TOTALLY perfect for fussy cutting! I cut out a few of the frames and cut the middles out too. I then added two of the tiny journaling cards from the A5 Paper Stack inside the frames. They were the perfect size. They needed mounting onto a piece of scrap card first so that the frame had something to stick to (as they were exactly perfect for the apertures). I raised he frames on foam pads. The two cards I chose were the two rainbow ones – these look gorgeous inside the gold foiled frames.
I chose to use the yellow check side of the Feel Good paper for my background. I trimmed this down a bit, distressed the edges and added it to a sheet of white card. I then arranged my frames and my photo onto the yellow background.
I embellished the frames with Floral Ephemera and with the gold foiled icons fussy cut from within the frames – these are amazing as extra embellishments! I added some other little bits of Die Cut Ephemera to my clusters and added some small Puffy Heart Stickers too.
I added a title using ‘my sunshine’ from the Chipboard Title Stickers – I love this font! And the white letters stood out beautifully against my yellow background.
I finished off by handwriting my journaling and splattering my embellishment clusters with white paint! Here is the link to the process video I made for this layout: https://youtu.be/sb-V5KniUa8
I hope you have enjoyed seeing this layout, I loved making it!
Hi everyone! This is Niki (@nikiclairecreates) and I’m delighted to be back Guest Designing with my second layout and process video using Happy Days. I am obsessed with those gorgeous words on the Definitive paper and have spent some time fussy cutting a lot of them out. I wanted to make a feature out of them on this layout.
I chose the purple side of Flutterby paper as my background, which I paired with the pink strawberry side of Lush Blooms paper. I trimmed these both down and distressed the edges, then stuck them together offset slightly. I then positioned these onto a sheet of white card.
I mounted my photo onto a darker patterned paper and added that to my layout together with a gold fussy cut frame from the Specialty Foiled paper. I then arranged all the fussy cut words around the photo, cascading down from top to bottom. I raised them all on foam pads to give them some dimension.
I then added some of the Floral Ephemera to the bottom corner of my photo, and another cluster in the top right corner. I chose mostly pinks and purple flowers but also added a few yellow ones. Purple and yellow are opposite each other on the colour wheel, so are therefore ‘contrasting colours’. Contrasting colours work best when there is a lot of one colour with a small amount of the contrasting colours and this is exactly what I did with the yellow – just a couple of small pops of it in amongst all the beautiful purple.
I added another tiny cluster in the bottom right corner of the layout using some of the Die Cut Ephemera. I added some butterflies and handwrote my journaling under all the words. I also embellished the words with lots of Puffy Heart Stickers.
I finished off with a few splatters of white paint over the top of the embellishment clusters! I absolutely love how this turned out, I adore purple as a colour so love how this looks as a background! Here is the link to my process video for this layout if you would like to watch along: https://youtu.be/2ygAZcQKt0c
Thanks so much for joining me today and happy scrapping!
We are thrilled to be able to welcome a special guest designer today – the very talented Niki Rowland! Niki will be joining us with some projects featuring our ‘Happy Days’ collection and we know you are going to LOVE them!
I’m Niki, I live in the UK with my creatively challenged husband and my three children. I’m a pretty paper addict who makes the occasional cupcake and likes coffee and shortbread biscuits. I love turning bright colours and floral ephemera, into scrapbook layouts, with a few mini albums along the way too. I currently create for Simple Stories, and GoGo Getaway which is my own scrapbooking retreat business. That keeps me pretty busy but because I wouldn’t want to get bored, I also am a governor at my children’s school and somehow, I also ended up leading the PTA as well…so now I can add ‘fundraising’ to my list of skills too! Creating feeds my soul and I try to do something creative every day. I hope you enjoy my creations x
Hi everyone! This is Niki Rowland (@nikiclairecreates) and I’m delighted to be guest designing for Cocoa Vanilla Studio today!
I will be sharing four projects during June and July, and today I have my first layout and process video to share with you, using the Happy Days collection. I cannot tell you how much I love this collection, it is so bright, happy and fun! I absolutely fell in love with the colourful stripes on the Sunshine Lollipops paper and decided to focus on that for this layout.
I decided to cut the stripes into their colour groups and make rosettes in a variety of colours. I really enjoy making rosettes and love how they look and really went for it on this layout! I cut out two wide pieces (four stripes wide), several smaller stripes (two stripes wide) and one teeny stripe (one stripe wide). I scored them every quarter-inch and concertina folded them. To make the rosettes themselves I glue the two ends together to make a cylinder, then press the cylinders down in the middle and glue a punched paper circle on top to hold them in place. I did this for all the smaller rosettes, but for the two wide ones the strips needed to be longer to make full circles, so instead I just made semi-circles. These were perfect for the edges of my layout!
I then arranged the rosettes across a white cardstock background, but felt they needed something more, so I added some ink in coordinating colours under each rosette. I also added splatters in the same colours. This creates a ‘glow’ behind each rosette and make them pop off the page even more! I then glued the rosettes in place onto the background, using hot glue.
I cut out the subjects of my photos and added them to each of the large rosettes. I also fussy cut several words from the Definitive paper and added these to all the smaller rosettes – I love these words so much, the font is awesome and the words are perfect for my photos!
I then added Floral Ephemera colour-on-colour, tucked in around the photos and rosettes. I raised some on foam pads for added dimension. I also added a few bits from the Die Cut Ephemera pack including two very cute pinwheels, several hearts and a couple of phrase banners.
I handwrote my journaling in black ink and underlined it to make it stand out more. I loved the look of the black against the colourful rosettes so decided to add splatters of black paint…a bit of a risky move but I LOVE how it turned out! I finished off by adding a few of the mini heart Puffy Stickers in the coordinating coloured areas.
Thank you SO much for joining me today, I really hope that you have enjoyed reading about my layout. I have also created a process video so that you can watch it all come together, it can be viewed here: https://youtu.be/ooh3f_t6Mo4.
Once again thank you so much for joining me, and thank you so much to Cocoa Vanilla Studio for inviting me to guest design!
Hi everyone, it’s Sue Plumb here to share my latest design team project with you. This month we are focusing on the reason we all scrapbook, and that is telling stories. For today’s layout I decided to document the story of my son and his friend. These two have known each other since they were babies, and it is so lovely to see that their friendship has lasted. I decided to use the gorgeous Storyteller collection for my page, and kept my photo black and white so that it wouldn’t clash with any of the colours of the collection.
I began my layout by creating a mixed media background, using a combination of pale peach acrylic paint and ‘Prize Ribbon’ Distress Oxide ink. I applied the acrylic paint with a brayer over an area approximately half of my page, leaving a white border around the edge. I really love the effect the brayer creates, and it also helps the paint to dry fast because the coat is so thin. On the other half of the page I applied the Distress Oxide by mixing it with water and using a wide brush, before setting it aside to dry. I love the contrast using two different mediums give the page – both from the colours and the effect of the different techniques.
Whilst my background was drying, I turned my attention to the paper component of my page. I cut a piece of the vibrant Oh My Heart paper to sit horizontally across my page where the paint and ink met. This provided separation between the lighter colour at the top and the darker colour at the bottom. I also added a very thin strip of the green pattern on the the reverse of the Fly Away paper behind where I planned to sit my photo. My photo was matted with a blue paper from the A5 Paper Stack, and I also tucked in a small yellow doily and some frayed gauze underneath it. In the top right corner of my photo I added the so happy banner sticker from the Accessory Sticker sheet.
Alongside my photo, I added one of the Pocket Cards which featured a coordinating strip of coloured hearts, and I used my typewriter to add my journalling to it. I then topped the card with the the story behind the photo die cut from the Die Cut Ephemera pack, which was mounted on some foam tape to help it stand out. Along the bottom edge of the card I added another die cut, this time a small banner which read happy little moments, that was also mounted on some foam tape. A Wood Epoxy Button with a sweet little camera completed my cluster on that side of the page.
Near the top edge of the page along the border of my paint, I added a second strip of the Oh My Heart paper, which I used as the anchor for another embellishment cluster. This one featured two die cuts – a camera and a floral piece, which were both adhered using foam tape. I also added another Wood Epoxy Button, this time the smaller size, over the lens of the camera. Alongside that was the noteworthy banner piece from the Chipboard Stickers sheet.
Below my photo I added yet another piece from the ephemera pack – a beautiful strip of bunting which provided a lovely underscore for my photo. This was also popped up on foam tape to ensure it sat up at the same height as my photo.
At the bottom of the page I added the words So Sweet from the Foam Title Stickers pack to form my page title, and a small foam heart from the same pack nearby. I finished embellishing my page by adding three butterflies from the ephemera pack and then last of all I added some small black ink splatters to tie it all together.
I am so happy I documented this story of friendship for my son and I know this layout will mean so much more to him with my words included on it than if it was just another pretty page. I know we can all be guilty of not including enough journalling on our layouts from time to time, so hope you are feeling inspired to get a story told on your next page.
If you’d like to see exactly how this page came together you can watch my process video:
Hi everyone, Sue Plumb here to share my latest design team project with you featuring the awesome No Limits collection. For today’s layout I decided to create a page using a monochromatic colour scheme with blue as my focal colour. I used shades of blue that varied from a deep, midnight blue right through to a pale sky blue. I was documenting a series of photos of my son helping to make homemade pizzas recently.
I chose the Universal paper for my background, which is a light grey with a subtle graduated dot style pattern. I added some midnight blue acrylic paint using a rubber brayer to define the focal area of my page. Over the top of that I added a piece of the Stardust paper, which I cut from the side featuring the blue stars.
I topped up the papery layers using a card from the Pocket Card pack and some scraps I had left on my desk, then added a paper doily and some frayed gauze.
I chose the nested stars from the Die Cut Ephemera pack as my primary embellishment and used them as the base for three embellishment clusters. Other embellishments I used on my layout included Accessory Stickers, Puffy Stickers, and Chipboard Stickers.
My title was a mix of the awesome die cut from the ephemera pack, and some chipboard alphas from my stash that were coloured with the same paint as the background then highlighted using a correction fluid pen.
If you would like to see exactly how this page came together and hear me chat about it, you can watch my process video here:
Hi everyone, it’s Sue Plumb here to share my latest design team project with you. For today’s post I was assigned with showcasing the A5 Paper Stack and Pocket Cards from the new ‘No Limits’ collection so I decided to create a pocket page. If you have been keeping up with my recent creations, you will already know that I have been making a concerted effort to create more pocket pages this year to go alongside my traditional 12×12″ layouts in my albums. This is so I can get more photos and details recorded, but still have the freedom to be artistic on my 12×12″ pages. So far, the balance has been working well and I intend on keeping it up. (So yes, there is a traditional layout that goes with this pocket page but for today I am just sharing the pocket page.)
The subject of this page is my son’s current love of soccer. As a result, I have a lot of photos that I have taken of him that look very similar. (If you are a fellow sporting mum, I am sure you can relate.) Documenting sports photos is a topic that I discuss in my process video for this layout, and I have some tips for creating pages with them.
You can watch my video here:
I have included some close up images of my layout below so you can get a better look at how it is constructed.
Adding embellishments directly to my photos is something I usually do on my traditional layouts, but it is a technique that works especially well on pocket pages. I like for there to be a lot to look at as the viewer’s eye travels around the page.
I used one of the papers from the A5 Paper Stack cut down to 4×6″ as the base for my title card, then several Pocket Cards and a piece from the 12×12″ cut apart paper to fill the remaining spaces.
I used my typewriter to type my journalling directly onto the Pocket Cards. (It has a few quirks and it never looks perfect, but I love it – it has personality!)
The embellishments I used were a mix of Die Cut Ephemera pieces; Accessory Stickers; Puffy Stickers and a few fussy cut pieces.
That’s all from me today, I hope you are feeling inspired to work with A5 papers or Pocket Cards too. Until next time, happy scrapping!
Hi everyone, it’s Sue Plumb here today to share another project using the awesome new ‘No Limits’ collection. (Loving this collection SO much!) This layout features a photo of my hubby and one of my sons that I took while they were busy doing work in our garden recently. (This boy loves to help his Dad with projects in the yard!) I decided to use the wood grain print from the Big Bang patterned paper as my background for this page, as I thought it would work well for the outdoor theme.
You can see I have added some light mixed media layers to my background paper. I used a combination of acrylic paint, a stencil with ink, stamping, and splatters.
I used a mix of layered patterned papers for the focal area of my page that included Stardust, Orbit and Latitude and I used distressing, tearing and some frayed gauze to add texture. I also tucked in a paint sample card from my stash to help draw in the green on my sons hat, which I thought also worked well with the DIY that was happening on the day.
I used Die Cut Title words for my page title, but then used the always be your awesome self quote card from the Universal cut apart paper below it as a subtitle. Both of these were popped up from the page like my photo to create dimension and help them stand out from the background.
To embellish my layout I used lots of fussy cut stars from the gorgeous Nebula paper, which I combined with pieces from the Die Cut Ephemera pack and Accessory Sticker sheet.
I also added a few pieces from the Chipboard Sticker sheet which also provided some extra dimension.
Of course I couldn’t help but include some of my favourite embellishment from this collection – those stunning Puffy Stickers. (Seriously, I wish I had a million of these things!)
If you would like to see how this layout came together, you can watch my process video here:
Thanks for stopping by today, I hope you are feeling inspired to use up those scraps on your desk! Until next time, happy scrapping.
Hello everyone! Today I have another layout made with brand new “No limits” collection. I once again reached out for the photo of my dog son and sent hit to the outer space. Idea for this page was maturing in my head since the day I got the collection. It’s filled with stars and fun cosmos related patterns so I though this kind of page is a “must do”. I didn’t have any specific picture so I had to improvise. This is the kind of page you make just for fun and to turn the idea into a project. Best part is everyone can recreate it becasue there are no special tools required like digital die cutting machine. I am a big fan of my Silhouette Cameo but I know not everyone has one and can be frustrated that some designes require this expensive equipment. That’s why I decided to make this page with handmade rocket. You can of course use cut file to recreate it but you don’t need to.
I cut every element of this page by hand with just a scissors and without any precise measuring and drawing skills. I started with printing my photo and cutting it into circle to establish the size of the rocket. Then I mixed several patterns from A5 Paper Stack and “Spark” paper to create a rocket. I was using one of the rockets from Die Cut Pack as a reference. It’s made out if basic geometrical figures cut by hand. They are not even, lines are wonky, but this is exactly what I was aiming at. After the rocket was finished I took my sewing machine and added some stitching of the edges for even more texture. You can replace them by fals stitches made with white gel pen.
I ended up cutting my dog out of the background and placing him in the round frame backed with piece of acetate creating a rocket window. I decided that the background in the photo was just too distracting. Word “epic” from Chipboard Stickers Pad became the name of the spaceship.
“Eclipse” paper is a perfect background for the outer space adventure! I places my rocket over it and added few wonky planets cut by hand here and there. Next step was to add title. It’s made with a set of Thickers in matching colors. My doggo is for sure out of this world! You can also add some other “space” related titles like “Take me to the moon”, “You are my moon, my sun and all of the stars” and probably few more. I finished my composition by adding few stars from Die Cut pack along and super cute puffy stars and planets from Puffy Stickers pack. Three wooden buttons add great texture. White splatters create make it all look even more like a space.
If you want to learn how this page was made, I recorded a process video for you!
I hope you will enjoy watching my Laika in the rocket.
That is all for today. Thank you so much for staying with me and see in again in two weeks!


 I used one of the papers from the A5 Paper Stack cut down to 4×6″ as the base for my title card, then several Pocket Cards and a piece from the 12×12″ cut apart paper to fill the remaining spaces.


