Happy Moments | Boys Rule & Midnight collections | Sue Plumb
Hi everyone, and welcome 2020! I am so happy to be here with my first project of the new year for you. Today I am continuing on with our Holidays & Vacations theme, and sharing a layout I created using a combination of the ‘Boys Rule’ and ‘Midnight’ collections. I know what you are thinking – a bit of a strange mix of collections, right? Despite the very obvious differences between the two, they did work together surprisingly well and were a perfect compliment for the colours in my photo.
For my layout I decided to document a photo that was taken at the Cocoa Vanilla retreat that was held last May. Scrap retreats are definitely one of my favourite kinds of holidays – besides spending time with great friends, you get to enjoy a change of scenery, have a break from your everyday responsibilities, AND you get to create! What’s not to love about that?!
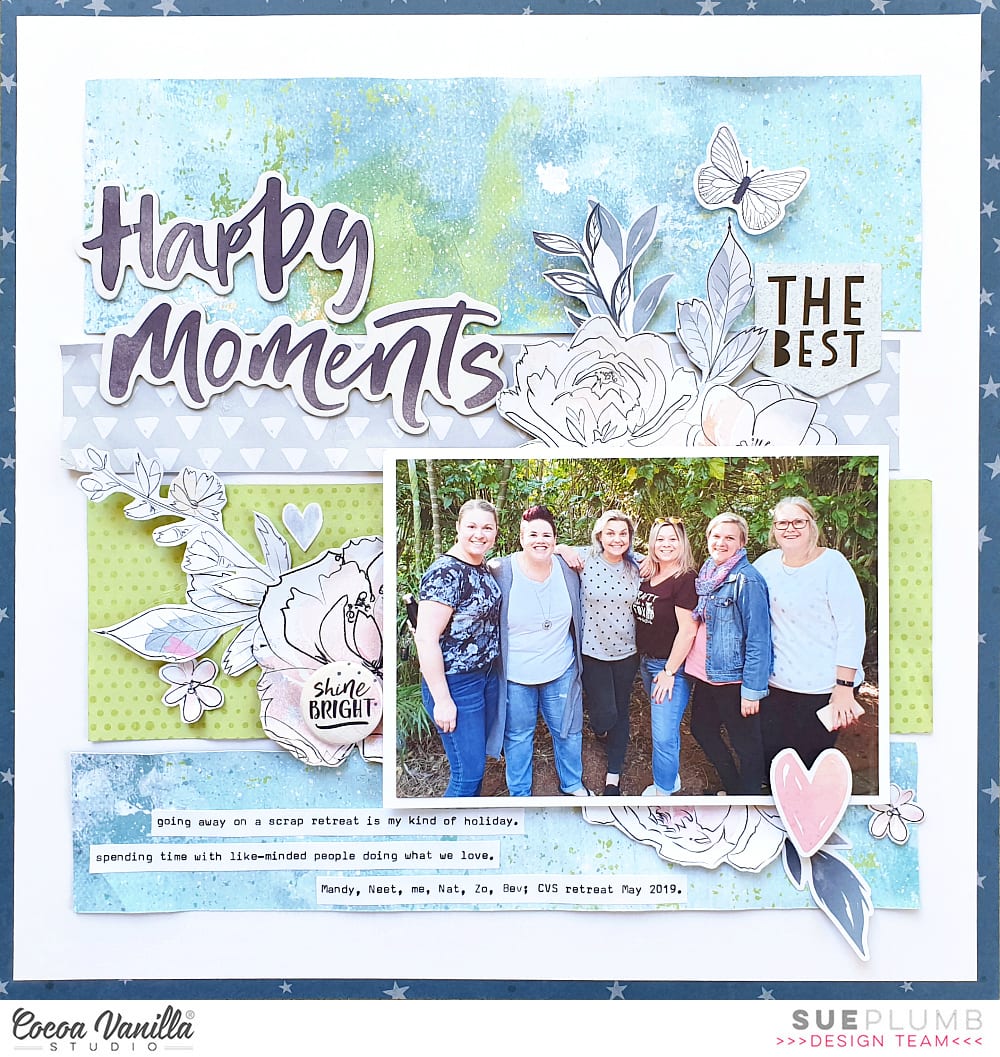
I started my layout with ‘Boys Rule’, with a sheet of Star Fall as my base,which I topped with piece of white cardstock, cut slightly smaller than the paper, to leave a narrow border around the edge. I then added four blocks of paper to my background using pieces of the Messed Up; Expressionist and Straight & Narrow papers. I distressed each of the blocks by scrunching and then flattening them back out; then ran them horizontally on my page to compliment the landscape orientation of my photo.
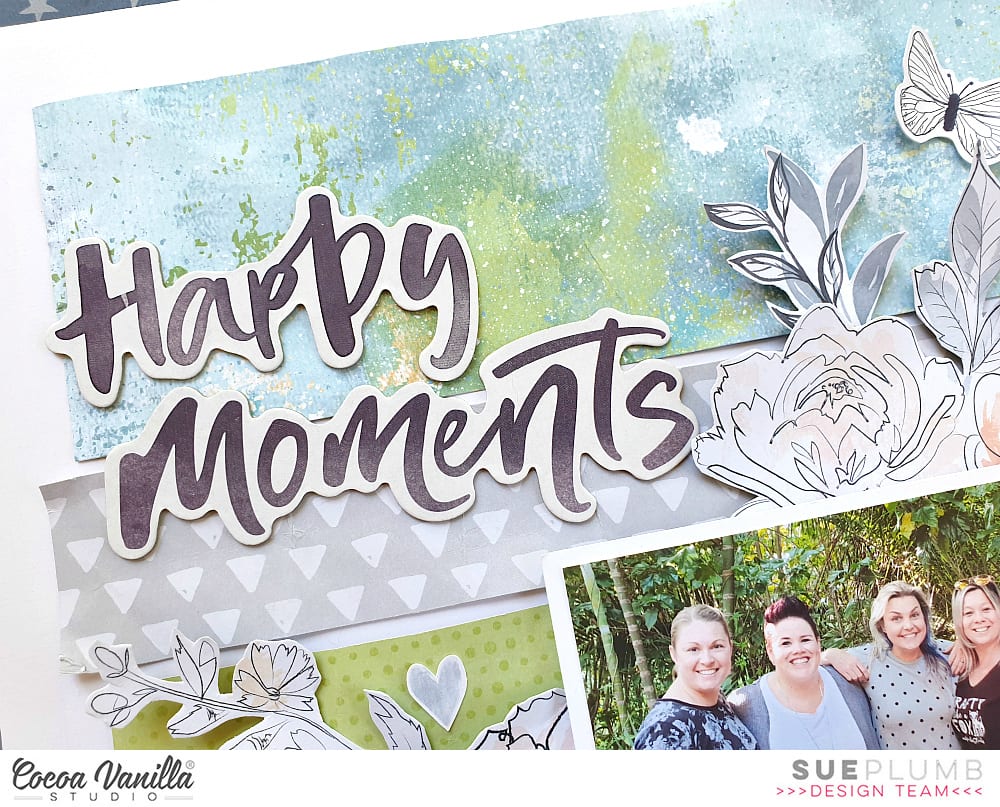
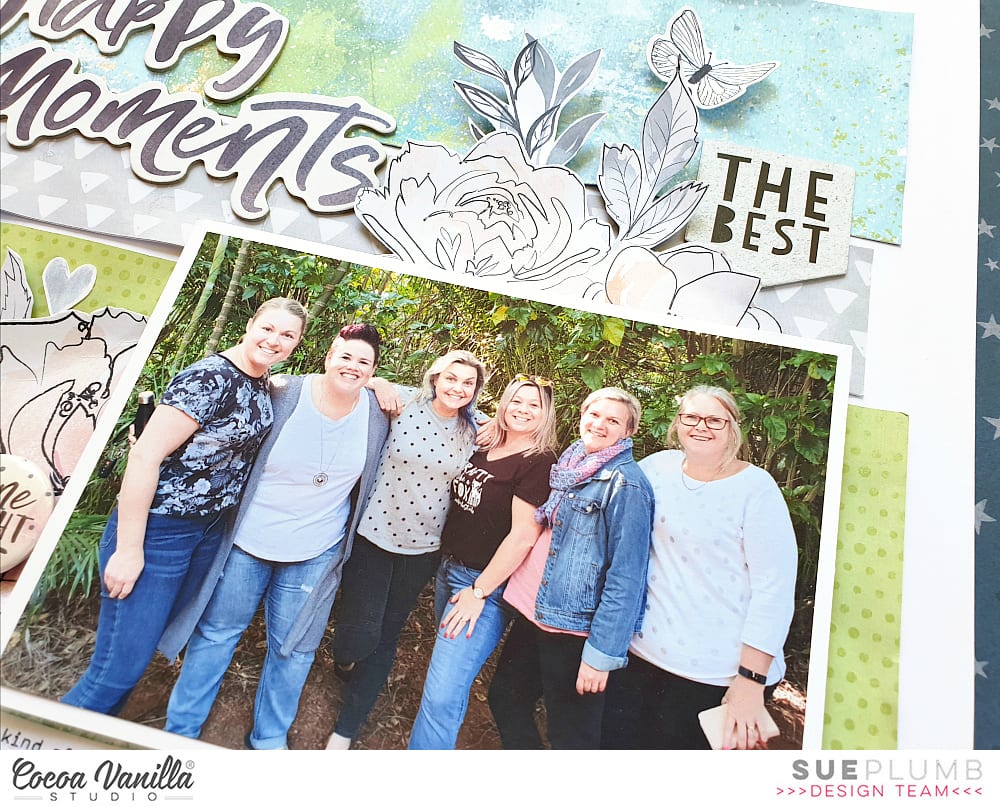
With my background complete, I then added some scrap cardboard to the back of my photo and decided on its placement on the page. I chose the beautiful floral print Bloom & Grow paper from the ‘Midnight’ collection to begin embellishing my layout, fussy cutting several pieces to tuck in around my photo to frame it.
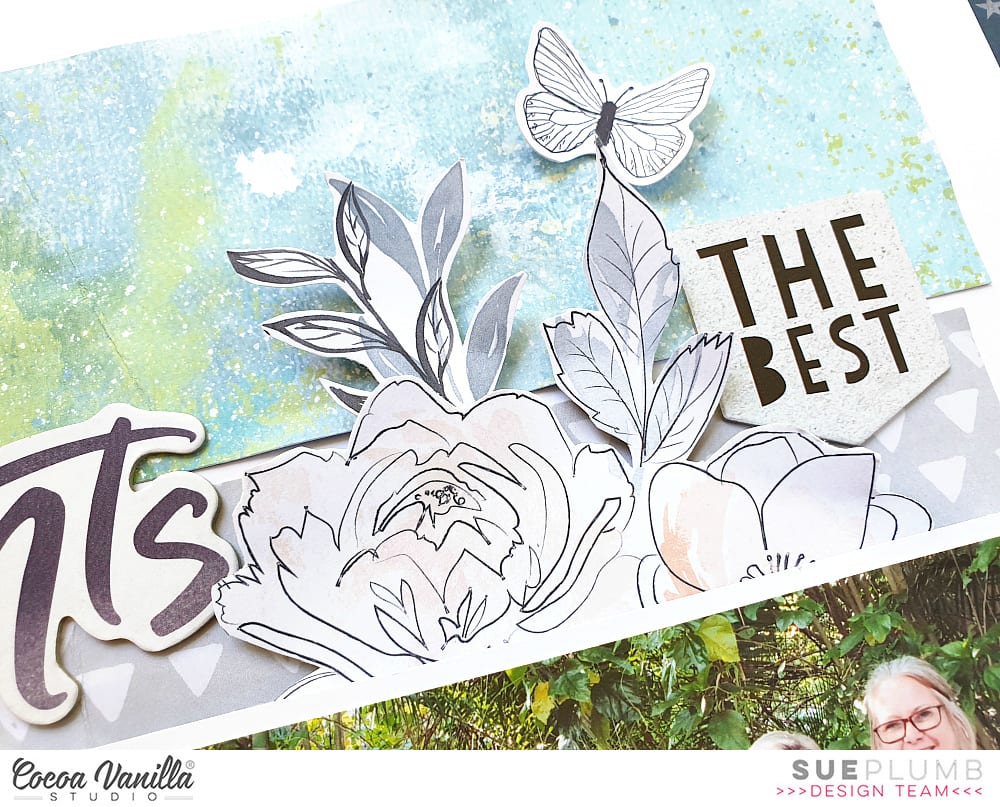
With the flowers in place I then added the little banner that said the best from the ‘Boys Rule’ Chipboard Pieces pack, and a small black and white butterfly sticker from the ‘Midnight’ Accessory Stickers; placing both near my top floral cluster.
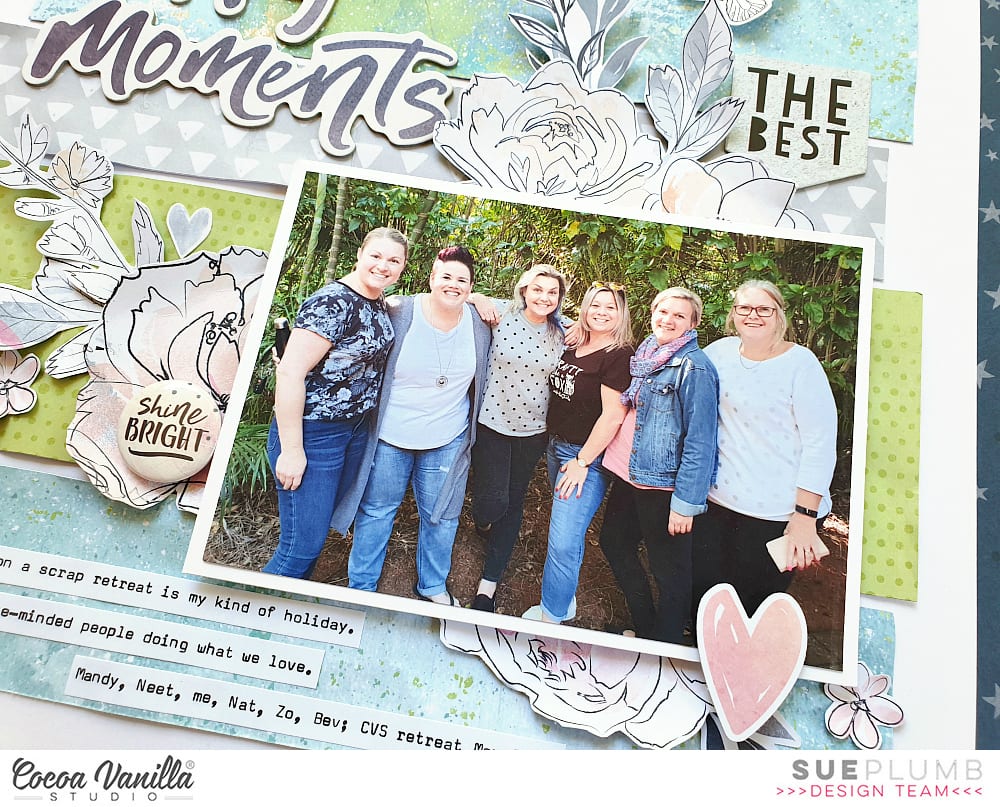
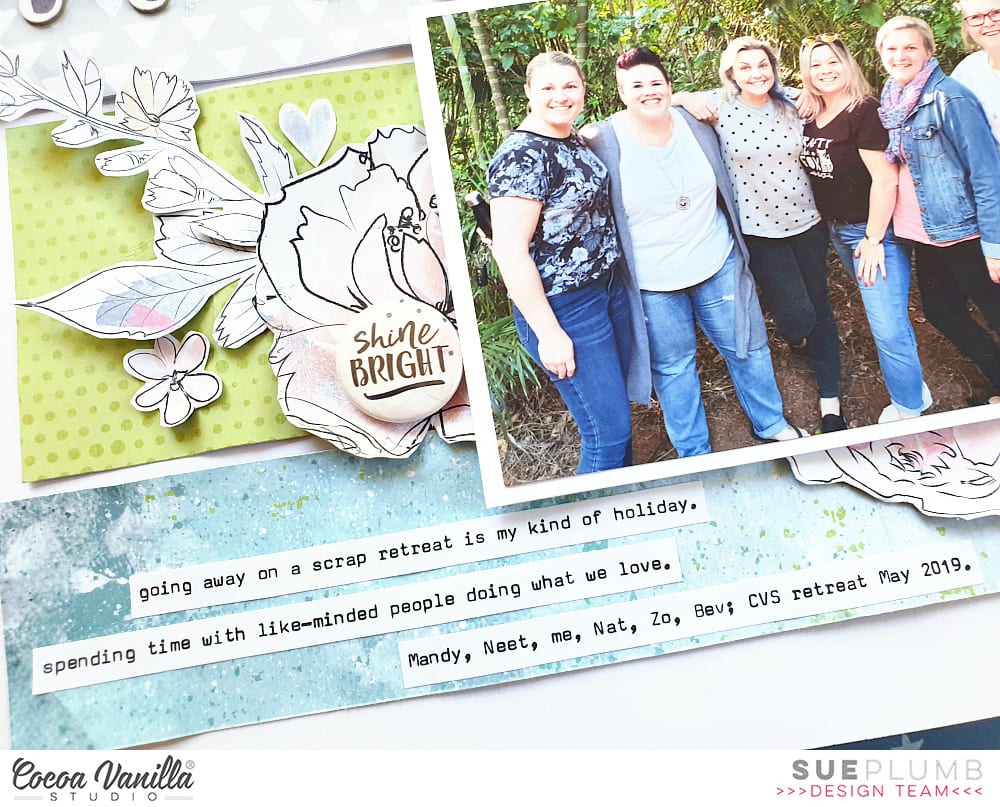
I created a small cluster below my photo by combining another fussy cut floral piece with a small leafy branch and heart, both from the ‘Midnight’ Die Cut Ephemera pack. In my cluster to the left of my photo, I also added the shine bright flair button from the ‘Midnight’ Flair Buttons set.
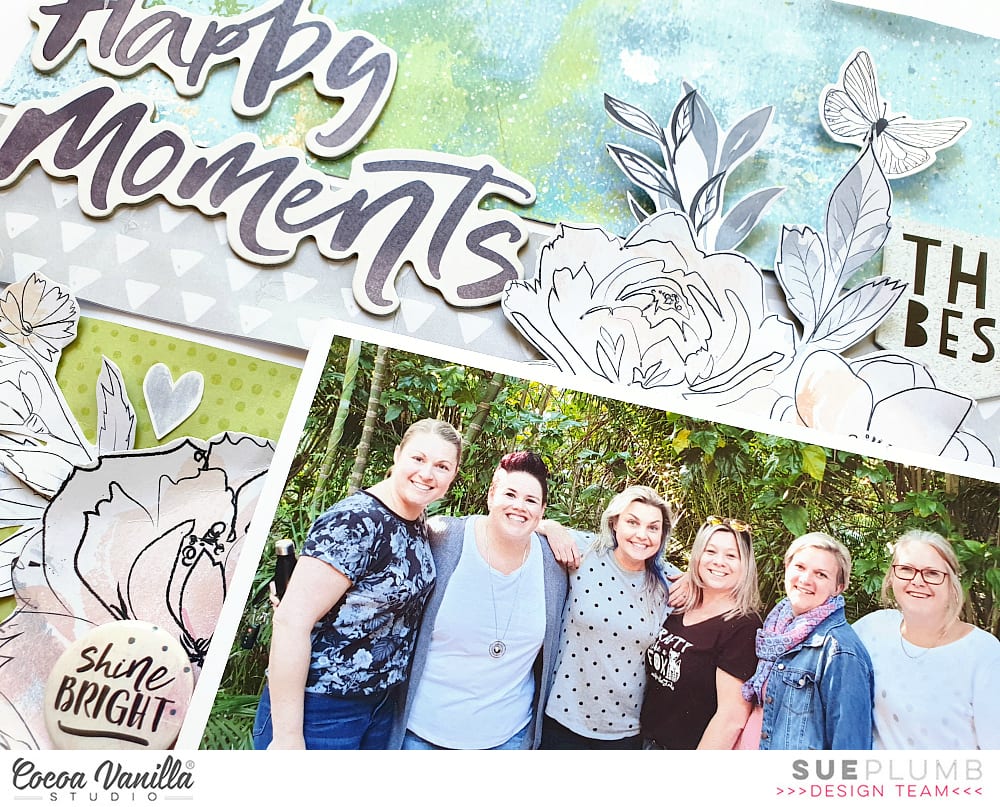
For my page title, I used the words happy and moments from the ‘Midnight’ Chipboard Pieces pack; and then I finished off my layout by typing up my journalling and applying it in strips (again tying into the horizontal theme) near the bottom of the page.
That’s all from me today. I hope you are enjoying our Holidays & Vacations focus and that you are perhaps feeling inspired to document some of your own holiday moments. Stay tuned for more inspiration from the team for this theme!
Until next time, happy scrapping!


 Santa is quite big so there was no much room left for embellishing. I created my title using ephemera leftover – word “christmas”. I added word “merry” using
 I don’t have much of the traditional collection left now but I am so happy to be able to get everything I need in digital form! I will never run out again! If your stash is getting low of
  I chose a photo of my youngest taken on Christmas Day when he was about 3 weeks old, he just turned 9 yesterday so the photo is quite old but its one of my favourites! I changed the colour of the photo to a soft black and white as the colours in the photo would have clashed with the soft colours in the collection. Underneath the photo I layered a small paper doily and a smaller piece of the red and white stripe paper to the right of the photo. I also layered a wood veneer frame on top of the photo, I like how this draws your eye to the photo. I popped up the photo using craft foam and then placed embellishments around the photo. The ticket that says ‘Child’ die-cut definitely had to be added, it was perfect tucked at the bottom of my photo.
 I used accessory stickers, enamel dots, die-cuts, wood veneer, sequins and a bitty bow to embellish. I have tons of the sequins left, I love the gold stars so I scattered a few of those around to add some sparkle. I placed the white bitty bow at the base of the tree to separate the tree from the pot. To finish the page, I added the date stamp of when the photo was taken. I love how my page turned out even with only minimal pieces from the


