Hello lovelies, sharing my first layout using the merry and Bright collection and as this week we are mixed it up with new and old I use some ephemera, stickers and one of the hearts from day dream..
My photo is of Luna kitty all curled up asleep after attacking the Christmas tree playing with the ornaments .. but seriously what kitty doesn’t have a super fun time with the Christmas tree…lol
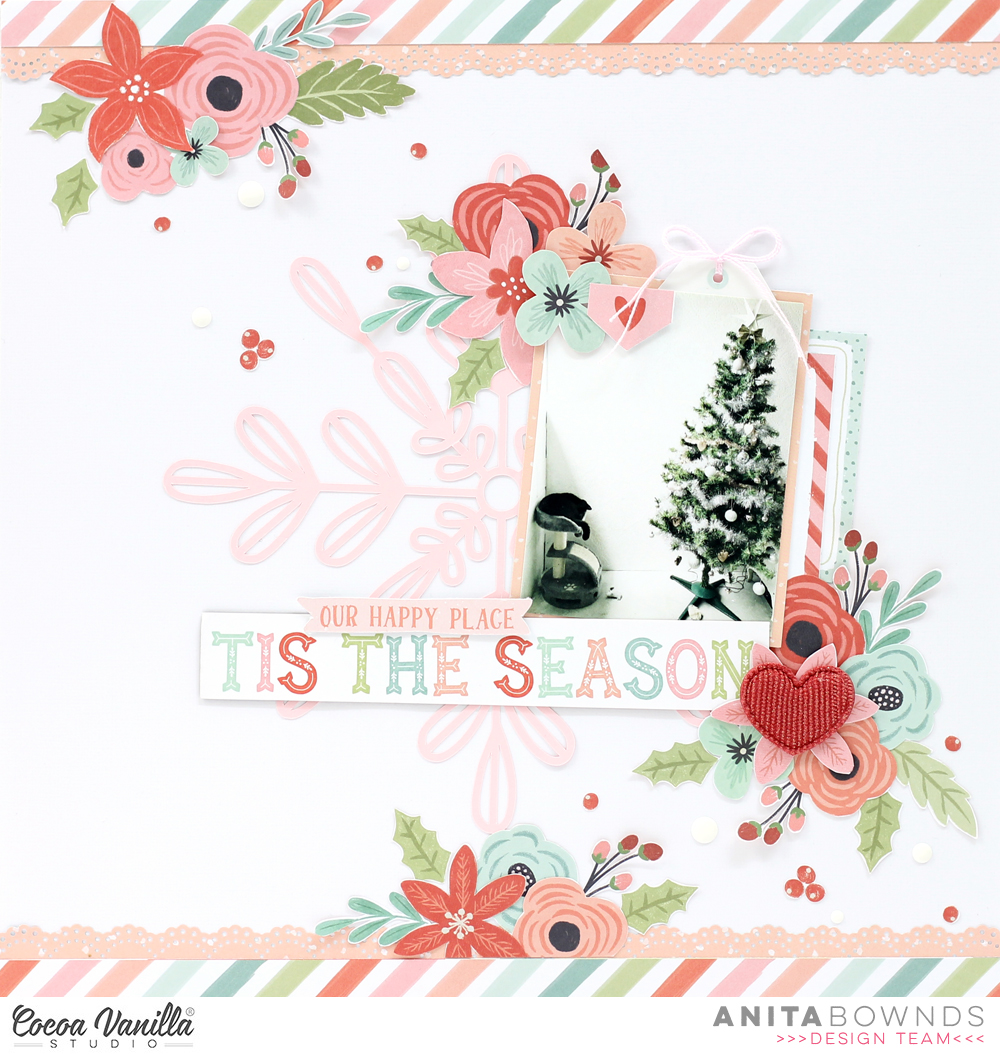
I started with a snowflake cut file design from Paige Evans that I cut out on light pink cardstock to match the light pink in the collection then I adhered it in the center of the white cardstock and then matted my photo on paper from the 6×8 and a few little labels from 6×8
Then using the season greetings pattern paper I chose to use tis the season for my title and popped it up with some double sided foam tape at the bottom of my photo
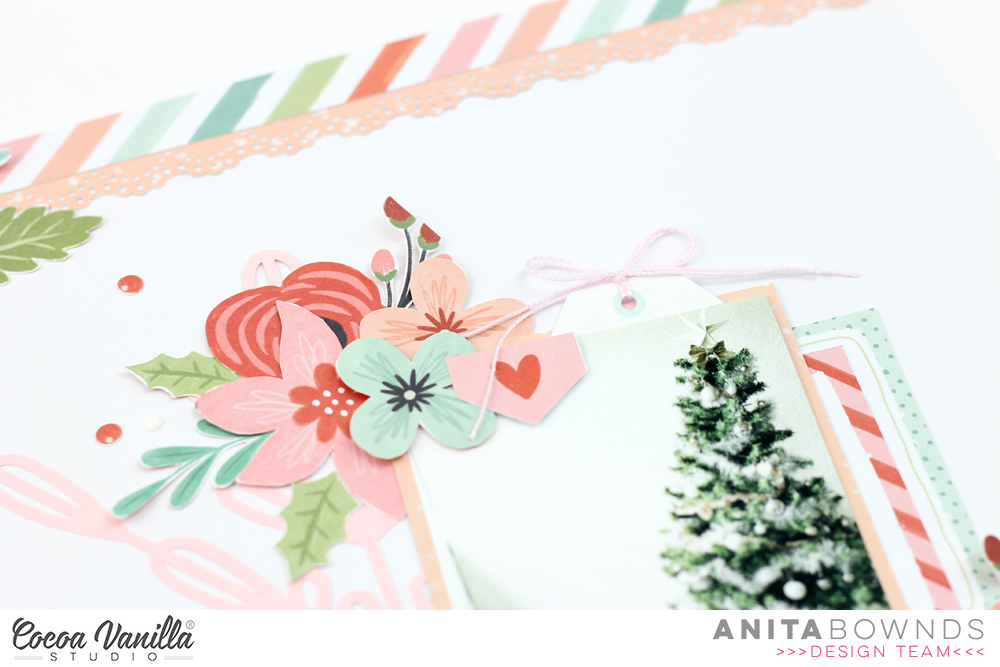
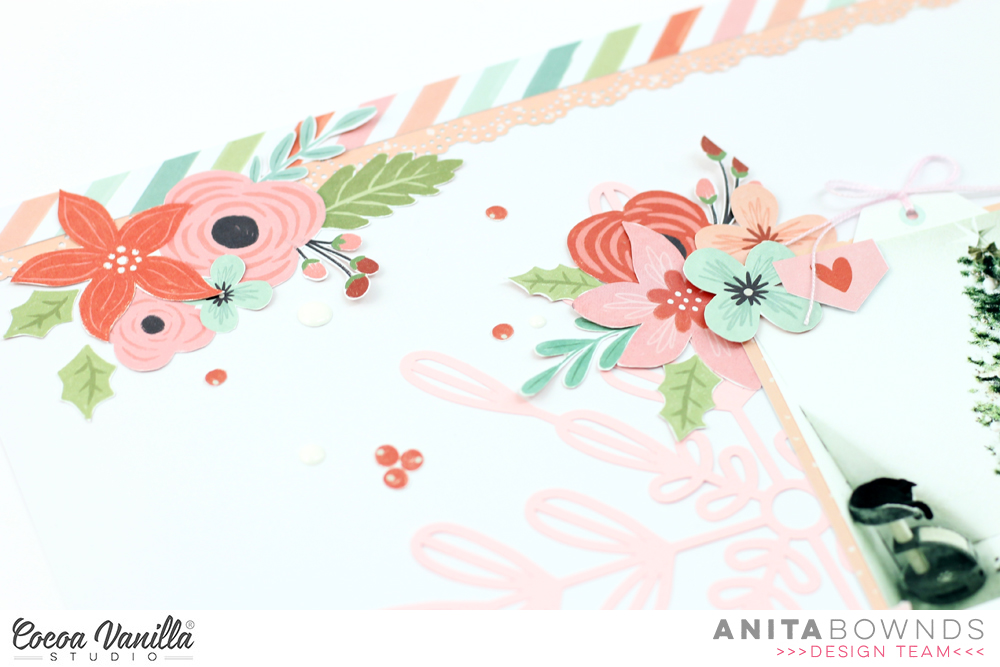
Then I cut 4 border strips 2 from joy to the world that a punched a lace border and one from oh what fun that I trimmed in half that I layered on top of the lace strip and added them to the top and bottom of my layout
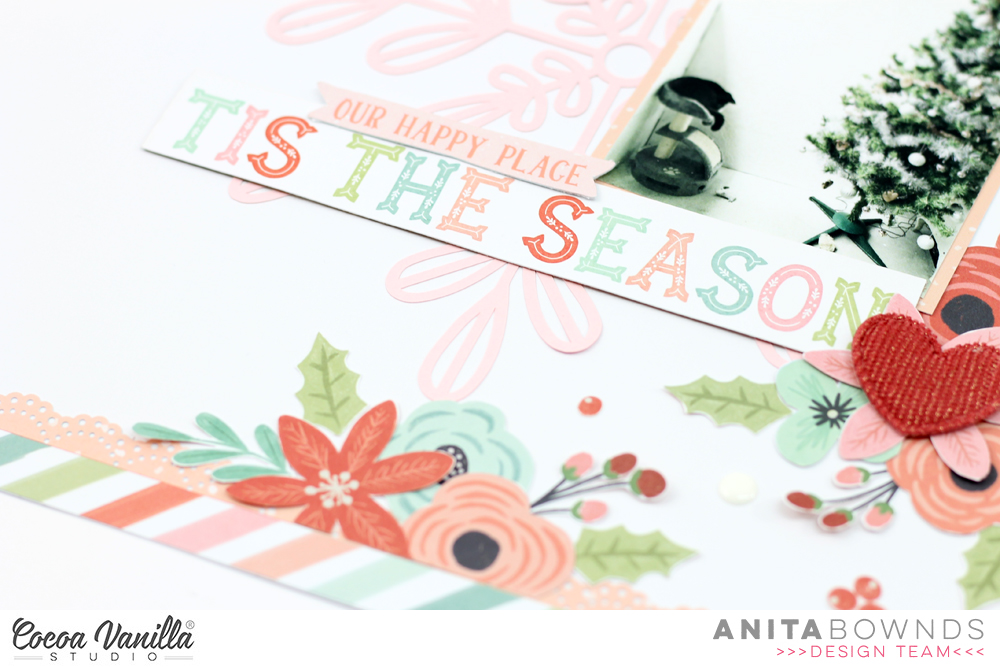
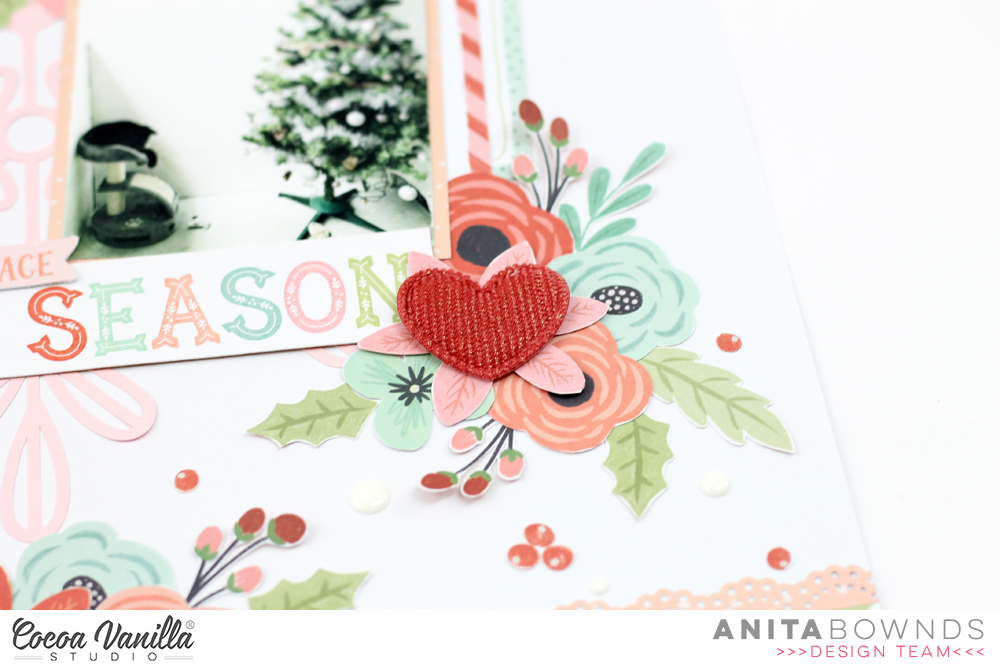
Then using joy to the world I fussy cut out a bunch of flowers and started clustering flowers at 2 corners of my photo and the top and bottom of layout I also added a few bits from day dream like our happy place from the ephemera pack , the tag from the accessory stickers and one of the puffy hearts
Then to finish it off I added little fussy cut berries and enamel dots from the legendary collection..
I hope you have enjoyed my inspiration today
don’t forget to pop on over and check out the process video:
Hi there lovely Cocoa Vanilla fans! Danni here with a fun layout using a mix of old and new Cocoa Vanilla Studio collections – Happiness and Daydream. I chose to marry these two collections because although they both have lots of pretty florals and butterflies, the colour palettes are quite different, with Daydream being beautifully soft and muted, and Happiness so bright and colourful. I really wanted to challenge myself to make the two collections work together, and I am really pleased with the result.
I have a photo of myself taken back in 2014 when I was in early pregnancy with my son; I had been suffering badly with morning sickness and this day was the first I felt well enough to get dressed up and go out, so I definitely wanted to celebrate that moment!
I started with the Sweet Serenity 12×12 patterned paper from Daydream, then took two pages from the Happiness 6×8 paper pad, layering them to make a large paper block in the centre of the layout to base my elements on. I also added a couple of strips of Over the Rainbow 12×12 patterned paper from Daydream because I love me some woodgrain!
I layered up some pieces from the Happiness Little Things 12×12 patterned paper behind my photo instead of matting it, and I also took one of the frames from the Happiness die cut ephemera to make a place for my journaling.
To jazz up my background a little I added some pink texture paste through a chevron-pattern stencil either side of my central paper block, elongating it to a more horizontal format. I went ahead and added a few tiny hearts with the same paste too, I just love little details like this.
For my title I chose the ‘Thankful’ die cut title from Happiness and layered it over my central paper block, overlapping my photo slightly. I chose to make two large embellishment clusters on this layout – I could have done a third but I wanted to keep most of my embellishments within that central paper block. I used a combination of accessory stickers from Happiness and die cut ephemera from Daydream to create my pretty floral clusters. I love the bright pops of pink from Happiness paired with the soft pinks and yellows from Daydream!
I decide to go all out with my clusters and added some die cutephemera hearts and sequins from Daydream, plus some tiny word phrases from the Happiness accessory stickers. To finish it all off I added a Daydream flair and two die cut butterflies, with some pearl drops as flight trails. I really love how soft and pretty this turned out with those bright pops of happy colour shining through. I also really love using that frame to give me lots of journaling space, definitely something I will be doing again in future!
I really hope you enjoyed joining me for this layout today. There is a process video on the Cocoa Vanilla Studio YouTube channel linked below if you would like to watch it come together. Happy scrapping!
Hello friends. It’s Anna Komenda here with another page created with amazing “Daydream” collection. I am still not ready to move to christmas projects, enjoying beautiful, fall color palette. I have bunch of new and shiny photos of my girls taken in the nearby forest and I picked one to scrapbook. They look so adorable together holding hands. This little moment made me melt in tenderness. It also made me think how important it is to cherish them and scrapbook even small things, not only those big ones.
Inspired by the forest, I reached for paper called “Over the rainbow”, with pretty wooden texture, and used is as a base of my page. Next step was to cut word “beauty” using my digital die cutting machine and “Sun shower” paper. I wanted letters to be bold and big. To spice things even more, I run each letter through floral embossing folder, giving them unique texture. I highlighted the “bumps” with golden ink.
You know I am a big fan of fussy cutting so I took paper called “Garden variety” and cut out most of the flower clusters from one sheet. I placed them around my letters to make everything more cute and feminine. The same thing happend with butterflies from paper called “All aflutter”.
After such a bold intro with the title I knew I needed to be more modest with the photo to make it stand against the big title. That’s why I didn’t add any paper layers under it. I only embellished it with the rainbow from ephemera pack and few flower leftovers.
Fabric heart and cute flair buttons are fantastic do add some finishing touch to the page. They also give this special texture. Brown, wooden paper makes everything pop from the background. I used gold, foam thickers to finish the title adding few words that all together sound: “Find beauty in little moments”. This is something I need to remember, especially recently. “Daydream” collection has so many faces and I have seen so many amazing projects made with it from my fellow DT girls. Each layout look so different. I just love that with one line you can scrapbook fall, cute baby photos, rain and puddles adventures and unicorns and rainbows. I still haven’t said the last word here too.
Thank you so much for stopping by and spreading your love in comments. See you in two weeks.
Hi everyone, its Melissa and I’m back with you today to share another layout that I made with the gorgeous ‘DAYDREAM’ collection. I’m nearly ready to start creating Christmas layouts, but first I wanted to create a layout with the signature paper from this range called ‘OVER THE RAINBOW’, and I’m sure you’ll know which paper I’m talking about because it has the woodgrain on the A side and the rainbow on the B side. I’ve seen a lot of beautiful layouts created with both sides of this paper, and I wanted to challenge myself to use the rainbow with hand stitching.
I also wanted to challenge myself to use more that one paper for my background. The ‘SUN SHOWER’ paper was perfect with the raindrops, and then I used ‘SWEET SERENITY’ for the remainder of the background. I love the way that the rainbow stops the rain!!
I started by cutting apart the rainbow, and then I pulled matching threads in each of the colours. Last time I created with Daydream I did some hand stitching on one of the ephemera rainbows, and I decided I wanted to recreate that to really help the rainbow shine. I especially love stitching sequins, and all of the sequins on this layout are from the ‘SEQUINS & FLOWERS’ pack. I even stitched the tiny gold sequins in the zig zag pattern printed on the paper.
For my embellishment I predominantly used fussy cut floral clusters from ‘GARDEN VARIETY’ and I love how they look with around my photo and tucked under pieces of the rainbow. Of course I had to use a ‘PUFFY HEART’ too!!
As explained in my journalling, the photo is a sweet photo of my youngest daughter Ava which I took in our local deli! I found that the best place for my journalling was in the centre of the smallest part of the rainbow.
I also added some of the phrases from the ‘ACCESSORY STICKERS’ which are always perfect if you don’t journal, or if you want a couple of words to help tell your story. The papers that mat my photo are from the ‘6X8 PAPER STACK’ and I purposefully chose papers that were darker to contrast against all of the lighter rainbow colours.
Sometimes I really struggle with the words for a title for my layout, and I love that I found a title for my page easily from the ‘DIE CUT TITLES’.
I hope you have enjoyed learning about my thoughts behind the creation of my layout! I have a process video that you can watch below.
Welcome back to the Cocoa Vanilla Studio blog! Today I am very excited to be sharing my first design team layout using the AMAZING new Merry & Bright collection! I have documented a fun Christmas photo of my 2 sons from last year. Oh my goodness, seriously this collection is stunning! It is the perfect Christmas collection without being too over the top. The colours and all the elements are so gorgeous!! Even if you are not a fan of Christmas, this collection can be used for any themed project!
I decided to make good use of the 6′ x 8′ paper stack and began backing a holly wreath cut file design from CUT to YOU with the pretty papers in the stack. I tried to have the green for the holly leaves and I added red for the berries. The other florals I added a mixed floral paper and a striped paper. I will admit this did take some time but I feel the end result is worth it. Once the cut file was all backed, I turned it over and added craft foam to the bottom of the cut file.
I chose the Happy Holidays paper as my background paper and adhered the cut file at the top and bottom of the page to create a wreath shape. I then trimmed down the Happy Holidays paper a little smaller and matted it onto the Oh Christmas Tree paper. I like how this brings out the green/teal in the leaves in the cut file. On the top large in the cut file, I added one of the super cute gold puffy stars. See image below.
I matted my photo using some more of the 6′ x 8′ papers and also layered a paper doily underneath. I adhered the photo and mats to the lower centre of the wreath. I then cut the Tis The Season words from the Season’s Greetings paper for my title and adhered it using craft foam to the bottom of the photo.
I added the green Merry Christmas die-cut under the title and one of the beautiful flair buttons to the left of my photo. I also stapled a banner die-cut to the top left of the photo and adhered a heart die cut to the right of the photo. I tucked in some leaf sprig die-cuts into the cut file to enhance the wreath design.
Lastly I stamped the date stamp just below the heart die-cut of when the photo was taken.
Are you getting the new Merry & Bright collection? If you are considering buying it, considerate no more and do it! You will not regret it!!
Thanks so much for stopping by today, I hope you enjoyed my layout and that you are inspired to create with Cocoa Vanilla goodies!
Hi everyone! Sue Plumb here to share my latest design team project with you. This weekend we are doing “Scraplift Saturday and Sunday”, so myself and Rachel (tomorrow) will both be sharing a scraplift of a recent layout from our Facebook Community group. The layout we are lifting was this beautiful entry into our October “Spring Vibes” monthly challenge by Debra Beer…
Scraplifting is when you take a design from someone else and use it as the basis for your own page. This could range from copying the design in its entirety using the exact same materials; to simply using the page as inspiration and treating the bones of the page like a sketch. Both Rachel and I have scraplifted the same layout to demonstrate how one page can inspire people in different ways.
Here is my take on Debra’s page using the ‘Daydream’ collection…
The first thing I decided when it came to creating my page, was that rather than a white cardstock background, I chose to use the Sun Shower patterned paper instead. I topped this with a piece of the Daisy Days paper to form the focal point of my page. I added extra texture to the paper by distressing the edges; and stuck some torn strips of washi tape under the top and bottom edges of it – just like Debra had also used washi tape on her page. I also added some frayed gauze for more texture.
On top of the Daisy Dayspaper, I added a small piece of the navy Up in the Clouds paper to help separate my photos a little from the busy floral print. For my photos, I also chose to go with both a portrait and landscape shot, just as the original page had. These photos were taken recently while my family were celebrating my mum’s birthday. I also added a paper doily, but changed the position of it slightly to tuck under the left top corner of my photo and I also tucked in a circular floral frame from the Die Cut Ephemera pack.
Just like Debra’s original page, I wanted to embellish my layout using clusters of flowers. I fussy cut several pieces from the Garden Variety paper and combined them with some ephemera pieces to create three clusters to frame around my photos. I also added a couple of small phrase stickers to my page from the Accessory Sticker sheet.
I finished off by adding a Die Cut Title word along the bottom edge of my photo, then added some scattered sequins from the Sequins and Flowers pack instead of the enamel dots Debra had used. A few tiny splatters of black ink, my journalling, a stamped date and I was done!
Thanks so much to Debra for her inspiration – I really love how this page turned out! If you ever find yourself stuck for ideas, take a quick scroll through our Facebook Community group and see all the gorgeous pages shared by our members there – you might find something to scraplift too.
Please note: if you are going to copy the work of someone else, it is common courtesy to credit the original designer when sharing your page. A small mention of who inspired you is often enough to make someone else’s day!
Be sure to pop back tomorrow to see what Rachel created too.
Hi there creative friends! Today I want to share a layout with you featuring the gorgeous Daydream collection and a photo of my little man at his 5th birthday party. I have been having a lot of fun scrapping girly photos with this collection, so I wanted to share the love and create some more masculine pages too. There are plenty of more boyish colours and patterns in this collection, so this page came together easily.
I started with the woodgrain side of Over the Rainbow 12×12 patterned paper because I just love a good wood pattern and I find it a very neutral pattern to work with. I added a border of Sun Shower 12×12 patterned paper to bring in some of the yellow that is in my photo.
To add some detail to my background I added some splatters with white ink, varying the size from delicate sprinkles to some larger drops. I also added a lighter sprinkling of lovely shiny gold mist for that metallic effect.
Next I found a geometric circles panel cutfile from Neat n Crafty Cutz that I had cut a while ago from white cardstock but had not managed to use – I love when I can get supplies that are just lying around to good use! I simply backed the entire cutfile with vellum, adding that lovely translucent quality while still being able to see the pattern of the paper behind.
I matted my photo with navy and blush pink papers from the 6×8 paper stack then layered it over the cutfile. I dug through the die cut titles to find the word “Happy” as the main part of my “Happy Birthday” title, using some small gold foam alphas from my stash to finish it off.
With the bones of my layout down, I added lots of pretty embellishments from the die cut ephemera and accessory stickers, building three clusters of embellishments in a triangle around my layout with my photo as the focus. I made sure to include a rainbow element and a more dimensional element in each cluster; I used a flair button, puffy heart and a foam-backed fussy-cut rainbow for those dimensional pieces.
As finishing touches, I added a handful of tiny word stickers from the accessory stickers, a sprinkling of the gorgeous sparkly sequins around each embellishment cluster and a hand-drawn border in white gel pen around outside edge of the woodgrain paper.
I really love how this turned out. I’m definitely a fan of flowers and rainbows on a boy page, and I think the masculine tones of woodgrain, yellow and navy really help to balance it all out. What do you think?There is a process video on the Cocoa Vanilla Studio YouTube channel linked below if you would like to watch this layout come together. Thanks so much for joining me today. Happy scrapping!
Hey y’all! Laura Alberts here today to share a darling 9×12 layout with you today that will truly pull at your heartstrings. My little girl doesn’t fall asleep in my arms anymore, but I surely cherish the many times that she did! This layout features a color and black and white version of this photo to really emphasize the moment. The soft colors of the Daydream collection were perfect for this layout! I used the Sun Shower patterned paper as a background and then used the leftover pieces to make an arrow behind each of the photos. This detail draws your eye from left to right, then right to left through the photos.
On either side of my photos I layered clusters of fussy cut florals, puffy hearts, rosettes, and rainbows. By using a variety of embellishment sizes, the clusters are dynamic and the layers create depth. Also, I add tiny details around each clusters with small hearts, Nuvo Drops, and gold ink splatter to finish them off. I loved the idea of these pillow-like puffy hearts on such a sweet, sleepy layout.
I love these titles included in the Daydream collection, they make it so easy to add a title! This tiny cluster in front of the title helped to tie it in with the other two clusters. I even used the collection title from the manufacturing strip and tucked it into one of the clusters because it perfectly matched these photos.
I hope the varied clusters on this layout inspires you to look at your embellishments a little differently! It’s fun to see how you can change things up. If you’d like to see the Sweet layout come together, I have the entire process in the video below!
Hello Cocoa Vanilla Studio maniacs. It’s Anna here with my brand new layout made with beautiful “Daydream” collection. I know that this line already won hearts of many of you but who can blame it? All the amazing flowers, very versatile feel and the rainbows are the ingredients of the perfect collection. Colors in “Daydream” are a little bit worn out and muted, with a pinch of wooden patterns so I thought they will match perfectly to the craft cardstock. I used it as a background for my page documenting our little, family trip fo the zoo from few weeks back.
I combined pretty floral pattern called “Garden variety” with raw color of craft cardstock adding some tearing in between to make the transition more smooth. My compostion runs from one corner to another diagonally with photo on one end and title on the second one. I framed the picture with one of the polarid frames from Ephemera pack. I also added some flowers, butterflies and tags to embellish it.
Little fabric heart from Puffy hearts pack is such a cute detail and adds great texture to the whole project. Sequins can be a perfect replacement for all the enamel dots and can be used as a finishing touch to every project. I used the ones from Sequins and flowers pack from “Daydream” collection so I was sure they will match the papers perfectly.
When it comes to my title I could use the ready words from Title die cuts but I wanted to have something lighter and more colorful. I chose the Happy days phrase from Emphemera pack and cut it into the single letters. I arranged the title once again skipping “s” in the word “days”. Thanks to that the title got less solid and more airy. I added pretty flair button as a finishing touch here.
This kind of page can be finished within half an hour, without complicated and sometimes scarry mixed media and big die cuts from electronic die cutting machines. Just simple, old fashioned layering. That is all for today my sweet Friends. Thank you so much for stopping by and see you in November.
Hello everyone its Melissa here and I’m so happy to be back with you again, this time sharing a new layout with the gorgeous Daydream collection!! For this layout I really wanted to attempt creating a layout with the B side of ‘STEPPING STONES’ as I’d had an idea for machine stitching in matching colours. I needed a happy fun photo, and this recent photo of Brielle was perfect!
I tore a piece of the patterned paper, and made sure that the top edge was torn as well. Then I went to town with uneven stitching in matching colours, back and forth on each stipe until I got the effect I wanted. Did you know I’ve only recently started machine stitching in coloured threads?
I also did lots of fussy cutting. I cut one of the floral clusters from ‘GARDEN VARIETY’ a placed it at the bottom of my photo. I used a couple of papers from the ‘6 x 8 PAPER STACK’ to back my photo, and tucked one of the beautiful ‘PUFFY HEARTS’ to the right of my floral cluster.
I also fussy cut lots of moths and butterflies from ‘ALL AFLUTTER’ to use as embellishments. I adhered them in positions that colour matched the thread and stripes.
For my title two of the ‘DIE CUT TITLES’ were perfect, and I placed elements on and around the ‘Sunshine’. I used a floral cluster sticker from the ‘ACCESSORY STICKERS’.
I finished with my journaling, splatters and some sequins from the ‘SEQUINS & FLOWERS’ pack.
I made a video of my process which you can watch below.