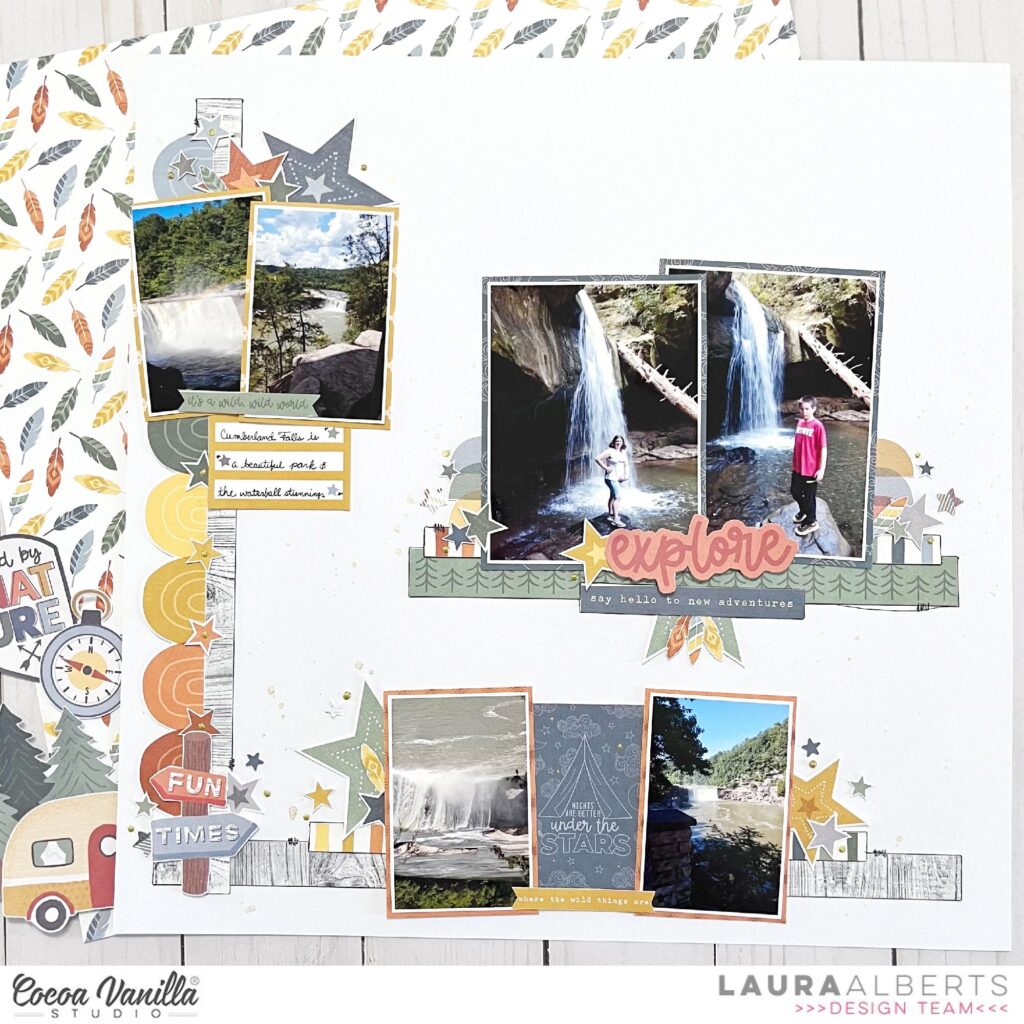
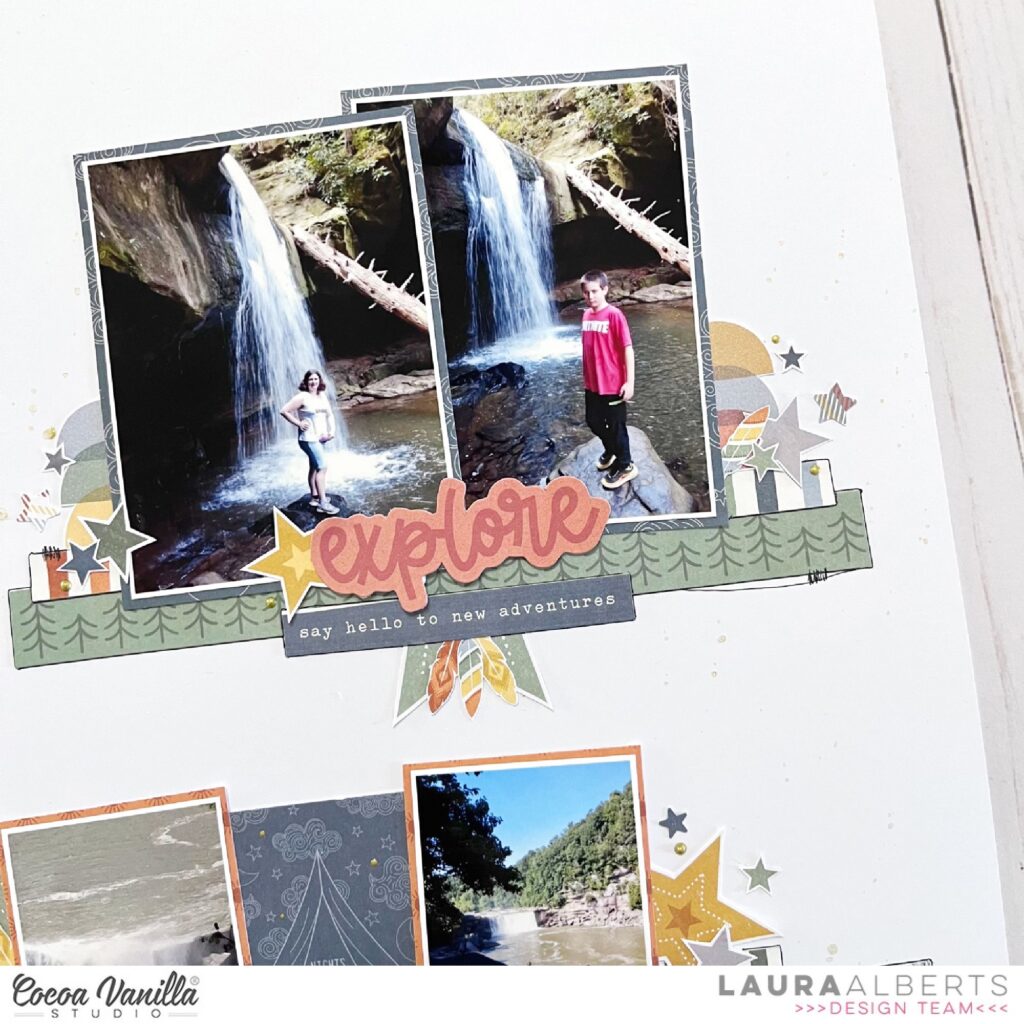
Hey y’all! Laura Alberts here again with another Great Escape layout featuring a ton of camping photos from our trip to Cumberland Falls! The waterfalls at this campground were stunning, so I wanted to squeeze as many photos on this layout as possible. In the end, there are two 3×4 inch photos and four 2×3 inch photos documenting the sights and my kids exploring the area.
I started with a few paper strips, two from the cut-apart Wild Life patterned paper and the others are off-cuts from Starry Night and Journey. In addition, I fussy cut a ton of stars from Star Gazing and the feathers from Direction. I love the patterned papers that have designs perfect for fussy cutting!
In addition to the vertical and horizontal strips that I used as a base for my design, I added an little shelf in the center to hold my main focal images. The fussy cut stars added a nice detail to the rainbows along the vertical strip, while the rainbow stripe reflected the same color scheme along the bottom and on the shelf, creating continuity between the three clusters of photos.
I hope this layout inspires you to expand your use of paper strips to think outside of the box! If you’d like to see “Explore” come together, check out this process video below:
It’s Tarrah here with you today to share my first layout using the awesome Great Escape collection!
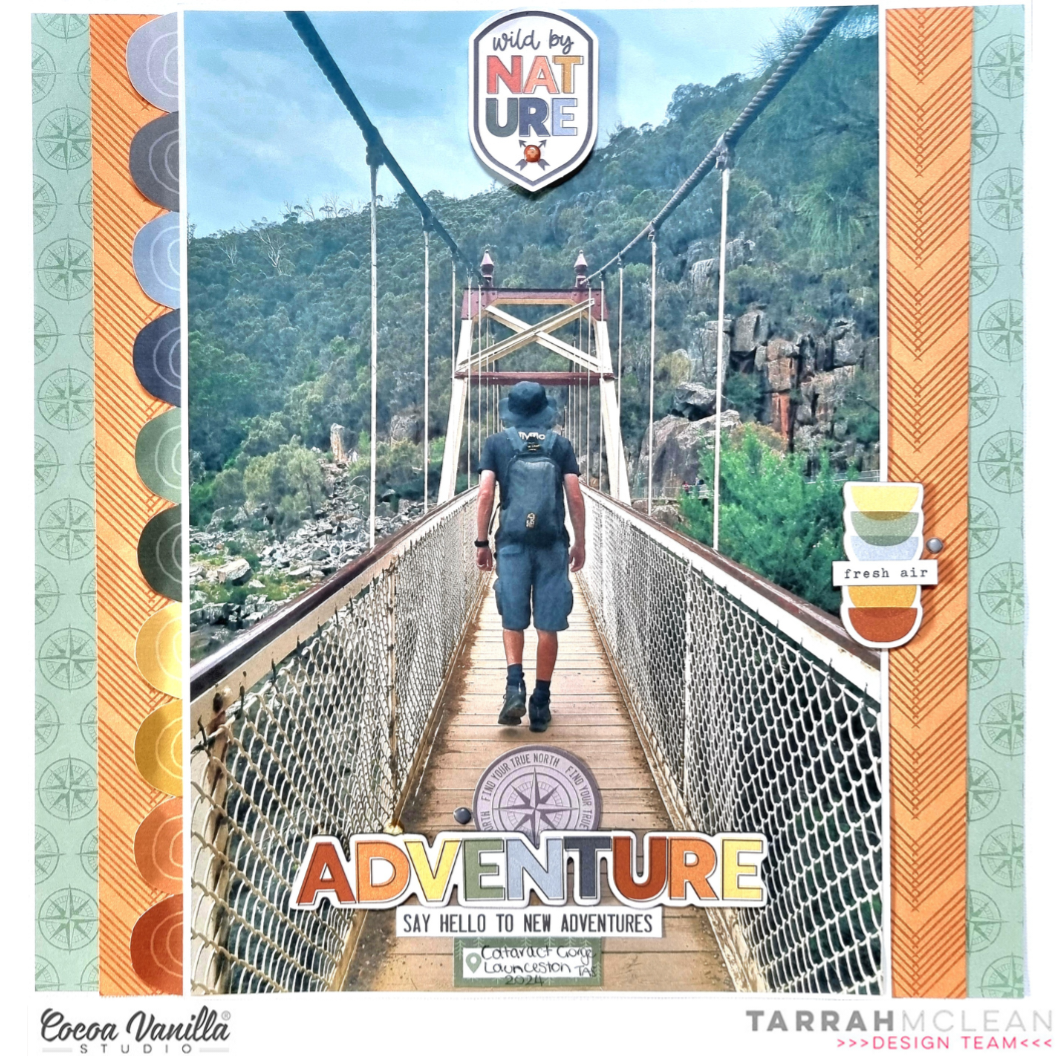
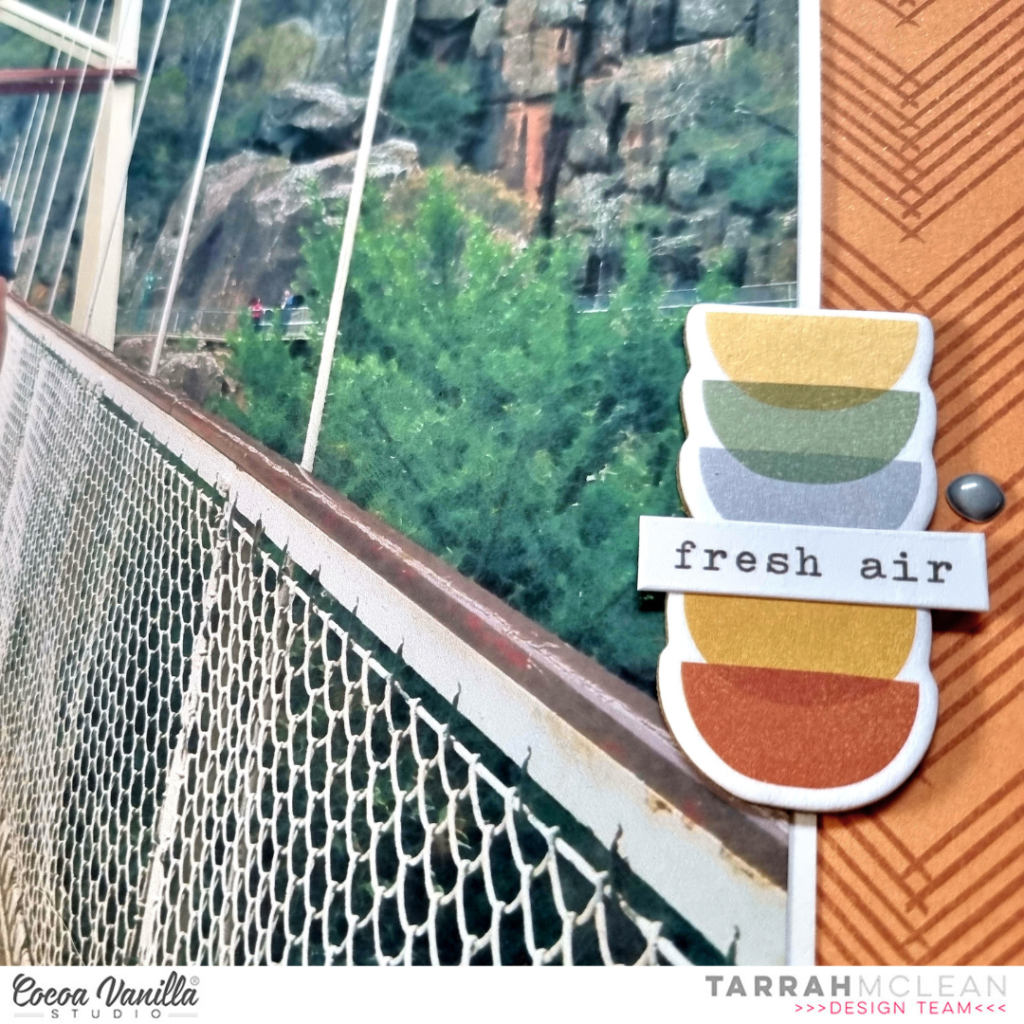
I decided to create a layout featuring a large A4 photo taken from the bridge over the amazing Cataract Gorge in Tasmania from our recent trip visiting Tassie. The Great Escape collection was the perfect collection to focus mainly on the photo for this layout and layering lots of the elements straight on top of my photo.
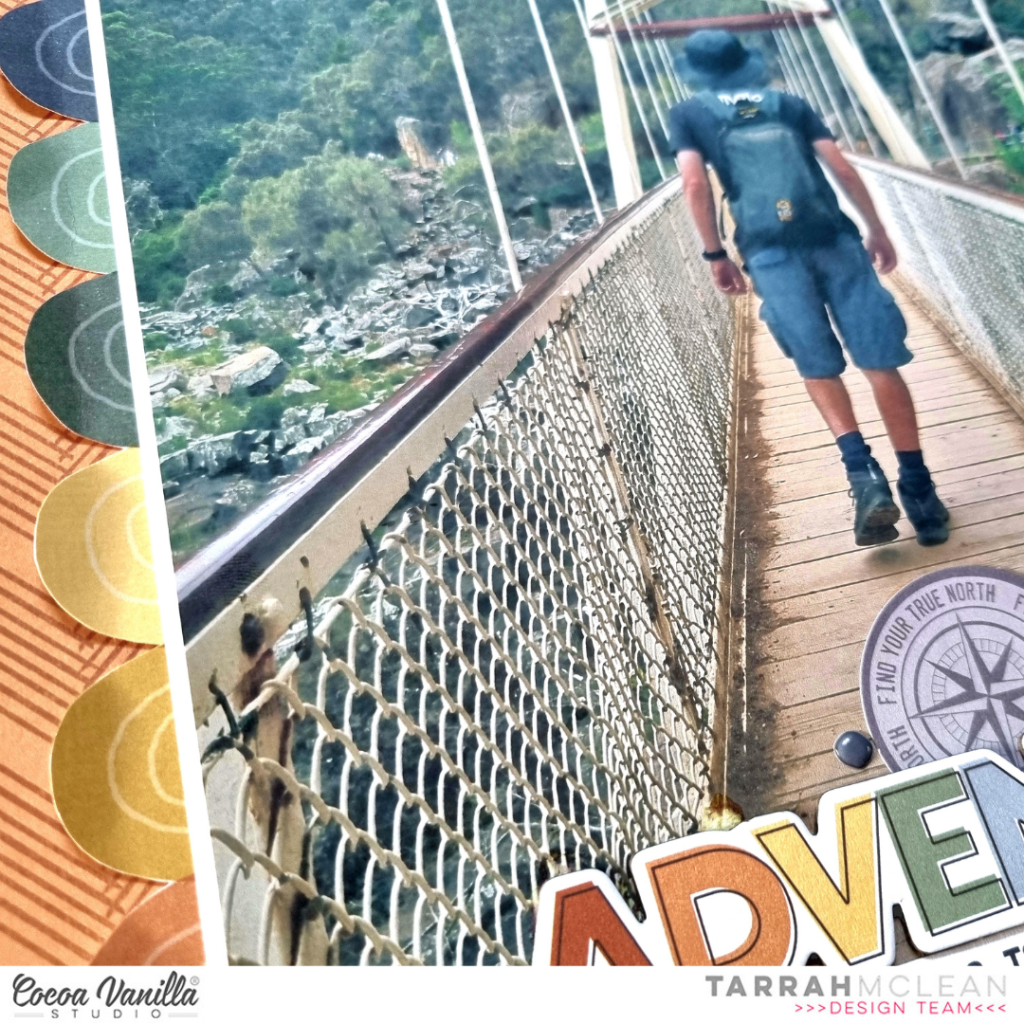
I started out with a plain sheet of white cardstock and placed my large photo in the very centre of the cardstock. I left the edges free of adhesive so that I could place the papers down the sides. I then cut some paper strips from the ‘B’ side of the ‘Happy Camper’ patterned paperand the ‘B’ side of the ‘Direction’ patterned paper, placing these vertically, the ‘Direction’ paper was placed at the outer edge and the ‘Happy Camper’ paper closer to the photo. I then fussy cut the scallops from the ‘Wild Life’ patterned paper and tucked this piece in on the left-hand side and bent the edges up to add some dimension.
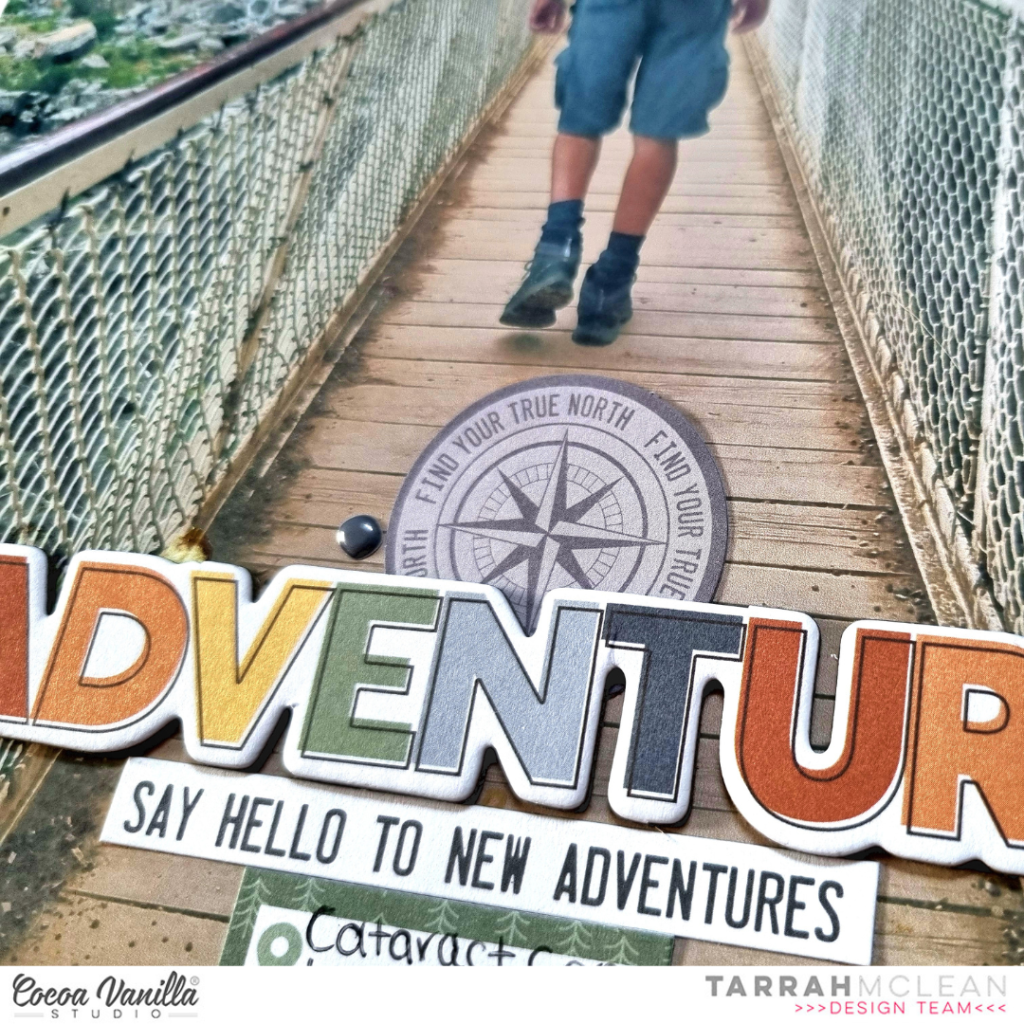
My title is the ‘Adventure’ title from the chipboard pack, I placed it down the bottom of the page, in the centre of photo and also placed one of the circle die-cuts from the ephemera pack just above the chipboard title. I took 2 of the stickers from the Accessory Sticker sheet and placed these below the chipboard title. I journaled the location and the date on the smaller sticker.
On the right-hand side I placed 2 more of the chipboard pieces to help balance the scallops from the left-hand hand side. I placed one of the phrase stickers from the Accessory Sticker sheet layered over the top of these pieces. I also placed one of the enamel dots from the enamel shapes pack here.
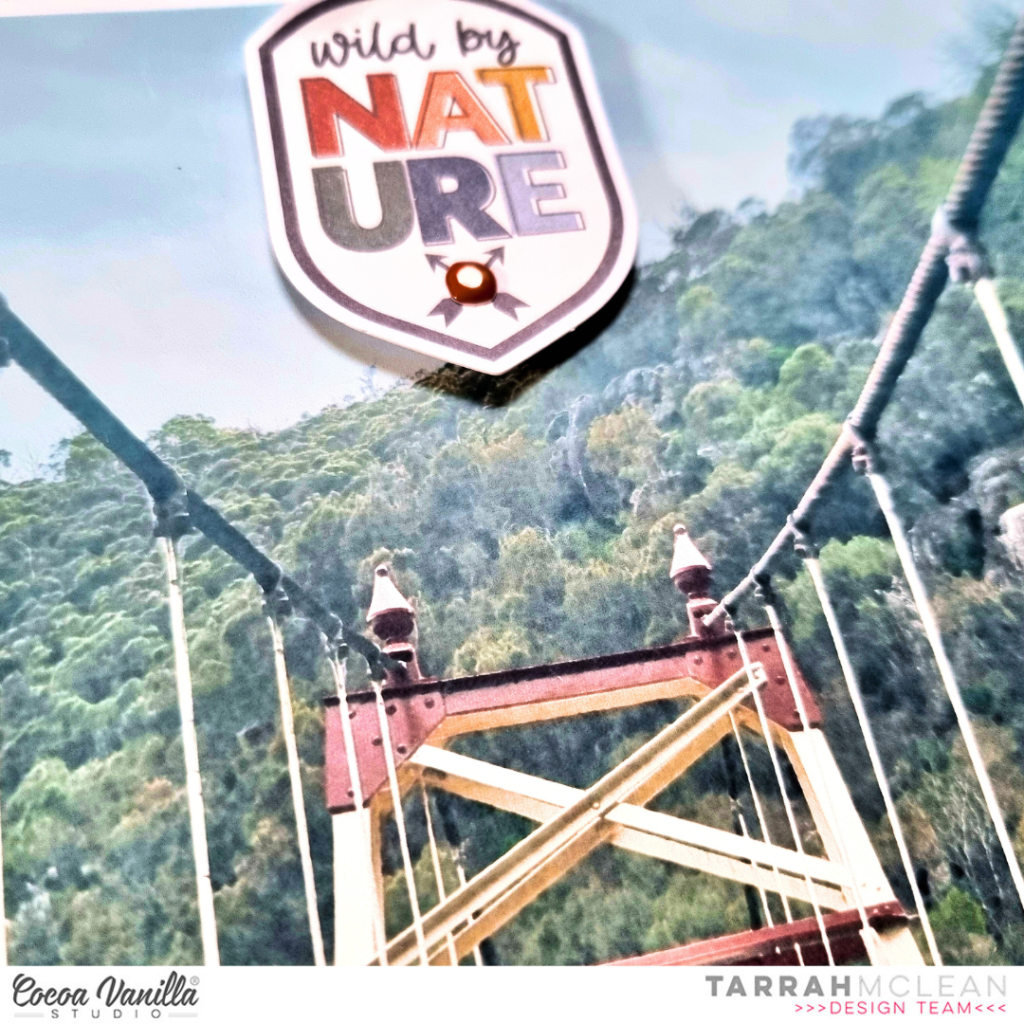
At the top of the photo, I placed the ‘Wild by Nature’ die-cut using foam tape to add dimension to the page. I also placed another of the enamel dots over the top of the arrows on this die-cut. This collection is perfect for your travel and outdoor adventures such as camping, road trips, hiking, fishing, walking, running or even documenting the boys in your life! I hope you get a chance to purchase this awesome collection to create some projects of your own!
Thanks so much for stopping by the Cocoa Vanilla blog today! I hope you are inspired by my layout and enjoyed reading about how I created it. Make sure you visit the blog to see all the other gorgeous inspiration from the Cocoa Vanilla design team!
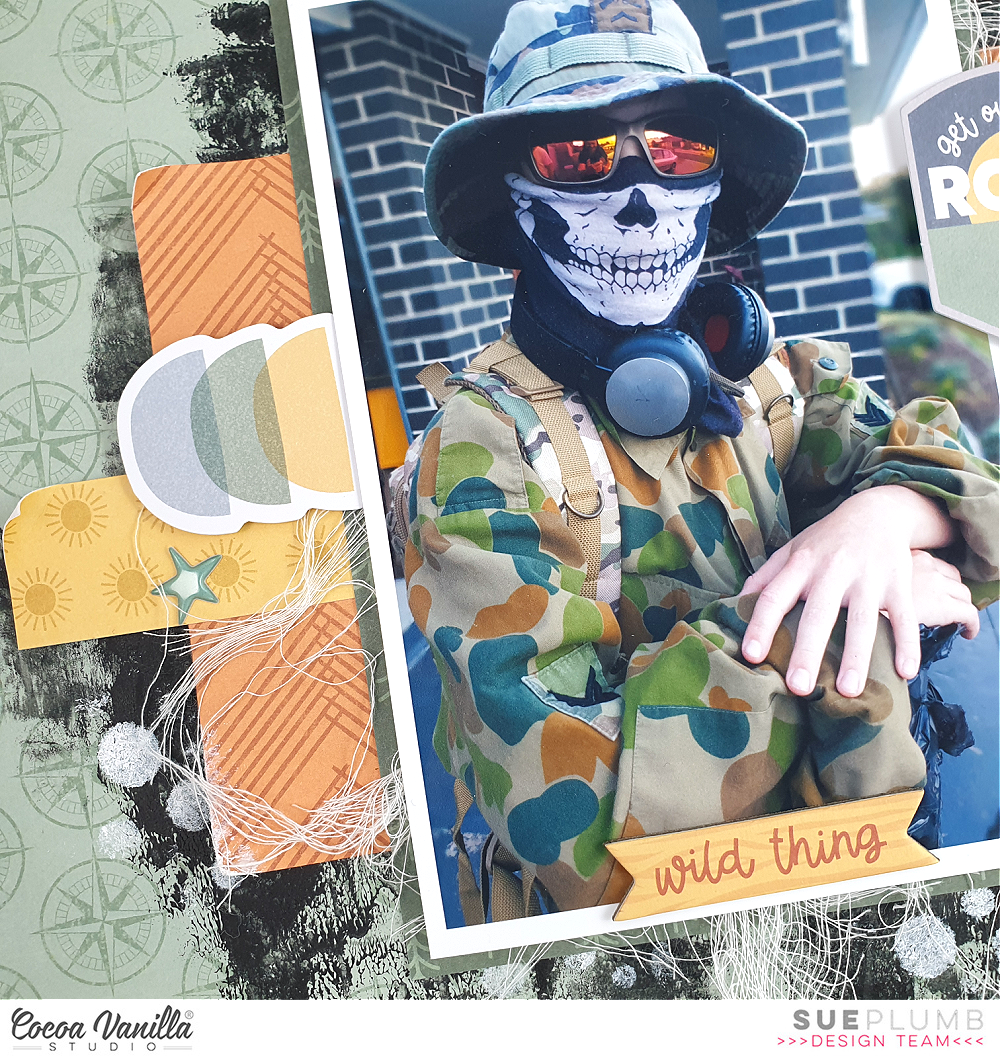
I am so happy to be back on the blog today and sharing a mixed media layout with you using the brand new ‘Great Escape’ collection. To say I was excited when I opened this box is an understatement. As a mum of two active pre-teen boys, I can see many projects coming up with this one! I had this first layout completed within a couple of hours of first opening the box…
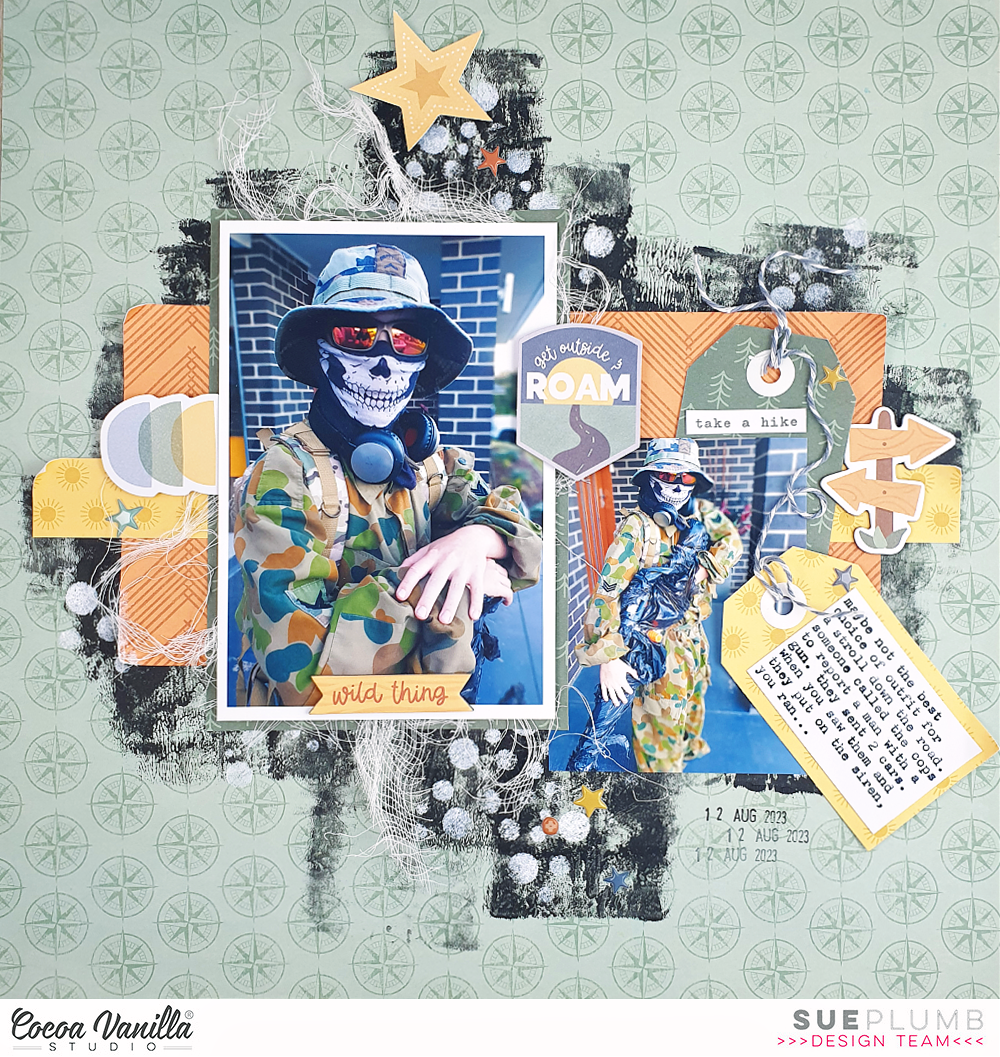
This layout documents a funny story about one of my boys, who is currently obsessed with all things military. I chose the compass print of the Direction paper to be my page background, and added some dark grey acrylic paint with a brayer to define the focal area.
I then added a wide strip of the B side of the Happy Camper paper horizontally across the page to serve as the anchor point for my design. This was topped with a narrow strip of the B side of the Horizon paper to further help draw the eye across the page. The larger of my two photos was matted with the darker green print from the Journey paper and I also added some frayed gauze for texture underneath it.
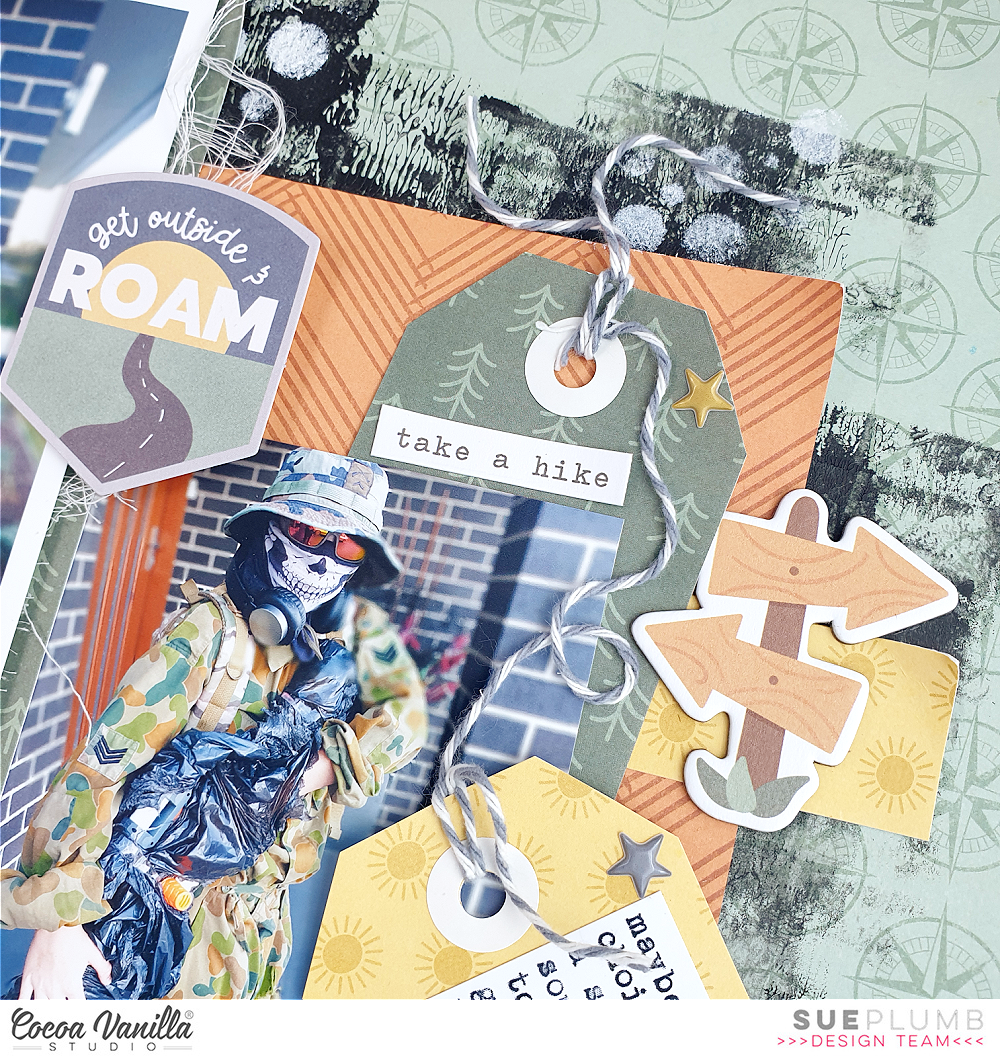
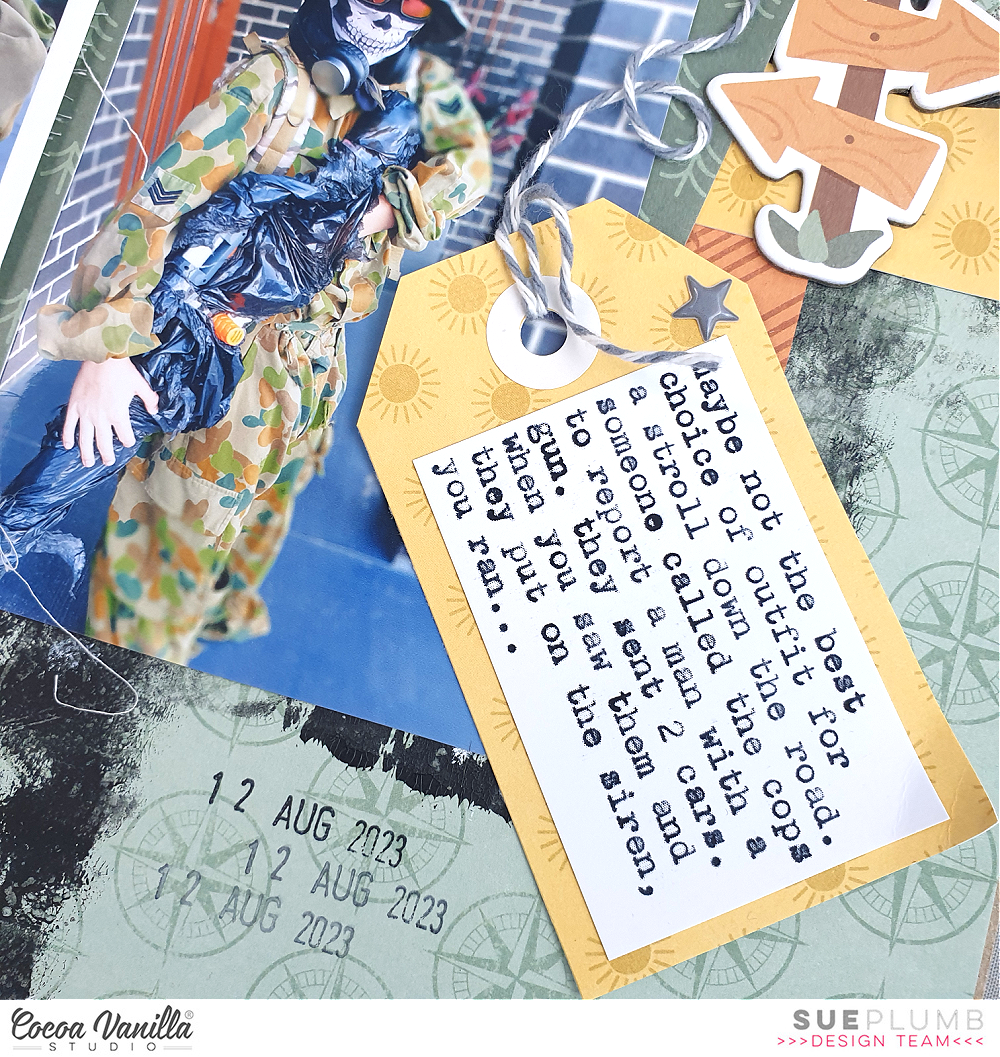
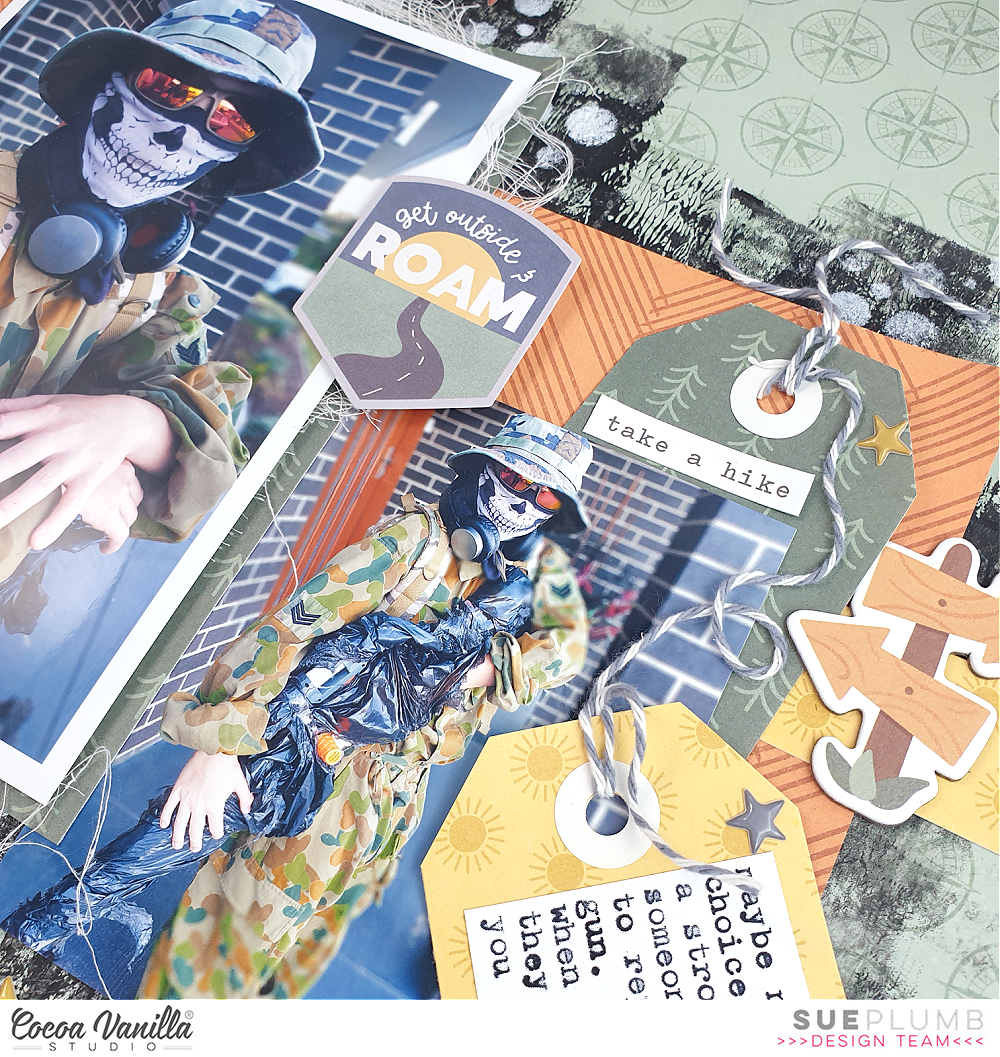
I then took the same Horizon and Journey papers again, and cut two tags from them, adding hole reinforcement stickers and bakers twine to each. The tags were then tucked alongside the smaller of the photos and I used the twine to join them together. This was to keep with the military theme, and were reminiscent of the dog tags worn by soldiers. I added a small phrase sticker from the Accessory Sticker sheet to one, and used the second to stick my typed journalling onto. (I’ll post a longer explanation of the back story of this page at the end of the post for those who are interested.)
To embellish the layout, I used a number of pieces from the Die Cut Ephemera pack, including the get outside and roam badge, which I mounted on some foam tape to pop it up from the page. I also loved the arrow signpost from the Chipboard Stickers sheet that I placed along the yellow horizontal strip too.
At this point I went back and added some white acrylic paint using a stencil and brush. The purpose of this was to bring a bit of added lightness to the page over the darkness of the grey paint and it also helps add depth to the design as well.
I finished off by adding the wild thing Chipboard Sticker along the bottom of my main photo for my title; a large yellow star from the Die Cut Ephemera pack near the top of the page; and then scattered smaller stars and circles from the Puffy Stickers pack.
I really love how this page turned out, and my son does too! The ‘Great Escape’ collection will be hitting the shelves of scrappy retailers very soon. Look out for a pre-order at your favourite store – you’re going to love it!!! Thanks for joining me today, I’ll be back with another project to share soon.
Now for anyone who has stuck around this far and wants to know the story of this page….
My son had dressed up in his dad’s old camos and had his big Nerf gun wrapped in plastic when he went for a stroll around the block. (Disclaimer: my son is not a big boy, and is clearly recognisable as being a kid.) Upon being spotted by someone on a street nearby, they called the police to report “a man with a gun”, and two police cars were immediately dispatched to the area. (One containing police in tactical response gear.) The police cars came rolling down our street, spotted my son and sounded the siren, who immediately panicked and ran. Luckily, my hubby had gone outside to see what was happening and he was able to speak with the police to explain. The officers all had a good laugh about it and were surprised they had been called as he “was clearly a kid”. It will definitely be a funny story for him to tell his own kids one day. Document your stories!
It’s Sophie with you today and a new layout to share!
I used an old favorite collection: More than Words!
I framed a 11×11 thick white cardstock by scoring the four edges and placed it on a beautiful black dot patterned paper from the collection.
I centered a sweet photo of my two dogs on the page, adding tissue paper and a few layers of patterned papers behind it.
I went for a big title with the black chipboard words from the collection, and decorated the page with fussy cut flowers, a beautiful fussy cut wreath and numerous butterflies from another patterned paper.
I added a few chipboard stickers as the finishing touch.
No journaling on this one, which is very rare for me!!
Here are more close-ups:
It’s crazy how just a few embellishments and a big dimensional title can easily create a delicate and beautiful page!
I hope that I could inspire you with this layout today, to maybe use up your older collections…even if you have just a little bit of them left!
Hey y’all! Laura Alberts back again with the brand new Great Escape collection! Love the camping/nature theme with this one! I have so many beautiful photos of my family on camp-outs and hikes to scrap, so this collection came at the perfect time. I started with the stunning Horizon patterned paper for my background.
I layered some simple cloud cut files with the rainbow strip paper from the A5 paper stack, then added fussy cut clouds and stars from the Starry Night patterned paper. A few lovely stickers from the 6×12 sticker sheet made the perfect cluster under the title and added a little extra detail to my photos.
I created a journaling spot in one of the clouds and used manufacturing strips to create an interesting asymmetrical base for my photos to sit on. Love how trimming these strips in half allowed me to tuck them behind my photos and stretch them to the full width of the page!
I hope this layout inspires you to try a busy background for yourself! If you’d like to see how “Campers Life” came together, be sure to check out the process video below:
Hello crafty Friends. It’s been a while since I shared some of my projects with you so I am back with another layout. While I am waiting for the brand new collection to come to my doorstep, I reached for older but still amazing “No limits” line. As you know I do not have human son so I usually use masculine collections to scrapbook my furry son or hubby. Hubby doesn’t like photos so I mostly focus on dog :)
He is very noisy and need to be at the center of every event, including all the house works. This time I caught him “helping” my hubby puting Ikea cabinets together. He was very interested in the process, trying to steal some parts to play with them.
I printed two square photos from that moment and decided to use a combination of wooden pattern and kraft cardstock for the background. I am running low on full 12*12 sheets from “No limits” collection so I needed to be creative.
I backed my photos with pieces of pattern papers I got left and added some frames from Chipboard Stickers sheet. Title of my page was created with Die Cut Titles. however, I didn’t used the whole words. I cut out single letters from some of them and arranged them into new words. This was I got a font that perfectly matches the collection.
I finished my design using bits and pieces from Epherema Pack and two leftover Wood Epoxy Buttons. It’s quite a simple page but who said they all need to be complicated, full of layers and techniques. It’s the story that matters the most. And scrapbooking by furry boy gives me a lot of joy!
That is all for today. Thank you so much for spending your time with me and see you in February!
It’s Tarrah back with you and today I am sharing one of my favourite to create – a boy layout! Because I have 2 sons, there is never a shortage of boy photos around here! I decided to pull out the awesome and very cool No Limits collection, one of my favourite boy lines by Cocoa Vanilla Studio! This photo is an older one of my youngest son who is now 13 – he is about 5 or 6 in this photo! I loved the way the shirt he is wearing matched some of the colours from the No Limits collection – that is where I got the inspiration from for my layout today.
I started off with a plain sheet of white cardstock – as I mostly do- then trimmed it down to measure approximately 11′ x 11′, backing this onto the ‘B’ side of the Big Bang patterned paper (the woodgrain side). I then pulled out a few of the various papers from the A5 paper stack and sorted through them to find some that co-ordinated with my son’s shirt. I decided to cut some into triangle shapes and then layered them top and bottom of the page. For some extra texture, I bent the edges of these papers and also applied a little mixed media to create a sort of shadow effect.
I placed craft foam underneath my photo and placed it in the centre of my layout, adding some layers underneath like a pocket card, a die-cut frame and a sticker and tag both from the Accessory sticker sheet. I love to layer embellishments on top of my photos and under my photos too, how about you? In the top right corner, I stapled a banner sticker here and tied a bow through the tag using some white wax cotton. In the bottom right corner, I placed the large star die-cut and added some chipboard ones on top.
In the bottom cluster of papers, I added another chipboard piece and also one of the super cute wooden epoxy buttons all from the No Limits collection. I love how these small details add some interest to an area to help draw your eye in. My title is ‘The Best’ letters from the chipboard sheet, I also added a phrase under the title, cut from the ‘Universal’ patterned paper. Another of the wooden epoxy buttons was also placed here and I love the teal/aqua coloured chipboard arrow pointing to the photo too.
Once I had most of the design in place and the larger elements on the page, I started to add smaller details for the finishing touches. I added some phrase stickers around the page and stamped the date stamp and added some sprinkles of mist in various colours also. Lastly I machine stitched a border around the entire edge using white thread.
Thank you so much for stopping by the Cocoa Vanilla Studio blog today! I hope you have been inspired by my layout in some way! Make sure you share your creations with us if you get some time to pull out your Cocoa Vanilla collections and create some cool projects!
It’s Sophie on the blog today with a new page to share!
This time I used the beautiful Daydream collection.
I wanted to use the wreath paper named “Daisy Days” for so long now. I fussy cut the outer side of the wreath and put most of it completely to the left of the “Garden Variety” patterned paper.
Then, I added some handstitched details to the leaves and flowers of the wreath, for a delicate extra touch.
I placed my photo in the center of the wreath and used the Daydream Die Cut Words for my title. I also placed a beautiful Puffy Heart next to the photo, and some fussy cut butterflies here and there around the page.
You can see more close-ups here:
This page came together in no time at all. It is very simple, but sometimes all you need is beautiful patterned papers and a few embellishments to make your layout stand out.
Hello Friends. We are only three days until New Year so it’s a perfect time for all the summaries of year 2023. That’s why I want to invite you for a short journey through my favourite layouts from 2023 that I made with wonderful CVS collections. I picked four of them – pages I had the most pleasure making. Let’s dive into them!
This page was made with “Daydream” collection mostly. I focused on pattern paper, filled with flowers and went crazy with fussy cutting. Next step was to arrange a big bouquet using all those florals and butterflies. It’s a perfect recipe for using up the leftovers of any CVS collection.
You know I like adding some mixed media to my projects and here I played with vividly colored watercolor brushes. Scrapbooking memory from our trip to Barcelona using bits and pieces from “Sunkissed” collection was a pure joy.
After the summer, there comes fall and another mixed media layout. This time I reached for newest “Heart & Home” collection and wonderful, warm color palette. Die cutting bunch of leaves from pattern papers is always a good idea! It’s a perfect way to use up scraps or smaller paper pads.
Last layout I wanted to share with you is also made with “Heart & Home” collection and it documents one of our family trips. I reached for one of my all time favourites – wooden pattern as a background of the page. Little doodled frames were a perfect match with my photos.
I can’t wait to see what Zoe prepared for upcoming year 2024. Whatever it will be, I am sure it will look amazing as always. I know you are waiting for new line as impatiently as I am!
Thank you so much for spending your time with me and see in 2024! Sending you lots of grean New Year’s wishes!
It’s Tarrah back with you for the last time this year sharing my favourite layout created in 2023!
Like some of the other design team members, my favourite layout of this year was created using the gorgeous Happy Days collection! Don’t you think there is something about the rainbow colours in the Happy Days collection that really catches the eye!? I sure do!
So besides the gorgeous colours in the Happy Days collection and placing vertical strips in rainbow order, I wanted to make the strips a little different so I decided to score lines in the strips and then fold them in a concertina fashion to create a zig-zag effect. I love how effective this looks against the white cardstock!
Another of my favourite things to do is to embellish my layouts in a tone on tone fashion. I chose co-ordinating embellishments for each colour and added them on top of the strips of paper and also tucked into the top and bottom of the strips as well. I used lots of various embellishments like puffy shapes, ephemera, puffy fabric hearts and accessory stickers.
I placed my title in the middle along with the gorgeous photo of my niece! Another thing that I love is that photo of my niece! Her outfit was perfect for this collection! I love how the rainbow colours in the collection bring out the colours in her jacket.
Have you got the gorgeous Happy Days collection? If you have, I hope you are inspired to use it up and create some cute projects with it?!
Thanks so much for stopping by the Cocoa Vanilla blog! I hope you have enjoyed the inspiration from myself and my fellow design team members throughout the year? Looking forward to sharing more Cocoa Vanilla projects with you again in the new year!
Merry Christmas and a safe and happy new year to you all!