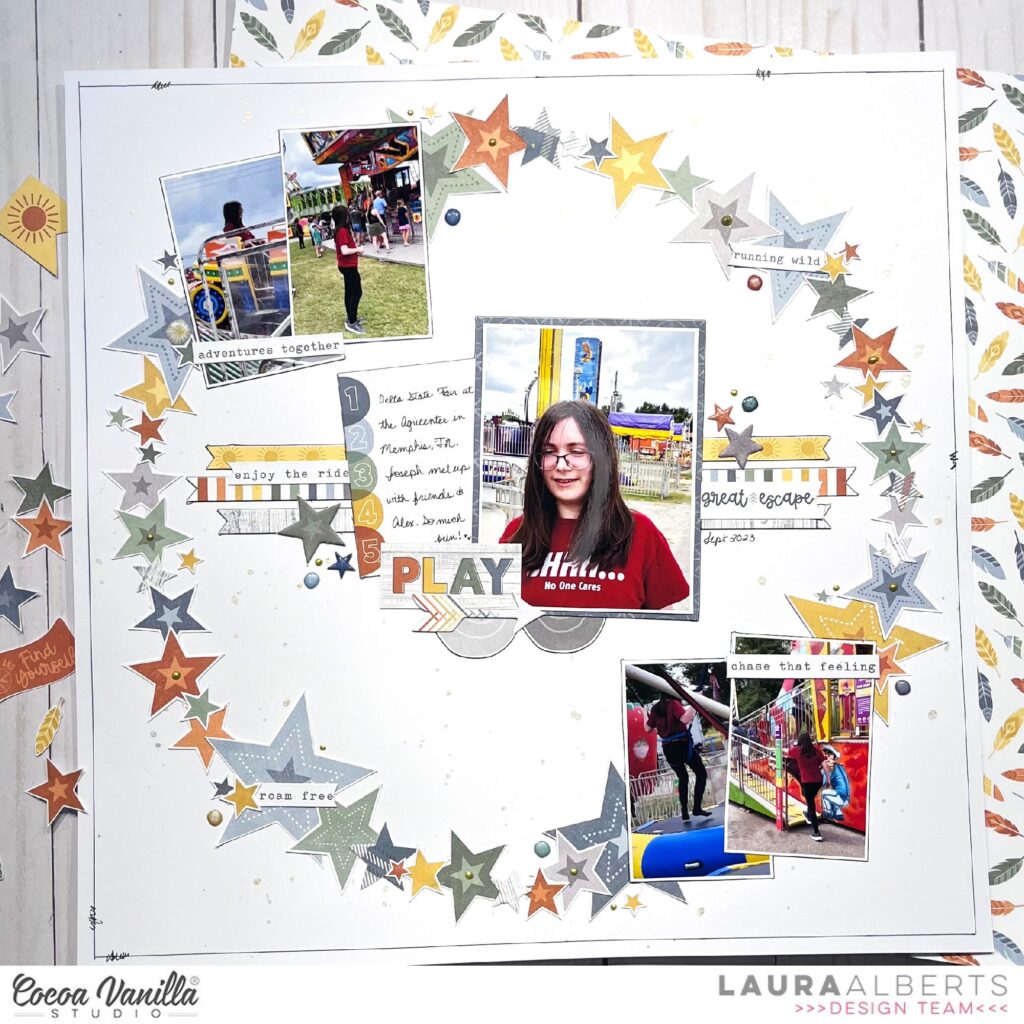
Hey y’all! Laura Alberts back again with the new Great Escape collection! These photos of my youngest son at the Delta State Fair were the perfect mix of colors for this collection, even though it steps well outside the nature/camping theme of Great Escape. The versatility of Cocoa Vanilla collections is one of the reasons it’s my favorite!
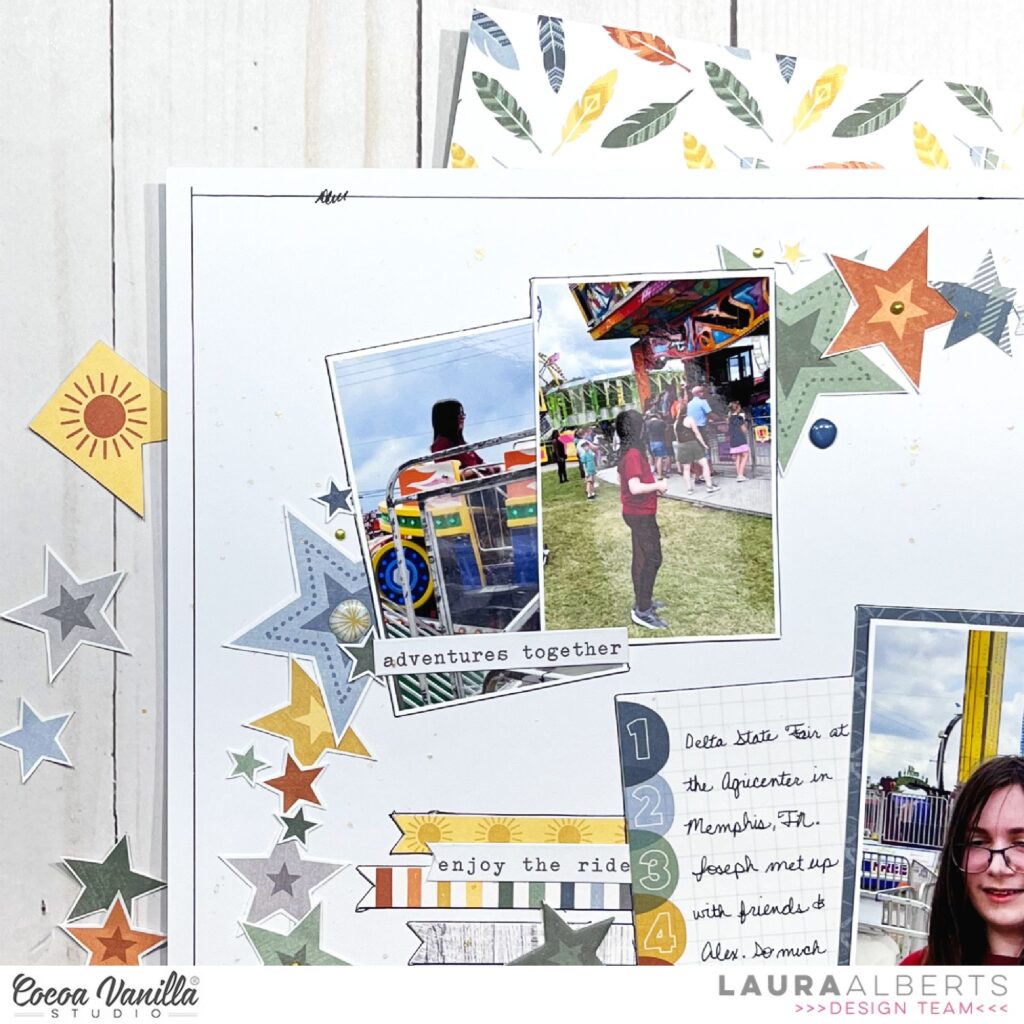
I started with a 10 inch circle using a chipboard template I made from a large bowl in my house. Using that as a guide, I stacked up tons of fussy cut stars around the circle. This gives the layout a celebratory feel that I think fits the State Fair!
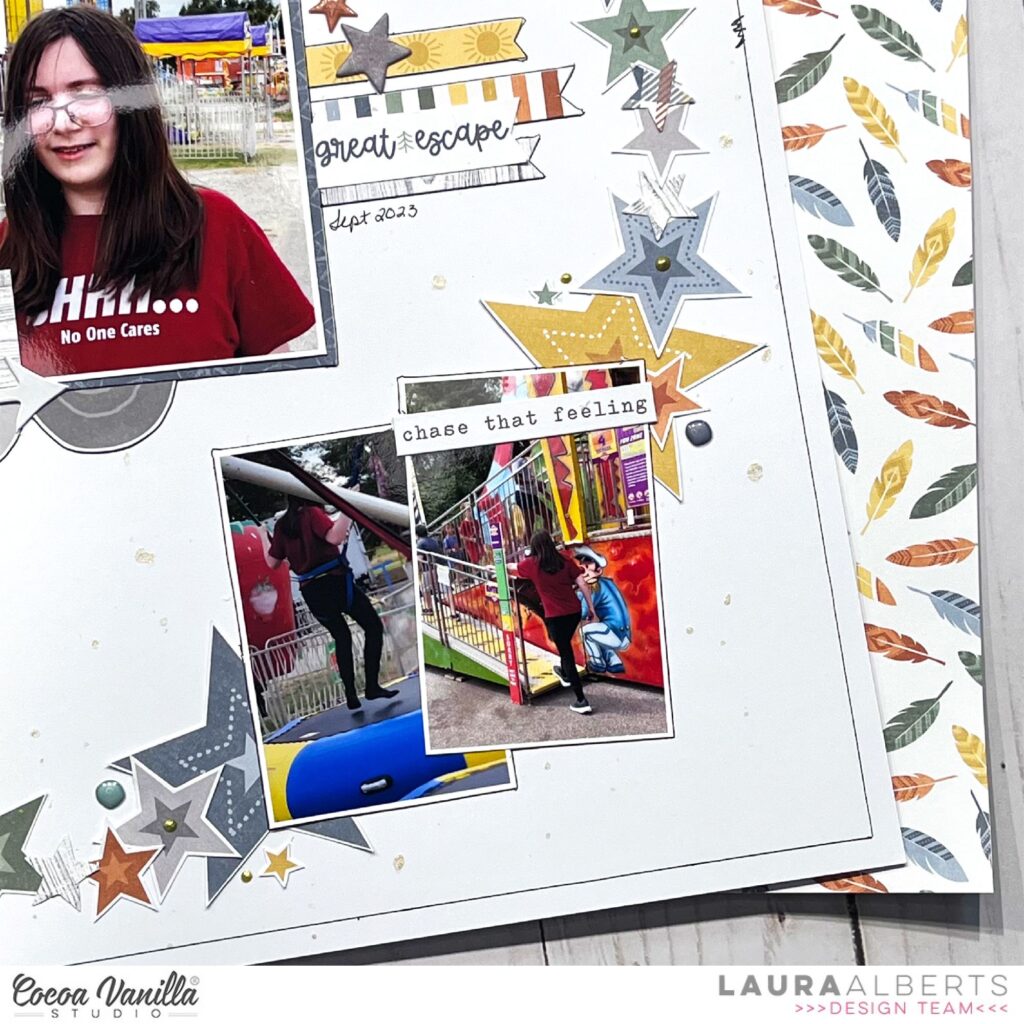
I grouped my photos into two small clusters at the top left and bottom right, then built a larger focal image in the middle. For my 3×4 inch photo in the center, I built up a shelf using scraps and manufacturing strips. This gives visual support to my focal image.
If you would like to see how “Play” came together, check out the process video below:
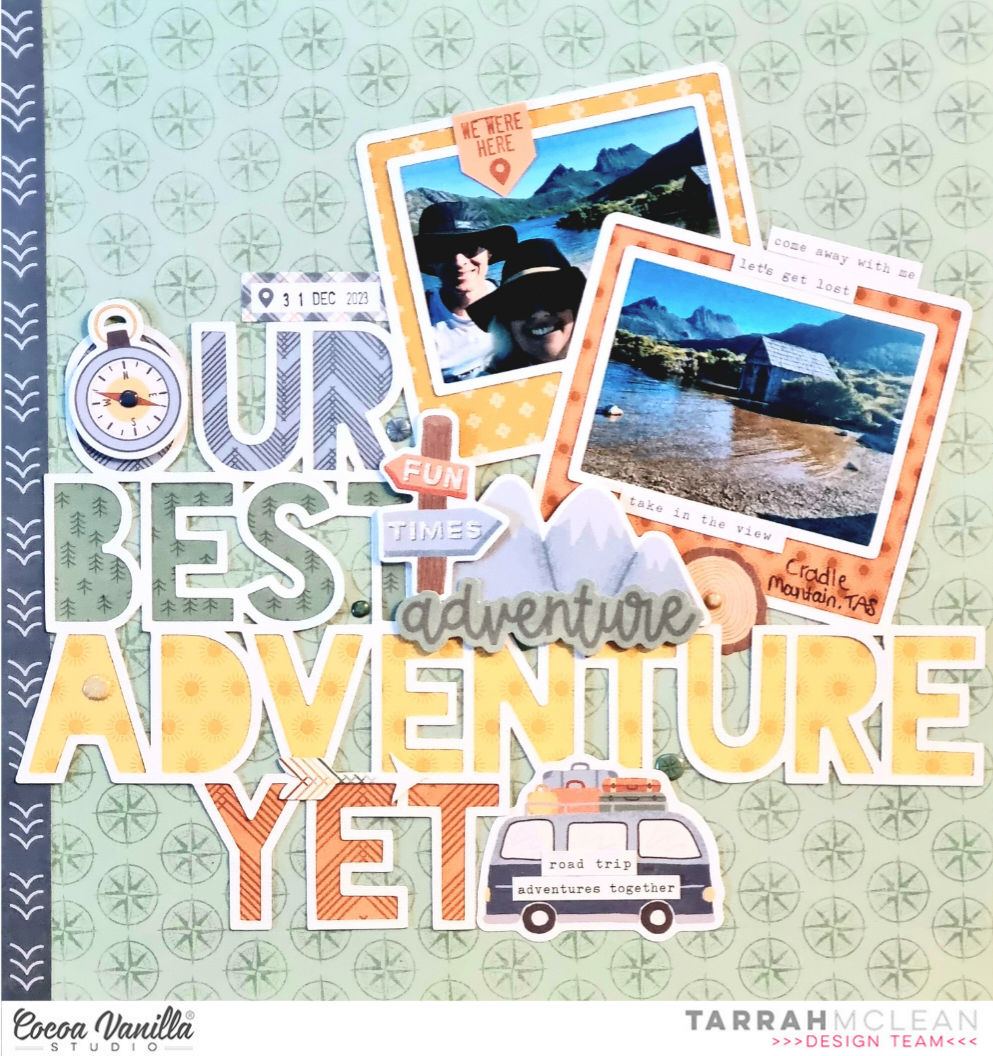
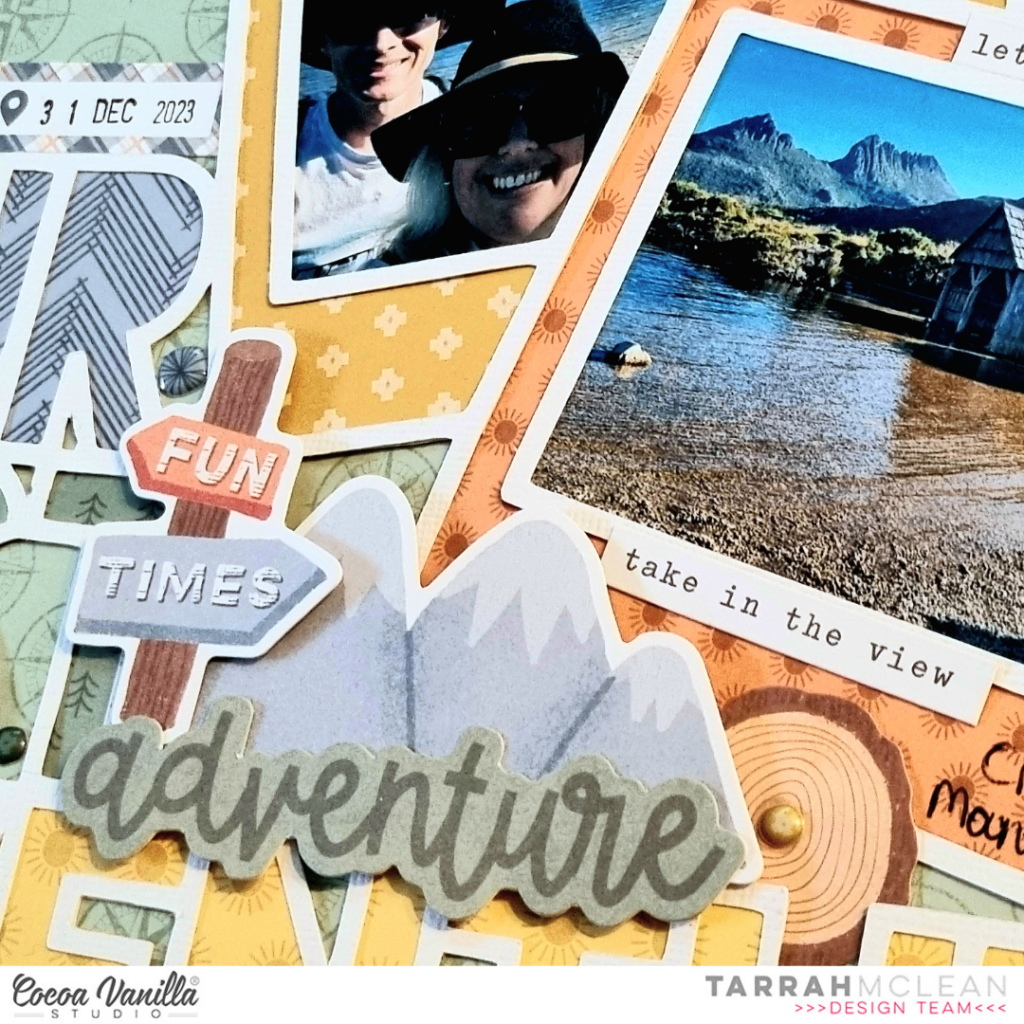
It’s Tarrah back with you and today I am here to share a new scrapbook layout featuring the awesome Great Escape collection! I don’t know about you but I love travelling and I love documenting those travels too! Recently my partner and I took a trip to gorgeous Tasmania, it was wonderful, these photos are from beautiful Cradle Mountain and this collection has been perfect to document our travels.
I started by cutting out a cut file from CUT to YOU from white cardstock and then backed the different words and frames with papers from the Great Escape A5 paper stack.
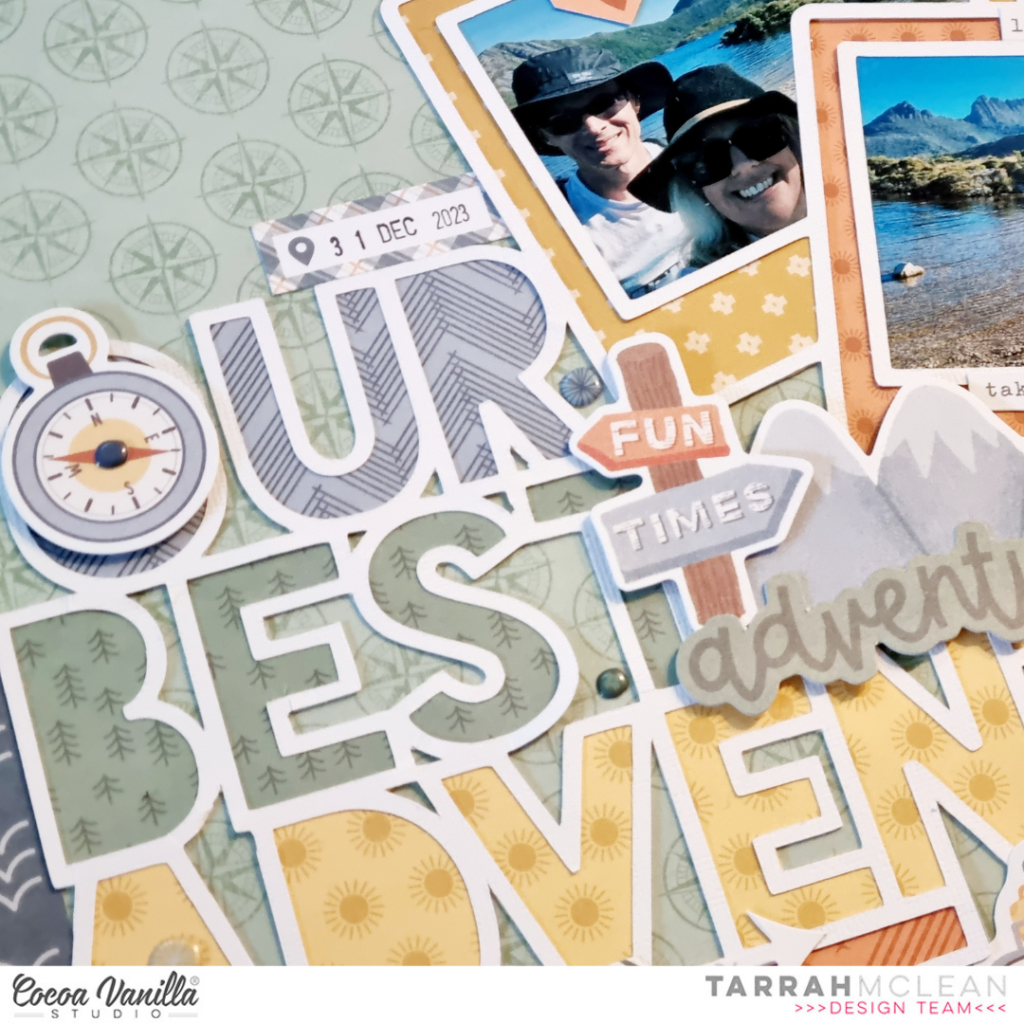
I added 2 photos in the frames of the cut file as well and I had to be strategic with what photo I added in the top frame due to the frame below covering up part of the photo. I chose the ‘Direction’ patterned paper as my background, I then cut the navy blue strip from the ‘Wild Life’ patterned paper and adhered it to the left hand side of the paper. Once the cut file was all backed, I adhered it to the same background paper. Usually I adhere my cut files using craft foam to pop them up, however for this layout I knew I wanted to pop up the mountains and other die-cut embellishments in the middle. I added the mountains, the Fun Times sign, the wood piece and the Adventure word all from the ephemera pack.
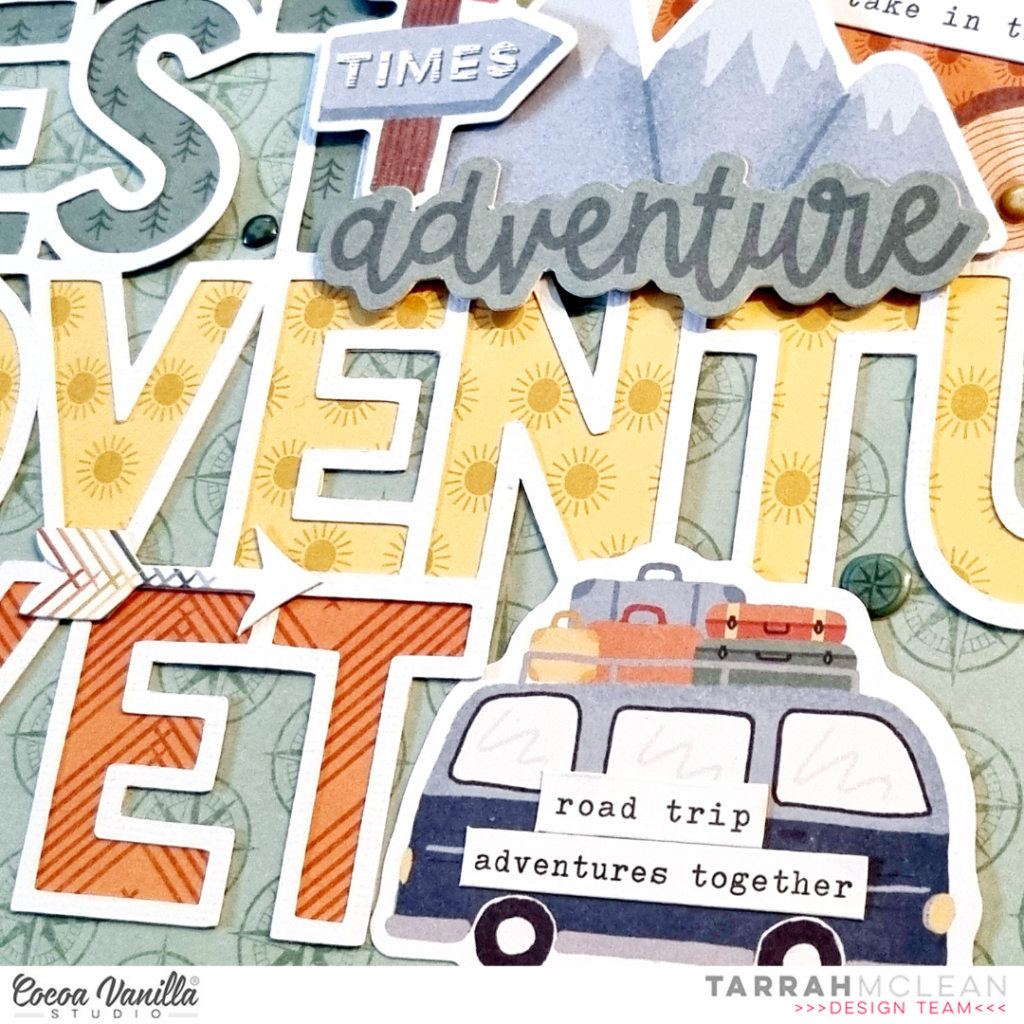
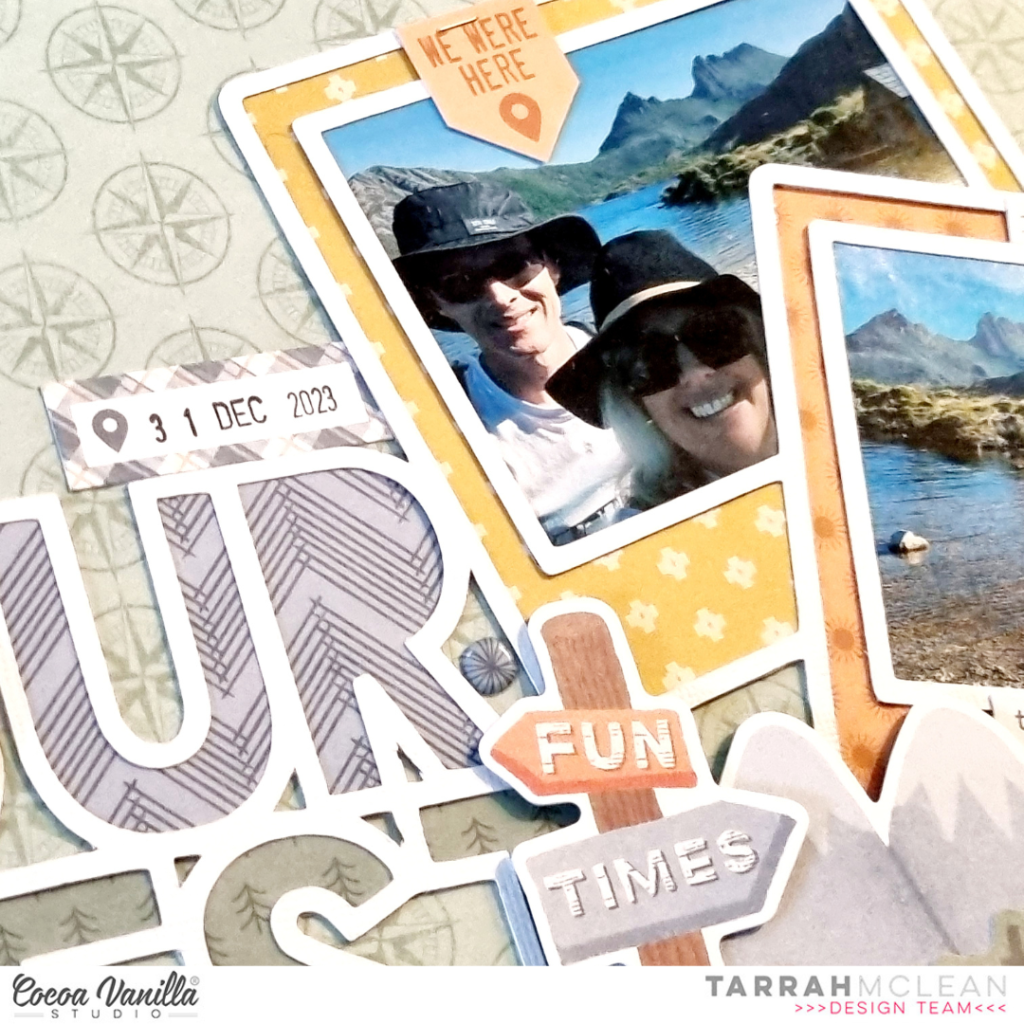
I also placed the compass die-cut to the middle of the ‘O’ of the word ‘Our’ in the cut file, I used craft foam for this piece also to pop it up off the page. Down next to the ‘Yet’ word, I placed the super cute camper die-cut and layered some phrase stickers from the Accessory Sticker sheet on top from the ephemera pack. Once the larger elements were added to my page, I then added a few smaller embellishments including puffy enamel shapes and some more stickers from the Accessory sticker sheet, including the arrow sticker and the journal spot above the word ‘Our’. I love how the puffy enamel shapes add a touch of colour and dimension and I love how the phrase stickers help to tell the story if you don’t feel like journaling!
Lastly I stamped the date stamp and journaled where the photos were taken. I love how this cut file helped to make the design and placement decisions on my layout and the Great Escape collection really does make it so easy to create great memories!
Thanks so much for stopping by the Cocoa Vanilla blog today! I hope you enjoyed reading about how I created my layout as much as I enjoyed creating it! Make sure you get your hands on the awesome Great Escape collection!
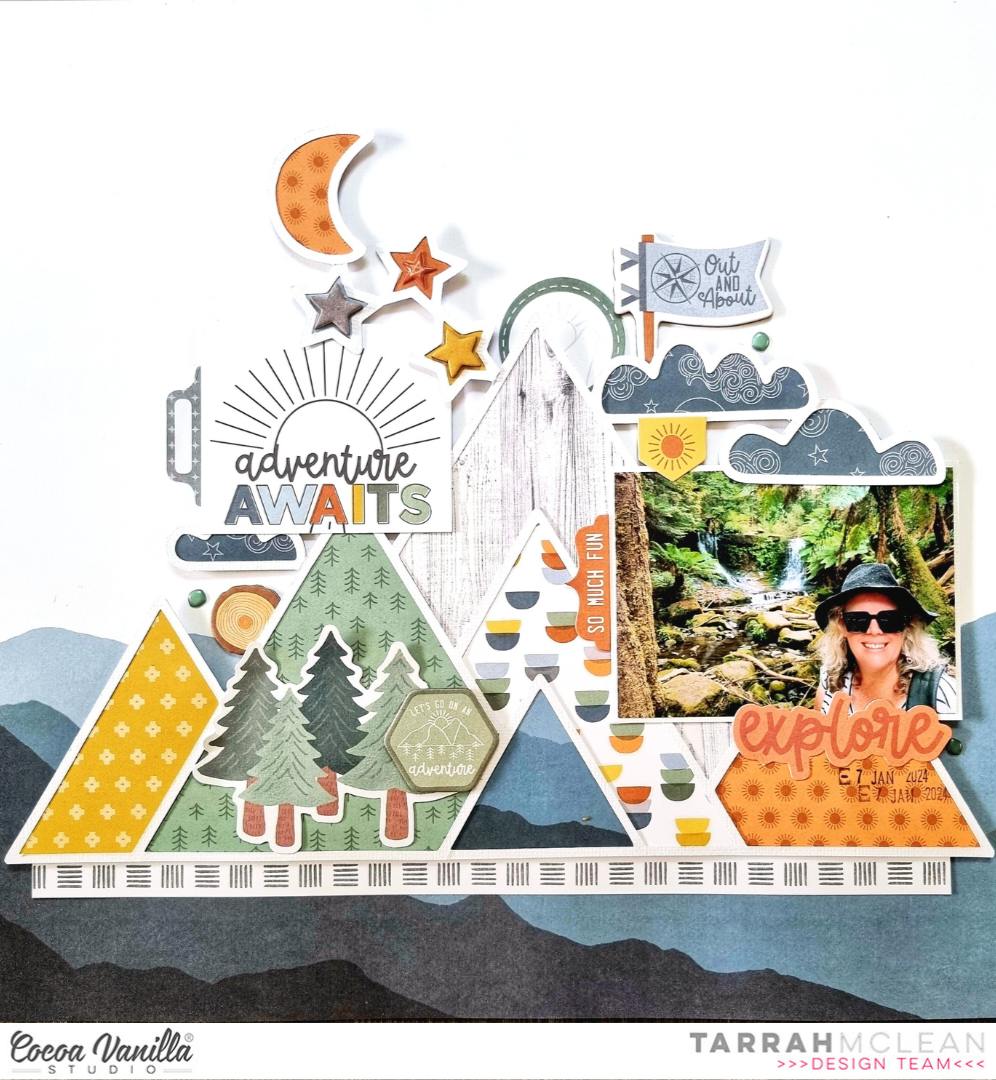
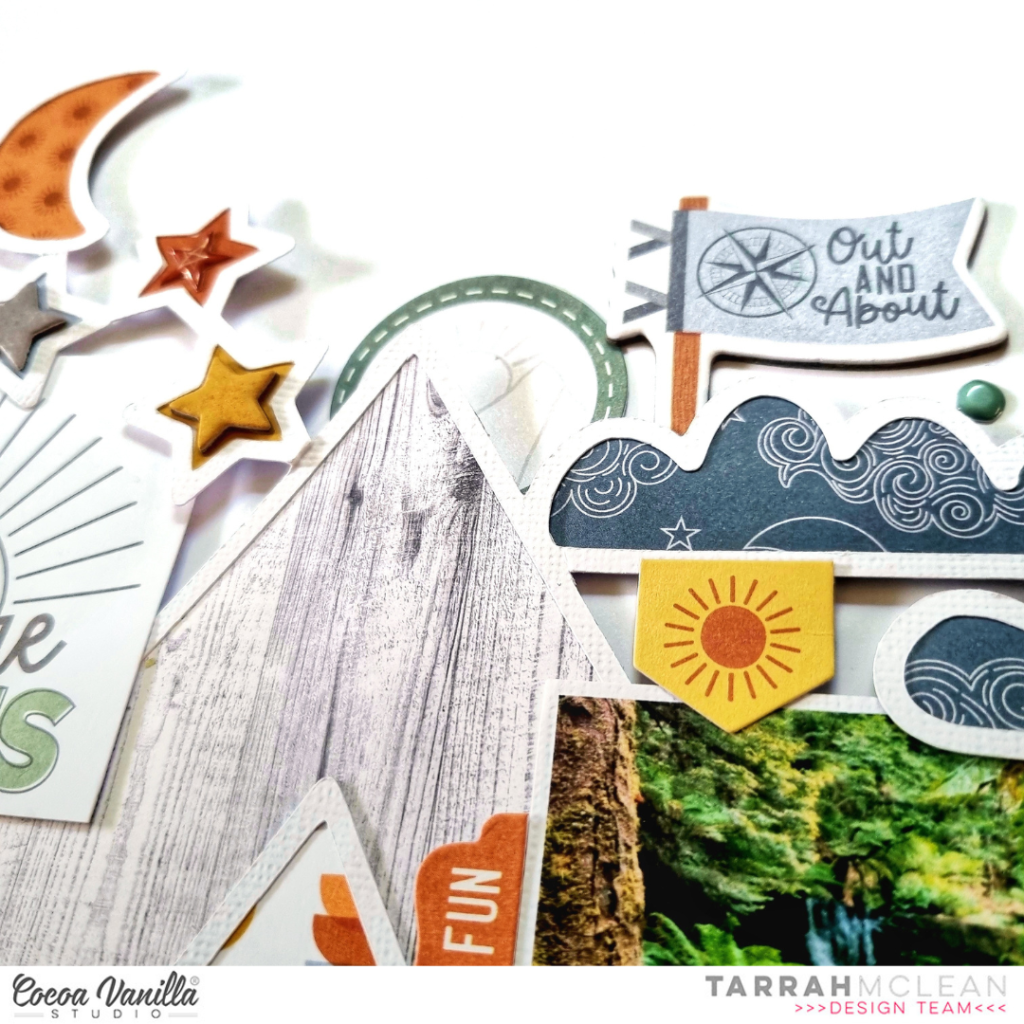
It’s Tarrah back with you today to share another scrapbook layout featuring the gorgeous new Great Escape collection! I have documented another photo from my recent trip to Tasmania, this time a photo taken at pretty Horseshoe Falls. The Great Escape collection is absolutely perfect for outdoor adventures, nature photos and road trips!
I decided to start with a cut file found on the internet and cut this from white cardstock. I then took the A5 paper stack and backed the spaces in the cut file with a variety of different papers. Once the cut file was backed, I adhered it using craft foam to the Horizon 12′ x 12′ patterned paper. I cut a small strip of the ‘B’ side of the Wild Life patterned paper and tucked it in under the cut file t the bottom.
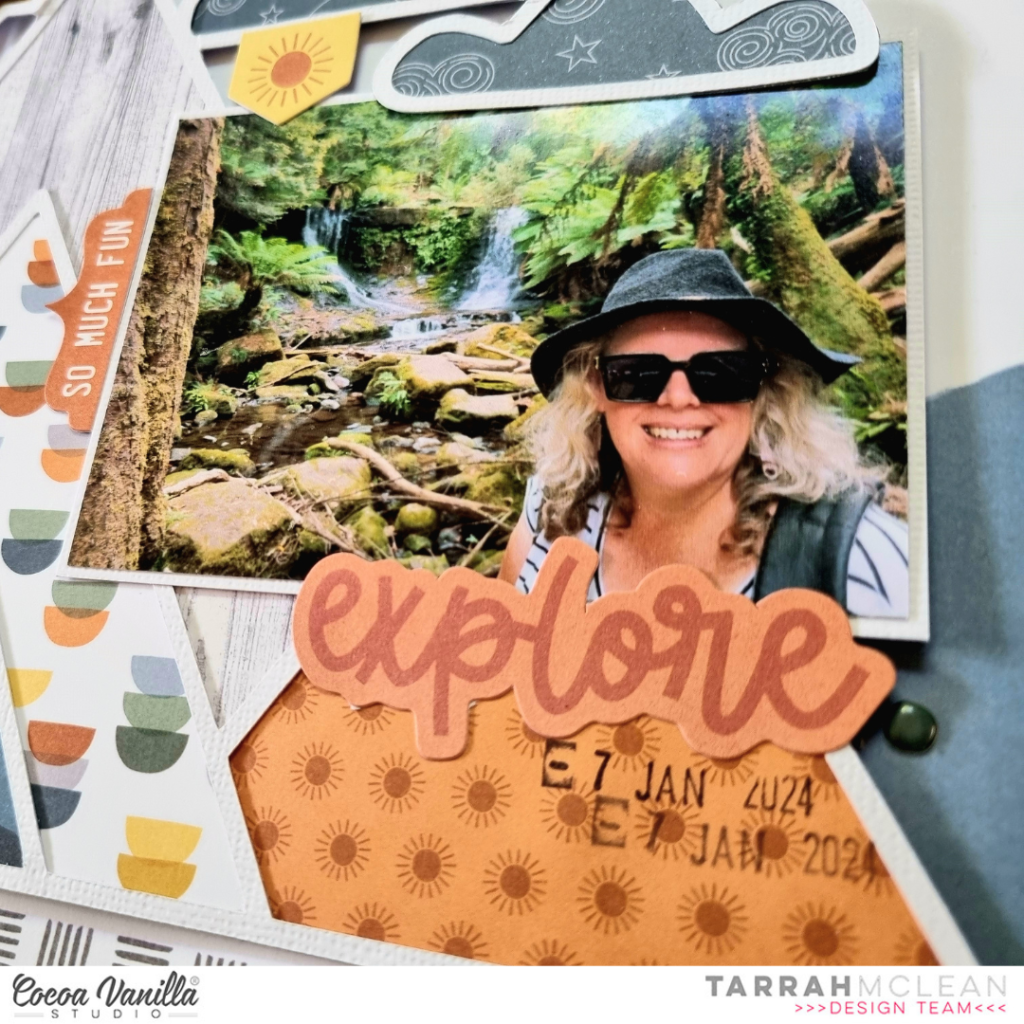
I placed my photo on the right-hand side of the page overlapping the cut file and allowing one of the clouds in the cut file to overhang onto the photo. I used craft foam to adhere the photo too. Above the photo, I placed a banner sticker, and on the left of the photo I placed a tab sticker all from the Accessory Sticker sheet. Below the photo, I placed the die-cut title ‘Explore’ from the ephemera pack and also added a puffy shape.
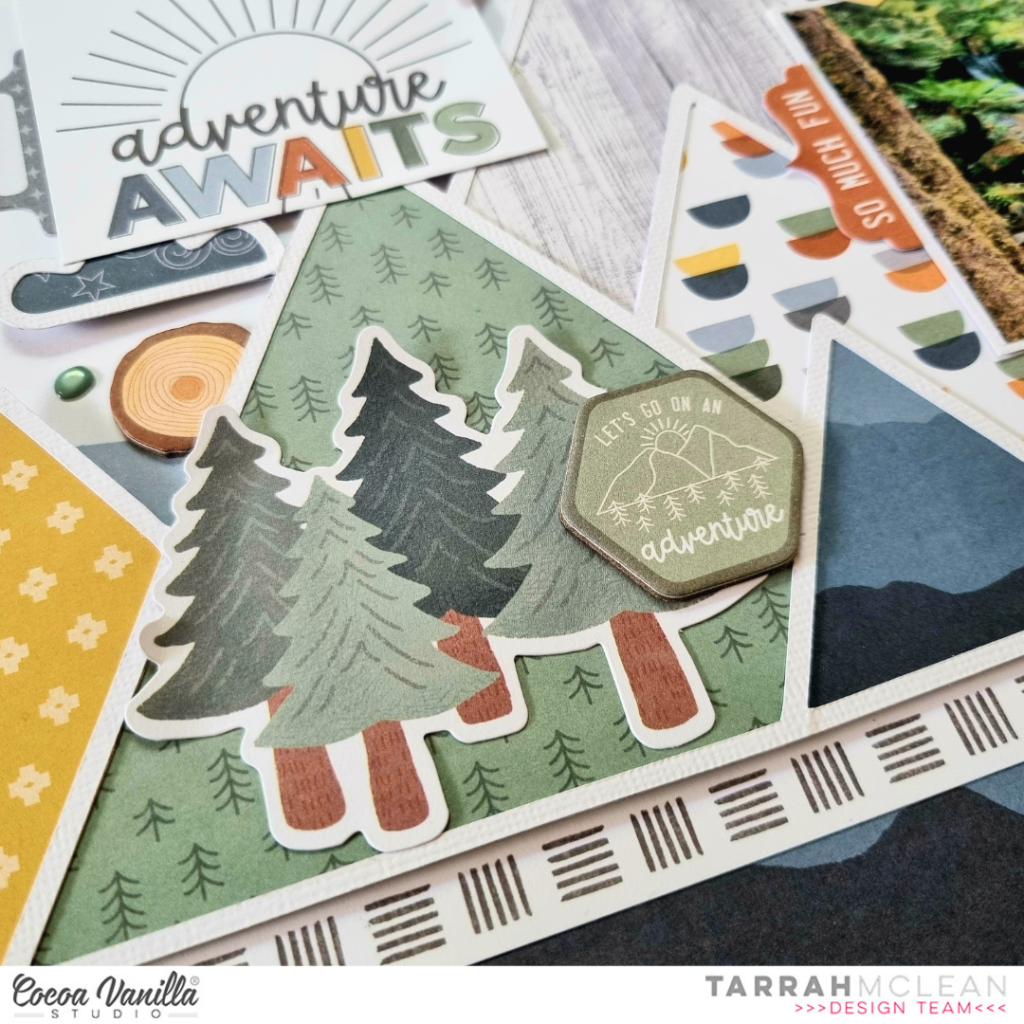
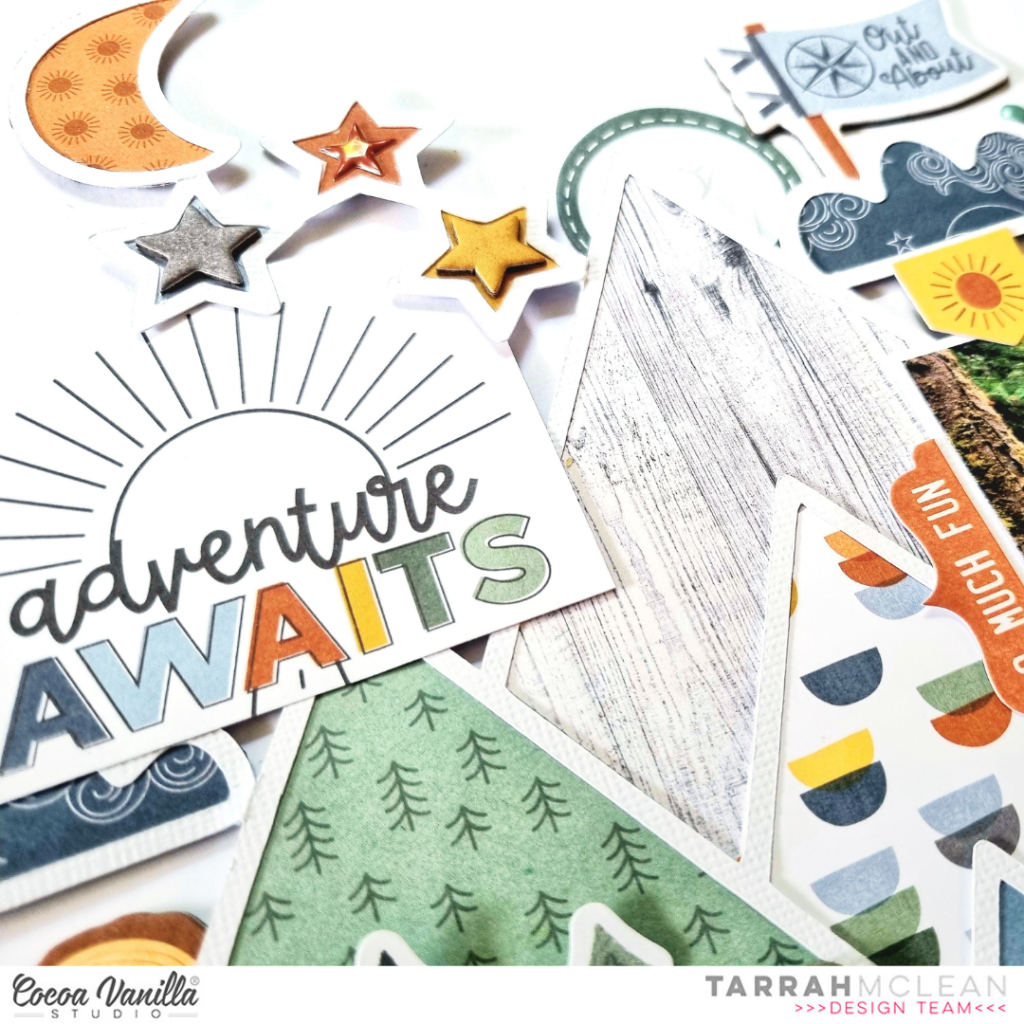
Also from the Wild Life patterned paper, I cut out the 3′ x 4′ card that says ‘Adventure Awaits’ and placed this right under the stars on the cut file again using craft foam to adhere it. I added another tab sticker to the left of the photo and also added the round sticker at the top of the mountain peak, both from the Accessory sticker sheet. I absolutely LOVE the chipboard elements in this collection! I added 2 of the stars, the flag popping out of the clouds, the log piece between the mountains and also the hexagon shape overlapping the mountains at the bottom.
Once the larger elements were placed and I was happy with them, I went ahead and placed some smaller finishing touches like some more puffy shapes and some extra die-cuts from the ephemera pack, I also stamped the date of when my photo was taken.
Thanks so much for stopping by the Cocoa Vanilla Studio blog today! I hope you have purchased the Great Escape collection or have plans to purchase it really soon so you can get busy creating with it!
It’s Sophie with you on the blog sharing this new page created with the Great Escape collection!
I had this photo from a recent hike and thought it was perfect to match a Paige Evans cut file that I love and wanted to use.
I backed the cut file with several different patterned papers from the A5 Paper Stack, and added a few phrases in matching color to each of the signs.
I put the cut file and photo on the Horizon paper. I added a few die cuts from the Die Cut Ephemera pack and phrase stickers from the die cut sticker sheet. I also fussy cut cute clouds from the Starry Night paper and added the date.
Here are more close-ups:
I am very happy with the result and hope you like it too!! Did you get your hands on this collection??
Hello Friends! It’s Anna Komenda here with my first ever project made with brand new “Great escape” collection! I was going to start bold with travel album but I run out of time so layout it is :) But do not worry – I will make this album too and will share it later with you. I decided to scrapbook our adventure on rail bike from last summer. They are becoming more popular in Europe, where restoration of old tracks turns them into fun biking adventure for the whole family. This particular one we took in France and it took us two hours of pedaling, going through little tunnels, old bridges and country landscape. It was really a fun, family time.
I started with white cardstock as a base and four strips of pattern papers: “Journey”, “Adventurer”, “Direction” and “Horizon”. I arranged them on the left side, adding some decorative edge with edge puncher.
Next step was to add pictures in a vertical row and decorate area around them. I started with a bag of Ephemera Die Cuts and picked the ones that match my theme, like compas, map, trees and fun banners.
With all of them in place, I could add the title. I decided to combine words “good times” taken from Chipboard Stickers sheet with smaller words created with Mini Puffy Alphabet from older “Heart & Home” collection. Their colors matches this new line perfectly!
With all of those in place, I added some finishing touches with super cute tiny Puffy Stickers and some orange splatters. Making this page took me less that half an hour which is sort of time record for me. It usually takes me much, much longer but this time elements just clicked into the right spots. Magic of well designed collection!
That is all for today. Thank you so much for spending your time with me and I will be back with more projects made with this line!
Hey y’all! Laura Alberts back again with another Great Escape layout, but this time it’s a birthday page. Four photos and a shower of stars is the recipe for creating a layout bursting with celebratory vibes! The colors were too perfect not to step outside the theme of this collection for a fun spin a column design.
I started with a strip of the stunning plaid on the Star Gazing patterned paper, layered it with thin strips of the navy, then attached it to the beautiful gray woodgrain of the Starry Night to build my background. I lined up my three smaller photos and a few cut aparts from the Wild Life paper to fill in my column.
On the right side, I scattered fussy cut stars from the Star Gazing patterned paper to create a second column, then added my 3×4 focal image and a journaling spot on top! The chipboard stickers were perfect to embellish both columns and add a title with a 3D pop!
I hope this layout inspires you to try stepping outside the theme! If you’d like to see how this layout came together, check out the process video below:
It’s Tarrah back with you and today I am sharing a new travel layout featuring the new Great Escape collection. I decided to document our recent trip to Tasmania, printing a total of 6 favourite photos all in a small format to create a vertical filmstrip look.
I chose 3 patterned papers to use for the background of my layout. I turned the Direction patterned paper over to show the green side, the Happy Camper patterned paper was left with the flags showing and I also turned the Horizon patterned paper to reveal the yellow suns. Once the papers were arranged and adhered, I placed the photo strip over to the right side of the layout.
For my title, I decided to spell the word Tasmania using the ‘Fun Times Ahead’ chipboard title. As I was spelling the word Tasmania in my head, I thought all of the letters were there in the 1 packet of chipboard except Tasmania has 3 A’s so I did have to open a new packet of the chipboard elements and steal one of the A’s from that pack! I placed the title along the top line of the Horizons paper and I also added one of the puffy titles under the chipboard title too.
Just above the Tasmania title, I placed one of the round die-cuts and also placed one of the banner stickers from the Accessory stickers through the centre of the photo strip. On the right of the photos at the top, I added the Let’s Go flag die-cut and bent up the edges slightly to add some texture. To the direct right of the photos at the bottom, I added the tree chipboard and layered one of the phrase stickers from the Accessory sticker sheetover the top. I also added more of the phrase stickers above the Tasmania title.
Once the larger elements were added to my page, I added some of the smaller elements including one of the banner chipboard pieces below the Let’s Go title and I created a cluster of embellishments at the very top of the page using stickers from the Accessory sticker sheet and a puffy sticker too. I added a couple more puffy stickers and finished by freehand drawing a border around the outside using my journal pen, stamping the date stamp and sprinkling some black mist to finish.
Thank you so much for stopping by the Cocoa Vanilla blogtoday! I hope you are inspired by my layout and got some ideas for your next project!
Make sure to keep checking back here on the blog for all the other gorgeous creative projects from our design team!
Hi everyone, it’s Sue Plumb here to share another design team project with you. Today I am sharing a mixed media family themed layout I created using the beautiful ‘Heart & Home’ collection. I decided to document this photo of my hubby and kids from Father’s Day a few years ago and feature the blue / green tones of the range.
I decided to keep this layout relatively clean and simple, so began with a white cardstock base and some mixed media. I first added some stencilling using a Distress Oxide and script stencil; then some light stamping over the top using a ledger stamp and grey ink. These three points formed my “visual triangle” to help define my placement for my photo.
I chose a mix of patterned papers to use for my page that included the B sides of the Bountiful, Harvest and Framed papers. I added torn pieces of the green and wood grain patterns along the bottom edge of my page, using my fingertip to ruffle the edges for extra texture. I then mirrored the same paper pieces on a smaller scale along the top edge of my page. The mixed media on the background helps to connect these pieces to the main area of the layout.
For the focal area of my design I used a mix of all three patterned papers and tucked a grey paper doily into the layers. I also added some frayed gauze for texture before mounting my photo on top, and then began adding my embellishments. I started with the sweet little heart banner in the corner of the photo from the Accessory Sticker sheet. I love adding embellishments directly onto my photos, as not only can you use this trick to cover unsightly things in the background or fill negative space, but I find it also helps to connect the photo to the rest of the elements on the page.
I wanted to build floral clusters on this page, so I rifled through the Floral Ephemera pack and pulled out pieces that worked with my colour scheme. Then it was simply a matter of shuffling the pieces around until I was happy with the arrangement. I made sure to tuck the pieces over and under each other, as well as other elements on the page, to help create depth. I also bent the edges up or used foam tape to add dimension to some of them. To the left of my photo I added a handmade felt arrow from my stash.
I chose the word together from the Gold Foil Titles pack as my page title, and then a few phrases from the Accessory Sticker sheet for some additional text. (I always try to ensure a balance between images / text and other elements on my page – it makes it more interesting for the viewer to have a mix of things to look at.) I finished off with some scattered dots and hearts from the Puffy Stickers pack and some tiny black ink splatters.
Thanks so much for joining me today, I hope I have inspired you. Why not pull out some of those stencils or stamps from your own stash to add some subtle mixed media to your next project? Remember – you don’t need to cover the whole page and sometimes a little can go a long way!
It’s Sophie with you today and I am excited to share my very first layout with the new Great Escape collection!
As soon as I saw it, I knew exactly which photo to document with it!!
I started with a white background and the Starry Night paper to place my photo and embellishments.
I mounted the photo on tissue paper, adhesive foam and a few layers of patterned papers from the A5 Paper Stack.
I placed the photo on the right side of the page, and added white gesso on the left side where I was about to build a little scenery.
I selected a few embellishments from the Die Cut Ephemera pack like the trees, signage and tent to support the theme of the layout, and scattered numerous stars around the photo and title (Foam Title Stickers).
I completed the page with a few stickers from the Accessory Stickers sheet, and handwrote my journaling directly on the white background.
Here are more close-ups:
Oh how I LOVE this collection!! It’s just perfect for outdoors memories!!!
Happy Valentine’s Day everyone! As my posts always appear on 14’th of each month, I have this luck to be a Valentine’s Day inspiration each year too! So I always try to make something in a love theme and it became sort of mini tradition that I make little gifts for my daughters each year. It’s usually two sets containing of card and a little box for some treats. This year will be no different as I made heart shaped cards and boxes using “Happy days” collection.
This line is very versatile and has no specific theme so it’s easy to customize it. In this case by customization I mean making shaped hears and boxes. What better screams “Valentine’s Day” than hearts? So I used my digital die cutting machine and I cut two heart shaped boxes and two heart shaped card bases.
Each box can hold chocolates or other small gifts. I hose chocolates of course as my girls really like treats. Plus it is meant to be a small gift, just to appreciate them and tell them how much I love them. Valentine’s Day is not only about the other half for me. It’s about love in every shape and form, also to our children.
I created two sets in two different colors combinations. First one is yellow and it’s filled with fruits you can find within the “Happy days” collection. I spend some time to cut out them from “Juicy fruit” paper and from similar pattern you can find in A5 Paper Stack. Box itself is made with “Feel good” and “Little blossom” papers. Inscription on the box was made with super versatile Mini Puffy Alpha Stickers.
Card matching the first box is also decorated with fruits. I also added few butterflies fussy cut from “Flutterby” paper. Title on the card was created with Chipboard Title Stickers. I just treated them as alpha stickers picking letters I need from different words. I knew I won’t be able to use up all of them for titles so it seems like a good idea.
This card, similarly to the box, features flowers. It also has a title made with Chipboard Title Stickers. I finished the design by adding few little dots from Puffy Heart Stickers.
That is all for today. I hope you like my Valentine’s Day gift ideas and you are already waiting for the ones I will make next year ;)
Hug your loved ones today. See you in two weeks with an inspiration made with brand new “Great escape” collection.


 I created two sets in two different colors combinations. First one is yellow and it’s filled with fruits you can find within the “Happy days” collection. I spend some time to cut out them from


