Hello creative Paperlovers, Welcome to the Cocoa Vanilla Studio blog today! So happy to see you with this new share. It’s Josefine here with a new mixed media scrapbook layout using the beautiful “Daydream” collection.
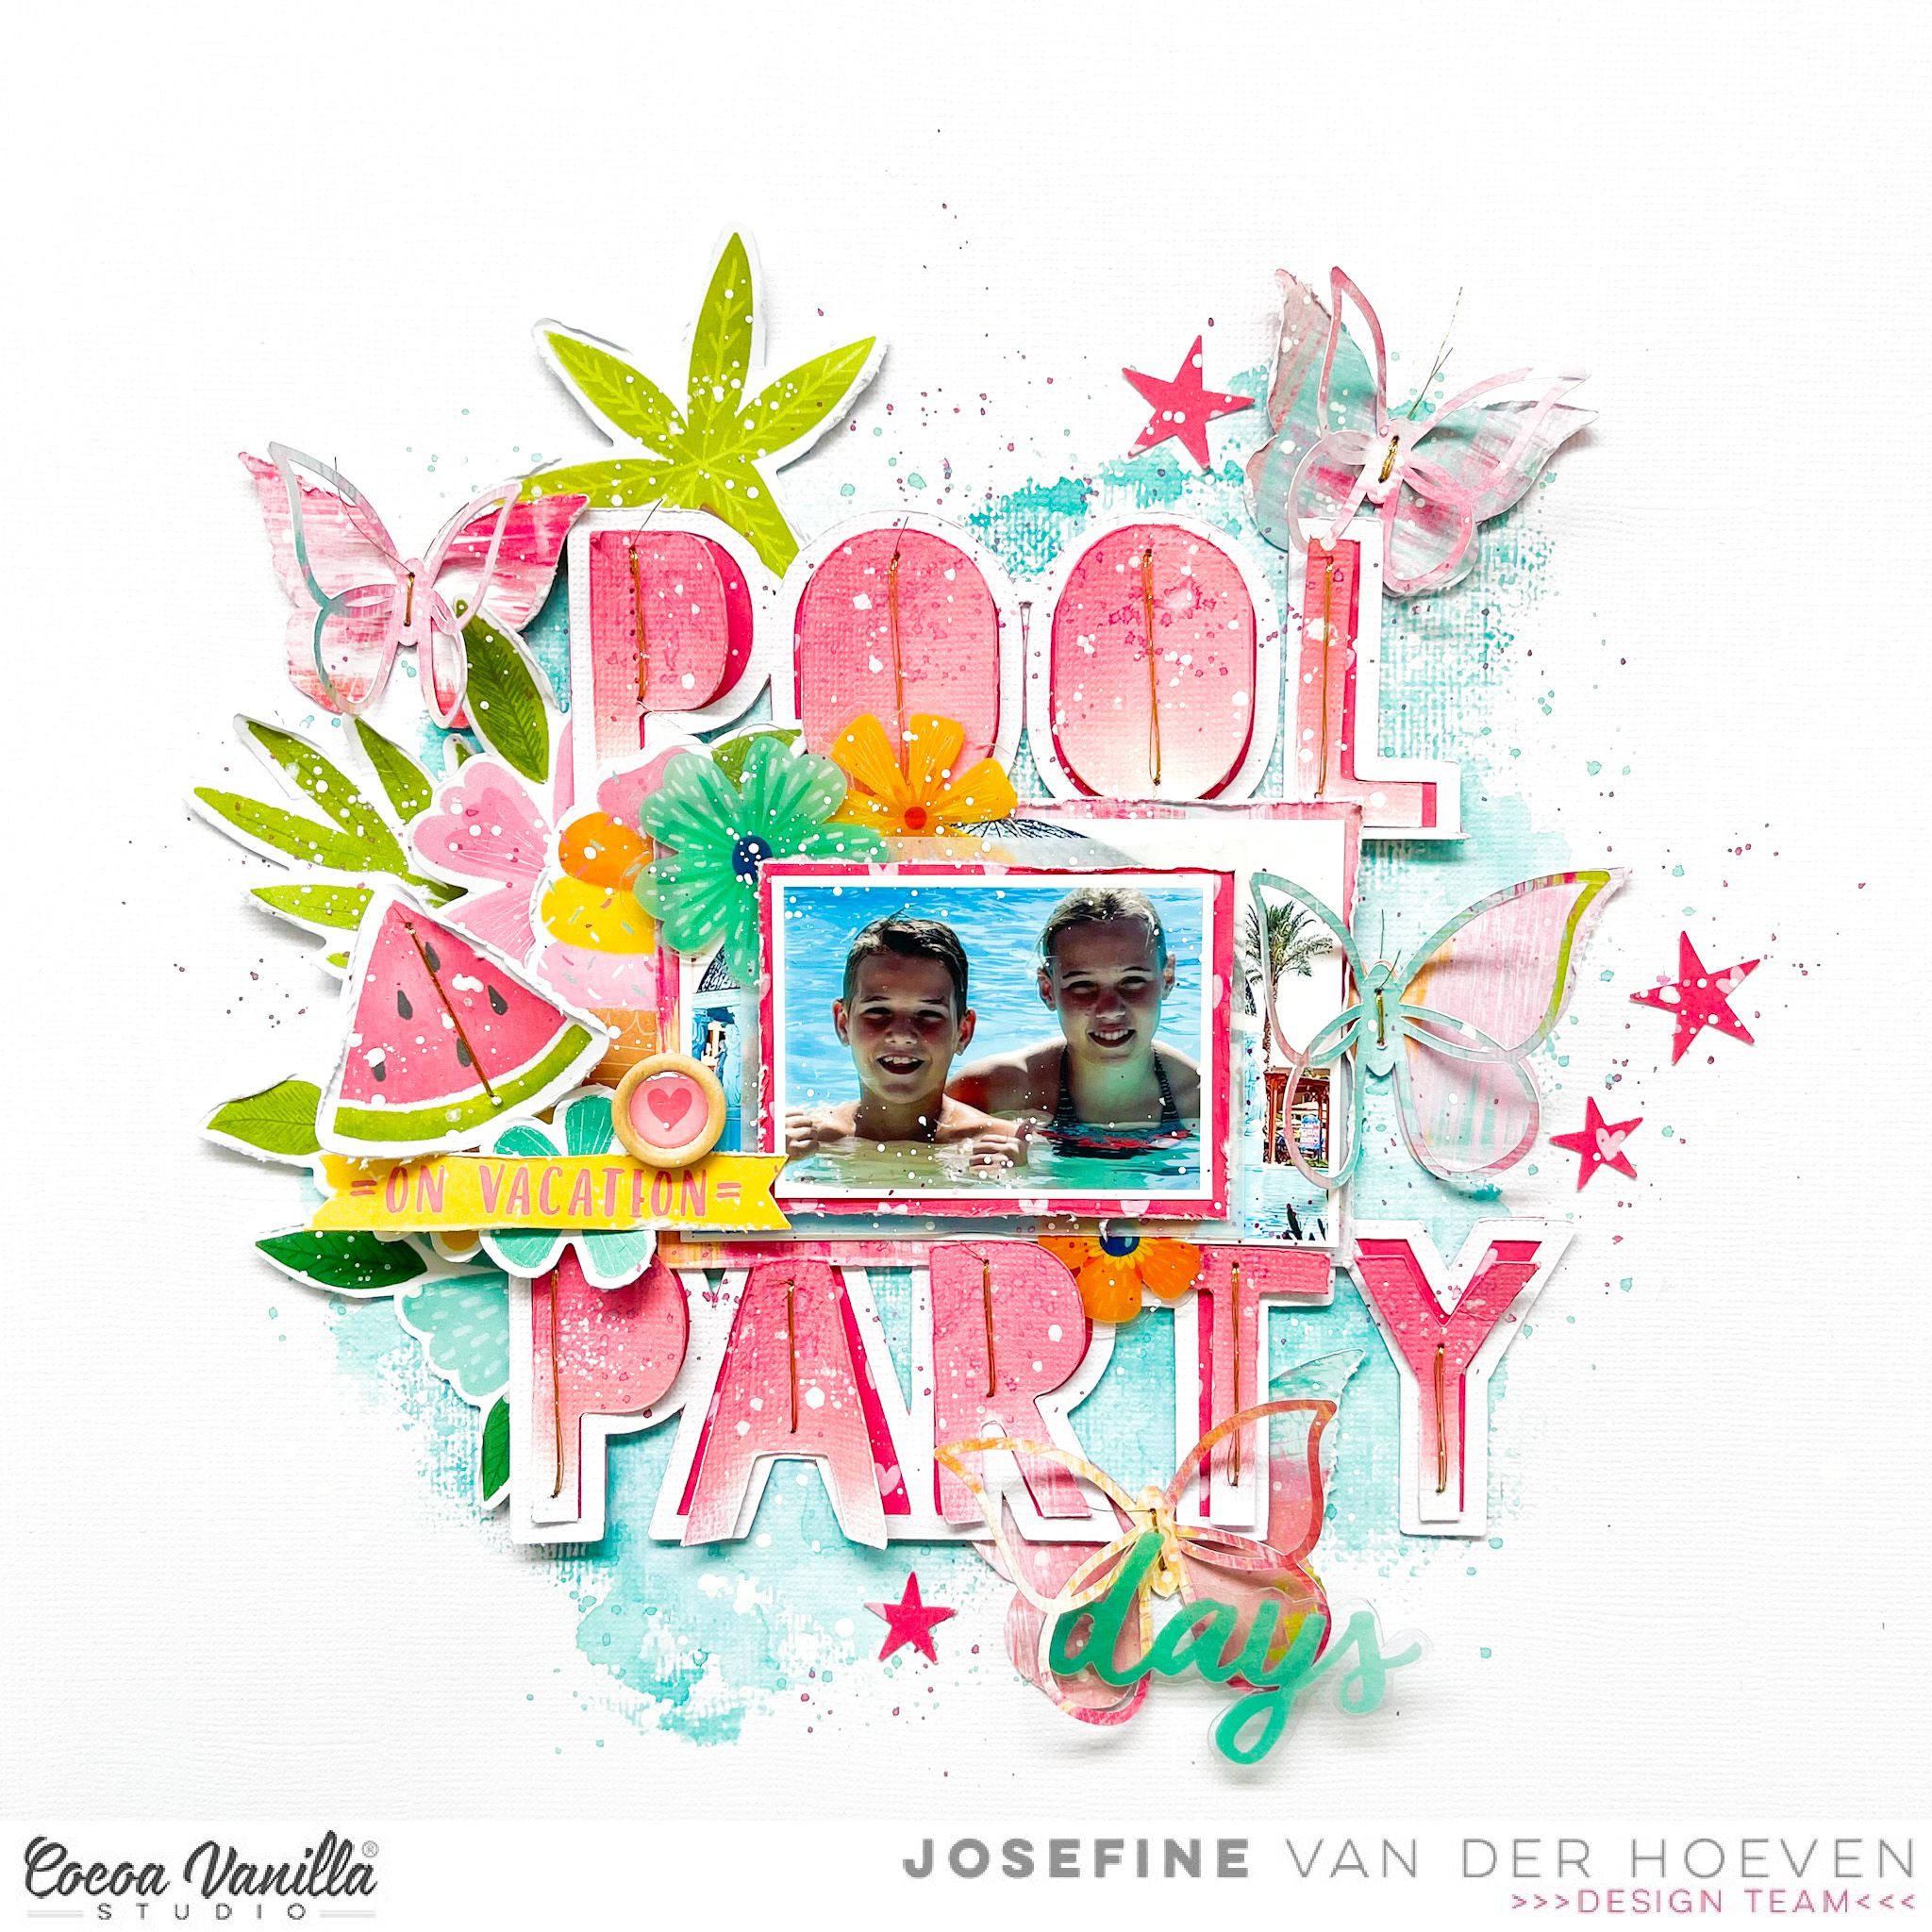
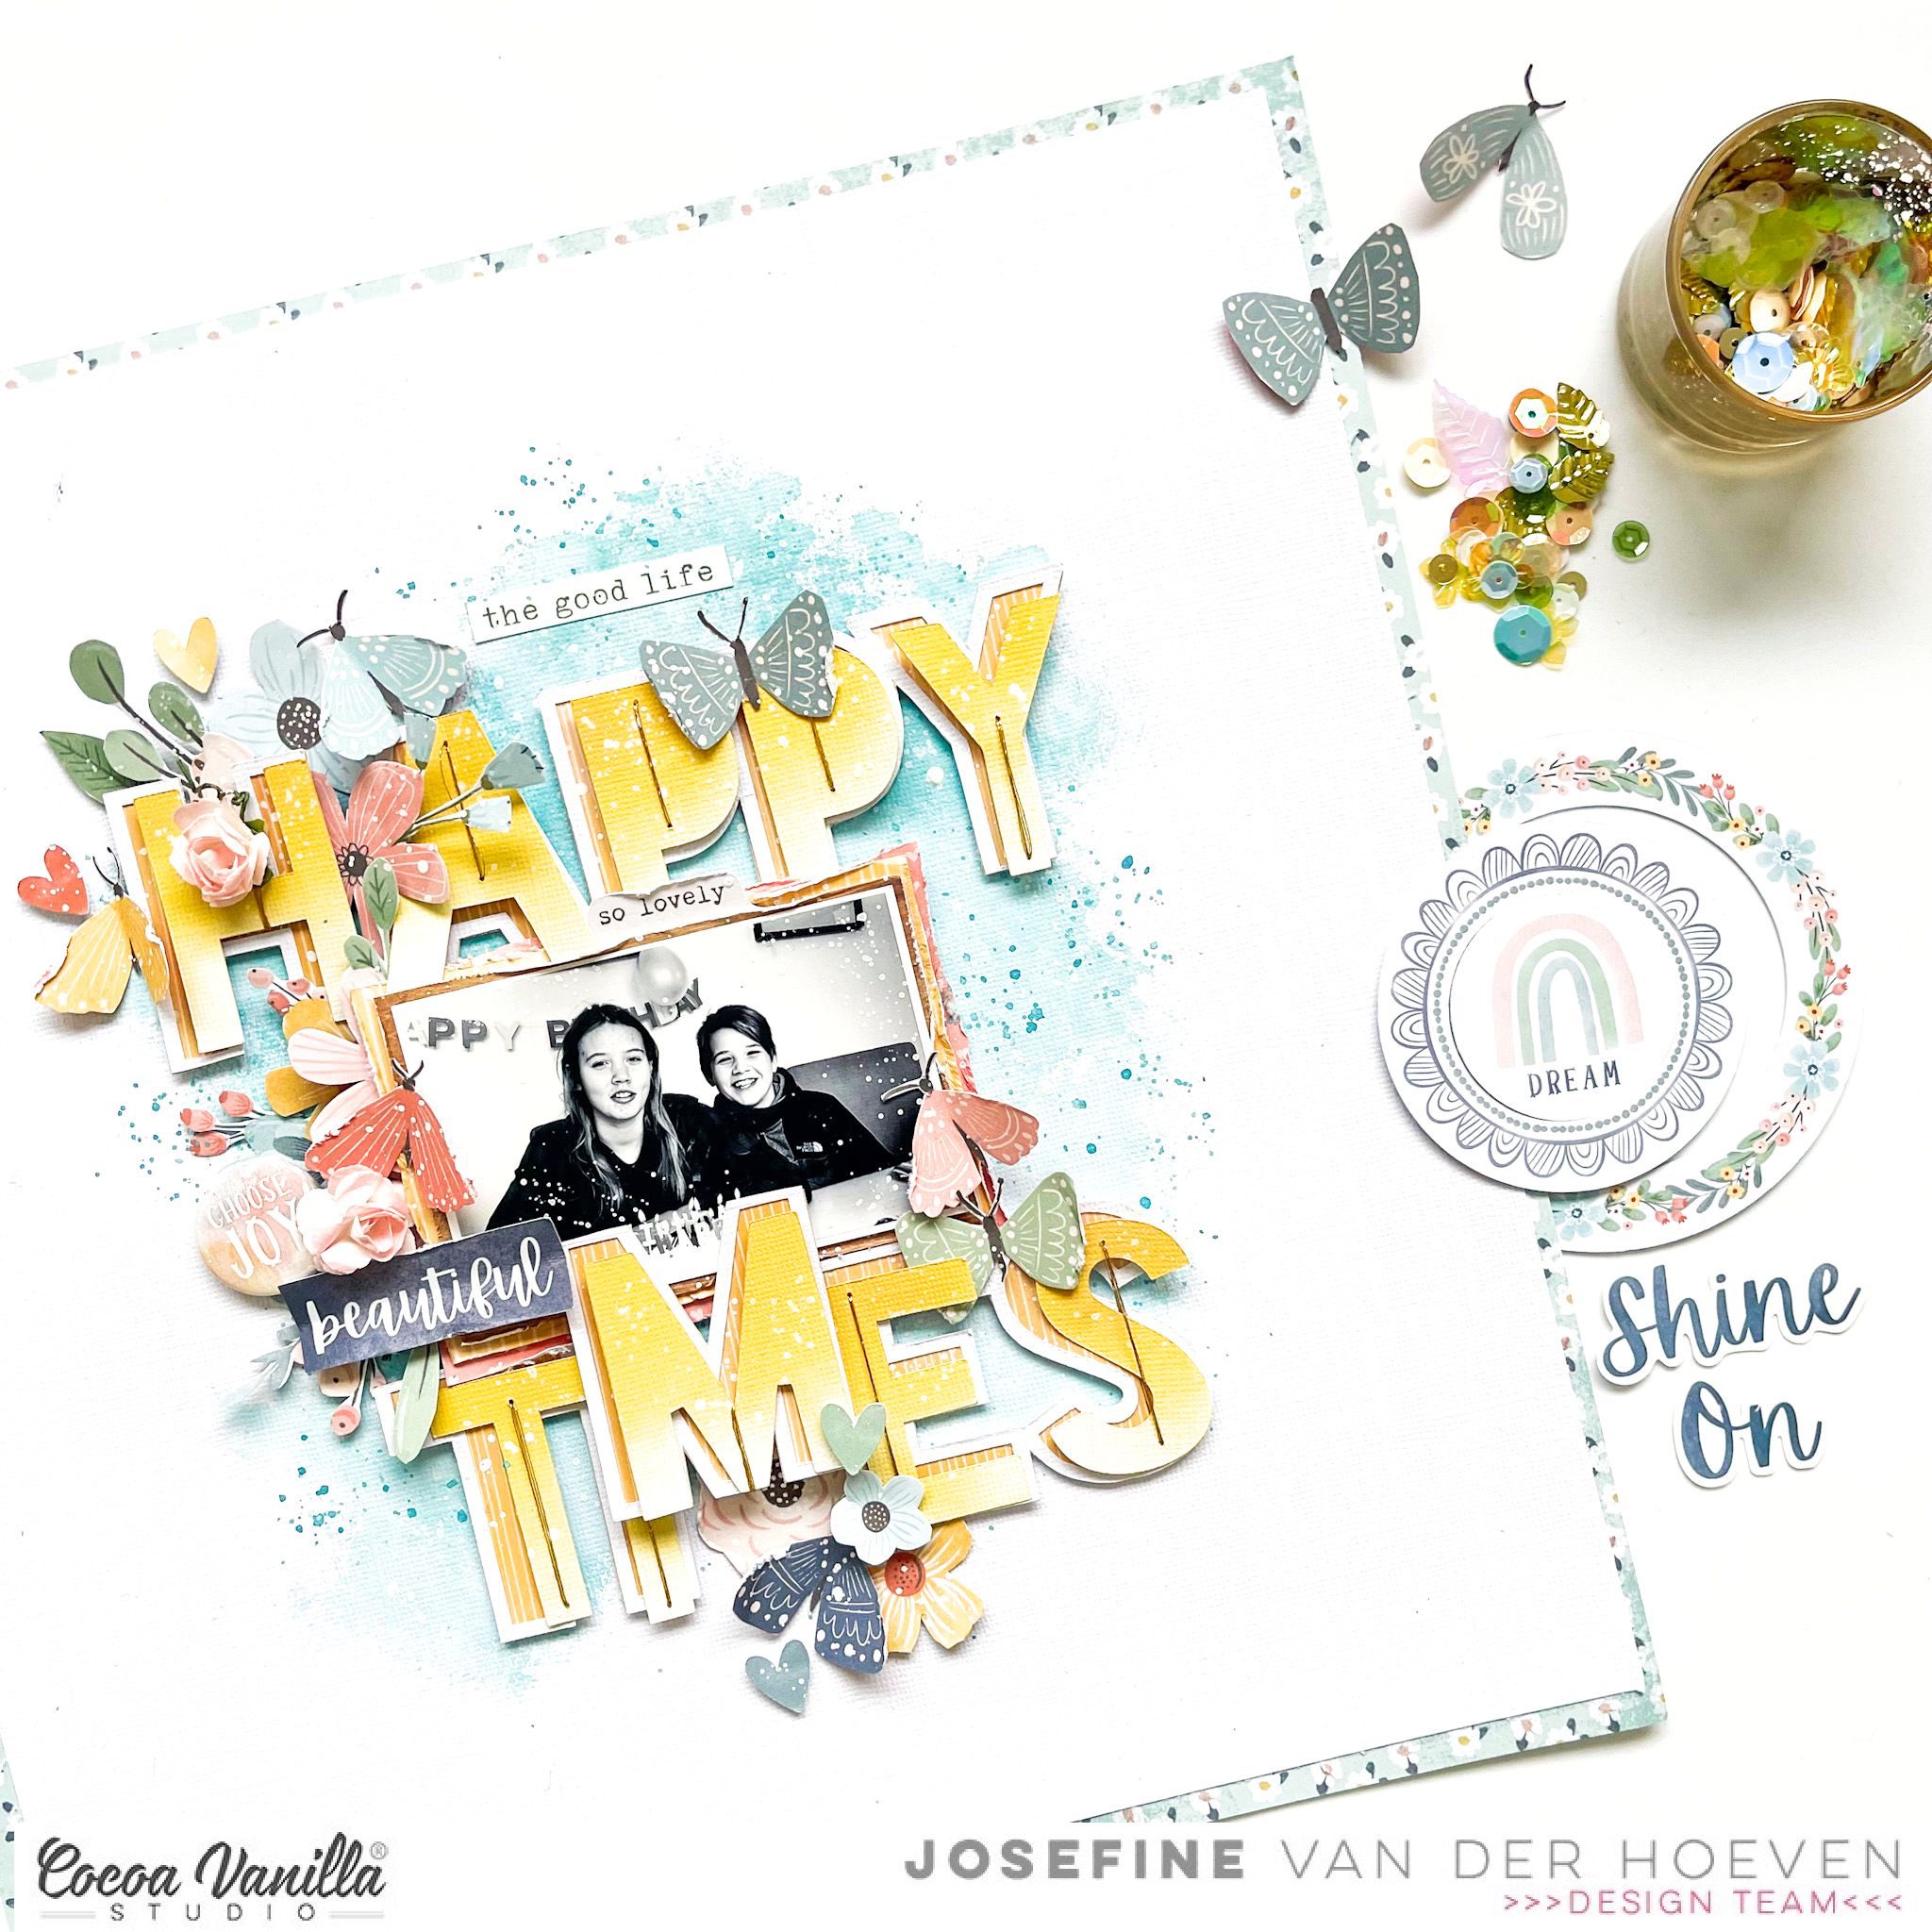
The challenge for this week is, scrap lifting myself. I couldn’t wait to make the “Pool Party” layout again. I wanted to challenge myself to use a different collection though and chose the beautiful “Daydream” collection.
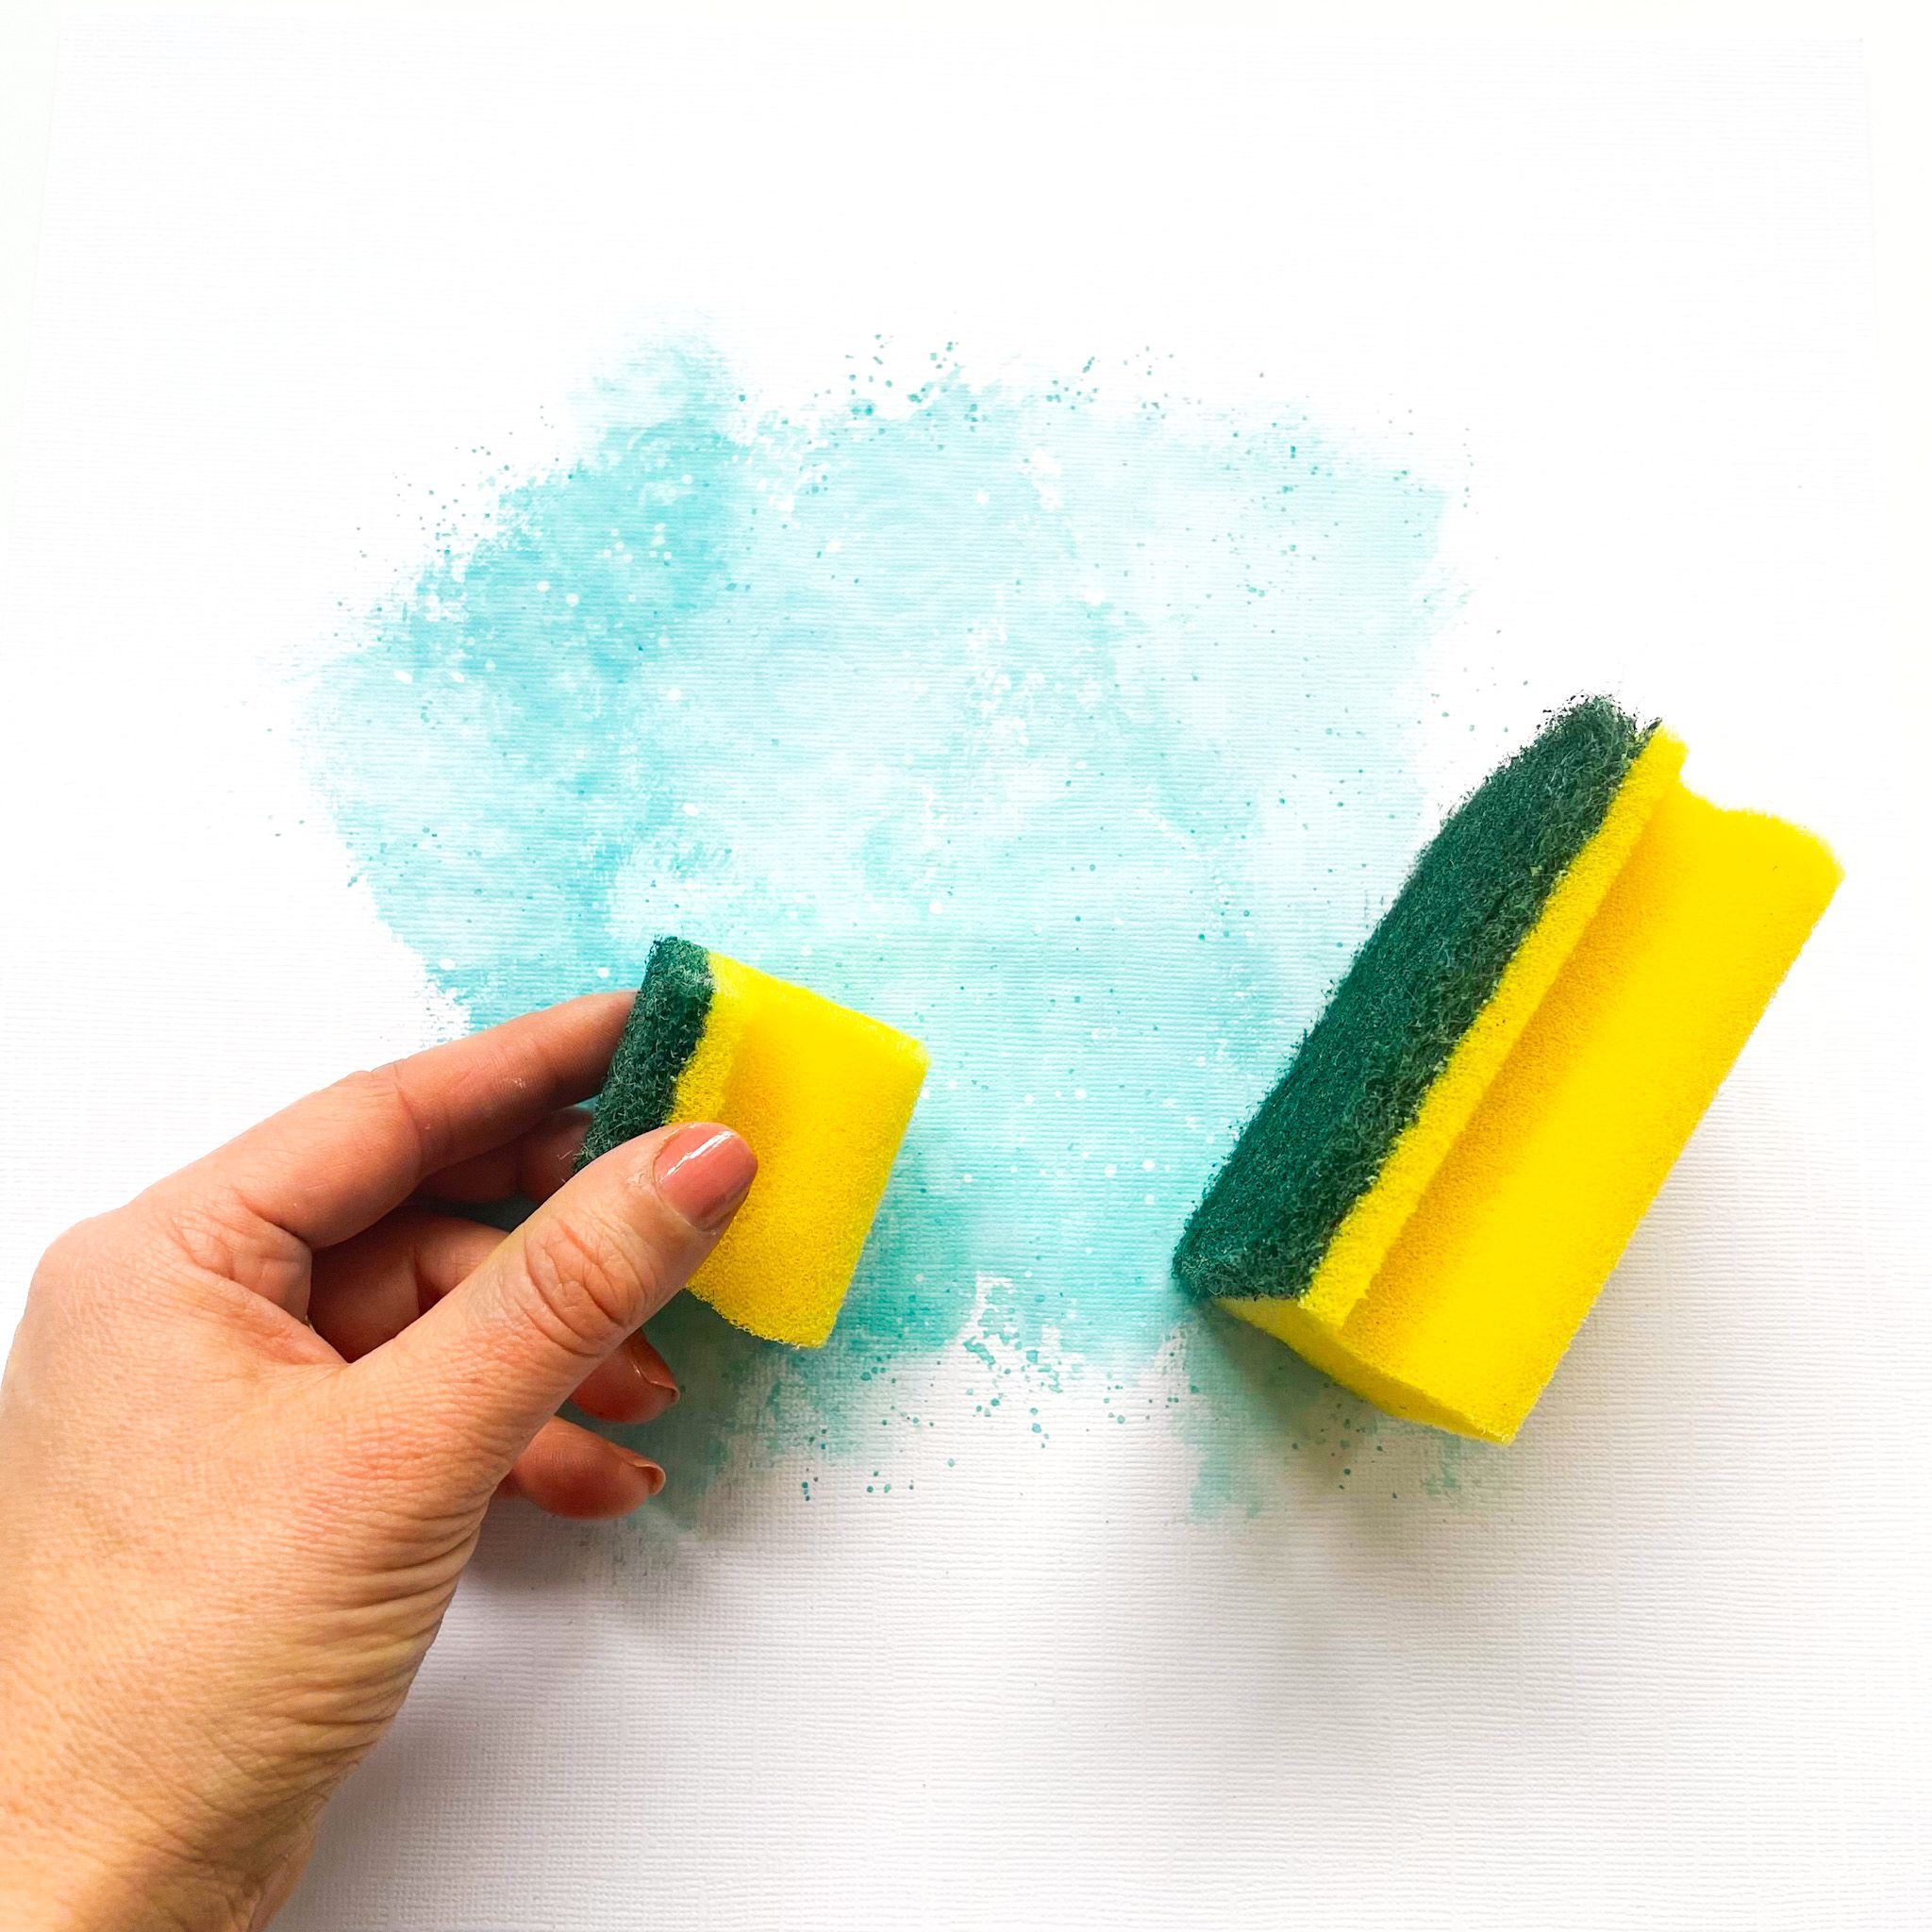
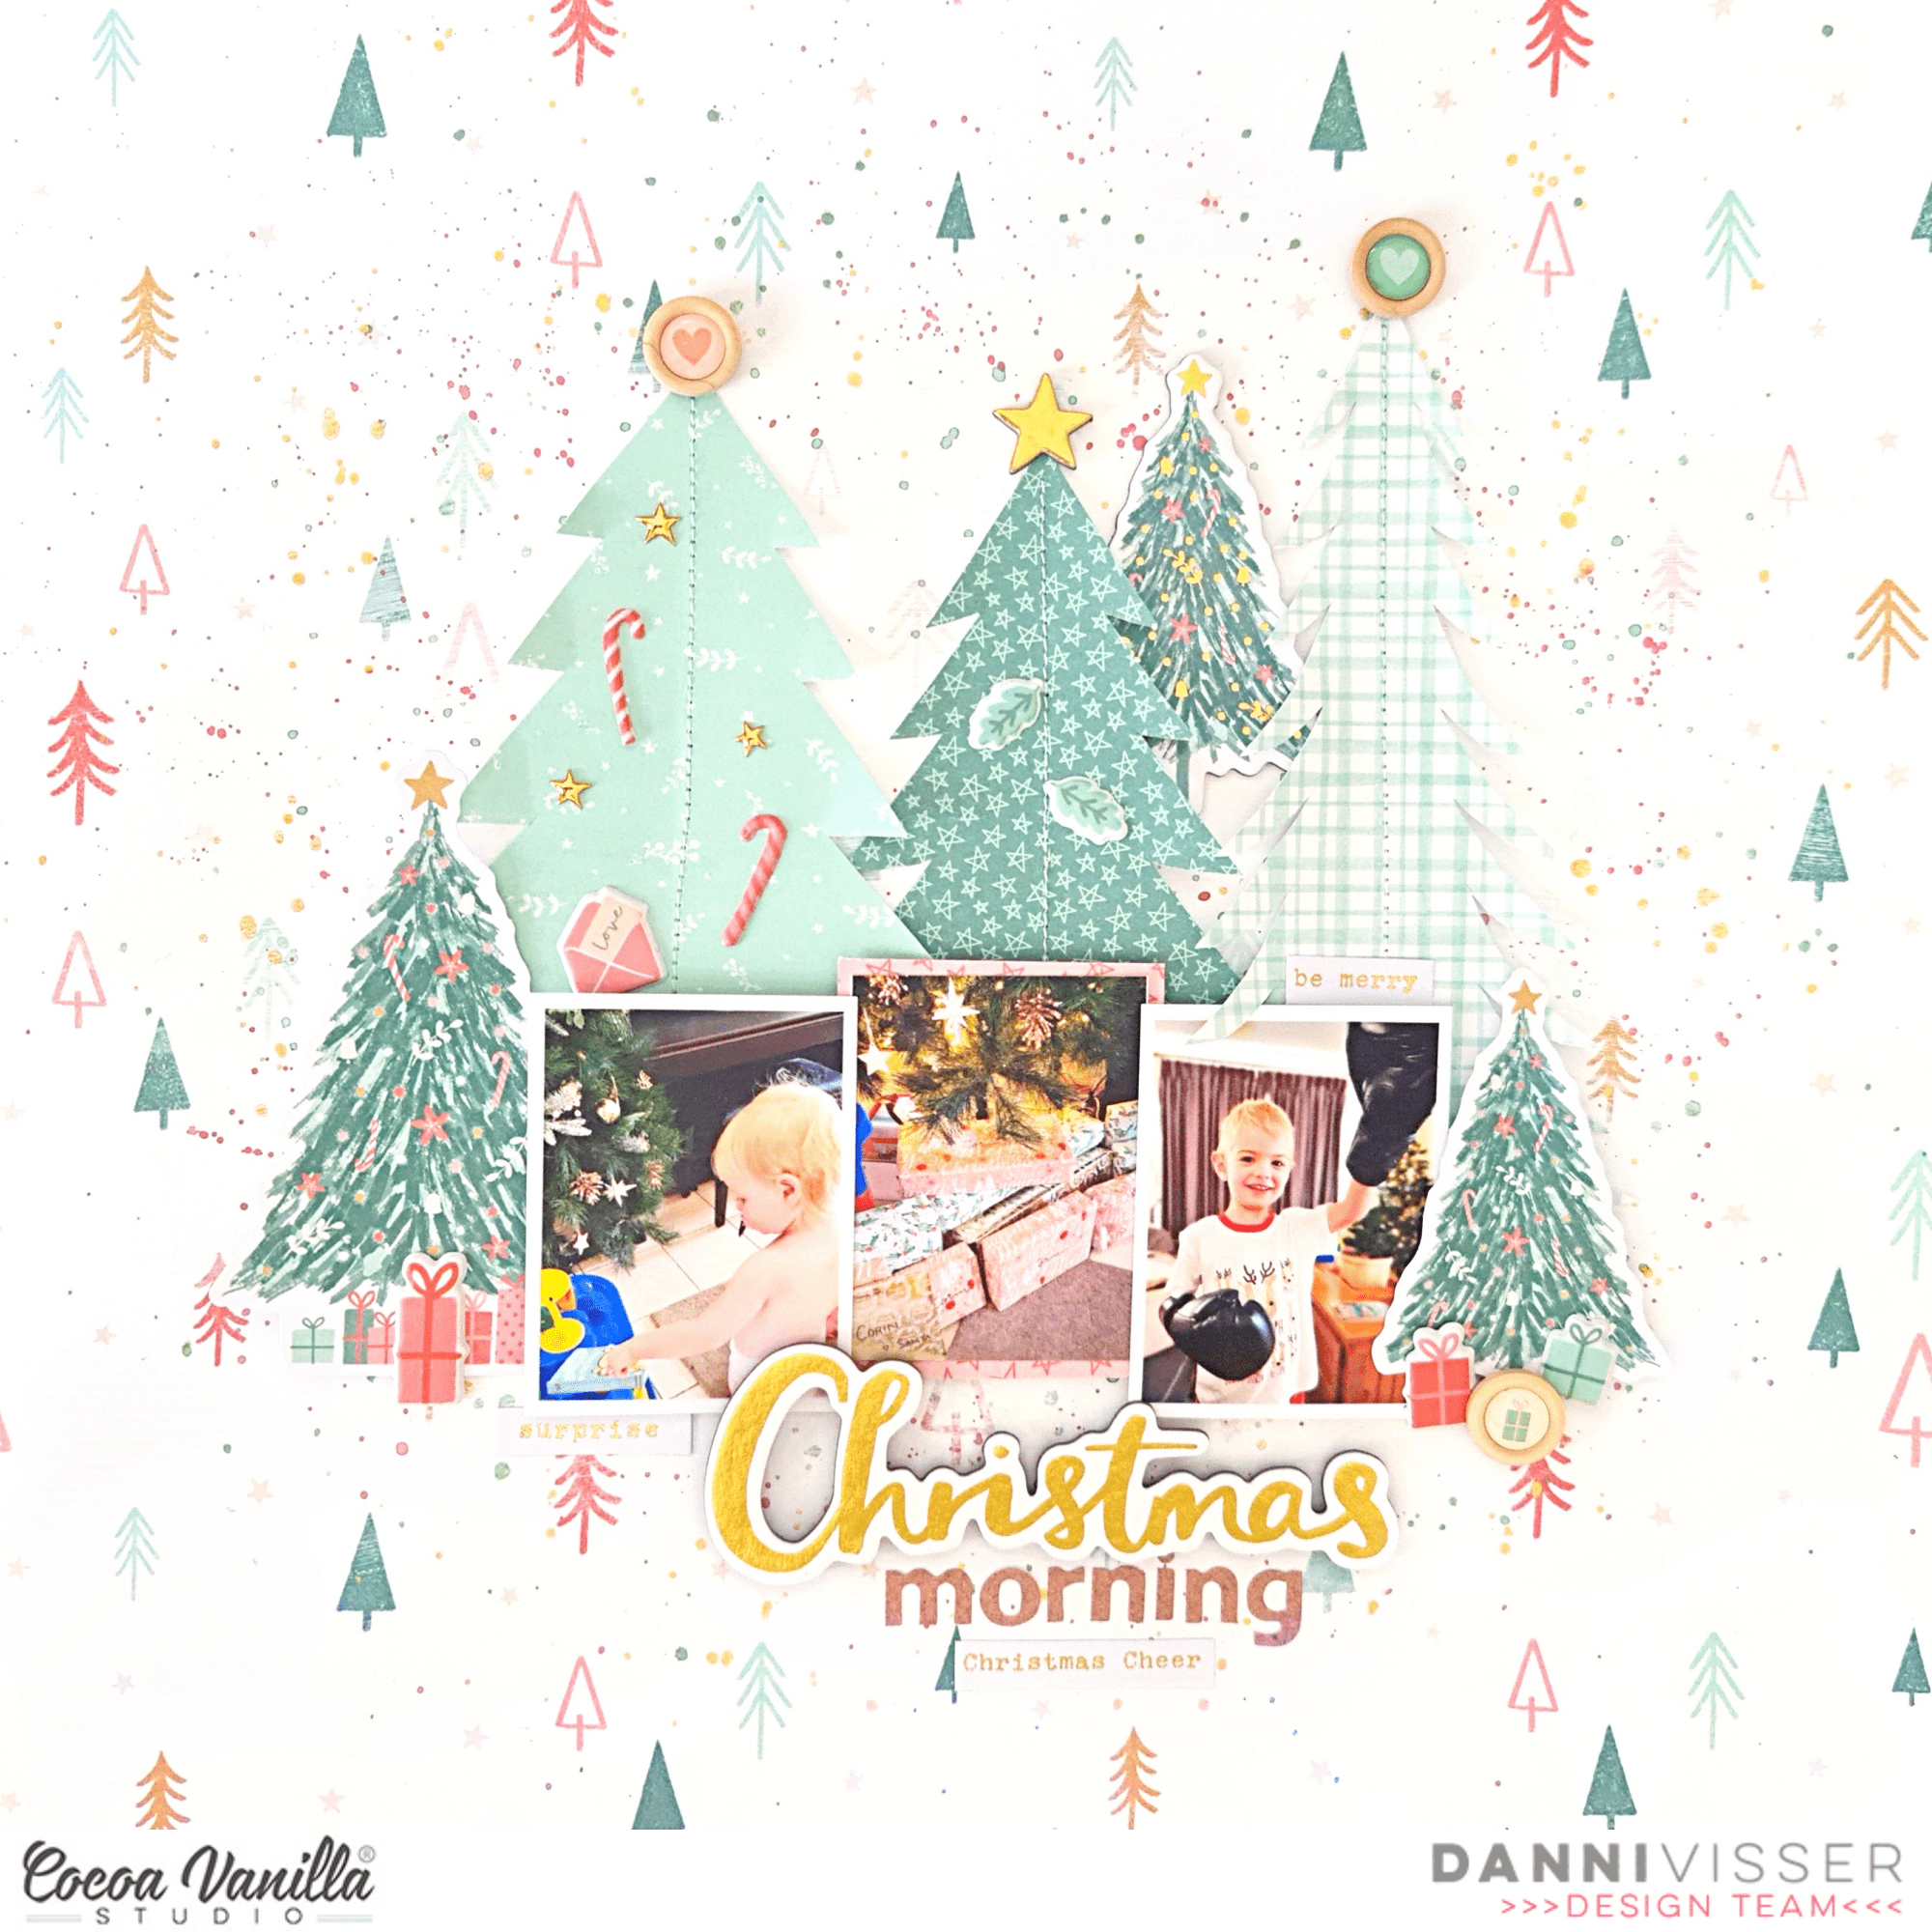
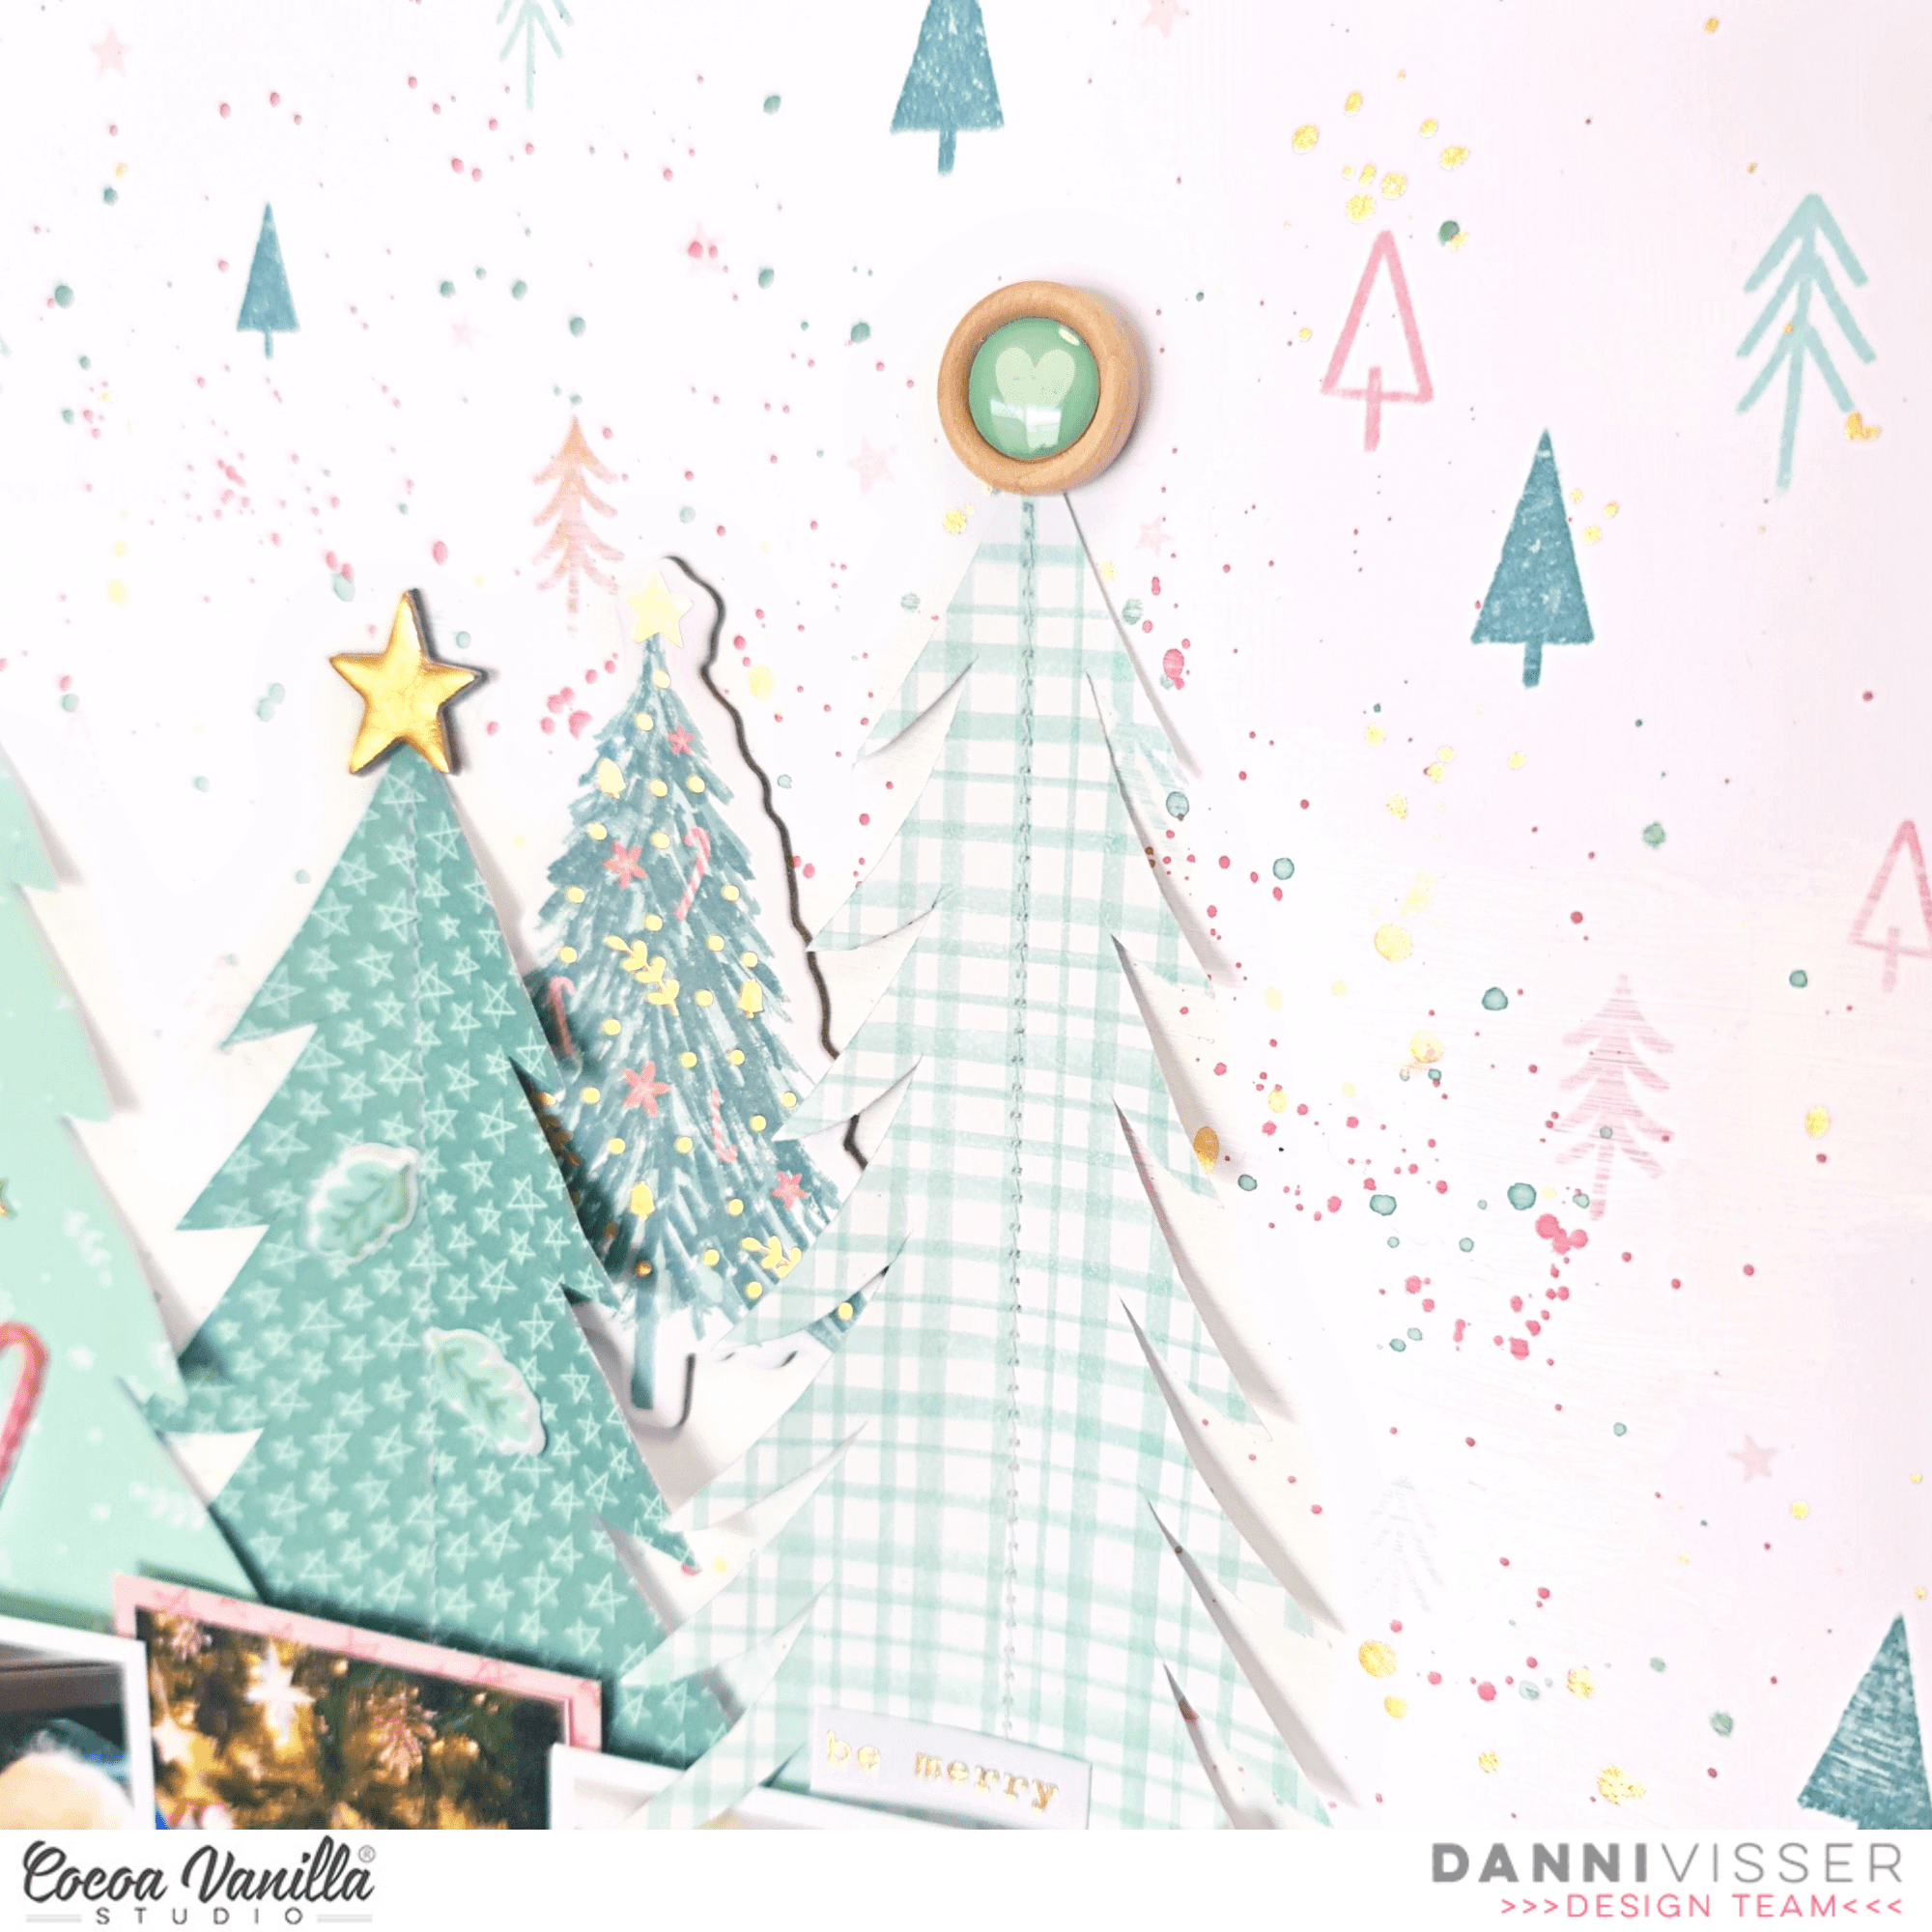
I used a white sheet of cardstock. I cut a kitchen sponge into quarters and one of them I’m going to use to stamp with. I moisten the sponge and with a brush I apply the Distress Oxide to the sponge. Then I start stamping on the background. I continue doing this until the stain is big enough.The color I’m using is “broken china” When I’m done stamping with my sponge I make splatters with the distress oxide.
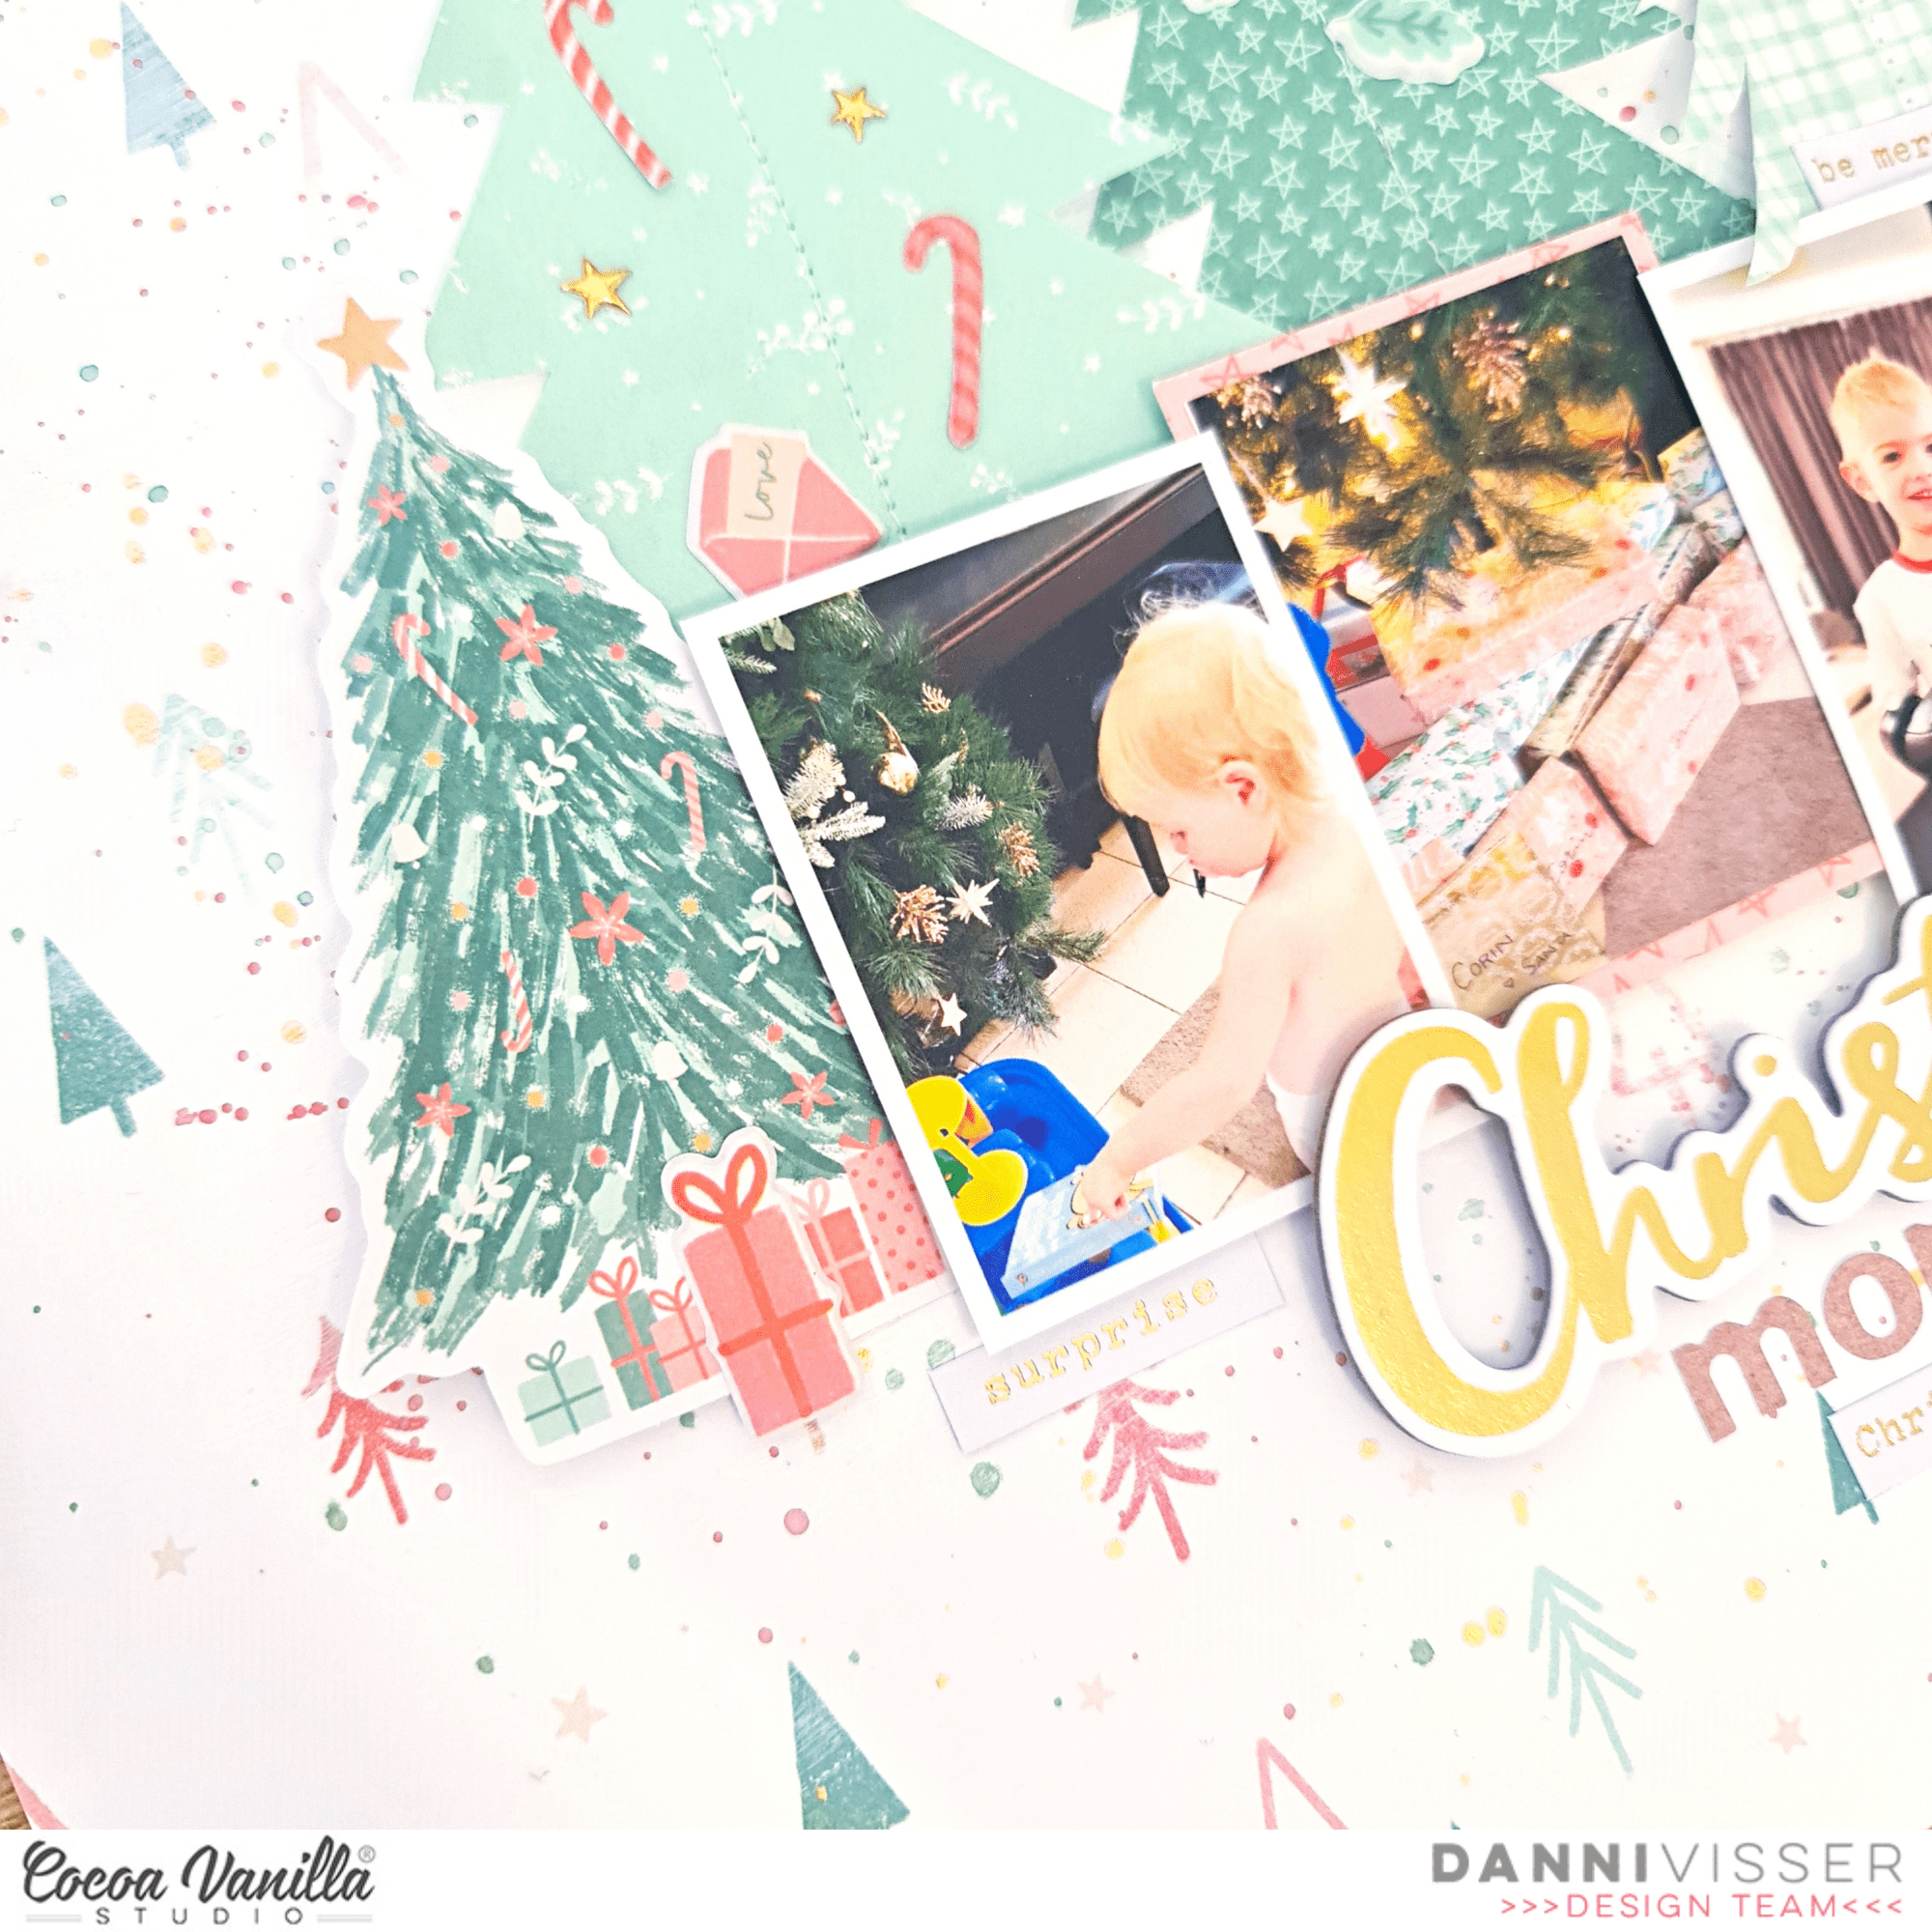
I cut the title “Happy Times” with my Cricut Maker and backfilled it with the beautiful design papers from the Daydream collection. This happy cut file is from Cut To You. I cut some more different design papers to size and placed them behind the photo.
I cut the title loose and placed the photo in between. I placed the cut file and photo in the center of my mixed media background. I picked different die-cuts, butterflies and flowers to made a cluster on the left side of the photo.
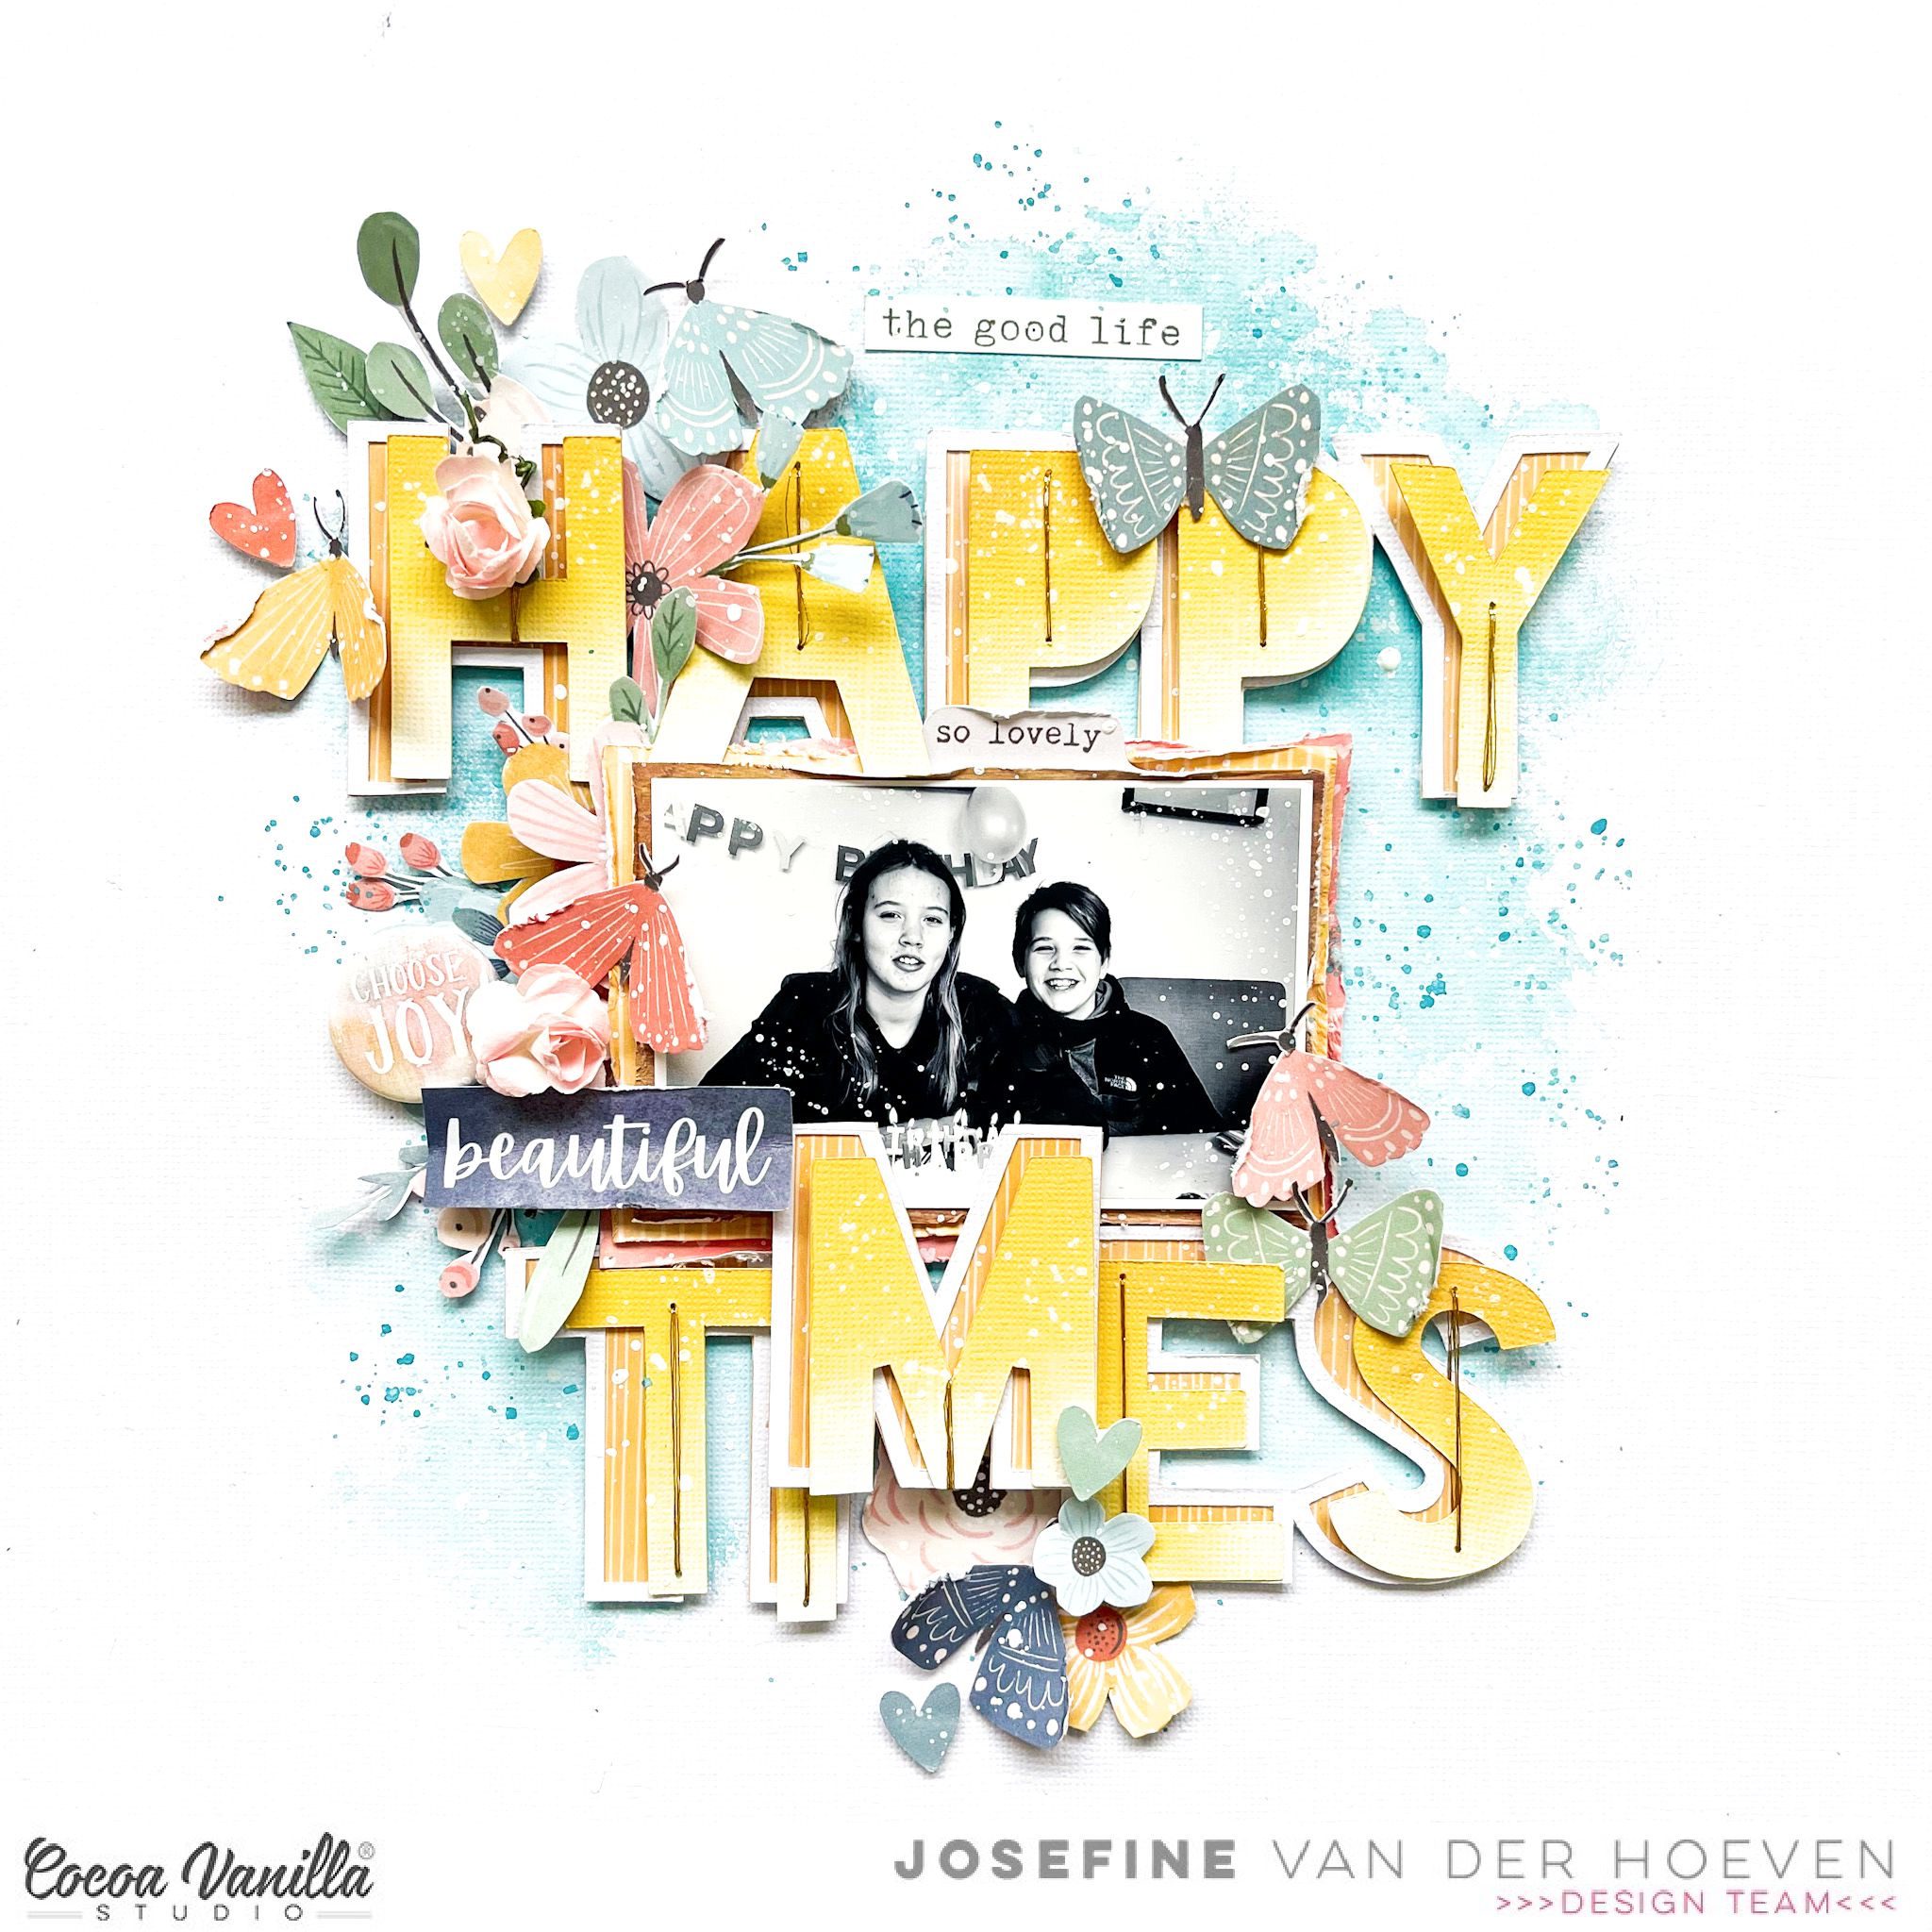
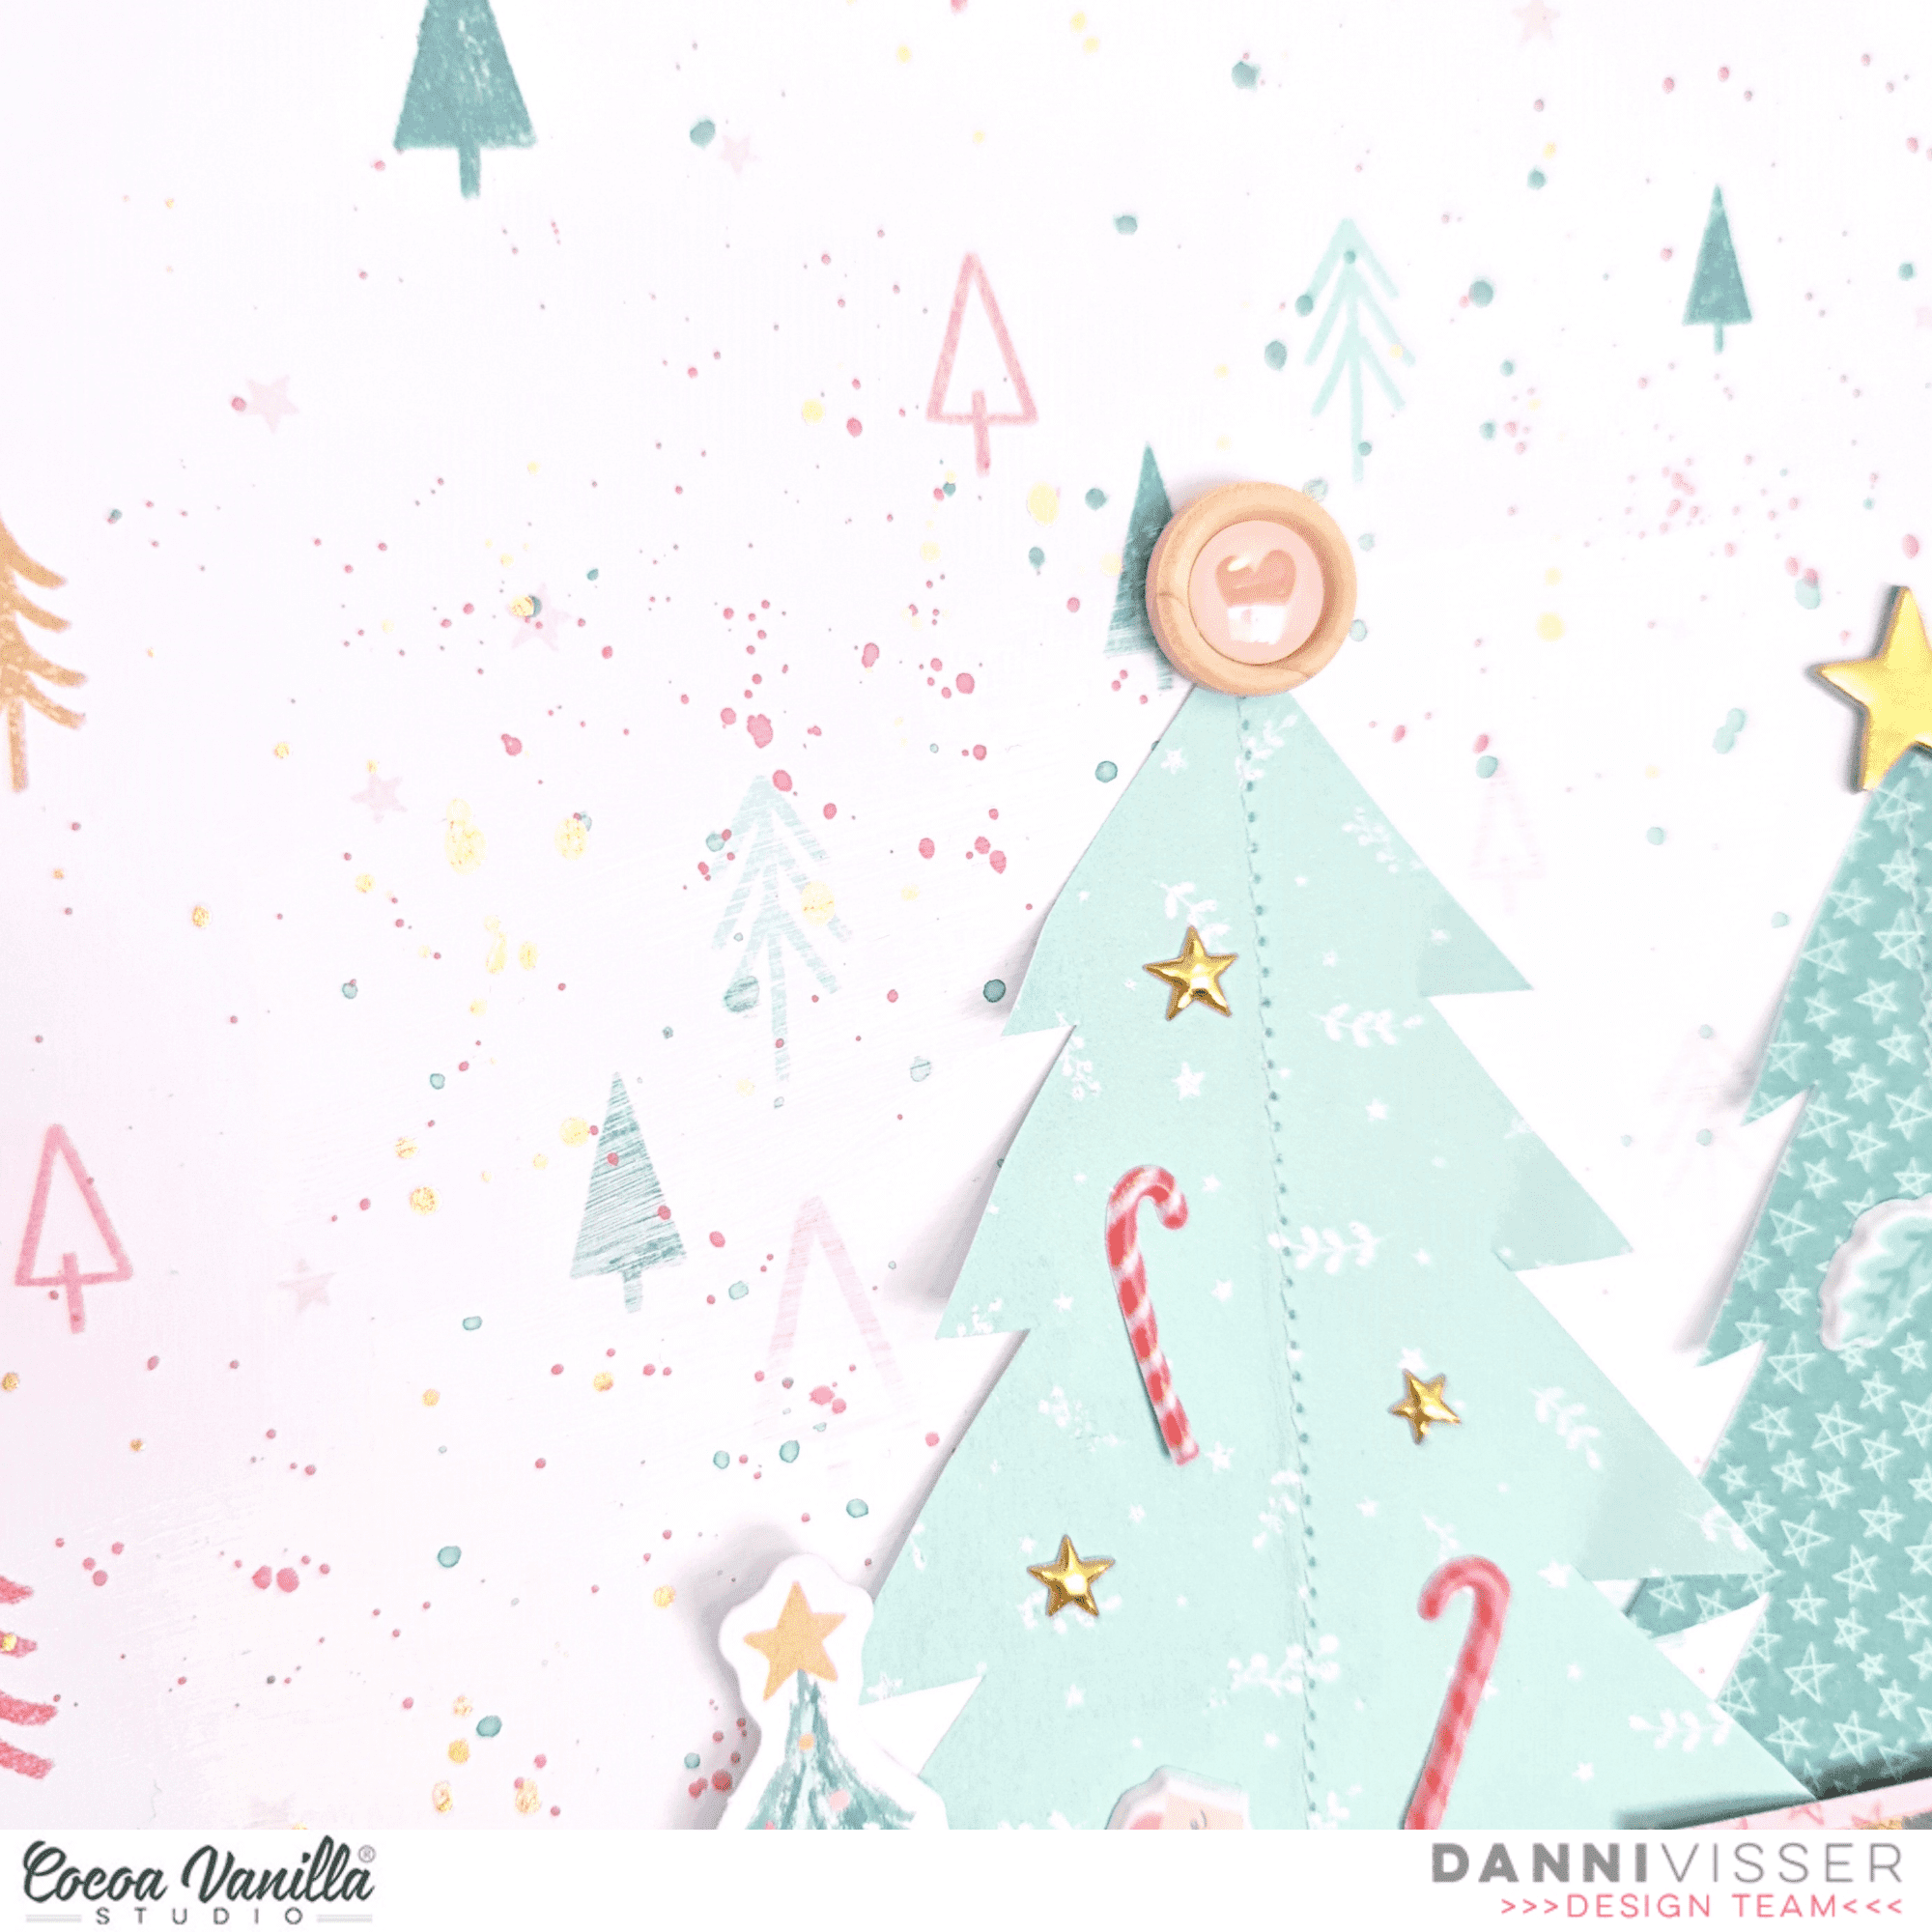
I colored the alphas from the cut file with distress oxide. The color I used for the alphas is “fossiled amber” I used my blending tool for blending. I attached the alphas with gold sewing thread. I created splatters with white gesso and used my brush for it. The cute little button “choose joy” is a great addition to this layout.
I hope I was able to give you some great crafty ideas! I had a lot of fun creating this layout with the amazing “Daydream” collection. I want to thank you for stopping by on the blog today. Wishing you a beautiful and creative day. XoXo, Jo
Hello Cocoa Vanilla Studio friends! Danni here with my final Christmas layout for the year (until the festive season rolls around again of course!) and naturally I had to use the amazing Joyful collection to round out my festive scrapping.
I still had a bunch of the gorgeous Christmas trees from this collection left, both die cut ephemera and chipboard stickers, so I decided to make a little tree scene using these along with some patterned papers. I started with Deck the Halls 12×12 patterned paper as a base for my layout, because I knew all those tiny trees would be a great backdrop for my embellishment trees. I laid down a layer of white acrylic paint in the centre of the page to soften the pattern and allow my elements to stand out better.
To finish off the background I added a bunch of ink splatters in forest green, a soft red and lots of bright metallic gold. While my paint and ink mediums were drying, I went ahead and hand-cut three tree shapes from the A5 paper stack papers in different shades of green. I did this by folding rectangles of paper in half lengthways, drawing a tree outline on the outside fold in pencil, then cutting out the shape. Super easy!
Next I arranged my trees on the background where I liked them, then sewed a line of machine stitching straight down the middle of each, along the fold line, to anchor them to the page securely and add some texture. I tucked my die cut ephemera and chipboard sticker trees in amongst the paper trees, then arranged my three 3×2’ photos of Christmas morning along the bottom of the cluster with dimensional foam to lift them up.
For my title I took the beautiful gold foiled ‘Christmas’ title piece from the chipboard stickers and added it along the bottom of my photos. I finished it off with some kraft stickers from my stash and a tiny word phrase from the accessory stickers. I also added two more tiny words from the accessory stickers around my photos.
I wanted to decorate my little trees, so I took the puffy stickers and added some tiny gifts beneath the ephemera trees, some candy canes and leaves to the paper trees and added some gold stars from the puffy gold title stickers. Finally, I topped my trees with a gold chipboard sticker star and some tiny wood epoxy buttons.
I hope you like this layout today – I am thrilled to bits with how it turned out. There is a process video on the Cocoa Vanilla Studio YouTube channel linked below if you would like to watch it come together. Happy scrapping!
Welcome to the Cocoa Vanilla blog! It’s Josefine here today with a new scrapbook layout for you. I absolutely love the new No Limits collection! and can’t wait to play with it. I was so inspired by the colors that I wanted to create a cool boys layout for this blog. So I took Legendary out of my stash to create a mixed media layout with a winter touch.
I draw a circle in the center of the layout and with Distress Oxide I created a mixed media background. I used a background stamp that looks like a splatter and stamp several times with the distress oxide in a circle on the background.I mixed the ink with water to create a watercolor look. With a. thin round brush I splatter with the ink on the mixed media background. I really love the effect of splatters on my layout. The color I used is “faded Jeans”
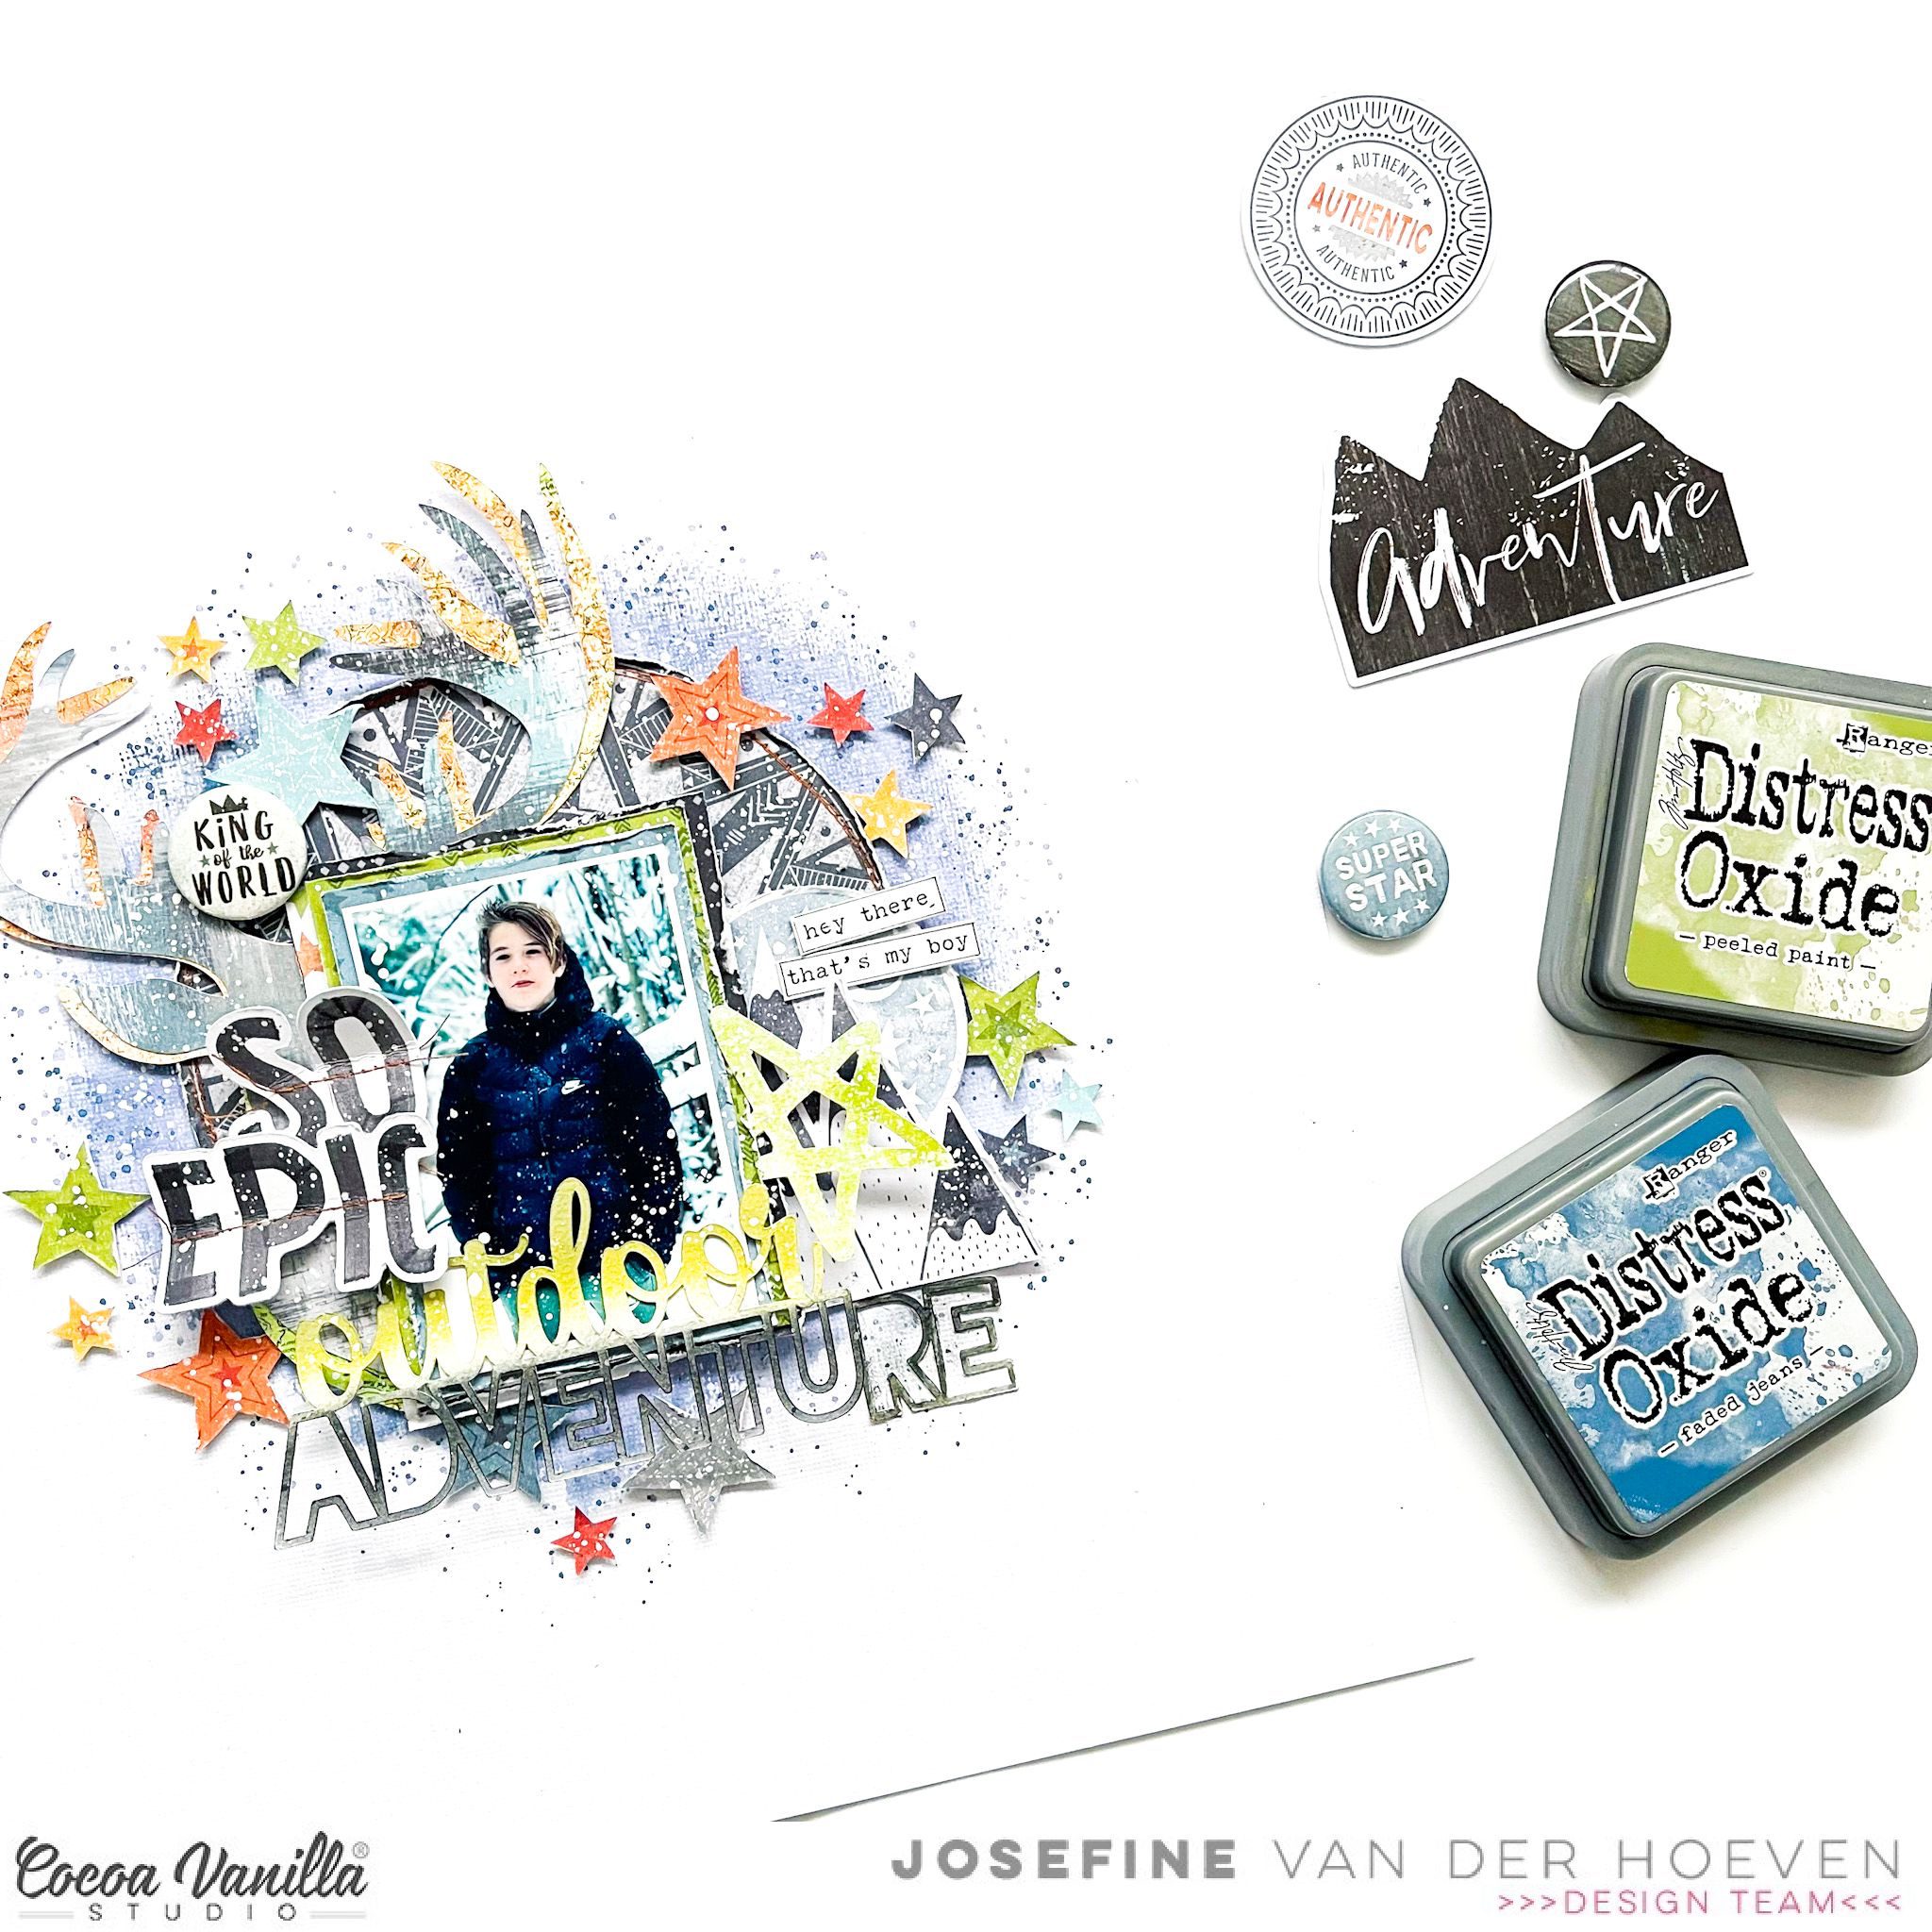
I used two cut files on this layout. The deer in the background I cut out twice and glued half on top of each other. The cut file is from the Cricut design studio. The “Outdoor Adventure” title is a cut file from Cut to You. I cut a circle from the design paper and stitch the edges with brown sewing thread. I place the circle in the center of the mixed media background. I placed the deer on top and cut some design paper to size and glued it behind my son’s photo. I placed the design papers with the photo on top of the cutfile. I use 3D foam to create more dimension.
I make a cluster of die-cuts and word strips on both sides of the photo. I stitched the words “So Epic” in the middle. I colored the cutfile title with a green Distress Oxide color. The color I used for that is “Peeled paint” I cut out several stars from the design paper and placed them in different places on my layout.
I attached the stars with 3D tape. I like the way the stars. stand out a little from the background. I mix the white gesso with water and with a thin brush I make white gesso splatters on my layout. I like the effect. I think Legendary is a great collection with pretty cool colors. I am so happy that No Limits will be the next wonderful boys collection from Cocoa Vanilla Studio!
I hope I was able to inspire you with this boys layout and am curious if you are also looking forward to the new collection “No Limits” I want to thank you for visiting for the blog today and hope to see you again next time with a new project.
Wishing you a crafty day friends!
XoXo, Jo
Hi everyone, Sue Plumb here to share my latest design team project with you.
For this one I decided to pull out my supplies of the beautiful ‘These Days’ collection as I still have plenty in my stash left to play with and was dying to use it again. I also had a sweet photo of my boys together that I took last year when they were heading off to their first school disco. Although they might be twins, you can see that they are very different and both have their own individual styles, which I thought was summed up quite well in this shot.
Despite the fact this range has quite a broad palette of soft colours, I decided to focus on predominantly the blue and green tones combined with the wood grain for my background. Before I moved onto my papery layers however, I really wanted to add some depth to the background by adding some paint and stamping. I used a white paint applied with a brayer, which also helped me to define the focal area of my page. Over the top of the paint, I used a brick pattern stamp with a grey ink.
For the papery layers over my background, I used a few papers from the A5 Paper Stack which I cut and tore to size. I also added a grey paper doily from my stash, a strip from the cut apart paper, and some frayed gauze for texture. My photo also had some scrap cardboard adhered to the back of it to help pop it up from the page.
For my embellishments, I started with the Die Cut Ephemera pack. I chose a doodled frame first, which I cut in half and tucked half in under the right edge of my photo. I often use frames in this way (cut into pieces and tucked into layers) as opposed to the way they were designed to be used. I also chose the stack of books from the ephemera pack as I thought this worked well with the fact it was a school disco the boys attended.
I used the gorgeous Mini Puffy Alpha stickers for my title, as I didn’t want to detract from all the delicate elements I had on the page. I love these alphas sooo much, they are a perfect size and such a pretty mix of colours. Along with the puffy alphas, I also added some of the Puffy Stickers to my page – a heart, a flower and a butterfly (because you can never have too many butterflies!)
There were plenty of regular Accessory Stickers on this page too – you can see how I used the tab and flag amongst the cascade of embellishments alongside my photo, and there were several phrase stickers used as well. From the Clear Stickers sheet I used three small clusters of crosses and a green brush stroke. This coordinated beautifully with the green Epoxy Wood Button that I also included.
I finished off my layout with handwritten journalling; stamped phrases and date; and some black stamped doodled circles and dots.
I have a process video available for this layout. If you would like to see how it came together you can watch it here:
Thanks so much for stopping by today, I hope you are feeling inspired to get creative too. Until next time, happy scrapping!
I am sharing a layout created with the colorful Happiness collection !
I played with some Lindy’s Stamp Gang magical powders and shakers and a lot of water on a thick white cardstock for a colorful mixed media background. I let it dry completely.
I went for a vertical design today, and my starting point was the little pink frame that comes in the Die Cut Ephemera pack.
I created several frames and squares that I placed together under and around my photo. I machine stitched on a few of them.
I printed my photo in color as it is quite neutral. I added tissue paper and adhesive foam behind it.
I printed my journaling directly on a rectangle cut out of a paper from the 6×8 Paper Pad.
I used the Happiness Die Cut Titles for my title and subtitles.
Finally, I embellished the page with a few beautiful Die Cuts. I fussy cut the blue butterfly out of the “Little Things” patterned paper. I added a Flair Button, a few Clear Sticker hearts and some sequins from my stash.
Here are more close-ups:
I love the end-result and hope you do too !
Thank you for stopping by, and I will see you again soon !
Hi Cocoa Vanilla Studio friends! Danni here with a fun mixed media layout featuring the absolutely beautiful Joyful collection, because I still can’t get enough of it! I have a couple of sweet photos of my little girl to document, so I decided to keep everything bright and add lots of texture using machine stitching.
I started the layout with a white cardstock base and added a border with the soft pink gingham side of Advent 12×12 patterned paper. I added a line of machine stitching around the edge to add extra security and added detail. This gave me an idea to add a quilt-inspired design to the page – I’ll explain more about that later.
I have been eyeing off the gorgeous double sided 3×4 cards for a while, and this is one of my favourite ways to use a bunch of them on a layout. I overlapped my two 3×4 photos slightly, then chose four of the cards to build a large cluster to go in the centre of the page. I distressed all the edges of the cards then layered them around and behind my photos at different heights and widths to create variety. I adhered all these together then set them aside while I worked on my background.
I wanted to add some mixed media to the plain white background, so I took some distress oxide ink pads and diluted the colour using water and some white acrylic ink. White acrylic ink is great because it mutes bright colours while also making inks more opaque. My colours ended up still being brighter than I wanted, but I’m totally ok with that. I used the packaging technique to add messy splotches of the ink to the white cardstock.
Once the paper was completely dry, I went in with my sewing machine and added lots of cross hatching lines of stitching in a quilted-style pattern. I made sure to add the stitching where it would be visible around my central cluster. Because my photo and card cluster was already adhered together, I could just go ahead and glue it down to the centre of the page in one piece. I ended loving the quilted stitching effect peeking out from behind everything!
I finished off the ‘All I want for Christmas’ card with some small phrase stickers from the accessory stickers – I just love that shiny gold typeface font. I also took a couple of flag accessory stickers and layered them below the lower 3×4 card, plus a tab accessory sticker at the top. I embellished lightly with some chipboard sticker holly leaves either side of my photo, and some shiny chipboard sticker stars cascading down my layout.
Finally I added some puffy sticker holly leaves layered with the chipboard sticker ones, then some tiny puffy sticker stars. I love how this one turned out, I hope you did too. There is a process video linked below on the Cocoa Vanilla YouTube channel if you would like to watch this layout come together. Happy scrapping!
Hello Paperlovers,
Welcome to my new post on the Cocoa Vanilla blog today! It’s Josefine here with a new scrapbook layout. For this layout, I chose a winter layout that I created with the amazing Joyful Collection and was inspired by the Cocoa Vanilla Moodboard.
One of the things that inspired me was the winter photos and the light blue color of course I added some extra colors to my design. With the velum and white gesso splatters, I tried to capture the winter vibe.
I start with a mixed media background that I created with the distress oxide ink. I chose the color “Victorian Velvet” I applied the ink with a stamp to my white cardstock background by stamping several times. This is how I created a stain of ink in the center of my layout. I punched out several butterflies from the design paper, vellum and light pink tissue paper.
I used gold sewing thread and stitched the butterflies together. I also punched out a photo in a butterfly shape. I placed the butterflies in the center of the mixed media background and start decorating using die-cuts, flowers, stars, stickers and wooden buttons.I placed die-cuts, flowers and stickers between the butterflies. I loved how that turned out. Look the gorgeous word strips on my layout and the gold title Memories under the butterflies. I splashed white gesso and gold acrylic paint splatters on top of the butterflies and embellishments.I punched some white twigs out of white cardstock and gave them a winter look with the Nuvo glacier. WoW, such a cool effect! I really love the shimmers. Curious to see more details and exactly how I made the layout! Just hop over to the Cocoa Vanilla Youtube channel for the process video! https://youtu.be/lkJee7SFoG8
I want to thank you for visiting the blog today and hope I was able to inspire you with this layout! I wish you a very happy and creative day today and enjoy watching the process video.
XoXo, Jo
Hi everyone, happy new year! If you are anything like me (4 weeks deep into school holidays), you are having trouble remembering what day it is and are tired of hearing “muuuuuum” for the five hundred and twentieth time today. (Hang in there, we’re past the half way mark!) Fortunately, I do know today is Thursday, because it is actually “Throwback Thursday” and my turn to bring you some fresh inspiration using an older collection. I didn’t go too far back though, because today I am sharing a layout featuring the beautiful ‘Sunkissed’ collection which is still available in the Cocoa Vanilla Studio online store.
For this layout, I wanted to create a mixed media page and decided to use some of my stash of acrylic paint. I love using paint because it is quick, easy, economical, and available in a great range of colours. And even those of you who are not “mixed media people” will usually have access to paint if you want try a technique like this yourself. (I didn’t use any fancy paints – cheap student grade acrylics will do the job!)
The photos I documented on this page are of my two boys taken on the day of their colour run at school. This was not long after they had crossed the finish line and they were both so proud of how wet and coloured they were. (And no, I didn’t bother trying to wash the clothes, they were destined for the bin anyway.) It was the colours of the paint on their clothes that inspired my colour choices for this layout.
As I mentioned above, I used acrylic paint for my mixed media background on this page. I used three different colours which I applied with a small brayer. (This method is great if you are short on time as the thin application means it dries super fast!) I then mounted my painted cardstock on top of the beautiful Good Vibrations striped paper, which created a fun page border.
Next, I added my rainbow arches, which had been fussy cut from a piece of the Bright Side paper left over from a previous project. I cut only the pink, orange and yellow arches (or what I had of them anyway) and stuck them onto my background.
I then created a layered mat for my photos to sit on using a piece of the heart print Feelin’ Fine paper, topped with a piece of the smaller scale cloud print paper from the A5 Paper Stack and finally a scrap of the Summer Lights paper. I also added a small yellow paper doily and some frayed gauze for texture before adding my photos on top.
The next step was to add my title, which I ran along the horizontal strip in my paper stack. To the left of my photos I used some alphabet stickers I had left over from the Love Always collection for the word colour and then to the right, I used the word fun from the Glitter Foam Title Stickers. Look at that gorgeous golden sparkle!
With all the main components in place, it was time to add a few fun embellishments. I chose a number of pieces from the Die Cut Ephemera pack including a flag, umbrella, and a watermelon slice. These were chosen purely based on their colour, but I love that they add a touch of whimsy to the page. I also added several stickers from the Puffy Stickers pack.
I finished off with some phrases from the Accessory Sticker sheet and some tiny black ink splatters. I love how fun and colourful this layout turned out!
If you would like to see exactly how it came together, you can watch my process video here:
Thanks for stopping by so I could share this with you, I hope you are feeling inspired to bust out some of your older Cocoa Vanilla stash now too! Until next time, happy scrapping!
Hello and Happy New Year to all our Cocoa Vanilla Studio friends! It’s Danni here, ready to get started with a brand new year of creative fun. I have lots of photos left over from my holiday celebrations to scrap, so today I am sharing another festive layout using our Joyful collection.
We have several Christmas traditions that have developed over the years with my little family, and one of my favourites is going out for dinner on Christmas Eve for South/East Asian food in our old neighbourhood. The photo I have chosen was from Christmas Eve 2019 where my son learned to use chopsticks for the first time – he did so well!
To begin the page I took a sheet of white cardstock and cut a Christmas tree background cutfile by COAPA Cutfiles using my digital cutting machine. Instead of using the outline cutfile, I took all the negative pieces and adhered them on top of Making Spirits Bright 12×12 patterned paper. This way the patterned paper peeks through all the gaps in the cutfile and creates a different texture than usual. I left some of the white pieces out so a few of the trees were a solid green for interest.
I wanted a fun bold title, and I noticed one of the double-sided 3×4 cards said ‘Christmas Eve’ which was perfect. I carefully fussy cut the letters from the card, then outlined them in black pen to make them stand out. I wanted a pop of red to prevent the green title blending into the green background, so I used the A5 paper stack to add some red paper behind my title and fussy cut around the outside to create a border. I finished off the title with a beautiful piece from the puffy gold title stickers.
I matted my two photos using the A5 paper stack and layered them slightly overlapping each other. Using the die cut ephemera I created three embellishment clusters – one either side of my photos and another at the bottom of the page. I used a cute animal embellishment in each of the clusters because I thought they looked as if they were frolicking through a forest of Christmas trees! I filled out the clusters with small foliage pieces, flags, a tree and a smattering of stars.
I adore the puffy stickers in this collection so I couldn’t resist adding a few puffy stars to each cluster. I used a sticker from the accessory stickers to add a few lines of journaling below my photo, then added a tiny puffy star to this as well. To add some extra details I added a bunch of messy splatters using distress oxide inks in green, pale pink and golden mustard.
I hope you enjoyed joining me for this layout today. Happy scrapping!
It’s Sophie with you today ! It’s almost Christmas !! Who’s ready ??! Who’s been baking like crazy ??!
I have and like every year around Christmas, we prepare tons of different deserts and cookies and pastries ! I had to highlight that on a layout !
I used the beautiful Joyful collection for this page.
I started by creating a soft mixed media background on thick white cardstock on the upper side of the page, where I planned to put my big title.
I bought this title cut file from the Silhouette Store. It’s designed by SAS Creative. I cut the three words on different patterned papers from the A5 Paper Stack. I also did an offset cut on white cardstock to back each letter, and mounted them on adhesive foam before adhering them to the layout.
I teared a big chunk of the “Very Merry” patterned paper that I placed at the bottom of the page to ground my photo.
I embellished around it with beautiful elements from the Joyful Die Cut Ephemera Pack and fussy cut flowers and wreaths from the “’Tis The Season” and “Very Merry” patterned papers.
I fussy cut numerous stars out of the “Making Spirits Bright” paper that I placed around the title, and added a few Wood Buttons as the finishing touch.
Here are more close-ups:
I hope this inspires you ! I wish you a wonderful Holiday Season, with lots of good times with your loved ones !