Mandy here today to share another layout featuring the beautiful Heart & Home collection. For this layout, I documented another family photo from our recent trip to Mudgee. This one is of Mum, my son Isaac, and myself picnicking at a vineyard, and I plan to put this page alongside the layout that I shared last month with photos taken on the same day. I love the way the colours in this collection really bring out the colours in the photo!
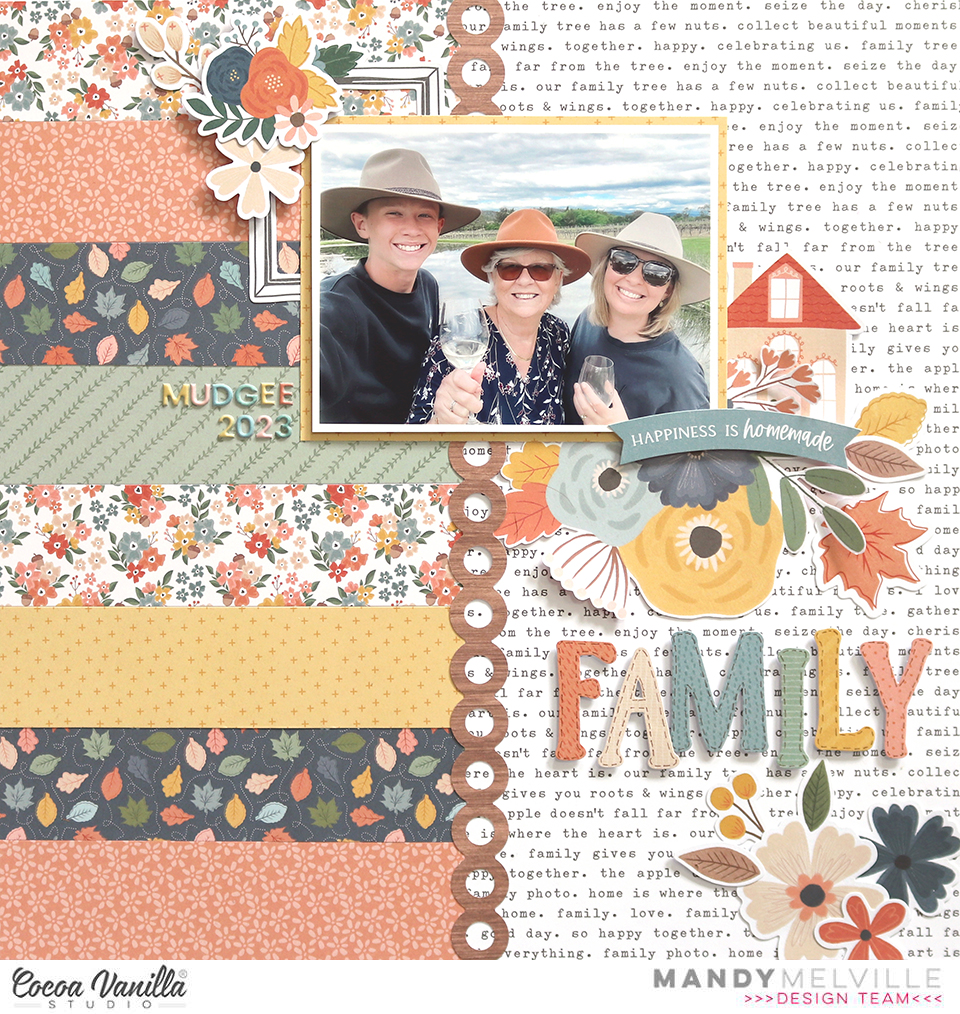
I started this page by cutting up 6 inch x 1.5 inch strips of patterned papers from the A5 Paper Stack. I then adhered these down the left hand side of a sheet of Golden Fields paper (b side). To finish off the background I punched a border strip from the woodgrain Framed patterned paper, and adhered it down the middle of the page where the paper strips meet the text background.
I matted my photo with the yellow paper from the A5 Paper Stack, and adhered it towards the top of the page, overlapping both the paper strips and the text background. Next I fussy cut a floral cluster out of the Bountiful paper, and tucked that under the bottom right hand corner of the photo. I added a few die cut elements to the cluster including some leaves, a house, and a banner. I adhered some items with foam tape to give the cluster some extra interest and dimension.
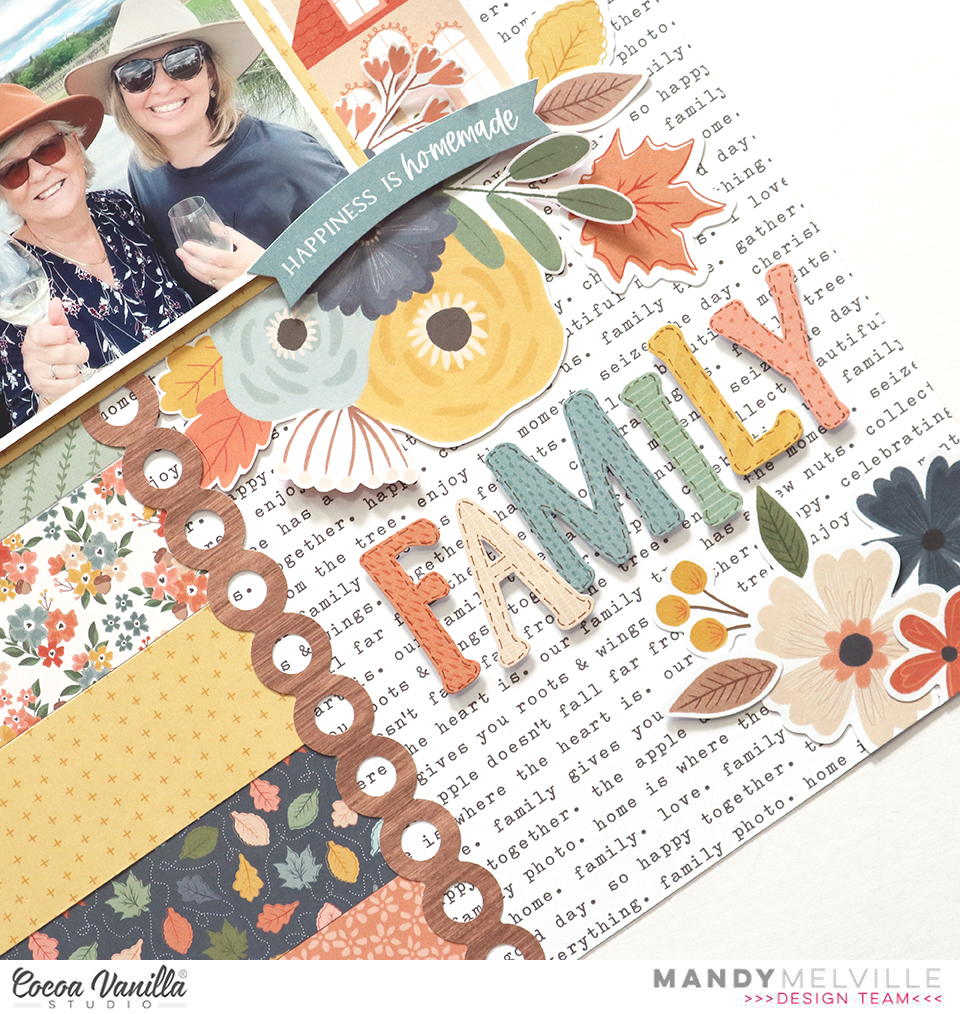
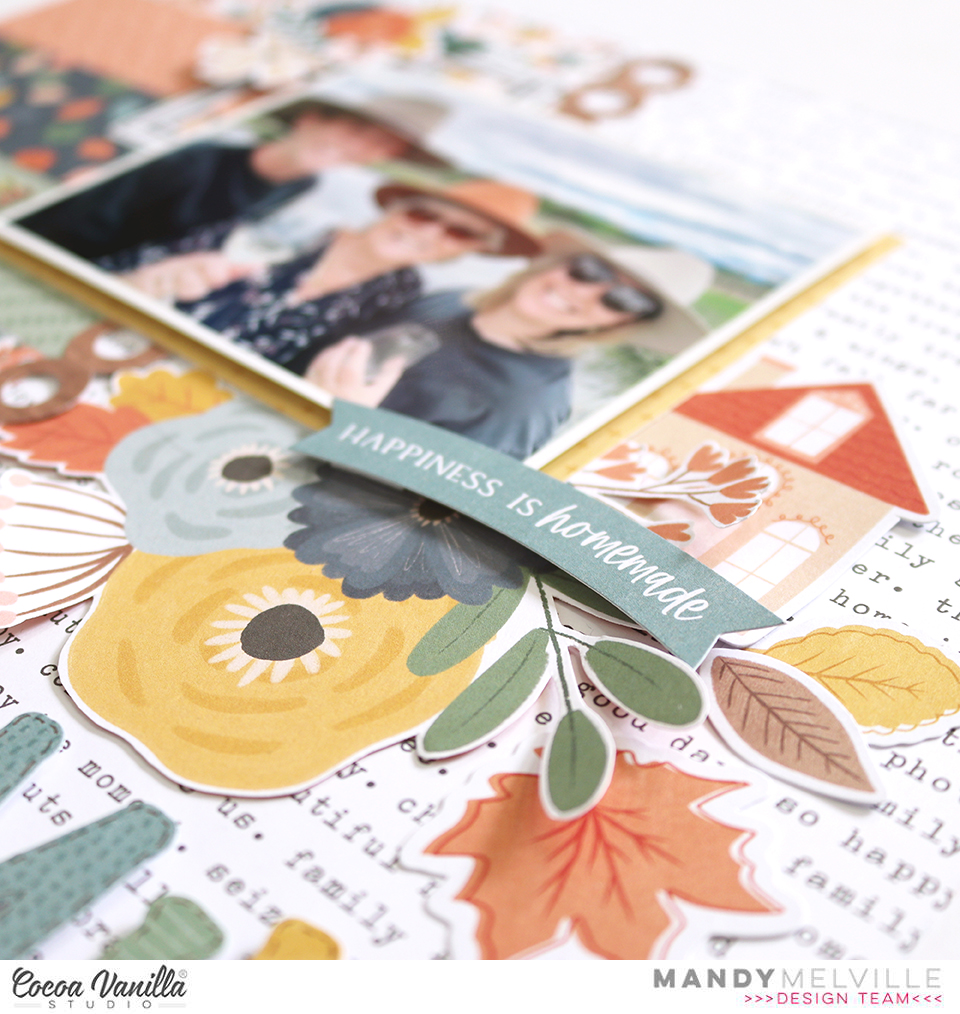
To balance out the larger floral cluster, I added two more smaller clusters to the page. One positioned on the top left hand corner of the photo, and the other in the bottom right hand corner of the layout. The positioning of the clusters gives the layout a diagonal flow, drawing the viewer’s eye from the top left, down through the photo and title, to the bottom right. I used more Die Cut Ephemera, as well as some flowers from the Floral Ephemera pack, to create the second and third clusters. You can also see here that I created a subtitle to the left of the photo using the Mini Puffy Alpha Stickers.
For my title, I chose the word ‘Family’ from the Die Cut Ephemera pack. I outlined the letters with a brown pen and adhered them with craft foam to help them to pop off the page.
Thank you so much for joining me here on the blog today. I hope that you enjoyed taking a look at my layout!
Hello Everyone, it’s Kel here today to share my first layout for the month of October….how this year is flying by!!
For today’s page I’m using Heart and Home and I decided to focus on the cooler tones…here is a look…
To start my page, I made some origami hearts (found a simple tutorial on Youtube) and to add more detail I added some hand stitching …they turned out really cute ! I used them as a feature across the bottom of my page.
I am documenting two pics of my youngest boy from many years ago…he was such a sweet baby. I placed my two photos to the top left of my page and placed paper strips under my photos to ground them to my page. To the top of my photos I added a tab and word phrase sticker from the Accessory Sticker Sheet.
I used the paper ‘Fall Beauty’ to fussy cut a bunch of the butterflies and placed them diagonally from the bottom and right side of the page so they flow up to my photos and draw attention to them. I also stitched some trails behind the butterflies.
Next I added some florals on both sides of my photos and these also have stitching added to them.
Lastly I added my title using a mix of the Puffy Mini Alpha Stickers and a Title with Gold Foil.
I hope you have been inspired today and are having lots of fun with the new Heart and Home collection.
Mandy here today to share another layout featuring the gorgeous new Heart & Home collection. I absolutely love the beautiful colours in this collection and how versatile it is! For my layout today I chose to document some photos of my son from a day that we spent getting out in nature together.
I started my layout with the striped Harvest paper as my background. On top of that I layered a piece of the woodgrain Framed paper which gave a neutral area for me to add my photos and title. Down the left hand side of the page I created a border by layering the Fall Beauty and the Leaf Litter papers and finishing it off with a punched honeycomb border.
To give some extra interest to the photos, and to help them stand out from the background, I added some patterned paper layers behind them. I also adhered the photos at a slight angle which gives the layout a more whimsical feel rather than being too structured.
When it was time for embellishing, I couldn’t resist fussy cutting some of the beautiful floral clusters out of the Bountiful patterned paper. I added the first cluster in the top left hand corner of the page, layering some smaller florals from the Die Cut Ephemera pack with it, as well as a small banner sticker to finish it off.
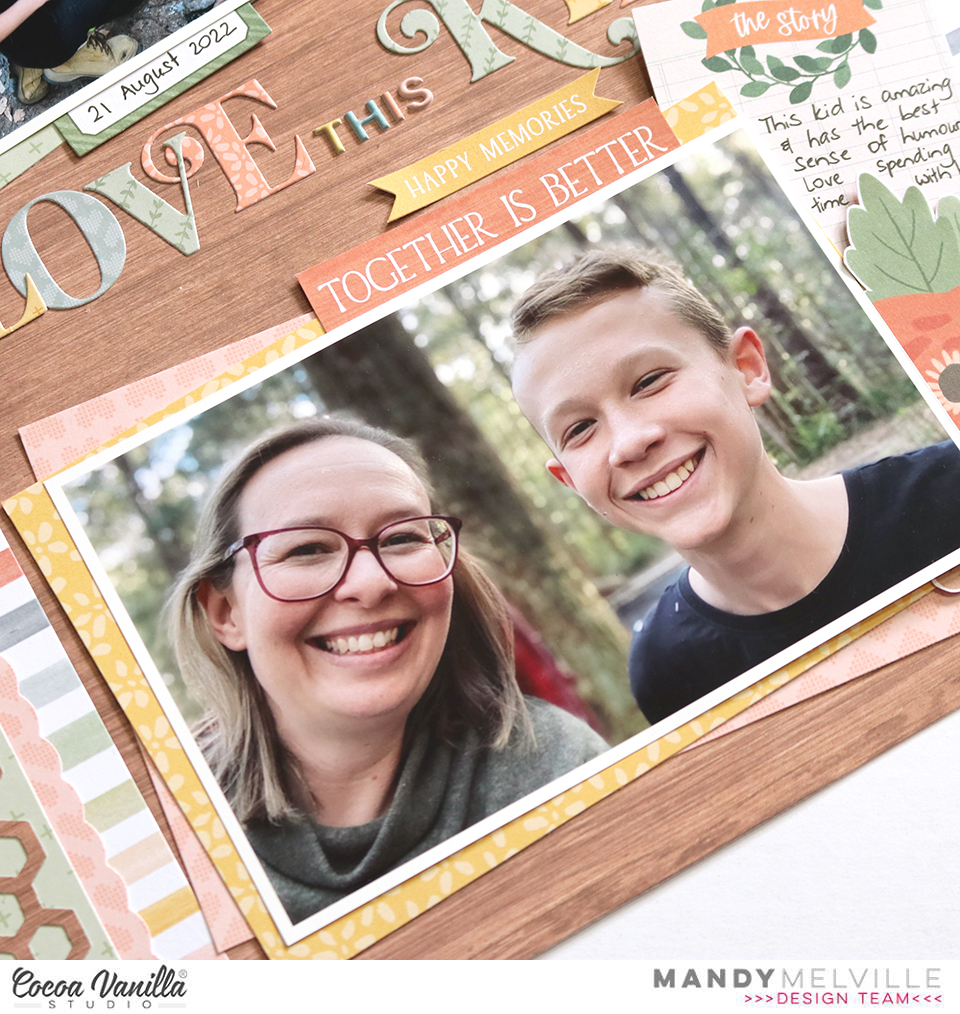
Next I added another floral cluster in the bottom right hand corner of the page. This balances out the first cluster and gives the layout a diagonal flow, drawing the viewer’s eye down through the photos. In this cluster I again used more fussy cut florals, as well as a journaling piece from the die cut ephemera pack.
For my title, I took inspiration from the ‘Family’ die cut pieces in the ephemera pack. I love that each letter is a different colour, and decided to create a similar style title using some metal alphabet dies from my stash. I cut each letter out of a patterned papers from the A5 Paper Stack and combined it with Mini Puffy Alpha Stickers. The title ‘Love this Kid’ seemed like the perfect sentiment for these photos!
I finished the layout off with a couple more stickers and the ‘Together is Better’ piece that I fussy cut out of the Gather patterned paper.
Thanks so much for joining me here on the blog today. I hope that you enjoyed taking a look at my layout and found some inspiration!
Hello and welcome back everyone. It’s Kellie here today sharing another page using the new Heart and Home collection.
Today I am documenting some silly family pics …here is my page…
I recently saw a cut file from Kelly Made It on her blog which reminded me of some of the stitched icons found in this collection and I thought it would work perfectly with this range so I chose matching embroidery threads and made them a feature on my page… love how this worked out.
I used the paper called ‘Harvest’with the stripes to add to the top of my page and another smaller strip to the bottom… I love how this brings in all the colours of this collection. I then bought in a strip of the woodgrain paper called ‘Framed‘ to separate the stripes from the stitching.
I placed my 3 photos vertically down the right side of my page and popped them on the ‘Gather’ paper, distressing the edges to give some dimension. I also added some of the cut aparts also from the ‘Gather’ paper to add to my photos.
Next I worked on my title. I cut out a frame from the ‘Framed’paper and used the ‘Mini Puffy Alphabet Stickers’ to add my title. I popped the frame up on foam pads to add dimension then added some florals which were cut from the ‘Bountiful’ paper to tuck in behind the frame.
I hope you found some inspiration today and pop back regularly to see what the Design Team has been working on.
Mandy here with you today and I’m so excited to be sharing my first layout using the stunning new Heart and Homecollection! I absolutely adore the soft muted colours and lovely ‘homely’ feel of this collection. For my first layout, I decided to document a recent photo of my hubby and kids taken on Fathers Day.
As this layout is focused on my hubby on Fathers Day, I decided to give it a bit more of a masculine feel by narrowing the colour palette down to the blues, greens and browns in the collection. I chose four of the patterned papers – Harvest, Golden Fields, Leaf Litter and Fall Beauty – and cut each into a large triangle before piecing them together to create my background. I matted my photo with the woodgrain patterned paper from the A5 Paper Stack and adhered it in the middle of the page using craft foam to help it ‘pop’ off the page.
To embellish the layout I created three floral clusters which create a visual triangle and help to draw the viewer’s eye to the photo. The first cluster underneath the photo includes some flowers and sprigs from the Floral Ephemera pack, as well as a label sticker that I added the date to, and a die cut phrase. I also fussy cut an acorn and leaf from the Leaf Litter paper to add to the cluster. Underneath the photo I added a sub-title using the sweet Mini Puffy Alpha Stickers.
Next I created a cluster to the left of the photo. Again I used Floral and Die Cut Ephemera, and the same colours that I used in the first cluster. To create some dimension in the cluster, I tucked some elements underneath the photo and adhered some overlapping the edge of the photo.
I created a third and final cluster at the top of the page using similar pieces that I’d used in the first two clusters. By repeating colours and elements throughout each of the embellishment clusters it helps to make the layout feel cohesive and balanced. I also finished off each cluster with a Puffy heart Sticker. Above the photo I added my title using one of the stunning words from the Gold Titles pack and underneath the title I added a final finishing touch with a tiny word sticker that says ‘family is everything’.
Thanks so much for joining me here on the blog today. I hope that you enjoyed taking a look at my layout featuring the beautiful new Heart and Home collection!
Hey everyone! This is Niki (@nikiclairecreates) and I’m excited to be back with another project and process video Guest Designing for Cocoa Vanilla Studio! This time I have made a mini album. It is a box in the shape of a rainbow, with an arch shaped mini album inside!
To make the box, I started with the front and back covers. I hand drew a rainbow onto a piece of scrap cardstock and cut it out and then used this as a template. I traced around it onto lots of different papers from the A5 paper stack and cut them all out, then distressed the edges and layered them all together. I then mounted this onto a piece of white card and cut out leaving a white border. I added pink hand stitching around the edge using embroidery thread I did all this twice so I had identical rainbows, one for the front of the box and one for the back.
To make the clouds I did the same: hand-drew a cloud onto a piece of scrap cardstock and cut it out to use as a template. I drew around it onto that super-cute ditsy heart print which I cut out and mounted onto white card. I added pick stitching around all of the clouds, then added them to my rainbows.
To make the inside part of the box, I used yellow cardstock to make an insert. I make these really simple, just two pieces of cardstock cut and folded – you can see more details on the process video.
With the box assembled, I moved on to making the mini album itself. I again created a template from white cardstock for the pages and cut that out. I then used this as a template for all pages. I drew them onto more papers from the A5 Paper Stack and cut them out. I then stuck them all together, back to back, to make a super-easy album, which I secured around the outside with ribbon.
I embellished the front of the box with a Chipboard Title, a few pieces of Floral Ephemera, a fussy cut butterfly and some phrase stickers. I also added the title ‘Rainbow Run’ using those adorable Mini Puffy Alphabet Stickers, to one of the clouds.
To embellish the album itself, I wanted to include the wooden medal from the Rainbow Run (this mini album is all about a sponsored run I took part in) and the actual ribbons from the medals at the event. I managed to incorporate those onto the front page and the ribbons are what tie the album together I think it’s really great to include momentums like that within albums if possible and these were perfect!
The album itself is quite interactive – I have 40 photos to include, so it had to be! Some pages have photos that flip up or flip out, there is a ball-chain containing 11 photos, there is also a pocket page. On one of the pages, I made a shaker pocket: I cut a piece of acetate to the same size as the page, pierced holes all the way around the edge and chain stitched with the same pink thread used for the album covers, trapping the sequins inside. I love how this looks!
I used more papers from the A5 paper stack throughout the album to decorate the pages and mount my photos. I’ve also used lots of Floral Ephemera,Phrase Stickers and several of the puffy heart stitchers throughout the album. I also used some of the other Chipboard Titles to make feature pages.
I absolutely love how this turned out, it is just adorable and so pretty to look at and I had the perfect photos for a rainbow album! I really hope you have enjoyed it too. I have made a process video of this mini album, which includes a flip through too, you can watch it here: https://youtu.be/jvOZK-Qy43o . Thank you so much Cocoa Vanilla Studio for having me as a Guest Designer, I have loved it!
Mandy here today to share a new layout showcasing the fabulous new Happy Days collection. This week our design team are sharing projects that feature the Puffy Alpha Stickers. My favourite way to use these sweet little alphas is to combine them with a larger alpha to create a longer title. This is exactly what I did on this page that documents a selfie of my hubby and I.
I started this layout off by trimming down a sheet of white cardstock and matting it on the gorgeous magenta Flutterby paper. I added a doodled border around the white cardstock to add some further definition and interest. Next I cut two triangles, one larger than the other, out of the beautiful yellow Feel Good paper, and adhered these on each side of the page. I matted my photo with a paper from the A5 Paper Stack and adhered that over the larger triangle on the left hand side of the page.
I love all of the different colour combinations that can be used from this one collection, and for this layout I decided to focus on the teal, magenta and yellow. I chose flowers in these three colours from the Floral Ephemera pack to create my floral clusters. To create interest and dimension I love to layer some flowers under the photo and others on top. I added one cluster to the top right hand corner of the photo, and another to the bottom left.
I created a third cluster in the bottom right hand corner of the page, over lapping the smaller yellow triangle. Again I created dimension within the cluster by adhering some elements with foam tape.
As I said, I love to combine the Mini Puffy Alpha Stickers with words from the Chipboard Titles. By using the mini puffy alphas, it enables me to create a longer title that also doubles as my journalling. These sweet little alphas are so fun and colourful and add so much interest to the page!
I finished the layout off with some cute banners in the top right hand corner of the page, a couple of little phrase stickers from the Accessory Sticker Sheet, and of course a sprinkling of hearts from the Die Cut Ephemera and the Puffy Sticker Pack.
I hope that you enjoyed taking a look at my layout and seeing how I used the Mini Puffy Alpha Stickers on my page. Thanks so much for stopping by.
Hi everyone, it’s Sue Plumb here and I am SO excited to be sharing my first design team project using the brand new ‘Happy Days’ collection. I am sure by now you have seen the collection in full (either here on the blog or in person), so I know you will agree with me when I say how gorgeous it is! All those bright, vibrant colours really do make me happy.
For my first layout I decided to document some recent happy photos I took – my daughter on her 15th birthday. She was ecstatic to receive her first pair of “Docs” (Dr Marten boots) as a gift – definitely a happy day for her.
I chose to start with the yellow plaid pattern on the B side of the “Feel Good” paper, which is the cut apart sheet for this collection. I didn’t really want to sacrifice the cut apart first up, but I could not resist that gorgeous happy yellow for my background. To add a little extra colour I added some teal acrylic paint using 2″ wide brush and the dry brush technique. Initially I had planned for the brush strokes to be horizontal on the page, but after spinning the page, I decided I like them better vertical.
Next, I started building my paper layers. I matted each of my three photos using the sweet strawberry print on the B side of the “Lush Blooms” paper. I also used an extra piece of this paper to place horizontally across the page as an anchor point for my photos. I tore along one edge to add a textural element. I topped the strawberry paper with a thin stripe of plum purple, which was cut from the top edge of the striped pattern on the “Sunshine Lollipops” paper. I then added some frayed gauze and an aqua paper doily before adding my photos on top.
Now it was time to start embellishing my page. I couldn’t resist reaching for the gorgeous florals from the collection; so I used a mix of flowers fussy cut from the “Lush Blooms” paper and pieces from the Floral Ephemera pack. The first cluster I created was around the top left corner of my photos. I also used a small banner piece from the Die Cut Ephemera pack across the top edge of my photo.
The second cluster I created was below the centre photo and here I used a larger fussy cut floral piece with foam tape behind it to add a little height. (I had already planned at this point that my title was going to go alongside it, even though I hadn’t added it yet.) With two clusters in place, it was time to add my third cluster to balance my page.
The position of the last floral cluster was alongside the photos on the right edge. The positioning of this final cluster completed my visual triangle around the focal point of my page. Again, I used some foam tape to create dimension.
With all the flowers in place, I then set about adding some text to the page. I chose the die cut hello flag from the ephemera pack to place along the bottom edge of my main photo. This formed the first part of my subtitle, which was Hello 1st Docs, with the letters for the second part coming from the Mini Puffy Alphabet Stickers pack. The main part of my title, So Awesome, was using words from the Chipboard Titles pack.
At this point it was simply a matter of a few finishing touches. I created a small cluster along the bottom edge of the page using a scrap of paper, a flower, a phrase stickers from the Accessory Sticker sheet and a sweet little heart shaped Puffy Sticker. I added a couple of extra phrase stickers and heart puffy stickers to the page as well. I also added a die cut butterfly (I am sure you already know how much I love them) and the final finishing touch was one of the gorgeous Puffy Hearts stuck directly onto my centre photo. Oh, and a little black ink splatter.
And that was it!! I hope you love my layout and it inspires you to get creative too. Even if you don’t have the ‘Happy Days’ collection yet, grab out some other Cocoa Vanilla goodies and get busy! ‘Happy Days’ is already shipping to retailers so keep an eye out at your favourite store.
Mandy here with you today to share a new layout using one of my all-time favourite collections, Daydream! I adore the pretty colours and sweet florals in this collection and I can’t help coming back to it time and again. The photo that I chose for this layout is one of my Mum and youngest daughter, taken recently when we enjoyed a fun girls day out, op shopping and lunching!
The gorgeous wreath on the Daisy Days paper is one of my favourites, and it was the perfect way to showcase a special photo such as this one. I decided to add some extra interest to the background by using the Sun Shower paper to frame the wreath. I did this by cutting a wavy circle out of the middle of the paper and then laying it over the wreath paper.
Next I matted my photo using one of the papers from the 6 x 8 inch Paper Stack and I adhered it at the bottom of the wreath. I added some extra die cut flowers around the bottom of the photo, adhering them with foam tape to give them some nice dimension. I also added some leaves from the These Days Floral Ephemera to the cluster, and I finished it off with a Wood Epoxy Button, also from the These Dayscollection.
I love combining different alphas to create my titles and on this layout I chose to use a combination of the lovely Mini Puffy Alphas from the These Days collection, with a word from the Daydream Die Cut Titles. My title ‘Sweet Moments’ was the perfect sentiment for this photo. I added my typed journaling strips underneath the title.
I finished the layout off by adding a couple of sweet little butterflies that I fussy cut from one of the 6 x 8 papers, and I also tucked one of the lovely Puffy Hearts into the cluster around the photo. I love the texture that this adds to the page!
Thanks so much for stopping by today! I hope that you enjoyed taking a look at my layout, and that you found some inspiration.
Mandy here today to share an Easter themed layout with you! I used a combination of two of my favourite collections for this page… These Daysand Daydream. These collections work beautifully together, and the soft pastel colours in both collections were perfect for an Easter themed layout. I documented a photo of my kids from last Easter, all ready for their Easter Egg Hunt!
I started my layout off with a sheet of white cardstock as my background, and then cut a 2 1/2 inch wide strip of the green These Days Family Tiespaper to layer across the bottom of the page. I cut the top edge of the paper in a wavy line to make it look a bit like a grassy mound for my Easter basket to sit. Next I cut a 1 inch wide border out of the yellow Daydream Sun Shower paper, and layered that over the top of the background. I added some machine stitching around the page, just inside the yellow border, to give the page some additional texture.
For my Easter basket I used a cut file from The Cut Shoppe. I cut it out of white cardstock and backed it with patterned papers from the These Days A5 Paper Stack. I also embellished in and around the basket with flowers from the Daydream Die Cut Ephemerapack, as well as some floral clusters that were fussy cut out of the Daydream Garden Variety paper. The basket was adhered using craft foam for added dimension.
Next I matted my photo with the These Days Family Tiespaper and adhered it to the the right of the Easter basket. I added a little banner from the Daydream Accessory Stickers to the top right hand corner of the photo, and then created another floral cluster to the right of the photo using flowers and leaves from the Daydream Die Cut Ephemerapack.
For my title I used the ‘Happy’ Die Cut word from the Daydream collection combined with Mini Puffy Alpha Stickers from the These Days collection. I love all those pretty colours in the alpha stickers, and that sweet font! I arranged my title in a curve to follow the shape of the handle on the basket.
To finish the layout off I added some typed journaling strips underneath the photo, and I sprinkled around some sequins from the Daydream Sequins and Flowers pack.
Thanks so much for stopping by today! I hope you all have a very Happy Easter!