It’s Sophie on the blog today with a new page to share!
This time I used the beautiful Daydream collection.
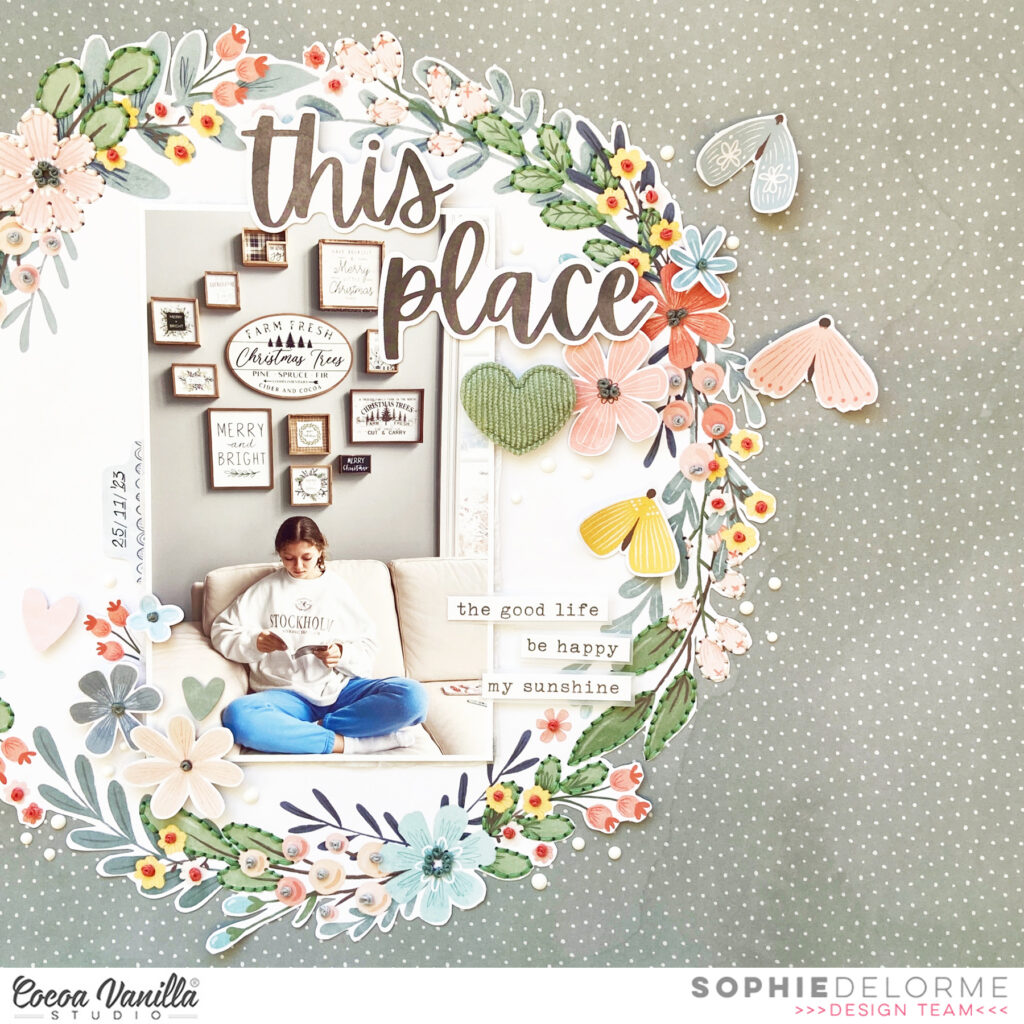
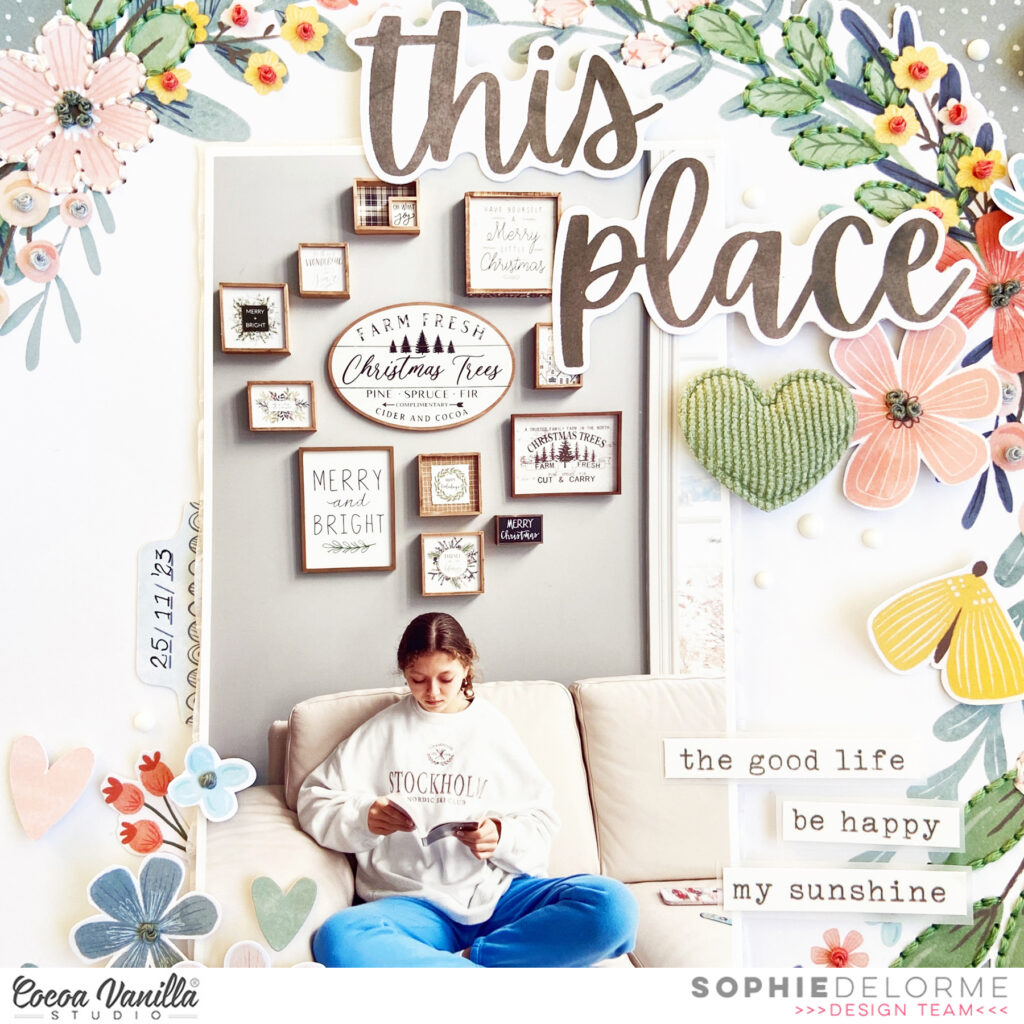
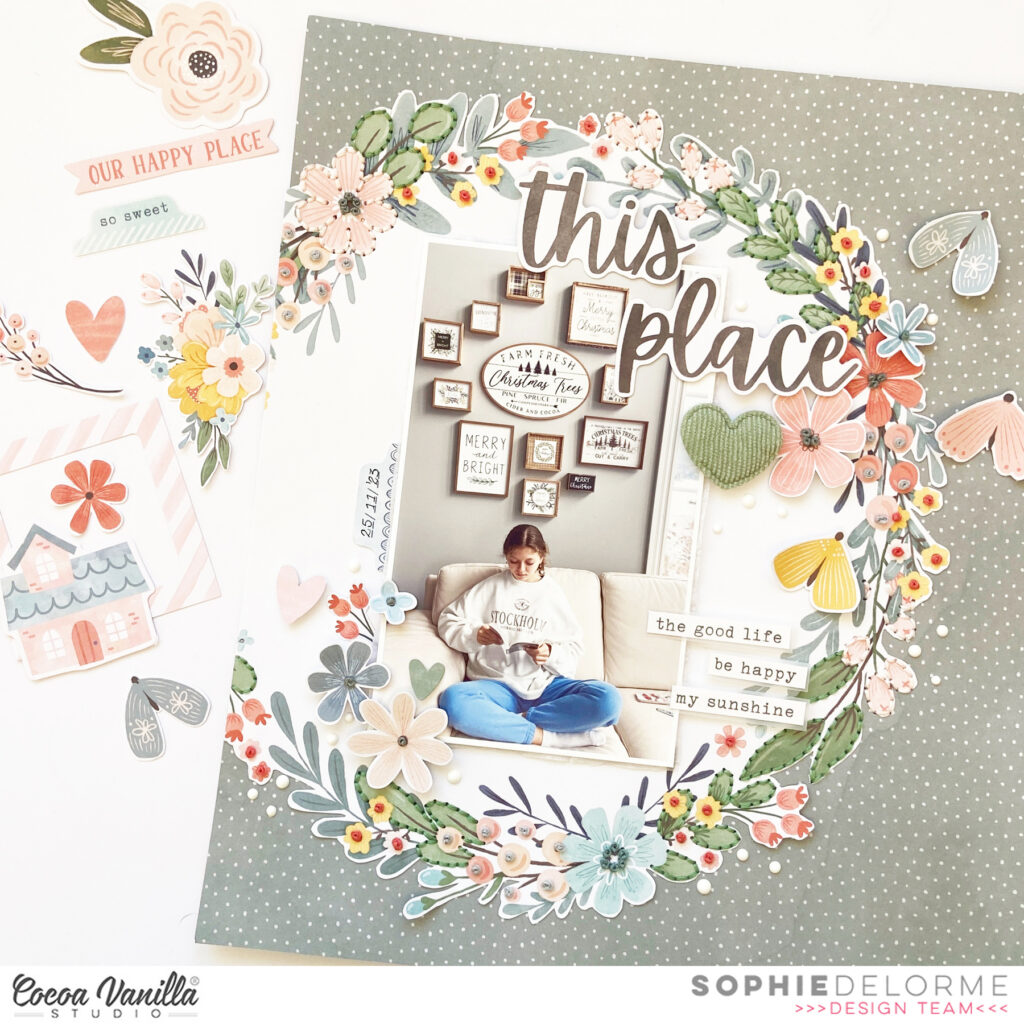
I wanted to use the wreath paper named “Daisy Days” for so long now. I fussy cut the outer side of the wreath and put most of it completely to the left of the “Garden Variety” patterned paper.
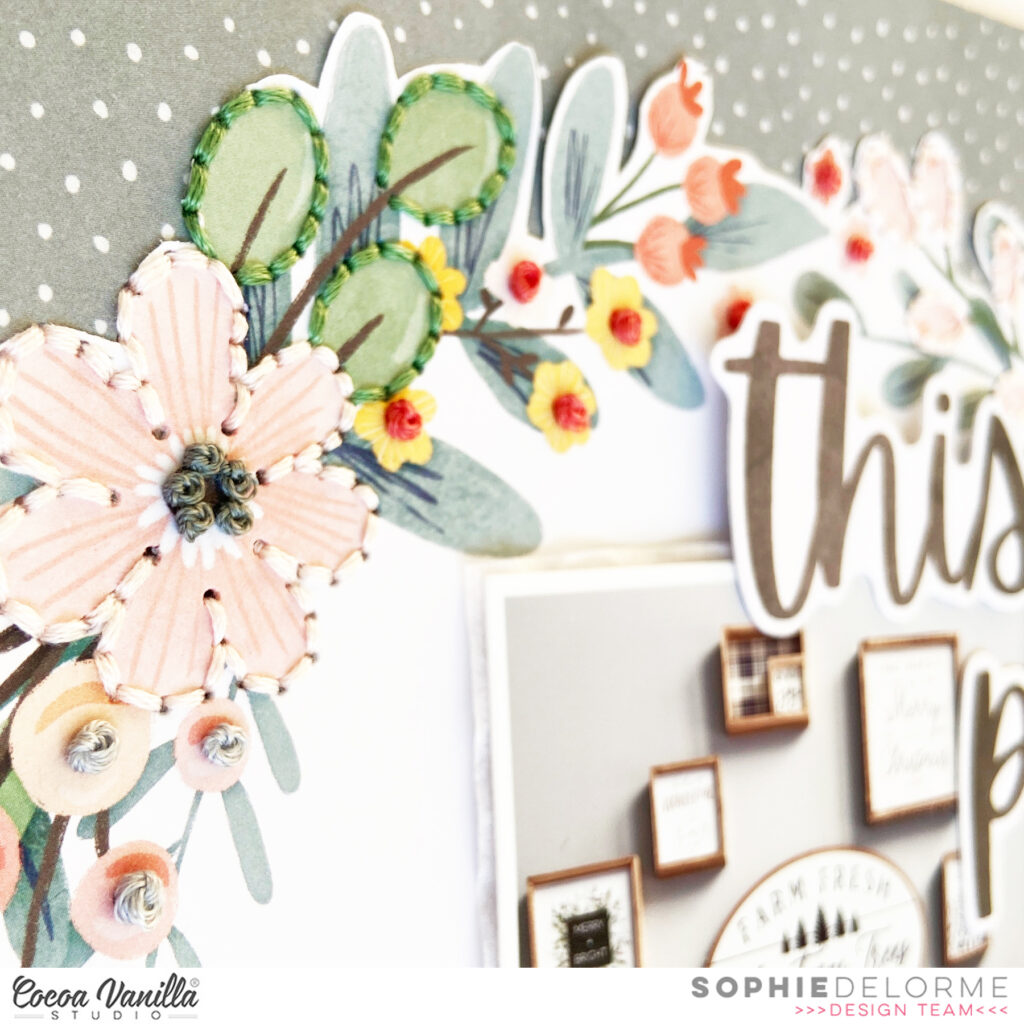
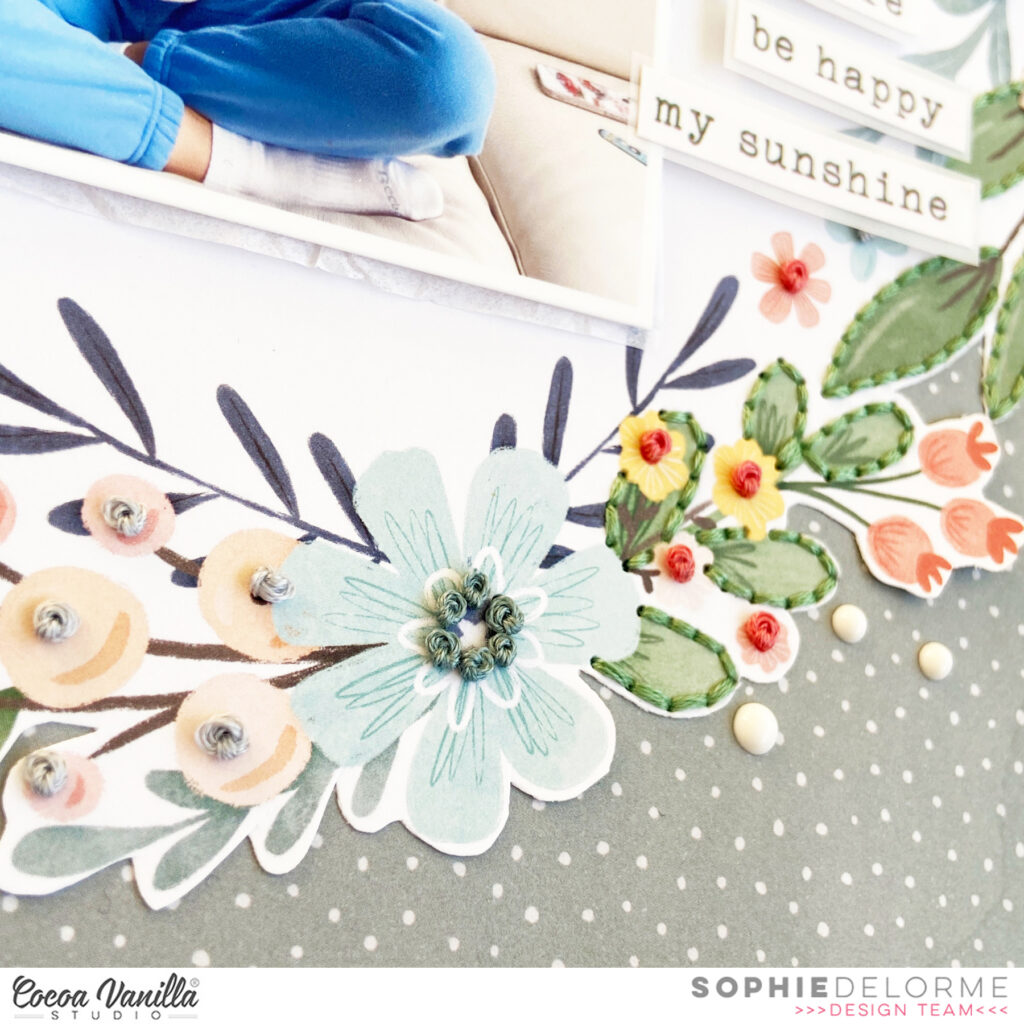
Then, I added some handstitched details to the leaves and flowers of the wreath, for a delicate extra touch.
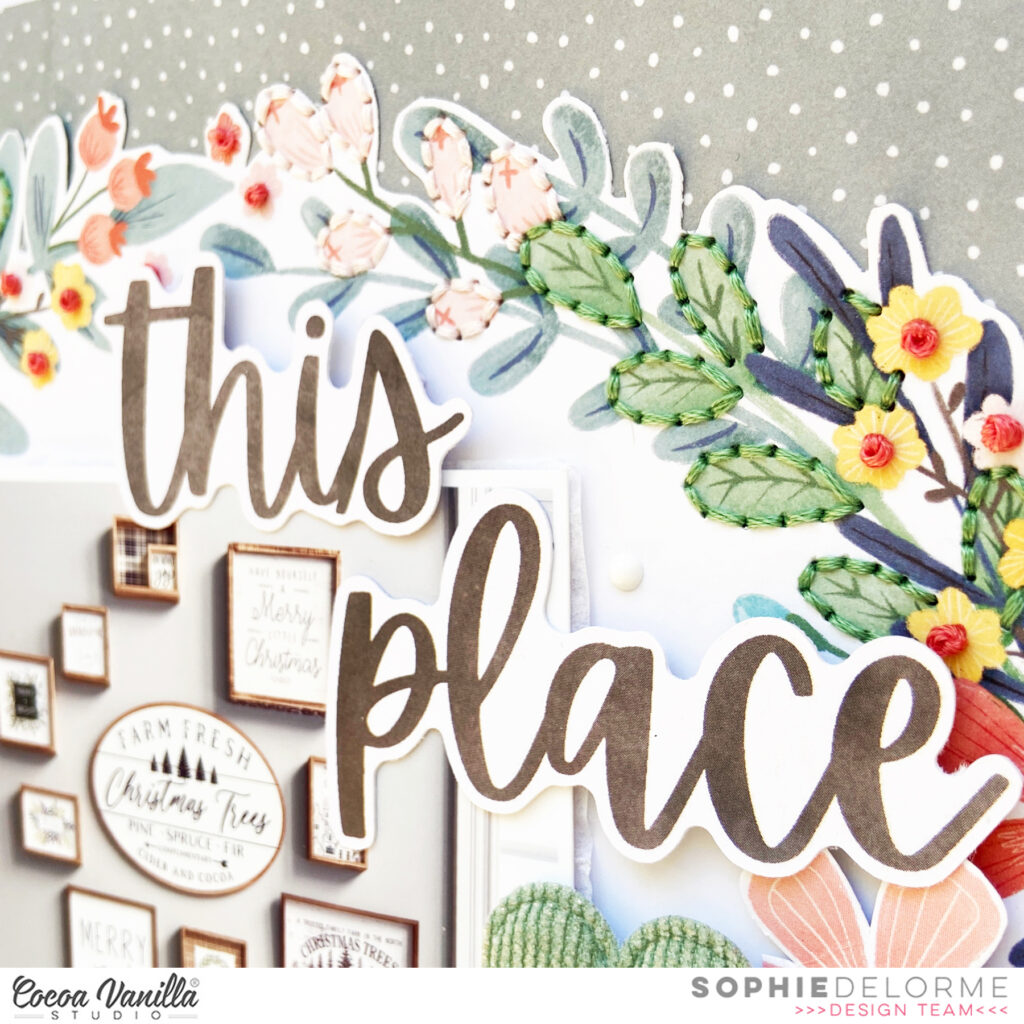
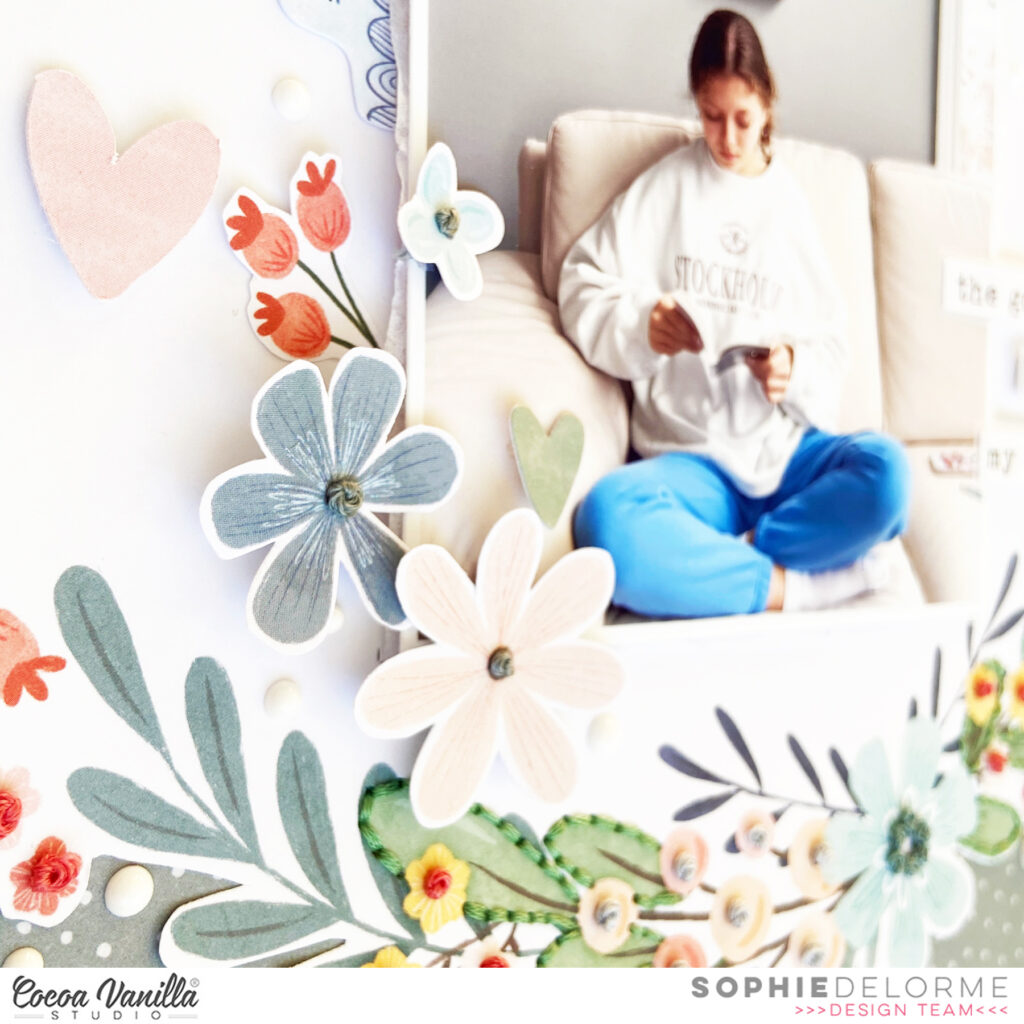
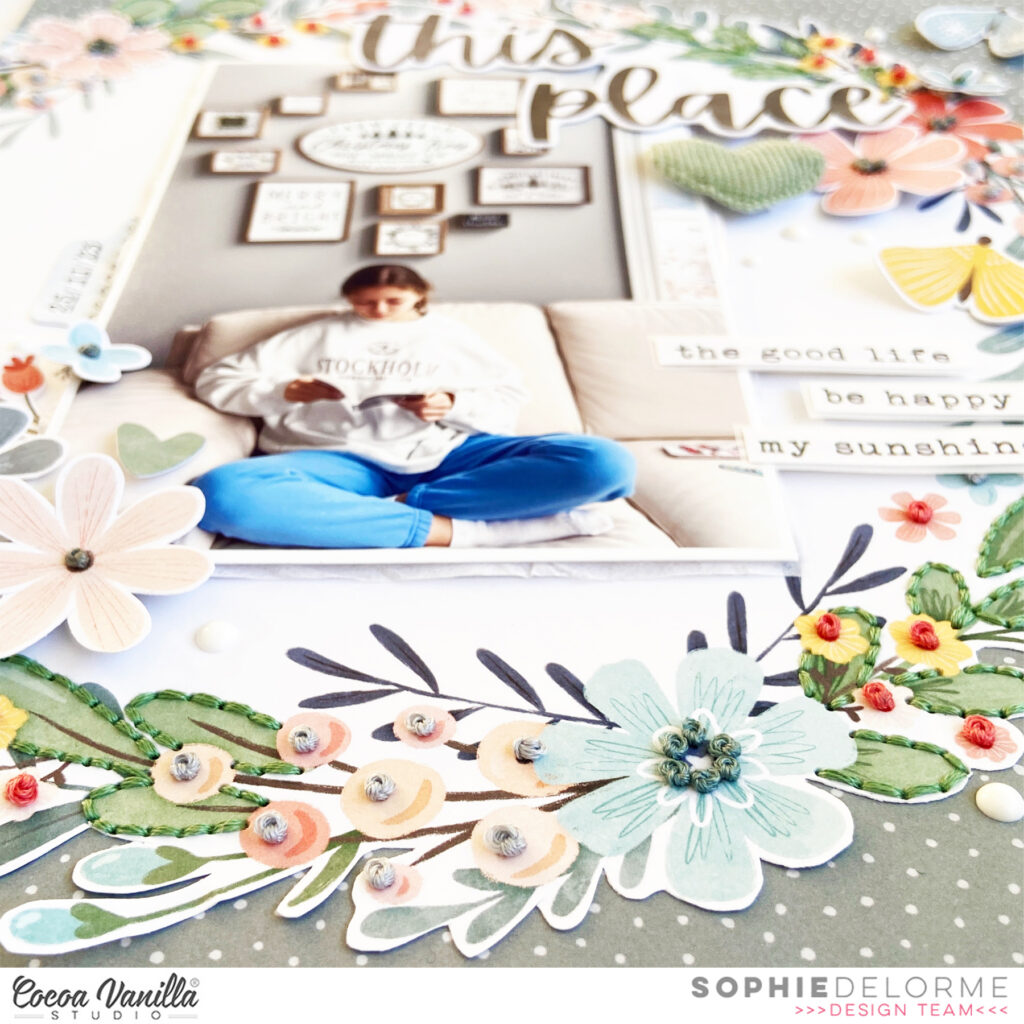
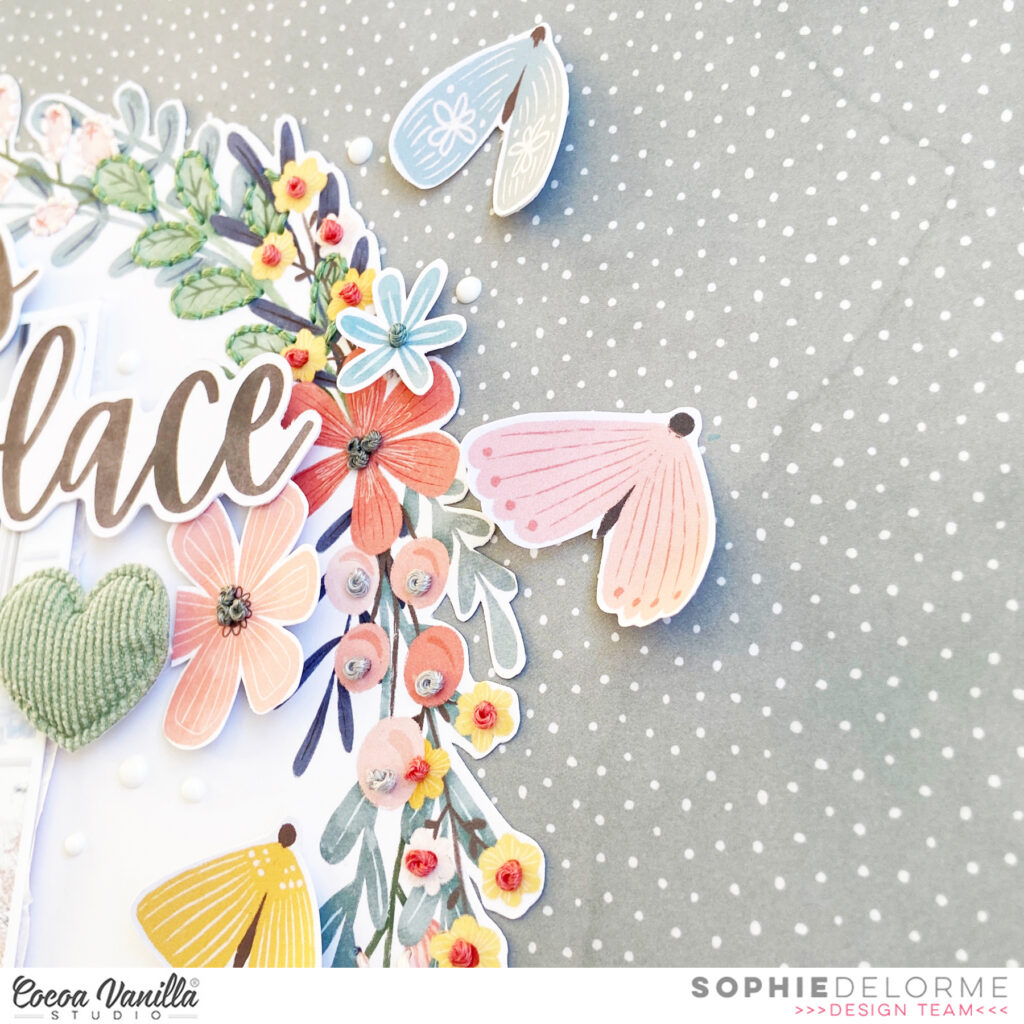
I placed my photo in the center of the wreath and used the Daydream Die Cut Words for my title. I also placed a beautiful Puffy Heart next to the photo, and some fussy cut butterflies here and there around the page.
You can see more close-ups here:
This page came together in no time at all. It is very simple, but sometimes all you need is beautiful patterned papers and a few embellishments to make your layout stand out.
Hello Friends. We are only three days until New Year so it’s a perfect time for all the summaries of year 2023. That’s why I want to invite you for a short journey through my favourite layouts from 2023 that I made with wonderful CVS collections. I picked four of them – pages I had the most pleasure making. Let’s dive into them!
This page was made with “Daydream” collection mostly. I focused on pattern paper, filled with flowers and went crazy with fussy cutting. Next step was to arrange a big bouquet using all those florals and butterflies. It’s a perfect recipe for using up the leftovers of any CVS collection.
You know I like adding some mixed media to my projects and here I played with vividly colored watercolor brushes. Scrapbooking memory from our trip to Barcelona using bits and pieces from “Sunkissed” collection was a pure joy.
After the summer, there comes fall and another mixed media layout. This time I reached for newest “Heart & Home” collection and wonderful, warm color palette. Die cutting bunch of leaves from pattern papers is always a good idea! It’s a perfect way to use up scraps or smaller paper pads.
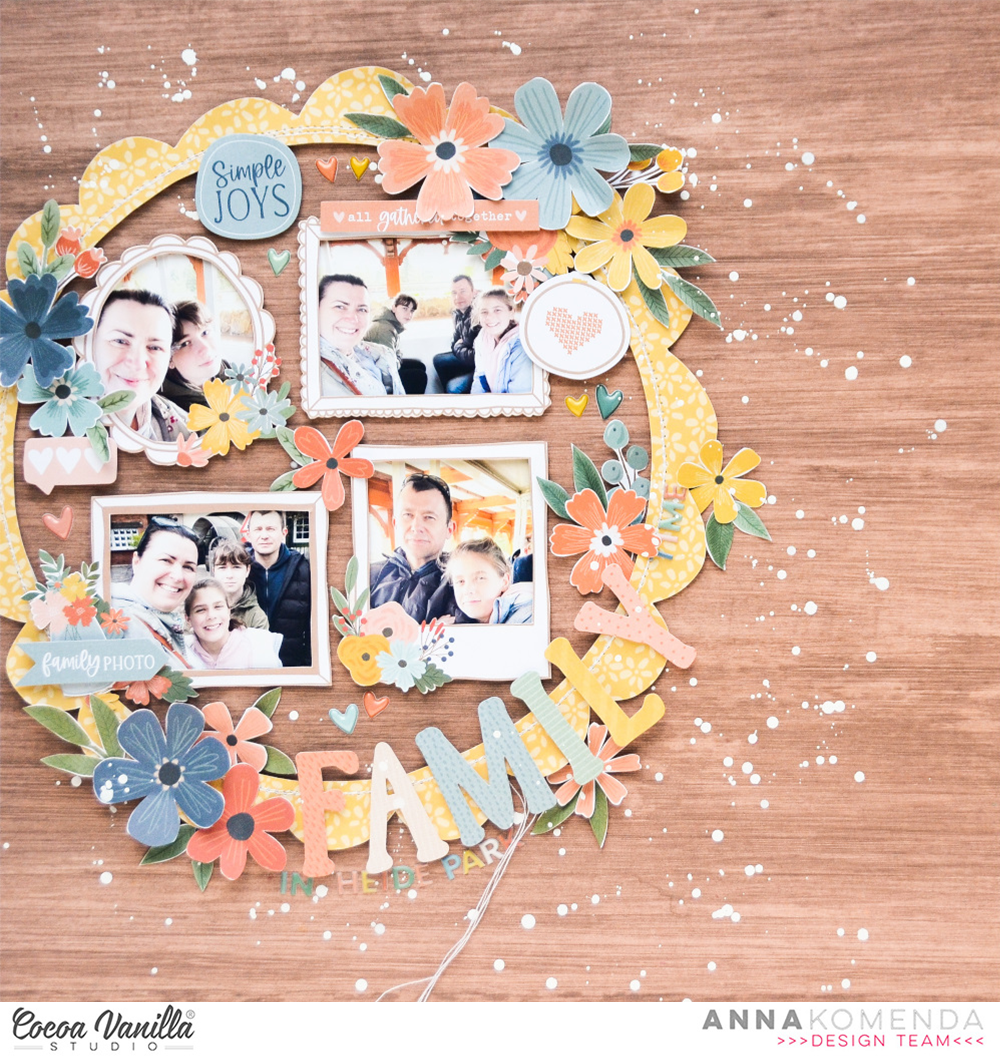
Last layout I wanted to share with you is also made with “Heart & Home” collection and it documents one of our family trips. I reached for one of my all time favourites – wooden pattern as a background of the page. Little doodled frames were a perfect match with my photos.
I can’t wait to see what Zoe prepared for upcoming year 2024. Whatever it will be, I am sure it will look amazing as always. I know you are waiting for new line as impatiently as I am!
Thank you so much for spending your time with me and see in 2024! Sending you lots of grean New Year’s wishes!
It’s Tarrah back with you for the last time this year sharing my favourite layout created in 2023!
Like some of the other design team members, my favourite layout of this year was created using the gorgeous Happy Days collection! Don’t you think there is something about the rainbow colours in the Happy Days collection that really catches the eye!? I sure do!
So besides the gorgeous colours in the Happy Days collection and placing vertical strips in rainbow order, I wanted to make the strips a little different so I decided to score lines in the strips and then fold them in a concertina fashion to create a zig-zag effect. I love how effective this looks against the white cardstock!
Another of my favourite things to do is to embellish my layouts in a tone on tone fashion. I chose co-ordinating embellishments for each colour and added them on top of the strips of paper and also tucked into the top and bottom of the strips as well. I used lots of various embellishments like puffy shapes, ephemera, puffy fabric hearts and accessory stickers.
I placed my title in the middle along with the gorgeous photo of my niece! Another thing that I love is that photo of my niece! Her outfit was perfect for this collection! I love how the rainbow colours in the collection bring out the colours in her jacket.
Have you got the gorgeous Happy Days collection? If you have, I hope you are inspired to use it up and create some cute projects with it?!
Thanks so much for stopping by the Cocoa Vanilla blog! I hope you have enjoyed the inspiration from myself and my fellow design team members throughout the year? Looking forward to sharing more Cocoa Vanilla projects with you again in the new year!
Merry Christmas and a safe and happy new year to you all!
It’s Sophie on the blog today with a new page to share!
I went for another Holiday layout as we seriously approach Christmas Day!!
I used the Merry & Bright collection and a white cardstock as my background.
I backed the photo with a beautiful diagonal stiped paper and placed a Pocket Card right next to it that serves both as my title and journaling.
I created a cluster of die cut Christmas trees all around it, with fussy cut flowers, a few ephemeras and a beautiful Flair Button from the collection.
I also added three Christmas ornaments and a label to stamp the date.
Here are more close-ups:
I love the result, and hope you do too!
Enjoy your Christmas holiday, I will see you again with a new layout in 2024 !!
Hey y’all! Laura Alberts back again with a fun family layout using the new Heart & Home collection. I love this sweet photo collage style and squeezed five 2×3 inch photos on this page. Heart & Home perfectly matched these photos, and they perfectly capture my family and their love of food!
I created three columns in the center puzzling together photos, cut-aparts, and icons from the ephemera pack, fussy cut from patterned papers, and the puffy stickers. Along both of the sides, I spread out vellum florals, fussy cut florals, and dotted Nuvo drops.
I added word phrases from the cut-apart sheet and the 6×12 sticker sheet to add interest on top of and around my photos. Love adding these little messages to my pages! The gold foil titles add a stunning elegance to this layout and ties it all together.
The journaling for this layout focuses on the big milestone of this event, the first in my new home! Love family-focused collections and I had a blast playing with this one!
I hope you enjoyed this fun layout and it inspires you to try collaging your photos together!
It’s Tarrah back with you and today I am sharing a new Christmas layout featuring the gorgeous Joyful collection!
I have documented another gorgeous photo of my niece from a Christmas photo shoot when she was younger, I just love this photo so much! The Joyful collection was perfect for this photo with the super cute animal icons, I was able to add the adorable reindeer, bird, squirrel and rabbit.
I chose the ‘B’ side of the Deck the Halls patterned paper for my background, I love the teal and stars on this paper! I trimmed it down and adhered it to a plain sheet of white cardstock and then added machine stitched border around the edges. At the top of the page, I placed one of the blank rectangle stickers from the Accessory Sticker sheet and layered some puffy stickers over the top. I wanted to make a large cluster in the centre of my page and decided to first choose a Cambridge doily to lay down first, I love the softness and texture that this brings to the layout. I then layered some of the 3′ x 4′ journal cards under the photo and adhered these down on top of the doily using craft foam to add dimension. At the top of the journal cards, I added my Joyful title from the gold puffy titles. These are sooo gorgeous! I love the different word choices and that you can mix it up if you want to! I placed one of the glitter gold stars and one of the banner puffy stickers!
From the Very Merry patterned paper, I cut out the Magical Moments phrase and adhered it below the photo and I placed one of the word stickers from the Accessory Sticker Sheet above the photo. On the right of the photo, I added some embellishments including the round journal spot from the Accessory Sticker Sheet, a stocking from the chipboard set, some candy canes in die-cuts and puffy stickers, the super cute bunny puffy sticker and one of the lovely epoxy wood buttons.
On the left of the photo, I placed the gorgeous reindeer chipboard piece and layered both a star and a bird puffy sticker. I love to layer embellishments on top of other embellishments! I also tucked in behind the reindeer, another candy cane die-cut and placed one of the glitter gold fabric stars too. Did you spot the pretty sprinkles of gold and white over the page? That was done using gold Heidi Swapp Color Shine and some white mist is by Dylusions. I just unscrewed the cap off the top and lightly shook the nozzle to add the sprinkles.
Under the photo, I tucked in one of the tags from the Accessory sticker sheet and tied a bow with some twine through the hole. I also placed more phrase and word stickers from the Accessory sticker sheet and also the cute squirrel sticker too. I also placed some of the small puffy stickers here as well. Such small details can really make a big impact on a page, although sometimes small embellishments are subtle, they really can make a difference to a page.
Thanks so much for stopping by the Cocoa Vanilla blog today! I hope you are inspired to get crafting with your Cocoa Vanilla Christmas collections!
Hello Paperlovers, welcome to today’s scrapbook blog from Cocoa Vanilla Studio! I’m so thrilled to have you here. I’ve got another round of scrapbook layout inspiration for you, and this time it’s all about the Christmas spirit. For this layout, I’ve designed using the incredibly beautiful and adorable Christmas collection, “Joyful,” from Cocoa Vanilla Studio.
To start off, I cut a circle from the white cardstock sheet, which will serve as my base. I choose for a mint green patterned paper as the background for this Christmas ornament. I added a stitched border around the circle using white thread and my sewing machine. Placing the Christmas photo of my hubby and me in the center of the circle, I used red patterned paper as a backdrop.
I selected lovely embellishments such as puffy stickers, wooden buttons, cut-out flowers, and leaves for the clusters. I created a cluster beneath the photo and on the upper left side. Then, I made a bow from a soft light salmon-colored ribbon and attached it at the top of the circle. I also created a loop with the same ribbon to give it more of a Christmas ornament appearance. I positioned the die-cut “Oh what fun” between the bow and the loop, creating a delightful effect that draws more attention to the bow.
For the title “Wonderful Memories,” I used the golden words from the “Joyful” collection, complemented by a second gold alphabet from my own stash. I added a few small puffy stars here and there, followed by some festive splatters created with white gesso and Distress Oxide in the color “festive berries.”
I’m delighted with how my Christmas ornament turned out, and this fantastic Christmas collection adds that extra bit of sparkle to my December memories. I hope I’ve inspired you with this layout and wish you an wonderful Christmas with your loved ones. Cherish each other and create beautiful December memories.
It’s Sophie on the blog today with a new page to share!
I am all in the Christmas fever this time of year and used the beautiful Joyful collection for my Christmassy layout!
I teared two big pieces of patterned papers from the collection and placed them on the top of a thick white cardstock.
I layered tissue paper, adhesive foam and another patterned paper behind my photo and placed it a little bit off centered to the right.
I built a beautiful cluster of embellishments from the Ephemera pack and some fussy cut florals, as well as a few sticker phrases on the bottom right of the photo.
My title is made out of the Puffy Title Sticker sheet.
Finally, I fussy cut stars out of patterned papers and scattered them around my title and photo.
Here are more close-ups:
I hope that you like this page and that it can give you new ideas to try ! Most of all, I hope that you are having a wonderful holiday season!
Hey y’all! Laura Alberts here with a fun and funky grid layout using the cut-apart sheet from the No Limits collection to scrap FIVE photos on one page! Absolutely love this mix of patterns, it was perfect for these pictures from out trip to the hands-on museum. This is a busy layout, but one of the ways I made this layout a little more cohesive was to mirror the top left corner with the bottom right.
Another fun idea was to use cut-apart cards from the second cut-apart sheet in the collection to layer on top of the first! The “You Rock My World” and Always Be Your Awesome Self” came from that second patterned paper and helped me to limit the color scheme of this page. The clusters on the open rectangles are a mix of chipboard, ephemera, and puffy stickers with fussy cut stars on the edges. The trio of tickets in the middle was a fun detail for a museum trip!
This bottom left side of the grid holds the title because the two photos that I loved the most ended up on the bottom row. Added to the die-cut title “Awesome” are borders of fussy cut stars from the Nebula patterned paper. Love all the elements that made it onto this page, especially the chipboard planets!
I especially liked this part of the grid with a rocket ship bursting from the “Out of this world” chipboard piece. It was a fun way to incorporate a science themed icon in this museum layout. The photos I’ve spread out throughout the grid are all so energetic and bold that I just had to use this equally bold collection.
I hope this layout inspires you to give your cut-aparts a second look and find new ways to use them! If you’d like to see how “Awesome” came together, check out the process video below:
Hello crafty Friends. December is almost here with it’s festivities and I am for sure going to join this merry madness. But before I will dive into christmas, I have one final fall project to share with you. It was created with beautiful “Heart & Home” collection – the newest addition to CVS family. It already landed in CVS shop and what’s even better – it’s on sale! So run quickly to grab it, along with many discounted goodies from older collections.
I created another layout, this time with brand new photos of my girls. I always take them to the nearby forest, when the autumn takes it’s most glorious colors to snap some photos. Thanks to that, I have a bunch of pretty pictures to scrapbook with all the pretty seasonal collections.
I love all wooden patterns and I like using them as a backgrounds. It’s already a second page I made with “Heart & Home” with “Framed” paper. It has such a lovely, warm color. I cut my photo into a circle and placed it in the middle of my page.
Using “Floral ephemera pack” I made a frame around my photo using both flowers and leaves. I also added some butterflies (or probably moths) to this composition. They are cut out from one of the 12*12 papers called “Fall beauty”. I just love papers with elements you can fussy cut and extend your ephemeras, as they usually run out quickly. So keep an eye on papers with elements, that are big enough to be cut out and are not clustered together overlaping eachother. Buy extra sheet of this paper and you will thank me later!
My title is made with super pretty and shiny “Die cut titles with gold foil”. They always look amazing but are so hard to photograph. They either look black or white in the photos because of the light reflecting off them. I used two words “happy” and “hearts” to make my title and spread them on both sides of the photo. I also added bits and pieces from “Ephemera pack”, like house and some sentiments.
My final touch, as always, was to add some tiny accents like puffy hearts from “Puffy heart stickers”. And that’s it! Layout was finished.
This page is a closure for my fall projects. Now it’s time to dive fully into christmas! I will be back in two weeks with something festive! Thank you so much for staying with me and wee you soon!