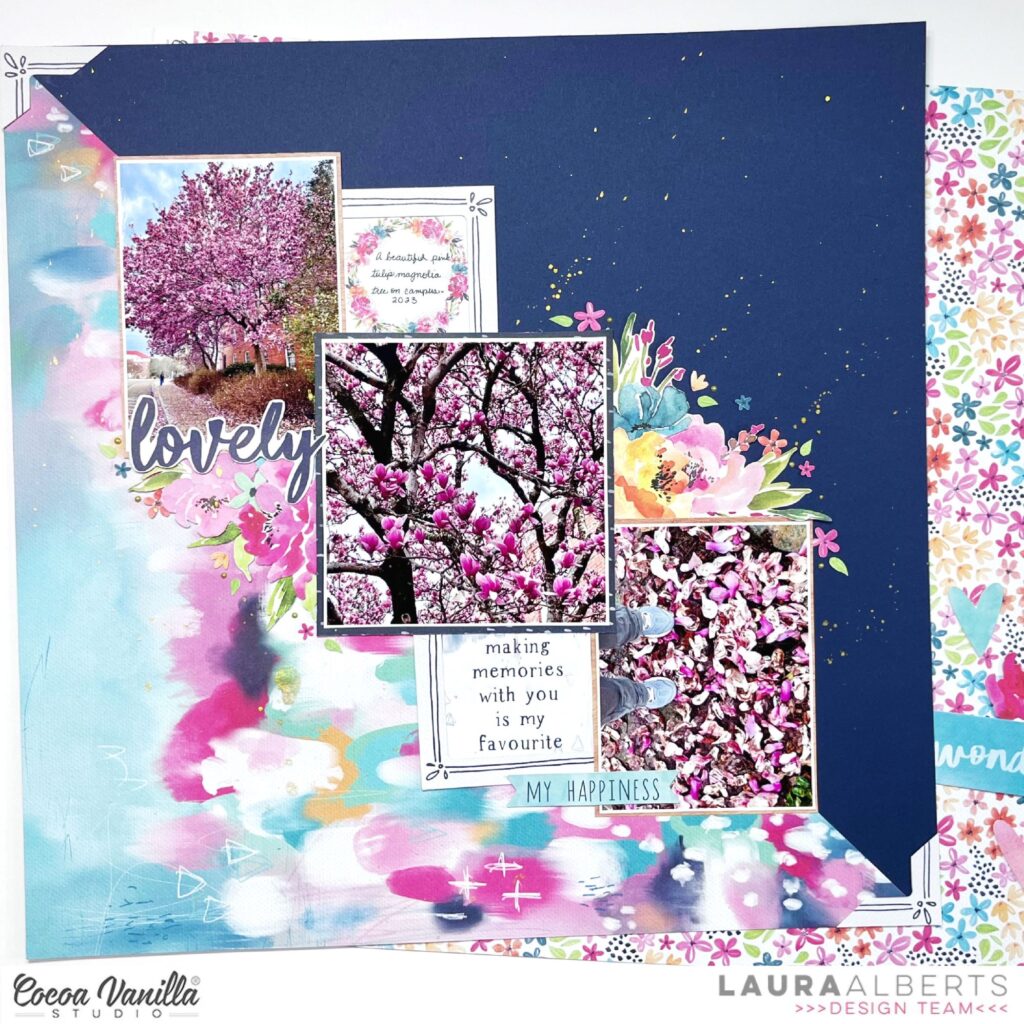
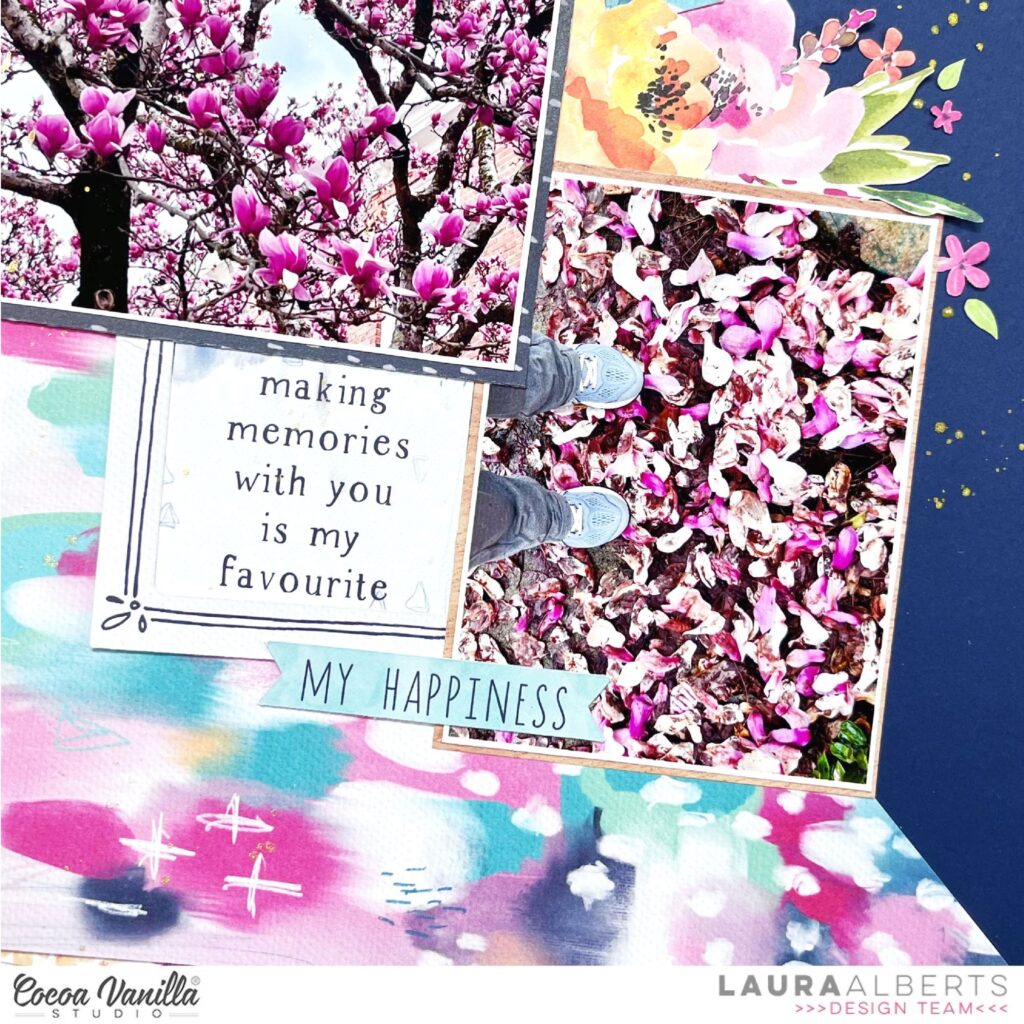
Hey y’all! Laura back again with a stash dive! This stunning Happiness collection is one of my all time favorites. To build this background, I cut a piece of the Expressive patterned paper in half diagonally and layered it onto navy cardstock. For the corners, I cut up a frame from the ephemera pack.
These lovely photos of a Tulip magnolia tree were a perfect color match to the bold pinks in this collection, so I knew it would compliment them. I added floral ephemera clusters on the inside corners of the stair-stepped photos and framed cut-aparts on the outside corners.
The tiny little florals are fussy cut from the A5 paper stack and I love the detailing these add to the page. With a little bit of gold Nuvo and ink spray for splattering, this one was done!
I hope this layout inspires you to dive into your stash for some crafty fun soon! To see how “Lovely” came together, check out the process video below:
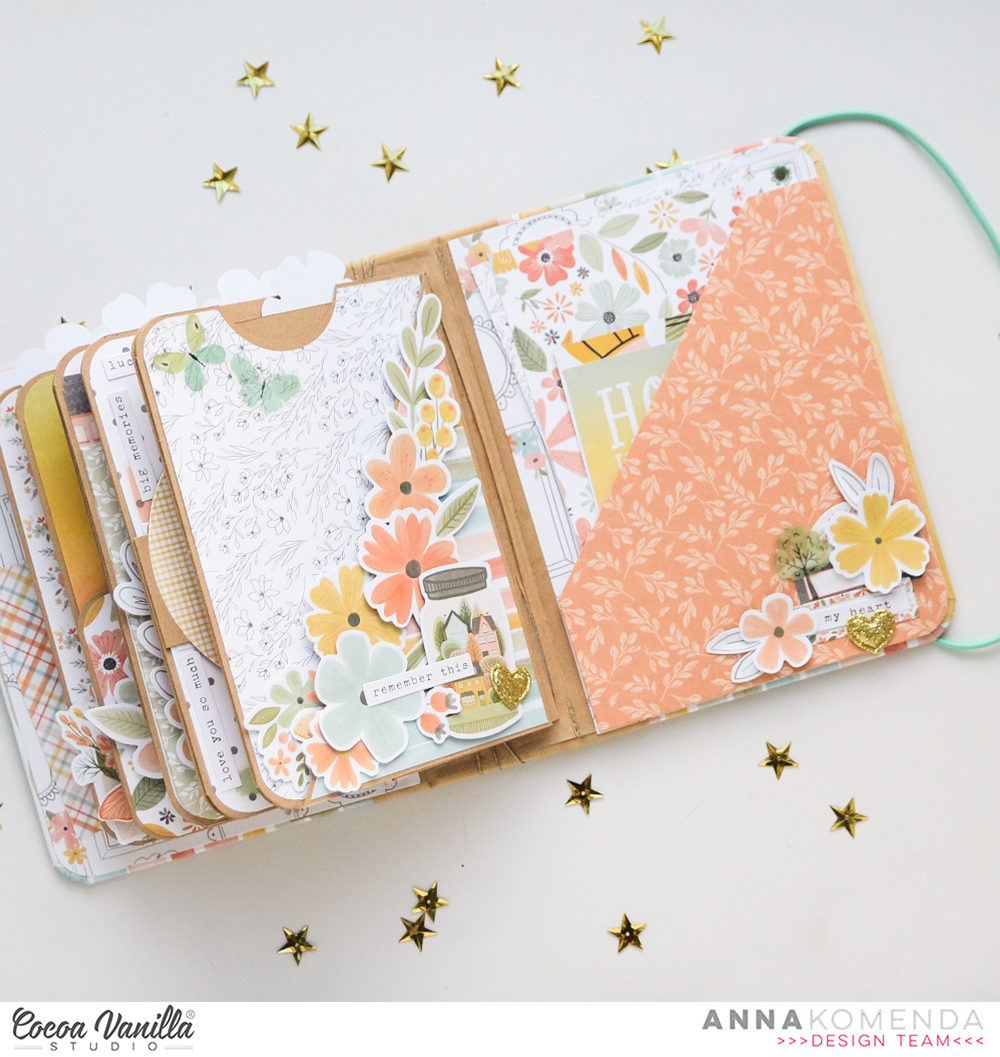
Hello Cocoa Vanilla fans. It’s Anna here with another (and probably my last ever) inspiration made with wonderful “These days” collection. Using whatever I have left from this line I created a mini album. This is my favorite way of “killing” the collection as it uses up the most of papers and random embellishements. I am left with wonderful album, ready to add the photos or be given as a handmade gift.
Album itself measures about 12*17 cm and can acommodate 10*15 cm vertical photos and some smaller ones. I made my album base from scratch adding five main pages inside. Cover is a combination of pattern papers and a piece of a false leather with wooden pattern to strengthen up this area, as paper may crack in time from opening and closing the album. I also added a row of paper flowers from Flower ephemera Pack as a decoration of the cover. This collection has a strong “family bonding” theme so I decided to dedicate it for all the moments spend together, hence the FAMILY TIME MEMORIES title. It’s a combination of black Foam Title Sticker and Accessory Sticker.
Inner part of front cover is decorated with two 3*4 cards from Pocket Cards set. I used up a lot of them while making this album. They are great for journaling but also for fussy cutting some extra elements for decorating pages. Doodly frames from Ephemera pack from the first page are mounted with a piece of foam tape and you can slip photo under each of them.
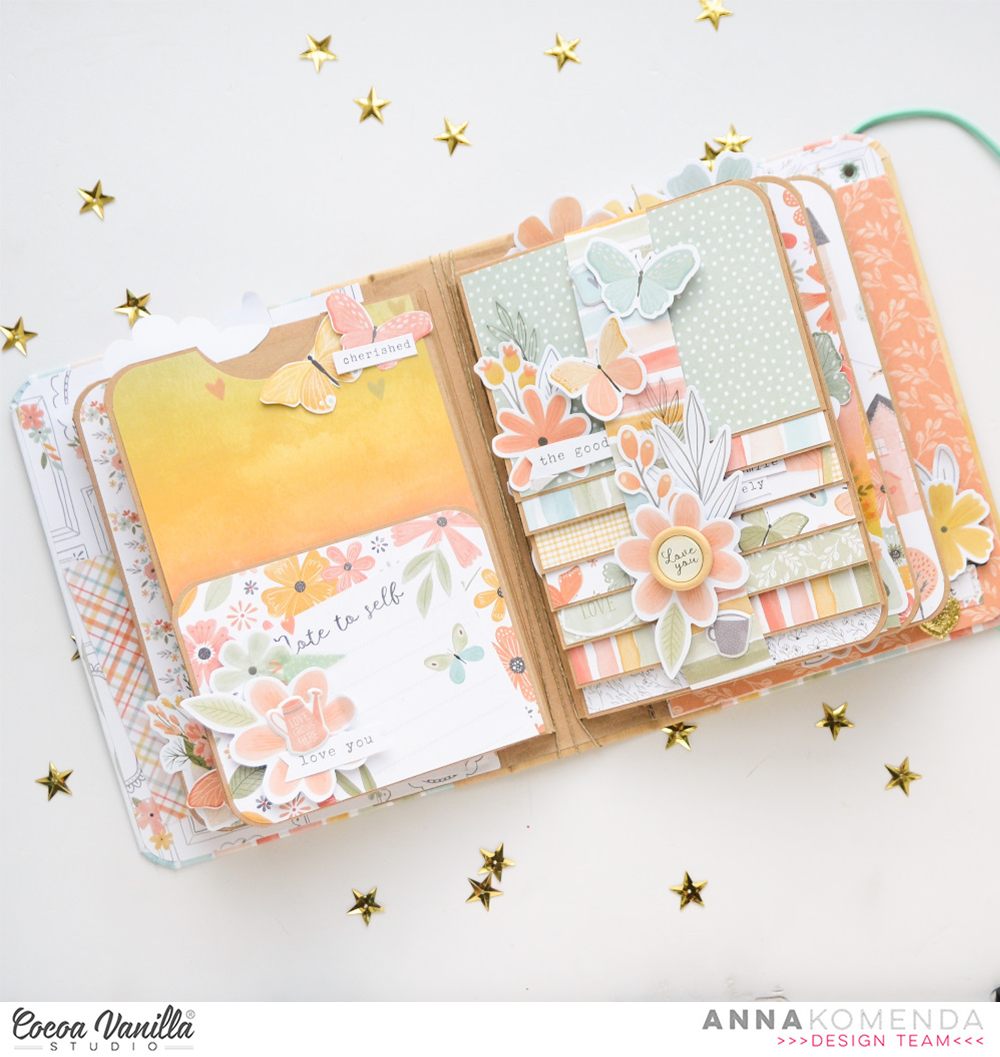
I like adding extra flaps, pockets and inserts to my album and each page has some interactive elements. They are hard to be shown on photos, but believe me – they are there. Thanks to that, album can hold many, many photos. Most of the decorative elements are placed in the cornes with glue added only near the corner so you can tuck the photos behind them too!
Each page is also a pocket with even more space for extra photos or hidden journaling. I also added a waterfall page, that will be perfect for adding multiply smaller, horizontal pictures. You can fit even 14 of them on a single page! I decorated the flaps using all sort of embellishments: Accessory stickers, Ephemera pieces, Flower ephemera, Clear stickers and Puffy stickers.
For decorating my pages I not only used 12*12 papers but also almost the whole 6*8 paper stack that I had left. I also turned some of the paper scraps into smaller tags and pocket fillers so nothing was going to be wasted!
As a page bases I used regular kraft cardstock that corresponds really well with “These days” collection. Whenever I can, I always prefer kraft cardstock over white one while making albums. It seems so decorative by itself and it makes embellishments pop more.
I turned my last page into a big pocket for extra keepsakes and photos so whoever will be using this album in the future will have even more possibilities to customize it.
After finishing this project I could throw away few empty sheets of stickers and other empty packs. I don’t know why but it’s such a pleasure for me to use up something to the very last bit. Do you feel similar finishing an embellishment pack or it’s only me?
There are still many elements from THESE DAYS collection waiting for you in CVS Store in a crazy low prices! Grab them quickly because when they are gone, they are gone forever!
Thank you so much for sticking out with me and see you in April!
It’s time for new inspiration from the beautiful and sunny ” Sunkissed” collection. I’m so happy to see you back on the Cocoa Vanilla Studio blog today. We are heading into spring and with the sunny weather coming up I couldn’t resist making a sunny layout with a beautiful summer memory.
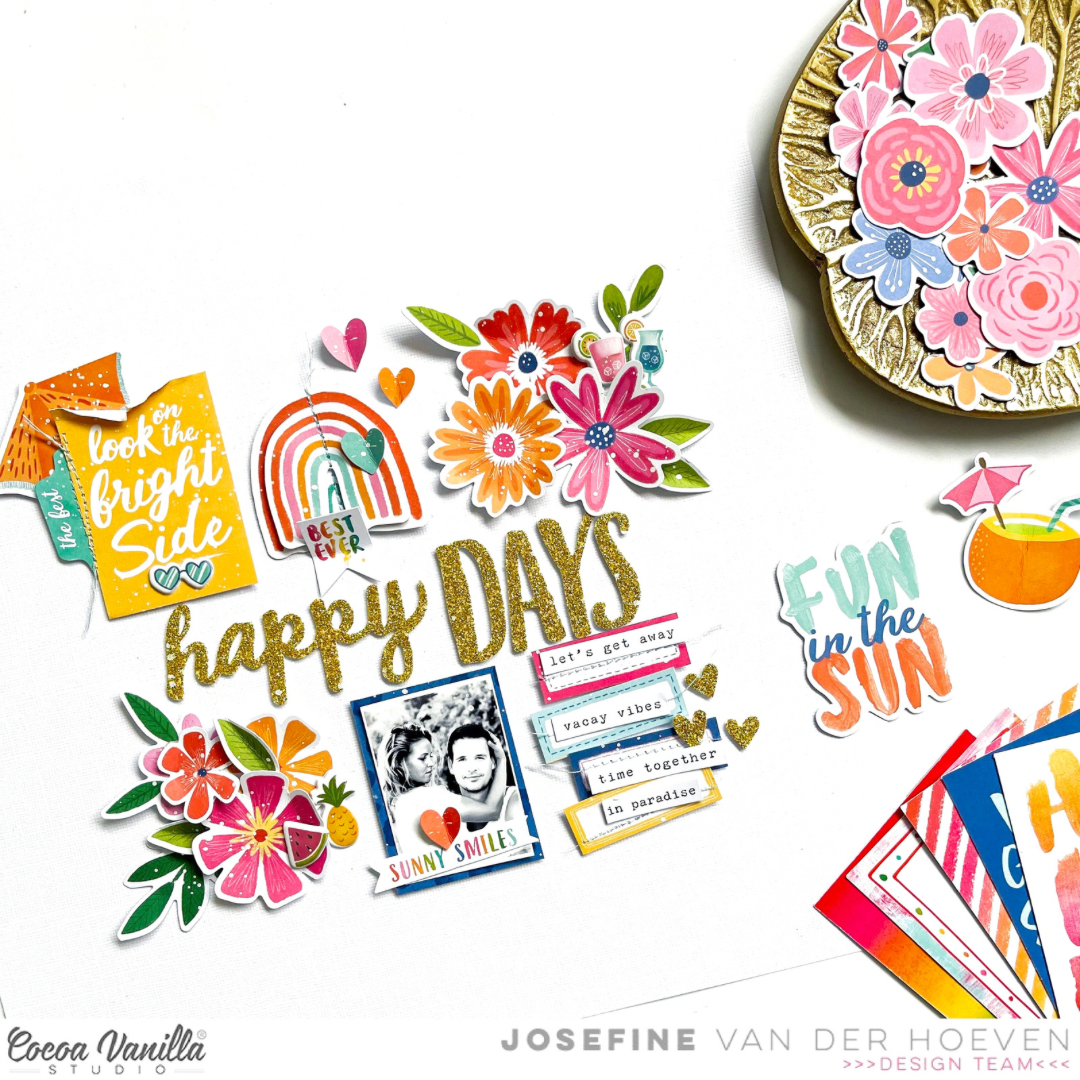
For this layout, I challenged myself to use only pocket page cards, die-cuts (flower), stickers, word strips, puffy stickers and the gold glitter foam titles. I created six clusters on my layout. I started with the two flower clusters. I placed these diagonally across from each other. I folded the flowers a bit so that they have a little bit more dimension on the layout.
I stitched the two rainbow die-cuts on top of each other with light blue sewing thread. I placed these next to the flower cluster on the top right. I choose three colorful hearts and fold them in the middle then I placed the hearts playfully around the rainbow. I love the beautiful, fun and playful text on the pocket page cards. I choose a pocketpage card tear it a little at the top and stitch a tab on the side with blue sewing thread. I decorate the pocketpage card with a die-cut and a puffy sunglasses.
I absolutely love the cute little “Sunkissed” puffy stickers. I even used them on the flower clusters. I tried to create a little bit of the tropical vibe. I cut a pocket page card to size and placed it behind the black and white photo of me and my hubby. I decorated the photo with a tiny heart and a colorful word die-cut. On the right side of the photo, I playfully stitched a view labels and word strips together with light bleu sewing thread. I playfully glued the labels on my layout and decorated them with three gold hearts.
In the center of the layout, I left extra space for the title. The awesome gold glitter title words fit perfectly on my sunny and tropical layout. I choose for the title “Happy Days” This title and of course the white gesso splatters make my layout complete.
I hope I was able to inspire you with this summer layout and I can’t wait for the new amazing “Happy Days” collection. I want to thank you for visiting the blog today and hope to see you again next time.
I wish you a very lovely and creative day friends.
It’s Tarrah back with you and today I am sharing a sweet layout created with the gorgeous These Days collection!
I am documenting a lovely photo of my sister and our Mum together from a few years ago.
I started my layout by choosing a cut file from CUT to YOU and cut it out from the Good Life patterned paper, I was careful to have the heart placed in the centre of the paper so that it would leave the 12′ x 12′ paper in tact but just with a big heart cut out of it! I trimmed down a sheet of plain white cardstock and adhered this to the heart paper, being sure not to place adhesive here the heart was cut out.
I chose a variety of the patterned papers from the A5 paper stack and backed all the spaces in the heart with all of the different papers. I used up lots of this paper pack for this layout! I love how the heart looks with all of the papers backed in the spaces. Once the heart was all backed, I added craft foam underneath the cut file and then adhered it to the white cardstock background. Next I added one of the super cute gold puffy hearts to the centre of the heart cut out in the cut file.
I placed my photo over to the right and on top of the cut file, layering one of the 3′ x 4′ pocket cards under the photo to help enhance the photo and make it stand out from all the gorgeous colours in the various papers. My title is the small card to the left of my photo, I cut this out from the A5 paper stack. I also added the Hello banner sticker above the title as well. I just had to add some of the gorgeous florals from the floral ephemera pack, I tucked these in both on the left and on the right of the photo. I added more die-cuts here too and some phrase stickers from the Accessory Sticker sheet too.
Above the photo, I adhered the Happy die-cut title and at the bottom I tucked in one of the tab stickers from the Accessory Sticker sheet. I stamped the date stamp on this tab. Around the outside edge of the heart, I added some of the gorgeous puffy hearts from the Puffy Stickers, I love how these look scattered around the large heart. A few more die-cuts like the butterflies and the tea cup finished off the embellishing of my layout and one of the last things added was one of the Wood Epoxy buttons.
Thanks so much for stopping by the Cocoa Vanilla Studio blog today! I hope you enjoyed reading how I created my layout and that you inspired to create using your These Days collection!
Hello crafty friends! I feels like ages since I created a CVS boy layout, so here is one for all those who need some boy layout inspiration! I have used the still awesome No Limits
I found a fab pie chart cut file from the Silhouette design store. I cut it twice, one slightly smaller than the other and then layered over each other. I used the Spark paper as my base/background paper and added the pie graph cut file. I used Orbit paper for the larger pie graph and Universal paper for the smaller one.
I next added my 6×4 inch landscape photo but before adhering to the centre of the pie graph I added two paper pieces/strips to the top and bottom of my photo. I used the star paper from the A5 paper pad as the patterns are printed smaller.
I used some elements from the Ephemera die cut pack, placing them is a way that your eye is drawn to the centre of the pie graph. You can see here I added some enamel dots behind die cuts that I had used foam tape to attatch.
I added phrase sentiment stickers over my die cut titles, which when your title is large (or words) you can add your journalling in this way.
Lastly I created a journal space by making another embellishment cluster, the epoxy wooden buttons are still available on the shop (https://cocoavanilla.com.au/shop/no-limits-wood-epoxy-buttons/) I have added extra stars around the edge of my base paper, using die cuts and enamel ones to add texture.
Blue, black and grey really are the most fab colours for a boy layout! With this colour combo you can add almost any coloured photo and it will work.
Thanks as always for stopping by and see you soon!
Before I share my page today, have you seen the sale on the ‘These Days’ collection in the shop?! There are still some gorgeous pieces left from this collection at a hugely reduced price… you can check it out HERE.
SO for today’s layout, I thought I would create something with this collection to inspire you to grab the last pieces available for this collection or grab out what you have in your craft room.
This is a picture from Christmas, with a bunch of our family…These Days is perfect for documenting family, home…anything close to your heart really.
I used the black and white dot paper for the base of my page…a great neutral to get started. Next, I adhered 3 strips of patterned paper to add colour and layers to my page…these are 3×8 inch in size. These were adhered with foam to create dimension.
I created multiple layers behind my photo with different papers. I cut the mason jar and the blue scalloped frame from cards found in the Pocket Cards.
On the right of my photo I added some tabs from the Die Cut Ephemera. Also one of the Wood Epoxy Buttons to the bottom right and top of my photo. The heart tab is from the cut apart paper.
The strip of houses under my photo is also cut from the cut apart paper… then to fill out my page I used a bunch of florals from the floral ephemera pack and also fussy cut some out from the floral paper. To add more black to the page I added some of the black foam stems found on the title sticker sheet. You may also spot a few of the Puffy Stickers on my page..they are so cute!
I hope you enjoyed my page and are inspired to check out the ‘These Days’ SALE.
Hey y’all! Laura back again with a bright and cheerful layout using the stunning Happiness collection! I am completely enamored with the pairing of bright, bold colors with deep, dark neutrals like navy. This is one of those collections that makes me smile every single time I pull it out! Perfect for some fun in the sun, backyard playground photos.
For this background, I used a set of metal heart dies to create these fantastic heart shaped frames. I backed them with this stunning watercolor stripe patterned paper and layered them behind my photos in a vertical column. My photos are interspersed with stunning floral ephemera pieces, cut apart labels and words, as well as fussy cut shapes.
One of the highlights to this layout were these stunning tassels from the ephemera pack! Such a fun detail to hang from the heart-shaped frames. With a bit of Nuvo for a touch of gold detailing and gold ink spray to finish it off, this layout was done!
I hope this layout inspires you to dig out your older stash to have a play! Those collections from the past deserve some love too! To see how “Sweet” came together, check out my process video below:
Hello Paperlovers, So happy to see you on the Cocoa Vanilla blog today! I chose the amazing collection “These Days” designed by of course Coco Vanilla Studio. I absolutely love the beautiful colors in this collection that fit perfectly to create a beach themed layout. With this blog I want to take you through my creative process…..
I started with a blank white cardstock sheet and took inspiration from cardmakers. Instead of one decorated circle, I place four in a grid pattern on my white cardstock sheet.I choose several pattern papers and cut out three circles. Then I cut out three circle edges. I add a light blue sewing stitch to these circle edges. I also provide the beach picture with a light blue sewing stitch.
I placed the circle edges with 3D tape on top of the pattern circles. This way I created more dimension and can slide the flower die-cuts between the layers much easier.
I love creating different layers with so many beautiful and different embellishments from this amazing collection. I choose different floral die-cuts, butterflies cut from patterned paper, wooden buttons, little cute gold colored heart and different word stickers. I absolutely love how the differents clusters turned out.
For the title “Happy Days” I used a shape die-cut along with the mini puffy alphabet. See the little title cluster on the photo. For a real beach vibe, I made a view white splatters with gesso. I mixed gesso with a little bit of water and I used a water color brush to splatter. I also made some light pink splatters using the Distress Oxide color “Saltwater taffy” I hope I was able to inspire you with this scrapbook layout and hope to see you on the blog next time. I wish you a happy and creative day. XoXo, Jo
It’s Tarrah back with you and today I am sharing a new layout created using the awesome No Limits collection!
I haven’t created a boy layout for a while and I have lots of the awesome No Limits collection! I grabbed a sweet black and white photo of my youngest son and got to work creating!
I chose the awesome Spark paper for my main background, trimmed this piece down to measure 11′ x 11′ inches and then adhered it to the ‘B’ side of the Latitude paper
I then bent the edges up to create some texture and shadows on my page. I decided on a round design for this layout and took a dinner plate and pencil and lightly traced a circle with the dinner plate. I knew I wanted to add lots of the ephemera around the outside edge. This is a great way to use up lots of leftovers or little bits and pieces you may have laying around and don’t really know what to do with!
Before adding all of the ephemera and embellishments around the circle I wanted to get my photo in its place, as it is a large element and the main focal point of my page, this is important to me to get this part right. I layered one of the 3′ x 4′ pocket cards under the photo and adhered it to the right hand side of the page using craft foam. I did also cut in half one of the round frame die-cuts and tucked a piece in the top and bottom of my photo. For my title, I adhered another of the cool pocket cards with the words Fun Fun Fun! I also layered one of the phrase stickers from the accessory sticker sheet on top.
My favourite part when I create a layout is the embellishing! What’s yours?
Once my photo and title were added it was time to add all the embellishments around the drawn circle. I used a mixture of ephemera, chipboard, wood epoxy buttons, puffy stickers and accessory stickers. I adhered them all down around the circle using different types of adhesives. The chipboard I used a wet glue (even though these have their own adhesive, I like to add more as extra), the ephemera I used double sided tape and foam tape to give different dimension heights. I was careful to place similar colour elements away from each other, this helps creating a visual triangle on my page.
It was so fun to arrange all the elements around the circle, I placed larger embellishments first and then added smaller ones in between. To the right of my photo I stamped the date stamp using black ink and my date stamp. Lastly I sprinkled some black mist to finish my layout.
There are Easter eggs and hot cross buns in the shop which means Easter is coming! I love creating for Easter, the colours, cute animals and an opportunity to gift your creations to others.
Today I am sharing a super cute Easter themed layout featuring my girl! Daydream collection is perfect for Easter themed paper creations don’t you think!
I firstly added a mixed media background choosing the blue/grey to add a contrast to my chosen papers. I next found a super cute bunny rabbit cut file from the Silhouette Design store. Instead of adding a pom pom to create the tail I decided to create a rosette to add extra dimension and visual interest. I also added some glitter to the rosettes for effect.
I cut a half rainbow from the journal cards paper which I tucked behind the smaller bunny and then added my photo over it. I matted my photo which is 3.5×3.5 inches, my photo is added with foam tape and finished off my adding a phrase sentiment tab from the Accessory Sticker sheet.
I found the perfect title for my layout from the Silhouette Design store, I did work out the placement before gluing anything down!
I fussy cut some butterflies from the 12×12 inch paper and added with foam tape except the yellow one which I tucked to the right of my photo.
Lastly I created a flower cluster under my larger bunny which add another contrast against the blue bunny, and to be honest every pretty layout needs flowers!
And there you have it, my first Easter project of 2023! This layout is a great way to use up smaller paper pieces and still create a fab layout.
As always, thank you for stopping by and see you later in the month where I will be sharing a BOY layout just to mix things up a bit!


 Inner part of front cover is decorated with two 3*4 cards from
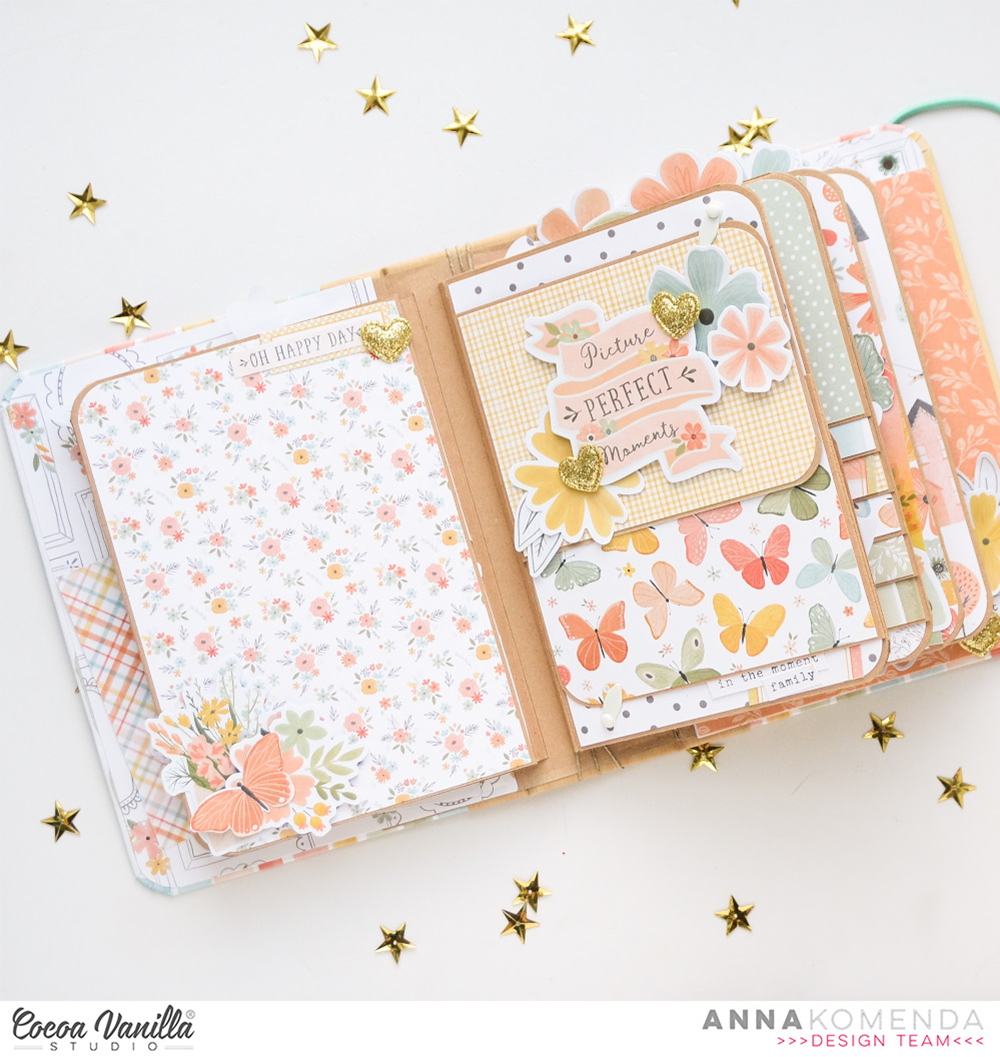


 For this layout, I challenged myself to use only pocket page cards, die-cuts (flower), stickers, word strips, puffy stickers and the gold glitter foam titles. I created six clusters on my layout. I started with the two flower clusters. I placed these diagonally across from each other. I folded the flowers a bit so that they have a little bit more dimension on the layout.
 I stitched the two rainbow die-cuts on top of each other with light blue sewing thread. I placed these next to the flower cluster on the top right. I choose three colorful hearts and fold them in the middle then I placed the hearts playfully around the rainbow. I love the beautiful, fun and playful text on the pocket page cards. I choose a pocketpage card tear it a little at the top and stitch a tab on the side with blue sewing thread. I decorate the pocketpage card with a die-cut and a puffy sunglasses.
 I absolutely love the cute little “Sunkissed” puffy stickers. I even used them on the flower clusters. I tried to create a little bit of the tropical vibe. I cut a pocket page card to size and placed it behind the black and white photo of me and my hubby. I decorated the photo with a tiny heart and a colorful word die-cut. On the right side of the photo, I playfully stitched a view labels and word strips together with light bleu sewing thread. I playfully glued the labels on my layout and decorated them with three gold hearts.


