Sweet | Love Always collection | Tarrah McLean
Hi creative friends!
It’s Tarrah back with you and today I am sharing a sweet layout featuring the gorgeous Love Always collection!
My assignment for today was to create a project for the Throwback Thursday feature that we sometimes run, I just had to use the Love Always collection for love month!
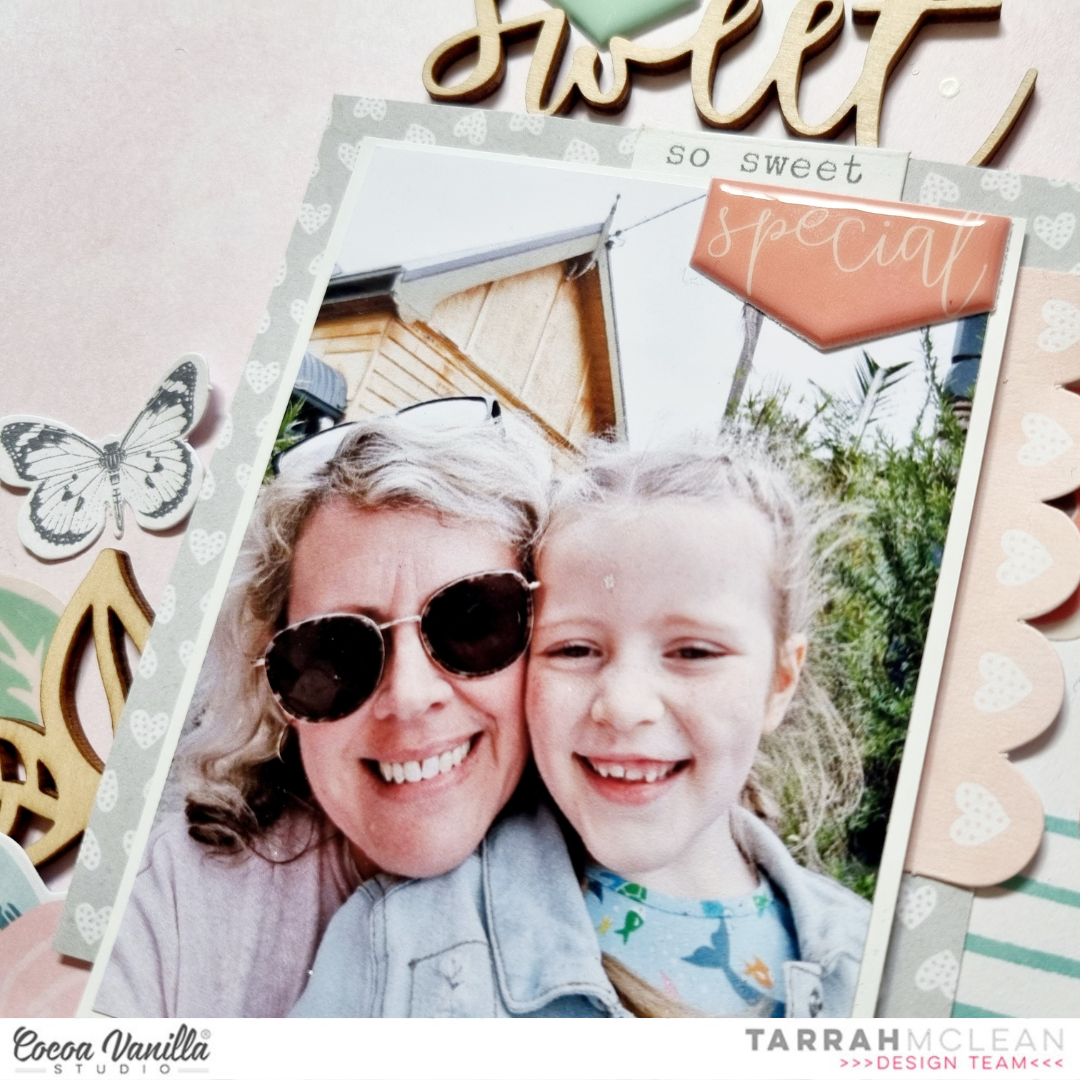
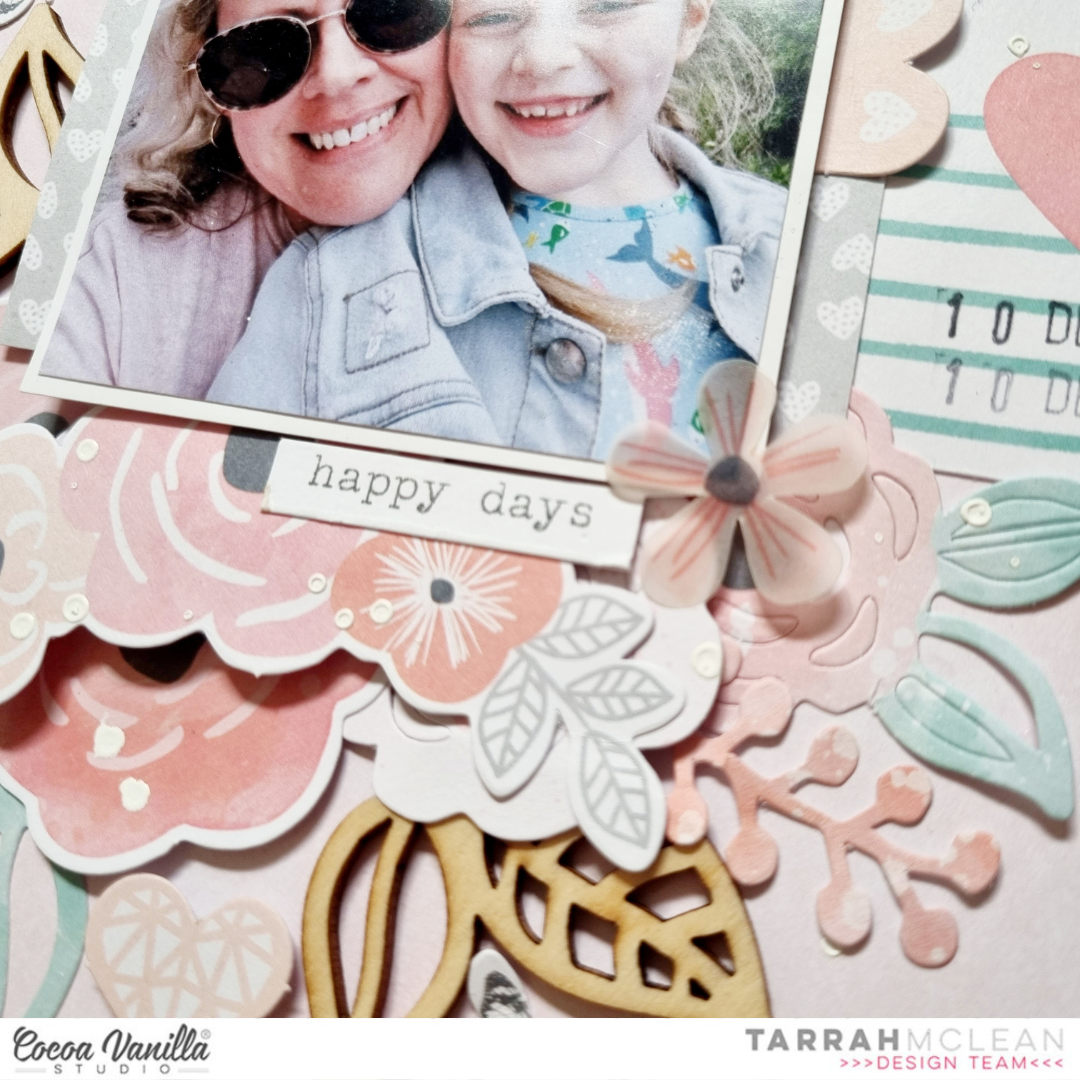
Documenting a sweet photo of myself and my eldest niece together when she was last visiting. She is always up for a selfie with her Aunty! Love her gorgeous face!
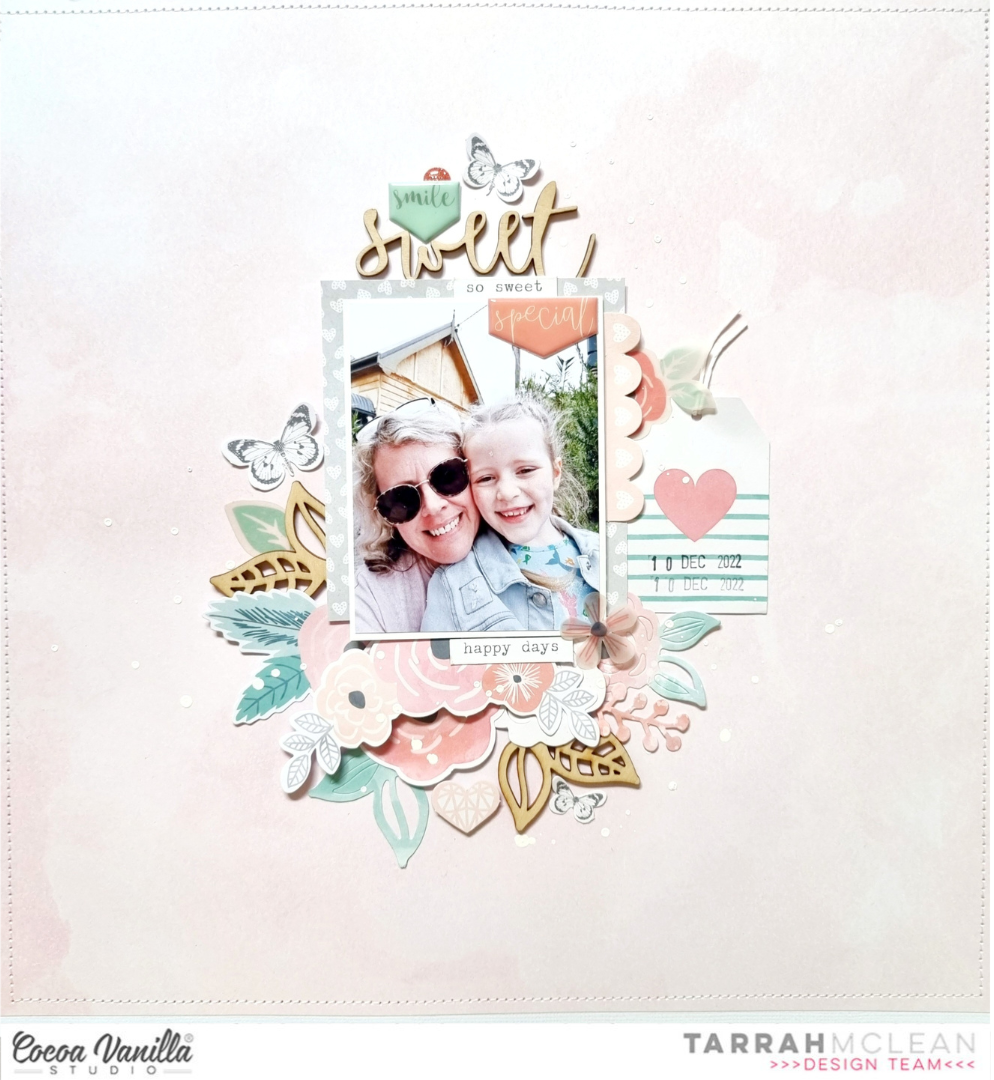
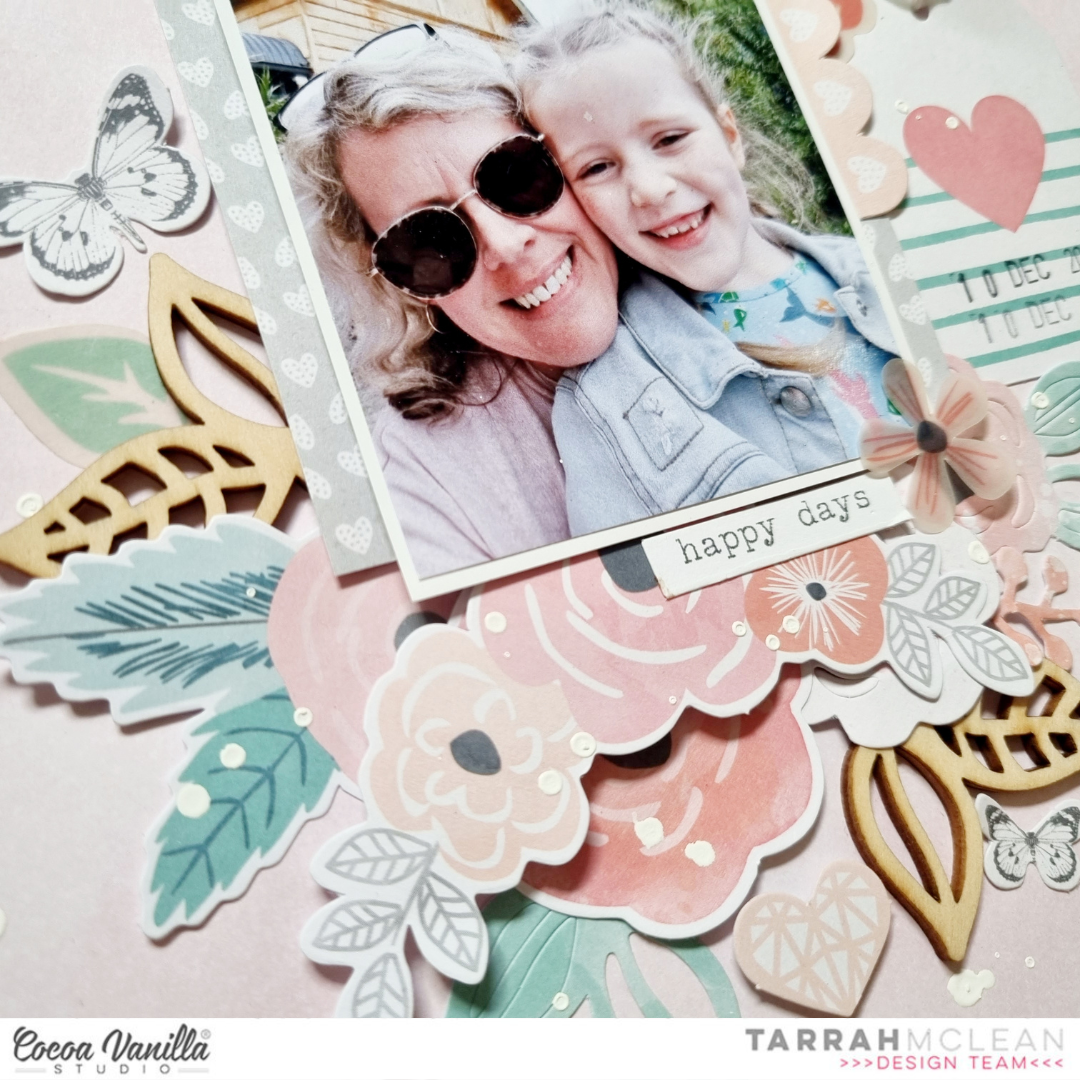
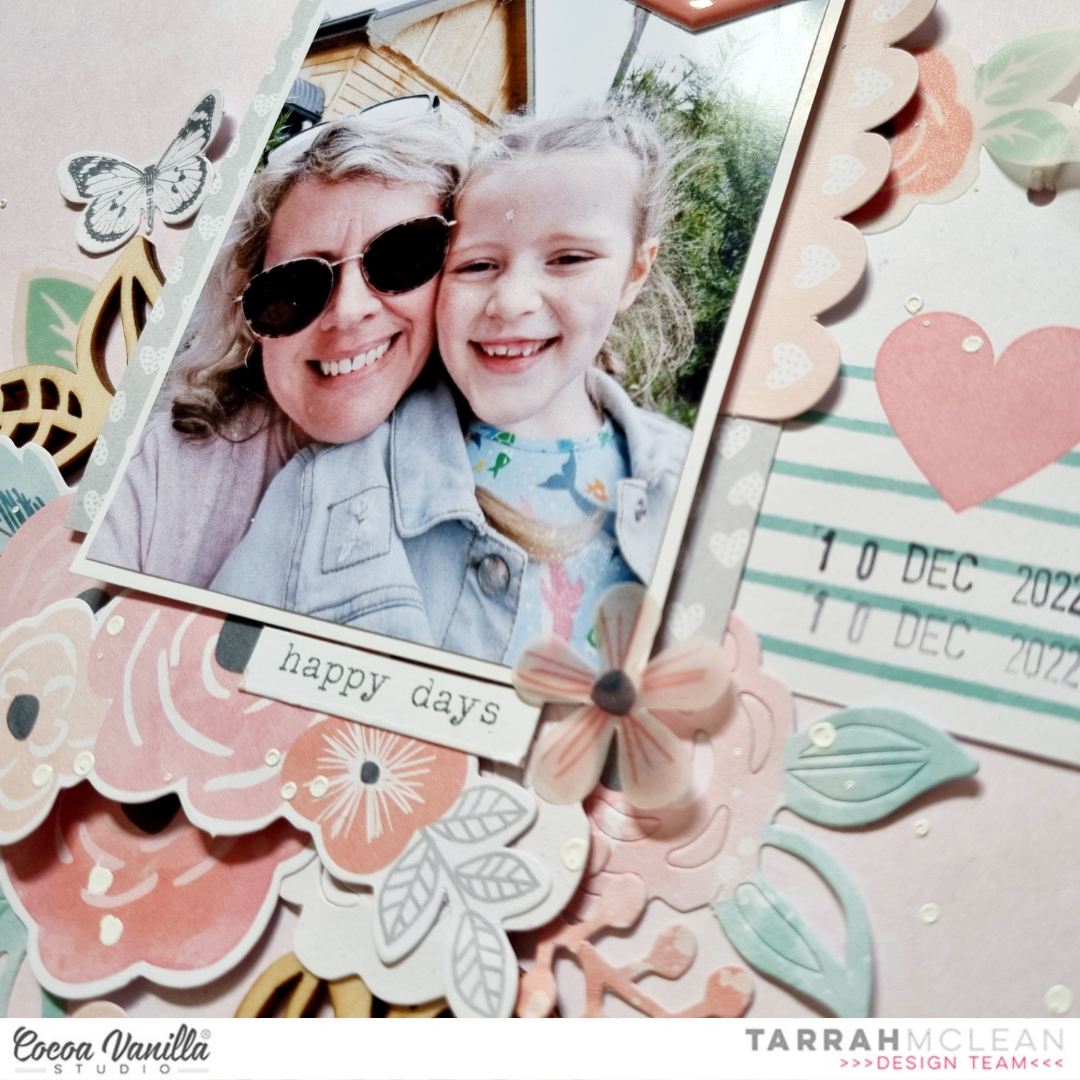
The Love Always collection has such pretty floral ephemera and I knew that I wanted to include a lot of them on this layout. I decided to build some layers of florals below the photo which I made the focus of the page by placing it in the centre of the page. I included both vellum florals and ephemera florals for some different textures on my layout.
Under the photo, I layered a piece of the grey paper with the small white hearts and I tucked in the scalloped border die-cut on the right hand side as well. On top of the photo, I placed one of the cute puffy stickers and a sticker from the accessory sticker sheet.
Also on the right of the photo, I tucked in the die-cut tag and added some twine through the hole in the top of the tag. I stamped the date stamp using black ink on the tag also. On the left I continued the floral layers including some wood veneers this time. Here I also added one of the gorgeous butterfly die-cuts.
For my title, I could not go past the gorgeous wood veneer word, deciding on the word ‘Sweet’ from the wood veneer pack. I did however add the cute puffy banner sticker that says ‘Smile’ too. I added another of the butterfly die-cuts here at the top and also a cute small one down the bottom below the wood veneer leaves.
I trimmed down the patterned paper background that I chose for my layout and matted it to a sheet of plain white cardstock. I then machine stitched around the edge of the entire page to create a border. Some of the last things to finish off my page were to add some more of the phrase and word stickers from the accessory sticker sheet, a few more die-cuts and I also sprinkled some white mist on my page.
Thank you so much for stopping by the Cocoa Vanilla blog today! I hope you enjoyed reading about how I created my layout as much as I enjoyed creating it!
See you next time!
Tarrah x


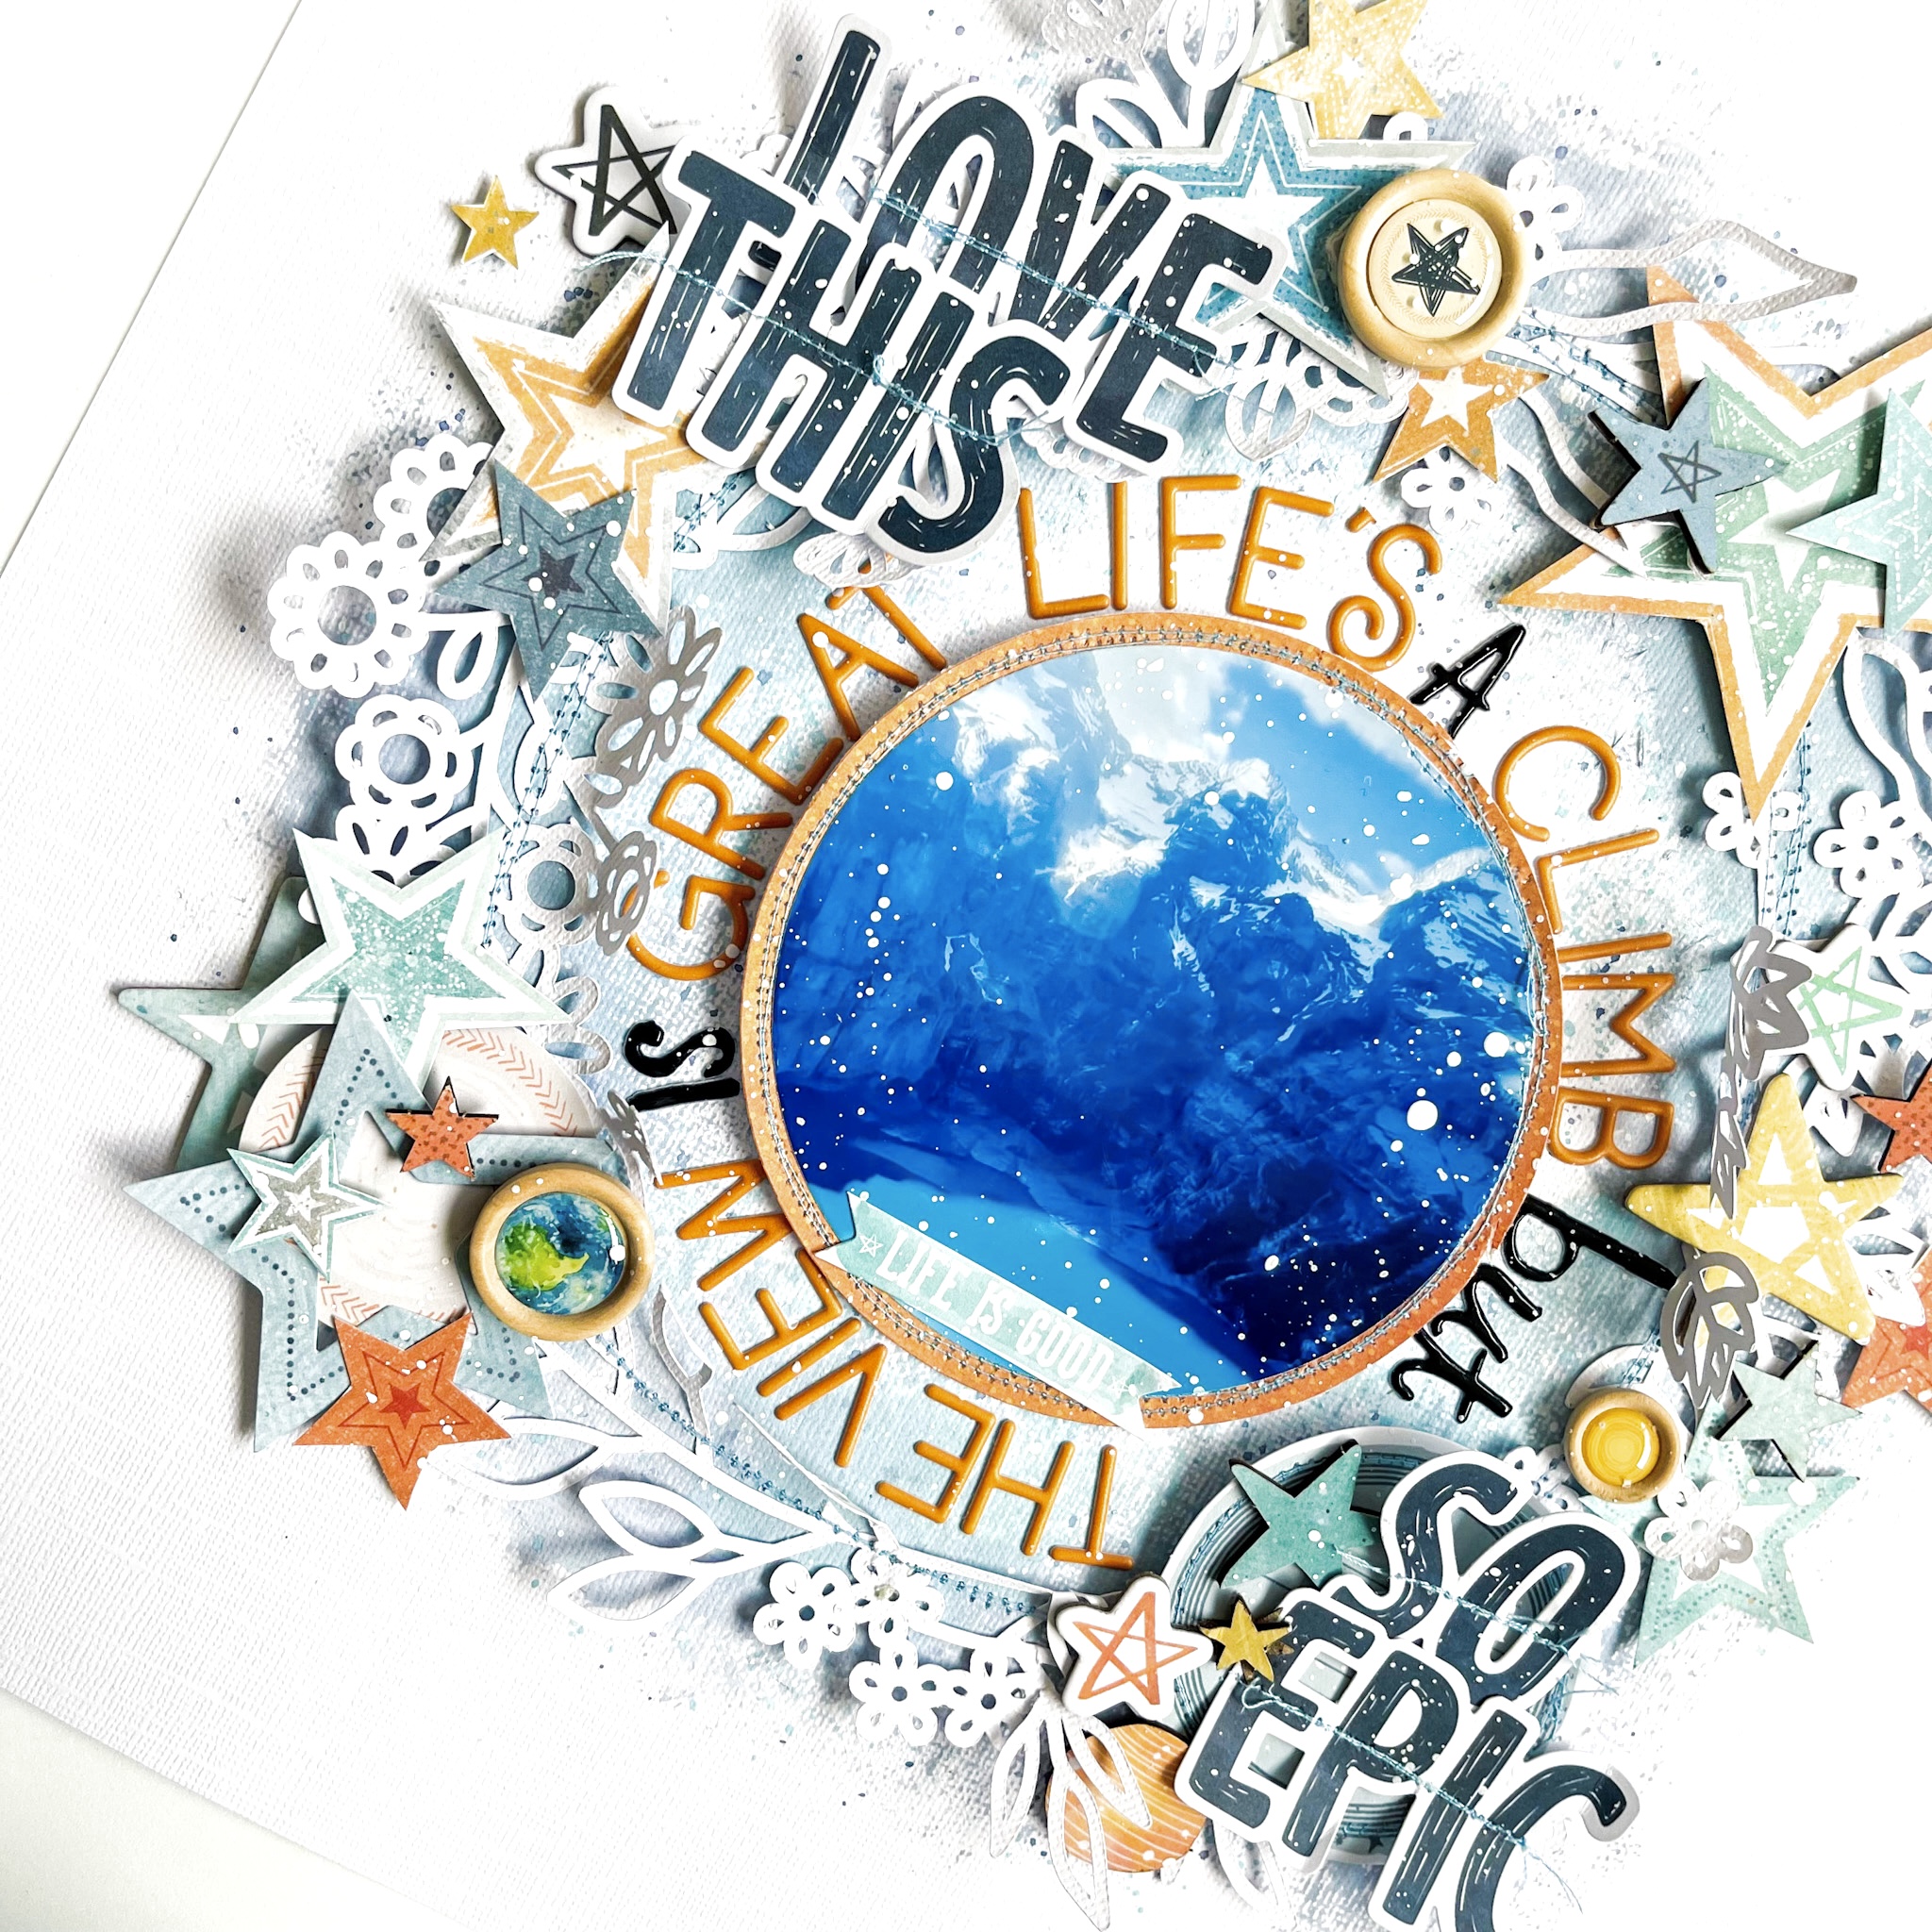
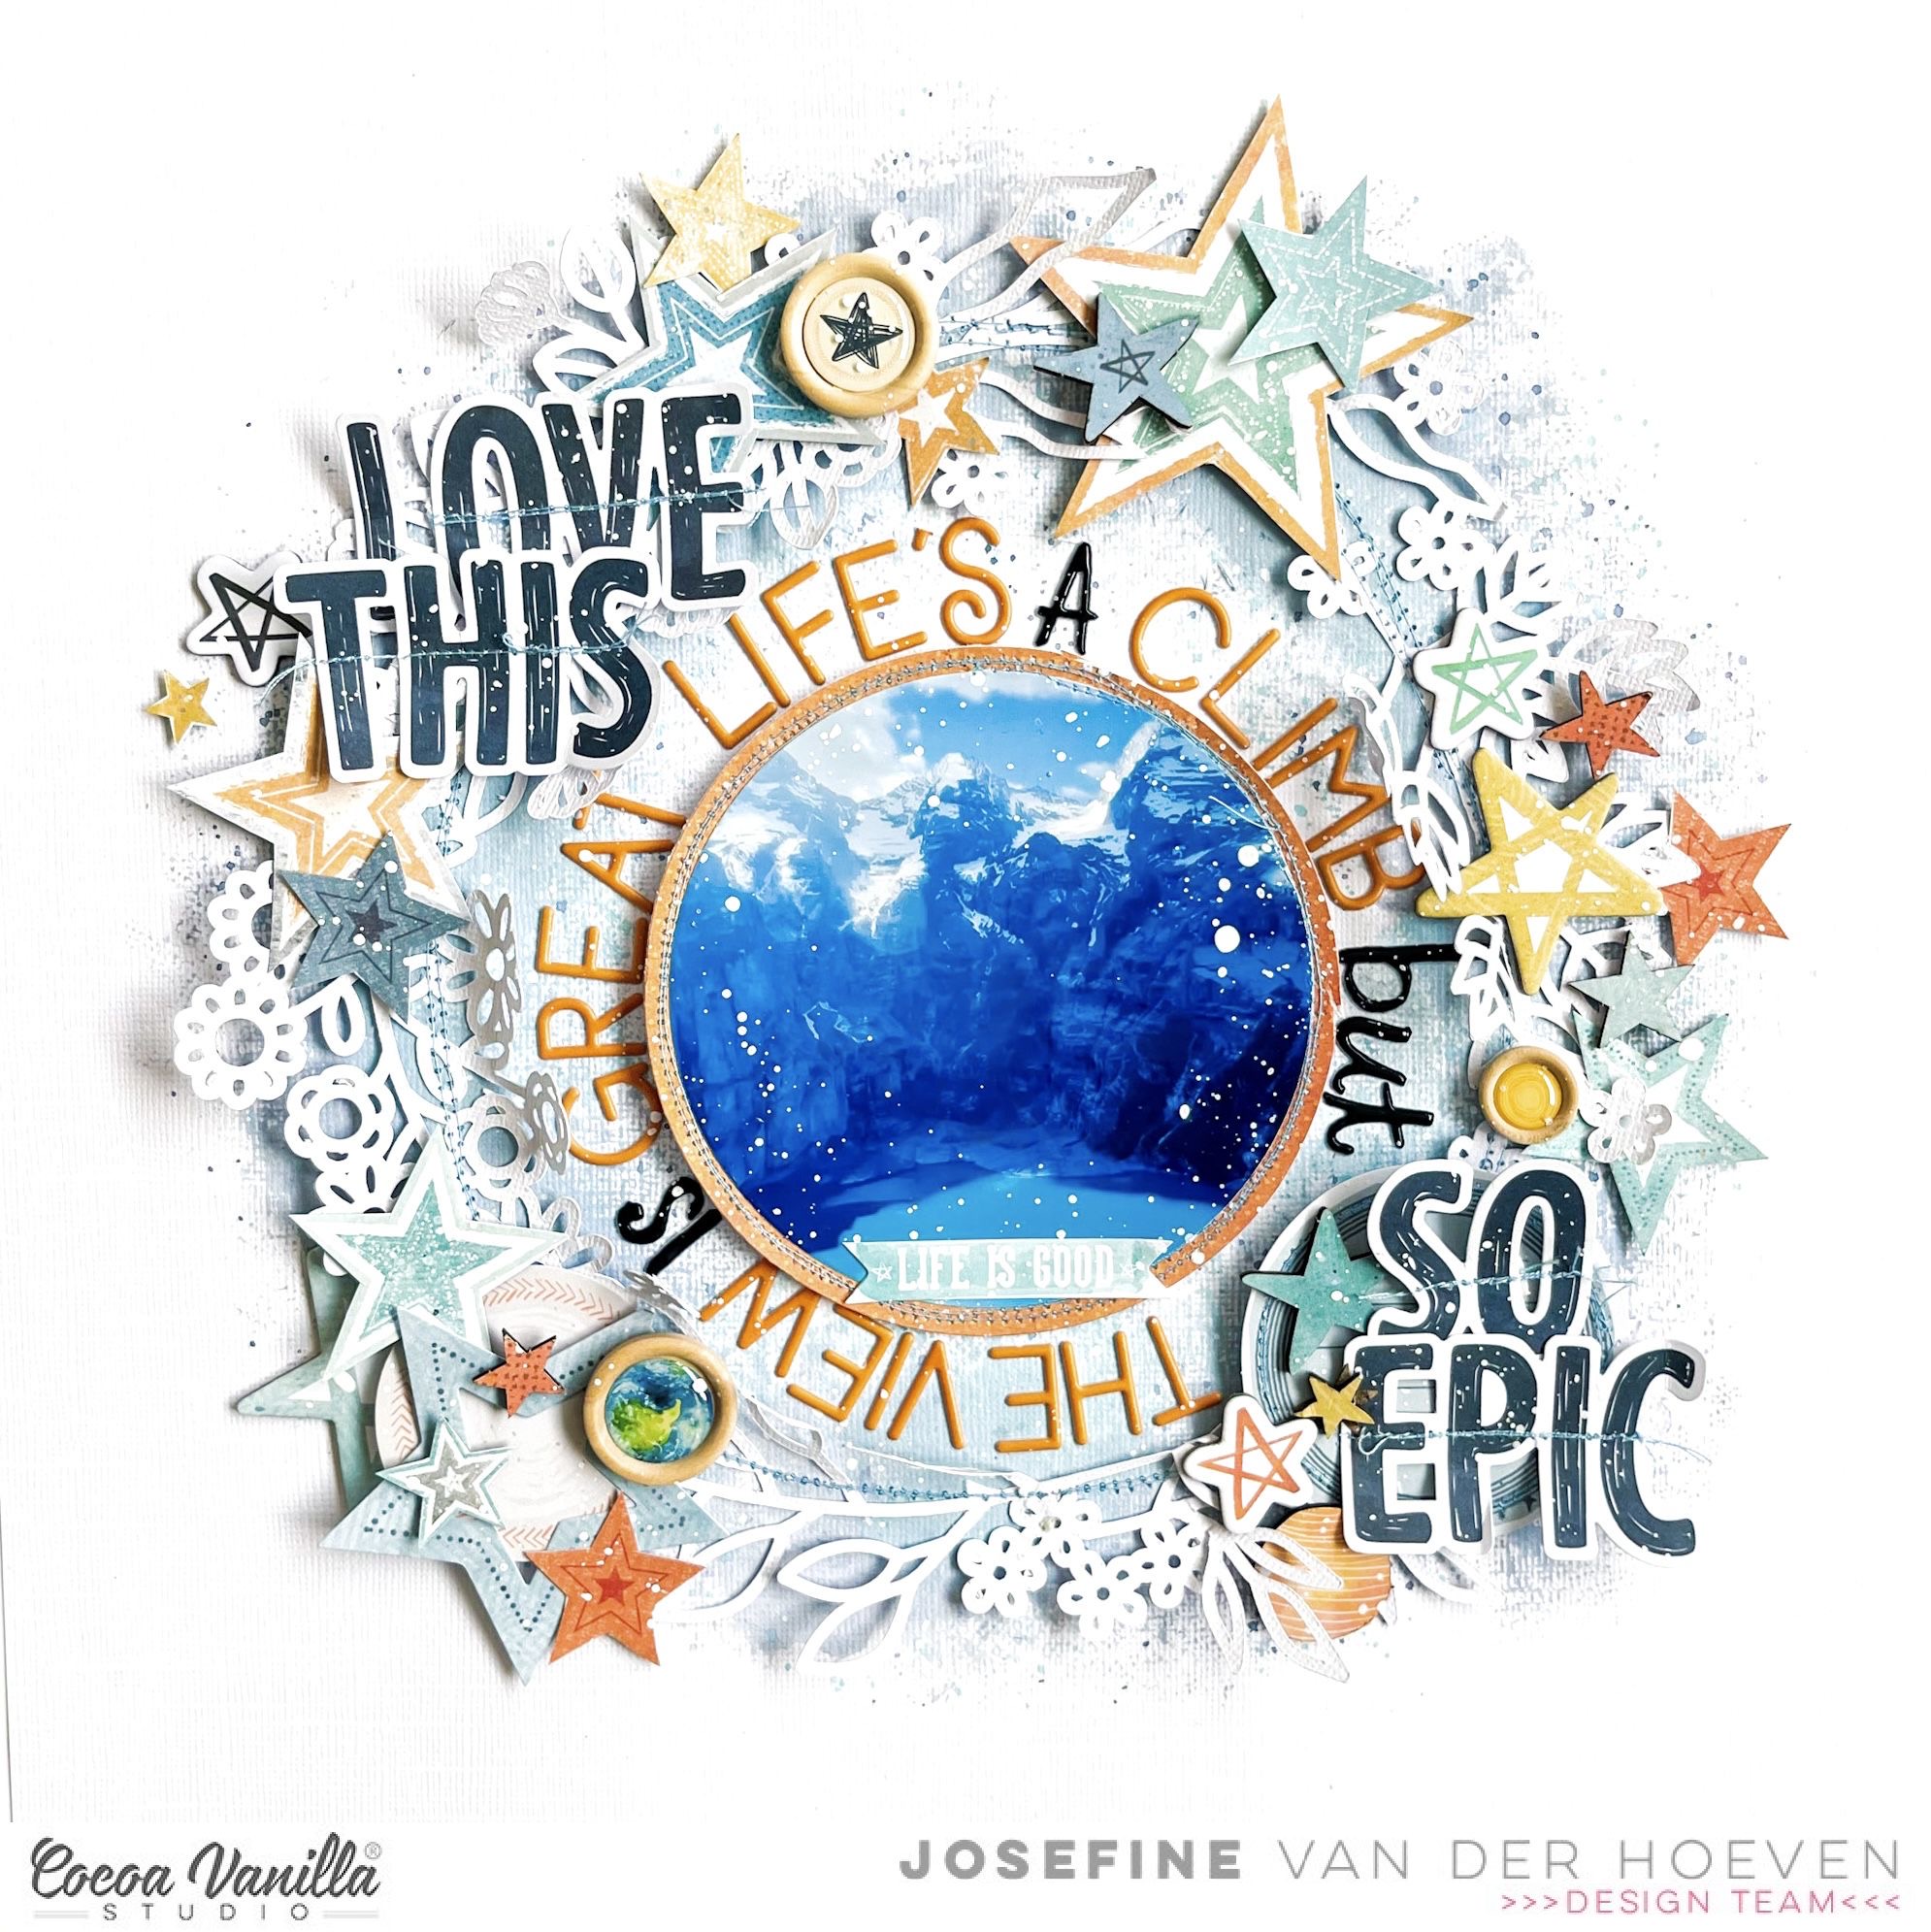
 One of my absolutely favorite collections is “No Limits” and I think this collection is perfect for a Happy New Year scrapbook layout.
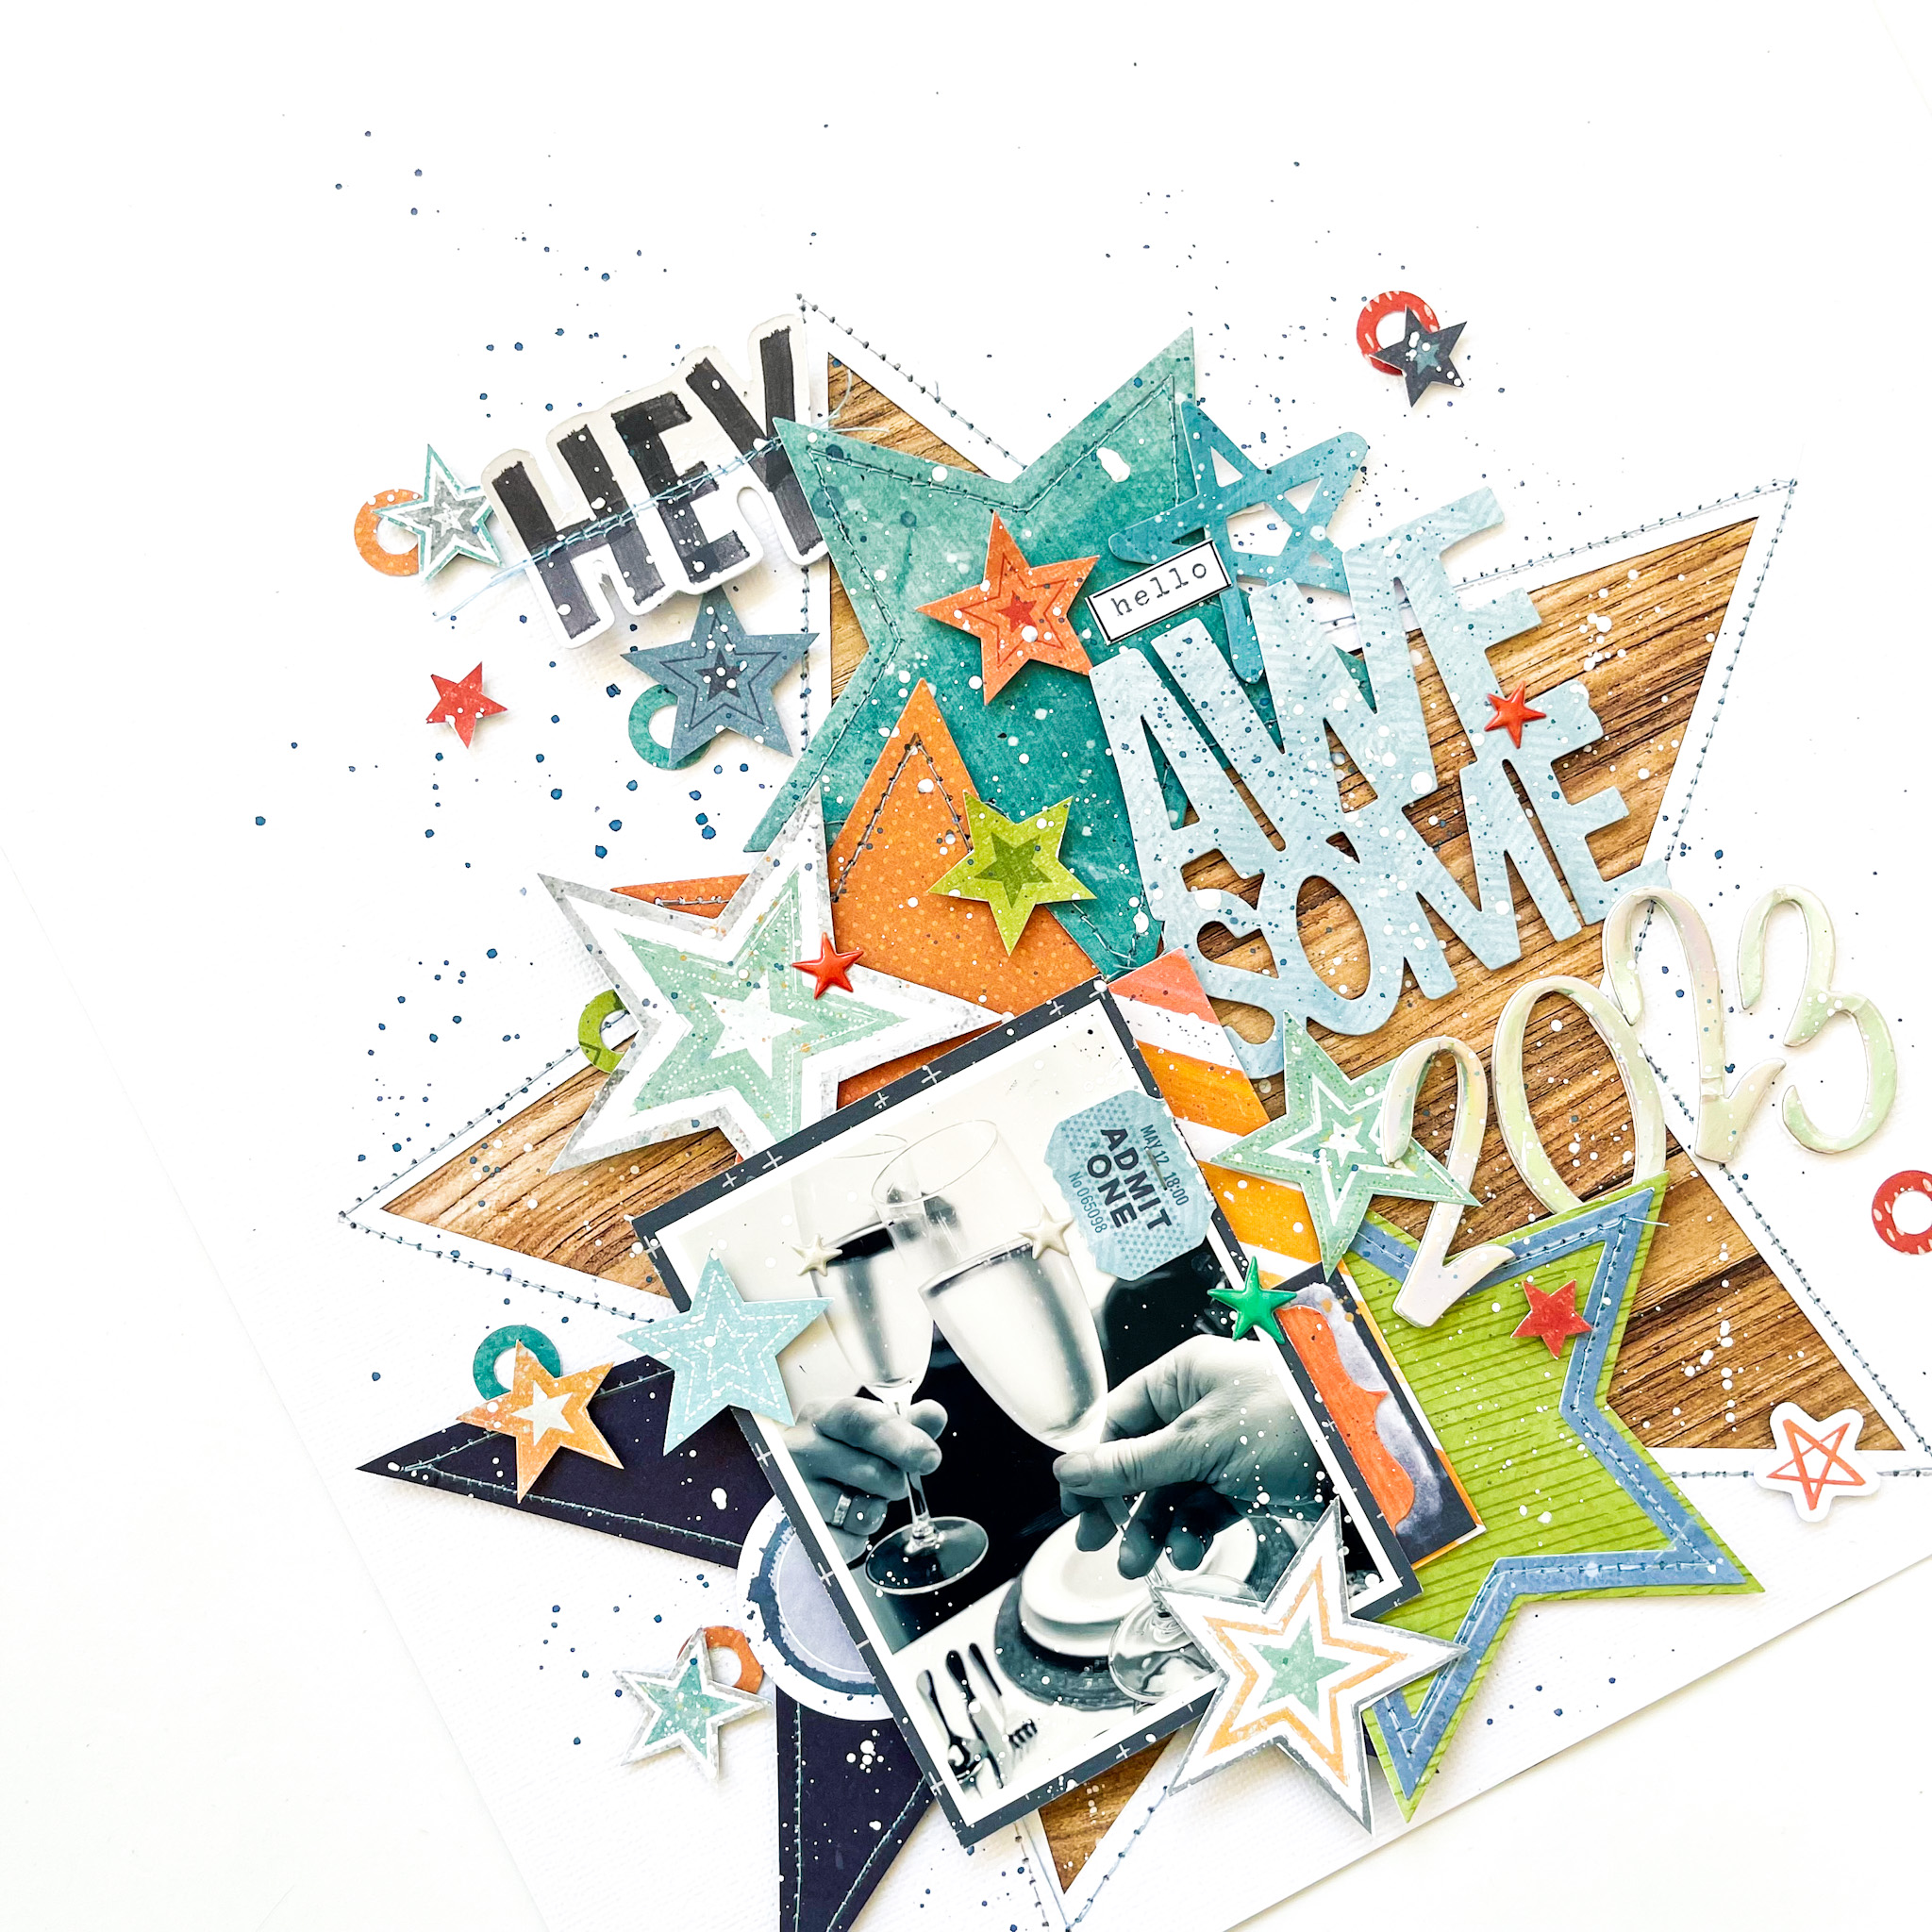
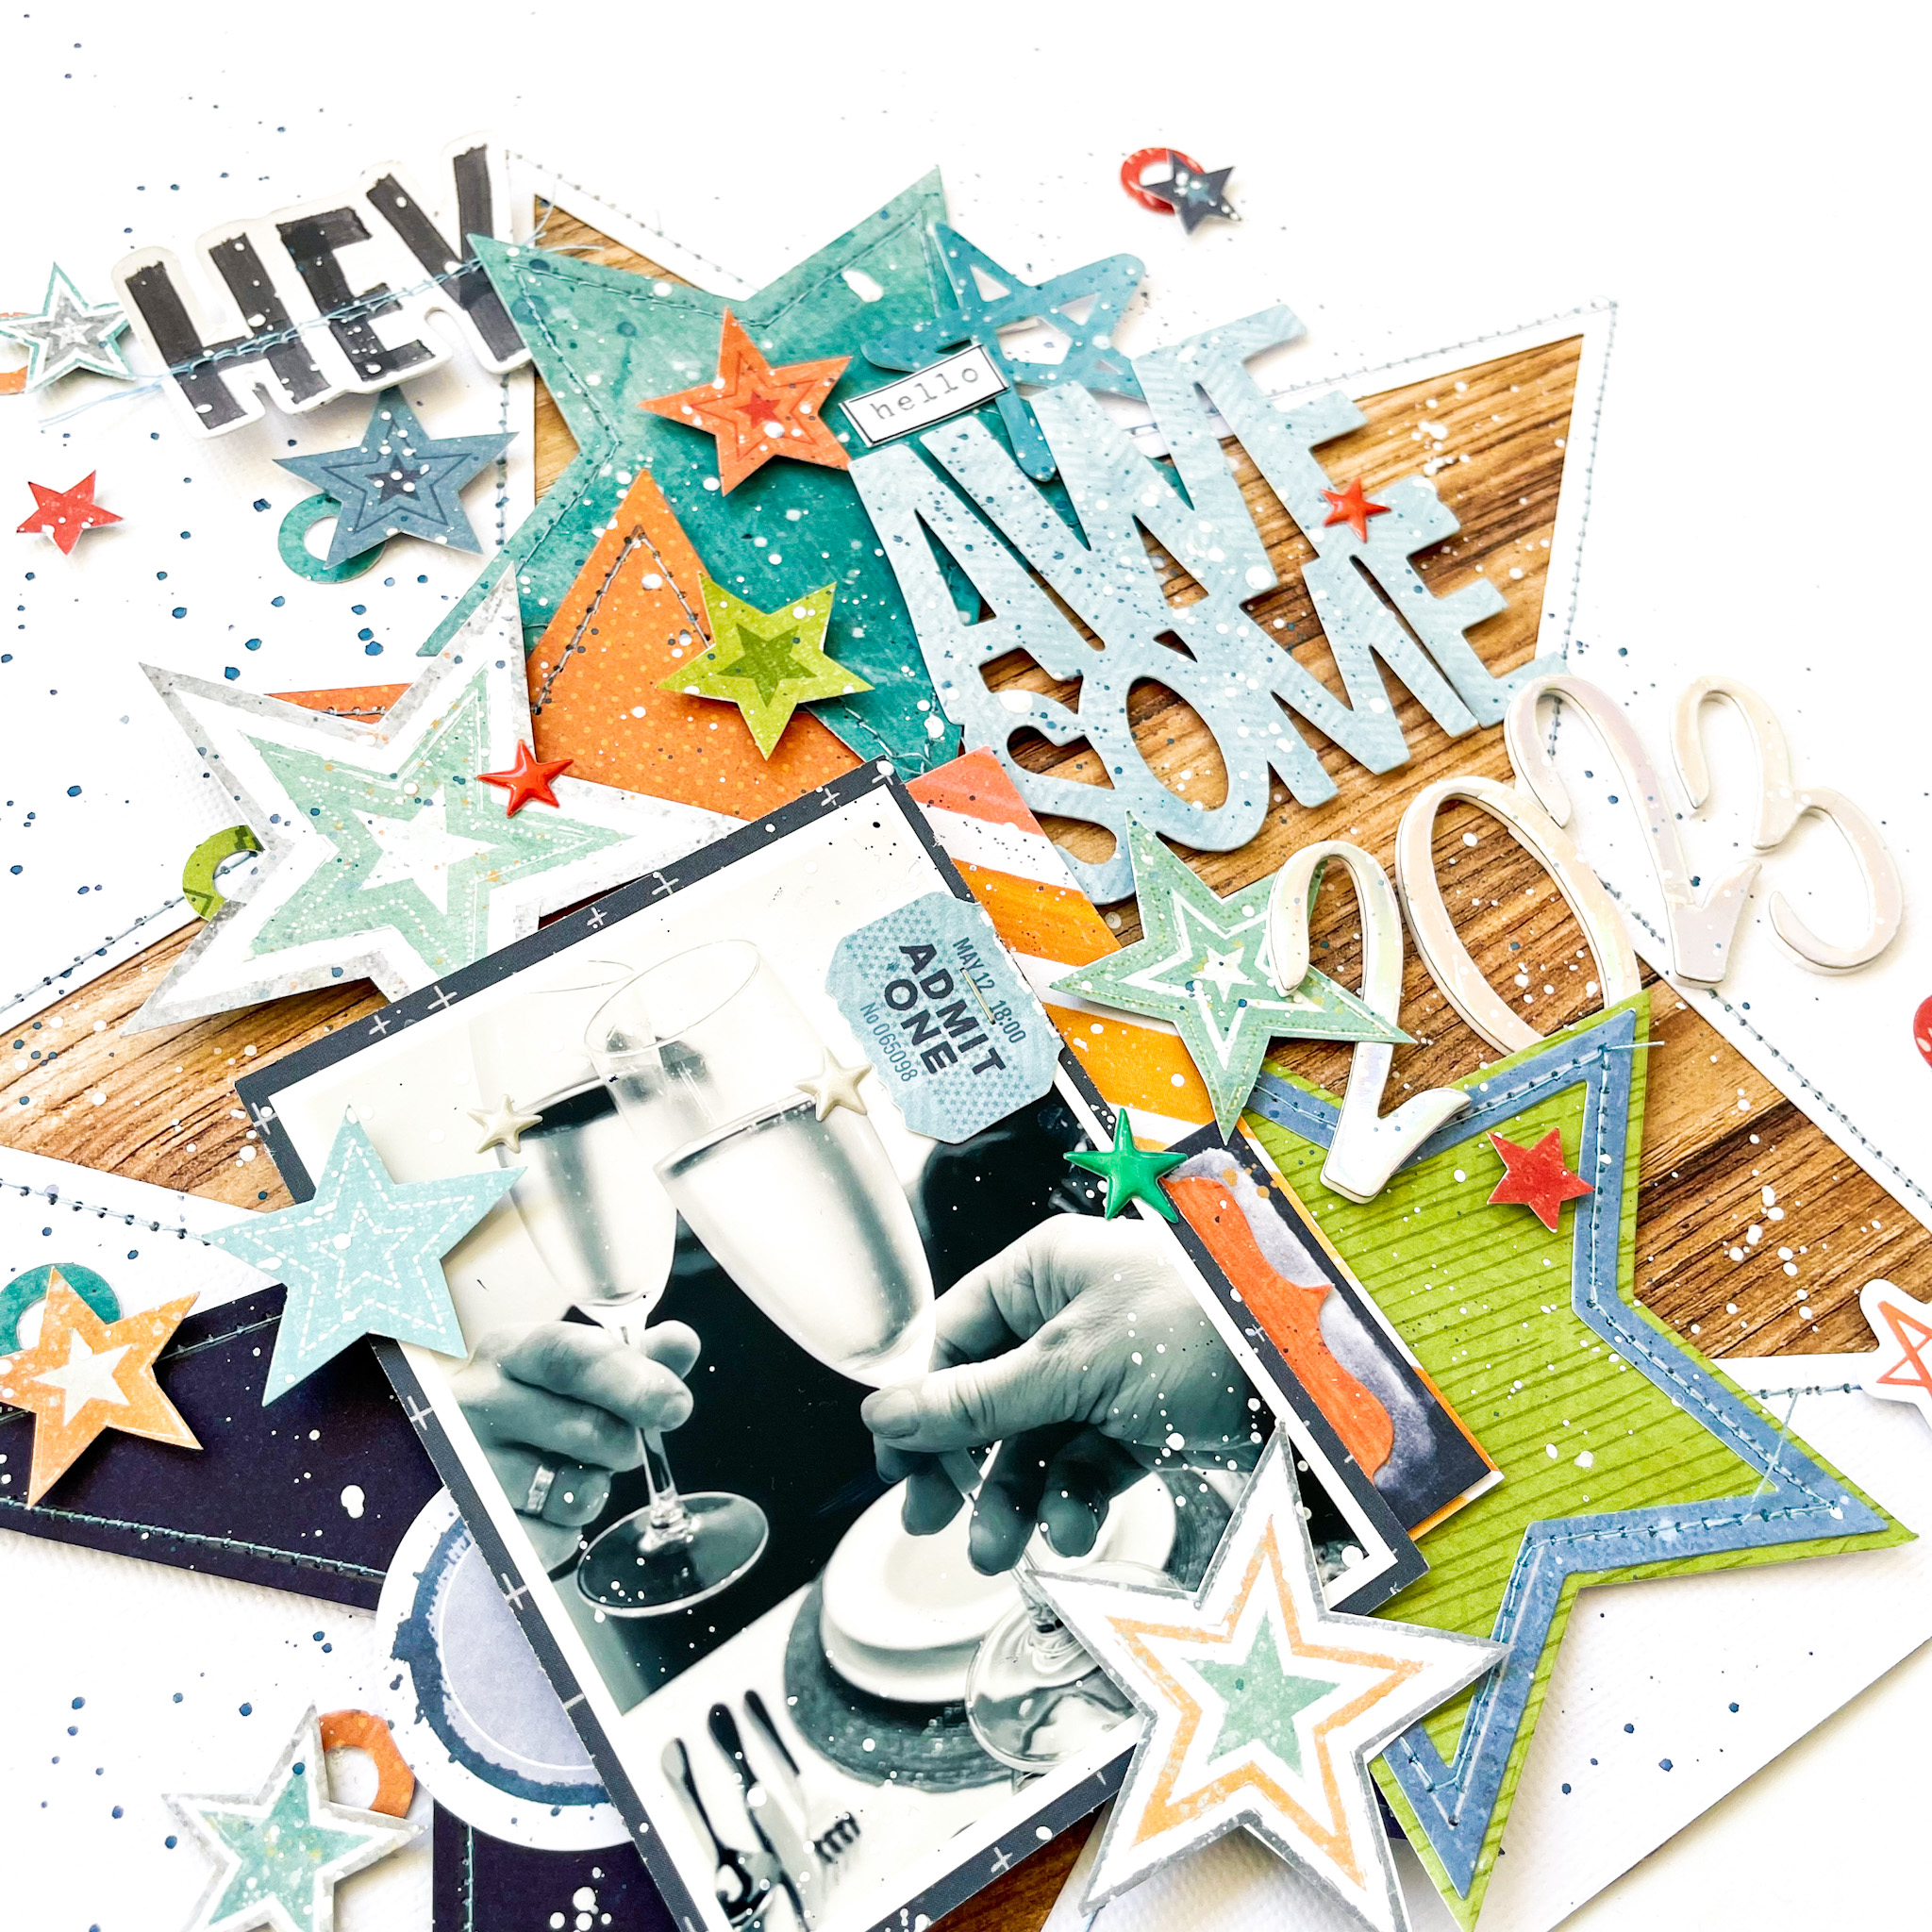


 I took a 12×12 watercolor paper and choose three pink colors of distress oxide to work with. The colors I used are, picked raspberry, kitch flamingo and spun sugar. I placed an ink pad on my white background and make a horizontal line. I do this with all the three different ink pads. Then I take a medium watercolor brush and blend the colors with each other by using a little bit of water. I splash some more with the colors by using my watercolor brush and then let the background dry by air. By splashing with water on your distress oxide and dabbing it dry with a piece of kitchen paper you create a super cool watercolor effect.


