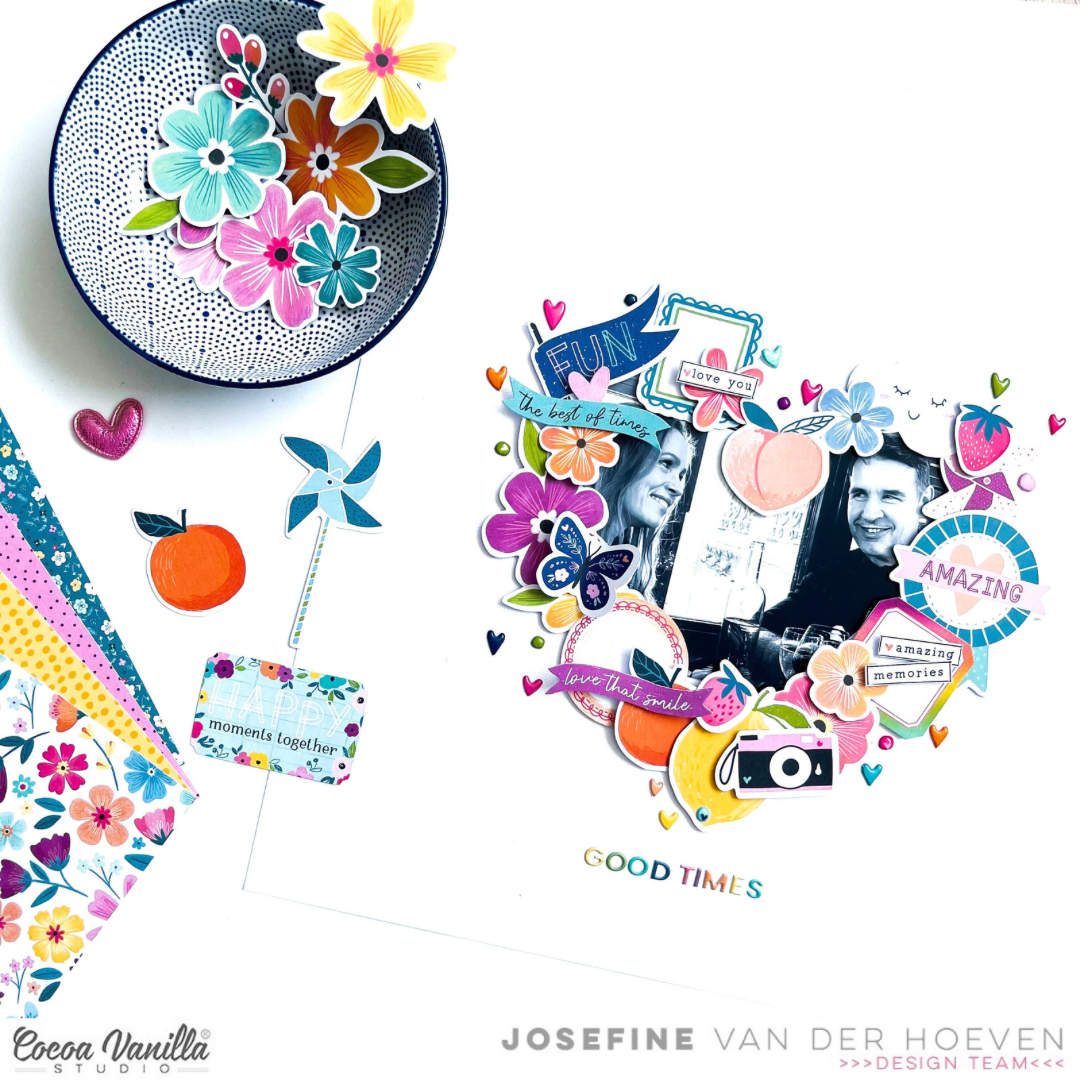
Welcome to the Cocoa Vanilla Studio blog. It’s Josefine here with a new scrapbook layout created with the amazing ‘Happy Days’ collection. In this blog post, I wanted to highlight the die-cuts ephemera. I chose a white cardstock background so that my heart die-cut frame gets all the attention it deserves.
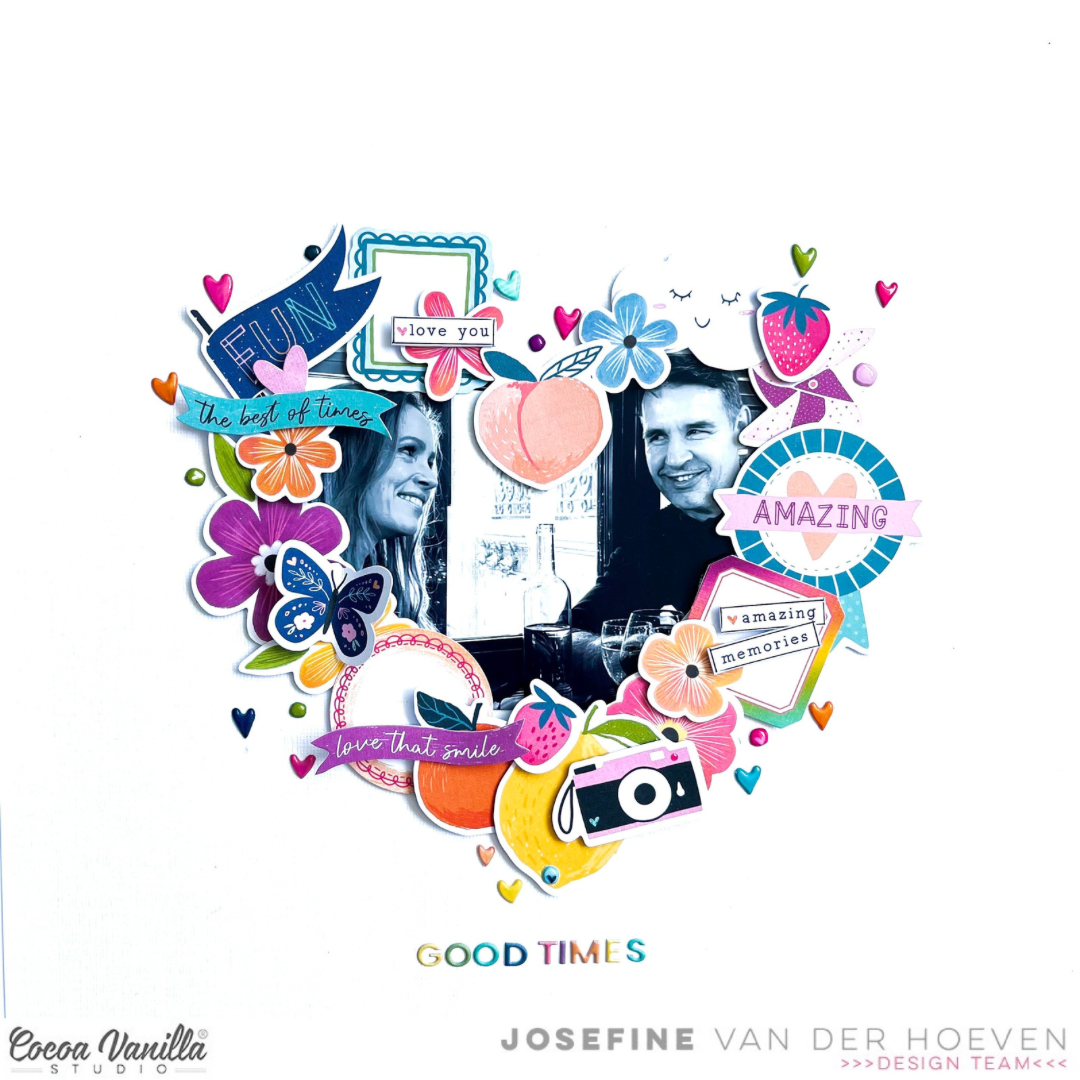
First, I used my Cricut electric cutting machine to cut out a large heart in the center of the layout. I enlarged a black and white photo of my husband and me in Paris and adhered it behind the heart using double-sided adhesive tape. Now, let the decorating begin…
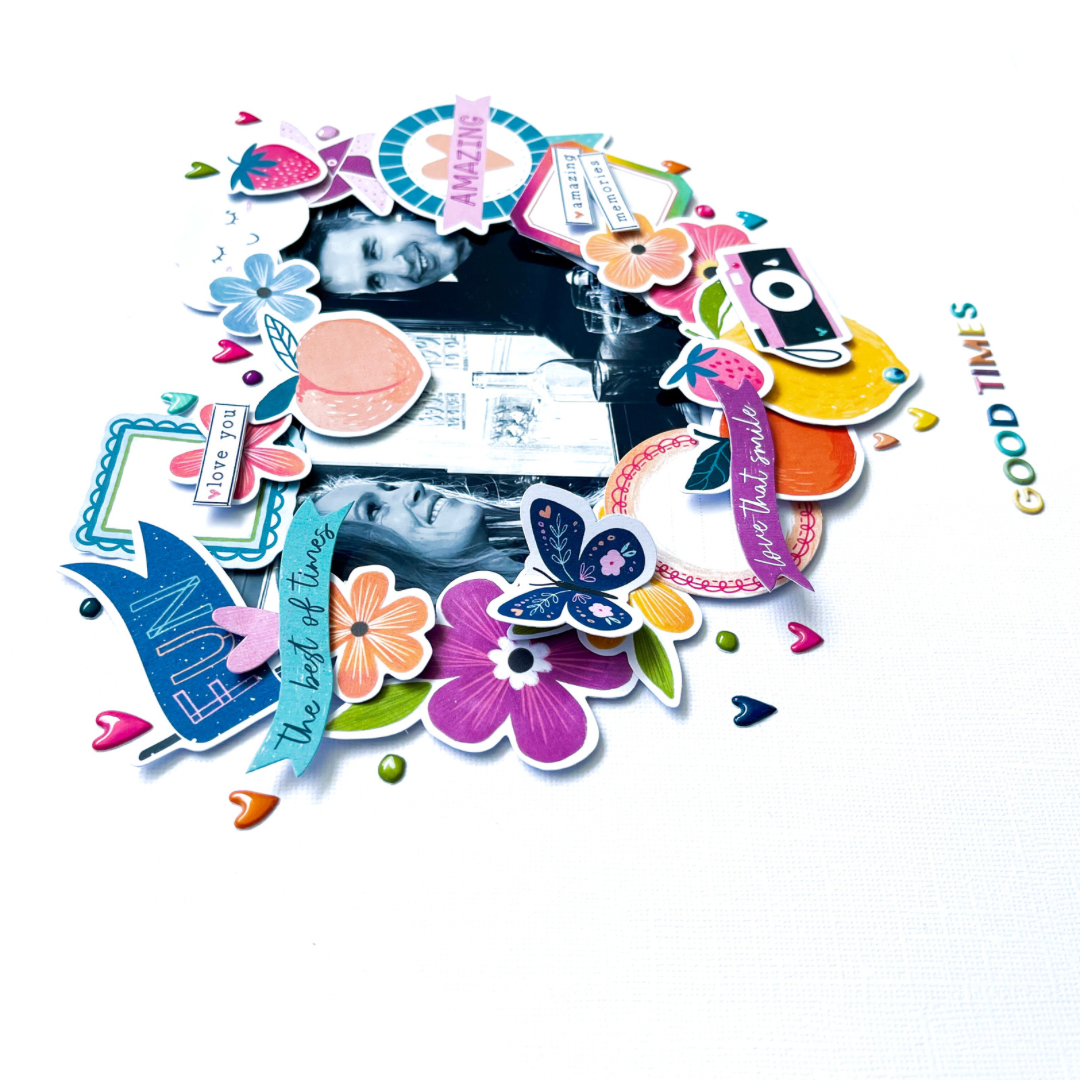
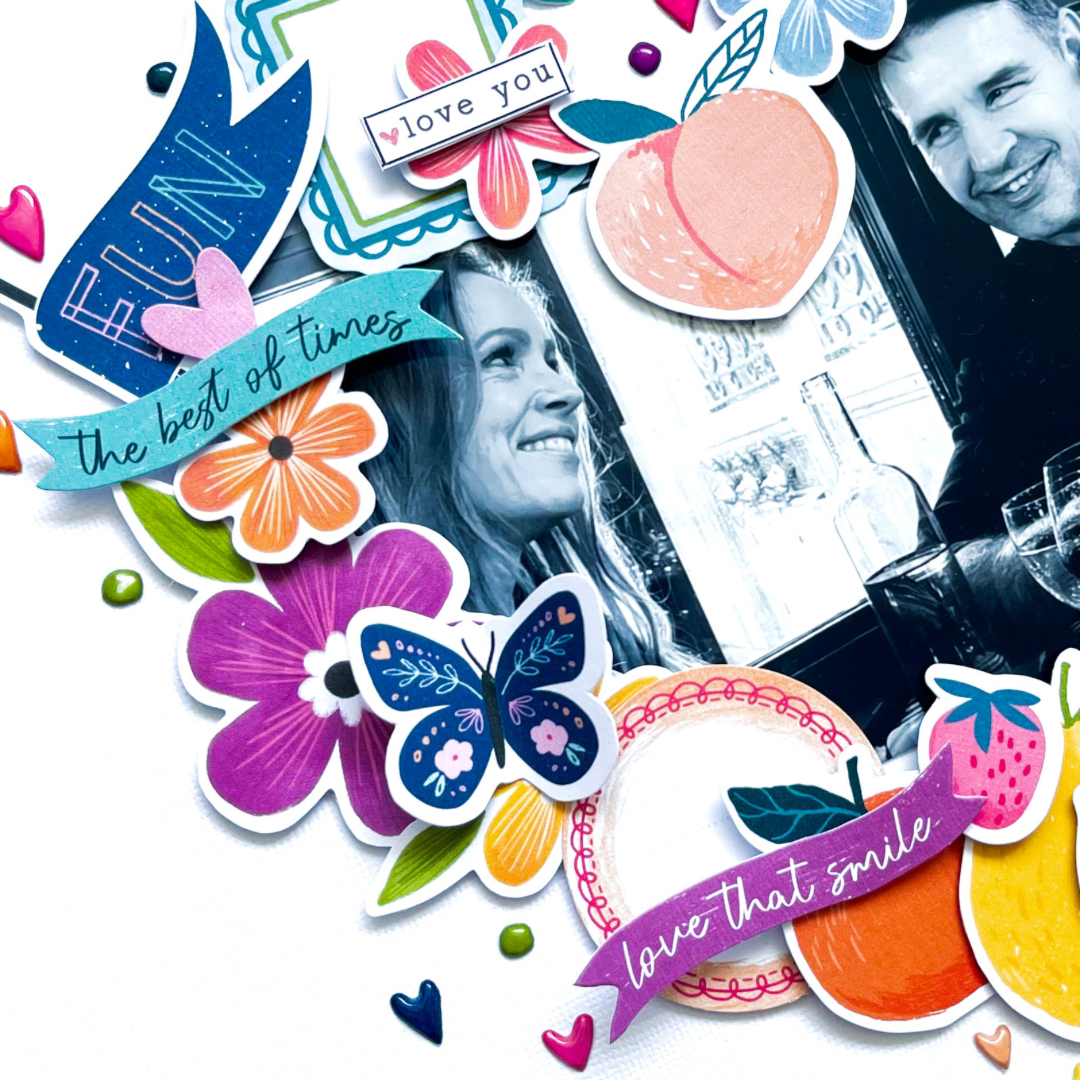
I love all the ephemera die-cuts and matching them by color, pattern, and theme. First, I select which die-cuts I want to use, and then I arrange them in a heart shape around the photo. Once everything is in place, I use 3D foam to secure the ephemera die-cuts. I’m super happy with the result, and the colored die-cut ephemera stand out beautifully against the black and white photo. It creates a explosion of color around the photo.
The small puffy hearts are so adorable that I give them a special place around the frame. For the title, I use the gorgeous colored mini alphabet and choose the title ‘Good Times,’ which is fitting because I thoroughly enjoyed our trip together. I also select a few word strips, add a thin black line to the edge using my fineliner, and place them on top of the die-cuts.
I hope I’ve inspired you with this layout and look forward to seeing you again on the blog for new inspiration! Have a wonderful and creative day!
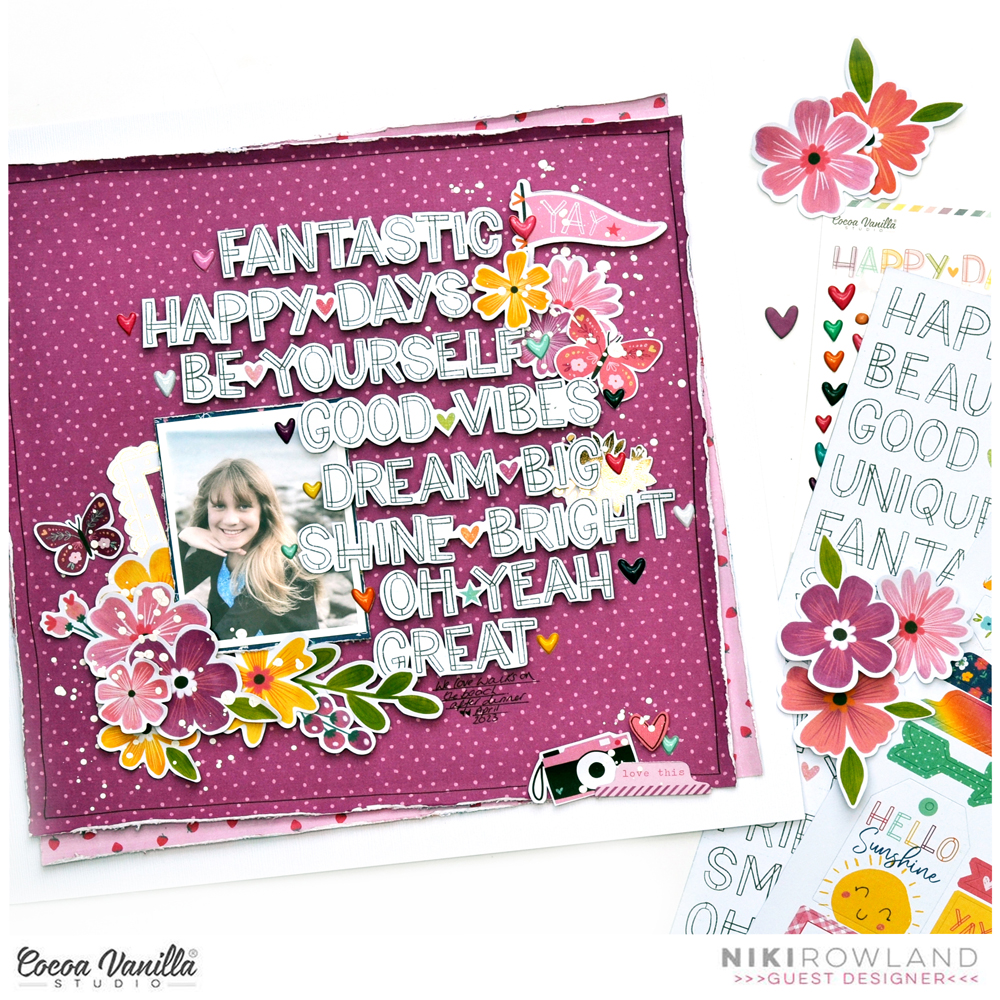
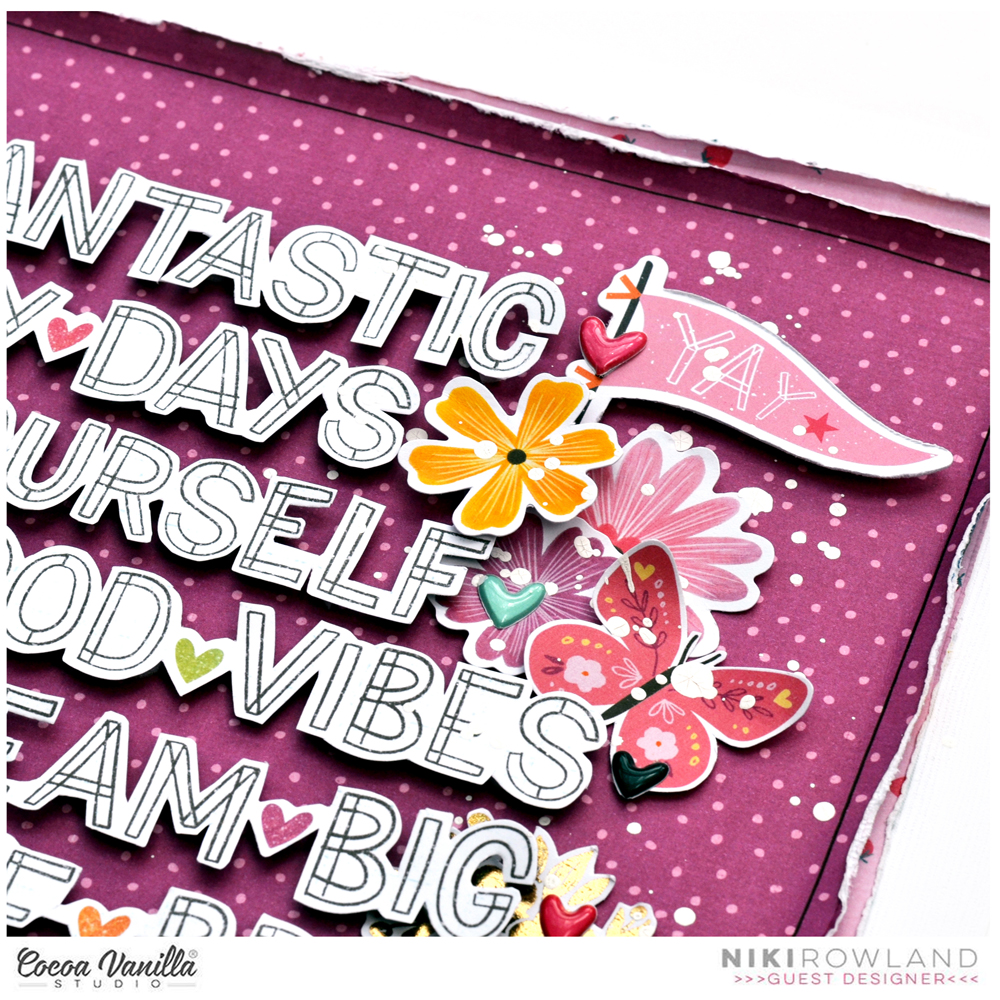
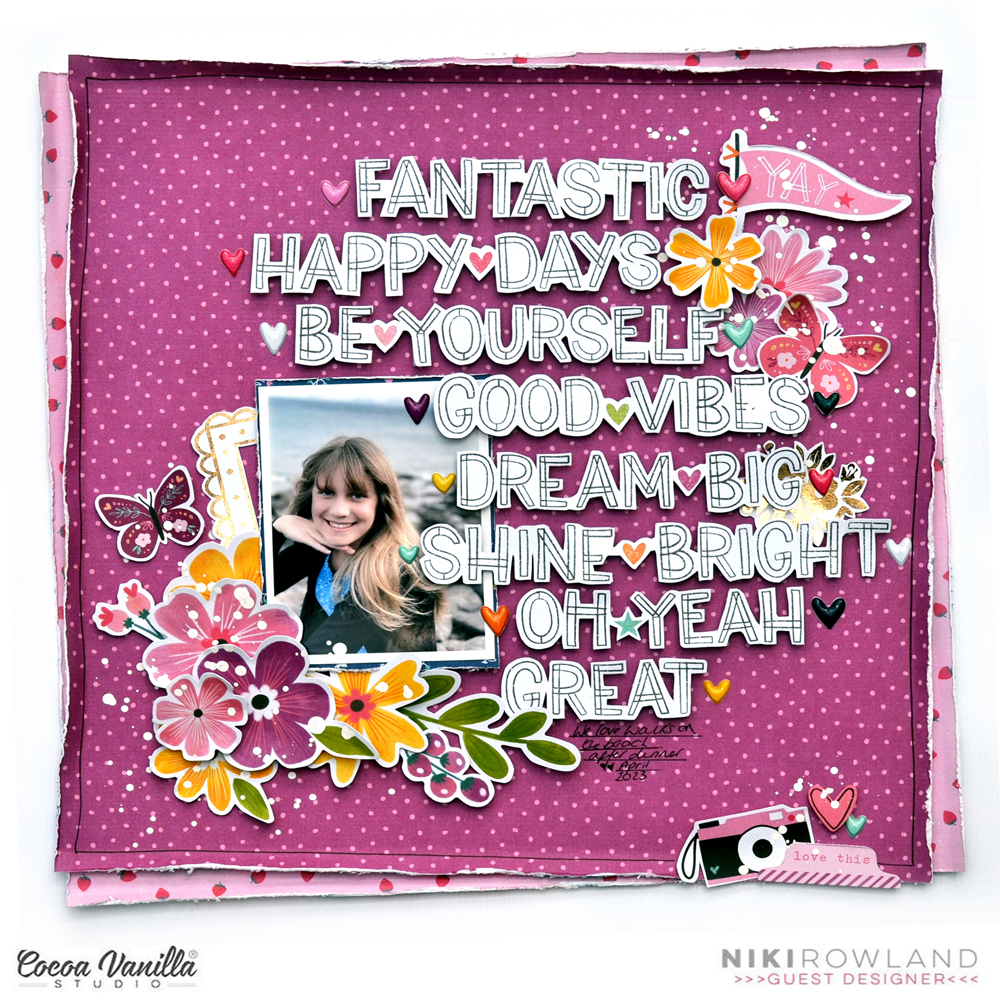
Hi everyone! This is Niki (@nikiclairecreates) and I’m delighted to be back Guest Designing with my second layout and process video using Happy Days. I am obsessed with those gorgeous words on the Definitive paper and have spent some time fussy cutting a lot of them out. I wanted to make a feature out of them on this layout.
I chose the purple side of Flutterby paper as my background, which I paired with the pink strawberry side of Lush Blooms paper. I trimmed these both down and distressed the edges, then stuck them together offset slightly. I then positioned these onto a sheet of white card.
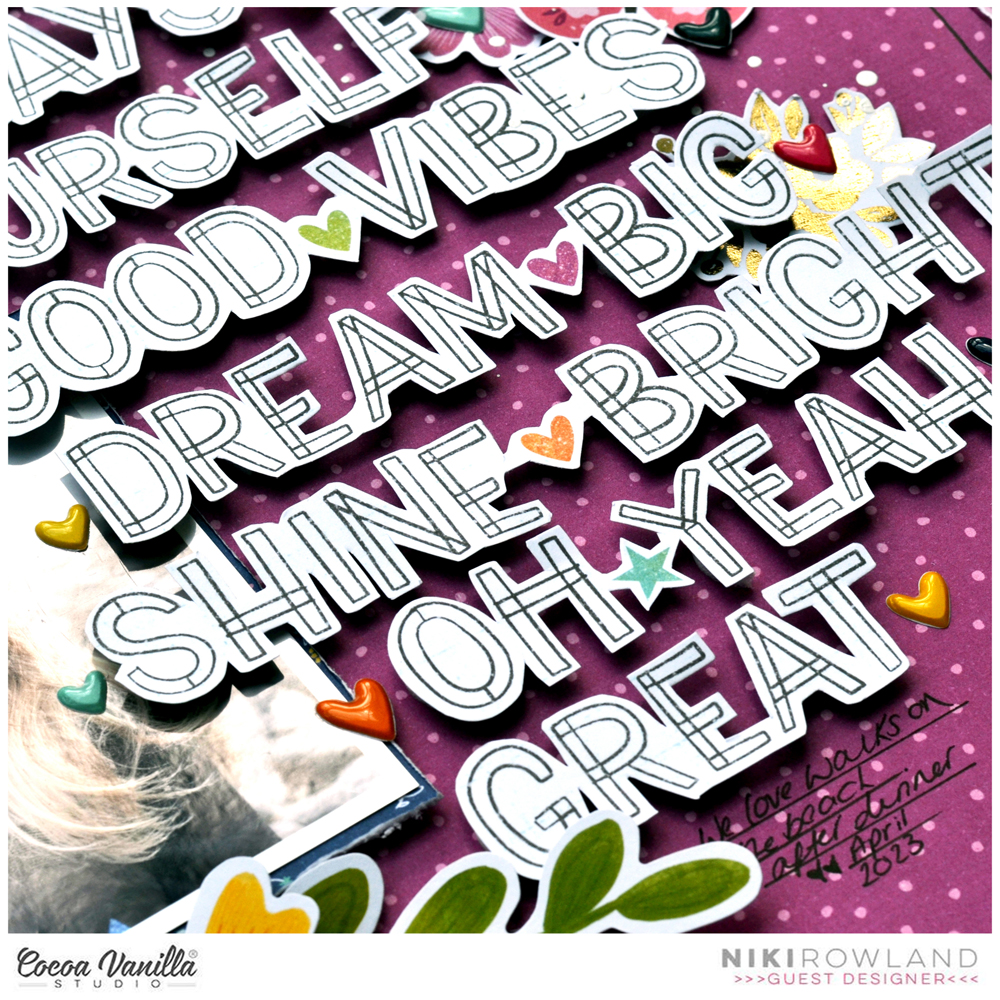
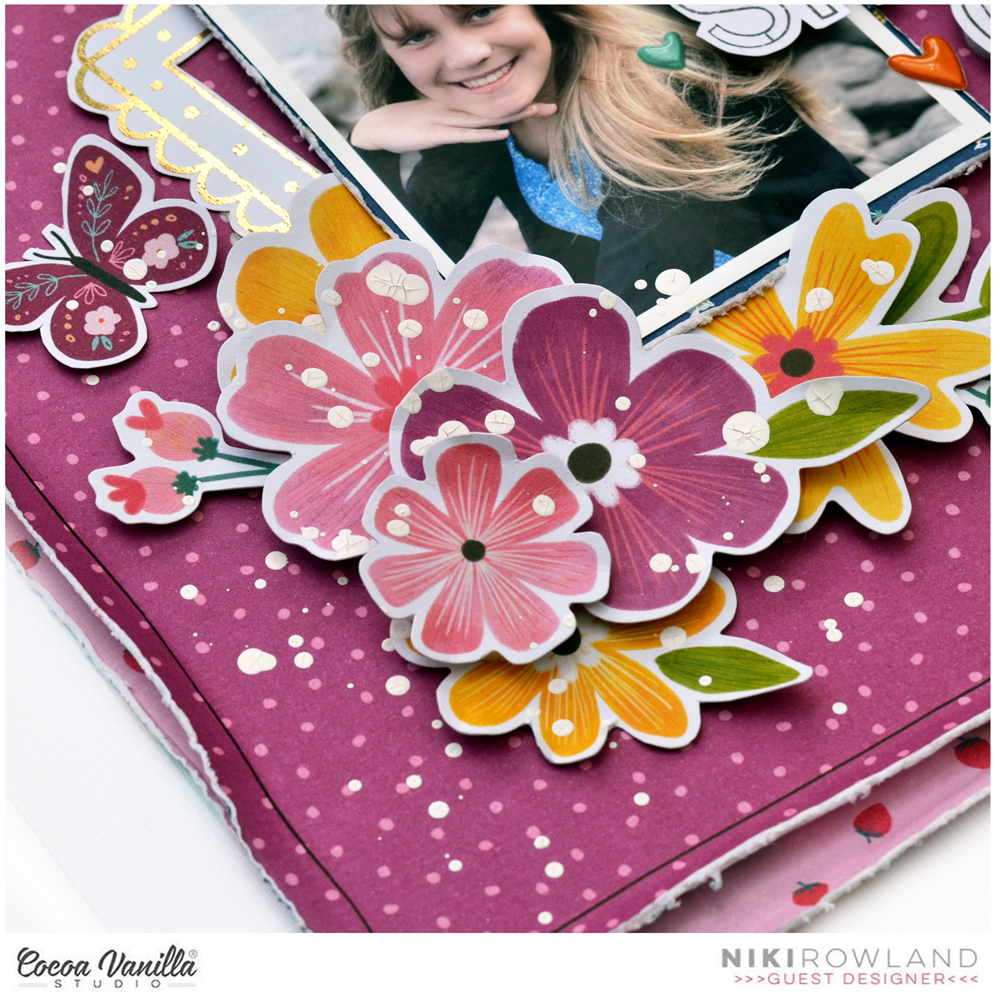
I mounted my photo onto a darker patterned paper and added that to my layout together with a gold fussy cut frame from the Specialty Foiled paper. I then arranged all the fussy cut words around the photo, cascading down from top to bottom. I raised them all on foam pads to give them some dimension.
I then added some of the Floral Ephemera to the bottom corner of my photo, and another cluster in the top right corner. I chose mostly pinks and purple flowers but also added a few yellow ones. Purple and yellow are opposite each other on the colour wheel, so are therefore ‘contrasting colours’. Contrasting colours work best when there is a lot of one colour with a small amount of the contrasting colours and this is exactly what I did with the yellow – just a couple of small pops of it in amongst all the beautiful purple.
I added another tiny cluster in the bottom right corner of the layout using some of the Die Cut Ephemera. I added some butterflies and handwrote my journaling under all the words. I also embellished the words with lots of Puffy Heart Stickers.
I finished off with a few splatters of white paint over the top of the embellishment clusters! I absolutely love how this turned out, I adore purple as a colour so love how this looks as a background! Here is the link to my process video for this layout if you would like to watch along: https://youtu.be/2ygAZcQKt0c
Thanks so much for joining me today and happy scrapping!
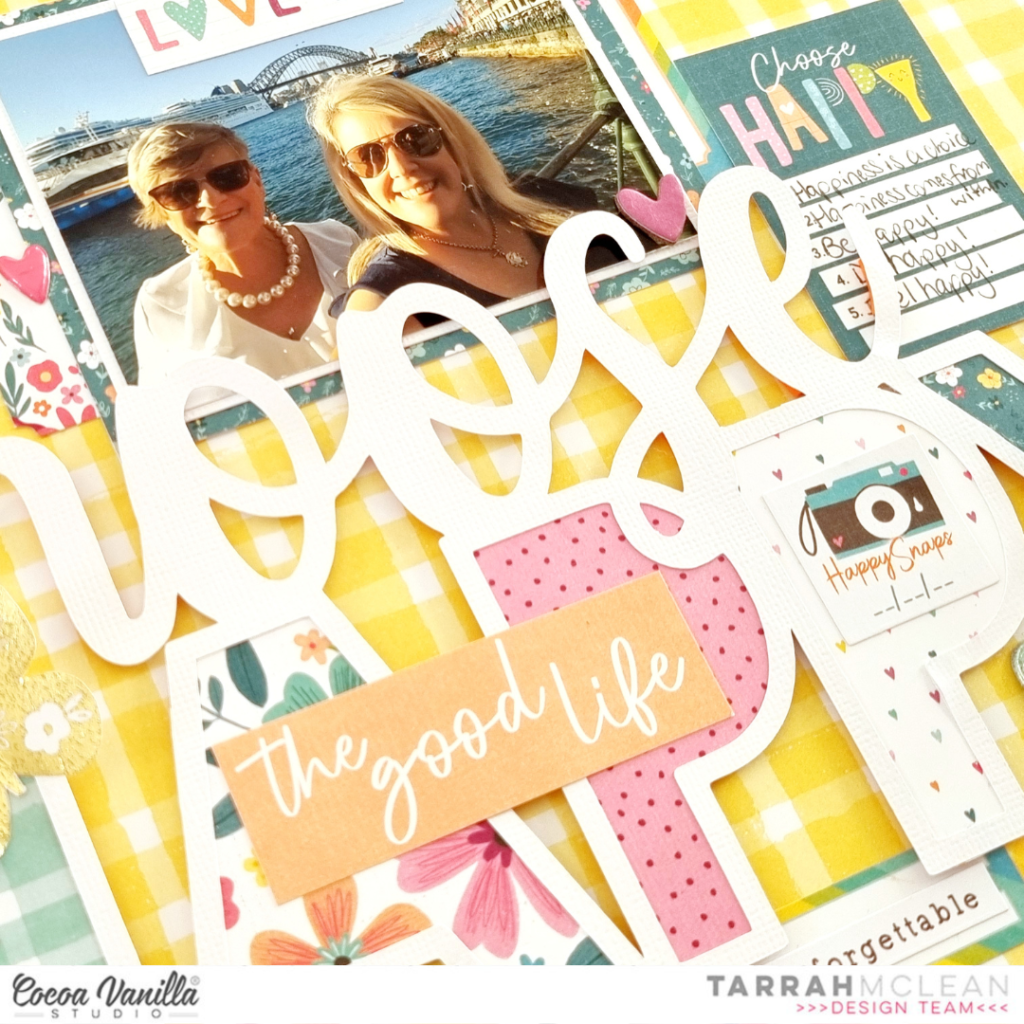
It’s Tarrah back with you and today I am sharing a new layout featuring the gorgeous Happy Days collection!
For this project I was given the assignment of using patterned paper for my background and chose the ‘B’ side of the ‘Feel Good patterned paper’ to document a photo of my Mum and I taken a few years ago.
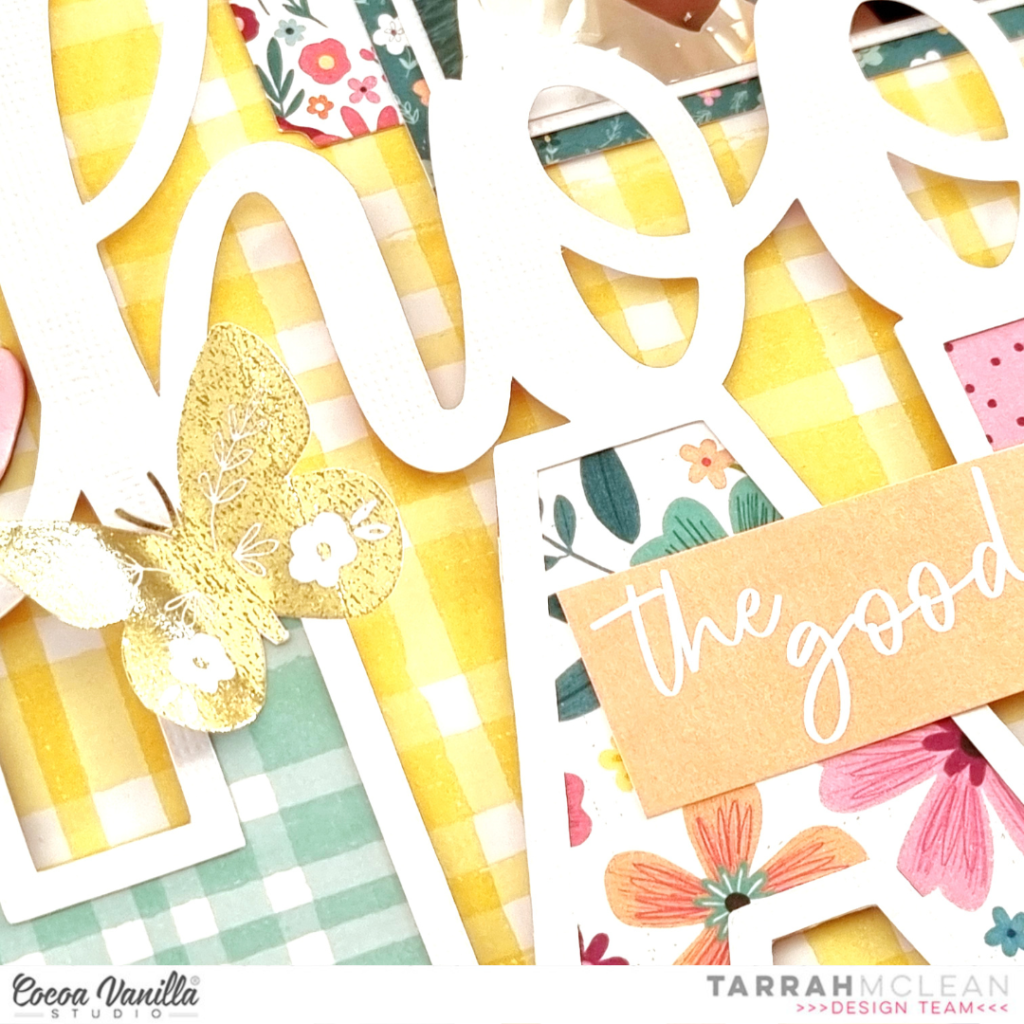
I chose a title cut file from CUT to YOU to add to my layout, cutting it from white cardstock. I then backed the open letters in the word ‘Happy’ with various papers from the A5 paper stack. I added craft foam to the underneath of the cut file and then adhered it to the background. I love how the white cardstock is a big contrast to the yellow background, this really helps the elements pop off the yellow patterned paper. I made sure to only use a small amount of adhesive so that things could be tucked underneath the cut file.
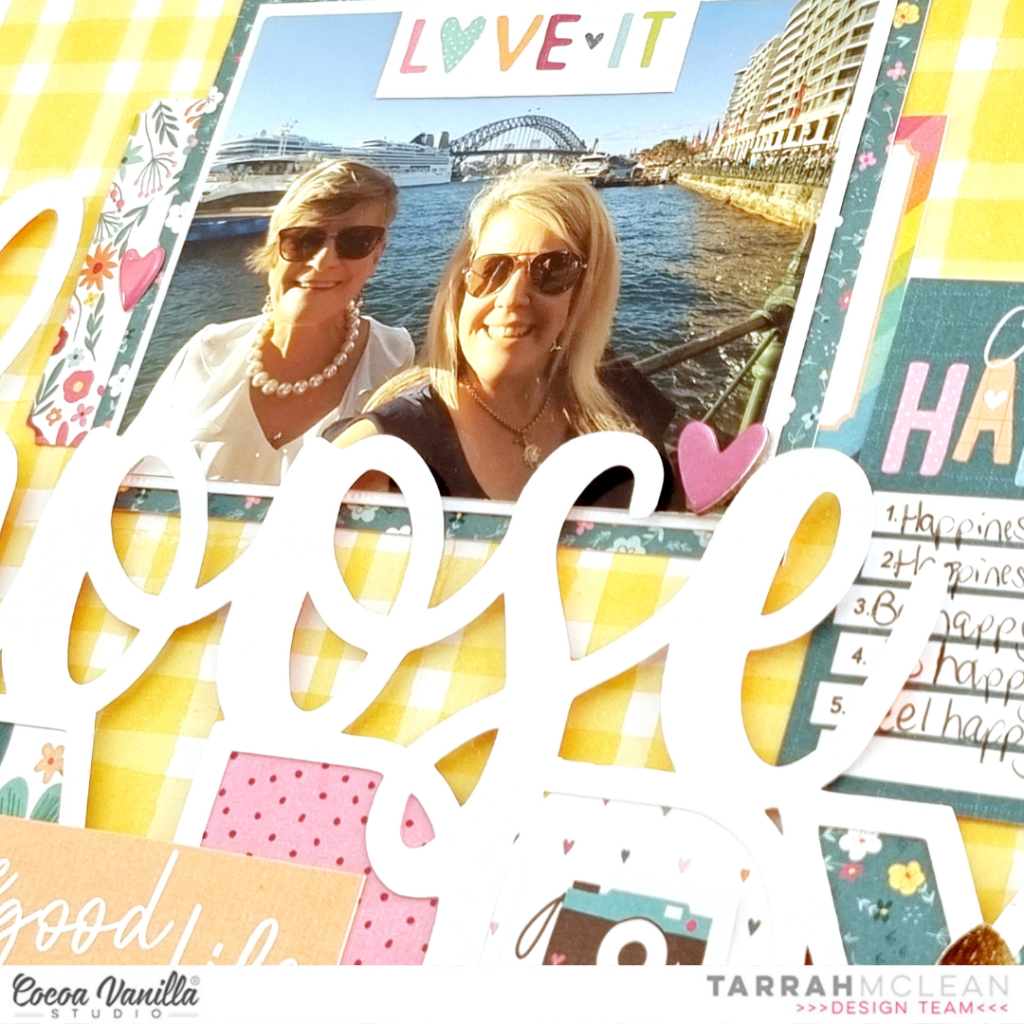
Above the cut file I tucked in my photo, I first layered one of the papers from the A5 paper stack under the photo, I also tucked in two of the stickers from the Accessory Sticker Sheet and tucked them in either side of the photo. I cut out some phrases from another sheet of the ‘Feel Good patterned paper’ and adhered one on top of the photo and the other on top of the cut file. I love to layer embellishments on top of cut files to add some more interest.
At the bottom of the cut file, I adhered the long paper strip with the tabs on it to also from the Feel Good patterned paper, I love how that looks like the cut file is sitting on a shelf of sorts. This was a great opportunity to add some of the small phrase stickers from the Accessory Sticker Sheet to the strip. I cut out the Choose Happy journal card also from the Feel Good paper and adhered it to the right of the photo, I then added some quotes about being happy to it.
Some of the smaller embellishments I added to my page are the Chipboard hearts, the gold foil butterflies cut out of the specialty paper, puffy hearts, ephemera, enamel hearts and some more accessory stickers. I love the dimension that my layout has and I love how it turned out too. Lastly I stamped the date stamp as I always do on my layouts. Don’t be afraid to use a busy patterned paper as your starting point for your page, you can still keep the focus on the photo by using clever techniques to draw your eye to the photo.
Thank you so much for stopping by the Cocoa Vanilla blog today! I hope you enjoyed reading about how I created my layout as much as I enjoyed creating it!
It’s Sophie with you today and a beautiful and simple layout to share, created with the Happy Days collection!
I went for a grid design and selected a few patterned papers from the A5 paper stack, and used a scalloped circle die from my stash to cut 6 scalloped circles.
I aligned them in two horizontal lines on a white background cardstock.
I cut three photos of my dog Fiona in a circular shape and placed them on three of the circles.
I mounted everything on adhesive foam.
My title is a mix of the Accessory Stickers, Mini Puffy Alphabet stickers and an ephemera.
I embellished the page in a color block manner with floral die cuts, fussy cut flowers and butterflies, a few accessory stickers and a paper bow.
Here are more close-ups:
Honestly, this page was very simple and easy to make! I love the result and hope you do too!
Mandy here today to share a new layout showcasing the fabulous new Happy Days collection. This week our design team are sharing projects that feature the Puffy Alpha Stickers. My favourite way to use these sweet little alphas is to combine them with a larger alpha to create a longer title. This is exactly what I did on this page that documents a selfie of my hubby and I.
I started this layout off by trimming down a sheet of white cardstock and matting it on the gorgeous magenta Flutterby paper. I added a doodled border around the white cardstock to add some further definition and interest. Next I cut two triangles, one larger than the other, out of the beautiful yellow Feel Good paper, and adhered these on each side of the page. I matted my photo with a paper from the A5 Paper Stack and adhered that over the larger triangle on the left hand side of the page.
I love all of the different colour combinations that can be used from this one collection, and for this layout I decided to focus on the teal, magenta and yellow. I chose flowers in these three colours from the Floral Ephemera pack to create my floral clusters. To create interest and dimension I love to layer some flowers under the photo and others on top. I added one cluster to the top right hand corner of the photo, and another to the bottom left.
I created a third cluster in the bottom right hand corner of the page, over lapping the smaller yellow triangle. Again I created dimension within the cluster by adhering some elements with foam tape.
As I said, I love to combine the Mini Puffy Alpha Stickers with words from the Chipboard Titles. By using the mini puffy alphas, it enables me to create a longer title that also doubles as my journalling. These sweet little alphas are so fun and colourful and add so much interest to the page!
I finished the layout off with some cute banners in the top right hand corner of the page, a couple of little phrase stickers from the Accessory Sticker Sheet, and of course a sprinkling of hearts from the Die Cut Ephemera and the Puffy Sticker Pack.
I hope that you enjoyed taking a look at my layout and seeing how I used the Mini Puffy Alpha Stickers on my page. Thanks so much for stopping by.
We are thrilled to be able to welcome a special guest designer today – the very talented Niki Rowland! Niki will be joining us with some projects featuring our ‘Happy Days’ collection and we know you are going to LOVE them!
I’m Niki, I live in the UK with my creatively challenged husband and my three children. I’m a pretty paper addict who makes the occasional cupcake and likes coffee and shortbread biscuits. I love turning bright colours and floral ephemera, into scrapbook layouts, with a few mini albums along the way too. I currently create for Simple Stories, and GoGo Getaway which is my own scrapbooking retreat business. That keeps me pretty busy but because I wouldn’t want to get bored, I also am a governor at my children’s school and somehow, I also ended up leading the PTA as well…so now I can add ‘fundraising’ to my list of skills too! Creating feeds my soul and I try to do something creative every day. I hope you enjoy my creations x
Hi everyone! This is Niki Rowland (@nikiclairecreates) and I’m delighted to be guest designing for Cocoa Vanilla Studio today!
I will be sharing four projects during June and July, and today I have my first layout and process video to share with you, using the Happy Days collection. I cannot tell you how much I love this collection, it is so bright, happy and fun! I absolutely fell in love with the colourful stripes on the Sunshine Lollipops paper and decided to focus on that for this layout.
I decided to cut the stripes into their colour groups and make rosettes in a variety of colours. I really enjoy making rosettes and love how they look and really went for it on this layout! I cut out two wide pieces (four stripes wide), several smaller stripes (two stripes wide) and one teeny stripe (one stripe wide). I scored them every quarter-inch and concertina folded them. To make the rosettes themselves I glue the two ends together to make a cylinder, then press the cylinders down in the middle and glue a punched paper circle on top to hold them in place. I did this for all the smaller rosettes, but for the two wide ones the strips needed to be longer to make full circles, so instead I just made semi-circles. These were perfect for the edges of my layout!
I then arranged the rosettes across a white cardstock background, but felt they needed something more, so I added some ink in coordinating colours under each rosette. I also added splatters in the same colours. This creates a ‘glow’ behind each rosette and make them pop off the page even more! I then glued the rosettes in place onto the background, using hot glue.
I cut out the subjects of my photos and added them to each of the large rosettes. I also fussy cut several words from the Definitive paper and added these to all the smaller rosettes – I love these words so much, the font is awesome and the words are perfect for my photos!
I then added Floral Ephemera colour-on-colour, tucked in around the photos and rosettes. I raised some on foam pads for added dimension. I also added a few bits from the Die Cut Ephemera pack including two very cute pinwheels, several hearts and a couple of phrase banners.
I handwrote my journaling in black ink and underlined it to make it stand out more. I loved the look of the black against the colourful rosettes so decided to add splatters of black paint…a bit of a risky move but I LOVE how it turned out! I finished off by adding a few of the mini heart Puffy Stickers in the coordinating coloured areas.
Thank you SO much for joining me today, I really hope that you have enjoyed reading about my layout. I have also created a process video so that you can watch it all come together, it can be viewed here: https://youtu.be/ooh3f_t6Mo4.
Once again thank you so much for joining me, and thank you so much to Cocoa Vanilla Studio for inviting me to guest design!
It’s Tarrah back with you and today I am sharing a new scrapbook layout with you featuring the GORGEOUS Happy Days collection!
For this layout, I am documenting a recent photo of myself and my 2 sons. It is not very often that we get a photo together so when we were together recently, I took the opportunity to snap a photo! I did print the photo in colour however as we are all mostly wearing black it goes with the Happy Days collection perfectly!
I started with a plain white cardstock background, as I often do and trimmed it down to 11′ x 11′ inches, adhering it to the ‘B’ side of the Flutterby paper. I then machine stitched a border around the outside of the layout to add some texture. Next I traced a dinner plate onto some cheap cardstock and free hand cut around the circle. I did not bother too much with how the circle was cut out as I knew that I would be covering it with lots of different patterned papers.
I took out the A5 paper stack and chose all of the different papers to include on the circle. I cut them into strips of different sizes and layered them over and under each other to create a shadows and dimensions on the circle. I adhered them all horizontally but changed the angles on many to create the eye catching look to the circle. I used craft foam and regular adhesive to create different heights and looks to the circle. Once I had completed the circle I added craft foam underneath the circle and adhered it to the centre of the white cardstock background. I love creating lots of dimension on my layouts!
I adhered my photo to the right hand side of the circle and also adhered the black and white doodled frame from the Ephemera pack to the outside of my photo. I love how the black in the frame helps to draw your eye to the photo amongst the busyness of the patterned papers. Next I decided to further enhance the photo by adding some of the gorgeous florals from the Floral Ephemera Pack. I added these tucked in and around the photo, using both foam tapes and regular tapes to adhere them. I also added one of the super cute Puffy Hearts to the bottom right corner and placed a tab sticker from the Accessory Sticker Sheet to the right side of the photo also. On the left hand side of the photo, I adhered the Hello banner flag from the Ephemera pack.
Whenever I create a circular design, I like to be able to add embellishments and my title around the outside so I did this again using the Chipboard Alphabet Stickers to add my title. I spaced out the words so that you have to read around the circle which helps to draw the eye around the layout. In between the spaces I added Die-cuts, Puffy Hearts, Puffy Stickers, more Florals, and Accessory Stickers. On the actual circle, in between the paper layers, I placed some of the phrase stickers from the Accessory Sticker Sheet, these help to tell the story about the photo I am documenting on my layout, more Puffy Stickers and some Die-cuts here also.
I absolutely LOVE how my layout turned out and hope you like it too?! I hope you can find some inspiration from my layout and create a similar page to mine using your Happy Days collection!
It’s Sophie on the blog today with a new layout to share! I used the lovely new collection Happy Days again!
I cut three rectangles from the A5 Paper pack and stitched them down on white cardstock. I added a little scalloped border on their upper edge, and a zigzag stitch between them.
I printed a colorful photo of Sabrina and mounted it on tissue paper and foam adhesive. My title comes from a JustNickStudio alphabet cut file. I placed a smaller velum rectangle on the yellow one to soften it up so that my title stands out a bit more.
I added a beautiful bicycle die cut from the Ephemera pack and created a ground with watercolors from my stash. I fussy cut tiny little flowers that I scattered on the ground around the bicycle and wrote down my journaling on a sticker from the sticker sheet.
Here are more close-ups:
It’s a very Springy page and I LOVE the bright color scheme!
Mandy here today to share a new layout using the beautiful new Happy Days collection! I absolutely love all of the gorgeous bright colours in this collection and for this layout I wanted to create a fun and happy layout featuring all of the colours! What better paper to use for this than the Rainbow Bright paper! I knew that this would be perfect for documenting a photo of my youngest daughter with her besties on her 5th birthday.
The Rainbow Bright paper made such a gorgeous background for this photo and really brought the layout to life! Once I had decided on this paper, I then matted my photo with one of the papers from the A5 Paper Stack. I adhered it to the page using craft foam in order to give it some nice dimension and to help it stand out against all of the bright colours in the background.
For my embellishing I decided to keep it mostly tone-on-tone. So on the pink section of the rainbow I added pink embellishments, on the yellow I added yellow embellishments, and so on. I started with a fun little cluster on the bottom right hand corner of the photo. As this was on the blue and purple section, those were the colours that I chose for this cluster. I included some florals from the Floral Ephemera pack, as well as some that I fussy cut out of the Lush Blooms paper. I also added a couple of DieCuts to the cluster.
Moving over to the left hand side of photo, I added another embellishment cluster using similar items that I used in the first. I tucked some of the flowers under the edge of the photo and some on top to give the cluster some dimension. How gorgeous are the Puffy Hearts?! I couldn’t resist adding one to each of my floral clusters!
I added a third cluster above the photo, creating a visual triangle to draw the viewer’s eye around the page. To keep the clusters looking balanced I again included similar items to the first two. You can also see that I fussy cut a few butterflies out of the Flutterby paper and I scattered these around the page, again keeping them tone-on-tone.
For my title I decided on using the ‘Happy Days’ words from the Die Cut Ephemera pack. I positioned the words so that they curved around the arc of the rainbow. It was the perfect title for this happy photo!
I finished the page off with some typed journalling strips and a few little hearts from the Chipboard Titles pack.
Thanks so much for joining me here on the blog today! I hope that you’re able to create some bright and fun layouts with this collection too!
Hey y’all! Laura Alberts back again with a lovely shelf design featuring the new Happy Days collection. I absolutely adore the bold rainbow patterned paper in this collection and decided to use it with some white cardstock to create these lovely, detailed shelves for my photos to rest on.
Next to each of my photos, I’ve paired it with a cut-apart piece from the A5 paper stack. Love these smaller cut-aparts! This gave me an opportunity to add a journaling spot to the layout. Layering embellishments into large horizontal clusters was a great way to keep the attention on the photos by limiting the attention drawn to each of the individual ephemera pieces.
I used a chipboard title “Love” on one of the smaller shelves. I purposely left plenty of white space and limited my embellishing to my shelves to give my eye a place to rest on the layout. Each set of these shelves is balanced by using similar sized clusters.
I hope this layout inspires you to use your punches in a slightly different way! If you’d like to see how “Love” came together, check out the process video below.


 I started this layout off by trimming down a sheet of white cardstock and matting it on the gorgeous magenta Flutterby paper. I added a doodled border around the white cardstock to add some further definition and interest. Next I cut two triangles, one larger than the other, out of the beautiful yellow Feel Good paper, and adhered these on each side of the page. I matted my photo with a paper from the A5 Paper Stack and adhered that over the larger triangle on the left hand side of the page.


 I finished the layout off with some cute banners in the top right hand corner of the page, a couple of little phrase stickers from the Accessory Sticker Sheet, and of course a sprinkling of hearts from the Die Cut Ephemera and the Puffy Sticker Pack.


 The Rainbow Bright paper made such a gorgeous background for this photo and really brought the layout to life! Once I had decided on this paper, I then matted my photo with one of the papers from the A5 Paper Stack. I adhered it to the page using craft foam in order to give it some nice dimension and to help it stand out against all of the bright colours in the background.
 For my embellishing I decided to keep it mostly tone-on-tone. So on the pink section of the rainbow I added pink embellishments, on the yellow I added yellow embellishments, and so on. I started with a fun little cluster on the bottom right hand corner of the photo. As this was on the blue and purple section, those were the colours that I chose for this cluster. I included some florals from the Floral Ephemera pack, as well as some that I fussy cut out of the Lush Blooms paper. I also added a couple of Die Cuts to the cluster.
 Moving over to the left hand side of photo, I added another embellishment cluster using similar items that I used in the first. I tucked some of the flowers under the edge of the photo and some on top to give the cluster some dimension. How gorgeous are the Puffy Hearts?! I couldn’t resist adding one to each of my floral clusters!


