Hey y’all! Laura back again with a large photo layout. This 5×7 inch photo of my darling child and her new nickname are an important story to share in her album and I think the Sunkissed collection was perfect to highlight it! I added a border to a piece of white cardstock and then weaved three strips of patterned paper vertically and horizontally to make a corner to place my photo.
I outlined each of the strips to give them a little extra pop and added a title along the right side of the photo with clear stickers to accent each of my clusters as well. A banner on the top left and top right of the layout gives it a fun feel. I even tucked a clear mixed media style sticker behind the journaling strips I cut from a journaling card.
This cluster of florals were fussy cut from the patterned paper and I layered it on top of a die cut rainbow with a word phrase sticker tucked alongside and two more on top! Little puffy hearts are spread all over the layout for my scattering bits! Nuvo drops and gold ink splatter finish off the white spaces!
I hope this layout inspires you to have some fun with the bold colors and patterns in the Sunkissed collection! To see how the “Call Me Charlie” layout came together, check out the process video below!
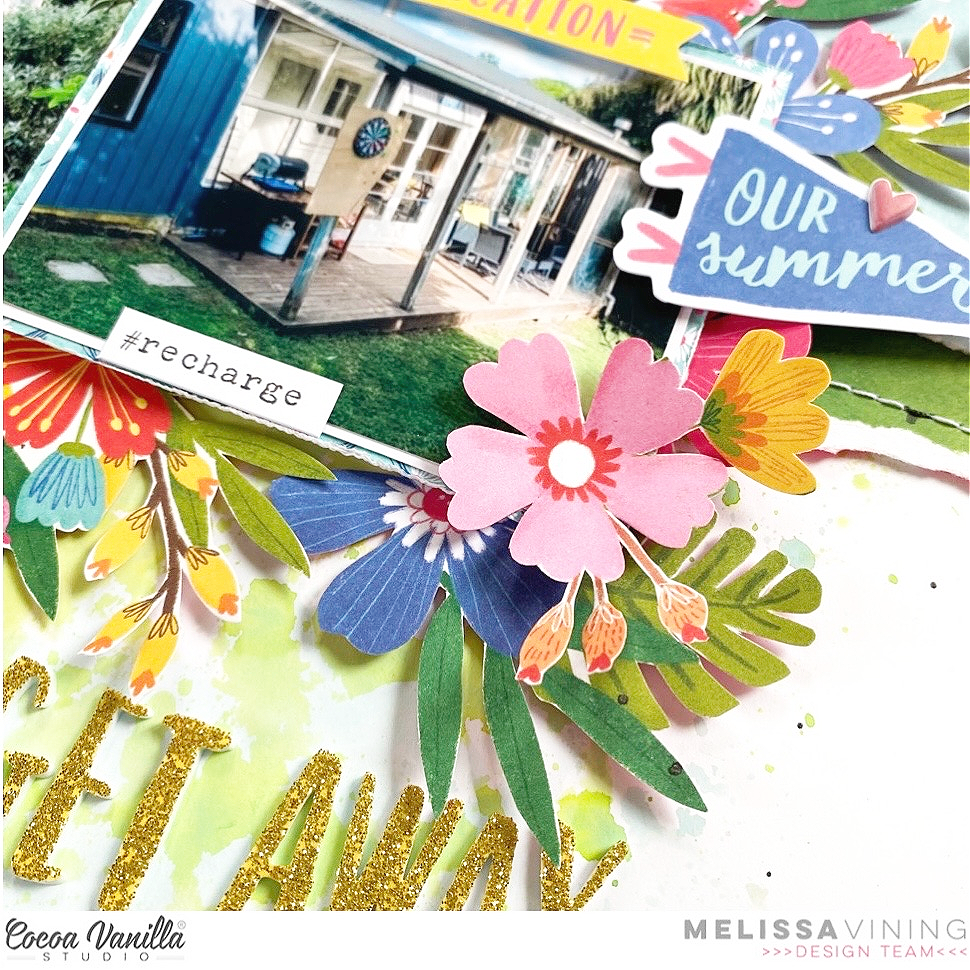
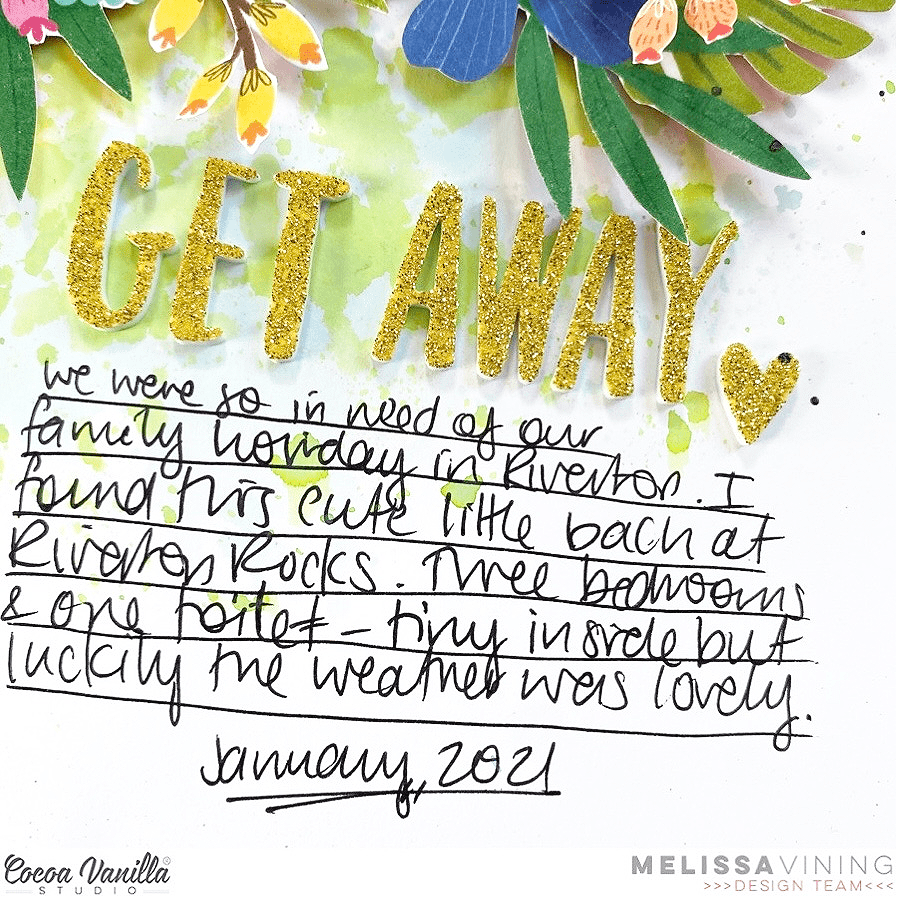
Hello everyone!! Its Melissa here and I’m so excited to be back with another layout created with the stunning Sunkissed collection!! I really can’t get enough of this collection and I’m using it exclusively to scrap our January 2021 beach holiday at Riverton over summer (I’m creating a 12×12 album). For this layout I decided to document the cute little beach house that we stayed in.
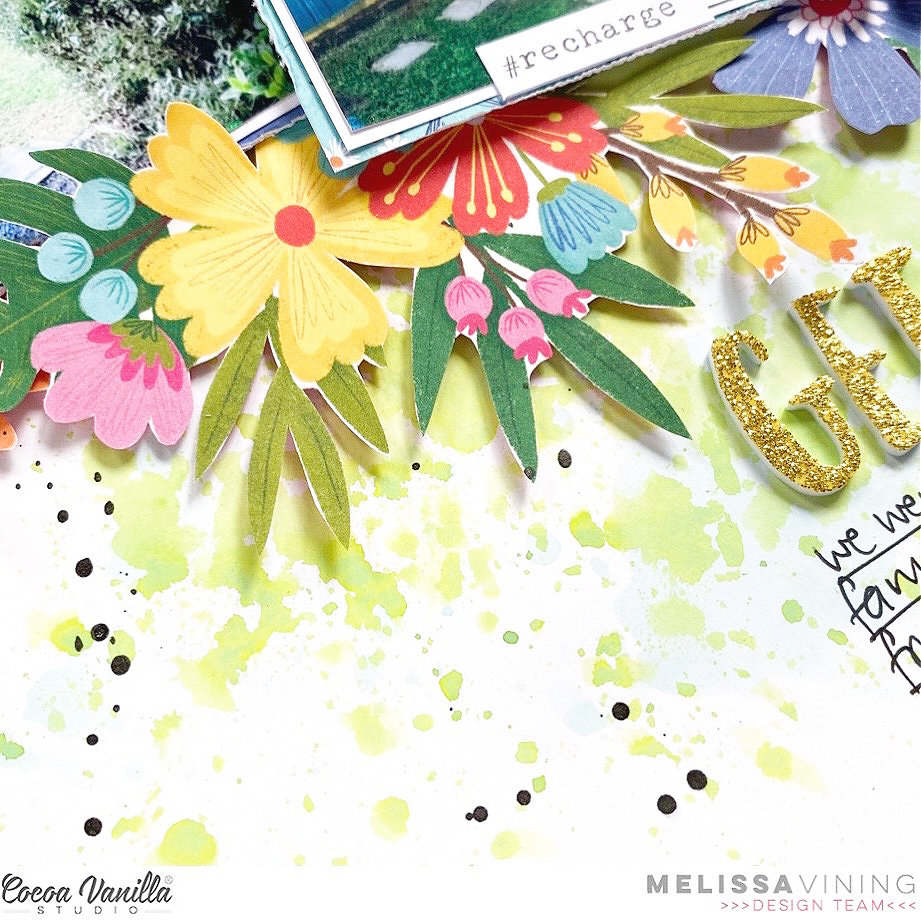
I decided to fussy cut almost a whole sheet of the gorgeous florals from the ‘Growing Wild’ patterned paper. I honestly find fussy cutting relaxing and I love the look of layered florals.
For my background I used distress oxide inks in green and blue to complement the blue skies of ‘Just Chillin” and the green of the leaves. I created the water colour effect by stamping the ink pad onto plastic, spritzing with water and then smooshing the plastic on to my card stock (the packaging technique). I didn’t use any gesso, and I also allowed my paper to dry naturally so to reduce the warping.
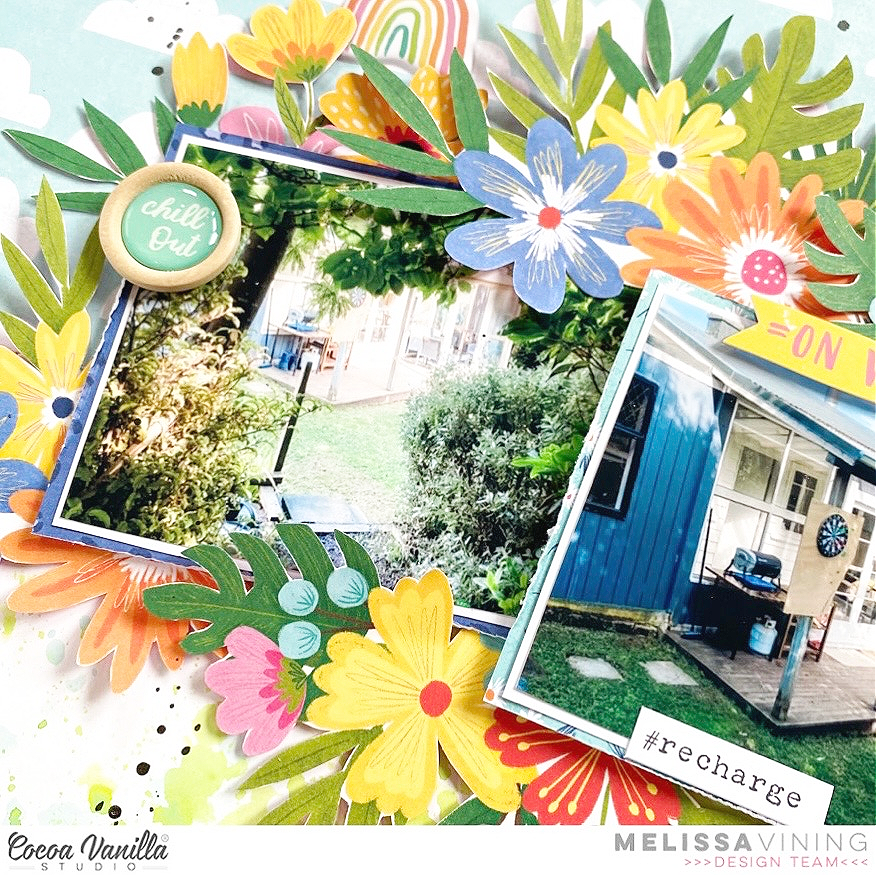
In order to pull out more of the blues and greens I used a torn strip of ‘Good Vibrations’, and machine stitched both pieces of paper. I then built my floral clusters around my two photos, and I love how it mimics the house that is located within bush.
Some of the flowers I placed over the photos, but most we tucked underneath. I just kept adding flowers until I felt the layout was balanced. I kept my embellishment very simple because the flowers and leaves did so much of the work for me. I just had to add the ‘Die Cut Ephemera’ sun, which I popped up on dimensional adhesive. I added some other die cuts too.
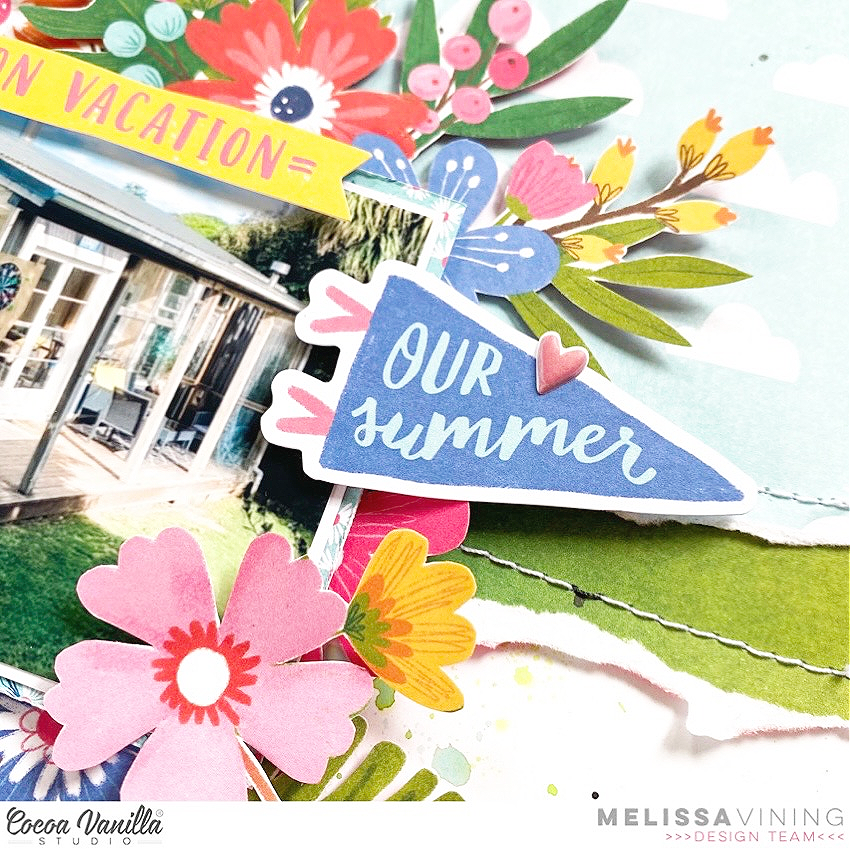
I used the banner ‘Our Vacation’, and even though its not a term we use in New Zealand I love it! I also had to use the ‘Our Summer’ flag, with a ‘Puffy Sticker’ heart layered over it.
I used two of the gold glitter ‘Foam Title Stickers’ for my title, and as aways I had to add my handwritten journalling. My final touch was to add some black splatters.
Hey Hey! Its Michelle back here today with a new layout share. I’ve used the stunning new Sunkissed Collectionand went a little crazy again with the fussy cut florals from the Growing Wild paper.
You will also notice that I added a touch of mixed media to the background of this layout, just like I’ve done with the last couple. You might be able to say that this clean scrapper has been slightly converted to the messy side. I went with the packaging technique using watered down ink sprays and some bubble wrap, giving the background a watercolour look. Then added a strip of Sunny Days across the middle to hide all the ugly parts and sewed it in place for a subtle hint of texture
The entire layout came together pretty quickly once all the elements were fussy cut, but I did notice towards the end that I was creating a layout design that is very similar to the last layout I shared. Whoops!
The photos I’ve documented are some of many taken at the last Cocoa Vanilla Studio Creative Escape Retreat. It’s hard to believe that this retreat was almost 2 years ago, but man we had a ripper time! This outdoor seating area was perfect for an afternoon beverage, even if it was just a Lemon Lime & Bitters.
I backed the larger photo with a piece of wood grain from the A5 Paper stack and the super pretty pink hearts paper Feelin’ Fine. There’s a tab from the ephemera pack tucked into the top, date label from the Fun in the Sun cut apart paper layered behind and a banner from the ephemera pack over the top. I added the smaller photo, backed with the A5 version of Feelin’ Fine, to the bottom left of the larger photo layered with the ‘welcome to paradise’ tag. This whole piece was raised off the background using a piece of foam sheet.
Next to create was the fun title to the right of the photo using a banner from the Fun in the Sun cut apart sheet and the word CHEERS from the gorgeous GOLD Glitter Foam Titles. Under this I’ve added more pieces from both sizes of the Fun in the Sun cut apart sheet and sewn through them to keep in place. There’s a phrase sticker above this from the Accessory Sticker sheet.
Above the title is the first of 3 floral clusters, this one made of multiple fussy cut floral pieces from the Growing Wild paper, a cute palm tree from the ephemera pack and a sweet little pink drink puffy sticker
Under the photo is the second large floral cluster using more fussy cut florals, some fun heart sunglasses from the puffy sticker sheet and another phrase sticker
Up at the top of the layout I kept the cluster very small using the same type of embellishments as the other two to tie it all together.
Here’s one final look at the entire layout. I’m super happy with the end result and glad I’ve been able to document another memory from this wonderful week in paradise using this wonderful collection.
Well friends that all from me today. Thanks so much for stopping by to check out my latest creation using the NEW Sunkissed Collection. I can’t wait to see all the creations you’re going to make with this collection too!
Gwen back on the blog today with a new share and all this week on the blog the design team have been creating in our ‘Signature Style’. I love being able to do this, it’s always so fun to just make a layout focusing on the way you love to create. I’ve created this page to document a sweet photo of my daughter taken recently and I thought it might be fun to go through 5 things I love to do on all my scrapbook layouts, things I do all the time when creating – 5 things that make up my signature style.
So, first up, let’s talk about photos. My style would have to be a single photo on my pages. Most of my pages have a single photo which is usually 4×4 size and generally only has one or two people in it, being my daughter and/or husband. I share a lot of photos on Instagram, so that’s why I have a lot of photos in 4×4 format. For this page, I’ve backed my photo using the ‘Stepping Stones‘ print but in the ‘6×8 Paper Stack’ so that the print is smaller.
Secondly, I like to use a lot of Cut Files on my pages. I’ve used one from CUT to YOU for this page. There are some lovely cut files in the Cocoa Vanilla shop as well, which you can see here. I’ve used the B side of the ‘Sweet Serenity‘ pattern paper and the 6×8 Paper Stack to back the cut file for this page and then just placed flat onto my background.
Thirdly, is pattern paper. I just love the stuff. I love using pattern paper in my backgrounds too rather than cardstock. For this page, I’ve used the A side of the ‘Sweet Serenity‘ pattern paper. This is one of my favouites in this collection, you definately need several sheets of this one! xo
Next up is clusters. We simply need to talk about clusters. For me, adding clusters is the most fun part of creating a page, I love mixing and matching elements in a collection to create pretty clusters on my layout. I’ve used elements from the ‘Die Cut Ephemera‘ pack, Accessory Stickers, a ‘Flair button‘ and fussy cut elements from the ‘Garden Variety‘ and ‘All a Flutter‘ pattern papers on my page. I’ve also added some sequins from the ‘Sequins and Flowers pack‘ as a finishing touch to my clusters.
and the last of the 5 things that make up my signature style is stitching. I stich on every page that I make. I just love the added detail it gives to a page, it really makes it special. I tend to sew on most of my photos and around the edge of my layouts, just with my machine, so it’s a sweet detail that doesn’t take very long to add.
I’ve also made a YouTube video which shows you the process for this page and I also talk more about the 5 things that make up my style. You can watch it here:
Hey y’all! Laura back again with a bright and happy layout featuring the new Sunkissed collection! The rainbow strip on the Good Vibrations patterned paper just called to me for these photos! By framing both sides with this brilliant mix of colors, I could keep the color scheme of the layout open ended and fun! I added a strip of Sunny Days to highlight the green tone in my daughter’s shirt.
I love to fussy cut, so the floral perfection of the Growing Wild paper just called to me! These clusters are stunning and make creating a long floral border super easy! I also added a small cluster from the A5 paper pad version at the beginning and end of the title. The wood buttons are so cute, I had to add one in the center of my photos for a different texture on the page.
I used clear stickers behind a few of the floral clusters and as accents around the title. These glitter foam words are amazing! Love pre-made titles and this one was perfect for my sassy girl’s car trip through the sunny backyard. To fill in some of the white space, I added some gold ink splatter and Nuvo drops.
I also created a sketch based on this layout to show how all of the layers fit together and make it easier for your to recreate the design if you’d like to!
I hope this layout inspires you to have some fun with the bold colors and patterns in the Sunkissed collection! To see how the “Fun in the Sun” layout came together, check out the process video below!
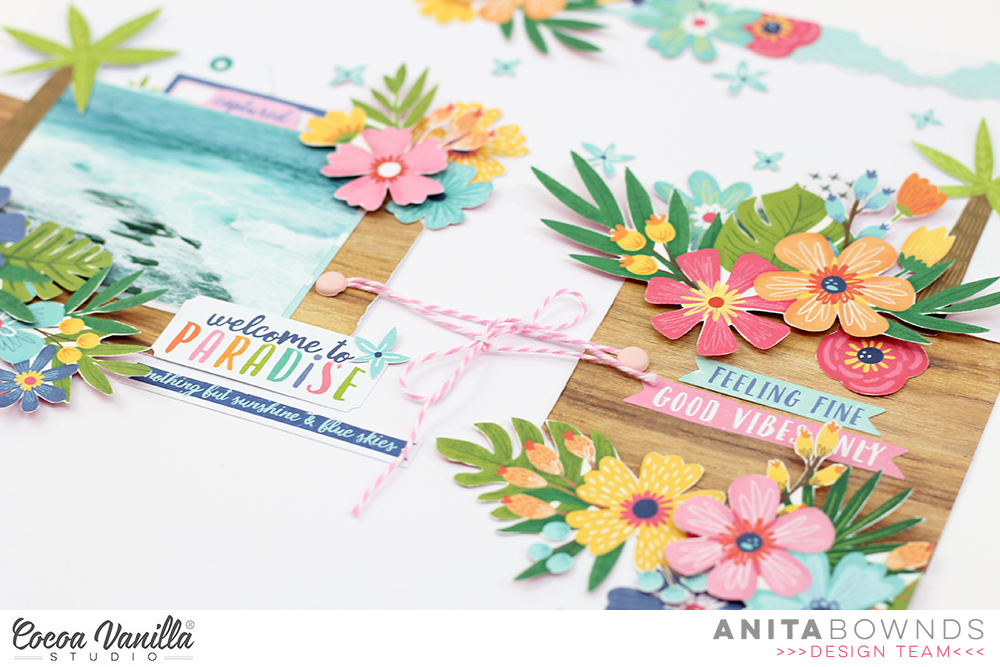
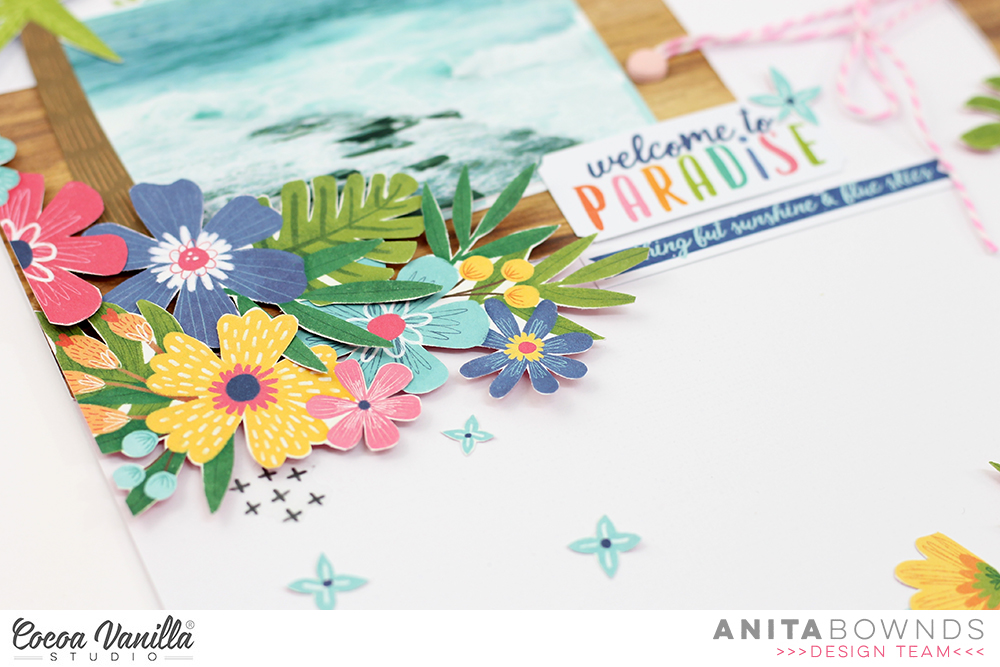
Hey lovely’s Anita here with you today sharing my very first layout with the brand new sun kissed collection as soon as I seen this beautiful bright colourful collection on my desk I knew those flowers had to be fussy cut . Something about the waves crashing on these rocks had me , the swirling of the water it just made me want to take a photo to remember that moment..
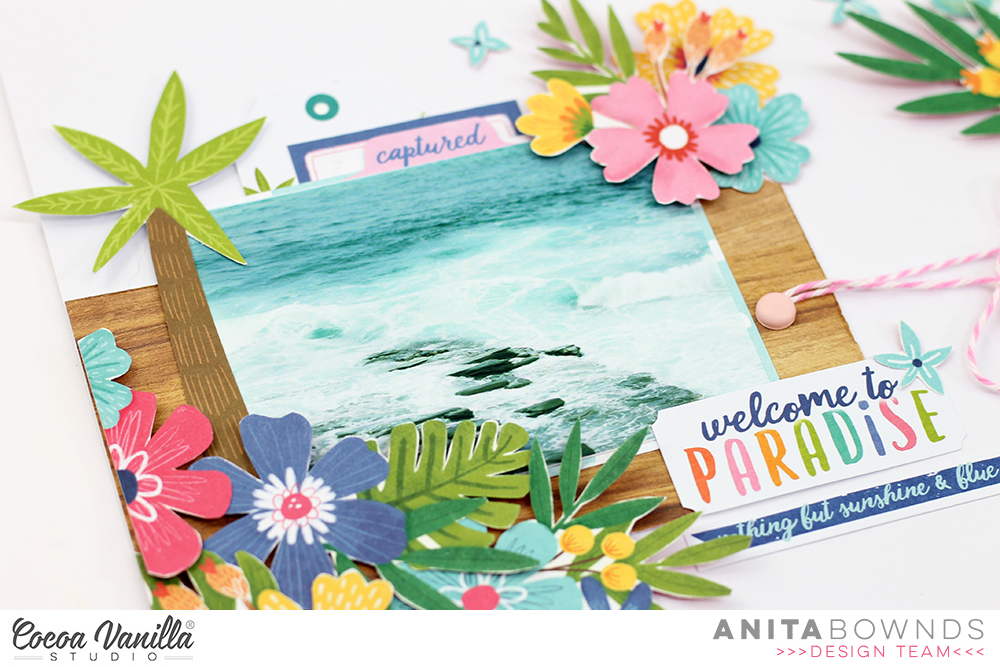
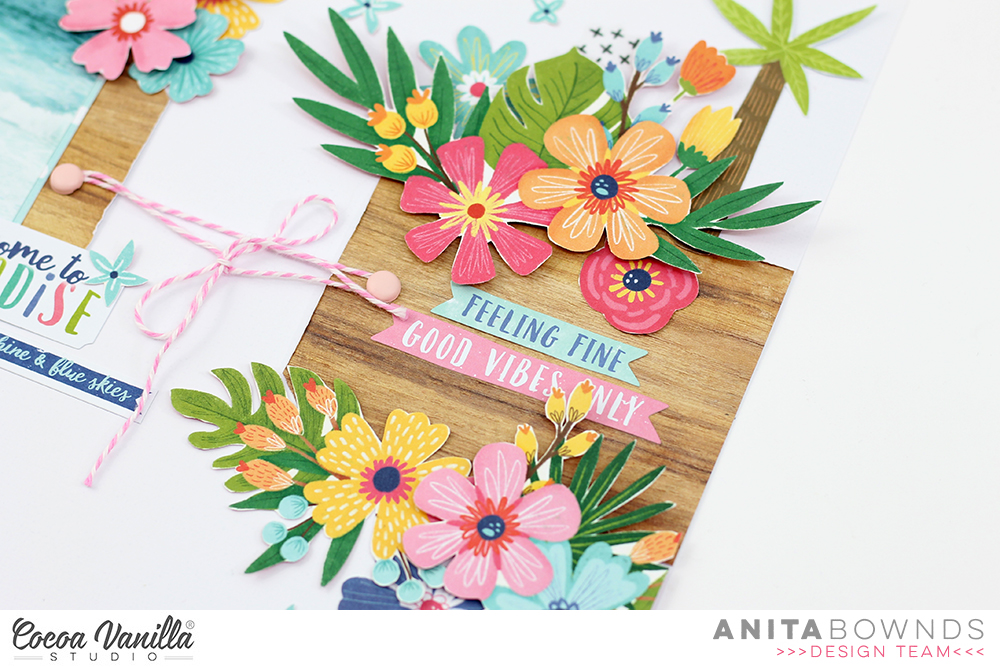
I started with white cardstock and using the wood grain pattern paper from the paper pad
I cut a strips and cut on shorter then the other and made them into tags and glued them down in the middle on both sides
Added brads and twine to tie them together and added my photo backed with pattern paper from the paper pad
Then fussy cut a bunch of flowers from growing wild pattern paper to add around the 2 tags and my photo
Then I tucked ephemera and stickers in the top of the photo and added some to the bottom of my photo. I also added some palm trees, one to the side of the photo and one on the other side of the layout
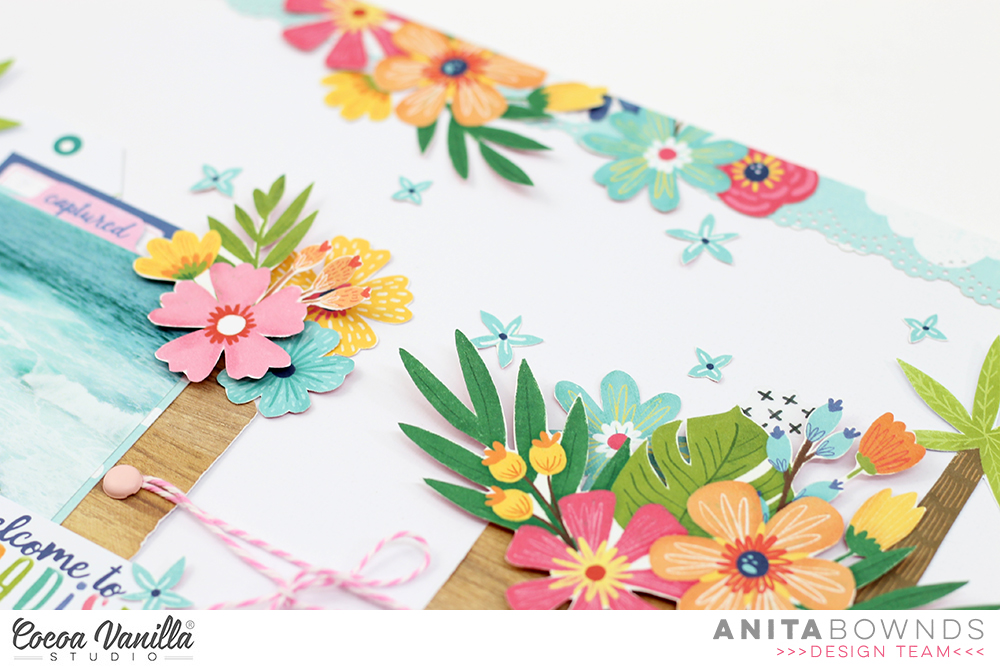
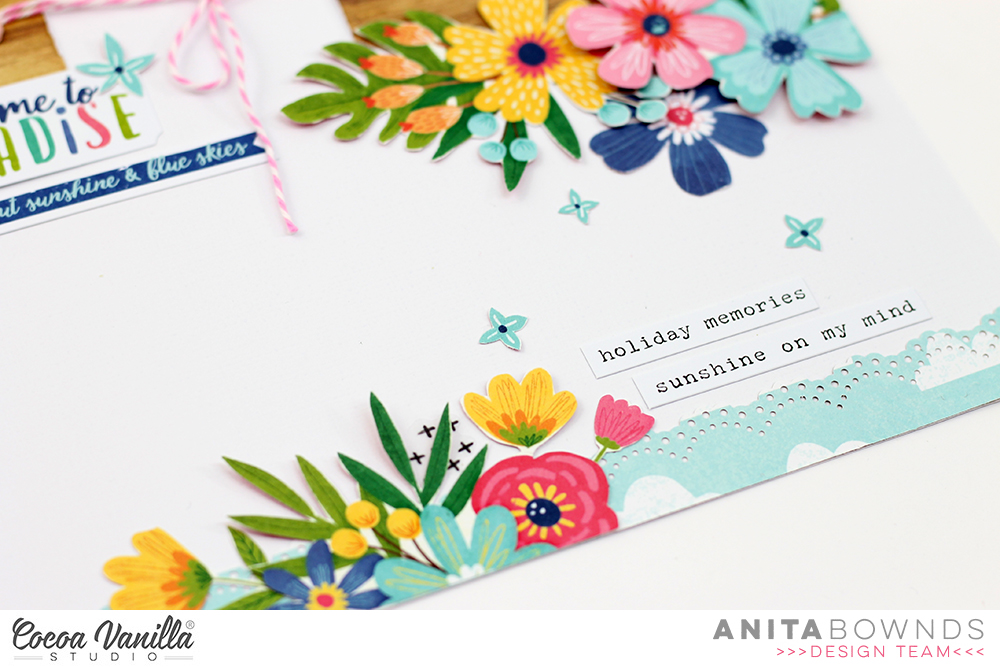
Then I cut 2 strips of just chillin and punched a decorative border on the edges and added them to the top and bottom of layout then I fussy cut out more flowers and added them to the strips to tie it all in , then the little flowers from the growing wild pattern paper to add around the clusters of flowers
And to finish off the layout I used the clear stickers to add something on the edges of the 3 main clusters of flowers.
And a few little phrase stickers at the bottom of the layout.
Hi scrappy friends! Danni here sharing a fun rainbow layout featuring lots of hand stitching texture and summery goodness. I am really just starting to dip my toes into the new Sunkissed collection and I am having so much fun with it! Like several of my fellow design team members and many of you amazing Cocoa Vanilla Studio community members, I was instantly inspired by the gorgeous rainbow on Bright Side 12×12 patterned paper.
My first step was carefully fussy cutting all the rainbow stripes from the paper. I knew I wanted to do a bunch of hand stitching, and in hindsight the stitching would have been much easier if I had stitched first THEN fussy cut, but hindsight is 20-20 and at least you can learn from my mistakes!
Next I chose embroidery floss in colours to match each of the stripes and pierced stitching holes in my paper with an awl to prepare for stitching. I began by doing a chain stitch in the red colour, loved how it looked but I wanted more variety and texture so I decided to switch it up and add a different stitch to each colour. I really love this result! For reference the stitches from top to bottom are chain-link, cross, diagonal, zig zag, blanket and chevron. This did take some time over several days, but I get comfy in front of the television and stitch away while I watch shows with my family and the time flies by.
I decided to use Just Chillin’ 12×12 patterned paper for my background because I have been dying to use that gorgeous woodgrain. I knew the colours would pop on the neutral base and I love the more masculine, natural element it brings in, especially as my photo is of my two boys. I jazzed up my background by splattering white and gold ink, then glued down my rainbow stripes.
I used the blue daisy pattern from A5 paper stack to create a simple photo mat and added my photo to the left of the layout; as the rainbow is slightly offset to the right, bringing weight to the left helps to balance the layout. I added some of the stunning glittery foam title stickers under the rainbow, slightly overlapping my photo.
I wanted to cover as little of the stitching as possible, so when embellishing I chose the floral ephemera and cut several of them in half before tucking them underneath the edges of the rainbow stripes. The smaller florals I popped up on foam before adding to the clusters. I also added one of the smallest wood epoxy buttons to each of the clusters; they are just too sweet!
The finishing touch was to add a scattering of hearts from the foam title stickers and die cut ephemera, as well as some of the adorable cross hatch patterns from the clear stickers randomly scattered about.
I hope you enjoyed this layout! There is a process video linked below if you would like to watch it come together. Thank you for joining me and happy scrapping!
Hi everyone, its Melissa here and I’m so happy to be back with you again, this time with my first creation with the stunning new ‘Sunkissed’ collection!! We also have a sparkle and shine theme going on right now and I was thrilled to receive this assignment. I decided to scrap a body boarding photo of myself and my two oldest kids at Riverton Rocks Beach (located at the bottom of the South Island of New Zealand).
I just had to use the beautiful rainbow paper ‘Bright Side’! I cut the rainbow apart, added glittery paste to each of the arcs, stitched through them in corresponding coloured threads, and then popped them up with craft foam. I adhered them onto white cardstock and I love how subtly sparkly they are!
I used tissue paper from my stash to make an uneven whimsical mat for my photo. This also helps provide separation from the saturated colours of the rainbow to the more subtle ocean tones of my photo.
I used lots of flowers and leaves from the ‘Floral Ephemera’ to create clusters above and below my photo. I bent up the edges of the petals and leaves, and added small pop dots for dimension. I embellished the photo with a phrase sticker from the ‘Accessory Stickers’ and a starfish ‘Puffy Sticker’. I love the contrast between the rainbow and my photo!
I cut apart one of the Pocket Cards and used part of a card to write my journalling.
I just had to create my title from the amazing gold glittery ‘Foam Title Stickers’ – so perfect for this assignment!!
It’s Anna here with you again sharing a new layout. This week, the theme of our projects is “sparkle and shine”. I’m not very fond of sequins and glitter, but I do love foil. For today’s page, I’ve used the Unforgettable collection.
I started with white cardstock for my background. Then, I cut a diagonal strip of the Sprightly paper. On both sides of the patterned paper, I put two pieces of washi tape with gold foil.
For my title, I cut a phrase with a metal die from black toner ink cardstock. Then, I ran it through a laminator to cover it with pink foil. I also cut the outline from vellum and placed it on the right side of the page with foam squares to add more dimension.
emboss
To fill the spot below the picture and to the left side of the title, I placed some flowers and leaves from the die cut ephemera and a little phrase from the Accessory stickers.
I fussy cut some butterflies, two bigger ones from the Pretty Bits paper, and the rest are from the Lacewing paper. I added a sparkling touch on the wingtips with gold embossing powder. I also added some enamel dots and a couple of hearts from the clear stickers.
The brightness of this layout is very subtle, and it’s quite difficult to photograph the foil, but I hope you can appreciate it a bit.
Thank you so much for stopping by today. I wish you a happy weekend and remember to save some scrappy time!
Hello Scrappy friends! It’s Michelle back today with a new layout to share as part of our current Sparkle and Shine theme. I recently got my DT Box full of Sunkissedgoodness so I was super excited to use it for this layout, especially the NEW Gold Glitter Foam Titles. Oh my HECK they are stunning and perfect for a theme like this one!
I started the layout by getting a little messy, yep you read that right. Clean freak here got messy for a second layout in a row! I used pink and gold shimmer sprays to create a watercolour effect using the plastic packaging technique, then splattered over the top using the spray tube. Once it was dry (and very warped) I added paper strips across the middle ( Fun in the Sun & Feelin’ Fine ) and machine stitched for a little extra detail. Then I hand cut the wavy edge in the ‘ Sunny Days ‘ paper and tucked that under the layers
I used papers from the A5 Paper stack to layer under the photo ( Just Chillin’ and a pink version of Bright Side ) This whole stack was layered with foam both between layers and under the entire stack to give it dimension off the super warped, never going to be flat background. I tucked a label from the ‘ Fun in the Sun ‘ cut apart paper and a tab from the ephemera pack into the layers also.
To the right of the photo I added a large cluster of fussy cut flowers from the 12×12 version of the STUNNING ‘ Growing Wild ‘ paper. I’ve got a stack more cut out ready for the next few layouts too. I added the title under this using the sweet Gold Glitter Foam Titles – a new edition to the Cocoa Vanilla Studio Embellishment range. Absolutely beautiful product to use. Oh and the Wood Buttons are back too, those who have followed CVS from the early days will remember these from earlier collections. I took the adhesive foam dot off the back and used a flat glue dot to adhere to the areas that already had enough dimension.
I used more fussy cut florals under the photo to create the second point to the visual triangle of embellishments I was aiming to achieve.
And then up the top of the layout a much smaller cluster of florals mixed with bunting flags from the ephemera pack. This is when I started adding all the sequins (from the Daydream collection) and a few glitter hearts from the Gold Glitter Foam titles pack. Tiny sequins to add a little hint of extra sparkle and to give the clusters a more completed look.
Lastly I added a touch of handwriting to document this season of life, or I should say that season. A time when Leila would actually cooperate and sit still long enough for me to take photos like this. These days they are very few and far between now that she is 10. I cherish all the photos I was able to get when she was younger, I might need to use bribery for some updates!
Before we say goodbye for today, here’s one final look at the entire layout
I think its safe to say the messy stuff is here to stay.. it certainly adds an extra element of completion to a layout.
Well friends thanks so much for stopping by today. I hope you’ve enjoyed seeing my first creation using the wonderful Sunkissed Collection. I can’t wait to create more stunning titles with those amazing Gold Glitter foam words. What are you excited to use from this collection? Let me know in the comments below


 emboss


