So Happy | Storyteller collection | Tarrah McLean
Hi creative friends!
It’s Tarrah back with you and today I am sharing a new scrapbook layout featuring the stunning NEW Storyteller collection!
For this week I was given the brief of focusing on the wood epoxy buttons in the Storyteller collection! How can you go past these cute embellishments? These are great little additions to any project, providing beautiful dimension and texture!
I recently went away on a little weekend getaway and there was a lovely fireplace inside the cabin we stayed in, I took a couple of selfies in front of the fire as it was so cozy!
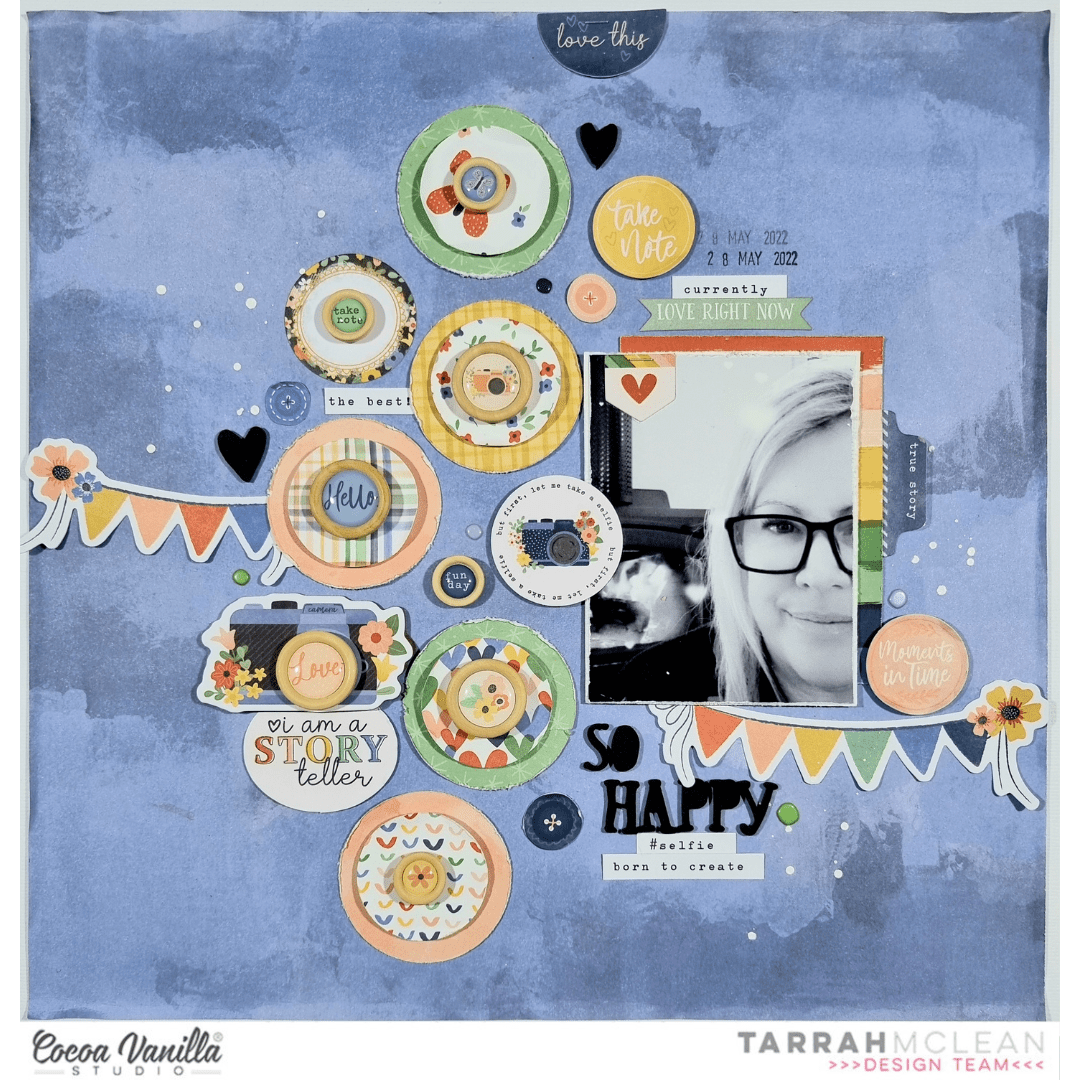
I chose the ‘B’ side of the beautiful Spring Fling paper for my background, trimming it down slightly and adhering it a piece of plain white cardstock, I printed my photo in black and white and distressed the edges of the photo, I then pulled out one of the pocket cards and layered it under my photo. I popped the photo up from the pocket card using craft foam, I love the dimension this creates on my layout. On the photo, I stapled a banner sticker from the accessory sticker sheet and to the right of the photo I also adhered a tab from the ephemera pack.
For my main design element I decided on a circle design, and since the gorgeous wood epoxy buttons are the feature, it allowed me to add lots to the centres of the circles!
I took my circle punches and the A5 paper stack and punched out a few circles from the papers in different sizes, I then layered them together to create 5 layered circles……I distressed the edges of all of the circles and added craft foam in between each layer to add dimension and texture.

I then took a wood epoxy button and added one to the centre of each of the layered circles I created. Once the layered circles were completed, I arranged them on my page how I liked them. I adhered them down, leaving some space at the bottom at the bottom to add a title and some more embellishments. I adhered the gorgeous rainbow banner from the ephemera pack below my photo and popped up the circle die-cut on the right of the photo. On the left of the photo, I just had to add the circle sticker from the accessory sticker sheet that says. ‘But First, Let Me Take a Selfie. I added pop dots to the left edge of this piece and placed it overlapping the photo slightly.

I chose the title ‘So Happy’ from the awesome foam title stickers from the collection and placed the title below my photo and also took some phrase stickers from the accessory stickers and added these below the title and above my photo too. To balance out the other side of the page, I adhered the shorter rainbow banner die-cut from the ephemera pack. I also adhered the camera chipboard piece using craft foam to add dimension and adhered another of the wood epoxy buttons in the centre of the camera.

To help fill in some of the spaces between the circles, I bought in some of the smaller embellishments. I added some of the button die-cuts, some puffy stickers, accessory stickers, foam black hearts and even more wood epoxy buttons too. I added two of the black foam hearts to create the all important visual triangle on my page, strategically placing the hearts in places to draw your eye around the layout. Lastly I sprinkled some white mist and stamped the date stamp.

Thank you so much for stopping by the Cocoa Vanilla blog today! I had so much fun creating this layout and focusing on the super cute wood epoxy buttons! I hope you enjoyed reading how I created it. Make sure to ask your retail store for the gorgeous Storyteller collection…you absolutely NEED this in your life!
Happy creating!
Tarrah x

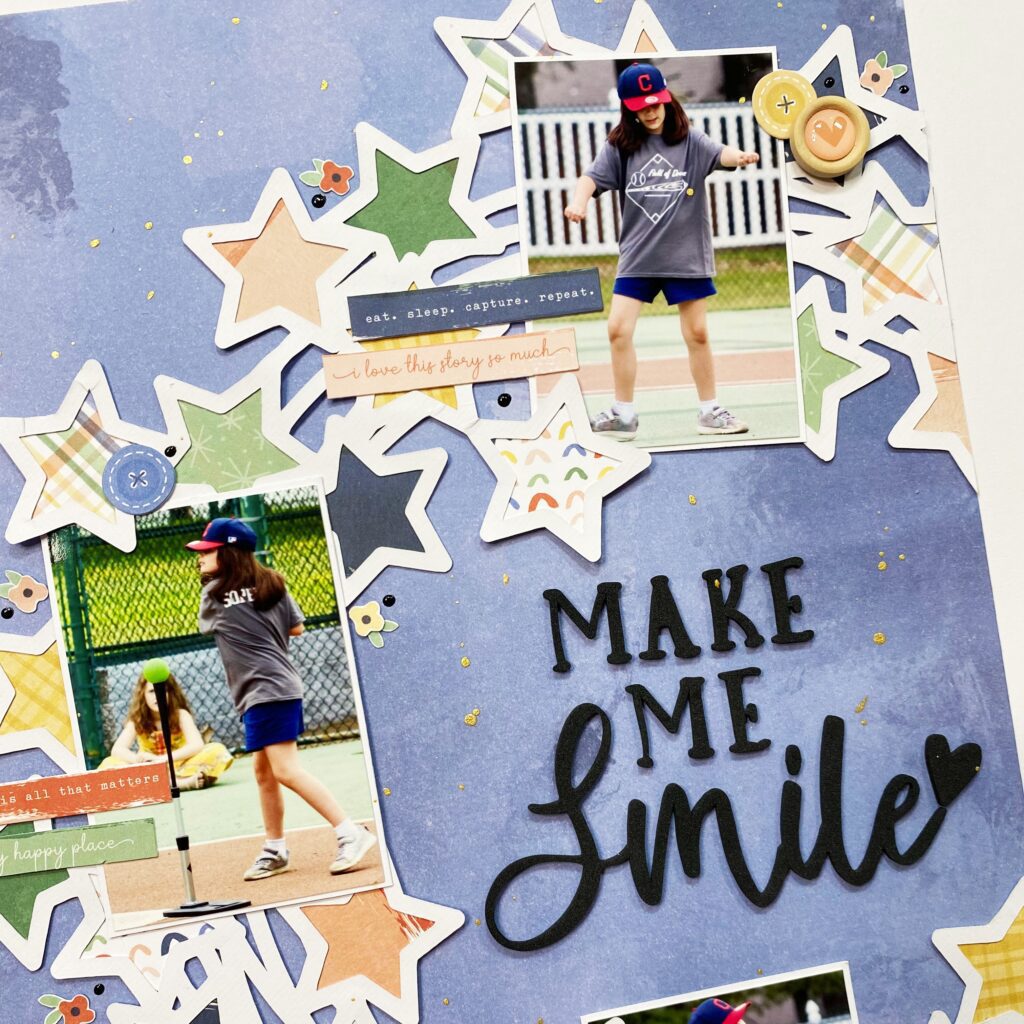

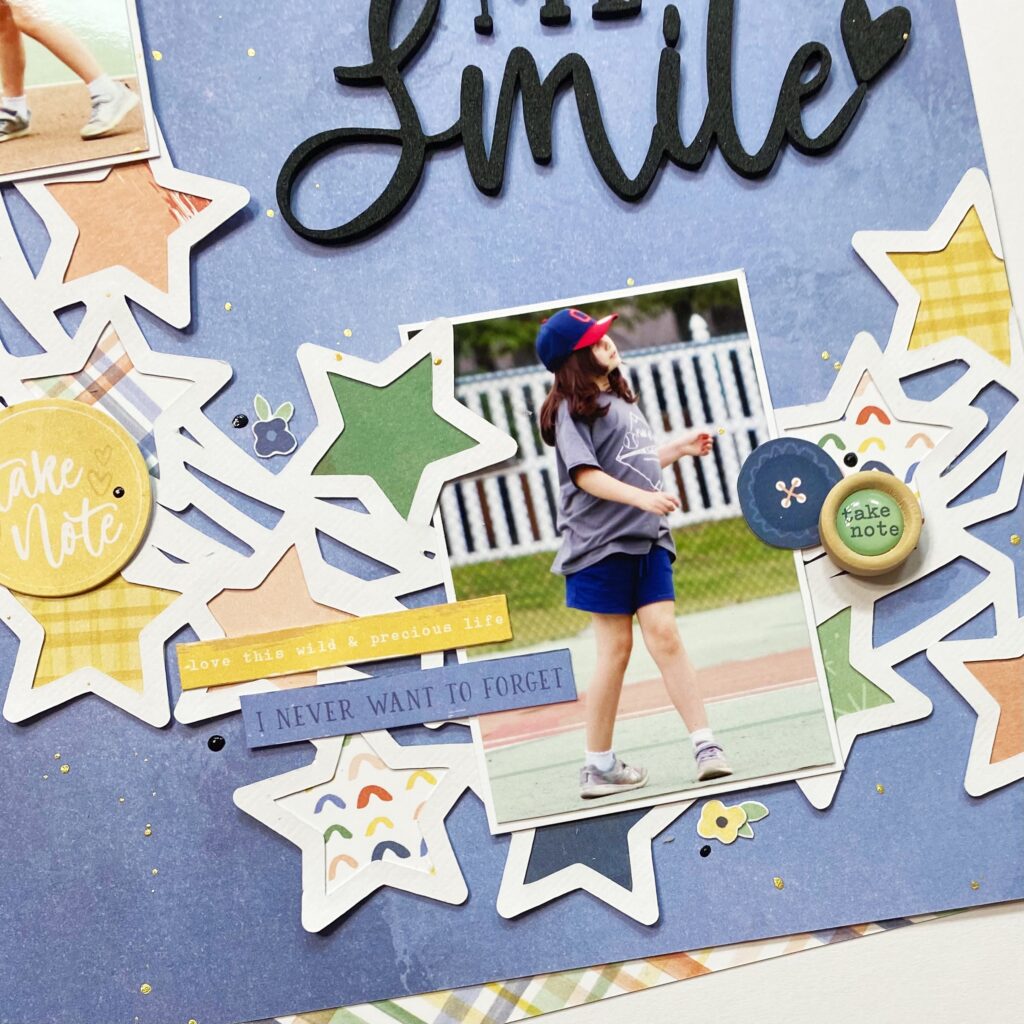


 I placed my photo slightly to the right of the page using craft foam to add dimension. I layered some papers from the A5 paper stack underneath the photo and distressed the edges slightly to add some texture and to help make the photo pop! I searched through the pocket cards and found the perfect one to suit the photo of my son as photographer! I used craft foam to adhere the pocket card to the left of the photo. When I am placing elements on my page and I am not 100% certain about their position, I will mostly always only use a very small amount of adhesive in case I need to reposition anything or add an extra layer underneath. Once I am happy with where everything ends up on my layout, I add extra adhesive for reinforcement.
 Now I have the main focus of the layout sorted out, next I added a title. I went through the gorgeous black Foam Titles and chose the word ‘Smile’. I placed this word at the bottom of the pocket card to help tie the photo, pocket card and title together. At either end of the photo and pocket card, I tucked in some pretty flower ephemera pieces, I also added the little piece that says ‘Snap Happy’ to the right of my photo.
 On top of my photo, I adhered the ephemera piece that says, ‘The Story Behind the Photo’ and also a small phrase sticker from the Accessory Sticker sheet in the top right corner. I also added some more of the phrase stickers above the photo and below the photo, these are great additions to a page to help tell a story! Above the pocket card, I added the camera die-cut using craft foam. From this point, I decided to add my embellishments in a tone on tone look…I took some of the super cute heart die-cuts, enamel hearts and wood epoxy buttons and placed them on their corresponding colours.