Joy to the World | Merry & Bright collection | Rachel Lowe
Hi CVS friends today I am sharing my first layout using the gorgeous new Christmas collection Merry & Bright.
As most of you know I LOVE cut files and what’s better when one is already cut for you with a beautiful water colour mixed media effect! (large die cut and backing kit) All I did before starting my layout is splattering the page with gold paint.

I love the Christmas Krispy Kreme doughnuts and so I have used this photo to Create a fun layout. My photo size is 4×4 inches. Using the 6×8 inch paper pack I used Star Bright and Oh Christmas Tree papers and cut at 4.2 inches. I angled each mat behind the photo but attached the photo straight with foam tape over the right of the tree.

I tucked under my photo the double heart flair buttons and finished off using two die cut tabs from the ephemera pack.

I created a floral cluster on the left side of the tree, using foam tape of some of the florals to add dimension. I tucked a die cut ticket slightly under the larger flower.

Of course I had to add the happy Father Christmas die cut and created a small embellishment cluster in the lower left corner of my layout, again using foam tape on some of the die cut ephemera.

Lastly I added one of the gold puffy hearts to the top of the tree. I had considered adding some machine stitching but to be honest this cut file kit is just perfect the way it is.

Super quick and super easy layout that still looks fabulous!
Thank you for stopping by today and I will see you again soon with an off the page creation all about Christmas.
Rachel X


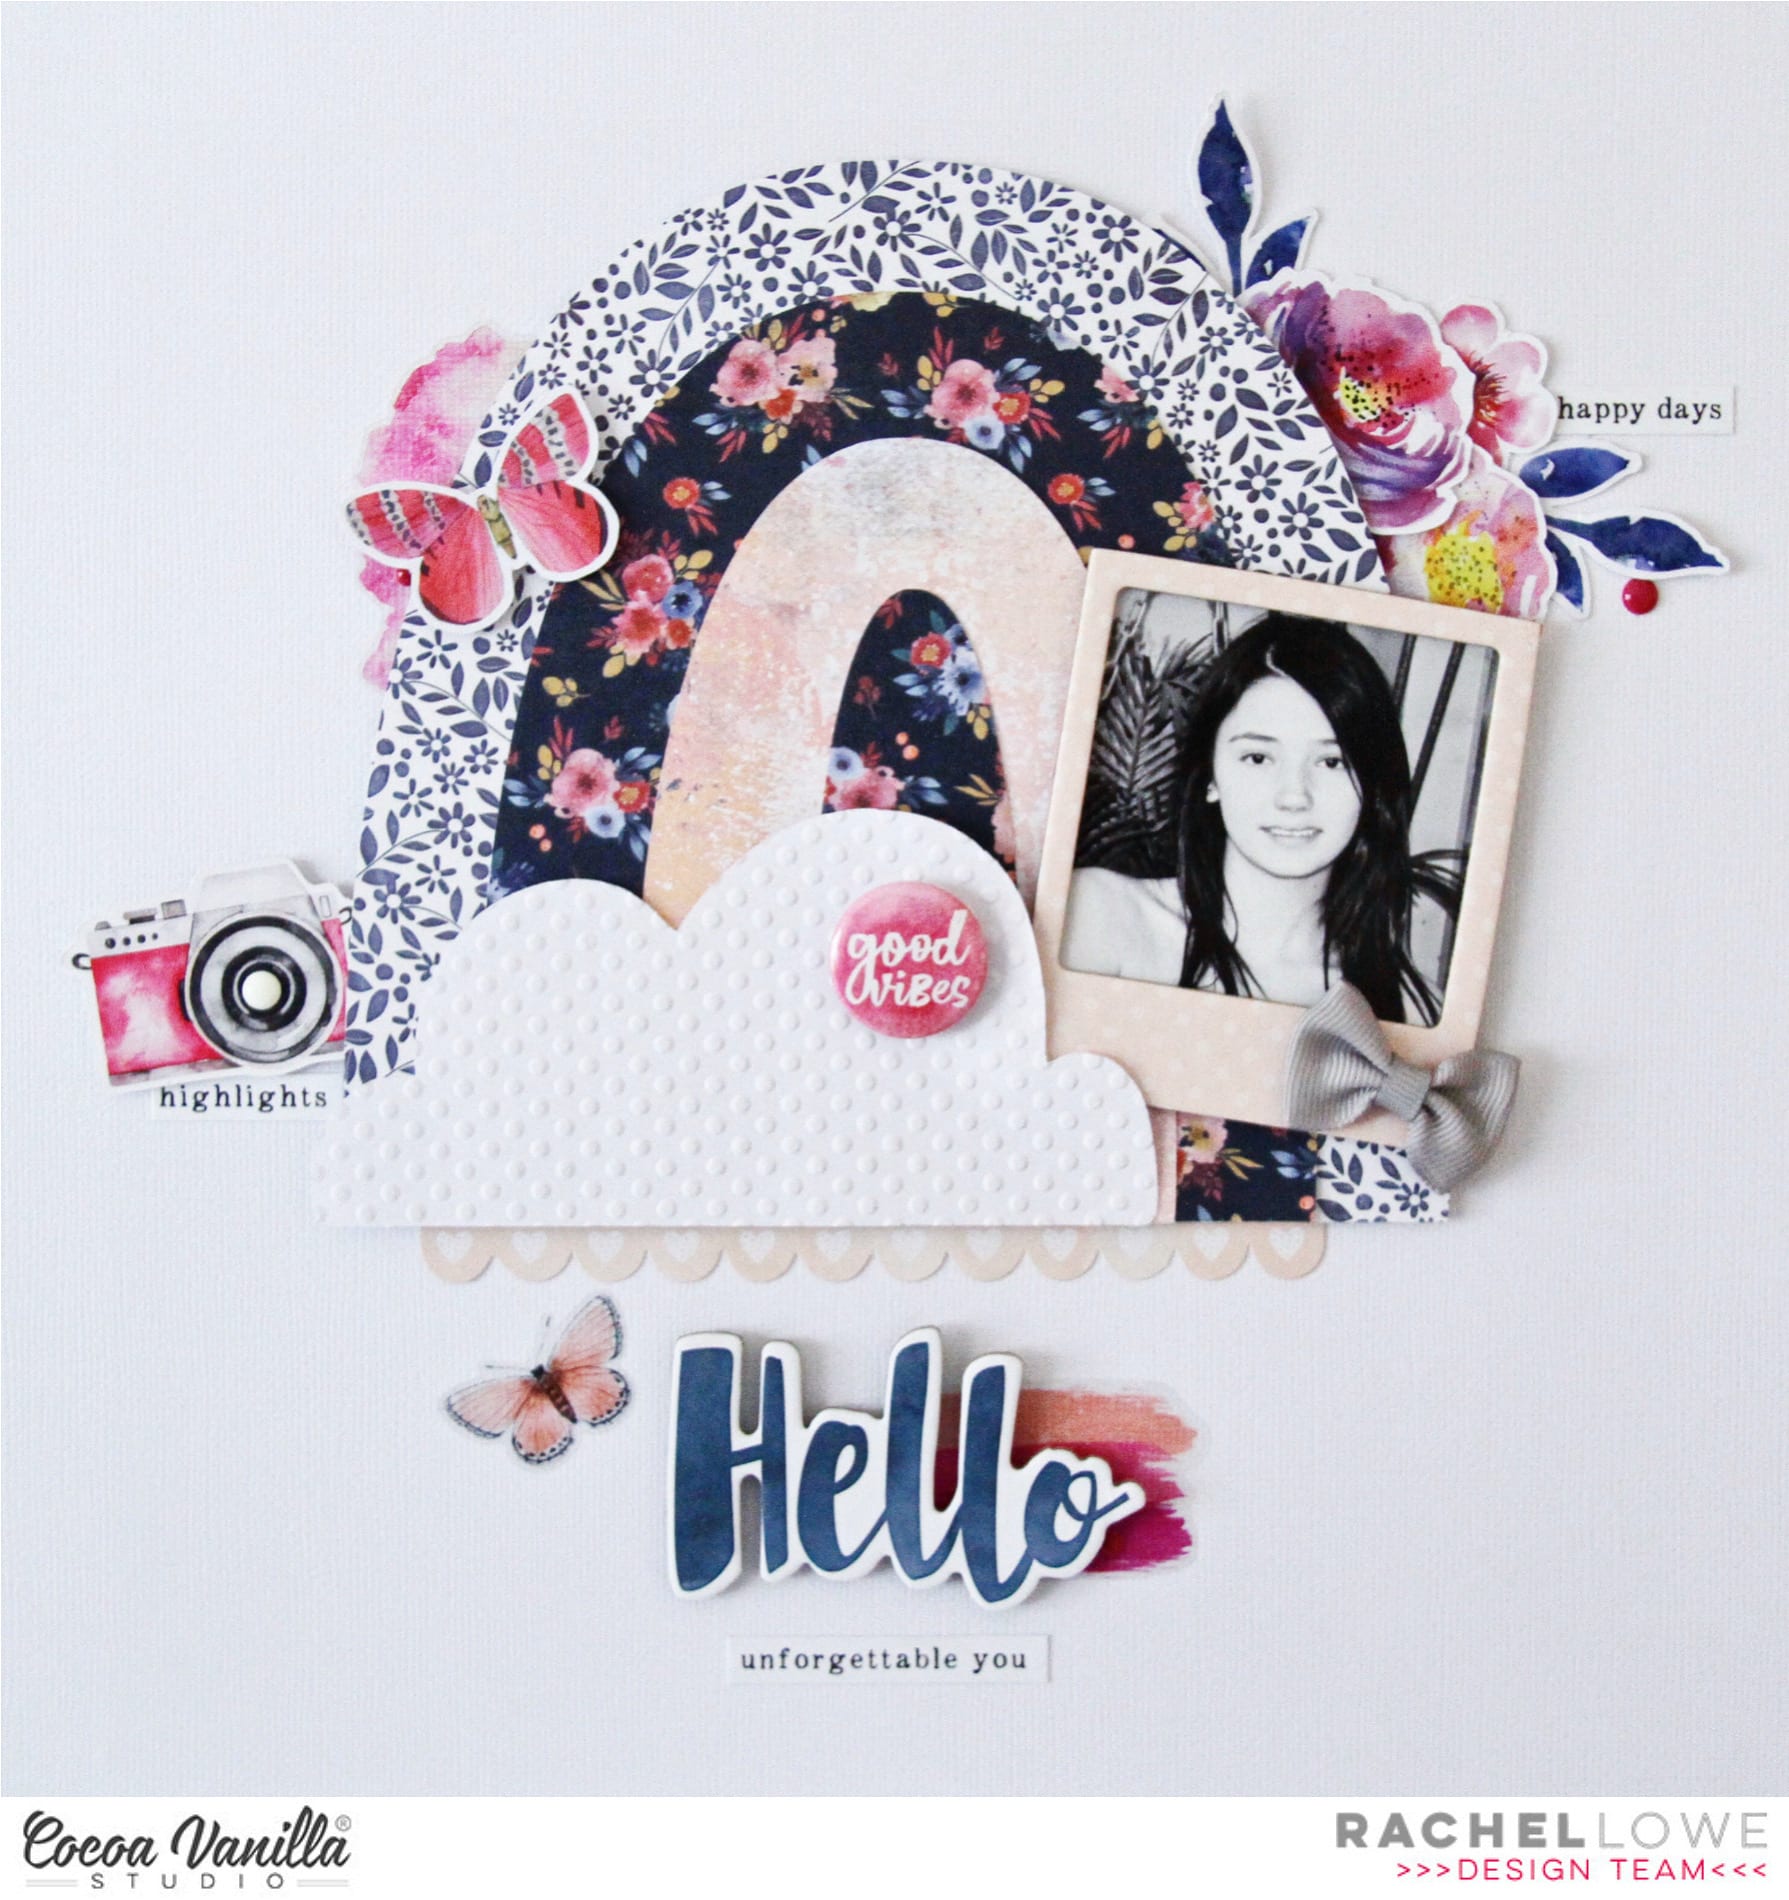 Firstly I chose this super sweet rainbow with cloud cut file (Silhouette Design store). I kept to the rule of thirds choosing three papers that coordinated. I used
  I added a
  I then used a mix of embellishments from various collections to pretty up this page. As always I added a paint/watercolour clear sticker behind my cloud and adding a die cut butterfly over it, both these elements being from the
  I found a chipboard polaroid frame for my photo in a pretty polka dot peach and used a grey min bow to finish off. I added a die cut camera under the rainbow, added an enamel dot to the lens centre and lastly added another phrase sentiment.
 I created my title using a mix of chipboard word (using a paint brush stroke clear sticker behind it) and accessory sticker phrase sentiment and a clear sticker butterfly. To create a visual break between the cloud and title I added a peach scallop die cut.
 All thats it from me today! Thanks for taking the time to stop by and I hope you have a wonderful week.


 To create my title I used the Super word from the Clear Stickers and adding a blue paint brush stroke clear sticker over it, finished off with a word sentiment from the Accessory Sticker Sheet.


 I decided to cut a strip of the stripe side of the ‘Sprightly’ paper and placed it vertically down a plain white cardstock background. I then trimmed the white cardstock down so that I could use the pink side of the ‘Unscripted’ paper as a border. I added some machine stitching down each side of the vertical strip. I added some layers under my photo including the floral paper from the ‘Pretty Bits’ paper and one of the die-cut frames, I popped these all up using craft foam.
  I tucked in one of the tab stickers both at the top and bottom of my photo from the Accessory sticker sheet. As you can see in the detail photo above, I used some of the gorgeous new foam words as my title! They are gorgeous and aren’t too sticky, perfect if you aren’t sure of placement, they are easily repositionable which is very handy for me! I also added one of the gorgeous bows and a few other embellishments finish off this side of the layout.
 On the left hand side, I added one of the cute banner stickers and tucked in some of the gorgeous floral die-cuts. I also layered one of the flair buttons to the top of one of the florals. A few other small embellishments like the clear stickers and enamel dots finish off this side. One thing I wanted to point out in the floral die-cuts is that gorgeous texture you can see in the detail photo below. I just love that not only are there beautiful colours in this collection but the texture is awesome too.