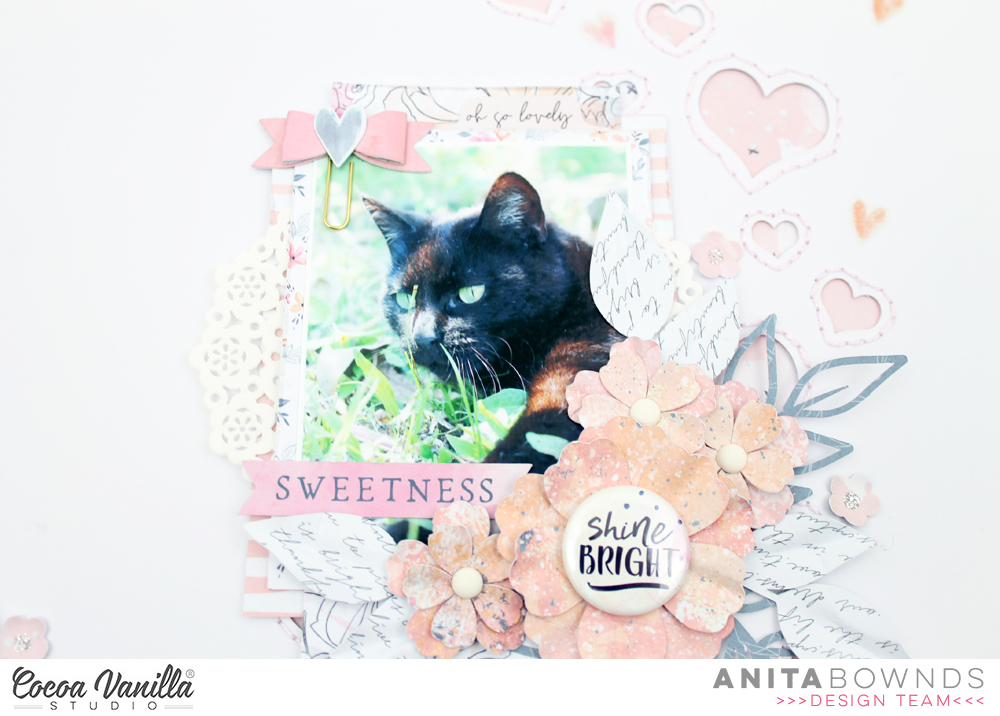
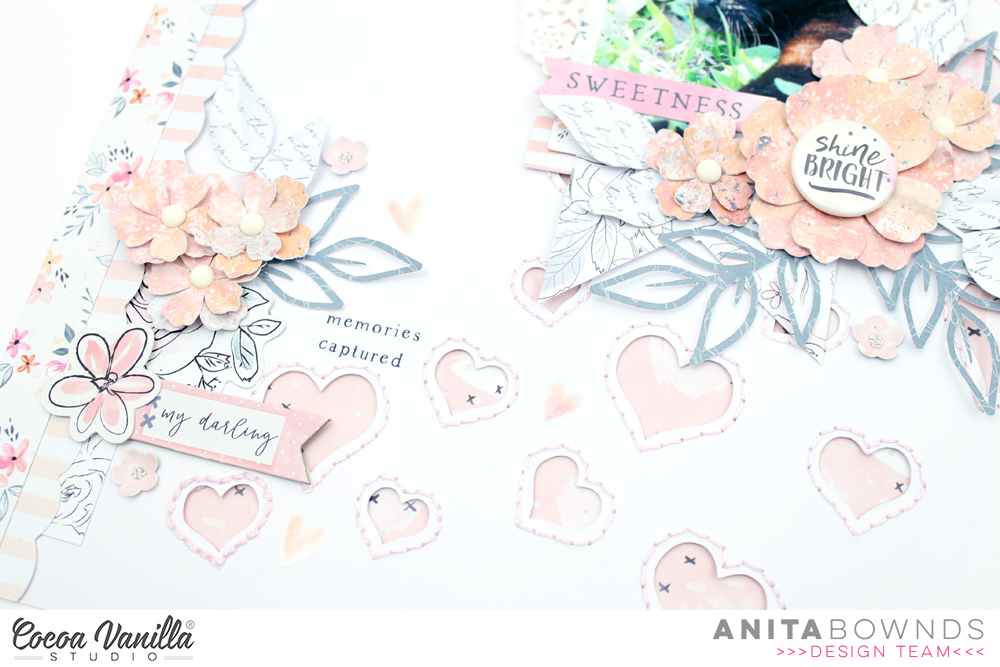
Hi there crafty friends, Anita here with you today sharing a sweet layout using the midnight collection there are lots of soft colours in this collection perfect for those girly shabby chic projects..you know me I love adding some flowers and what better way then to make them yourself from the paper in the collection…
I had a basic design idea in mind for my layout, but wanted to make flowers for my layout using moonlight patterned paper and I used papers from the 6×8 paper pad for the leaves. Then i started off using white cardstock
I then cut a few strips of paper from sophisticated and inky depths to lay on the left side of my cardstock just overlapping then to add a cluster of embellishments and to have it going diagonal up the page
I decided on adding more texture and dimension using a @neatncraftycutz scattered hearts background cut file
Adding some hand stitching and backing it with all the things pattered paper so to bring more of that light pink in the layout and draw the eye to the photo..
Then I layered patterned paper behind my photo with papers from the 6×8 paper pad and tucking a few little doilies in the layers then I started clustering the flowers and leaves around the photo along a few accessory stickers . I also add a few more embellishments chipboard pieces and ephemera to the clusters
Add the flair button in the center of my big flower adds a touch of dimension and texture
And to finish of the layout I add a few clear stickers around the layout..
Hi there scrappers! Danni here sharing a large photo layout using Legendary. I was itching to get some outdoor photos scrapped with this collection, so I decided to use this landscape photo of Tasmania’s Dove Lake at Cradle Mountain. It’s such a stunning image and I have been waiting for the right collection to scrap it – the mountain images in Legendary made it absolutely perfect!
My layout base is a 12×12 pale blue cardstock background. I went through all the patterned papers in this collection and cut a bunch of different size triangles from contrasting colours and patterns. A little tip for cutting even triangles – cut squares or rectangles, fold in half and pinch at the centre to mark it, then use a paper trimmer to cut straight lines from the two bottom corners to the centre point.
To create texture and interest, I added machine stitching to edges of some triangles. On others I used either white gel pen or black pen to add sketchy lines or faux stitching, while a few I left blank. I then arranged all the triangles in a horizontal line across the page, making sure to overlap them. My intention was to create the illusion of a mountain range behind my photo. Because you can see the mountains reflected in the water, I added some triangles at the bottom pointing down as well. To create a 3D effect, I popped the peaks of mountains on foam squares.
I matted the photo with a single simple layer using Outdoors Type paper. I happened to find the perfect mountains die cut from the die cut ephemera, which I layered behind the Explore cut apart from Epic Tales paper as my title to left of my photo. Three tiny word stickers from the accessory stickers were perfect accents to the right and top of the photo. The mountain flair button to the right of my photo perfectly echoes the mountain die cut on the opposite side.
For the sky, I added the moon from the die cut ephemera and fussy-cut a bunch of stars from All Star paper. Next I scattered some stars from the clear stickers throughout the sky and a couple on top of my photo. I particularly love clear stickers for layering on photos! To fill in any gaps in the sky, I sprinkled in some enamel dots.
As a finishing touch I splattered some white, gold and black inks on the background, mountains and a little on the edge of the photo. I really hope you enjoyed joining me today and that you are inspired to scrap some of your outdoors photos with this amazing collection! There is a process video below too.
Hey Creative friends, Gwen here today with some more scrapbook inspiration using the new ‘Legendary’ collection by Cocoa Vanilla Studio. I’ve scrapped another pic of my husband for this layout; this one was taken at one of our favourite local restaurants. For this one, I really just wanted to make a page that documents our relationship, I’m so lucky to have him!
The idea for this page actually started with my photo! I know right, that rarely happens for me! I’ve been wanting to scrap this one for a long time as it really captures my husband’s personality. I just love the colour tones in it and I knew it would be perfect for the ‘Legendary’ collection. I pulled out all of the blue and grey tones and found a stack of options, all that would go perfectly.
To start my page, I’ve created a base with some white cardstock from my stash and the ‘Brave Heart’ pattern paper. I’ve used it to create a border around my page as well as a photo mat for my picture. I’ve then gone about finding a cut file that would fit in with my ‘love’ theme (TN Geo Heart, from CUT to YOU).
I’ve backed the hearts with the dark blue and light blue blocks of the ‘Total Legend’ paper and the grey heart is the ‘All-Star’ pattern paper. Working with the darkest blue for the top heart and then the light grey for the bottom hearts.
At this point, I haven’t stuck anything down or decided on a page design. I knew I wanted to make a longer title element so I needed to sort that first. Going through the ‘Die Cut Title’ elements, I’ve decided on the title “Love this Dude So”… yep, it’s long, so I will need to be clever about how I position it on the page.
For the design of the layout, I decided on keeping everything vertical mainly because my title needed to be stacked in some way and I had the vertical style cut files. It is far easier to work with the elements you have than to try and work around them. Go with the flow I say! I simply played with the layout of the cut file, photo and title elements until I was happy focusing on things running top to bottom on the page.
With my four main elements locked in, it was now just a matter of adding in the embellishment details. For these, I like to work largest to smallest as I audition things. If you leave larger elements too late in the design process they just won’t fit, so it’s a great idea to work with them early on. The large circle piece that says ‘Authentic’ and the ticket element are both from the ‘Die Cut Ephemera’ pack.
I found this very sweet sentiment “to the moon and back” on the ‘Accessory Sticker Sheet’ which was perfect for my photo as well as the banner that says “You’re pretty Rad”. I like to add foam behind the stickers for added dimension on my page. I’ve also pulled the tab that says ‘Noteworthy’ even though it is orange. To make this work, I’ve added in some orange and blue stars from the ‘Die Cut Ephemera’ pack, I really like the small pop of orange, I think it gives the layout a bit more depth.
The page was now almost complete. I’ve added a flair from the ‘Flair Buttons’ pack and some Typed Sentiments from the ‘Accessory Sticker Sheet’. I’ve added some enamel dots in the centre of each of the star die cuts to finish off the page.
Thanks for popping by today to see my latest project. Do you have your hands on this collection yet? As always, be sure to pop into the Cocoa Vanilla Studio and CUT to YOU Facebook groups to share your pages, I love seeing what you make.
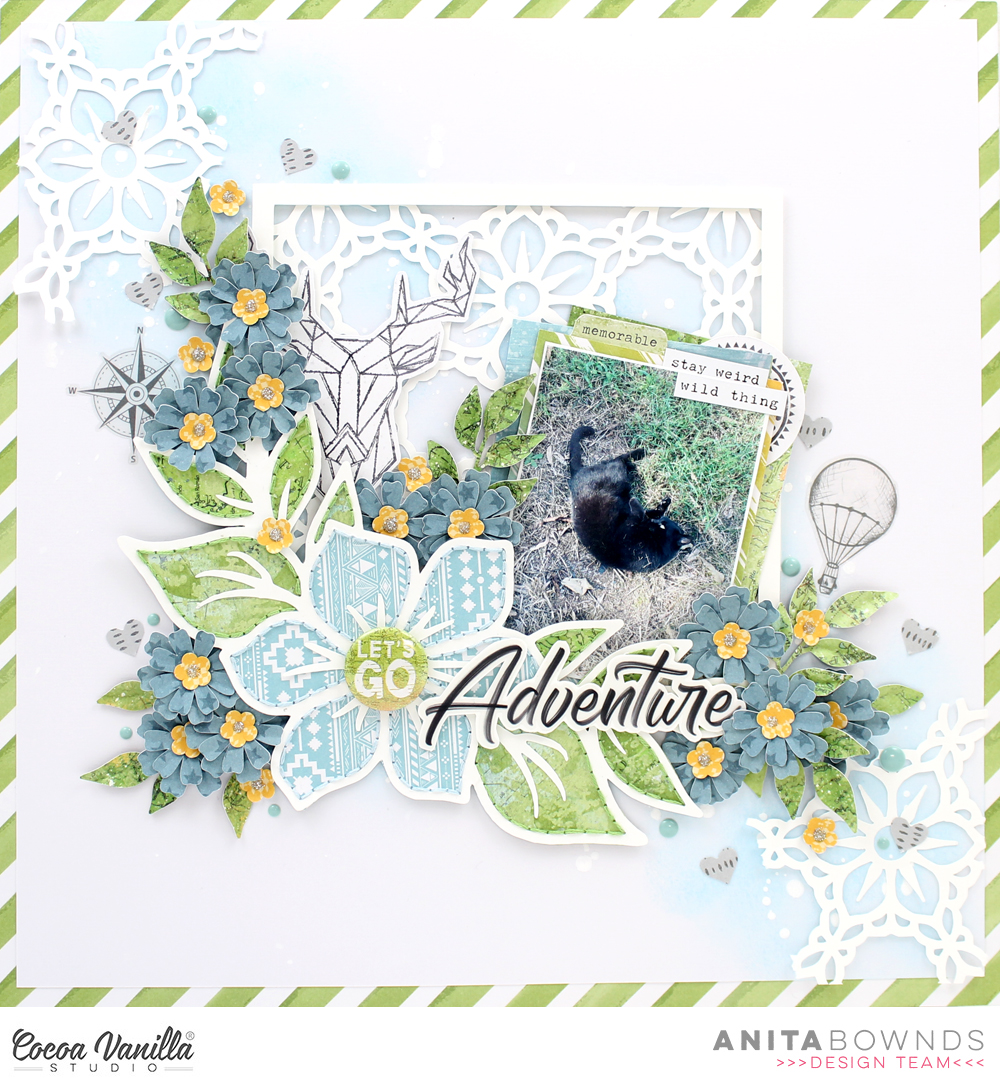
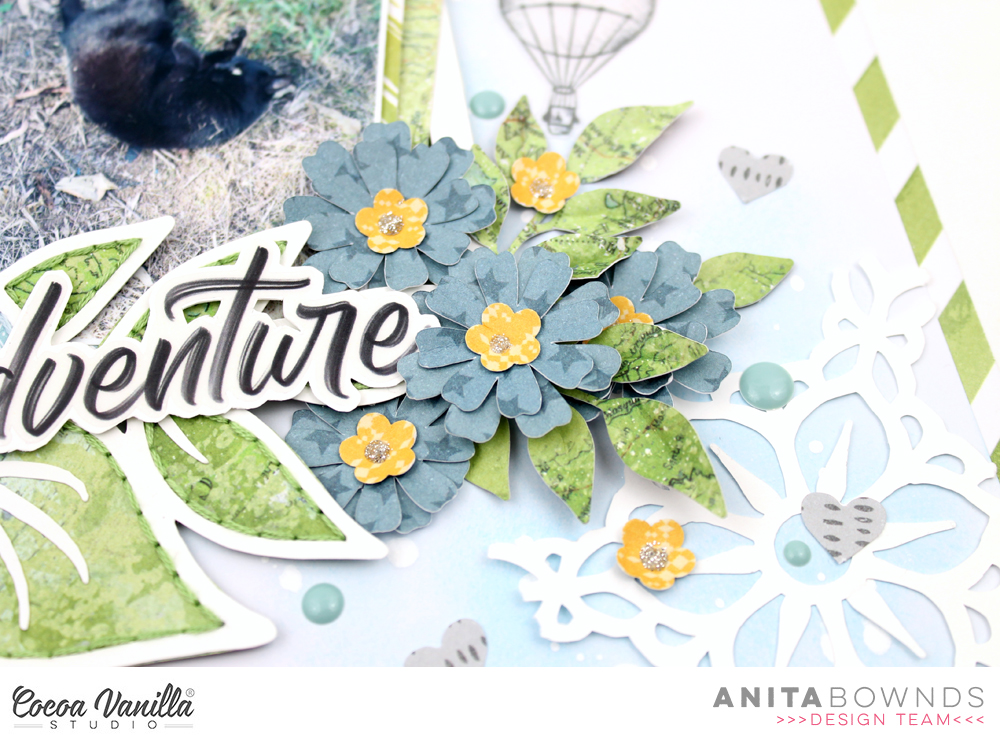
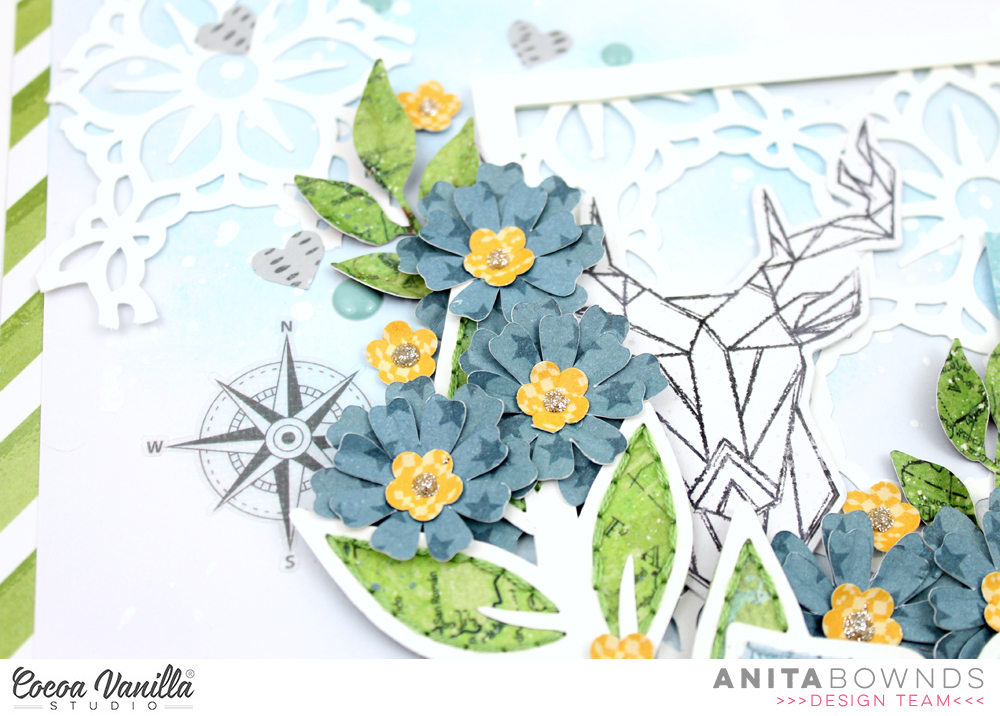
Hi crafty friends, Anita here sharing a floral layout using the legendary collection
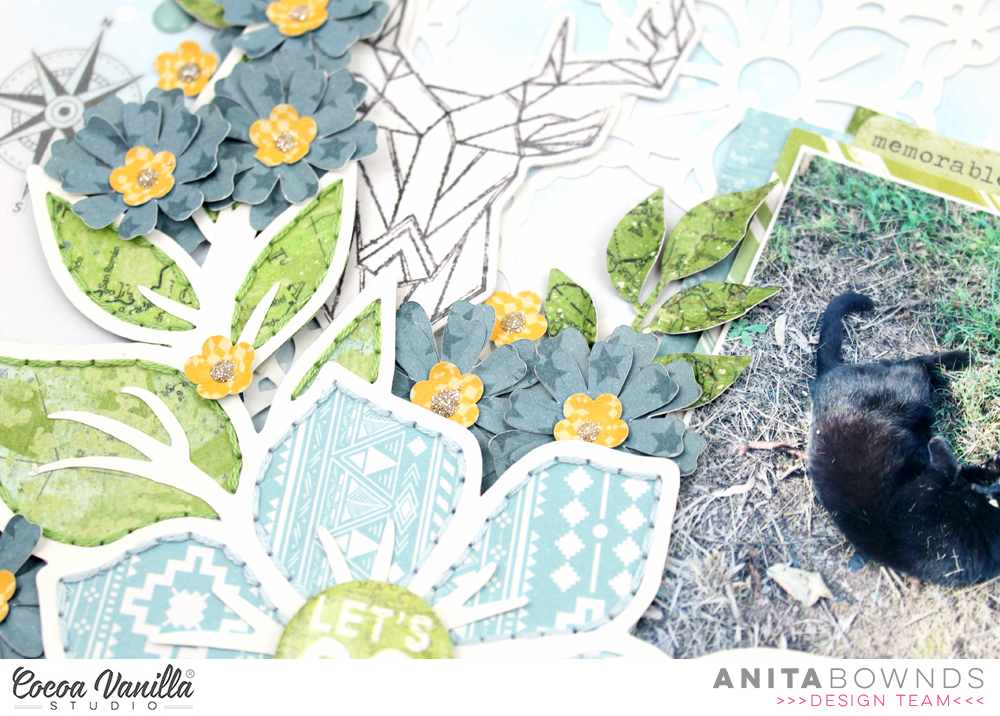
And as usual I went crazy with the flowers as I do have a lot of fun making them and they are really simple to make and featured on my layout today is our very own crazy kitty who love’s to go on little adventures all over our property when we go on walks…
I started of by using a blue ink pad and a blender and blended the ink across the layout and then backed it on pattered paper explorer
Then using my cameo and a few #neatncraftycutz cut files I cut out with white cardstock
I back the flower frame cut file with papers outdoors type and total legend and the other cut file is a travellers notebook cut file that I just made bigger so I could have a lace looking background behind my floral and photo and I tore apart a few bits to add in 2 of the corners
Then I decided I needed a bit more lovely texture I added so had stitching around the flowers and leaves
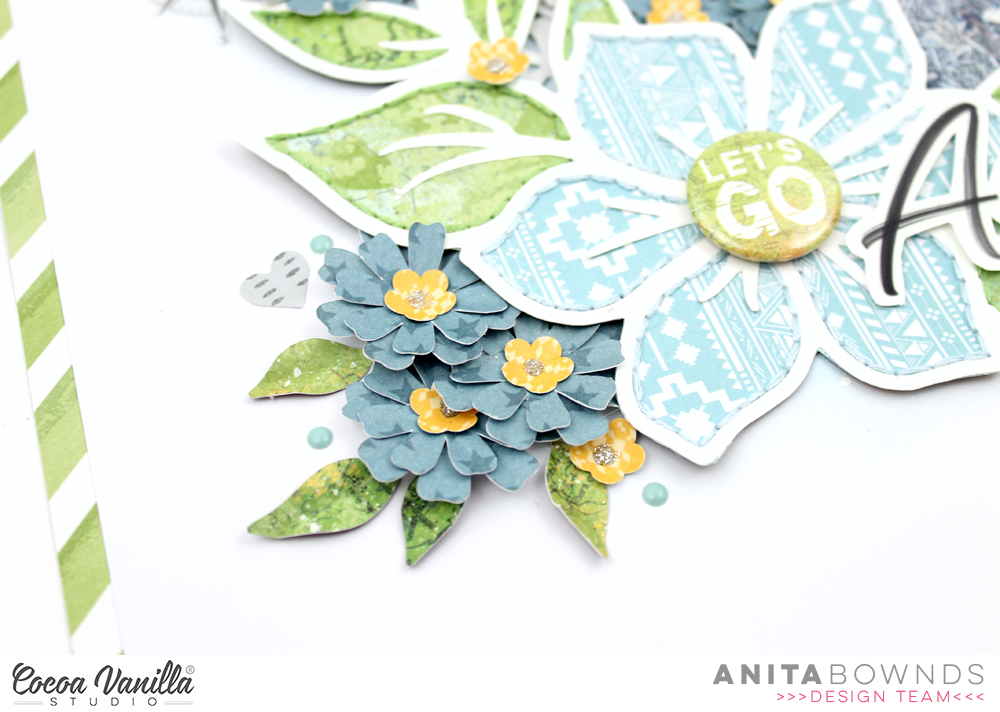
And popped a cute little flair in the centre of the flower and using the clear stickers to add my title
Using paper outdoors type for the leaves, offbeat for the flower and wild one for the flower centre’s Using a little flower punch. I just started layering them and adding clusters of them around the big flower frame
I added a few more of the clear stickers around the flowers clusters a few little punched hearts using paper all star
I layered patterned paper behind my photo using total legend,wild one and outdoors type
I tucked ephemera and accessory stickers around the photo and in the layers
And I finished off with a few enamel dots and glitter glue.
.I hope I’ve given you some more fun floral inspiration using the legendary collection..
Hi again Cocoa Vanilla Studio fans! Danni here with a Super Sweet layout to share using the colourful Legendary collection. I was challenged to make flair buttons a feature on this layout, and I absolutely love flair, so I was really excited to get creating this one! For this layout, I wanted to feature multiple smaller photos of my little boy enjoying this bowl of ice cream. Because of the dessert, I decided to use sweets as the theme! I started with this super cool gumball machine cutfile and backed it with lots of different coloured patterns from the patterned papers in the collection.
For my background, I took the Wild One 12×12 paper and mounted it with a thin white cardstock border, then popped some bright yellow card stock in the centre. I love how the rainbow stripe really pops between the two layers of plain cardstock! For some extra texture and to secure all the layers together, I machine stitched with white thread around the edge of the layers. Once my base was done, I added some peach and blue ink splatters on the background following a diagonal – this is roughly the way I planned to have my photos positioned across the page, so I wanted to draw the eye in the same direction with the splatters.
The photos were matted with alternating layers of One Way, Brave Heart and Explorer patterned papers, with 2 simple layers on each photo. I went through and distressed the edges of my photo mats too – I just love the textural effect this provides! I arranged my photos in a cascade from the top of the cutfile to the bottom, making sure they overlapped each other and showed the progression of events. How adorable is his little face?
Time for flair buttons! I added them in three places, making sure to place one in the slot at the base of the machine, to looks as if a gumball was falling out. I just love how that looks! I went ahead and added some decorative clusters using the die cut ephemera and accessory stickers, taking care to strategically cover the random people in the background of the photos. I also punched a bunch of small circles from the patterned papers and used them to fill in any gaps.
For my title I used SUPER from the die cut titles and some white foam alphas to make ‘SUPER Sweet’. I think that fits the theme of the layout quite nicely! To finish off I added a sprinkling of enamel dots and a few lines of journaling in grey pen.
Thank you so much for joining me today! I just love how colourful my layouts are turning out with the Legendary collection. There is a process video below if you would like to watch <3
Danni x
https://youtu.be/sptSMo7H8OM
Hello CVS Friends. It’s Anna here with another project made with brand new “Legendary” collection. This line is so easy to work with and you have to believe me as I am not used to using masculine lines. I made this page in about 30 minutes which is almost a record for me. “Legendary” is a very colorful collection with almost all colors from the rainbow in it. However this time I decided to focus on yellow, orange and blue. I took those colors from the picture of my cute nephew.
I started with white background and some colorful splatters made with mists. It’s such an easy and fast way to add some unique touch to your pages. Second step was to pick three patterned papers and cut them into pieces. I also added decorative edge made with border puncher. If don’t have any, you can just tear off the edge of paper to add a little bit of mess.
Next step was to add photos over the layered papers and some title made with amazing product – Die cut titles. You have so many words to choose from and they are designed the way, you can also make longer phrases.
I love adding simple shapes to my projects and “Legendary” collection has great set of stars in various sizes and colors. I choose three bigger ones from Ephemera pack to create a visual triangle. I also added small stars from Clear stickers set and added them here and there.
I finished my page with few ephemera pieces, mostly tags and tickets, and few enamel dots. I am so happy how it all turned out. Tt will be a perfect addition to the gift for upcoming birthday of this little super hero.
I hope I inspired you to reach for this super cool collection. Zoe is a master of masculine collections! Thank you for stopping by and stay safe and healthy my Friends.
It’s Tarrah back with you today to share a new layout using the awesome Legendary collection!
I love how versatile this collection is, it can be used for boy projects, travel projects and even girl projects! Make sure to check your local or favourite online scrapbook store and get your hands on it!
I started out by trimming some of the papers into a few different sizes and arranged them on a white cardstock background. I chose the white arrow paper to feature my photo and some of the main embellishments. My photo is one of my eldest son looking handsome and going to his Year 6 farewell night a few years back.
I love the star die-cuts in the ephemera pack, I added the grey ones in 3 places to create a visual triangle on my page. I like how this takes your eye around the page. In between 2 of the stars I added some of the clear sticker stars, I like how this adds a bit more impact to the die-cut ones.
Inside the large grey star, I added one of the large circle Authentic die-cuts, I used craft foam underneath it to raise it up, I like how it gives it shadow and dimension. I also added the ‘Epic’ die-cut title below my photo, this became my title for my page. The flairs are awesome in this collection so I added the ‘Let’s Go’ one on this page since the photo is my son getting into the car! I also added the ‘Admit One Adventure Pass’ ticket just above the flair also.
Thank you so much for stopping by today. I hope my layout inspires you in some way! Make sure to keep an eye on the Cocoa Vanilla online store as the Legendary collection will be in the online store in the next few weeks!
Hey Creative friends, Gwen here today with some more scrapbook inspiration using the new ‘Legendary’ collection. This photo is of my husband, taken on a recent family vacation… for those who don’t know, he is a photographer, so it’s rare that he is in front of the camera! I do try and pry it out of his hands and take some shots, so it was so good to get these fun photos scrapped.
For this page, I knew I wanted to use two photos and that they would take up quite a lot of space on my page, so the design had to be kept quite simple. I decided to go with a vertical design for the photos, and add interest to the background with a grid design. To do this, I’ve used a cut file, this one from CUT to YOU and cut it from the pattern paper ‘Brave Heart’. I’ve then arranged it on a white cardstock base. I’ve also mounted this onto the same pattern paper, to create a border for my page.
*TIP – If you aren’t a fan of backing cut files but love their look, use pattern paper to cut them out and then simply add to your page, no backing required!
I’ve then worked on the photo mats for my photos. I’ve gone with a double mount, first up using the ‘All Star’ pattern paper, and then using the ‘One Way’ paper. I am loving the pop of orange here with the blue and grey tones of the other elements. As usual, I’ve added stitching around my photos and then around the edge of the layout for detail.
Next, I’ve worked on my title. For this, I’ve used the ‘Die Cut Title pack’ and gone with the title “My Hero”, I’ve pulled out the ‘Super Star’ banner piece from the ‘Die Cut Ephemera’ pack to use as part of my title as well. I’ve also pulled out all of the elements that I could find that were either blue or orange; I’m keeping the colour palette very simple with this one.
I love this large prize ribbon element and find something round like this softens the look of the page. I’ve teamed it with a flair from the ‘Flair Buttons’ pack to create a cluster and round out the title element.
I’ve also included here some of the typed sentiments from the ‘Accessory Stickers Sheet’, added to the page with foam tape for dimension.
With my main cluster complete, I’ve added a second cluster to balance the page out. The ‘Die Cut Ephemera’ has lots of tags and tickets included and they are really fab way to build clusters and interest on your page. I’ve firstly chosen elements due to their colour, and then how they fit together to help me tell the story of the photo. The star elements here balance out and coordinate with the star image on the flair button and also balance out the pops of orange on the page.
I’ve also added some of the ‘Enamel Dots’ to my embellishment clusters to help draw the eye around the page and it finishes everything off nicely.
Thanks for popping by today to see my latest project. Do you have your hands on this collection yet? As always, be sure to pop into the Cocoa Vanilla Studio Facebook group to share your pages, I love seeing what you make.
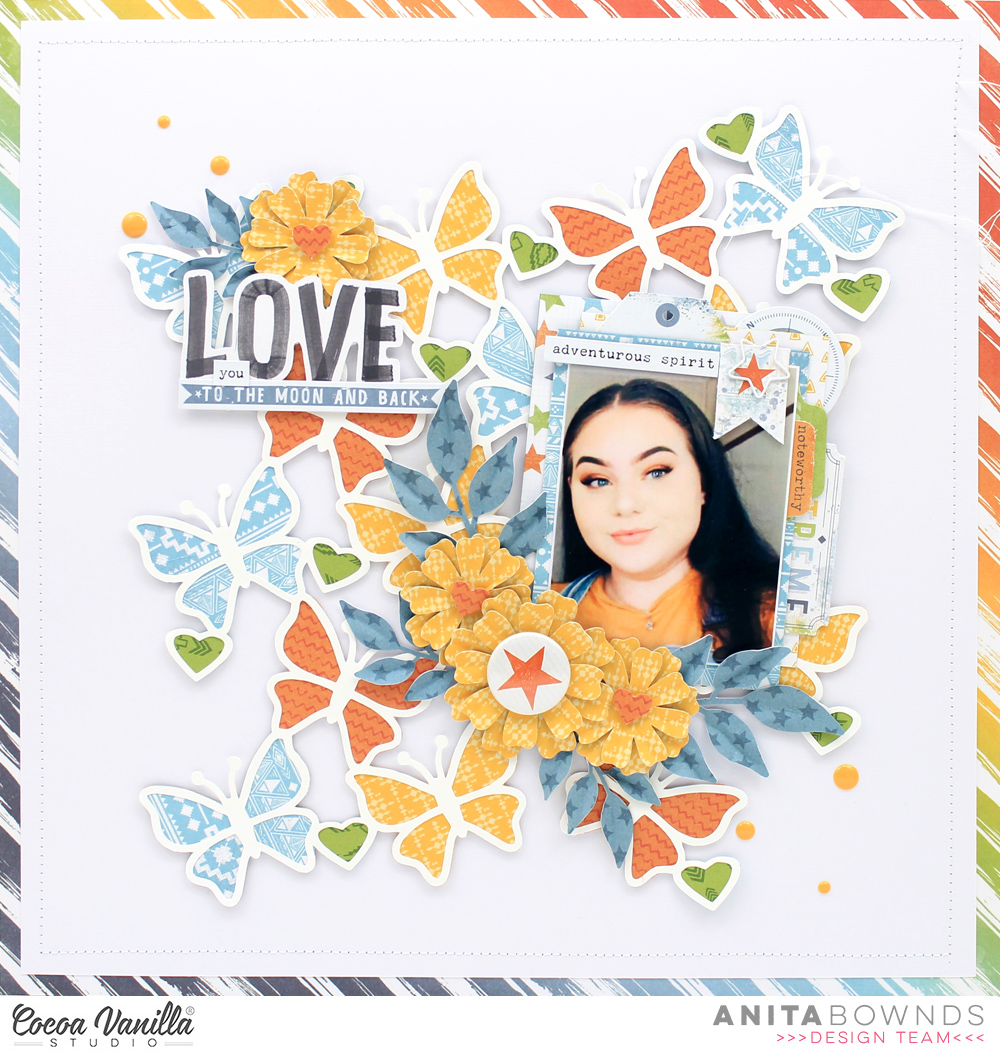
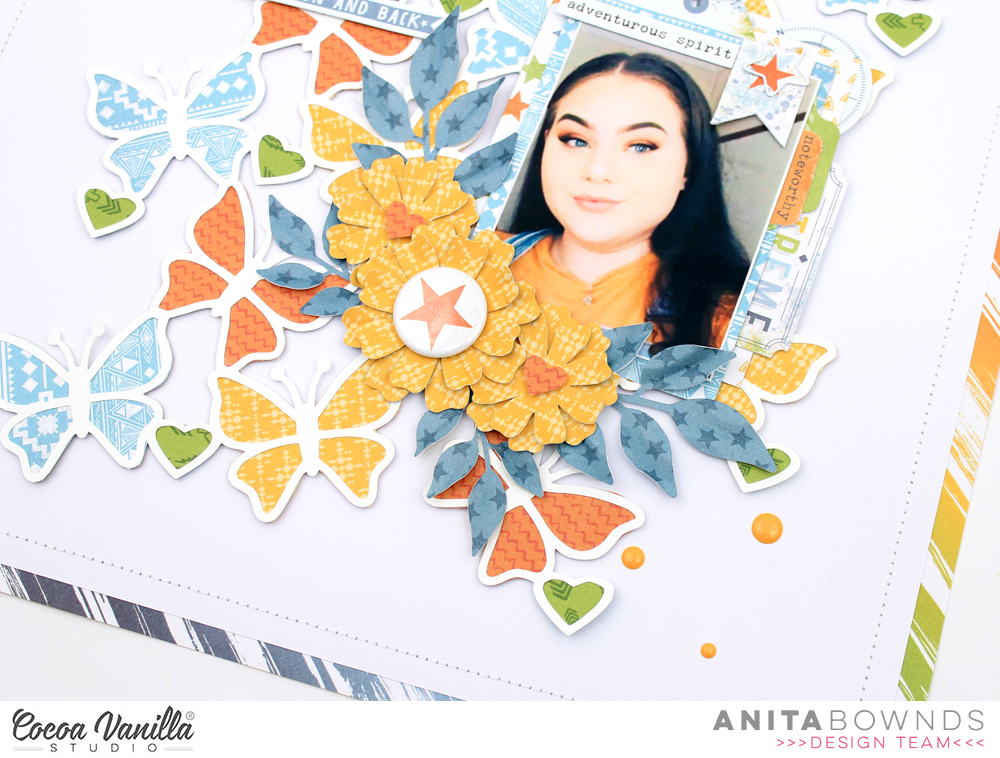
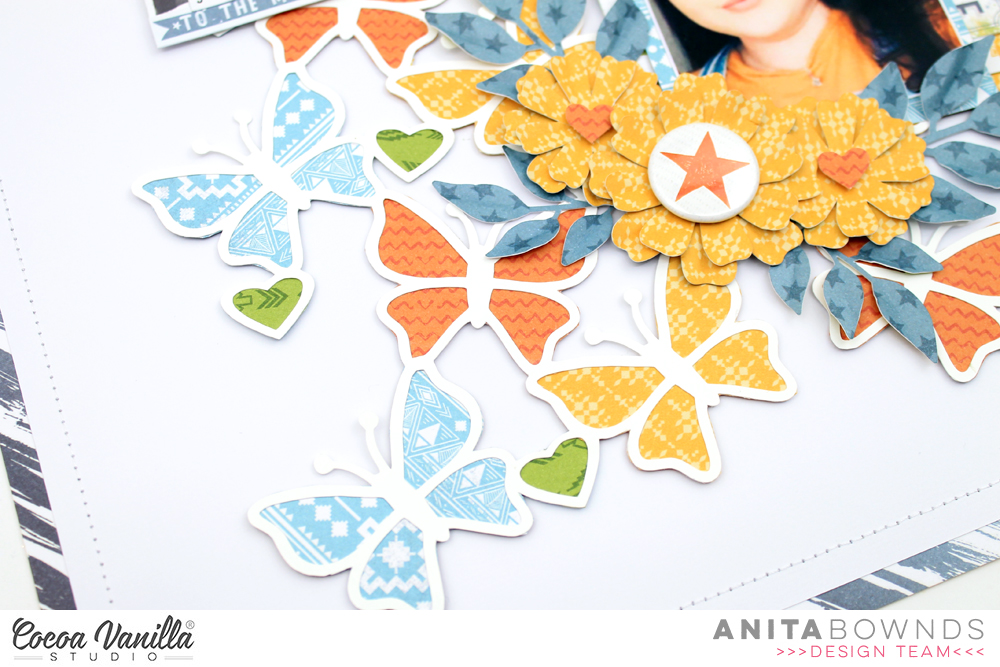
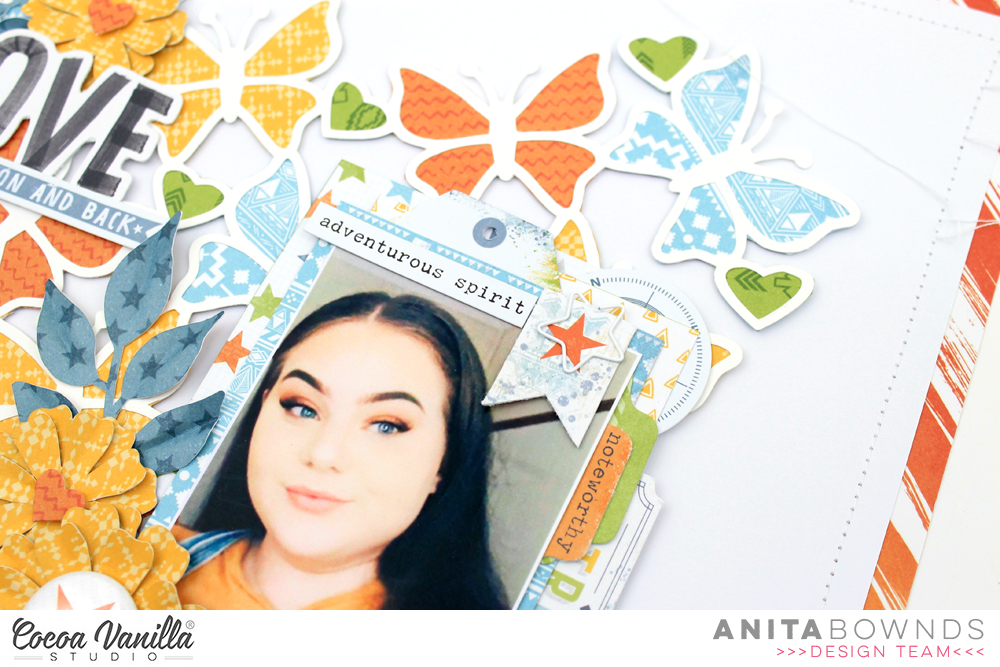
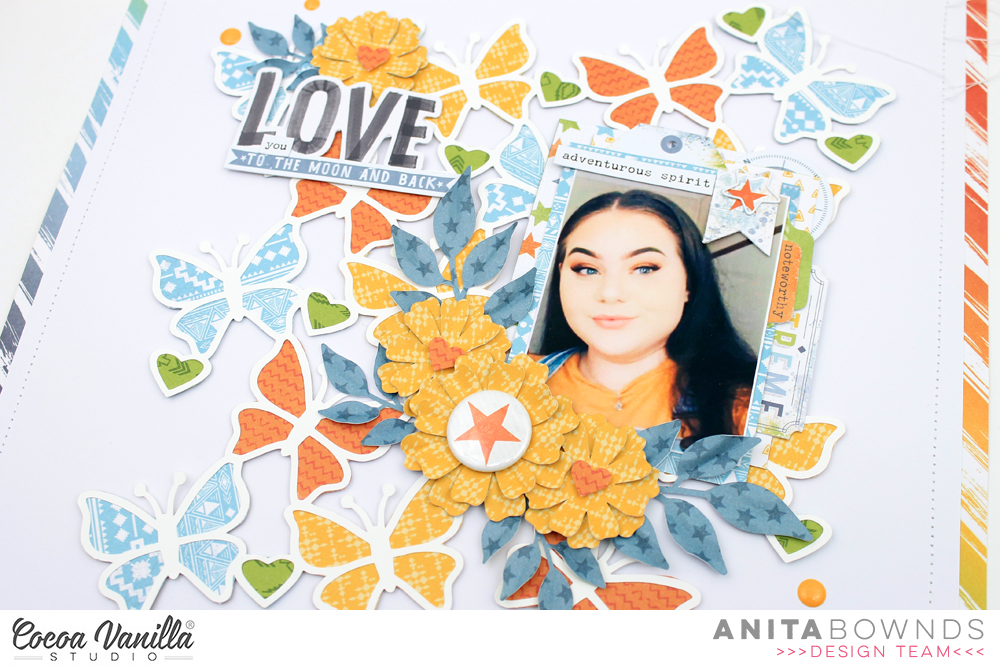
Hi there crafty friends , Anita here today sharing a girly layout using the legendary collection
Yes you can make beautiful girly layouts with a boy collection and using a cut file can help a lot if you don’t know where to start ..my go to is flowers totally love them!! I really enjoy making them and adding lots of depth and colour and they always give that feminine touch to any project
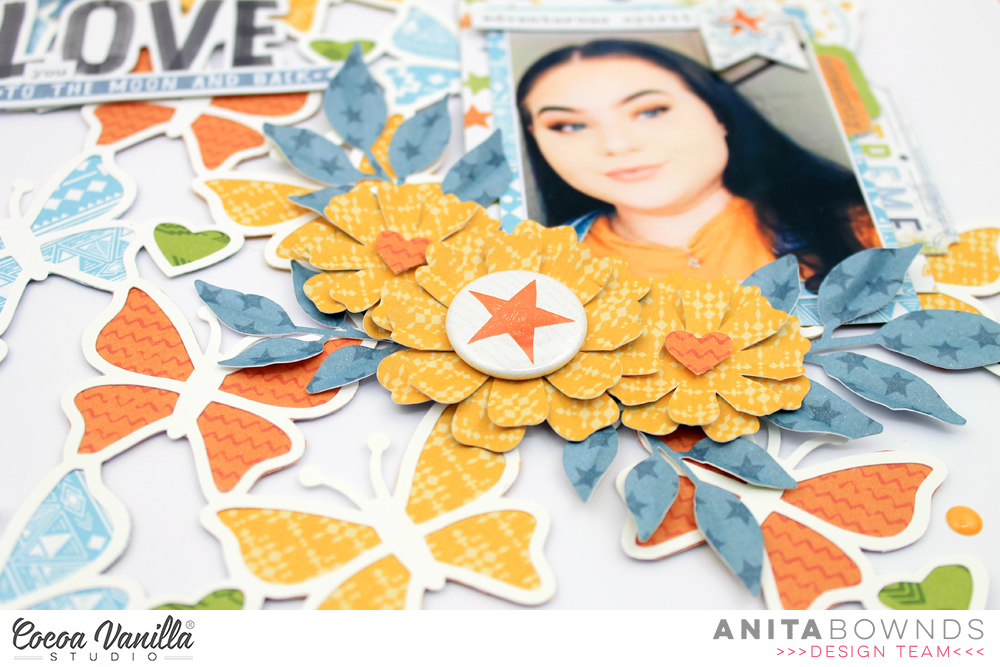
So I chose 2 cut files from @neatncraftycutz a background full of butterflies and tiny hearts to add colour using papers ( total legend , wild one , one way ) and a flower cut file to bring that girly vibe
( wild one , one way and offbeat)
And I really wanted to bring more of those colours to the background I matted my white cardstock on
Pattern ( Wild one ) and machine stitched around the border..
When matting my photo I decided on colours and patterned papers (total legend)
so that didn’t over power but blended With the colours of pattern papers of the butterflies .
I also tucked lots of (ephemera and accessory stickers ) in the paper layers to add more colour
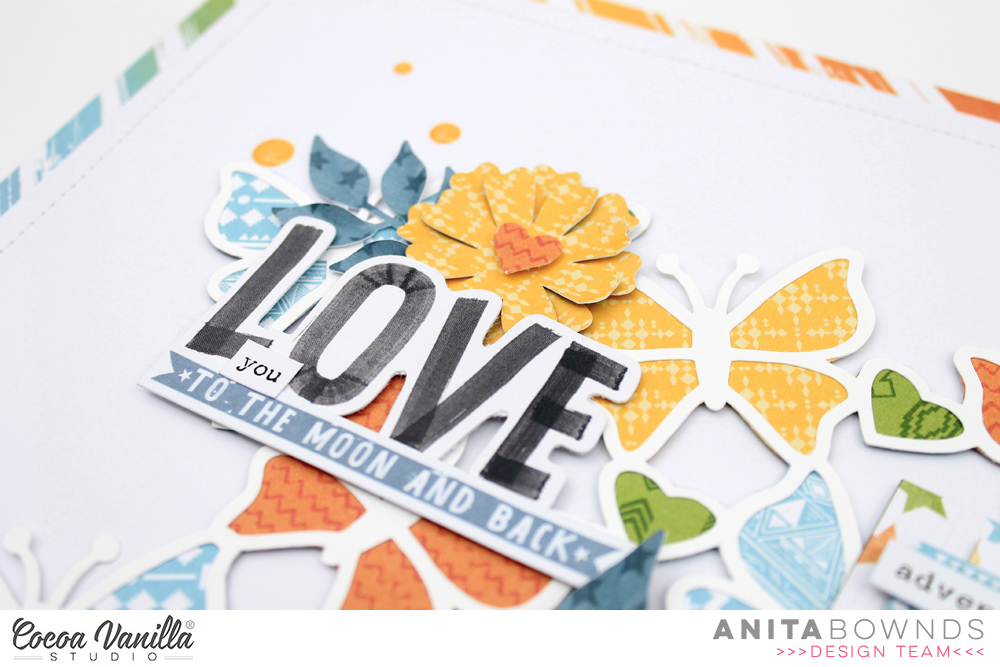
With my title I used The ( die cut titles and accessory stickers) to balance out the colour I added a small flower above the title I also add a (flair button ) to break up the colour with the flowers.
Hello my sweet friends. We continue to inspire you with projects made with brand new “Legendary” collection. I made travel themed layout with this line already and this time I decided to make a mini album. I am a mom of two girls and very lovely beagle dog Pirat. It was a great opportunity to change pink and glitter into some other color palette :) After all, he also deserves his own pages, right?
I decided to use circles as a base of my album. I picked some solid patterns from the papers included into “Legendary” collection: All star, Offbeat, Wild one, Total legend, Explorer, One way, Outdoor type and Brave heart. They are very colorful and perfect for any type of project, not only masculine ones.
I used every single item from “Legendary” in this album. Various products add various textures and this is something I am always aiming for. This line can be easily mixed with some older boyish collections from CVS – “Boys rule” and “You rock“. I used some bits and pieces from them to add some decorative hanging element on the album ring.
Each page holds one or two pictures taken during different occasions. My boy is fancy, lazy, sporty, elegant and crazy. “Legendary” line is filled with pretty starts so you can find this motif on almost every page. I mixed them with tabs and words from sticker sheet and ephemera pack. I also added few flair buttons and titles from Titles pack. I finished my project adding enamel dots. here are all the pages included into this mini book:
That is all for today. Do you like my album? Isn’t Pirat the cutest dog ever? It was so fun to scrapbook so many pictures of him at once. He is already a senior dog with 13 years behind him so I cherish every single photo I have. Despite his age he is still full of live and loves to play.
Thank you for stopping by and see you in two weeks <3


 I love the star die-cuts in the ephemera pack, I added the grey ones in 3 places to create a visual triangle on my page. I like how this takes your eye around the page. In between 2 of the stars I added some of the clear sticker stars, I like how this adds a bit more impact to the die-cut ones.
 Inside the large grey star, I added one of the large circle Authentic die-cuts, I used craft foam underneath it to raise it up, I like how it gives it shadow and dimension. I also added the ‘Epic’ die-cut title below my photo, this became my title for my page. The flairs are awesome in this collection so I added the ‘Let’s Go’ one on this page since the photo is my son getting into the car! I also added the ‘Admit One Adventure Pass’ ticket just above the flair also.