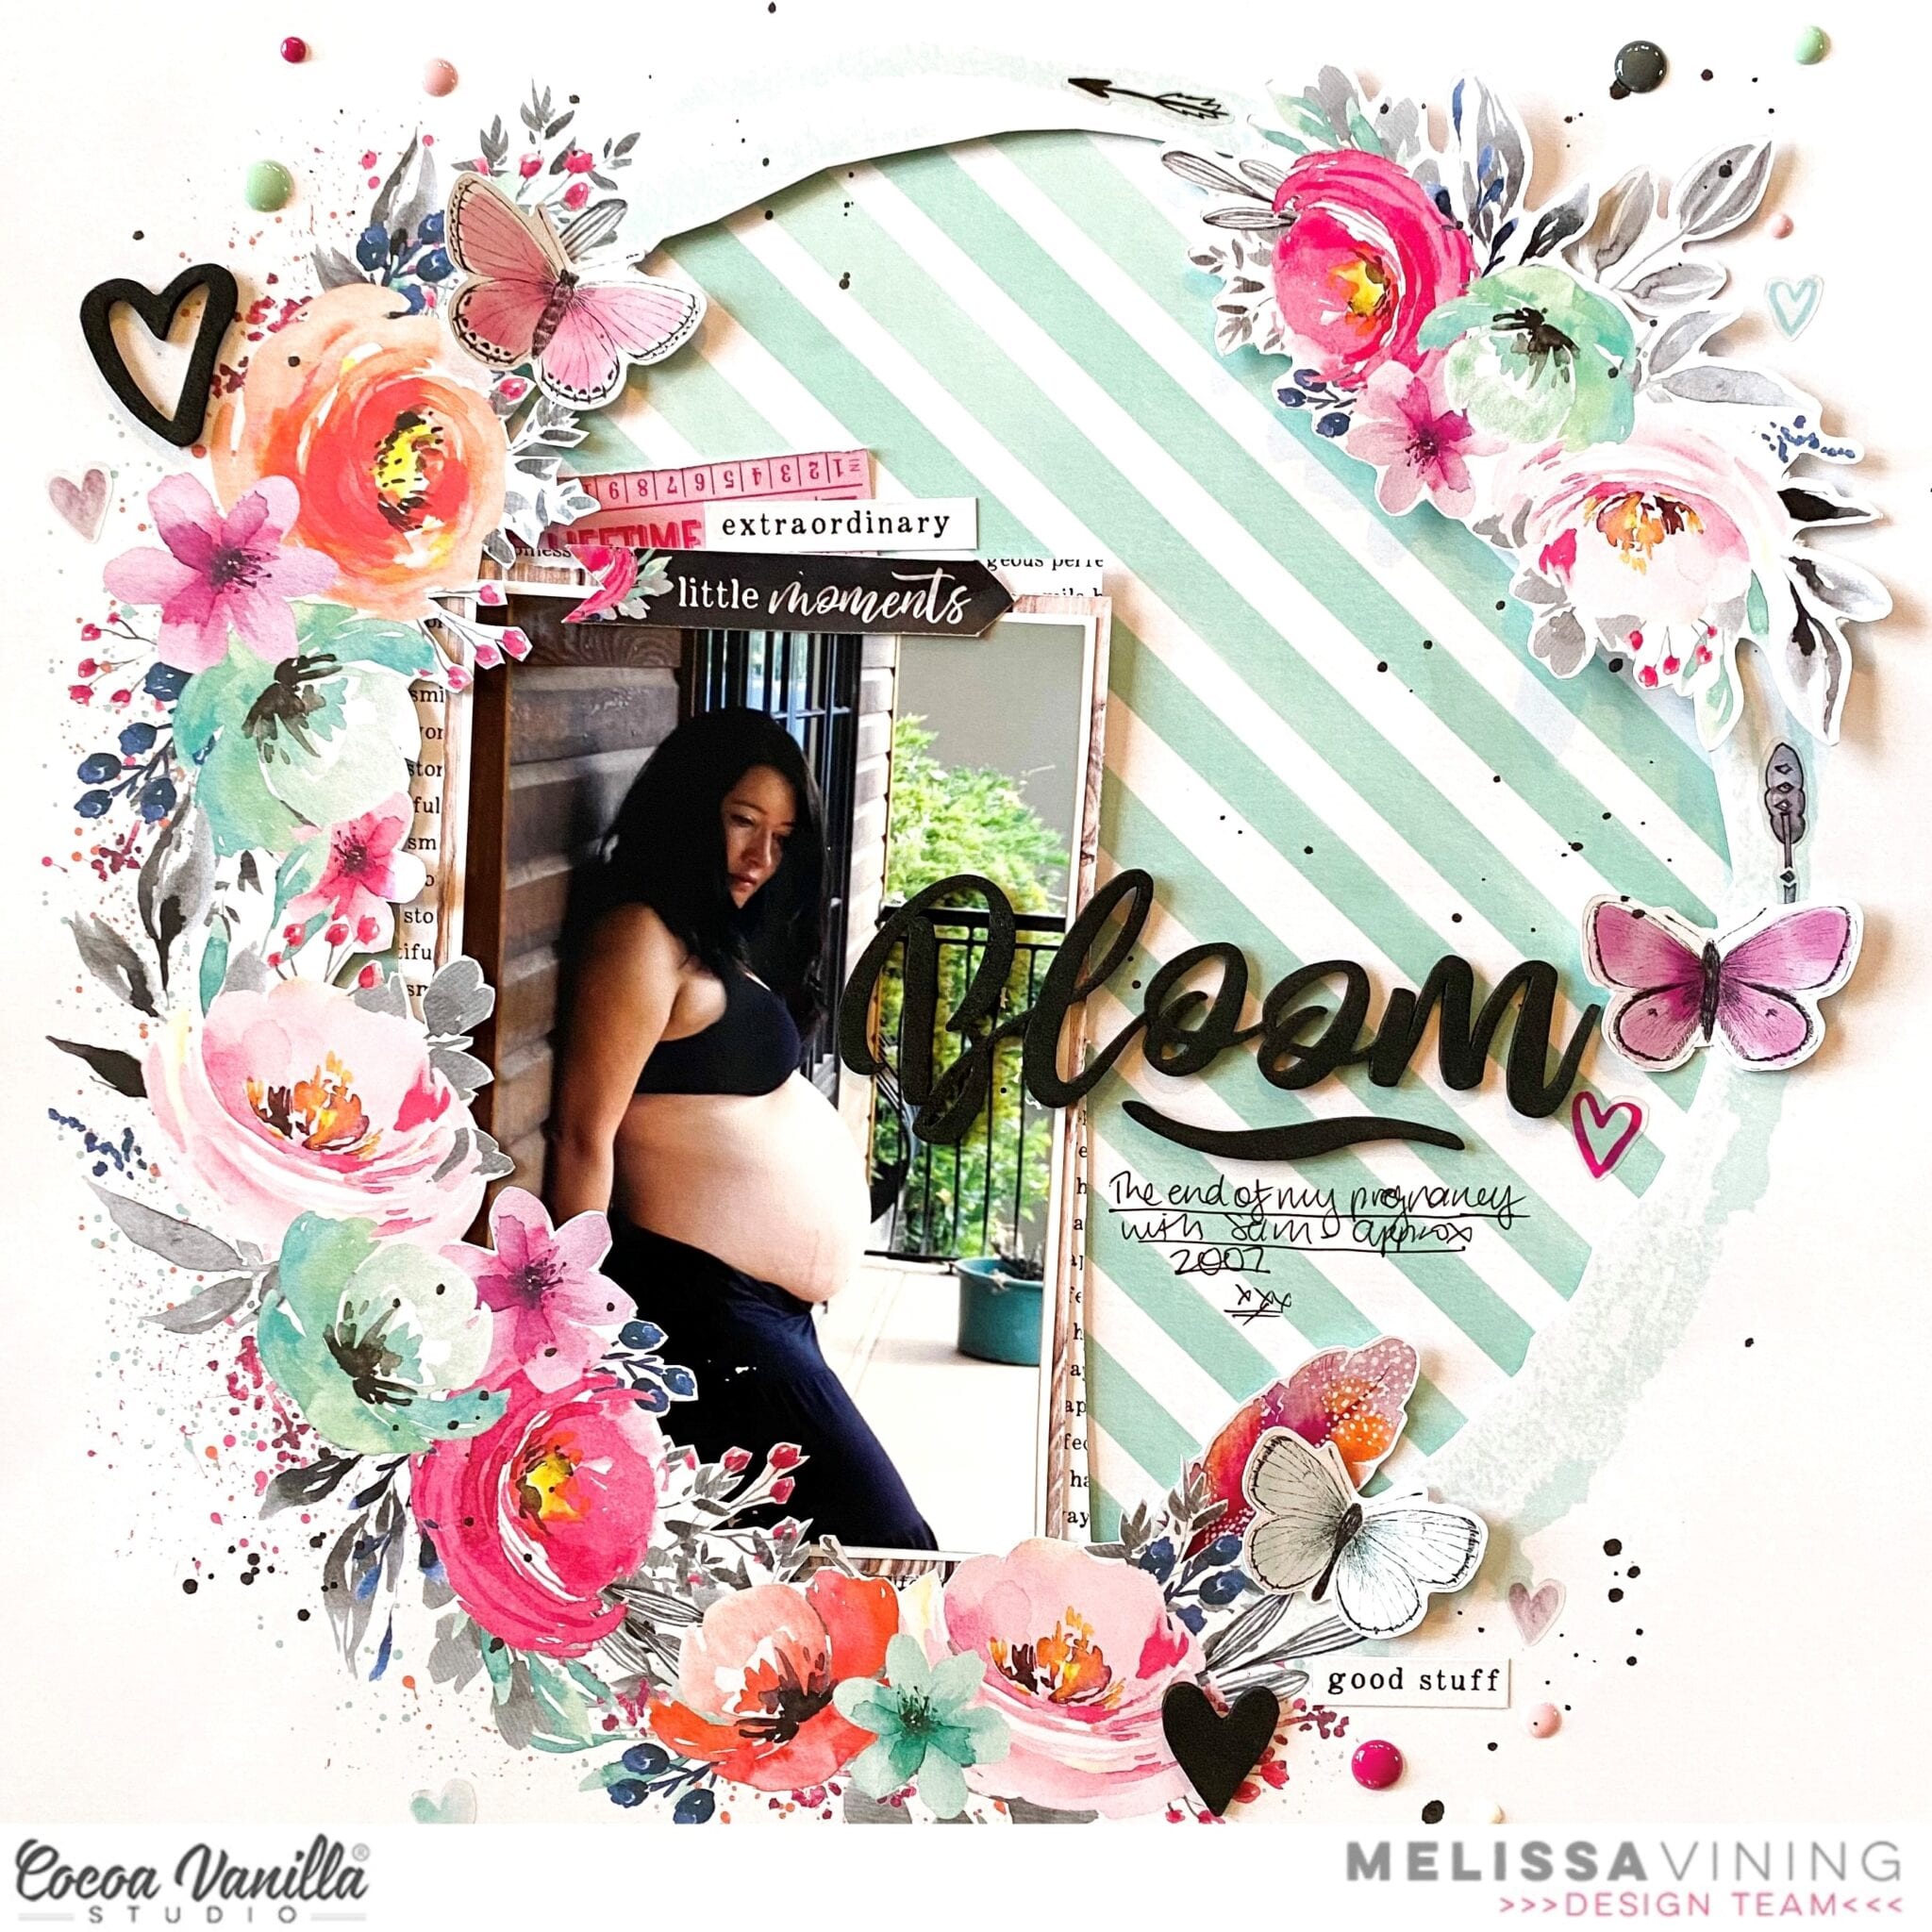
Hi everyone, it’s Melissa here and I am so happy to be back with you today sharing a layout that I created with the beautiful Unforgettable collection. I recently used this collection for Throwback Thursday and as I was going through it I realised that I hadn’t yet used the partial wreath paper. I was recently packing up my craft room (we are moving) and I found this really old photo of myself pregnant with my first baby, who is now 14. My photo is slightly damaged, but it didn’t stop me from scrapbooking it!
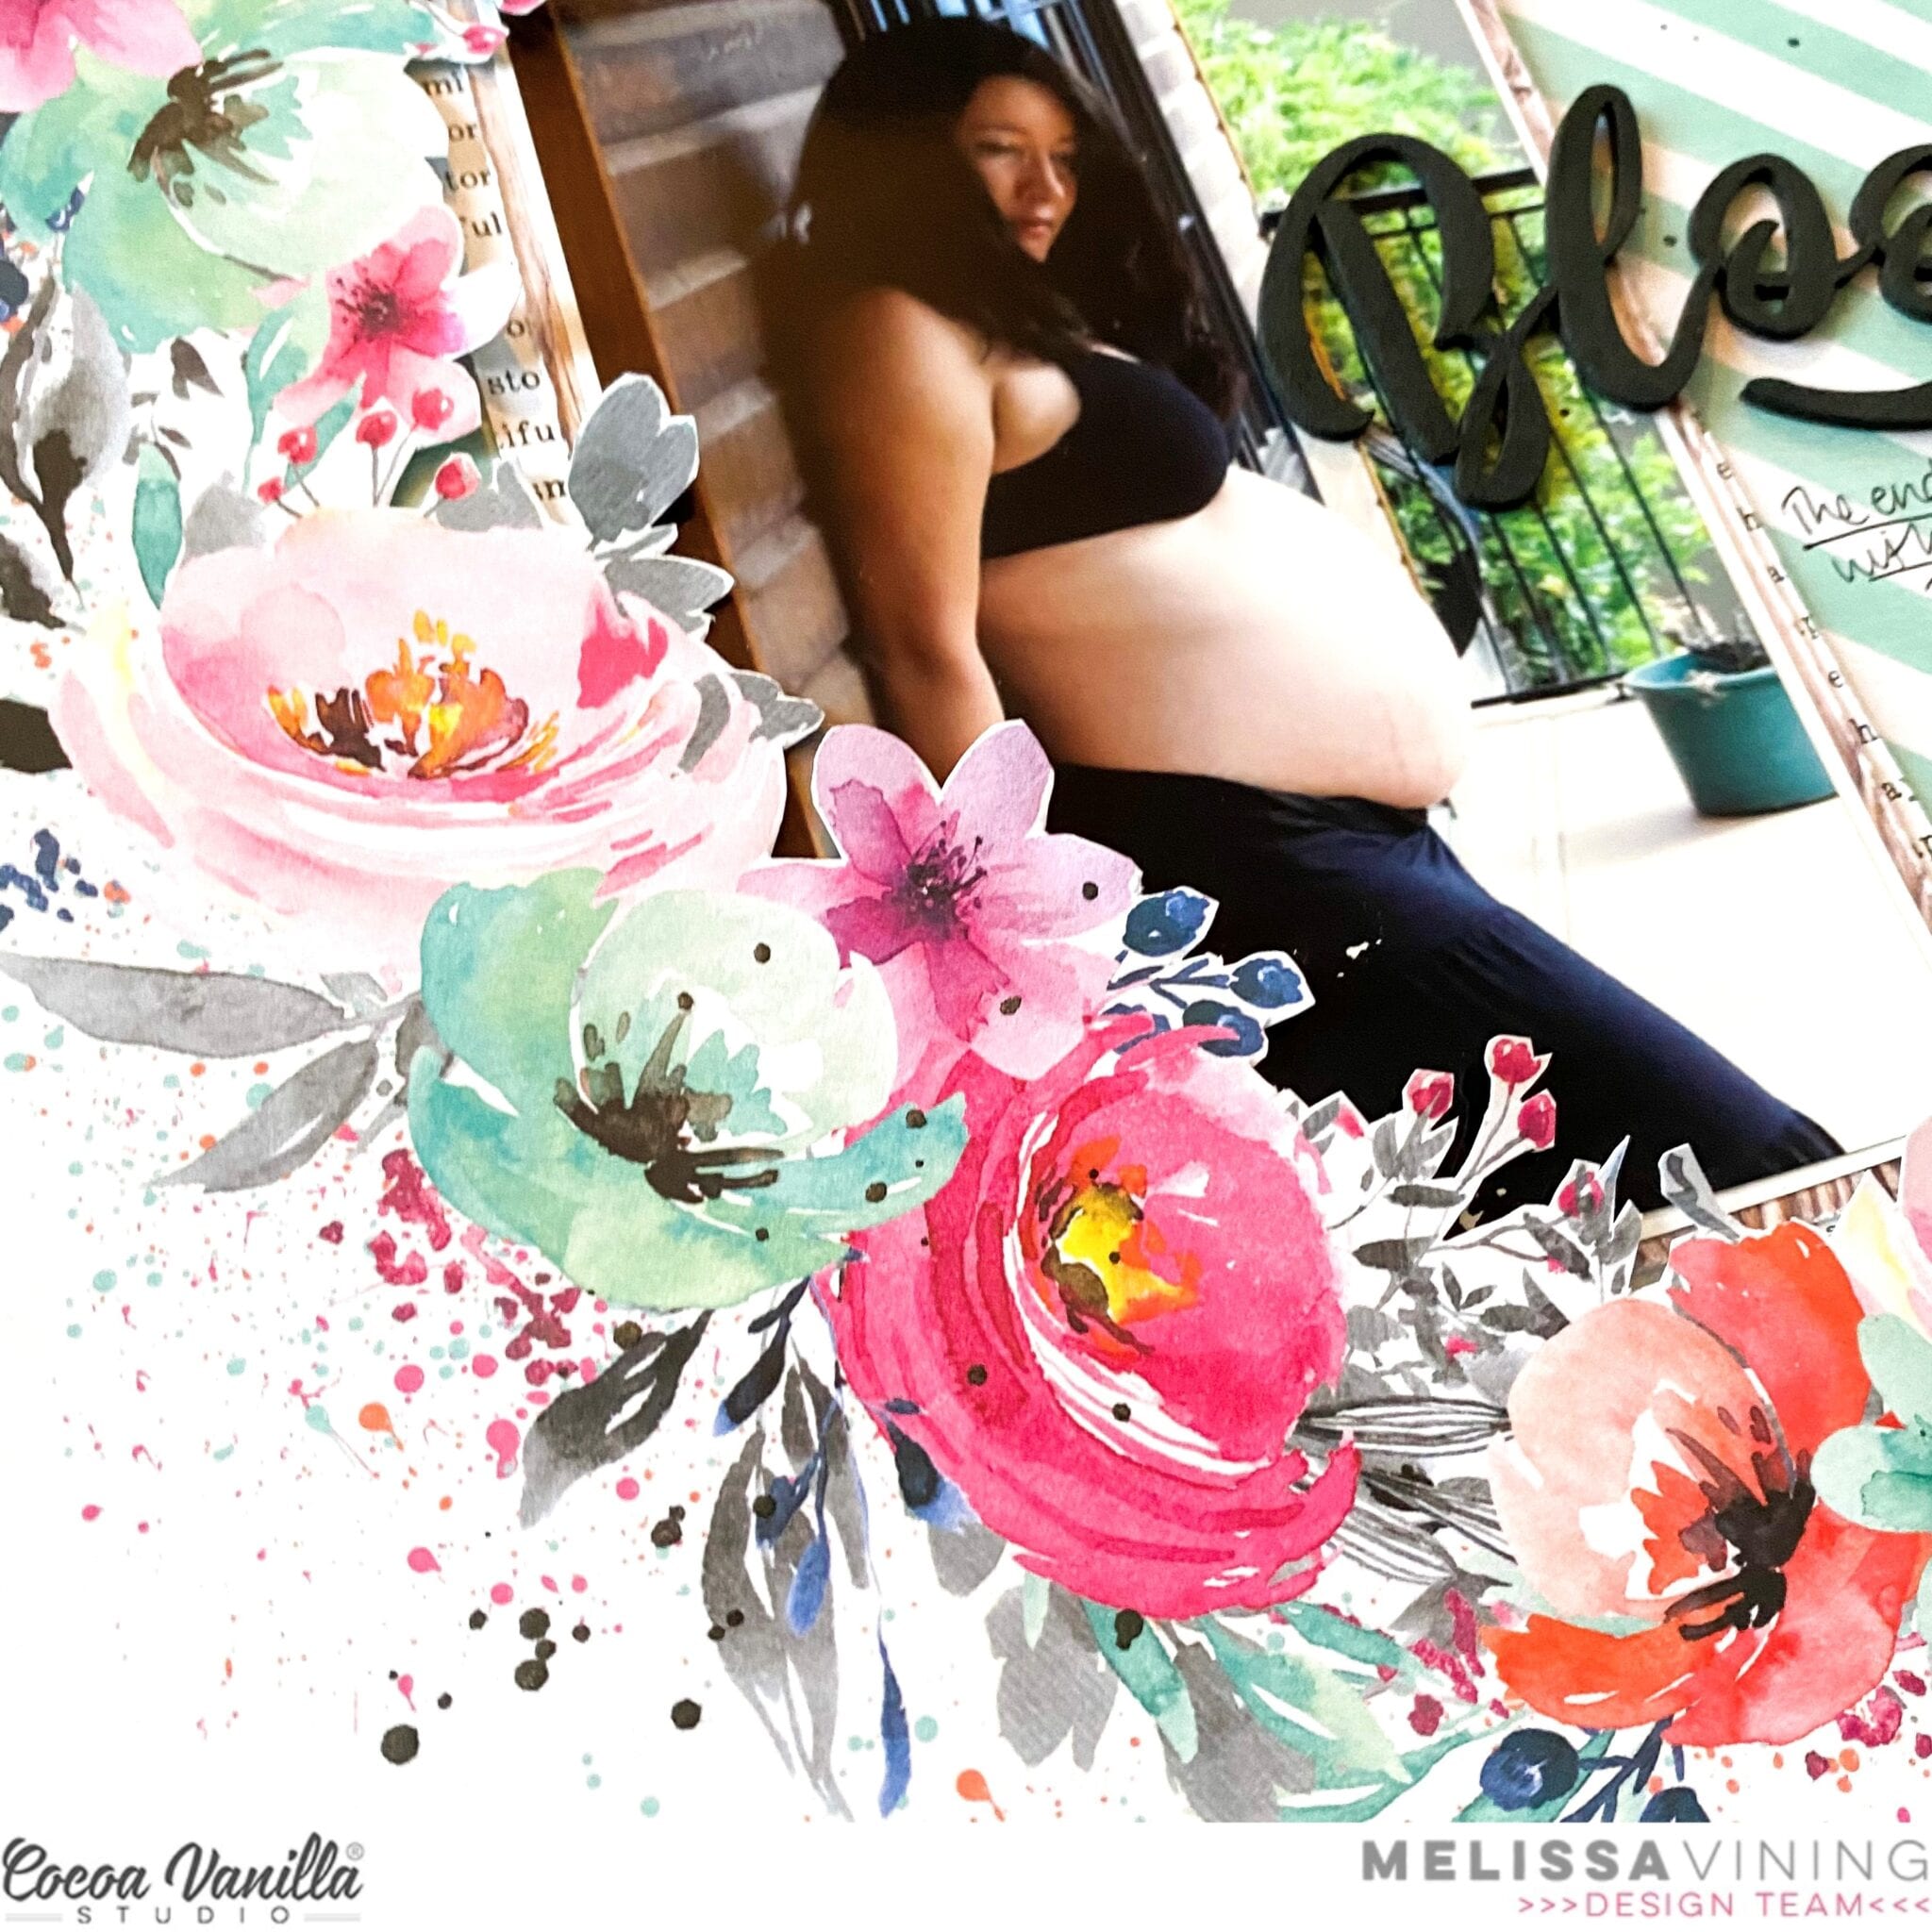
I started by fussy cutting out the centre of the wreath, and I adhered the wreath to the blue and white stripped paper. I backed my photo with some of the papers from the 6 x 8 paper stack, and lightly distressed the edges. I used dimensional adhesive to lift up the edges of the wreath.
I rotated the wreath so that it was located on the left side of the page, and then I tucked my photo under it.I added more dimensional adhesive under the flowers that overlapped my photo.
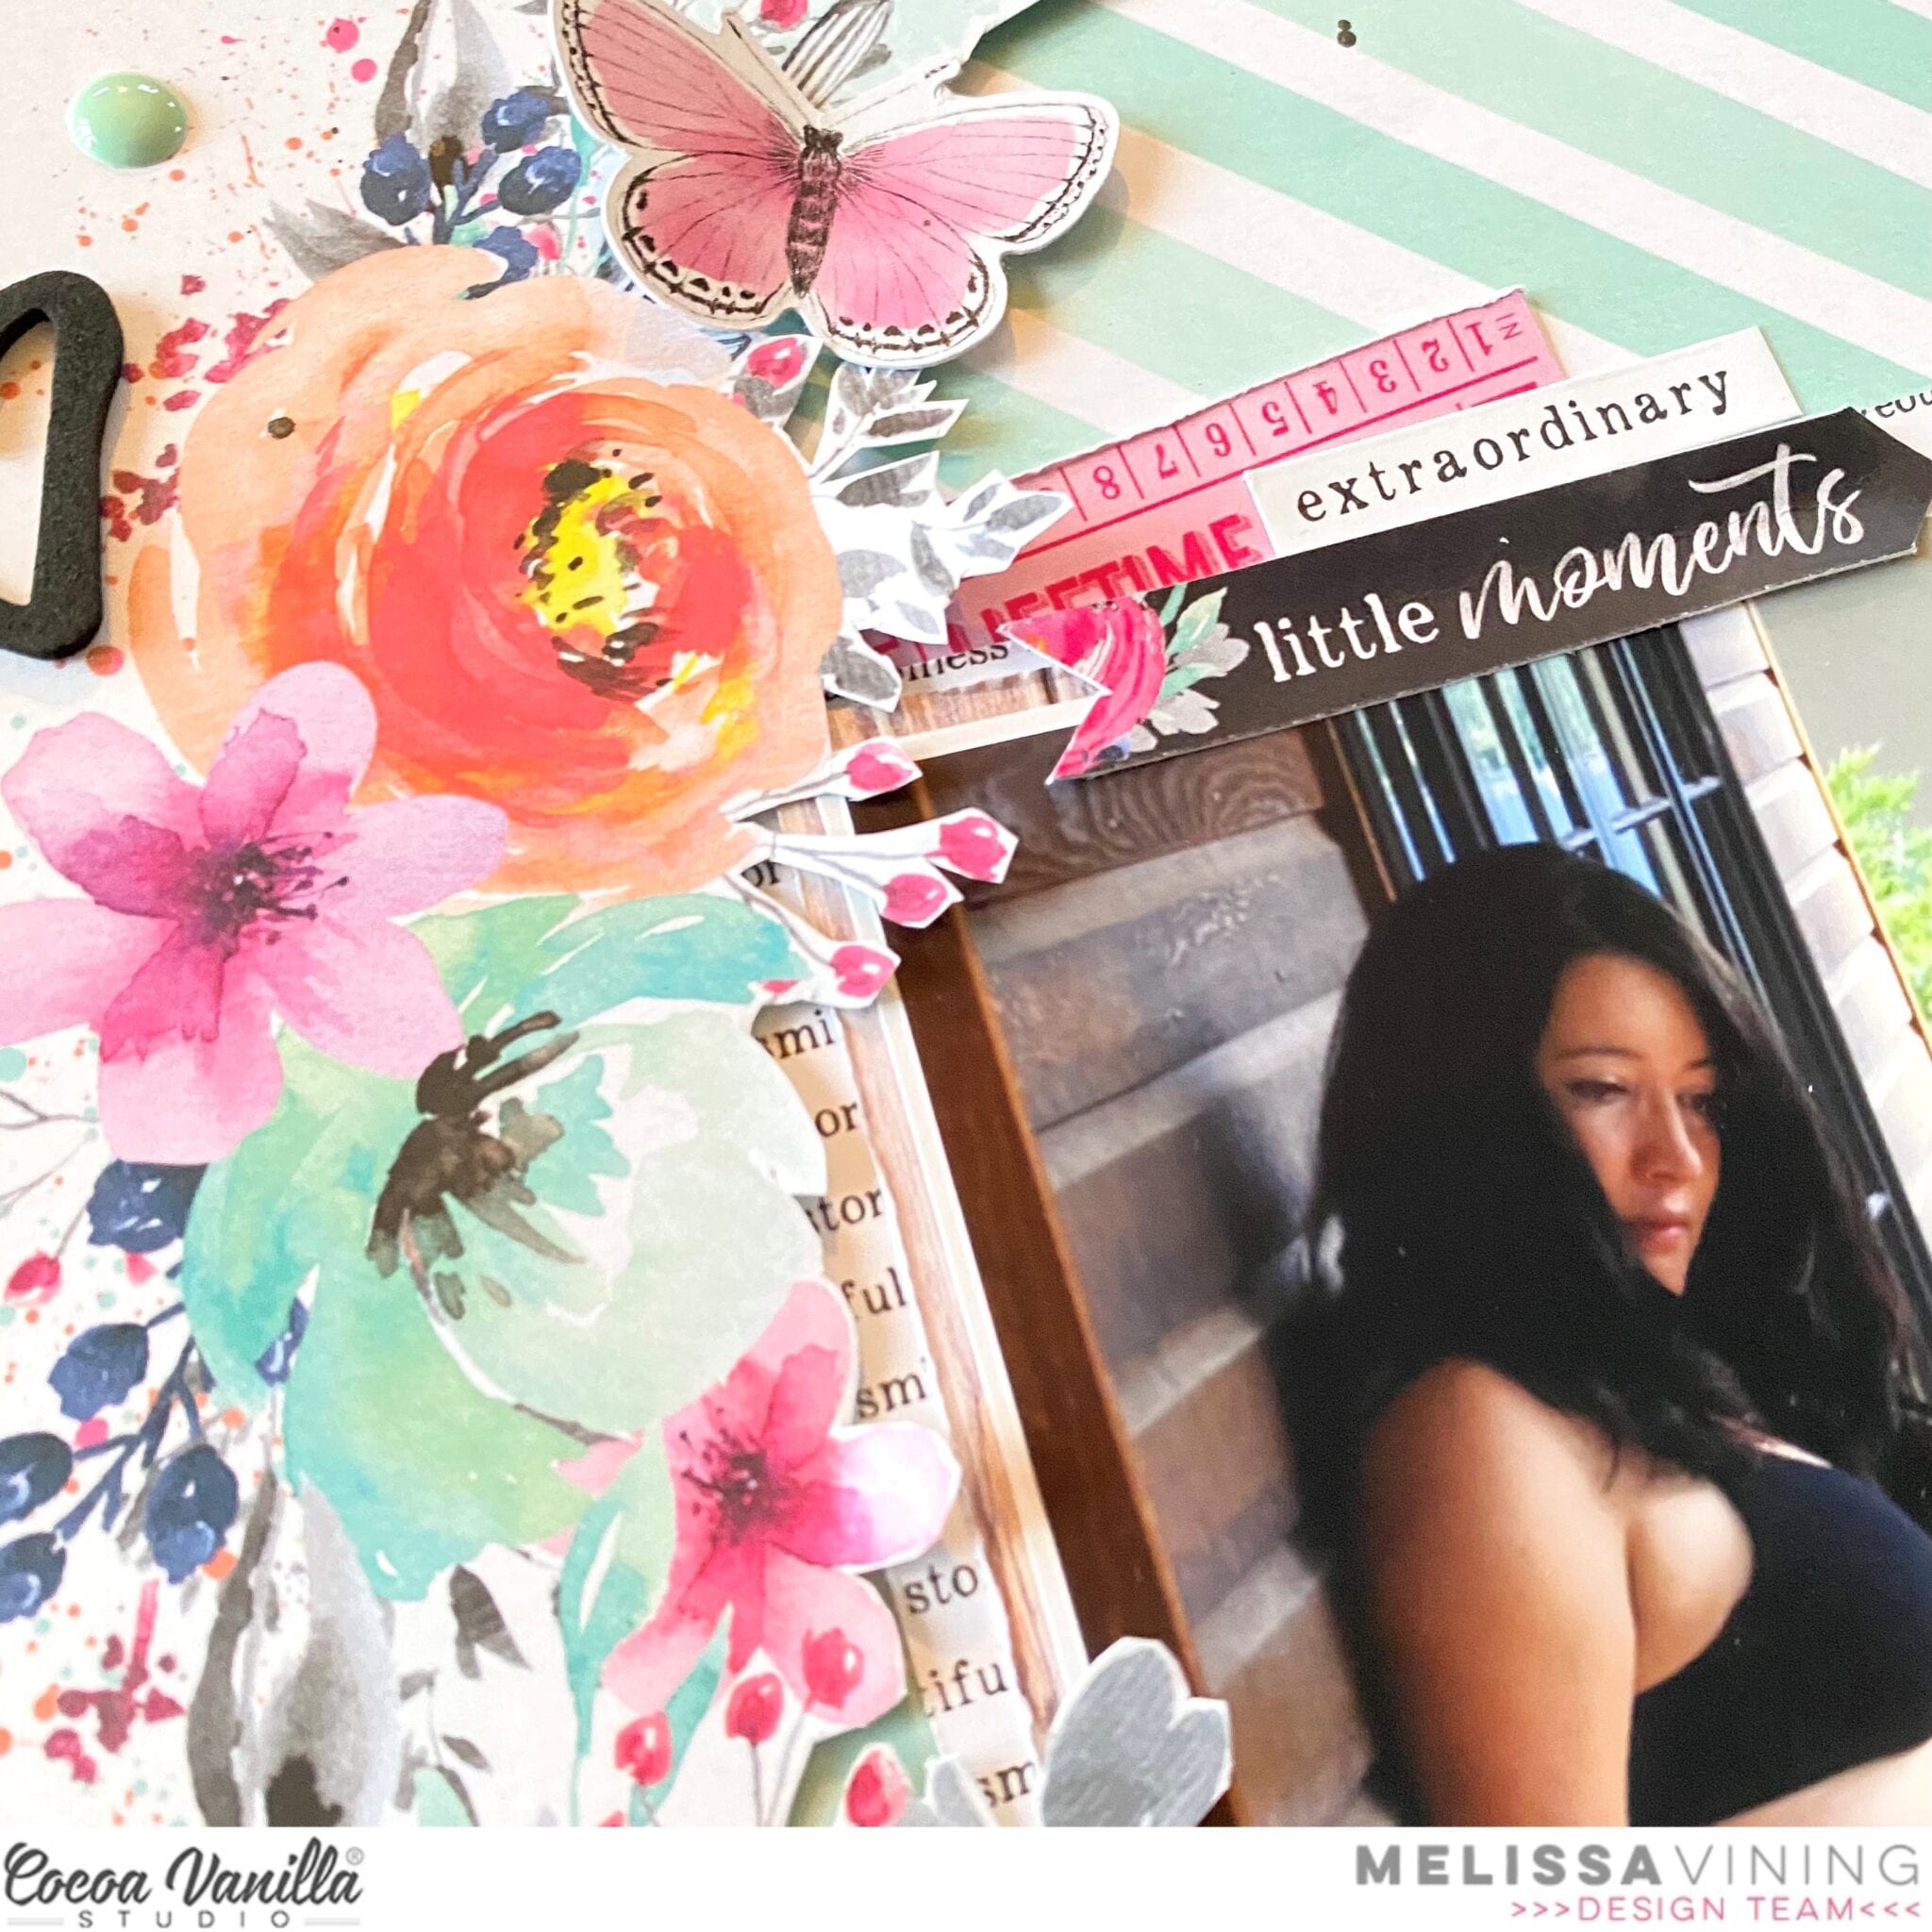
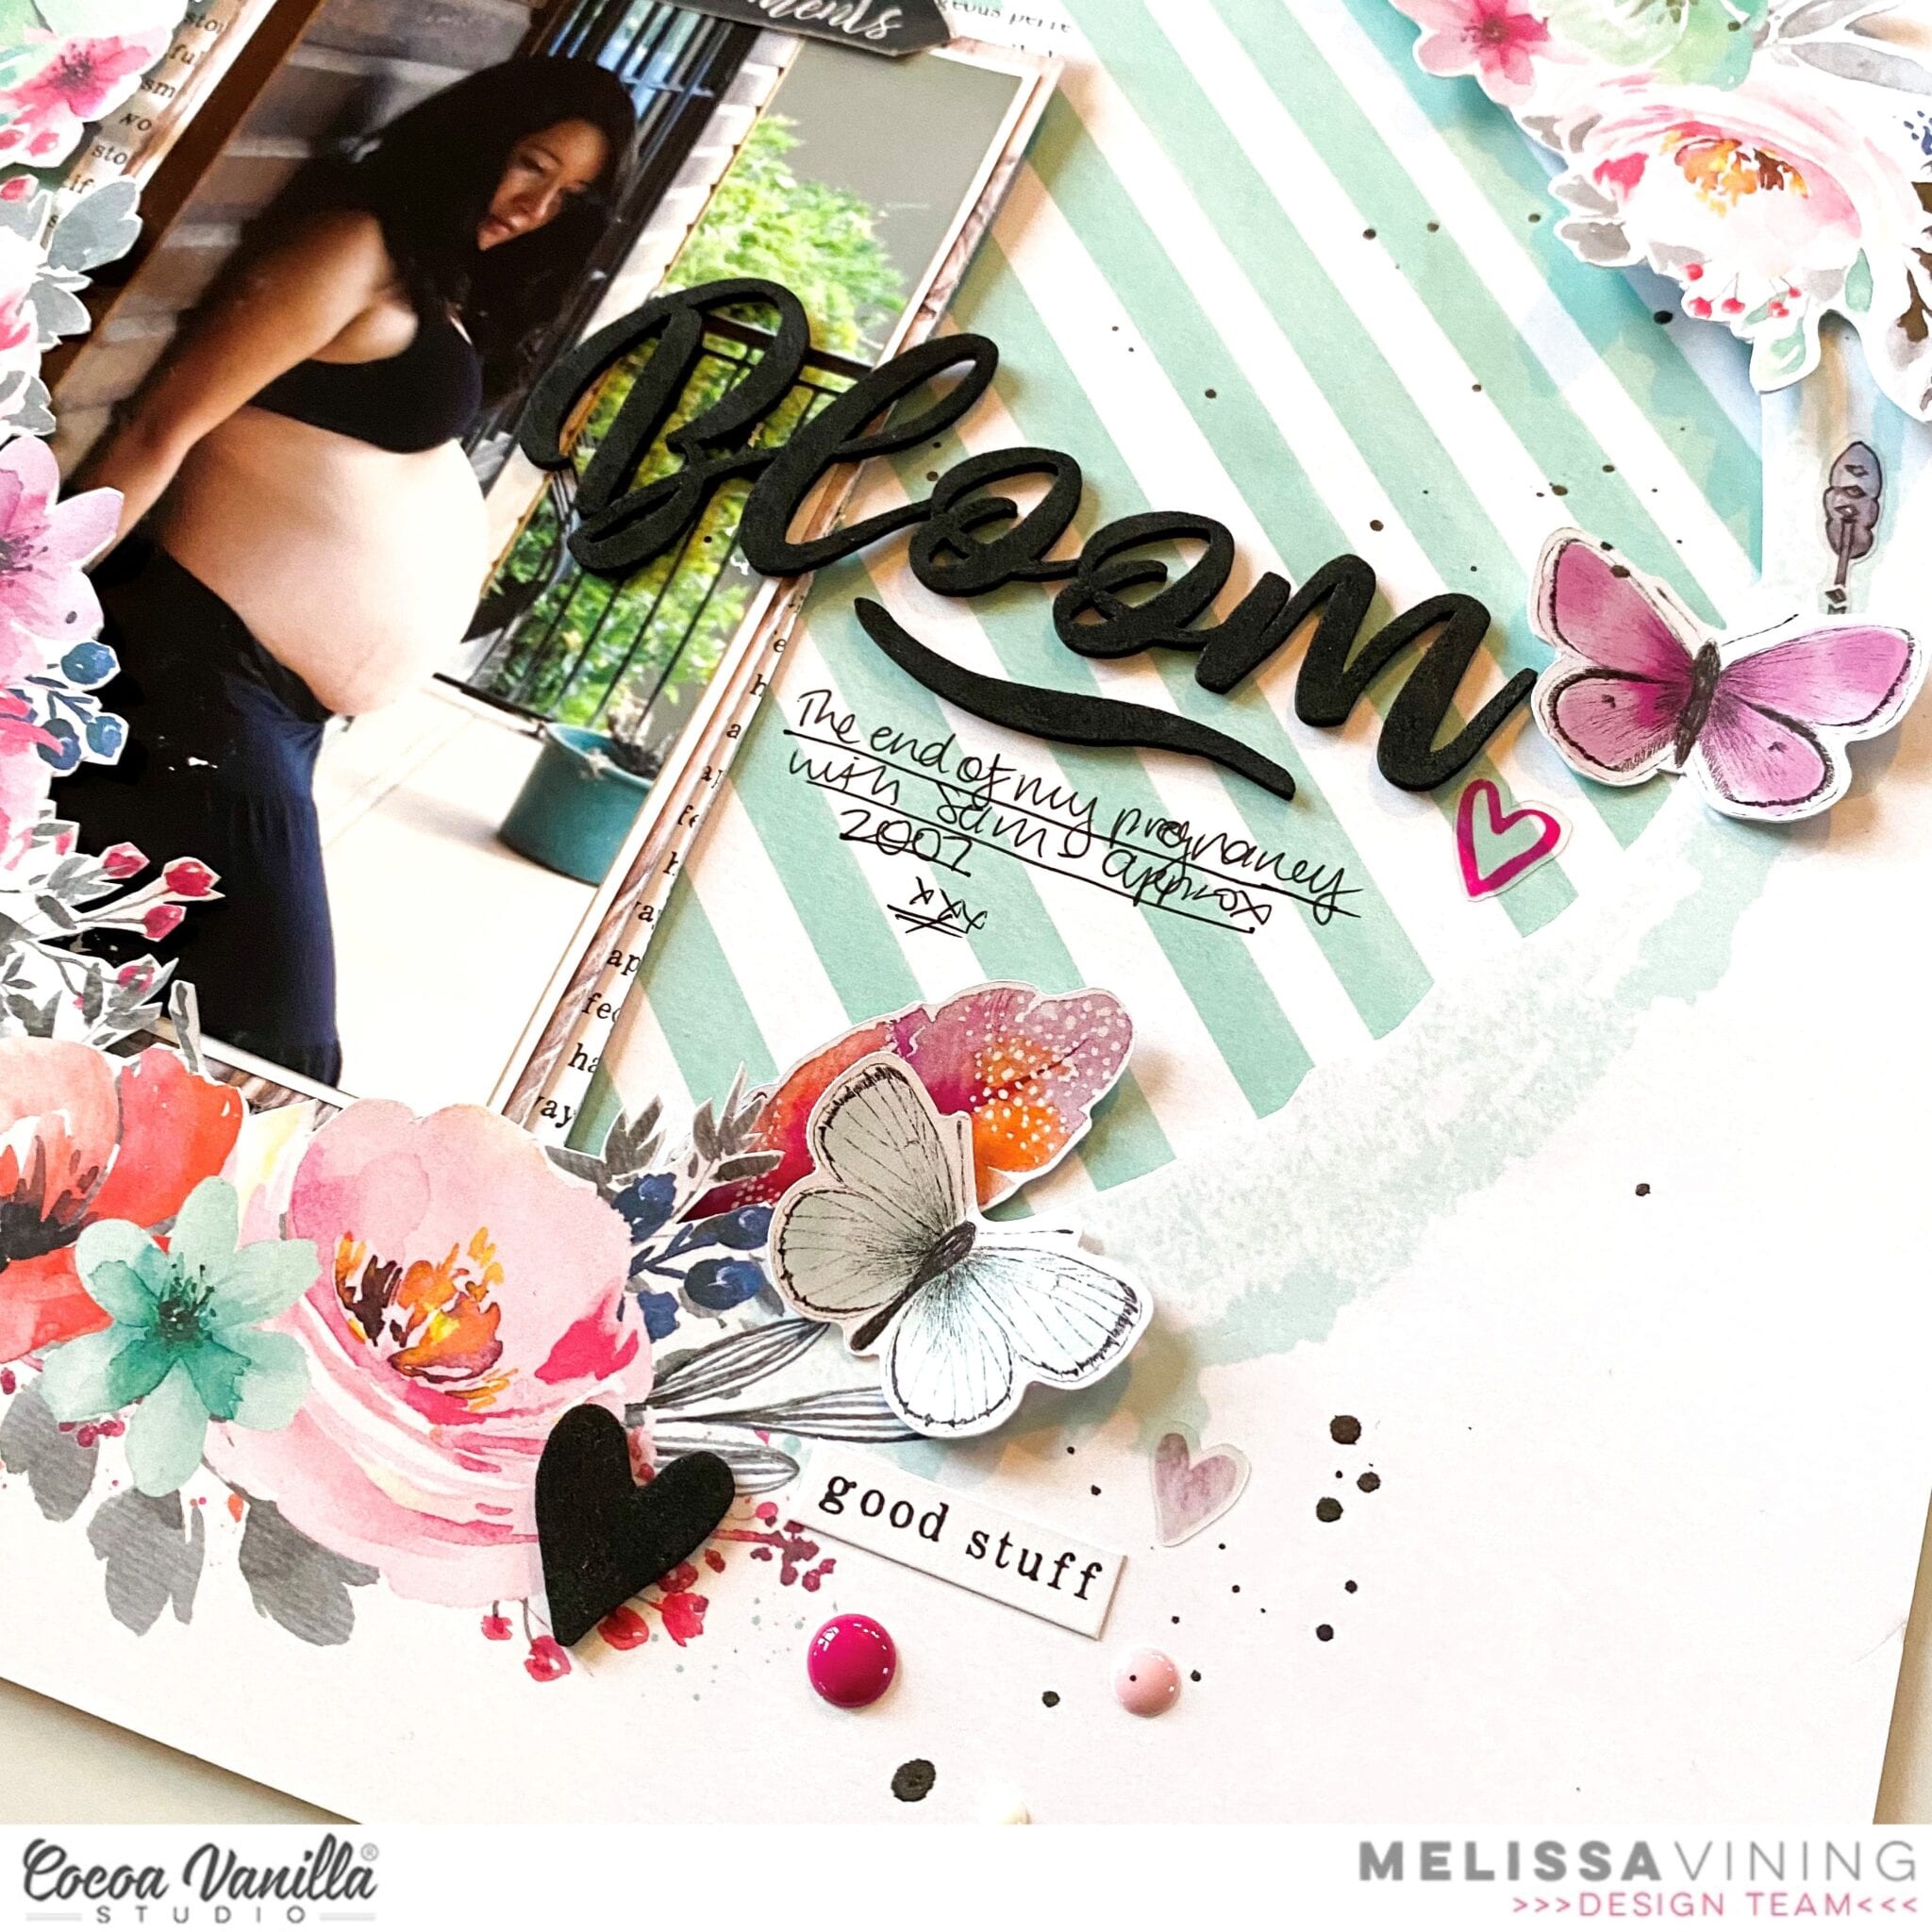
I embellished with ‘Die Cut Ephemera’, ‘Accessory Stickers’, ‘Clear Stickers’ and ‘Enamel Dots’.
The Bloom title is from the ‘Foam Title Stickers’ and was so perfect for my photo.
I hope I have inspired you to use the wreath paper from this beautiful collection in a different orientation.
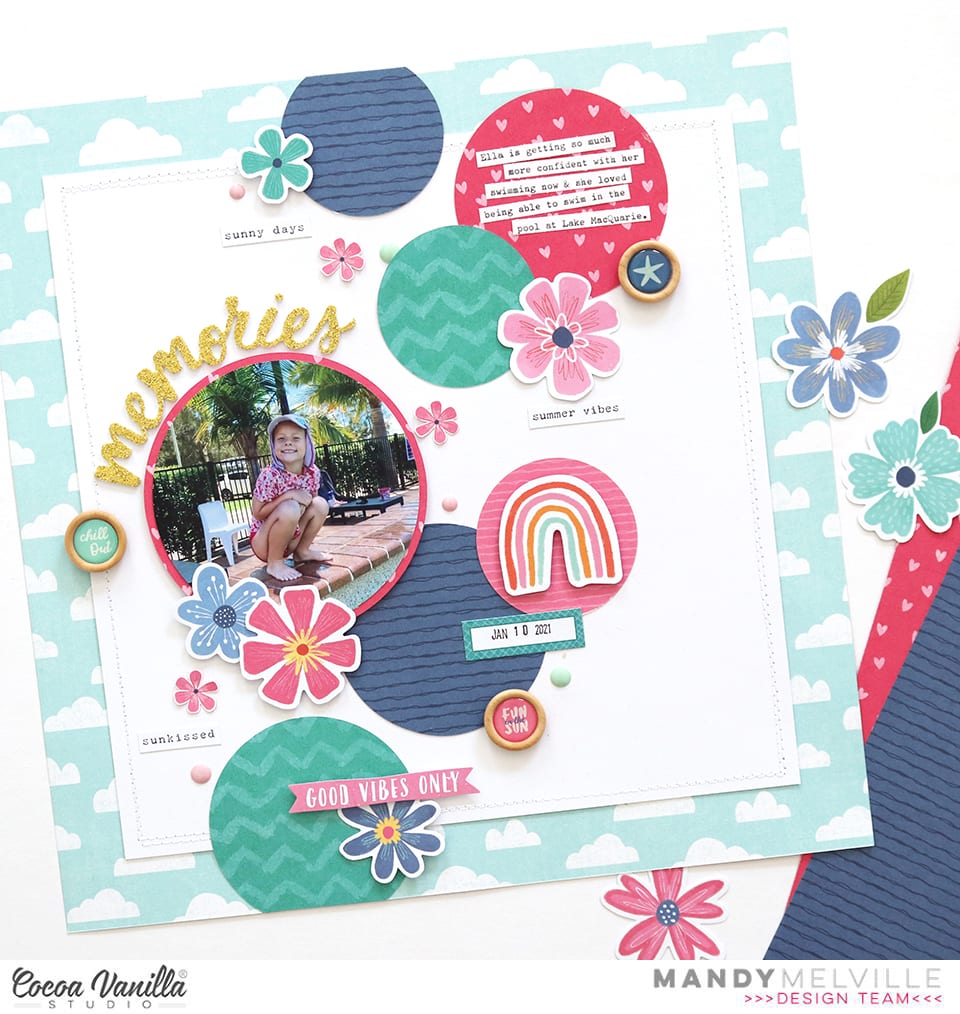
Mandy here with you today to share a new layout using the gorgeous Sunkissed collection! This week on the blog our design team are creating projects featuring either circles or squares. I have to admit that usually I would be more comfortable creating with squares, so that’s what I initially planned to use for my project. But I decided to challenge myself to use circles instead, and I’m so glad I did because it was a lot of fun!
I documented a cute photo of my youngest daughter Eleanor at the pool when we were on holidays in January.
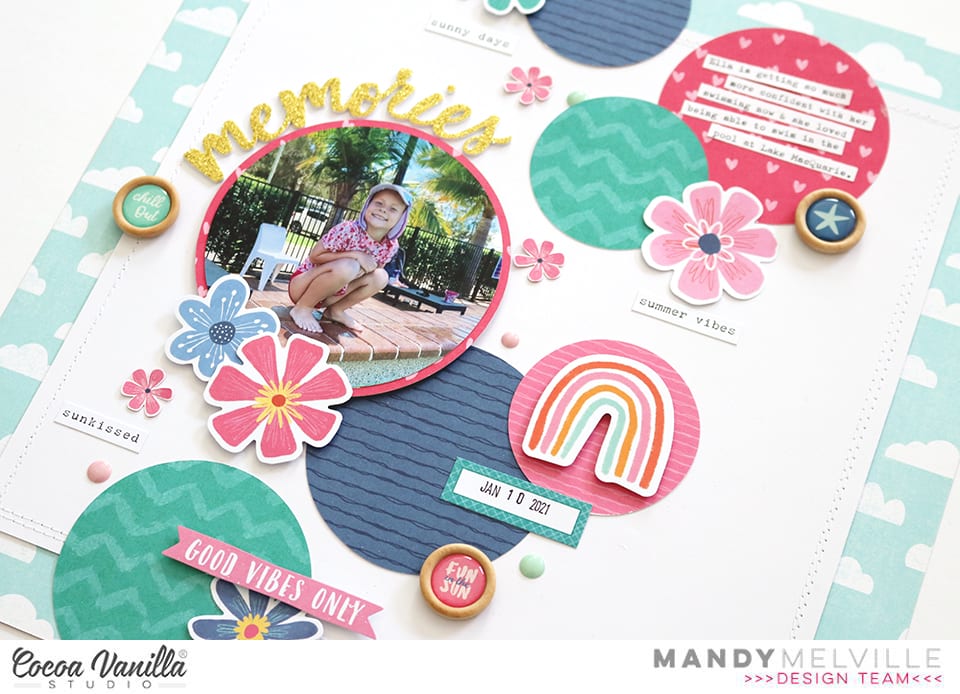
I started my layout off by trimming my white cardstock background down to 10 inches, and matting it on the Just Chillin patterned paper. I also added some machine stitching around the edge of the white cardstock to give the page some additional texture. I then went ahead cutting various size circles out of the Sunny Days, Feelin Fine, and Bright Side patterned papers. There are so many gorgeous colours in this collection, but for this layout I decided to keep my colour palette to the teal, pink and blue. For this reason, I chose to use the more subtle b-sides of the papers to allow me to feature those three particular colours. Once I’d cut out my circles, I arranged them on the page so that they flowed from the top to the bottom, with some overlapping.
To continue with the circle theme I decided to cut my photo into a circle as well (I don’t remember the last time I did this!). I matted it with the Feelin Fine patterned paper and added some craft foam underneath it to help it to really pop off the page! I embellished around the photo with some flowers from the Floral Ephemera pack, and then added my title around the top of the photo using one of the gorgeous Glitter Foam Title Stickers.
I adhered my typed journaling to the pink circle at the top of the page. I also added another Floral Ephemera piece to this cluster, as well as one of the fun Wood Epoxy Buttons. I love that the wood buttons add another circular element to the layout!
I created another point of interest on my layout to the right of my photo. I embellished these circles with a beautiful die cut rainbow, a label from the Accessory Sticker sheet, and another Wood Epoxy Button.
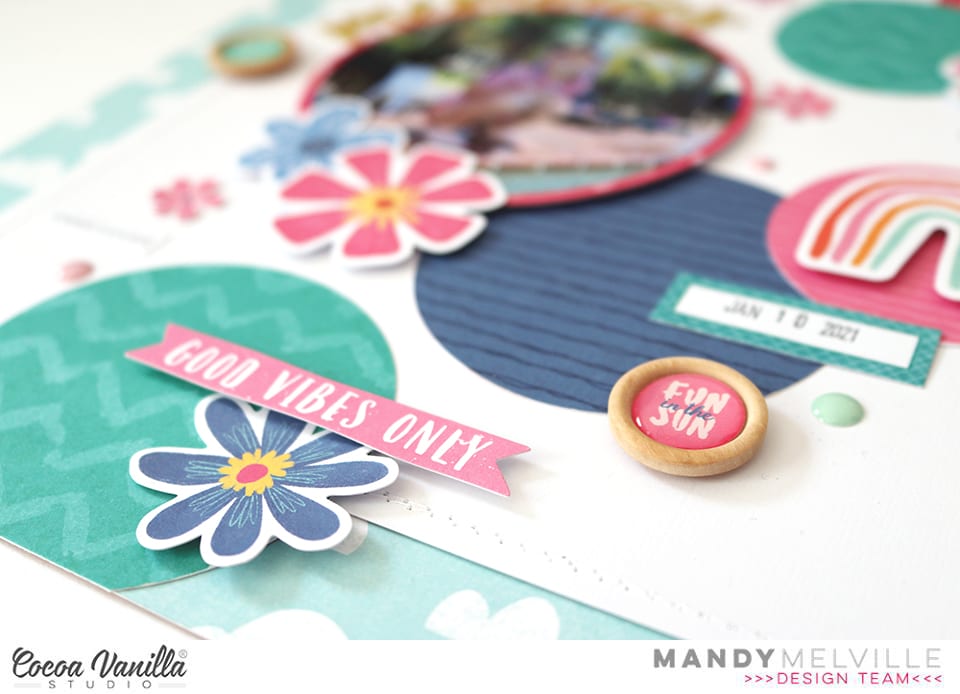
The final little cluster of embellishments is at the bottom of the page on the teal circle. Here I chose to add a blue flower from the Floral Ephemera pack, as well as a little die cut banner. You’ll notice that I kept my embellishing to the same colour combination that I chose for my patterned papers, focusing on the pinks, blues and teals in the collection.
Around my photo, I added three little flowers that I fussy cut out of the Growing Wild patterned paper. The visual triangle that this creates helps to direct the viewers eye towards the photo. To finish the layout off, I added a few little phrase stickers from the Accessory Stickers, and lastly I sprinkled around some Unforgettable enamel dots.
Thanks so much for joining me here on the blog today! Make sure you pop by each day this week to check out what our other design team members are creating for the circles and squares theme!
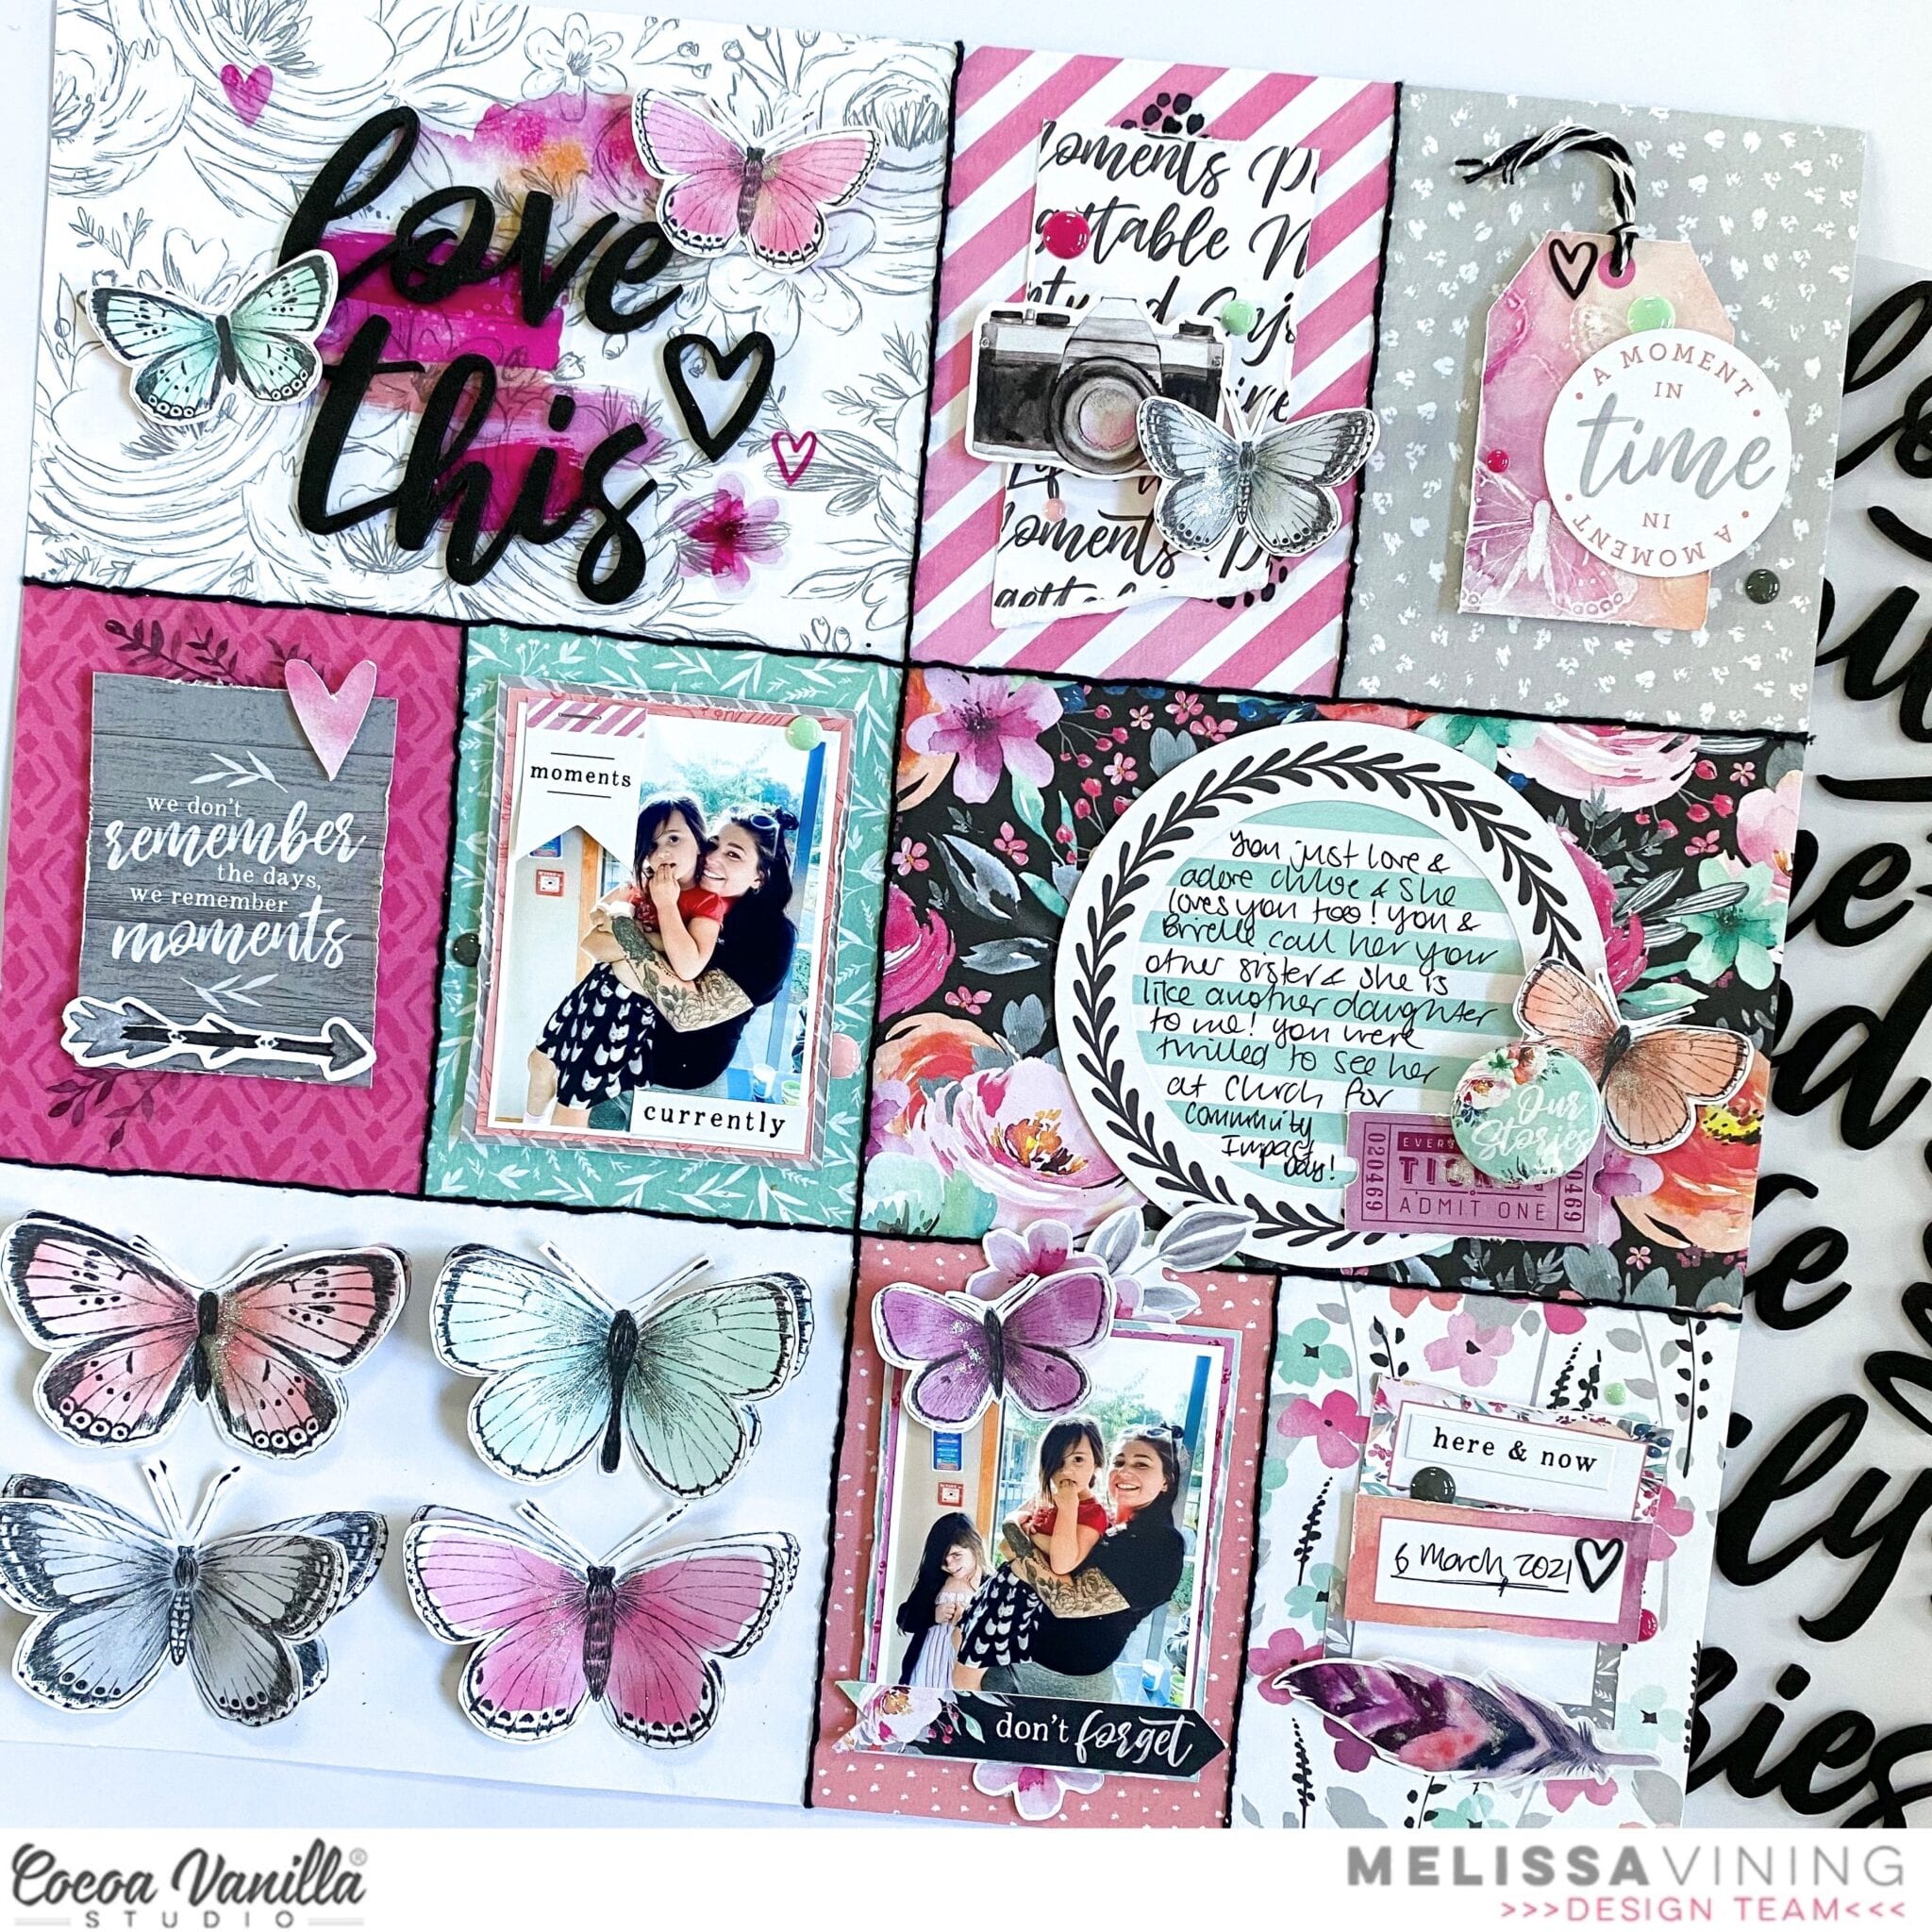
Hello everyone! It’s Melissa here and I’m thrilled to be back with a layout I created for Throwback Thursday! I always love when its my turn to use an older collection, and today I decided to go back to 2019 when life was what we considered normal! I created my layout with the beautiful Unforgettable collection, and I specifically wanted to challenge myself to use a cut apart patterned paper as a full sheet. The paper I chose to use is ‘Pretty Bits’ and ordinarily I would cut this paper up to use as layers, or use it to back a cut file. The photos are of my youngest daughter Ava with a friend who my little girls consider to be their older sister!
I used black embroidery thread to stitch between the lines of the different papers and I love how it created a pocket page look, but without the pockets.
I decided to place my two photos on two patterns that were small and repeating. I used papers from the ‘6×8 Inch Paper Stack’ and distressed the edges. I also cut out some of the smaller cut aparts from the paper stack because the smaller size was perfect to use as embellishments for my page.
The top left hand part of the paper had a very subtle black floral on white which was perfect for my title. I used several of the ‘Clear Stickers’ and even layered them to create a mixed media look. I created my title from two of the ‘Foam Title Stickers’ and placed them directly on top of the clear stickers. I love how this turned out, and I added a fussy cut butterfly.
For my journalling I used a circular frame from the ‘Die Cut Ephemera’ pack and I glued it onto the striped side of ‘Sprightly’ so that I could use the lines for my hand writing. I embellished with a ticket from the Die Cut Ephemera, a ‘Flair Button’ and another fussy cut butterfly.
The bottom left had side part of the paper had 4 larger butterflies printed on it. I fussy cut the same butterflies from another piece of the same paper, and then adhered them by glueing the centres and lifting up the wings and adding dimension. I also added lots of subtle shimmer to the butteries, and several other features on the layout.
I made a video of my process which you can watch below.
I hope I’ve inspired you to use a cut apart as a whole entire sheet.
Hey y’all! Laura Alberts back again with a bold and beautiful boy layout featuring the stickers in the Legendary collection. On the right side of the layout, I’ve created a trail of clear arrow stickers to add a border along that side and anchor the layered block to the side of the page. Then, alongside the right side of the bottom photo, I added a column of phrase stickers from the cardstock sticker sheet. The enamel dots give a little pop of dimension next to each phrase.
To the left of the photos, I layered clear star stickers around the die cuts to give a “stamped” effect. Love how clear stickers look on a white background! Then, I layered punched scraps and fussy cut stars all around the large die cut star (which I backed like a cut file with patterned paper). Enamel dots, Nuvo Drops, and ink splatter added the perfect detail finishers to this large star explosion!
The title may be my favorite part of this layout, it’s fussy cut from the Epic Tales cut apart and fit perfectly in that spot at the bottom! I popped each letter up on foam to give it a bit of dimension and put them on a jaunty angle for a bit of fun. Love the way the colors of the letters tie the layout together. I added my journaling around the perimeter of the layout for an extra border.
I hope this layout inspires you to have some fun with the bold colors and patterns in the Legendary collection! To see how the “Epic” layout came together, check out the process video below!
Hi CVS friends, today is all about stash busting, yes its throwback Thursday. I recently invested some time in sorting out my older CVS collections, using three pizza boxes, one for 12×12 papers, one for paper scraps and the last one for embellishments. I have done this because I do not have enough left of a collection to create but adding them all together means I can be creative and mix and match collections.
Here is my throwback Thursday layout featuring a photo of my daughter. I went for an uplifting/inspirational layout for her. As you can see I have used a mix of collections here but they still coordinate so well together. I used two cut files from the Silhouette design store, paint palette and title ‘paint your dreams’.
I used the script writing inspirational paper as my base. I cut a 10×10 inch white cardstock strip and centred this on my base page. I next cut the paint palette and brush as this was the feature of my page. I found a wood grain paper in my CVS 12×12 paper box, once cut I added machine stitching to the edge. I backed it with a marble paper and to add a little something extra I added glitter to the paint blotches. I then added with foam tape off centre onto the white cardstock.
I then added my paint brush and added some small butterfly die cuts under the palette. I found a gorgeous die cut doily and used this to mat my photo. I used some phrase sentiments under my photo and finished off with a camera die cut.I added my title, I used some silver glitter paper for one word to stop it from looking too flat visually. I also added a light splash of black paint to add some contrast.
To finish off my page I added some beautiful die cut flowers and enamel dots. I added some more light splatters of black paint.
Most of these papers and embellishments are no longer in the store but you can recreate this layout with what you have in your CVS stash and don’t forget CVS have digital bundles of older collections too, just print and use.
Thanks for stopping by today and I hope you have a fab week!
Hi everyone, it’s Sue here today to share my latest design team project with you. Do you know what day it is today? It’s Throwback Thursday! And that means I am sharing a brand new layout using up some of my older Cocoa Vanilla stash. The purpose of this regular feature is to help inspire everyone to continue using up what they already have (so we can make room for all the new pretties, like the ‘Sunkissed’ collection).
For today’s project I decided to create a boy-themed layout, as I get lots of requests for boy pages, so I dug into my stash of both the ‘Legendary’ and ‘Boys Rule’ collections for an epic mash-up of the two. I love the way they combined for this layout, and I hope you do too!
I started my layout with the mandala-style print of the Explorer paper from the ‘Legendary’ collection as my page base. I then added a small amount of dark grey acrylic paint using a wide brush to help define the focal area of my page. My aim for this layout was to stick with a largely monochromatic palette of black / white / grey, with a pop of one colour, and I chose yellow. I love this colour combination for boys, as it’s a great change away from the traditional blues & greens that are often used for masculine pages.
I added a large piece of the Wild One patterned paper with the gorgeous yellow print in the centre of my page, which provided me with the big pop of colour I was looking for. I used a torn edge to add texture to the page and tucked a smaller piece of the Straight & Narrow striped paper from ‘Boys Rule’ under it. I double matted my photo using the Happy Go Lucky and Messed Up papers (also from ‘Boys Rule’) and added some scrap cardboard under it to pop it up from the page.
My title was the next element I tackled, as I knew I wanted it to fill the space beside my photo. I used a combination of the ‘Boys Rule’ Clear Stickers and ‘Legendary’ Die Cut Titles – because I love a good mixed font title!
For my embellishments, I created three clusters to form a visual triangle. The main cluster was at the bottom right corner of my photo, and consisted of a handmade star embellishment which I topped with one of the ‘Boys Rule’ Flair Buttons. I also added a die cut banner along the bottom edge of my photo and some gold twisted wire which I stapled to the page.
For my remaining embellishments I used a mix of ‘Legendary’ Die Cut Ephemera pieces; a few ‘Boys Rule’ Accessory Stickers and some of the ‘Legendary’ Enamel Dots. Then I finished off my page with some black ink splatters.
If you would like to see exactly how this layout came together, you can watch my process video here:
Thanks for stopping by today. Until next time, happy scrapping!
Hi everyone!! It’s Melissa here and I’m so happy to be back sharing another layout with you. This time it’s a much requested boy themed layout, and of course I had to use the amazing Legendarycollection!! At the beginning of every year I create a page for each of my four children as an introduction to the year, setting the scene and telling them what I hope for them in the preceeding year. I used a stunning cut file from Cut To You which was so perfect for the theme of my layout for Sam (who is aged 13).
I created my background with a water activated ink pad. I stamped on my craft mat, sprayed it with water and then did the reverse packaging technique where you place the cardstock onto the mat several times. The key is to not add too much water, especially if you’re not using gesso. I also used a stencil and foam pad to blend the same ink. My final mixed media touch was to splatter with some sparkly water activated powder and white iridescent ink spray. The reuse tis a very subtle layered background behind the cut file.
I backed the cut file with patterned paper that was not overly blue, so that I could use blue in my background to make the colours pop! I used Wild One, Total Legend, Brave Heart and All Star. For the stars I cut them in One Way and popped them up with dimensional adhesive. I love the interest that it provides, especially as everything else on the cut file is glued flat to the background paper.
Its not often that I incorporate my photo into the backing of a cut file, but for this one the open “A” was perfect, especially as my photo of Sam was taken at our favourite beach. One of my daughters was also in the photo, and my placing him in the cut file I was able to cut her out. I love that I’m still able to see the rocks, beach and sea.
I embellished very simply withAccessory Stickers, Die Cut Ephemera, and Enamel Dots. I didn’t want to take away from the cut file and especially the photo, and I think the small clusters work well to achieve this.
Hey Hey! It’s Michelle here today with another instalment of what I like to call ‘Scraplift a follower’. The past few days members of the Design Team have been set a scraplifting challenge here on the blog and I’ve chosen one of our friendly CVS Community Group members to inspire my creation. I used the Bohemian Dream collection and even got a little messy with some mixed media on the background, which was kind of fun for this “clean” scrapper.
I love how this came together combining all the elements of the original, created by Petra de Vroege, with some slight changes to make it my own. I’ve scrapped a photo of Leila from 4 years ago when she was going through a hilarious dorky dress up phase. A time when she kept us constantly entertained, oh how I miss those days. Now its all Youtube, Roblox and Nintendo nonsense and hardly any dressing up at all. The colours in the photo worked so well with the patterns and colours from the Bohemian Dream Collection, which I must note its sadly no longer available as you all LOVED it so much it sold out! There are plenty of other gorgeous collections to choose form though
Heres a look at the layout Petra created..
Super cute! Those scattered stars down the page were what originally caught my eye, and I’m a sucker for cute photos and mixed font titles too!
What a character! This photo was around the time that Leila could finally wear this costume without tripping over the mermaid tail, which was about the same time that posing for photos was no longer fun.
To begin the layout I started with the stars, cutting out a range of different sizes on my silhouette using a free star cut file I found via Pinterest. I chose a few different pattern papers from the 6×6 paper pad that all complimented each other and the photo then popped them to the side once cut to continue with the background
I got a little messy and tried out the plastic packaging technique using the flat side of some bubble wrap and smooshed different coloured inks that were watered down on some white cardstock. The texture of the bubble wrap left a pretty cool pattern, although most of it was covered by the stars and photo and also my hands lol. I splattered a few extra colours that coordinated with the Bohemian Dream collection over the top then left it to dry. At this point I may or may not have freaked out a little when I saw how warped the paper was so I pilled a pack of cardstock on top overnight once it was dry to help it flatten out a little
To create the title I used a mix of Chipboard words (raised off the layout using foam tape and glue dots) older alphabet stickers (sewn through to keep them adhered for years to come) handwritten words and a banner sticker from the Legendary Collection sticker sheet.
Next I’ve added strips of pattern paper to the top and bottom of the layout, which is different to the way Petra has added hers to the sides. I tucked the half labels underneath and added word banners on top along with some chipboard hearts
Lastly I added the stars, scattered randomly at the top and bottom of the photo to recreate the vertical line Petra has used. I adhered the stars with foam tape, glue dots and tacky glue to give different heights of slight dimension. I added in a couple of enamel dots too
Here’s a final look at the entire layout inspired by Petra’s super cute creation
I love how it all came together and can happily say I will definitely be trying some more messy backgrounds in the future.
Well thats all from me today, thanks so much for stopping by! Be sure to keep sharing your own creations using Cocoa Vanilla Studio products with us in the CVS Community Group on Facebook. We love to see what you make using these amazing products, and you just never know when we might pick your creations to be inspired by.
It’s Sophie here with a grid design layout to share, this time with the lovely “Unforgettable” collection !
The beautiful “Story Teller” patterned paper was my starting point, as I was inspired by the black pocket card on it for my title. That’s what gave me the idea to create a grid.
I separated my layout in four quadrants and stitched a vertical and a horizontal line that crossed in the center of the page with aqua thread to divide my grid. I then applied watercolors in tones that matched my color scheme on each of the four quadrants.
I placed my photo, printed in black and white, on the upper left quadrant. I added many layers behind it; tissue paper, adhesive foam, “Forgive me not” and “Pretty bits” patterned papers. I used a Die Cut Ephemera “Living the Dream” next to my photo and added a beautiful Flair Button.
On the upper right, I added adhesive foam behind the Pocket Card and aqua cardstock. I decorated this section with two beautiful Ephemera labels and butterflies.
On the left lower quadrant, I selected two pieces of patterned papers: “Sprightly” and “Pretty Bits” and attached them with pink baker’s twine together. I added Ephemeras, Enamel Dots and a sticker from the Accessory Stickers.
On the last section of the grid, I used the “Sprightly” and the “Forgive Me Not” papers as my base. I cut out a part of the “Storyteller” paper to write down my journaling and embellished it with flowers, Stickers and Emanel Dots.
Lastly, I created a little floral cluster on the base of the grid, tying everything together. Some of the leaves in the cluster were created with watercolor and fussy cut out of whatercolor paper.
Here are a few other close-ups:
I love the result. Working to decorate one section at a time in a grid design is so fun ! It’s also a great way to use many different patterned papers and embellishments without making it look too busy.


 Here is my throwback Thursday layout featuring a photo of my daughter. I went for an uplifting/inspirational layout for her. As you can see I have used a mix of collections here but they still coordinate so well together. I used two cut files from the Silhouette design store, paint palette and title ‘paint your dreams’.
 I used the script writing inspirational paper as my base. I cut a 10×10 inch white cardstock strip and centred this on my base page. I next cut the paint palette and brush as this was the feature of my page. I found a wood grain paper in my CVS 12×12 paper box, once cut I added machine stitching to the edge. I backed it with a marble paper and to add a little something extra I added glitter to the paint blotches. I then added with foam tape off centre onto the white cardstock.
 I then added my paint brush and added some small butterfly die cuts under the palette. I found a gorgeous die cut doily and used this to mat my photo. I used some phrase sentiments under my photo and finished off with a camera die cut.
 I added my title, I used some silver glitter paper for one word to stop it from looking too flat visually. I also added a light splash of black paint to add some contrast.
 To finish off my page I added some beautiful die cut flowers and enamel dots. I added some more light splatters of black paint.
 Most of these papers and embellishments are no longer in the store but you can recreate this layout with what you have in your CVS stash and don’t forget CVS have


