Christmas cards | Tis the season | Anna Komenda
Hello Friends. Counting down to christmas is starting to look serious. Only 10 days!!! If you didn’t have time to mail your christmas cards, it’s the last call. I prepared some isnpirations for you for quick and easy cards. Cocoa Vanilla had a christmas collection – “Tis the season” – few years ago and I still got some bits and pieces left, mostly papers. When Zoe recently released the digital versions of older lines, including the christmas one, I thought it’s the perfect moment to revisit “Tis the season”. I printed myself three sheets of embellishments included into this line. They are already prepared as a PDF versions, so all I needed to do is to pust the “print” button.

Making those three cards took me about an hour, including some fussy cutting of printed elements. It’s a combination of paper scraps, few stickers, ephemera leftovers, wooden elements and digital pieces.

I usually make 10*14 cm cards but I wanted to use up some longer stickers from the sticker sheet so I decided to use 10*20 cm size for the first card. I arranged longer strips, combining them with a piece of paper and glued them over a dotty background.

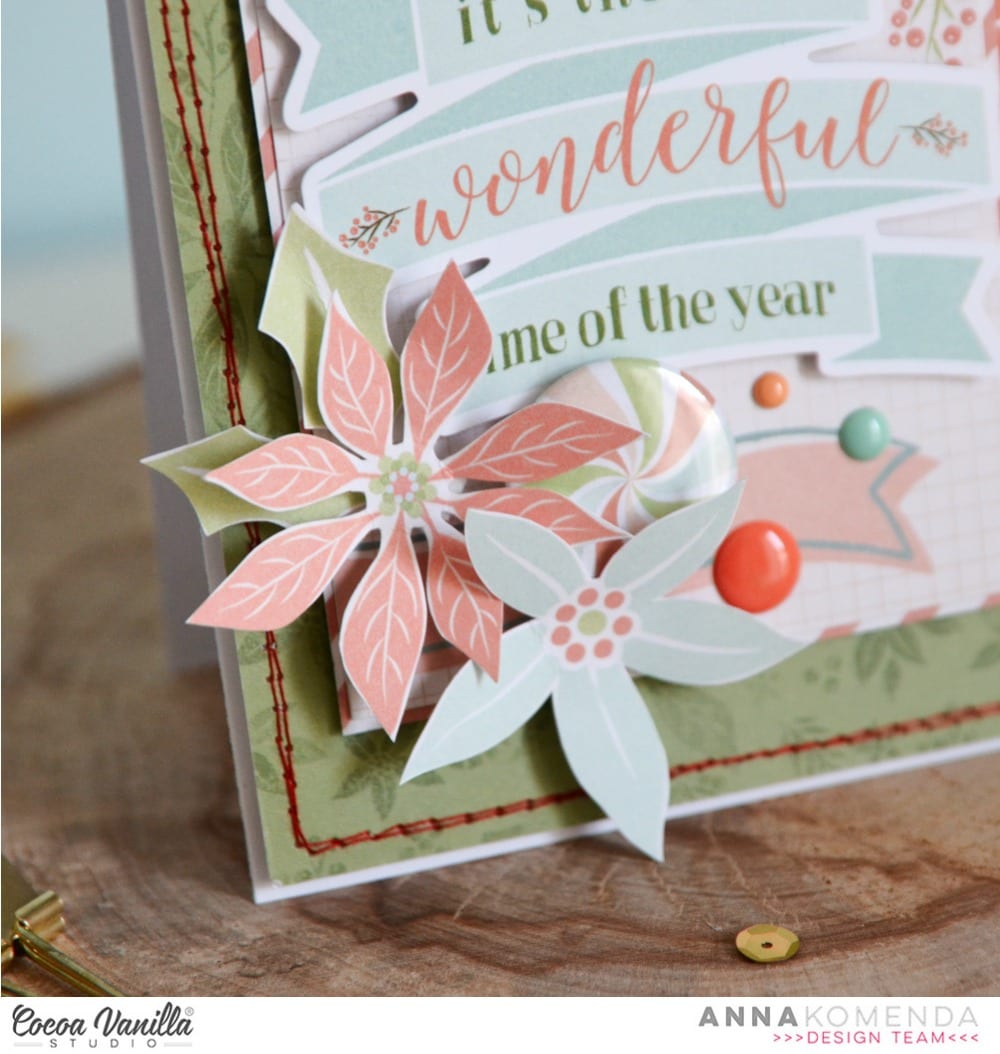
Something I like to include into all of my projects is dimension. I knew that the cards have to survive being mailed so I used solid cardboard instead of foam squares under the bigger surfaces. I finished my card adding few flowers cut out from printable sheets and wooden elements.
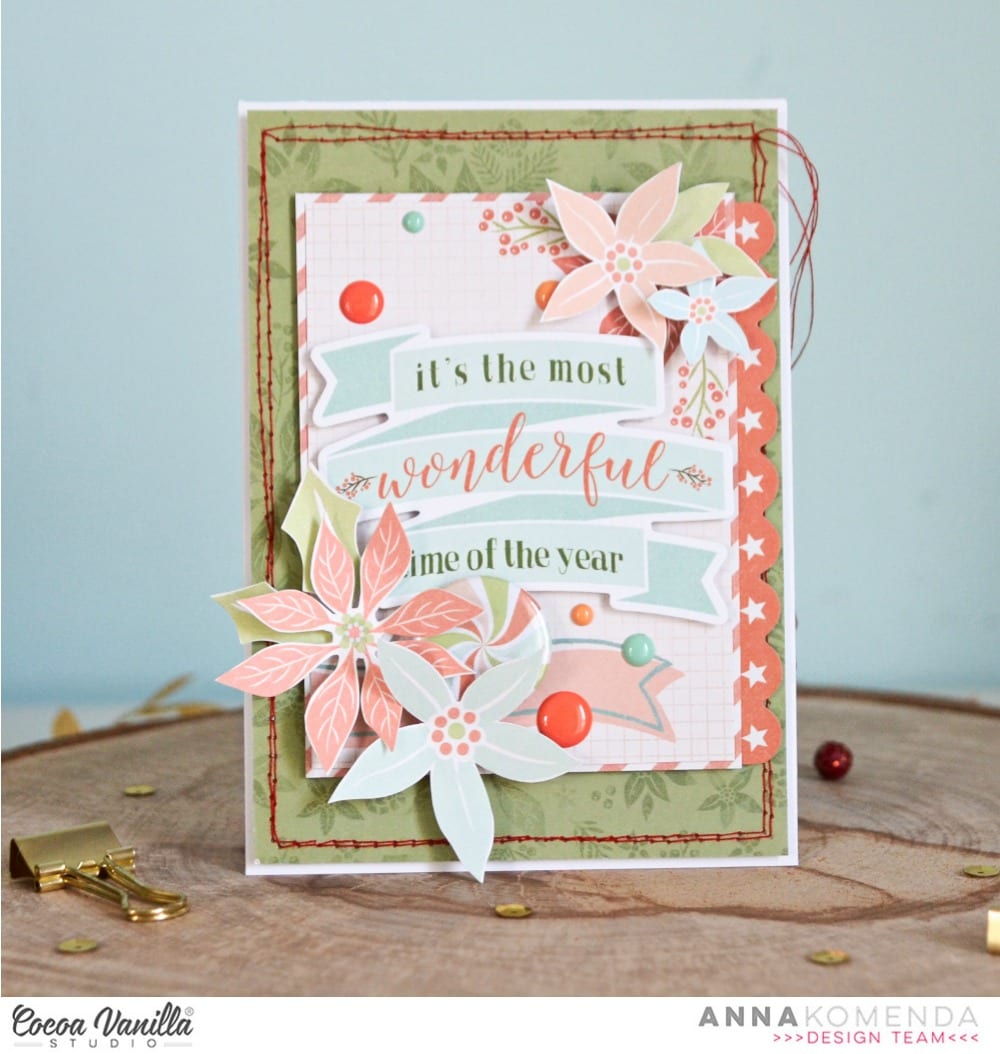
Second card is smaller. Once again I reached for papers scraps. I had few 3*4 elements from one of the papers and I decided to use them on cards. I started with a green background, then I added 3*4 card and finished it with a title from sticker sheet. Winter flowers are from digital version. Even if you don’t have papers, you can print them too!!! If you have a regular printer, you will get A4 size paper – perfect for any cardmaking.
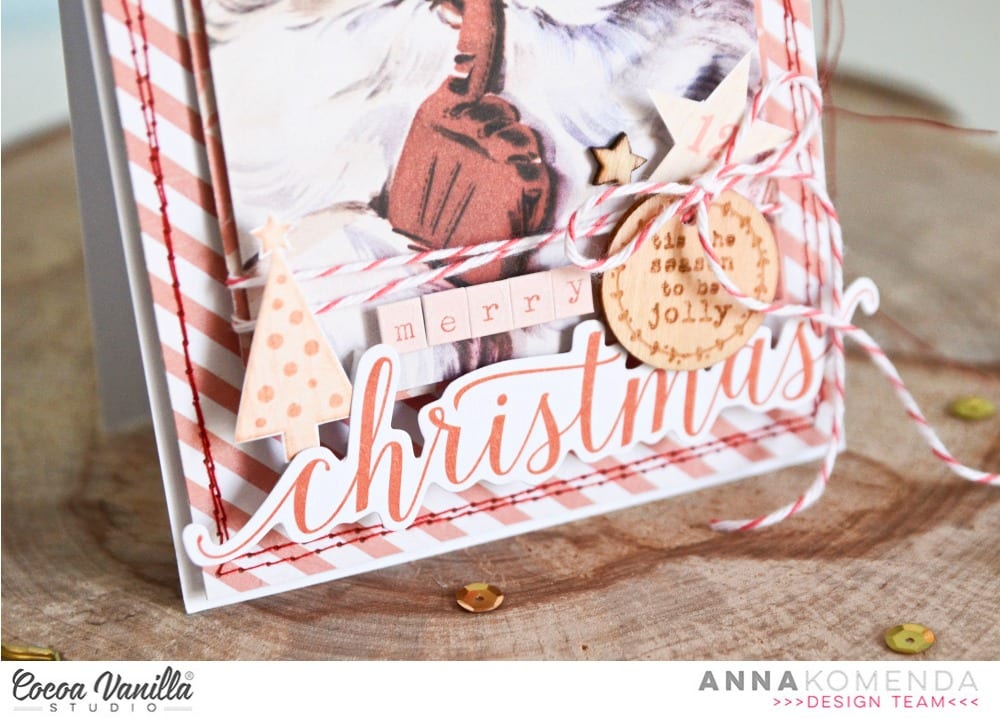
Last card I made has a cute, retro Santa as a main element and it was also taken from cut apart paper.
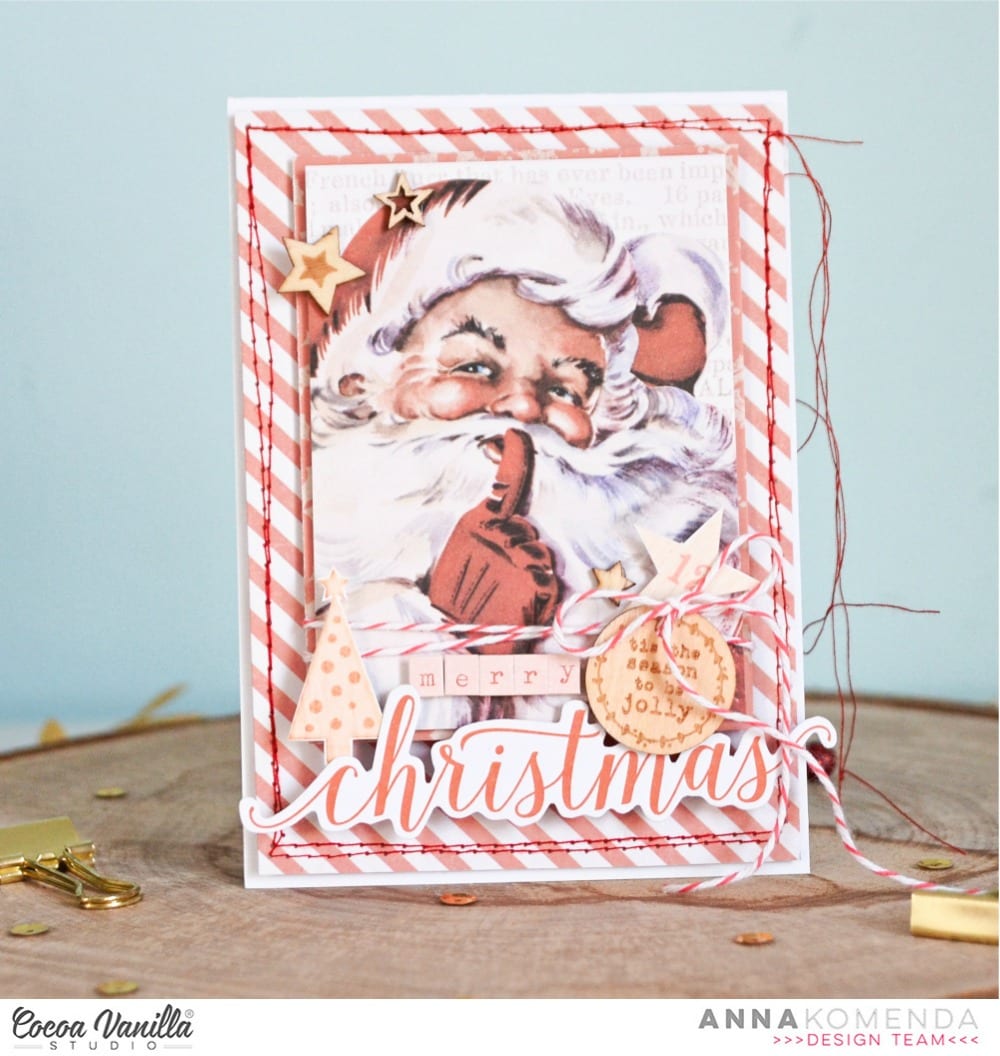 Santa is quite big so there was no much room left for embellishing. I created my title using ephemera leftover – word “christmas”. I added word “merry” using alpha stickers, that were included into the older lines. You can buy them really cheap now! I mixed real wooden element with the printed ones to finish my card.
I am so, so happy that Zoe decided to release those printable versions of older lines. I can come back to my favorite lines and use up the leftovers. And using up the leftovers always makes me happy and I know I am not waisting anything.
Thank you for stopping by and see you in two weeks.
XO Anna


 I don’t have much of the traditional collection left now but I am so happy to be able to get everything I need in digital form! I will never run out again! If your stash is getting low of
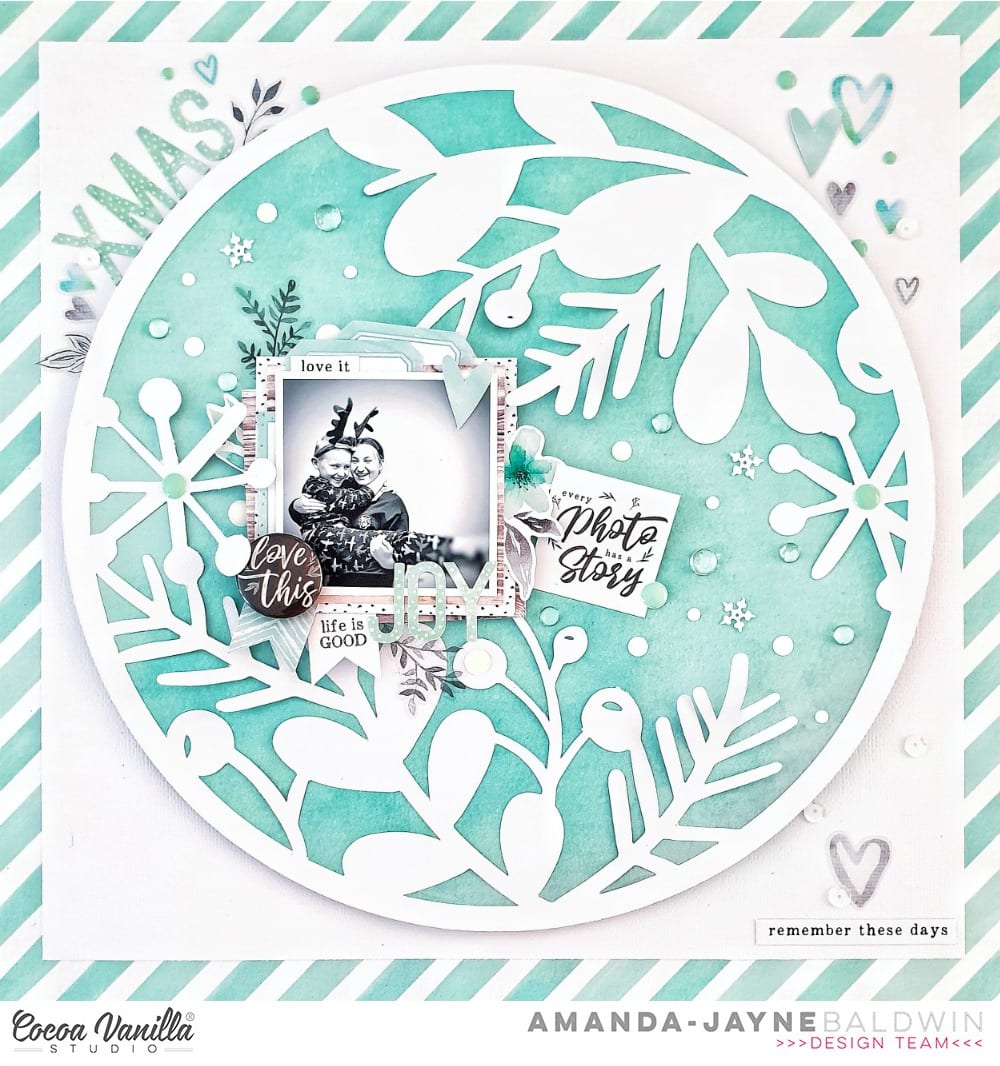
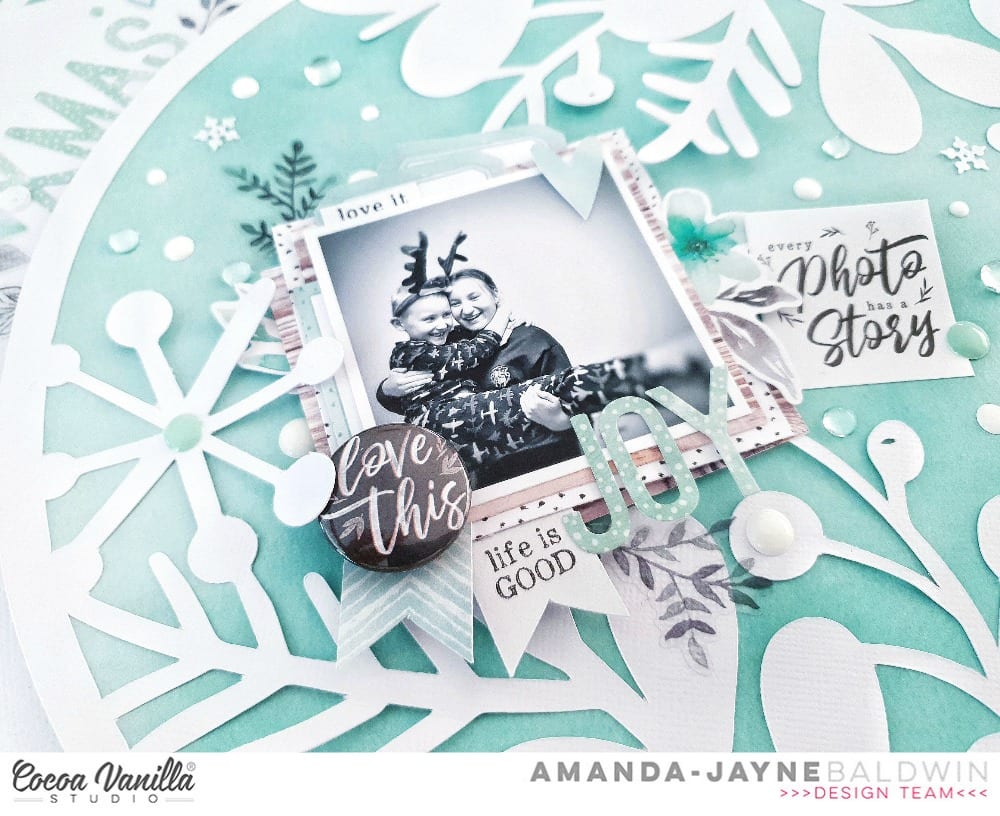
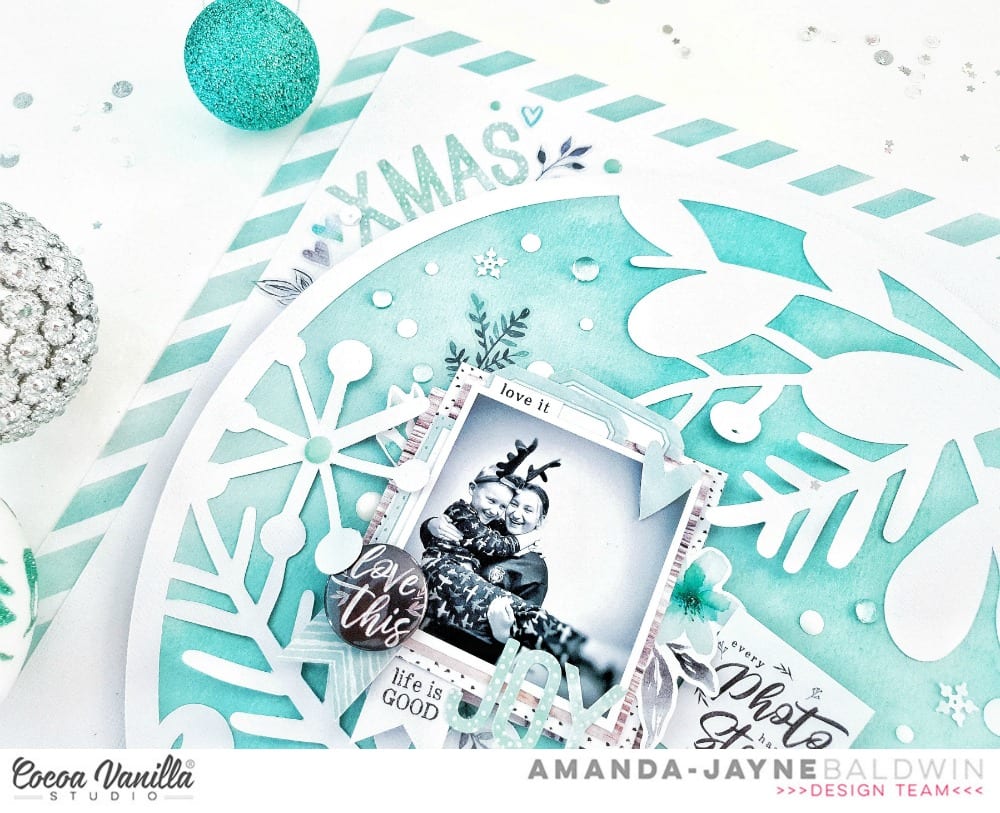
  I chose a photo of my youngest taken on Christmas Day when he was about 3 weeks old, he just turned 9 yesterday so the photo is quite old but its one of my favourites! I changed the colour of the photo to a soft black and white as the colours in the photo would have clashed with the soft colours in the collection. Underneath the photo I layered a small paper doily and a smaller piece of the red and white stripe paper to the right of the photo. I also layered a wood veneer frame on top of the photo, I like how this draws your eye to the photo. I popped up the photo using craft foam and then placed embellishments around the photo. The ticket that says ‘Child’ die-cut definitely had to be added, it was perfect tucked at the bottom of my photo.
 I used accessory stickers, enamel dots, die-cuts, wood veneer, sequins and a bitty bow to embellish. I have tons of the sequins left, I love the gold stars so I scattered a few of those around to add some sparkle. I placed the white bitty bow at the base of the tree to separate the tree from the pot. To finish the page, I added the date stamp of when the photo was taken. I love how my page turned out even with only minimal pieces from the