It’s Jo here on the Cocoa Vanilla Studio blog today sharing a new scrapbook layout with you. For this layout, I was inspired by two seasons. I chose to create a fall layout in spring colors. I had some leftovers from the Daydream and These Days collections and chose to combine them both for this layout.
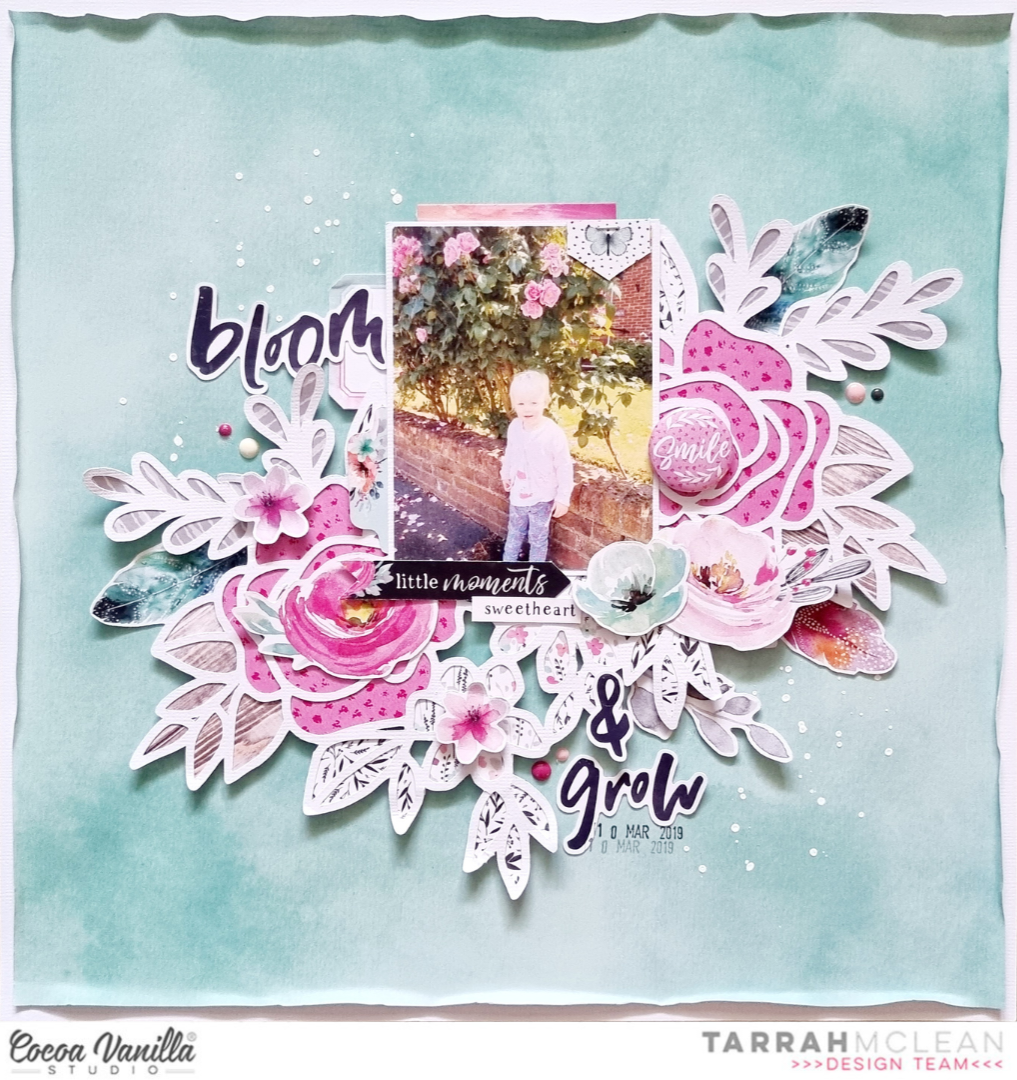
I grab a 12×12 white watercolor paper and choose one of my fave color distress oxide called “saltwater taffy” I create three stains on the white background by using a kitchen sponge. I make a stamping motion on the watercolor paper with the sponge and the Distress oxide color. Don’t forget to wet the sponge a little bit so the ink flows out nicely on your paper. I take a watercolor brush and splash some ink. I love the effect of ink splatters on my layouts. These splatters give my mixed media background more demension and a festive look.
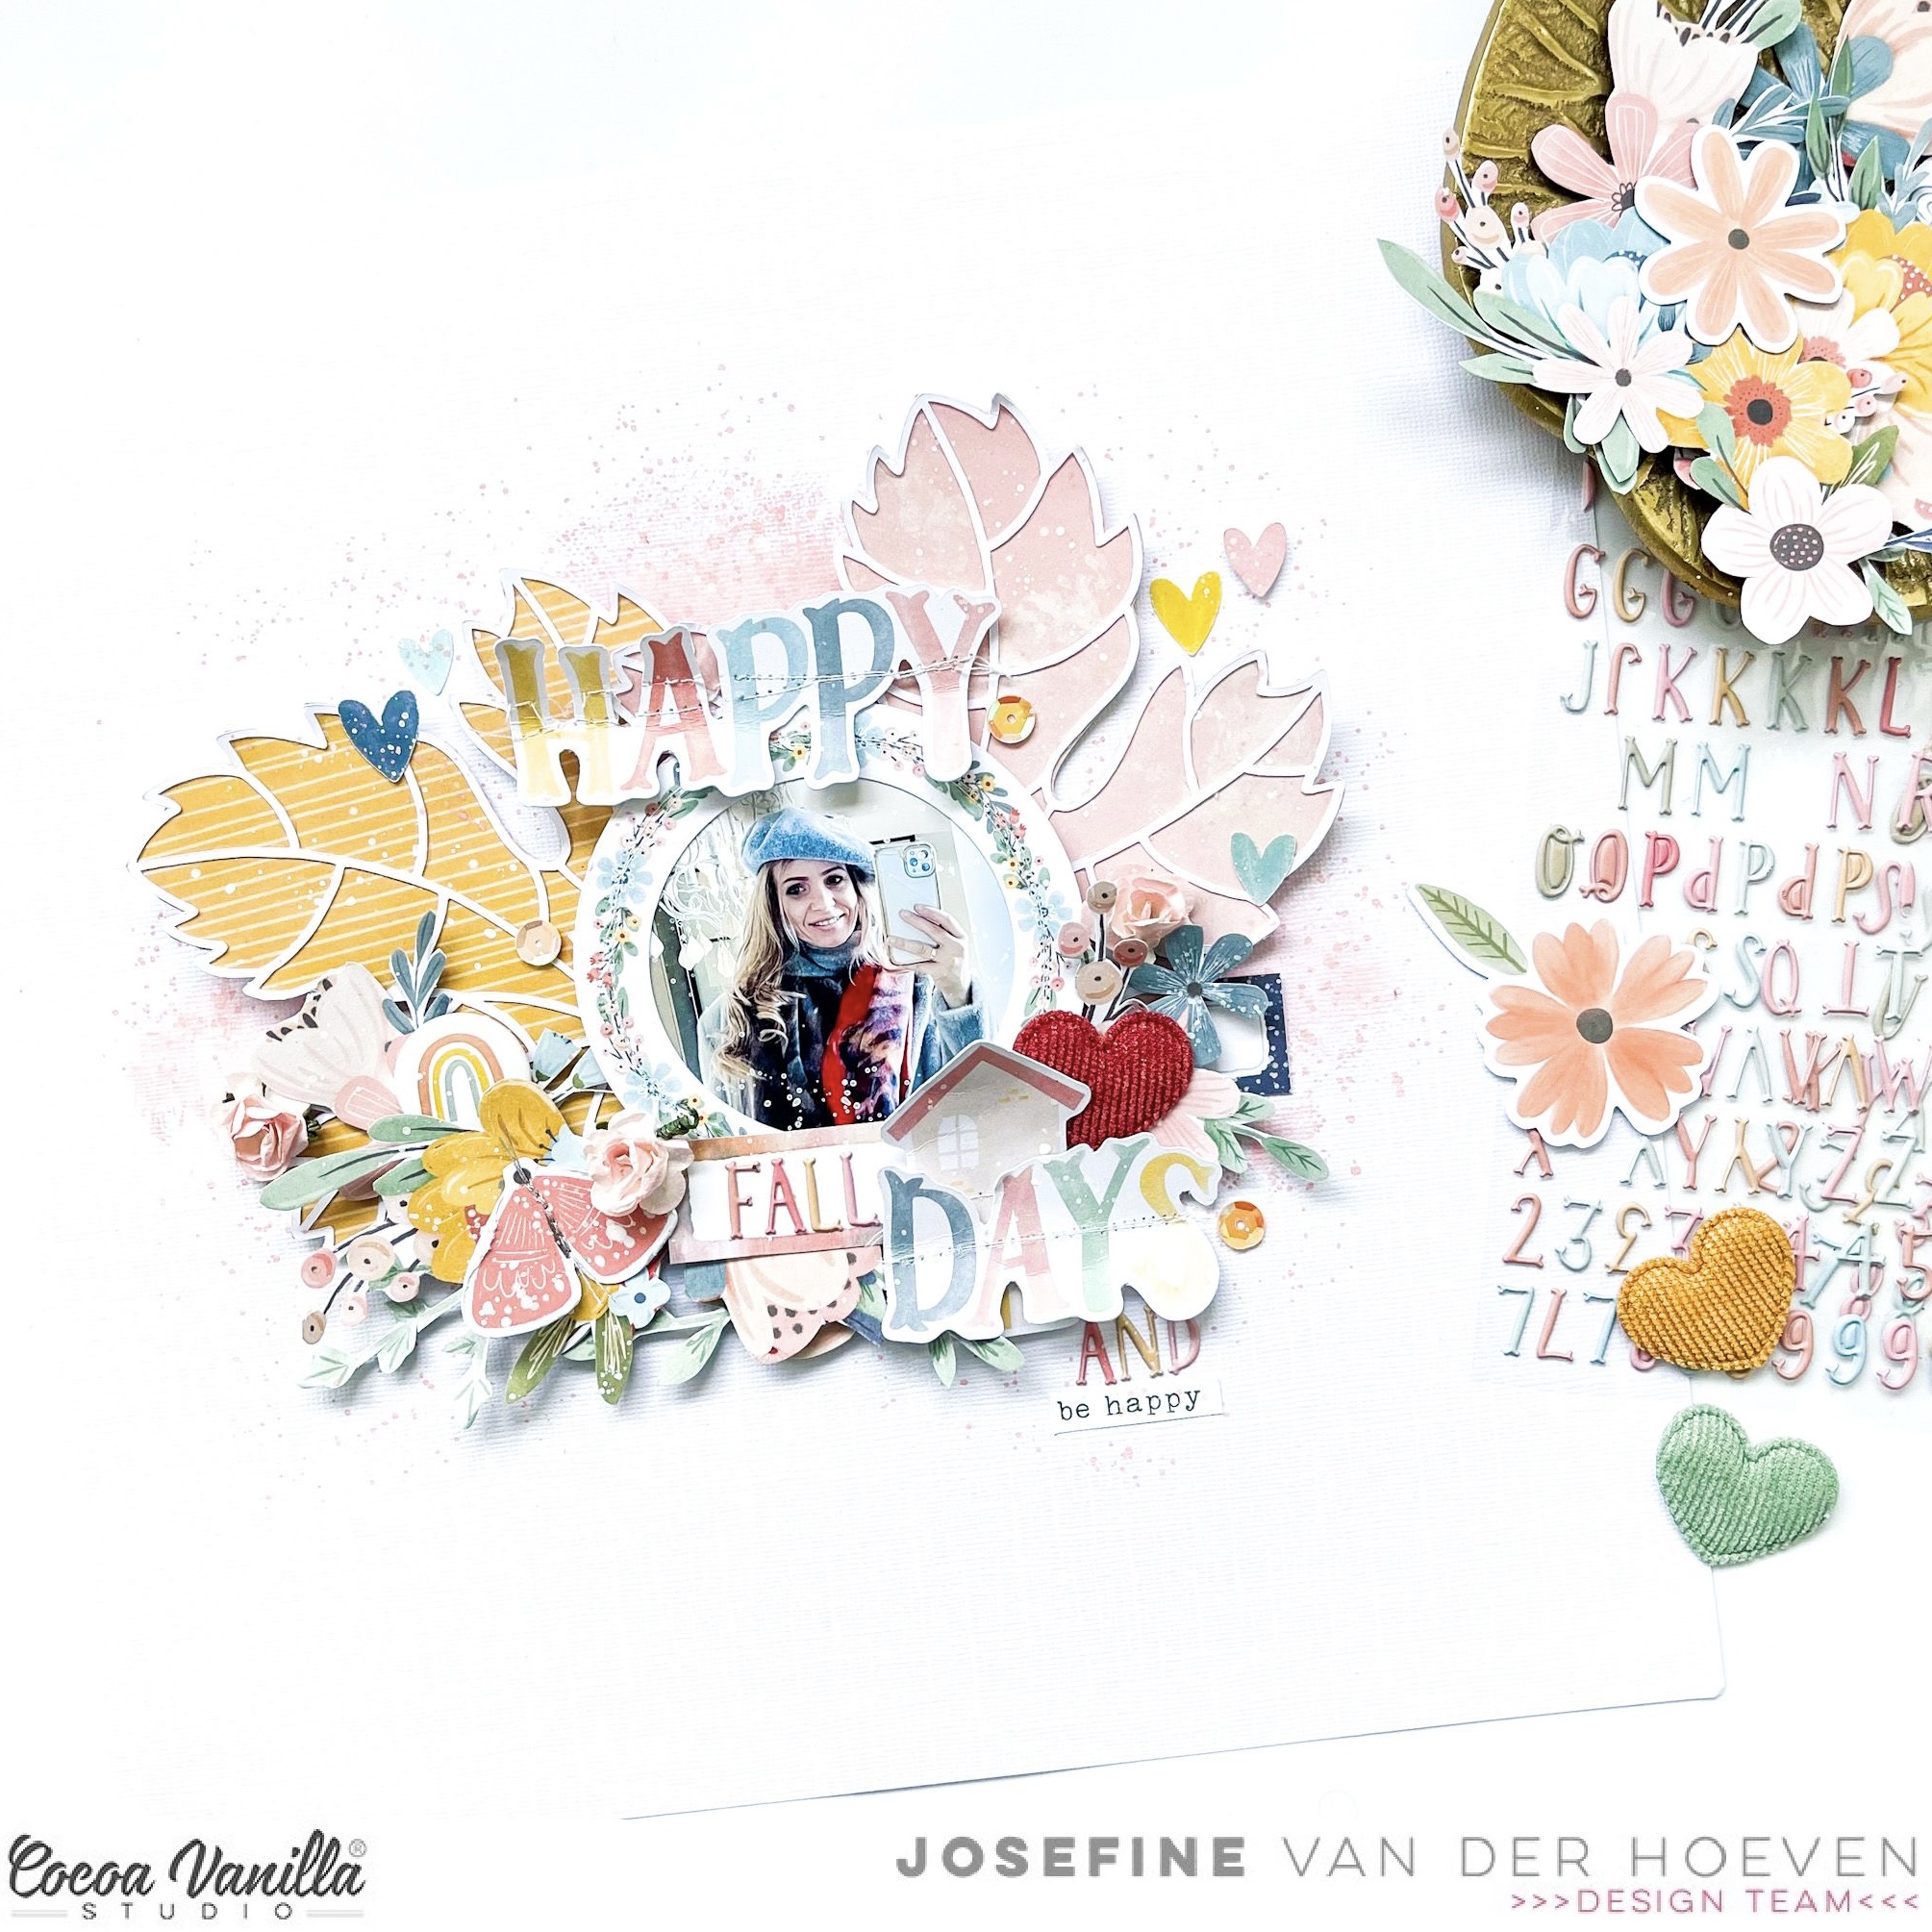
I use a beautiful cutfile designed by Cut to You called “Autumn leaf” I cut out the cutfile twice by using my Cricut Maker and backed it with yellow and pink colored design paper from the gorgeous Daydream collection from Cocoa Vanilla Studio.
I placed both cutfiles on top of my light coral pink mixed media background.
I fussy cut a few flowers from the pattern papers and placed these under my Happy Autumn selfie picture. I made a cluster on both sides of the photo with the gorgeous Die-cuts elements, stickers and figures from the Daydream and the These days collection.
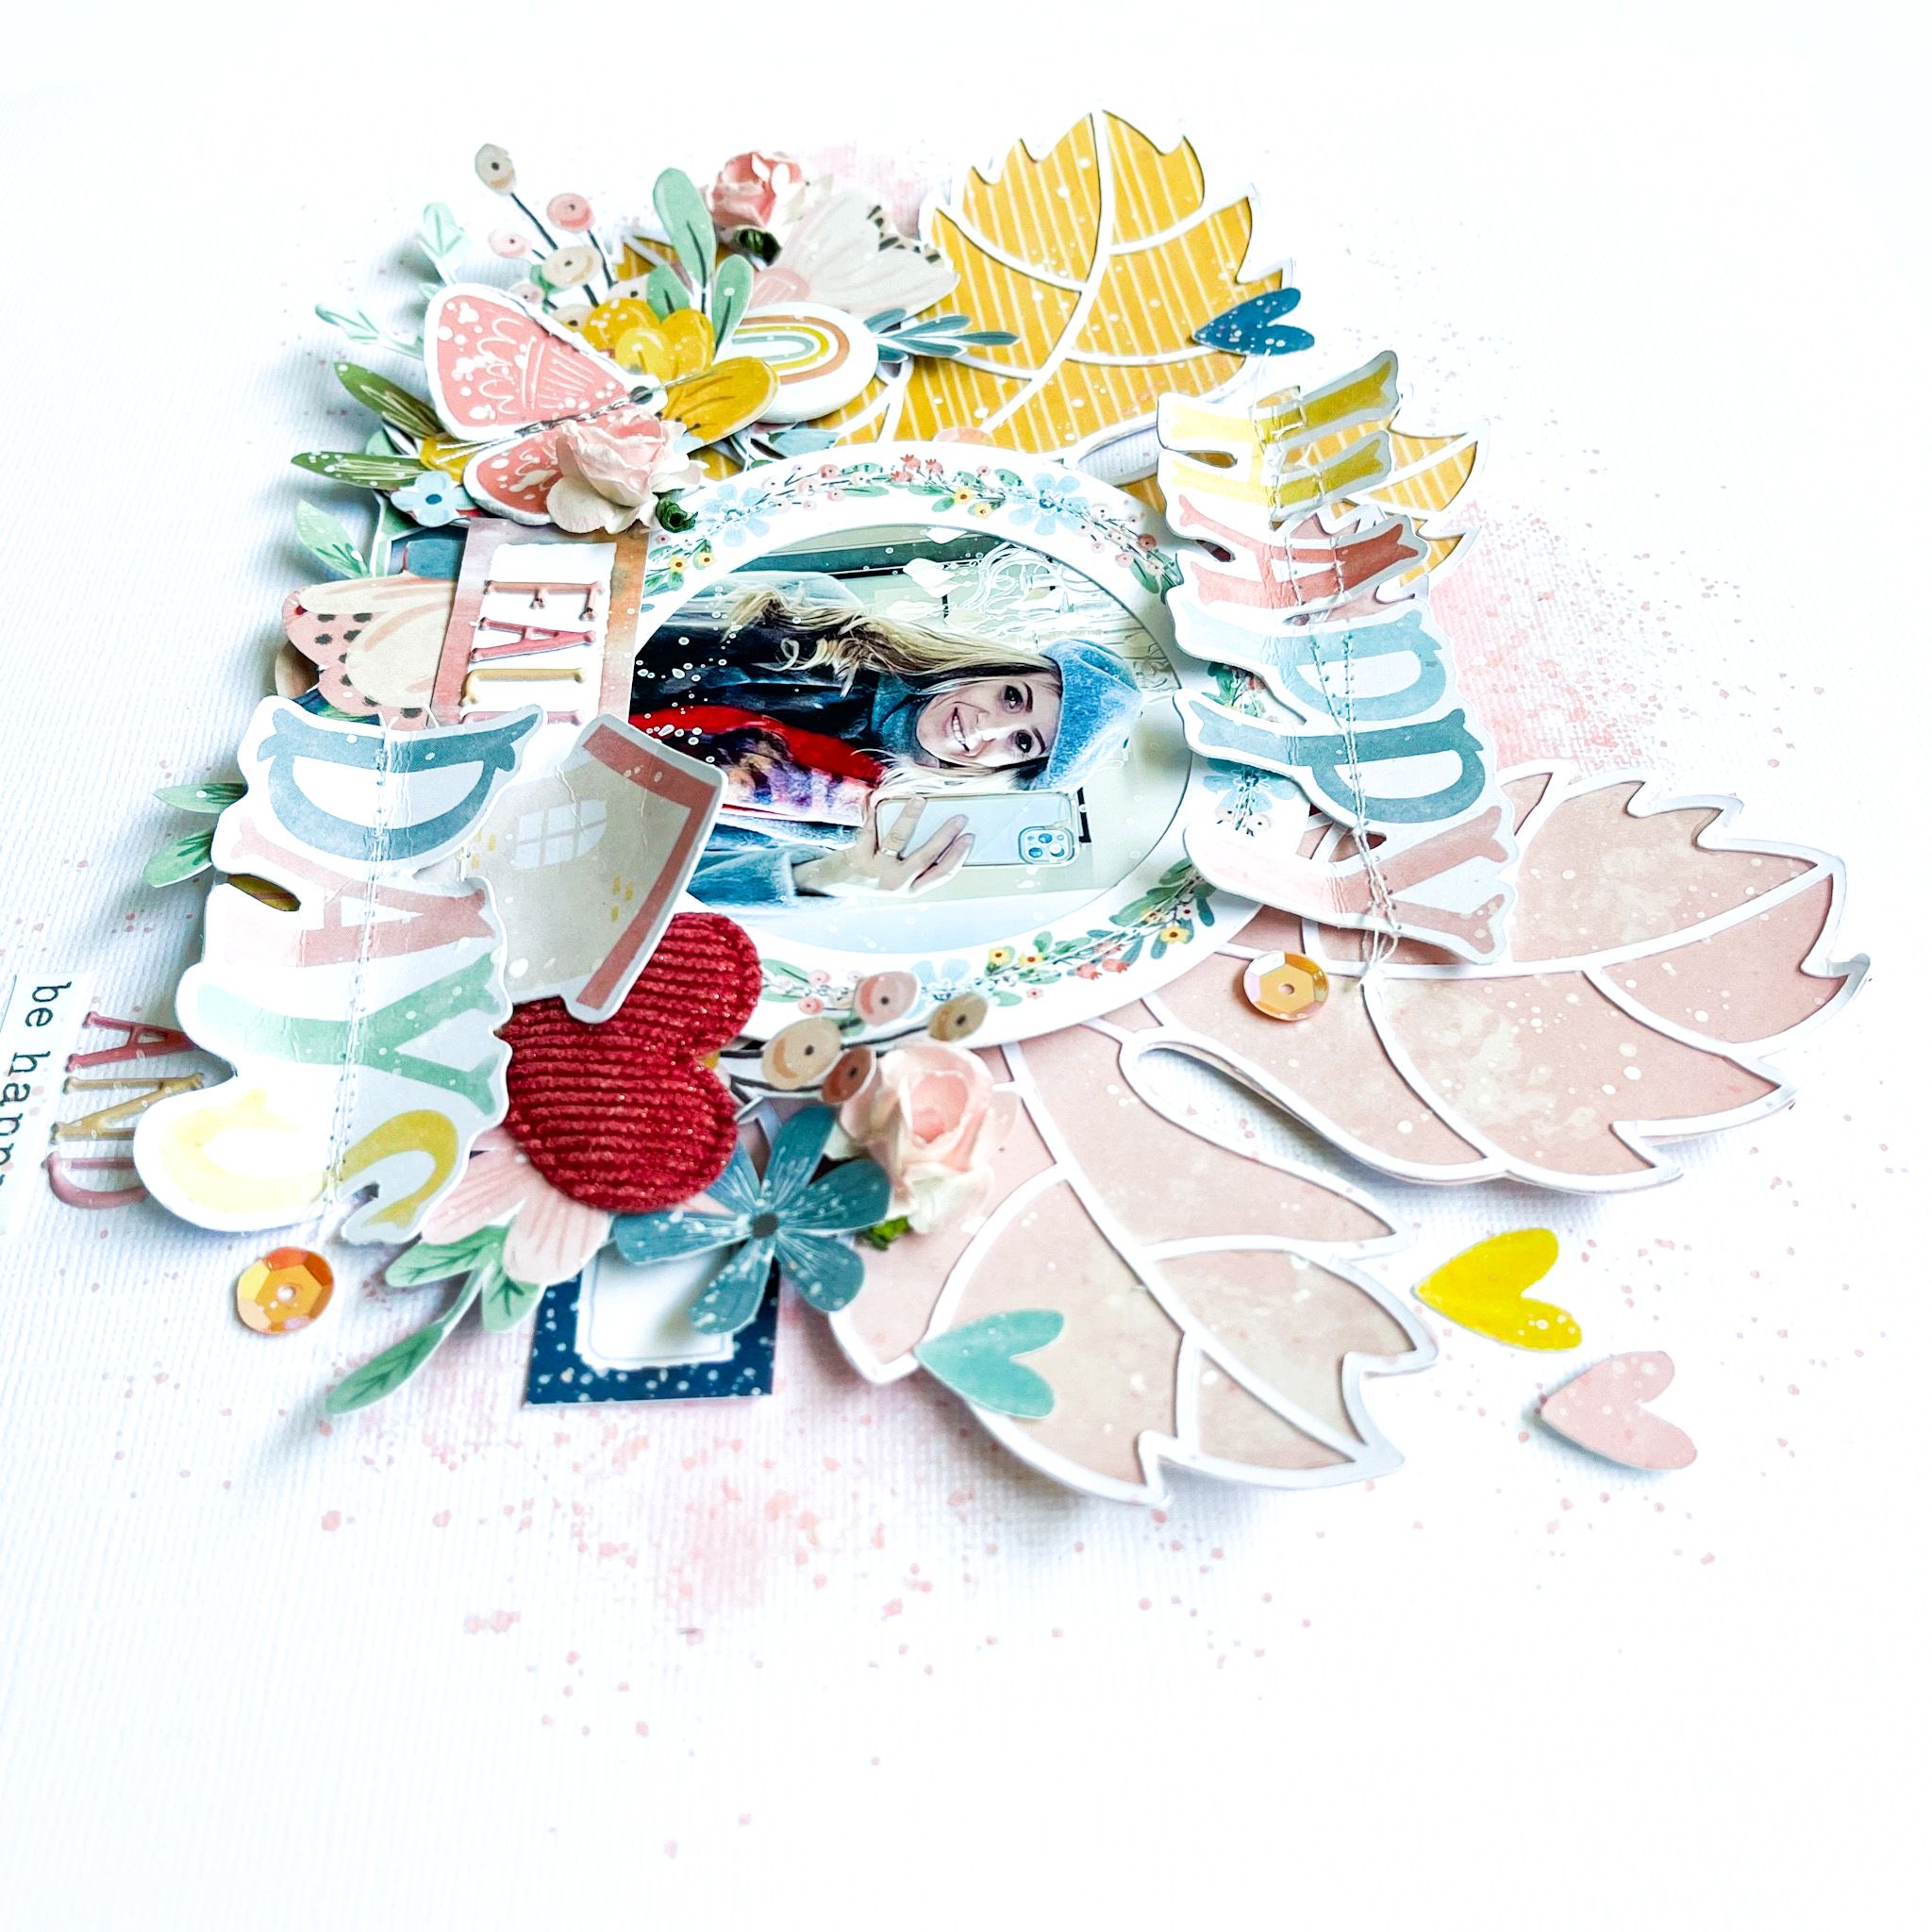
I placed a few extra embellishments like butterflies, sequins, labels and stickers to decorate my Autumn layout with spring vibes. Some of the embellishments I added white sewing thread with my sewing machine. Finally I give my layout some extra white gesso splatters.
I hope I’ve given you some fun ideas for combining different collections and themes like spring and fall with each other. I love to see you next time on the Cocoa Vanilla Studio blog and social with a new crafty scrapbook project! Can’t wait to see your gorgeous inspiration on the Cocoa Vanilla FB groep! Happy creating and I wish you a fun and crafty day friends!
It’s Tarrah back with you and today I am sharing a sweet Spring themed layout featuring the gorgeous Unforgettable collection!
We are focusing on our current seasons this week on the Cocoa Vanilla blog with our projects! Currently we are enjoying some Spring weather here in Australia so my layout today is all about the florals and my title is pretty fitting as well! I am documenting a photo of my niece in front of a beautiful rose bush, the Unforgettable collection compliments my photo perfectly.
I chose the gorgeous teal coloured paper from the Unforgettable collection as my background. I did trim this piece down and adhered it to a sheet of plain white cardstock, I then bent the edges up to create some texture.
I chose a beautiful floral cut file from CUT to YOU that I cut up slightly and then backed it all with some of the gorgeous papers from the A5 paper stack from the Unforgettable collection.
Once the cut file was all backed, I added craft foam to the underneath and adhered it to the background paper. By using the craft foam, it creates shadows and dimension on my page which I love. Because I cut up the cut file, I was able to strategically place my photo between the 2x floral clusters, I added a small banner die-cut to the top right corner of the photo.
Next it was time to embellish and add the title. I decided to use a die-cut title from the Midnight collection – called Bloom & Grow. I added the word ‘Bloom’ to the left of the photo overlapping the small journal sticker that is tucked in to the side of the photo. I also added the ‘&’ and the ‘Grow’ at the bottom of the cut file. On the right of the photo, I added one of the super cute flair buttons from the Unforgettable collection and below the photo, I added a phrase die-cut and a word accessory sticker. I took out some of the larger florals from the ephemera pack and adhered some with craft foam and some with regular adhesive.
Some of the smaller flowers I adhered with craft foam to help them pop up and give the page some more dimension. Next I tucked in some of the pretty feathers from the ephemera pack and bent the edges up slightly on them to make them look more realistic. I just love the enamel dots in this collection and quite a few made it onto this page, I placed 2 in each cluster. I created 3 clusters of the enamel dots.
Lastly to finish my page, I stamped the date stamp and sprinkled some white mist around the page. Do you have any of the Unforgettable collection that you’re hoarding?!
Get it out and use it for some gorgeous projects!
Thank you so much for stopping by the Cocoa Vanilla blog today! I love how my layout turned out and I hope you enjoyed reading how I created it!
I selected 4 of my favorite patterned papers: Sun Shower, Daisy Days,Happy Place and Garden Variety. I applied Distress Oxide inks directly on my white background watercolor cardstock in four vertical lines. I added water and colored splatters as well, and let everything dry.
I cut four strips of my selected papers that are of different lenghts and about 2 inches wide. I curled the top and bottom of each paper and aligned them in a horizontal line. I inserted a grey ribbon inside the curled top of each strip and tied a bow on the right and left side of the four aligned papers.
I printed my photo in black and white. It adds a little retro feel to the page…!
I used the Daydream Die Cut Title words for my title, and added beautiful fussy cut and die cut flowers to embellish around my photo.
I cut a rectangle out of white cardstock to write down my journalign and placed it on the Sun Shower strip, on the left side of the photo.
Finally, I added a few Accessory Stickers, two die cut butterflies and a few scattered sequins as the finishing touch.
Here are some close-ups:
I will never get tired of using this gorgeous collection ! My design is very easy to scraplift, and it is a simple way to use many different patterned papers on a page.
Hi Cocoa Vanilla fans and welcome back to the blog!
Today I have put my Storyteller collection away and have pulled out the No Limitscollection to play with.
I am documenting some fun pictures of my husband and youngest son on a recent holiday to Bali when we went quad bike riding.
To start my page I used the woodgrain paper called “Big Bang” and tore it about three quarters of the way down to create some texture and added a strip of the “Eclipse” paper underneath it.
I decided I wanted to add some mixed media to my background so I pulled out a circular stencil with some silver texture paste and added some white ink splatters.
I placed my photos in the middle of the page and used some vellum to add another layer. Next, to add more colour and papers to my page, I used a cut file from Paper Issues to add more circular elements to my page… I love these!!!
For my title, I used the word ‘Adventure’ from the Die Cut Titles and the word ‘Fun’ from one of the ‘Pocket Cards‘.
Once this was done I felt like the bottom of my page was too white so I pulled out some circular stamps and added these with co-ordinating colours … love the effect!
To finish my page, I used different pieces from the ‘Die cut elements’ pack’ and some of the Chipboard pieces including the stars to scatter around the page.
I hope you enjoyed my page today and you found some inspiration to get your memories documented.
Mandy here with you today, and I have a layout to share for our sketch theme this month. To make it even more fun, it’s Throwback Thursday! It’s probably no surprise that I decided to pull out the Daydream collection for this layout. It’s definitely one of my all time favourite collections, and it worked perfectly with this photo of my hubby and eldest daughter that I wanted to scrapbook! For my sketch inspiration, I decided on using one from Creative Memories…
I love working with sketches when I’m creating a layout. I find that they’re great for giving me a jumping off point and they provide inspiration for different page designs that I wouldn’t necessarily come up with on my own. I chose this sketch as I love the patchwork style design in the background, as well as the large circular element in the middle of the page. After that, I deviated from the sketch a bit as I only had one photo, and therefore didn’t create the collage of photos inside the circle, but the general design of the page is there.
I started my layout off by selecting some patterned papers from the 6×8 Inch Paper Stack to create my background. I cut each piece at 4.8cm x 14.4cm, and then pieced them together on my white cardstock background, making sure to balance out the patterns and colours as I went. I then cut a circle out of white cardstock, which was 8 1/2 inches in diameter, and I cut a slightly larger circle out of the peach All Aflutter patterned paper to matt the white cardstock circle onto. I also added some machine stitching around the circle to give the page some additional texture. My photo was matted on another paper from the 6×8 Inch Paper Stack, and was then adhered inside the circle.
Next I created an embellishment cluster on the top right hand corner of the photo, using a floral cluster that I fussy cut out of the beautiful Garden Variety patterned paper, as well as a rainbow Sticker. I also added my title here using one of the words from the Die Cut Titles pack.
To balance out the first embellishment cluster, I added another fussy cut floral cluster on the bottom left hand corner of the photo. You’ll notice that I chose florals with a curved design so that they followed the shape of the circle. I adhered this floral cluster with foam tape to add some nice dimension to the page.
To finish the layout off I added a couple of butterflies, one from the Die Cut Ephemera pack and the other fussy cut from one of the 6×8 papers. I also sprinkled around some sequins as well as a few more tiny fussy cut flowers.
I had so much fun creating this layout and I love the unique design that the sketch inspired!
Thanks so much for stopping by the blog to take a look at my page!
My page for today’s post is my interpretation of the monthly mood board designed by Melissa Vining…here it is if you haven’t already seen it.. soooo pretty!
For my page, I took inspiration from the flower wreath and those cupcakes. The light yellow and the pink of the cupcakes reminded me of the Daydream collection so I decided that’s what I would use for my page…here it is…
How pretty are the papers in the ‘Daydream’ collection?! I used a variety of them to back my cupcake cutfiles which are from Cut to You. The hearts on the cupcakes are so sweet!
To create my wreath I used the ‘Daisy Days’ paper and cut out the wreath and layered it over the right hand side of my page, then added some florals from the Ephemera pack popped up on foam tape to add some dimension and add fullness to the wreath.
Once I had my photo in position I decided I wanted my title to run down the right hand side of it. I used the word ‘Happy’ from the Ephemera Pack and the word ‘beautiful’ from the ‘Die Cut Titles’ then some gold thickers from my stash to finish it off…. I love using mixed fonts, they add more interest to the page. To fill in some spots around my title I used some of the butterflies and rainbows also from the Ephemera pack and the Accessory Sticker Sheet.
Other ways I added interest was some light ink blending through a stencil and some gold twine…. simple, yet effective!
Thanks for stopping by today, please consider giving the mood board a go, you may surprise yourself with where your imagination takes you!
Hi Cocoa Vanilla Studio fans! Danni here with a combination Throwback Thursday and Sketch layout. I was challenged to use a sketch and an older Cocoa Vanilla collection, so I settled on the stunning Sunkissed Collection and this adorable sketch from Lottie Loves Paper.
I love how a sketch can help guide you in a direction that you may not have thought of spontaneously. The rainbow in the sketch reminded me of the Sunny Days 12×12 patterned paper so I used that to make a border around my page. I also added a layer of the pink Growing Wild 12×12 patterned paper behind a piece of white watercolour cardstock, ready for some paint!
Continuing with my inspiration from Sunny Days 12×12 patterned paper, I matched the colours from the rainbows in the pattern by mixing up some acrylic paint, then painted a rainbow on the watercolour paper following the placement in the sketch. Next, I added some pink and gold ink splatters around where my photos would go.
The sketch called for three square photos, so I chose these pics from a day trip and picnic with my family last summer. I decided to trim my smaller photos a little, so they were more rectangular than square, just because they fit a little better on the page that way. I matted my photos using the A5 paper stack and backed them with 3D foam before adhering them down.
I chose a beautiful glittery title from the Foam title stickers and placed it following the sketch, curving it along the top of my hand painted rainbow. It fit just perfectly between my two photo clusters.
Next, I chose a collection of clear stickers, puffy stickers, accessory stickers, floral ephemera, die cut ephemera and wood buttons to create small embellishment clusters around my photos. I placed them roughly in the areas shown in the sketch, but I was pretty flexible in the placement of these.
Finally, I printed my journalling using a typewriter font and cut it into strips, before adhering it down at the base of my rainbow. I had a bit more journalling than the sketch had, so I just brought it up a little higher on the page. There was plenty of extra room, so I was happy with the final placement. And that’s the layout finished! I hope you enjoyed joining me today and happy scrapping!
It’s Sophie on the blog today for Throwback Thursday!
I used the Legendary collection for this page!
I wanted to document a little fishing trip that my son had a few weeks ago. I had the idea to use cute fish cut files from Just Nick Studio to help me with my theme.
I started with a thick white 8,5×11” cardstock and used many mixed media products to create beautiful shades of blue to mimic the sea. I backed the fish cut files with different patterned papers from the Legendary collection, mounted them on foam adhesive and placed them on my blue mixed media background.
I machine stitched around the edges of the 8,5×11 cardstock and backed it with a green cardstock before adhering it to the beautiful “Wild One” rainbow paper.
I added a few layers of papers and tissue paper behind my photo and placed it on the right side of the layout.
My title comes from the Legendary Die Cut Titles, mixed with some letters stamped with an alphabet stamp from my stash.
I decorated the page with a few embellishments from the Legendary Die Cut Ephemera pack, a flair button, plenty of white acrylic splatters and some sequins from my stash.
Here are more close-ups:
I adore this masculine yet very colorful page! I hope you do too!
It’s Sophie here and I am so excited to share my very first page created with the brand-new Storyteller collection!!
Where to start?? I am sure you know the feeling of wanting to hoard every little thing of a new collection and having a hard time choosing and actually using some of the beautiful goodies from it… Well, it definitely was a struggle for me here!!
I used the striped paper from the A5 Paper Stack and used a piece of it on the upper and lower part of the page. I cut between the colored stripes and curled some in different lengths on the top part of the page, and applied watercolor paint on thick white cardstock in different colors matching the stripes just underneath them.
I created a zigzag stitch in matching colors for the lower strip of striped paper.
I centered two photos on my page, a little bit crocked, and mounted on tissue paper and foam adhesive.
I used a Die Cut Ephemera for my title and a cute little banner above the photos.
I created clusters of flowers, most of which were fussy cut out of the A5 floral patterned paper.
Finally, I used beautiful Die Cut Ephemera butterflies and made them fly around my page, and placed a few Wood Epoxy Buttons as the finishing touch.
Here are more close-ups:
I am sure that you fell in love with this gorgeous collection just like I did!
Please share all your creations on the Cocoa Vanilla Facebook group!
Hi Cocoa Vanilla Studio fans! Danni here, back to share with you another fabulous No Limits collection layout. I have been eyeing off the gorgeous teal mixed media-inspired pattern on Stardust 12×12 patterned paper ever since I received the collection, so I decided to start with that as a base.
The first thing I did was add a sprinkling of stars using some different texture media. I used a 12×12 star stencil from my stash for the pattern, using a spatula to add first a sparkly gold glitter gel medium, then a white modelling paste. This added beautiful three-dimensional stars with lots of textural interest. I then added a bunch of ink splatters in gold and white all over the page.
Next I added two photos of myself and a very dear friend at dinner several years ago. Sometimes it’s lovely to look back and document a memory that happened a while ago! I added a white border to both photos and used the A5 paper stack to create a layered photo mat.
I used the die cut titles and some glittery alphas from my stash to spell out my title, layering it at the bottom of my photos.
For embellishments I went for a combo of the die cut ephemera, the accessory stickers and the chipboard stickers, layering them either side of my photo mat. I made sure to vary the heights of the embellishments, using foam squares in between where needed to create dimension.
I also added two epoxy wood buttons to finish off the packet, yay! I always feels SO good to use up a packet of scrapbooking supplies. I added a small embellishment cluster to the bottom of the page to balance out the top-heaviness of the layout.
Finally I added some puffy sticker dots to each of my embellishment clusters and a bunch of puffy sticker stars cascading down my page below the title. I love how this turned out and I hope you do too. There is a process video on the Cocoa Vanilla Studio YouTube channel if you would like to watch, link below. Happy scrapping!