Hello, its Melissa here and I’m so happy to be back for another Throwback Thursday layout!! I love Throwback Thursday because it enables me to dive into my stash and work with some older Cocoa Vanilla products. I decided to go into my stash and work with the first older collection (as in not from 2021) that I came across – hence the beautiful Unforgettable Collection! The photo is the offical school photo of my 7 year old daughter for this year.
I find school photos challenging to scrapbook because of the size of the photo, and often the colour tones that I can’t alter because the photos come printed. I decided to use “Natural Beauty” for my background, and I also layered up “Forget Me Not” and “Lacewing”. I used my scallop edge punch for extra texture. For my photo I fussy cut out the floral edges on one of the cut apart cards on “Story Teller”. I also used embellishments from the “Die Cut Ephemera”, Accessory Stickers and “Flair Buttons”.
I decided to use several of the “Clear Stickers” and I layered them in two positions next to my photo to provide a minimal mixed media look. I love how they look!
I created my title with one of the phrases from the Foam Title Stickers. I finished my layout with some black ink splatters.
I hope I’ve inspired you to create layouts and projects with Unforgettable.
Hello crafty Paperlovers,
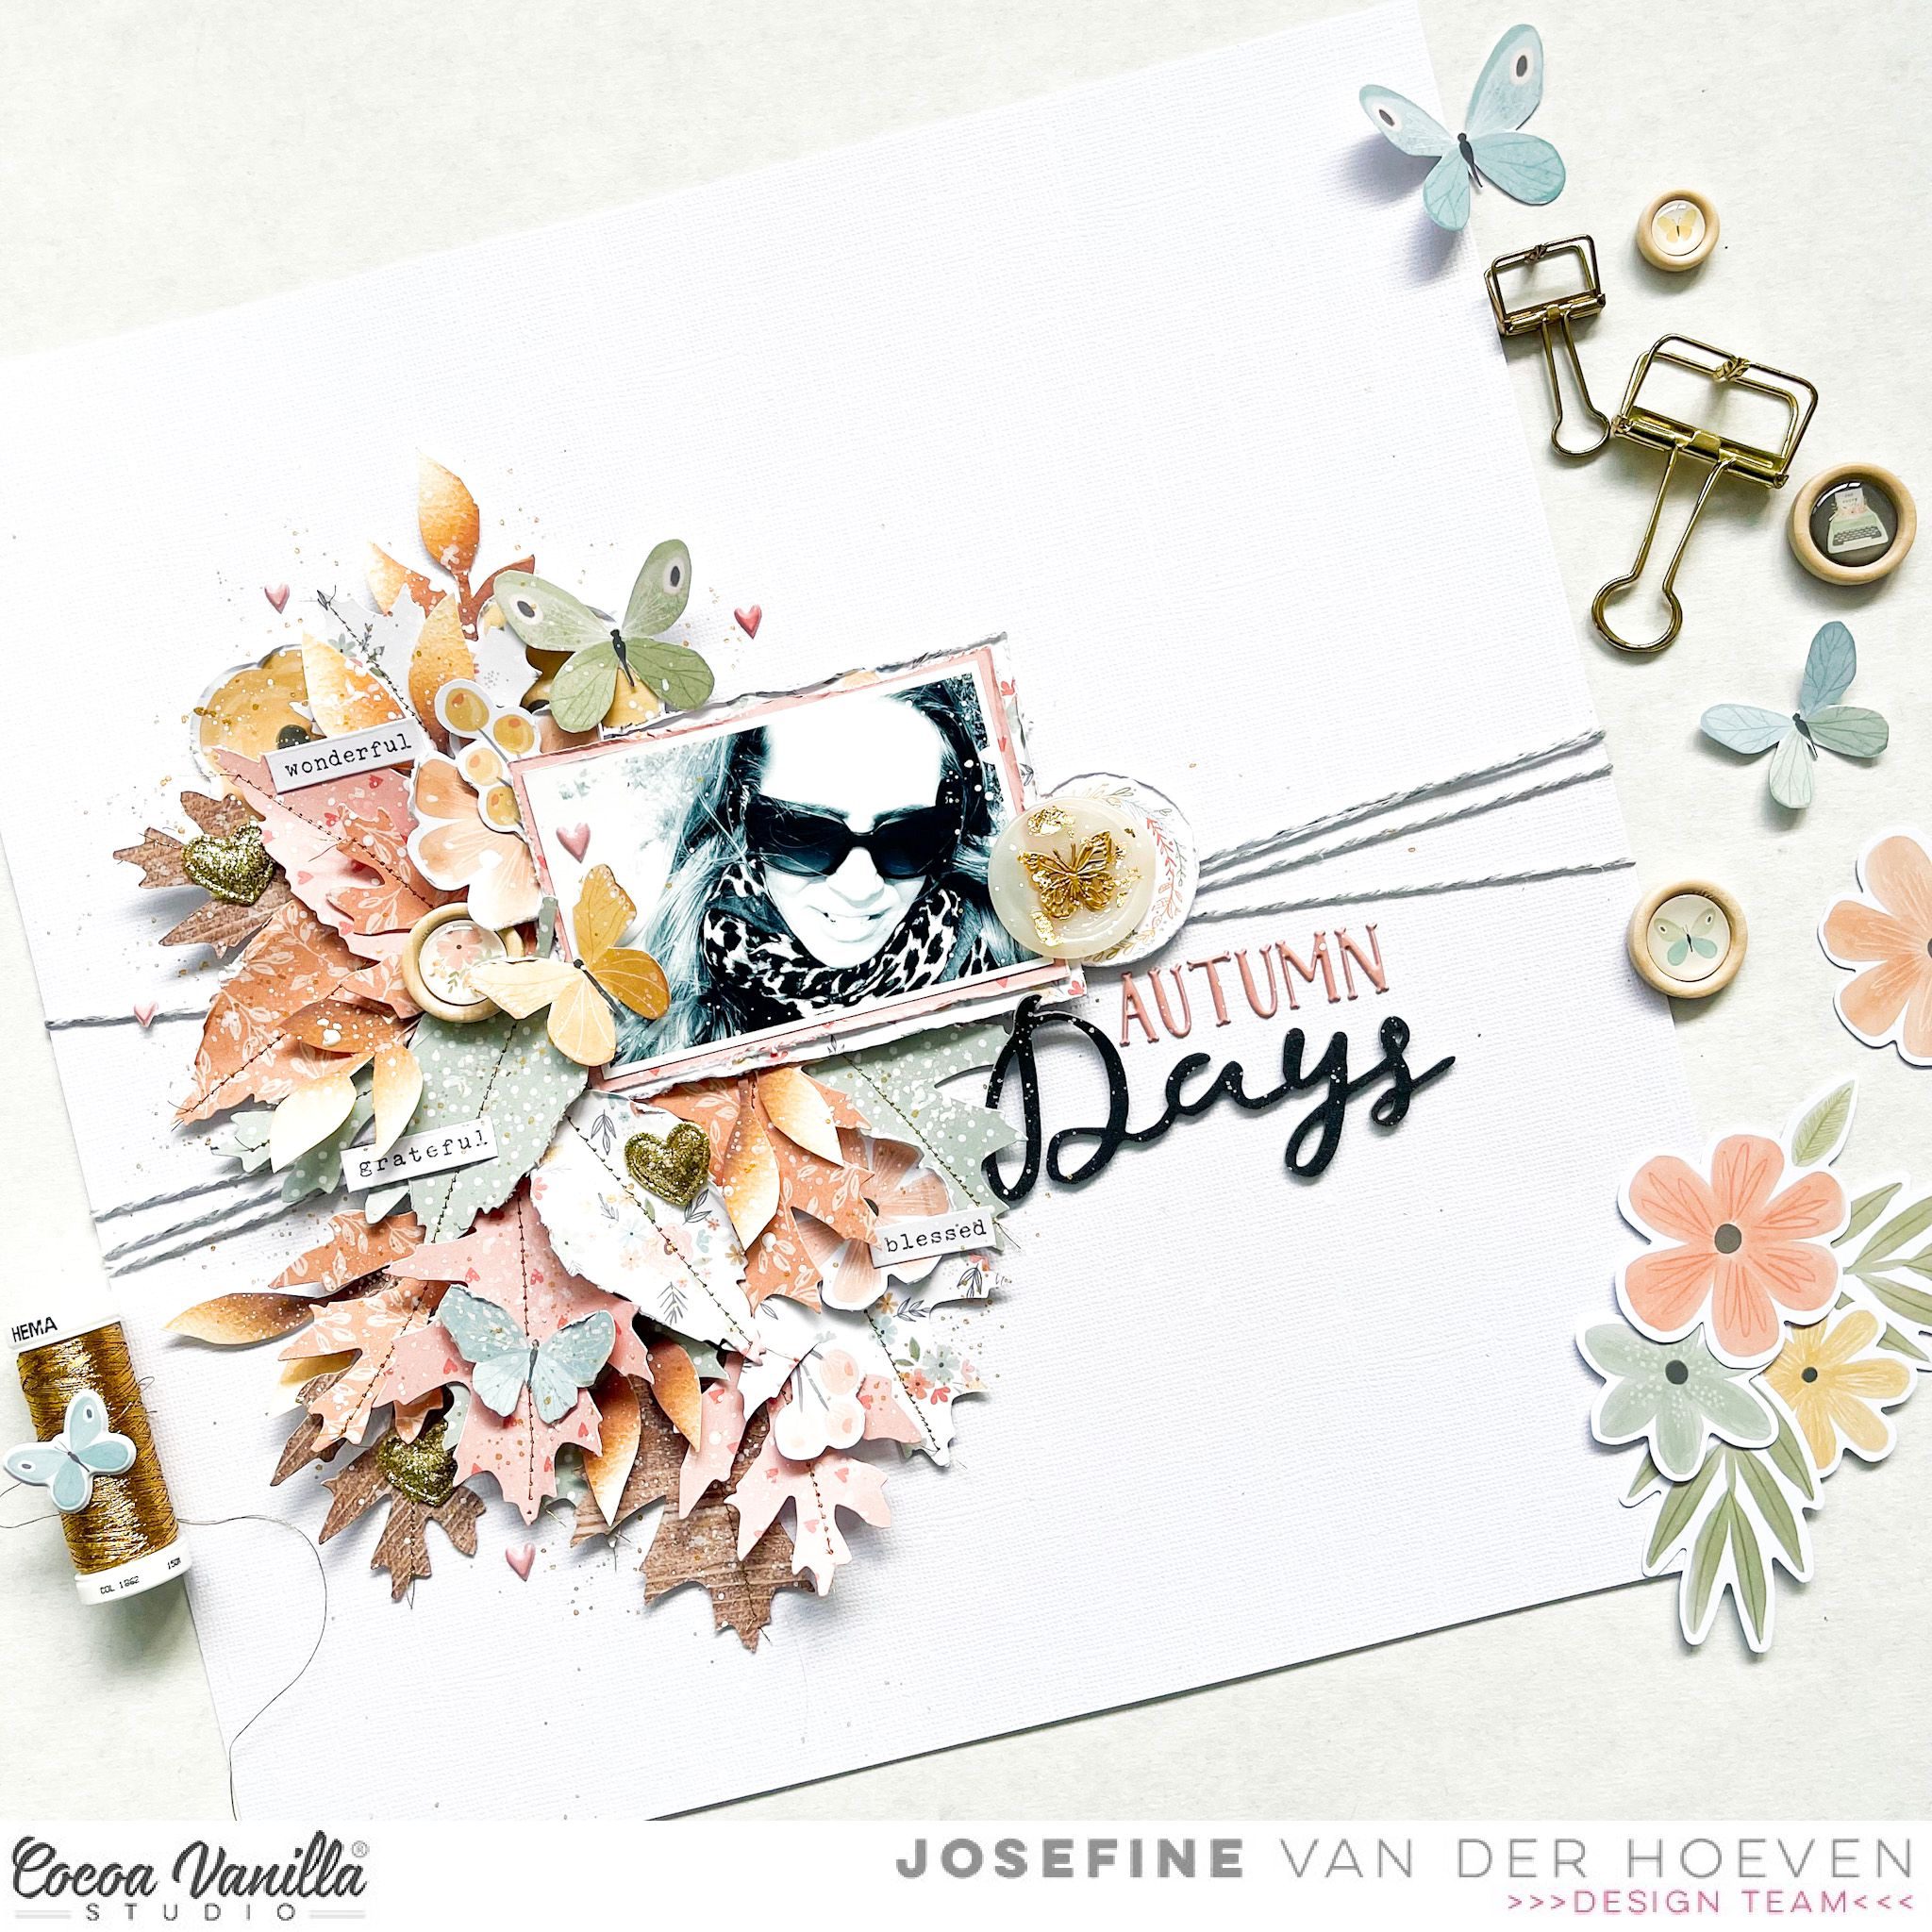
It’s Josefine here today with a new layout that I created with the beautiful collection “These Days”
I love the fall colors and this collection is a perfect match.
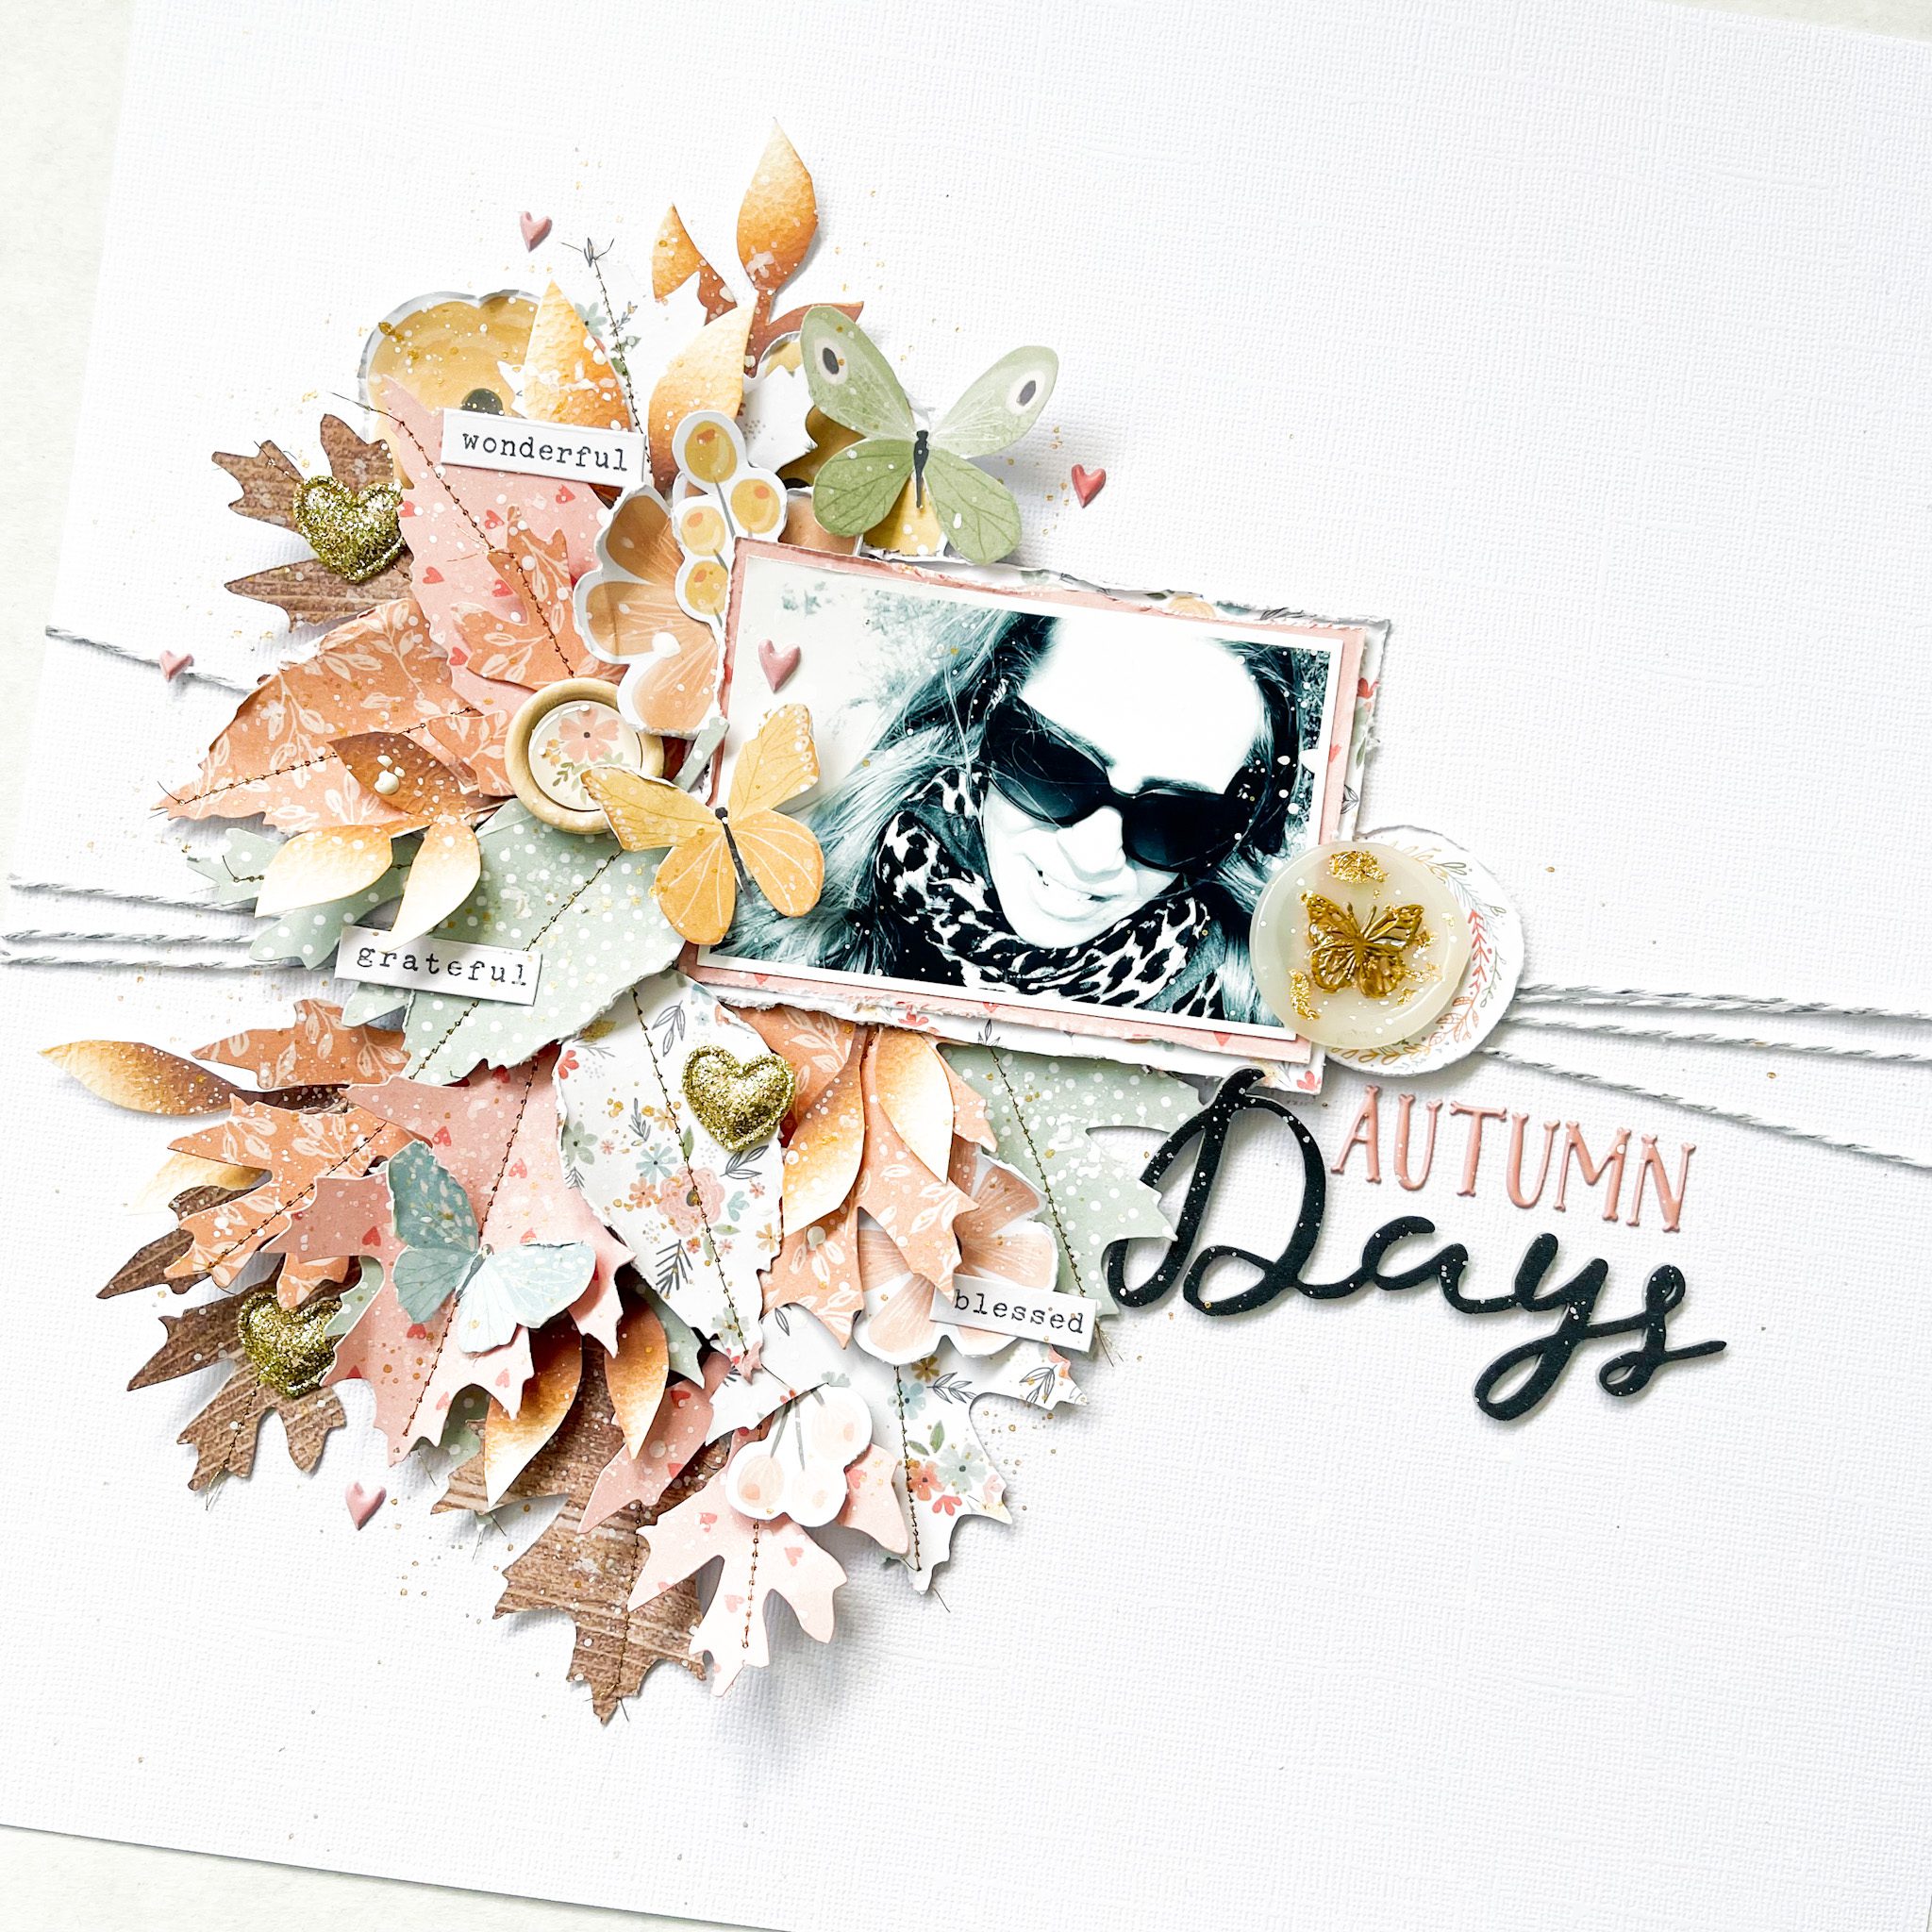
I choose different design papers from the “These Days” collection and punch out different leaves from the papers. In the center of the leaves, I stitch a border with gold thread and used my sewing machine for this.
I wrapped embroidery thread around my layout several times. I placed my picture on top on the embroidery thread and made a large cluster with the leaves. I chose different die-cuts, stickers and flowers and decorate my layout with these gorgeous embellishments.
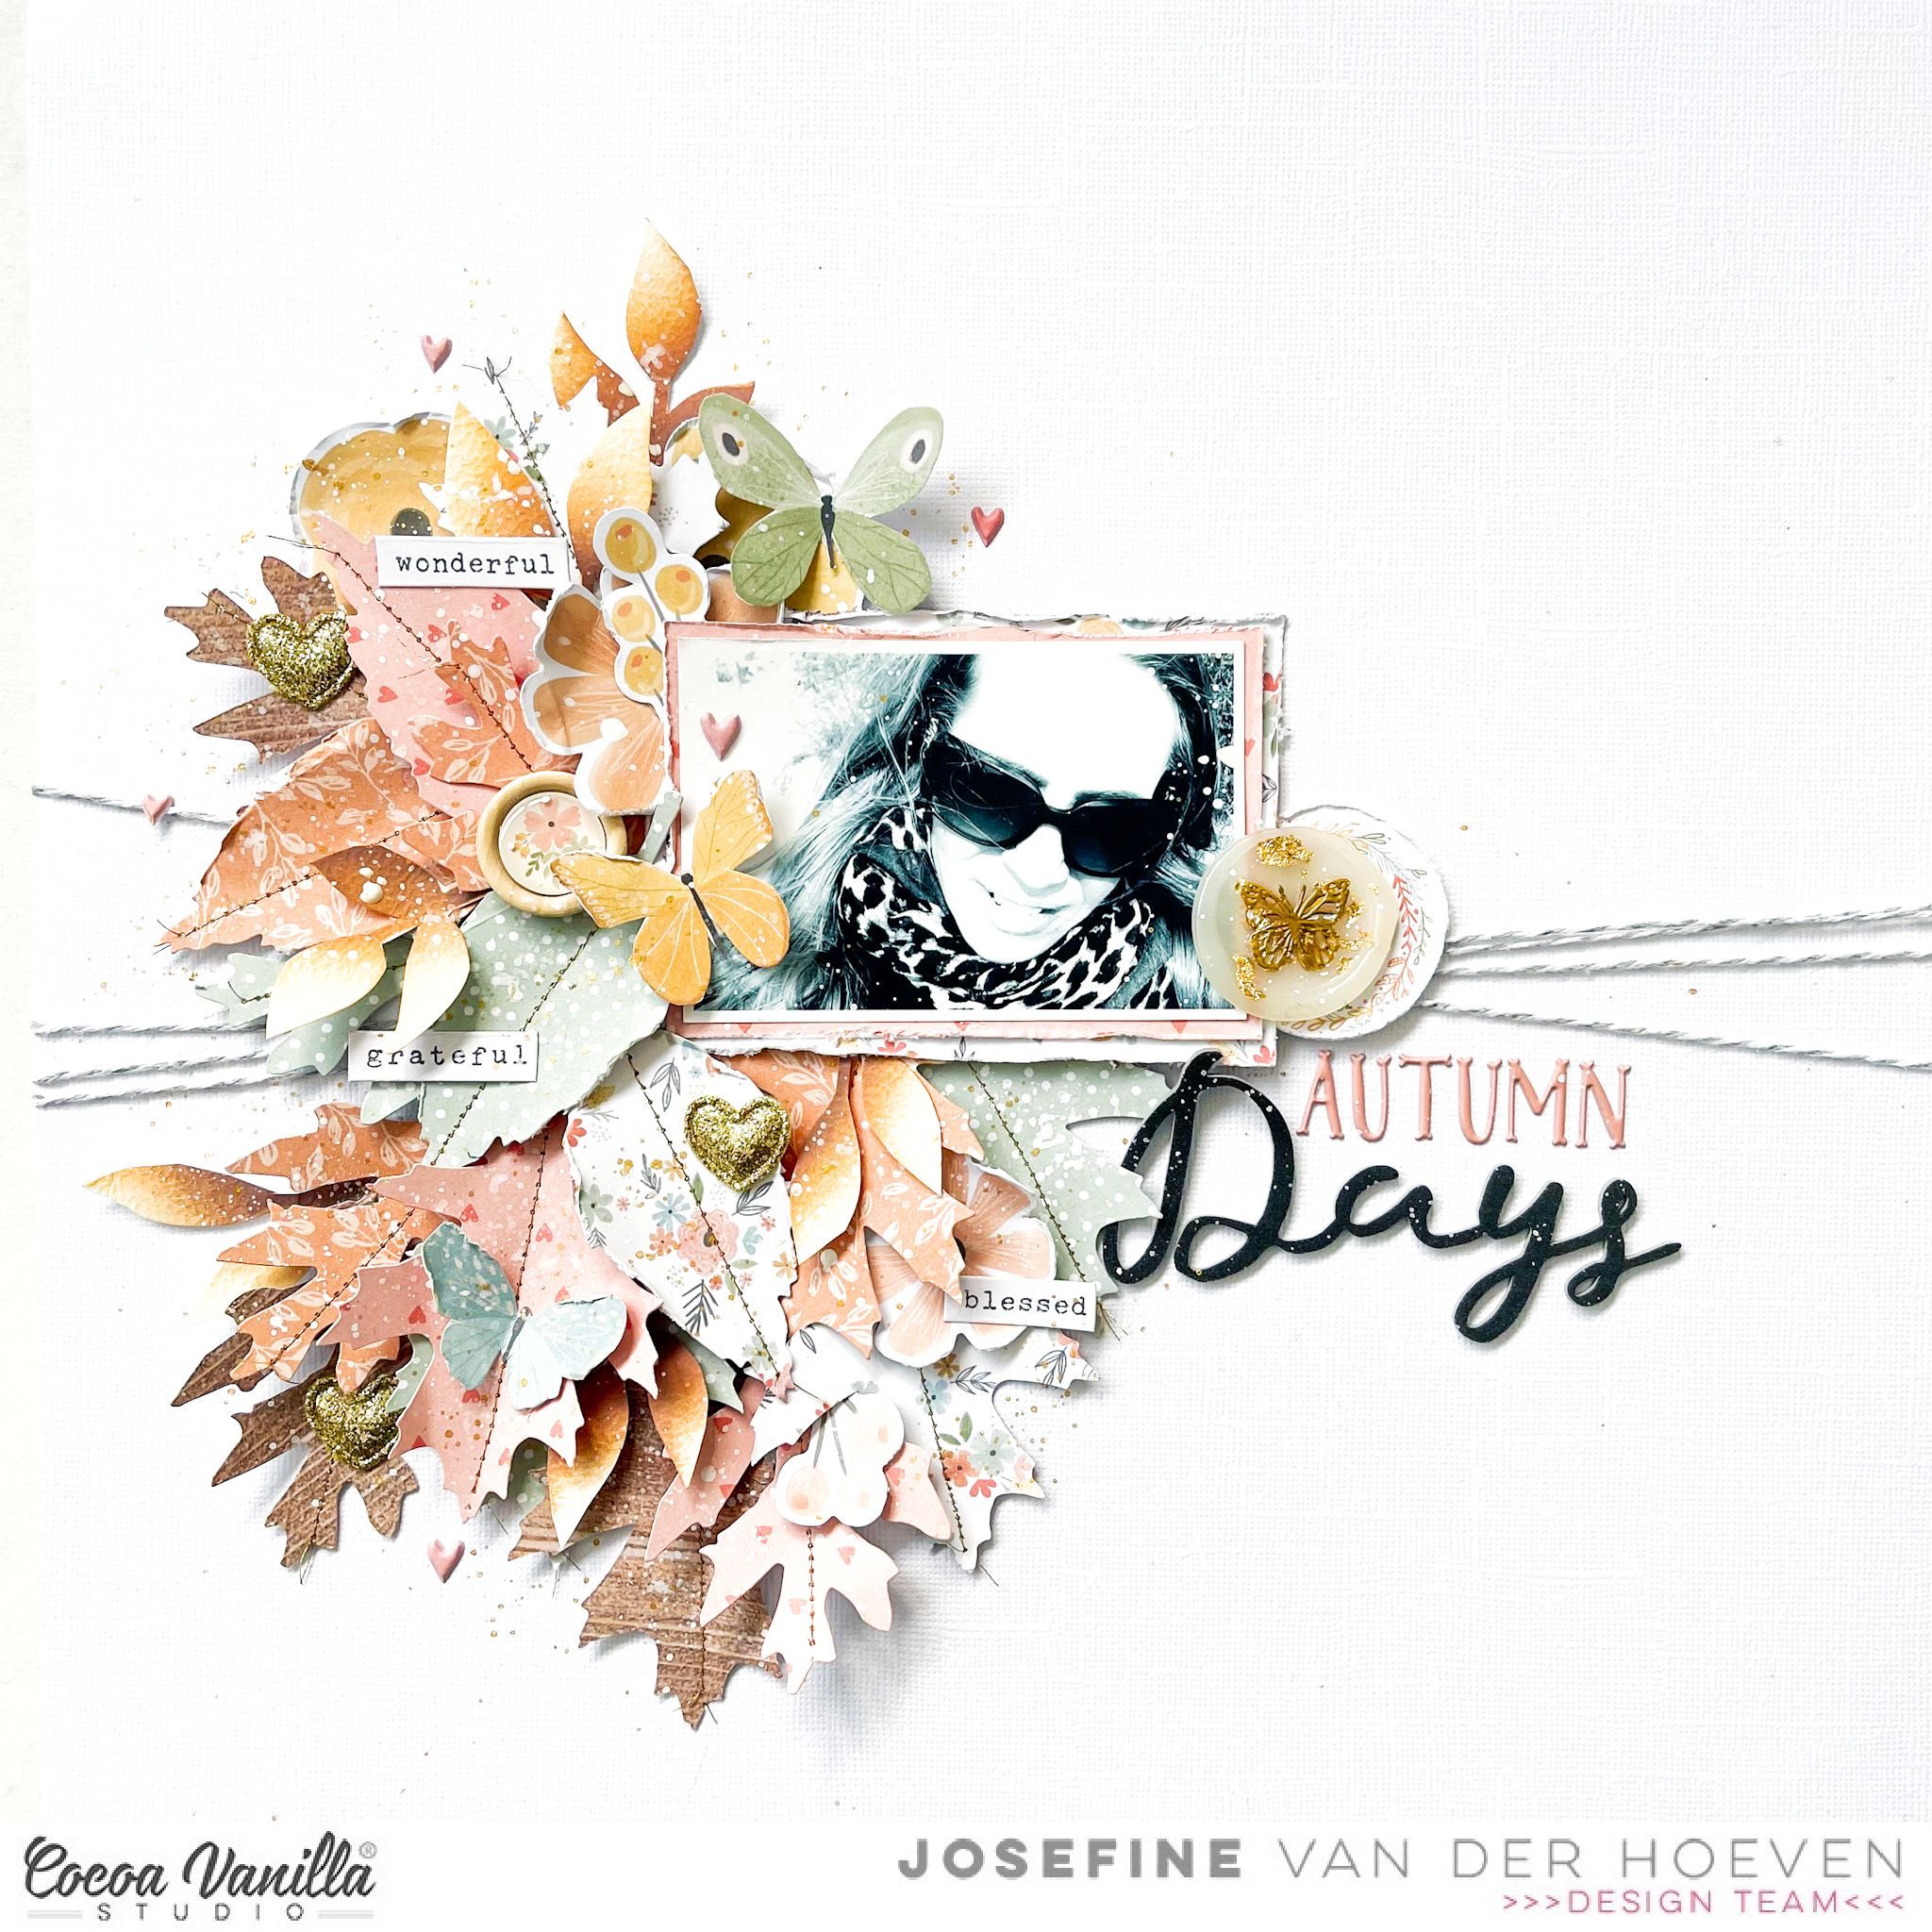
I decorated my layout with more beautiful elements from this wonderful collection. The wooden buttons, butterflies and the cute golden hearts. I love all these beautiful layers I have created with the leaves. I used a wax seal next to my photo that I made with wax and a seal stamp and decorated it with gold flakes.
I used two different alpha sets for the title “Autumn Days” I like the nice and playful effect of using different alpha sets. I cut branches from water color paper and colored them with two different colors of Distress Oxide. The colors are “rusty hinge” and “walnut stain” I placed the branches in different places between the leaves.You can also see that I made splatters with white acrylic paint and gold ink. I like how my layout turned out.
Well that’s it for today paper friends and I’m grateful you stopped by on the blog to see what I created with this beautiful collection. I hope I was able to inspire you with this Autumn layout.
Wishing you all a very happy and creative day!
XoXo, Jo
Hello scrappy friends today I am sharing a 8.5×11 inch layout documenting my beautiful children when they were younger! I have used the beautiful These Days collection.
I like to mix things up and so I decided to create a 8.5×11 inch layout instead of the traditional 12×12 ice layout. The great benefit of this is that I have used the 6×8 paper pad instead of cutting into my 12×12 inch papers. I used the same three papers at the top and bottom of my layout but changed the order for visual interest. When I adhere torn paper strips I never glue the top part so I can go back and add elements.
I added black machine stitching to these paper strips to add a stark contrast and texture. I created a floral cluster to the top paper strips, layering them over each other, tucking in extra leaf die cuts, puff sticker florals finished off with a wooden epoxy flair.
Again I embellished the bottom paper strips, adding die cuts and puffy stickers finishing off with a Accessory sticker phrase sentiment. Layering your embellishments in the different paper strips creates a beautiful cluster that your eye is drawn too.
Before adding my photo I added some texture paste using a dot stencil. I usually buy white texture paste and then add acrylic paint with the colour I want, it certainly is a way to save money buying lots of different coloured pastes. I matted my. photo again from papers in the 6×8 inch paper pad, when you background is white a contrast is needed. I added two of the gorgeous gold glitter puffy hearts to contrast against the dot stencil.
I used both the foam word titles and puffy alphas, again I wanted to create a stark contrast against the white and using two different types of alphas creates dimension. I added a tiny phrase sentiment from the puffy stickers and added directly under my photo. Lastly I added some butterflies around my page, some from the clear sticker sheet and the other from the die cut pack.
I enjoyed creating this layout, simple but pretty! As always thank you for stopping by and have a wonderful and creative week!
Today I am sharing a school themed layout with the gorgeous These Days collection!
I used a cut file from Paige Evans named “Open Book” and I thought this was a beautiful starting point for my page.
I used a thick white cardstock for my background, on which I added a little bit of watercolor paint starting from the open book and up, adding also lots of little splatters of paint.
I let it dry completely, and in the meantime, backed my cut file with different patterned papers from the collection.
I applied white gesso on some parts of the book to fade away the colors a little bit for a very soft look.
I mounted the open book on adhesive foam before adhering it to the page.
I used a photo of my sweet daughter on her first day of school a few weeks ago. I couldn’t be happier that she still wants to collaborate for that!
I added tissue paper and adhesive foam behind it and placed it a little bit crooked on the right side of the open book.
I fussy cut 3 frames out of one of the A5 patterned papers, scattered them around and added a few embellishments on them.
My title is a mix of Die Cut Ephemera, Clear Sticker and letters created with a die from my stash.
Finally, I created a floral cluster with the Floral Ephemera pack, I added two butterflies and stamped the date on a label from the Accessory Stickers Pack.
Here are more close-ups.
I am so happy with the result!
I hope you can find inspiration with my page today in using this beautiful collection in a versatile way!
Thank you for stopping by, have a great crafty day !
Mandy here today to share a new layout featuring the amazing Daydream collection! This is still one of my absolute favourite collections to work with! The colours are so pretty, the florals are stunning, and everything just works together so beautifully. It’s one of those collections that’s so easy to work with, and I’m always so happy with the projects that I create with it.
The layout that I’m sharing today features the beautiful Over the Rainbow patterned paper, and a sweet photo of my son Isaac and youngest daughter, Eleanor.
To start this layout off, I decided to fussy cut that beautiful rainbow out of the Over the Rainbowpatterned paper. I wanted to add some craft foam behind it so that I could raise it up and give it some nice dimension. I had originally intended to use a sheet of white cardstock for my background, but when I laid the rainbow over the woodgrain patterned paper (which is the reverse side of the Over the Rainbow paper), I immediately fell in love with how that looked. The hoarder in me was a little sad to use up two sheets of this gorgeous patterned paper on the one layout, but it looked so pretty that I couldn’t resist!
I matted my photo with two papers from the A5 Paper Stack and then adhered it over the top right hand side of the rainbow. I embellished around the photo using lots of the beautiful floral die cuts from the Die Cut Ephemera pack, as well as a cute little house. I added a large floral cluster above the photo, and created another smaller embellishment cluster on the bottom right hand corner of the photo.
In order to complete the visual triangle, and to balance out the photo and embellishments in the top right, I created another embellishment cluster in the bottom left hand corner of the page. This one includes more floral die cuts, as well as a banner that says ‘The Good Life’, and a little word sticker from the Accessory Sticker Sheet. I also added a Puffy Gold Glitter Heart from the These Dayscollection to each of the embellishment clusters. I love the sparkle and texture that this adds!
For my title, I decided on using the ‘Happy Days’ die cuts from the Die Cut Ephemerapack. I wanted to curve the title around the rainbow, so rather than using each word as a single die cut, I fussy cut each letter so that I could adhere the letters individually and curve the words around. I was really happy with how that turned out!
To add some extra detail to the page, I fussy cut a few little butterflies out of the All Aflutter paper in the A5 Paper Stack, and adhered them on top of the rainbow. I also added some white ink splatters around the embellishment clusters, and I doodled a white border around the top and right hand edges of the layout. To finish the page off, I added my typed journaling strips underneath the photo.
Thanks so much for stopping by today! I hope that you’ve been inspired by my layout!
Hi Cocoa Vanilla Studio fans! Danni here with a sweet baby layout featuring the adorable These Days collection. My inspiration for this one came from the stripes on Family Ties 12×12 patterned paper. I wanted to play with some textured paper layers, and I had a large cardstock heart left over from a cutfile, so that decided the direction of my page today.
I started by cutting Family Ties 12×12 patterned paper into strips, then distressing the bottom edge of each strip with a paper distressing tool and rolling the edge up a little more with my fingers. I then took my cardstock heart and glued the layers on top, starting from the bottom and working my way up to the top, overlapping each strip. I used the cutfile out of pure convenience, but you can easily do this just by hand-cutting a large heart shape.
Once I had all the strips glued, I trimmed off the excess with scissors by flipping the heart over and using the back of the cardstock heart as a guide. I chose a white cardstock background because I really wanted the gorgeous colours on the heart to stand out. I added some ink splatters to the background in shades of soft blue, pink and yellow to match the beautiful These Days collection colours.
I added two black and white photos of myself and my son when he was a baby. I love the way he is looking up at me in these photos! I backed the one where you can see his face more with paper from the A5 paper stack and popped it up on dimensional foam.
Next, I created three clusters using the floral ephemera around the heart and my photos. I added two of the tiny wood epoxy buttons to the centre of a flower in two of the clusters, then a large wood epoxy button to the middle floral cluster. Right in the middle of the heart I added a framed sentiment piece from the die cut ephemera. This phrase perfectly summed up how I felt about my sweet baby boy in this moment.
For a title I added ‘Together’ from the foam title stickers across the bottom of the heart, overlapping my photo and the bottom floral cluster. Finally, I added some adorable floral puffy stickers to the clusters and some teeny tiny puffy sticker hearts at the top and bottom of the page. A few sentiment stickers from the accessory stickers finished off the layout perfectly.
I love how sweet and light this layout turned out. I hope you enjoyed joining me for this project today. See you next time and happy scrapping!
Hey y’all! Laura Alberts here with a blast from the past! This layout features Hello Sunshine and a bit of Endless Summer, some of the oldest Cocoa Vanilla collections in my stash! To start this layout, I backed the stunning denim style patterned paper with this Happy Days pattern paper to give it a bright, cheerful border. Then, I used Vicki Boutin’s Iridescent Glaze to add some lovely hearts around the perimeter of my photo clusters. These little hearts help to define the shape of the center clusters.
In the top left corner, I layered an ephemera frame and florals from Endless Summer with a sticker banner from Hello Sunshine. I love the way some pieces are tucked underneath, while others are on top. The mix of the two makes this area of the layout feel more dimensional even though it’s quite flat.
On the top right side of the layout, I repeated that process, layering Endless Summer florals underneath of the photo and stickers from Hello Sunshine on top. To give these hearts a bit more interest, I added Endless Summer enamel shaped hearts and tiny punched gold foil hearts into the background. I love the mix of colors and textures in these clusters as a result!
The photos featured in this layout are of my husband and I’s favorite treat restaurant for date nights. It’s a special place for the two of us and makes special occasions feel even more special! Adding the ‘Just Perfect’ banner underneath the restaurant’s sign seemed fitting!
This title is actually a cut apart, but it blends in really well with the background, giving it the appearance of a stamp! After I finished the embellishing, I added gold Nuvo drops and splatter around the clusters for a bit of sparkle. My journaling is written around the entire perimeter of the layout, giving it a handwritten border, and talking about how much we enjoy this restaurant and why we we love it!
I hope this layout inspires you to reach deep into your stash and pull out some old Cocoa Vanilla Studio favourites! I love finding new ways to use older product!
Hello, hello crafty people. It’s Anna here with a little surprising (at least I think so) page in masculine style made with a big mix of many masculine CVS collections! You know it’s a rarity for me to make boy pages as I have two daughters and I am faithful to all things pink and glitter. You may also remember that I was a mom to the pretty beagle boy named Pirat. He was the hero of some of my layouts and albums. We lost him last year and we promised ourselves it will be our last dog as the loss was so heavy. However, after almost a year, we started missing fur on our clothes, couch and in the cup of tea. One thing led to another and now there is new king in our little castle!!!
Ladies and gentlemen – meet Filut (Jester in English). He is 4,5 months old beagle boy and he is with us since July. It’s like having little baby in the house again. He makes me laugh, sometime he makes my cry (after eating piece of wall…) but out house and our hearts are full again. Be prepared for more masculine layouts coming!!! He is so cute and I can’t resist taking pictures of him. For his first layout I had a very specific idea in mind with a child like page with wonky scene.
I started with picking background from the very first Cocoa Vanilla collection called “Flying high”. It’s not available anymore but you can purchase it’s digital version. You can also fing digi version of “Totally rad” line for even more fun! I then went through many other papers picking few to make a house. Some of them were only scraps. I didn’t measure anything, didn’t skecth any shapes. Just took the scissors and made few cuts. From all of the lines I used only “Legenday” is still available to purchase. So you may consider this page as using up older stash.
After my house was done, I added photo and embellishments around it. Again – I reached for the mix of stickers, cardboard stickers, chipboards and ephemera pieces. I keep them all in one bag – leftovers from old masculine collections – so I can’t even tell which line they belong to. In an empty area in upper left corner I added a title. I ased old alpha stickers from CVS too. Longer phrase perfectly fits here. I like adding my letters tilted and moved – I don’t need to worry they do not line up perfectly then! Make them cricket on purpose!
Whole page came together pretty fast and it was so fun to make. I just love using up my older stuff and plaing with basic supplies. You can make more girly version of this page too, with wonky house and random elements from various collections!
That is all for today. Thank you so so much for stopping by and see you again in October. Fall officially started on northern hemisphere which means much less daily light, gloomy weather, rainy days and cold. Not a fan here! However I am happy scrapbooking and Filut will be my companions during long evenings.
Hi everyone, I’m back with another Summer Layout using the beautiful Sunkissed collection!! I’ve been making my way through scrapbooking my Summer beach holiday photos from earlier in the year and Sunkissed has been perfect for all of these happy memories. For this layout I decided to document a photo of my teenaged son, because I’m very aware that probably 90 percent of my layouts are girly! I hope that those of you that love boy layouts enjoy seeing this page!
The cut file is a free one from Paige Evans, and it was perfect for my title because I could make it work for a boy themed layout. I used a large piece of Just Chillin’ for the cloud background, and positioned the horizon line of the sun along the line of the paper.
I backed the cut file with Sunny Days, Summer Lights, and Fun in the Sun. The gold glitter paper that I used to back the ampersand is from my stash.
I used art crayons to add some interest behind the words of the cut file in matching colours. It’s very subtle, but definitely adds some interest. I kept my embellishment very simple, and tried to avoid girly icons and flowers (although I did use one Puffy Sticker flower).
Hello crafty friends, today is throwback Thursday! I knew I wanted to use this gorgeous paint brush cut file from Confessions of a Paper Addict and my layout flowed from there. I dug deep into my CVS stash and realised that although I do not have much of collections left I had enough using a large cut file.
I used a wood grain paper to cut the handles of the brushes and to add visual interest I used a rose gold glitter paper which contrasted wonderfully against the black. Instead of using the cut file paint brush strokes I used the clear stickers paint strokes from various older collections. I love how they turned out!
I then embellished each paint brush by adding floral clusters tucked behind the wood part of the paint brush. I added butterfly flairs, and clear stickers in a way they look like they are flying into and away on my page.
I next added my photo with foam tape which is a 3.5 x 3.5 inches.I added it off centre to the middle paintbrush. To frame may photo I found two large die cut butterflies at tucked under my photo each side. I found some black phrase sentiments and chose a relevant one to my theme and added directly under my photo.
I found a die cut title and added with foam tape, just above it a added another phrase die cut as my sub title and to finish off I added a clear sticker camera.
Since I had every clear sticker sheet out that I owned I went back and added some more clear stickers, the mixed media strokes. I found another flair with Life is Good which was in a orange tone so blended perfectly with the colours of my layout.
I do love how this turned out and enjoyed the challenge of using my stash and older CVS collections/embellishments. Clear stickers have always been a favourite embellishment for me and they really added beautiful colour and texture to my layout.
Thank you for stopping by today and have a wonderful week!


 I choose different design papers from the “These Days” collection and punch out different leaves from the papers. In the center of the leaves, I stitch a border with gold thread and used my sewing machine for this.
 I wrapped embroidery thread around my layout several times. I placed my picture on top on the embroidery thread and made a large cluster with the leaves. I chose different die-cuts, stickers and flowers and decorate my layout with these gorgeous embellishments.
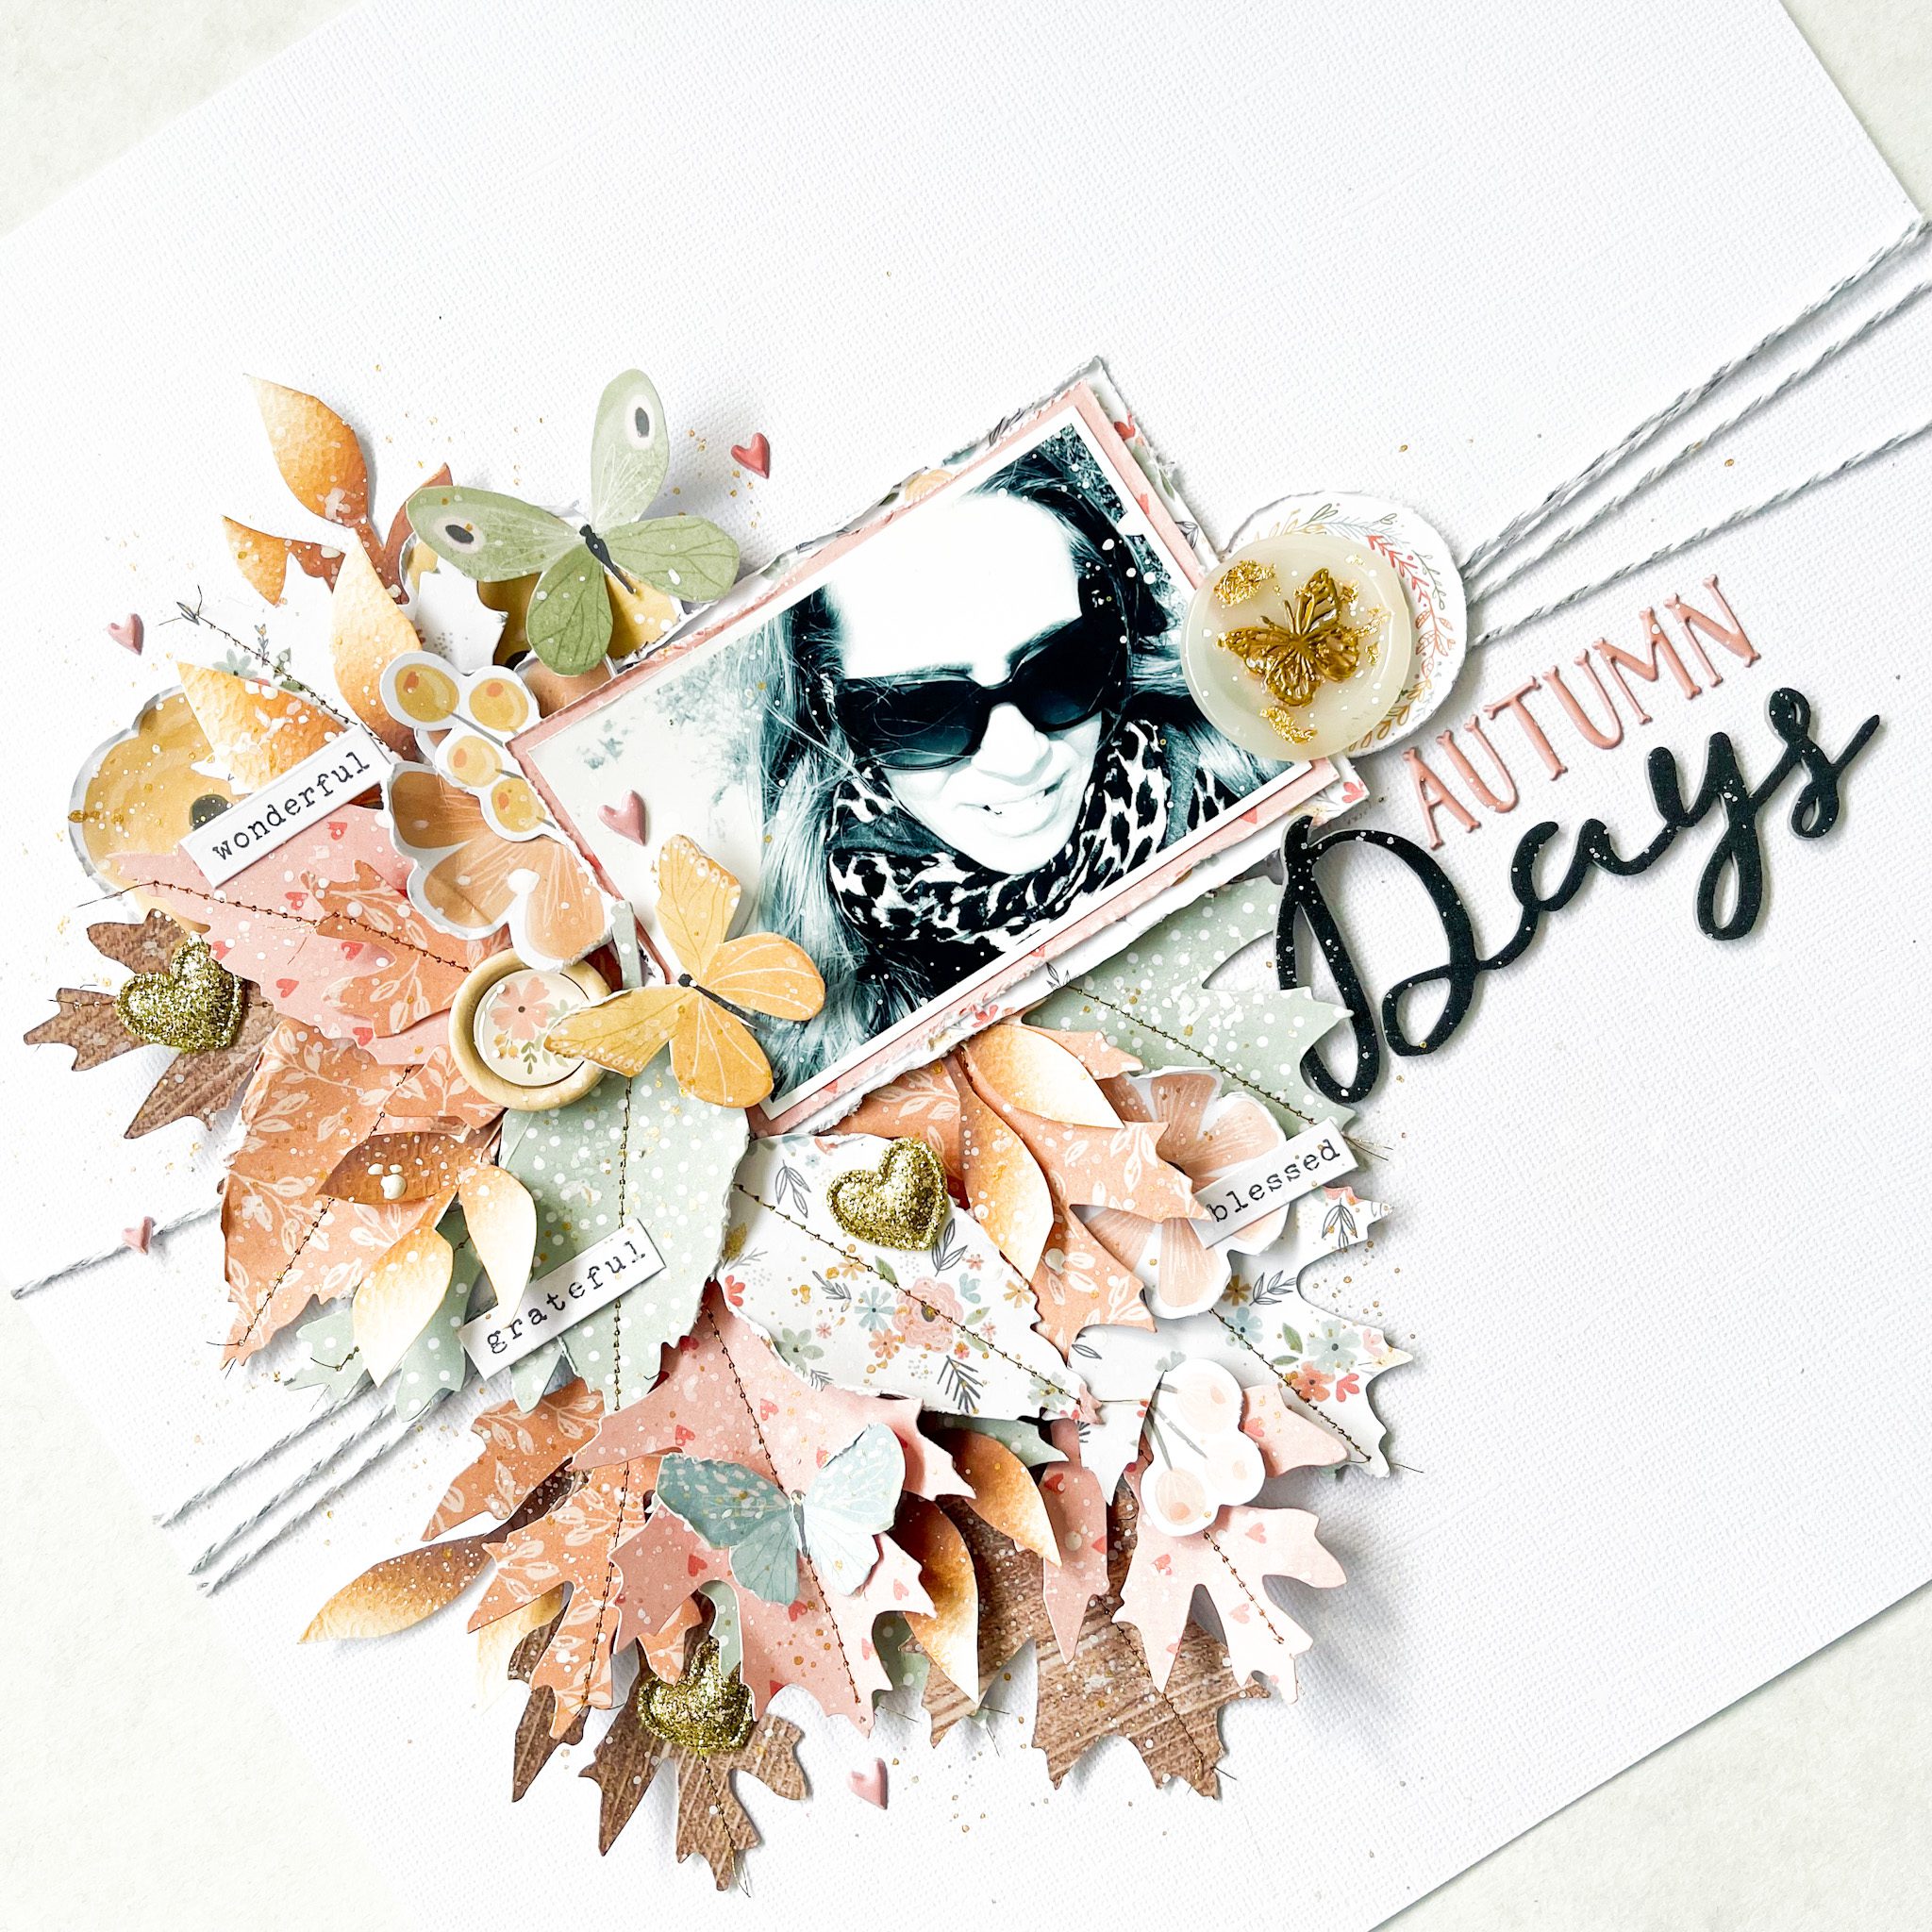
 Well that’s it for today paper friends and I’m grateful you stopped by on the blog to see what I created with this beautiful collection. I hope I was able to inspire you with this Autumn layout.


