December Daily Days 1 & 2 | Joyful Collection | Melissa Vining
Hi everyone, its Melissa here and I’m back to show you the first two days of my December Daily in my handmade Traveller’s Notebook. As I shared in my last blog post I’m creating my entire notebook with the gorgeous Joyful collection, which is so perfect for my summer photos! We also moved into our new house a month ago so this album will be so special to document new memories in our new town.
My Day 1 is always my kids with their Advent Calendars, and this is a tradition that we all love! Unfortunately Sam had already gone to school when this photo was taken. The large photo is of my 12 year old daughter Azaria wrapping gifts at church for our Christmas Boxes that we give to nominated people in our community. I kept things very simple with small areas of embellishment, and focussing on the photos and journalling.
 I cut apart Advent which is perfect for numbering each day. I distressed the edges and outlined the square with my journaling pen. I can’t add any bulk or dimension to my album so outlining is a great way to add extra detail. I backed my photo with a paper from the A5 Paper Stack.

Day 2 was a super cute photo of Brielle (7) with her advent calendar and Azaria and I late night shopping. When I made my Notebook I included a piece of Deck the Halls paper to break up the white pages. For my large photo I cut a banner from one of the papers from the A5 Paper Stack and outlined it. I embellished with a fussy cut flower, a Puffy Star from the Puffy Gold Title Stickers, and a phrase from the Accessory Stickers.

The photo of Brielle printed with a small mark on the top of her hair. I covered this up with a santa hat from the Die Cut Ephemera. It looks so adorable!

For the second page I lined everything up centrally. I embellished with an ephemera tag and an accessory sticker. I love how this page looks with the patterned paper as the background.

I hope you enjoyed seeing two of my pages! I’m looking forward to creating this album now that the pre-Christmas craziness is over!
Take care
Melissa xx
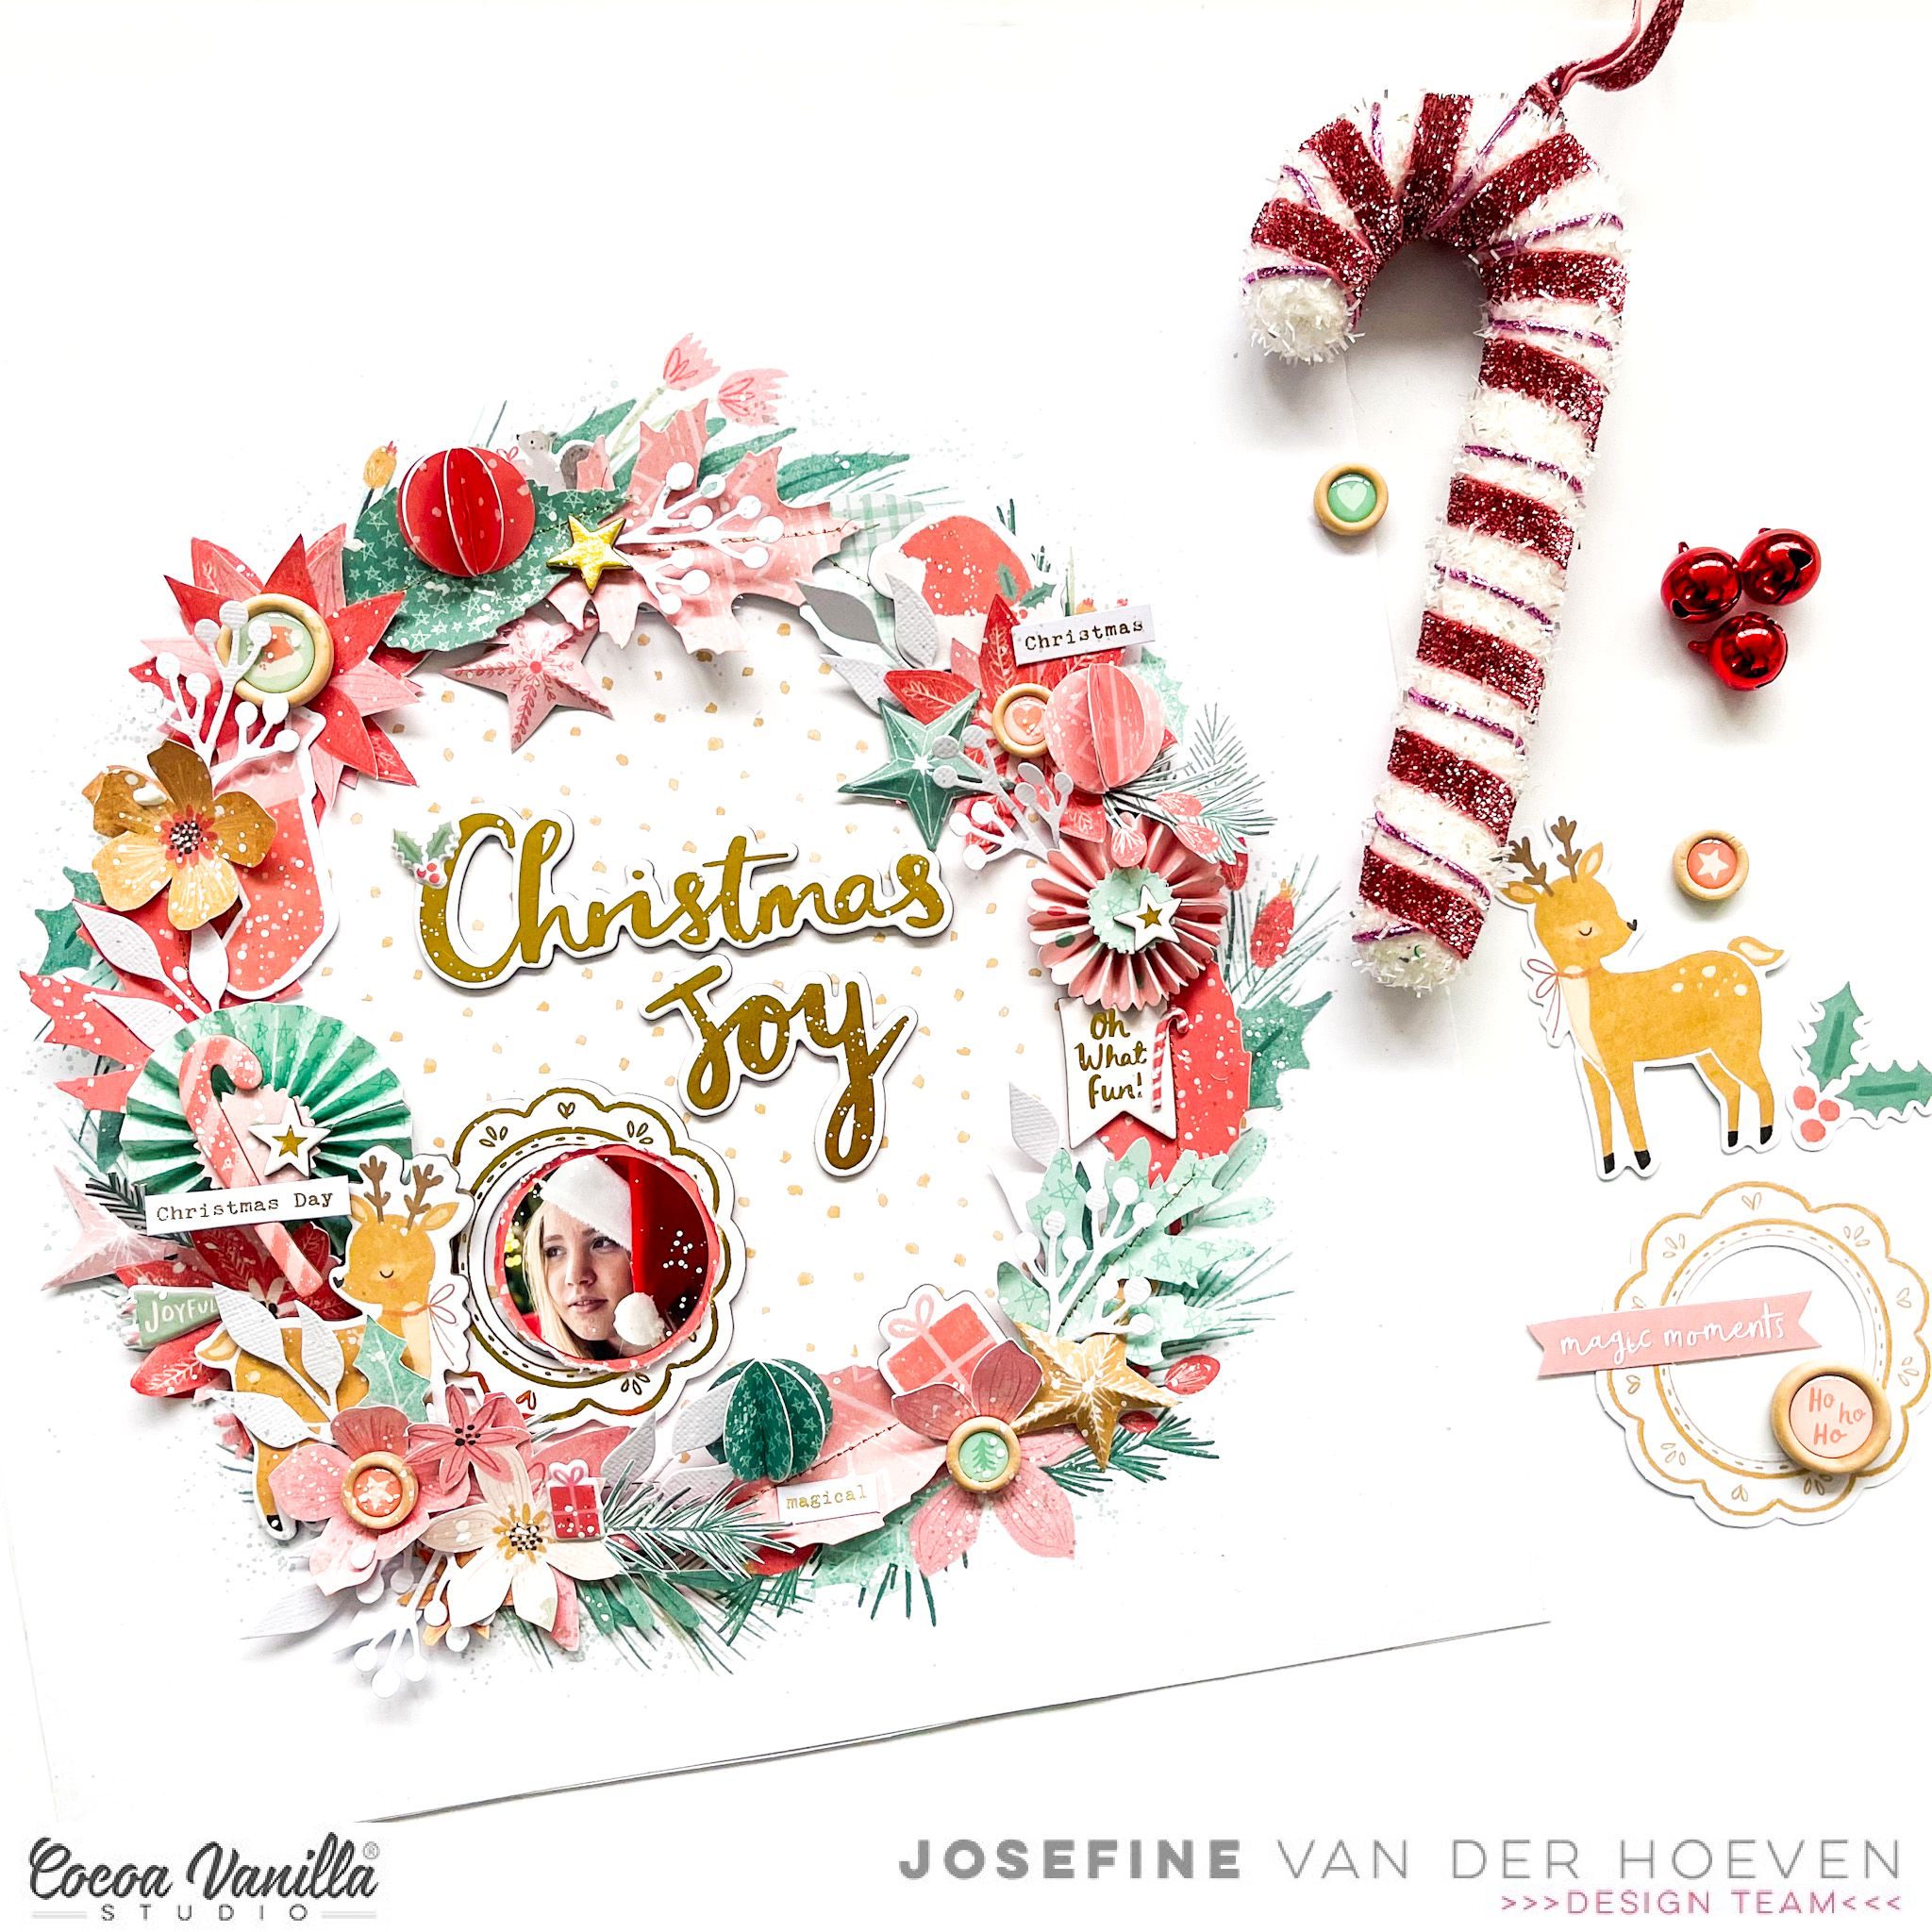 I used the beautiful designer paper with the Christmas wreath for this layout. Love, love, love the beautiful wreath design and also so easy to use with all the great embellishments. I cut the center and glued a design paper behind it with golden dots.
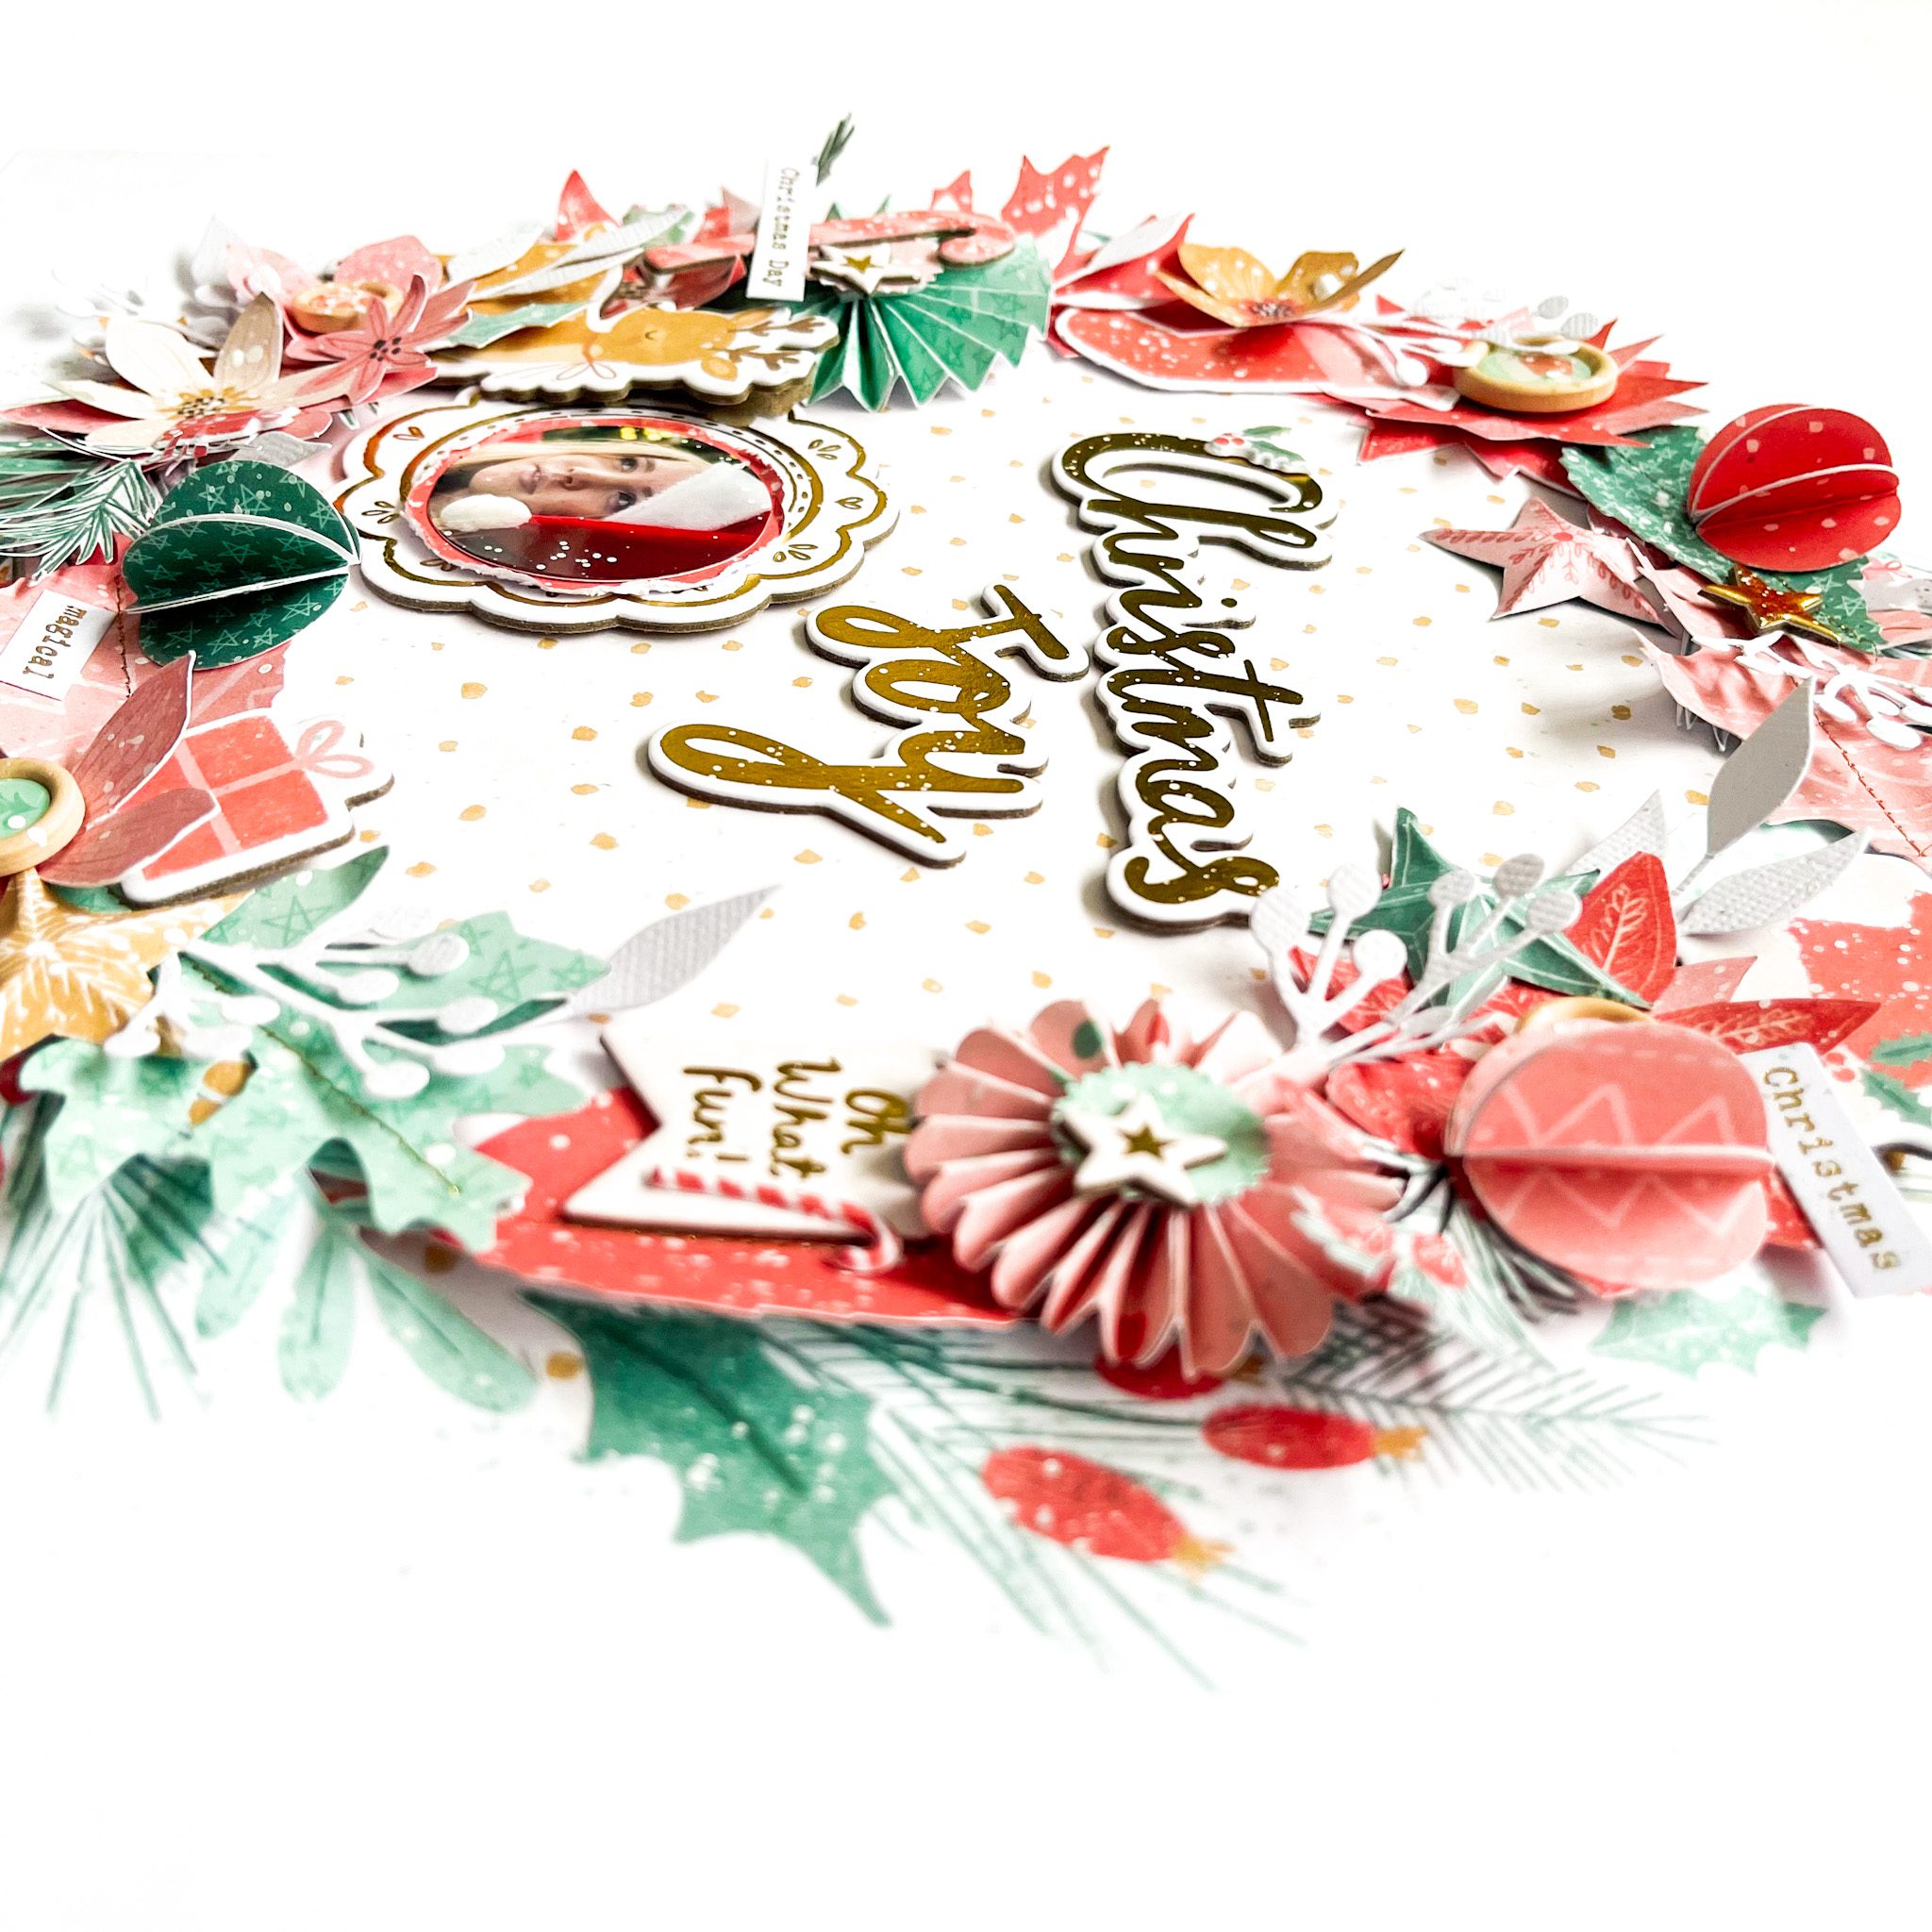 I made two rosettes from the beautiful design papers. I punched out several leaves and stitched them with gold thread. I put everything in a wreath on the design paper and used adhesive tape and 3D foam. This way I create different layers. I cut different flowers from the design paper and put them between the leaves. I used die-cuts, stars, chipboard figures and puffy stickers to decorate my layout.
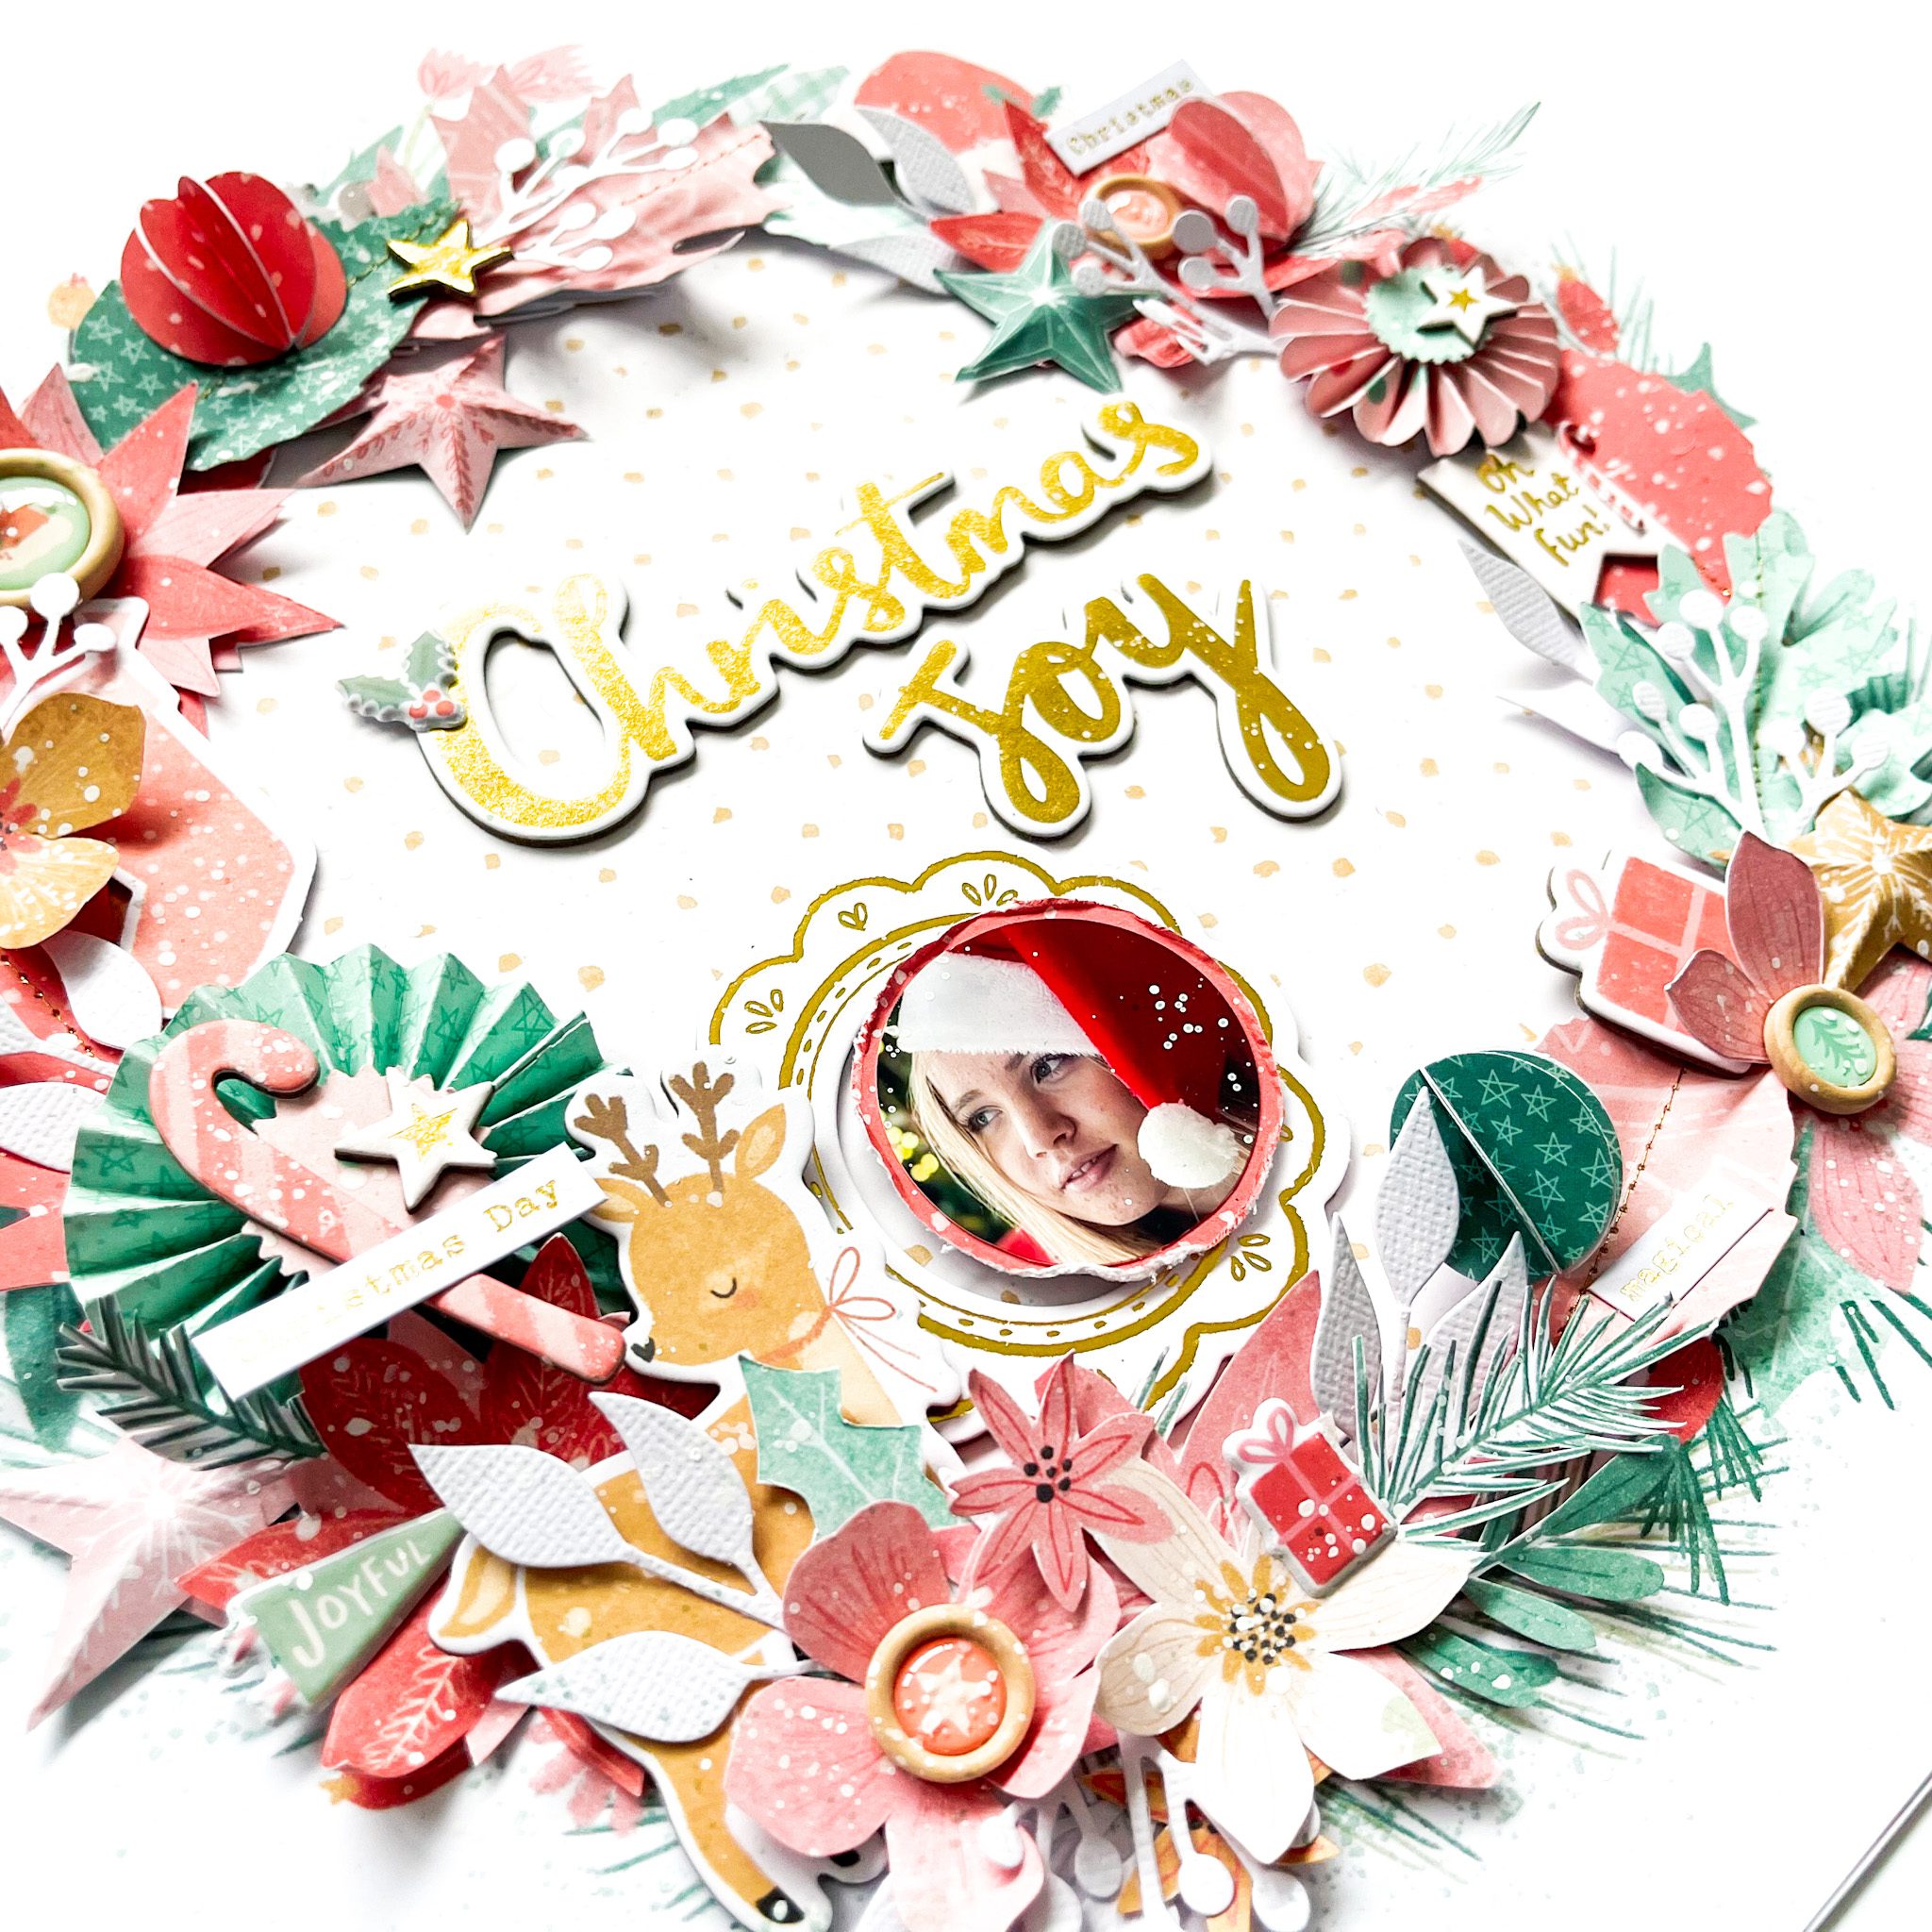
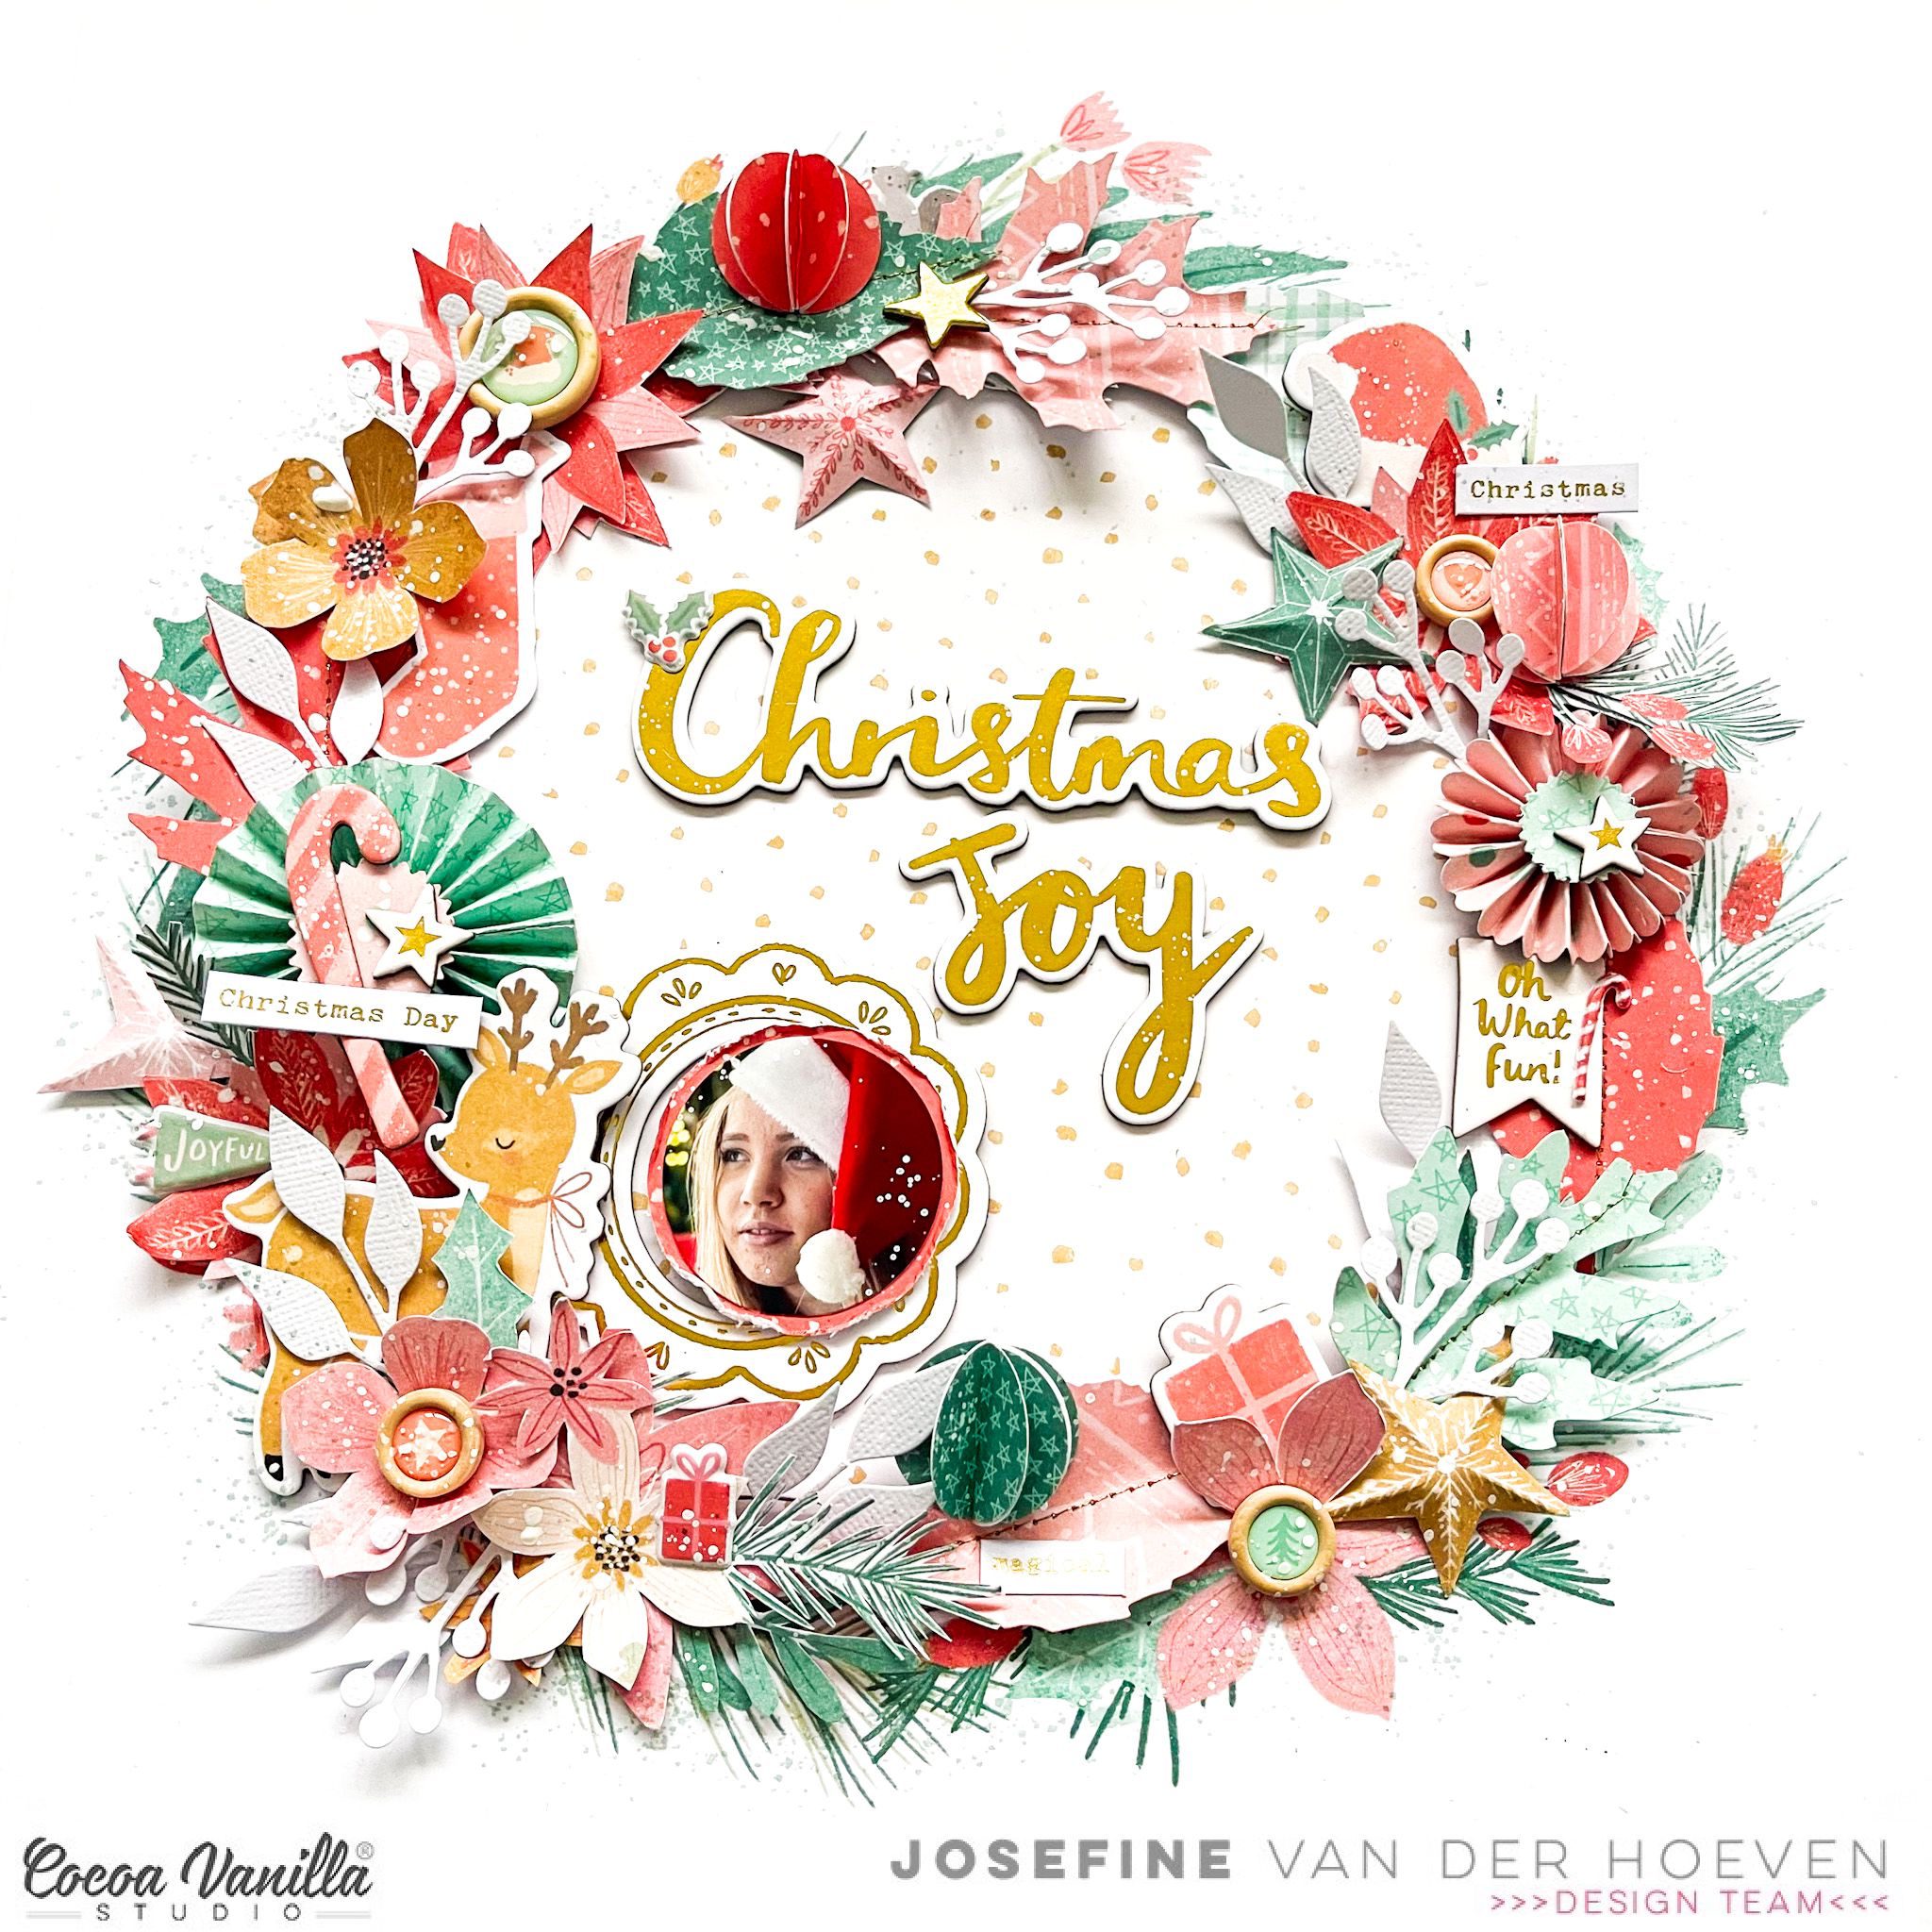


 I love the magical atmosphere during the month of December! Everything feels so much nicer and always look forward to spending the Christmas days with my loved ones. I made a mixed media background with the Distress Oxide color “flamingo kitch” by using a background stamp. I make various prints on the white cardstock and when the mixed media background is large enough I made some splashes with the pink Distress Oxide color.
 I stitched a pattern on my layout and used two colors of embroidery thread and some glass beads. I love how festive it looks. I cut out a picture of my daughter into a circle and also cut two circles from the beautiful design papers of this wonderful collection. I stitch the edges of the circles with gold sewing thread. I place the circles in the center of my layout and now it’s time to decorate.

