Together | Storyteller Collection | Danni Visser
Hi Cocoa Vanilla Studio fans! Danni here with another layout using the gorgeous new Storyteller collection. Are you enjoying this beautiful new stack of goodies as much as I am? This collection is so easy to work with and so versatile, I am having so much fun with it!

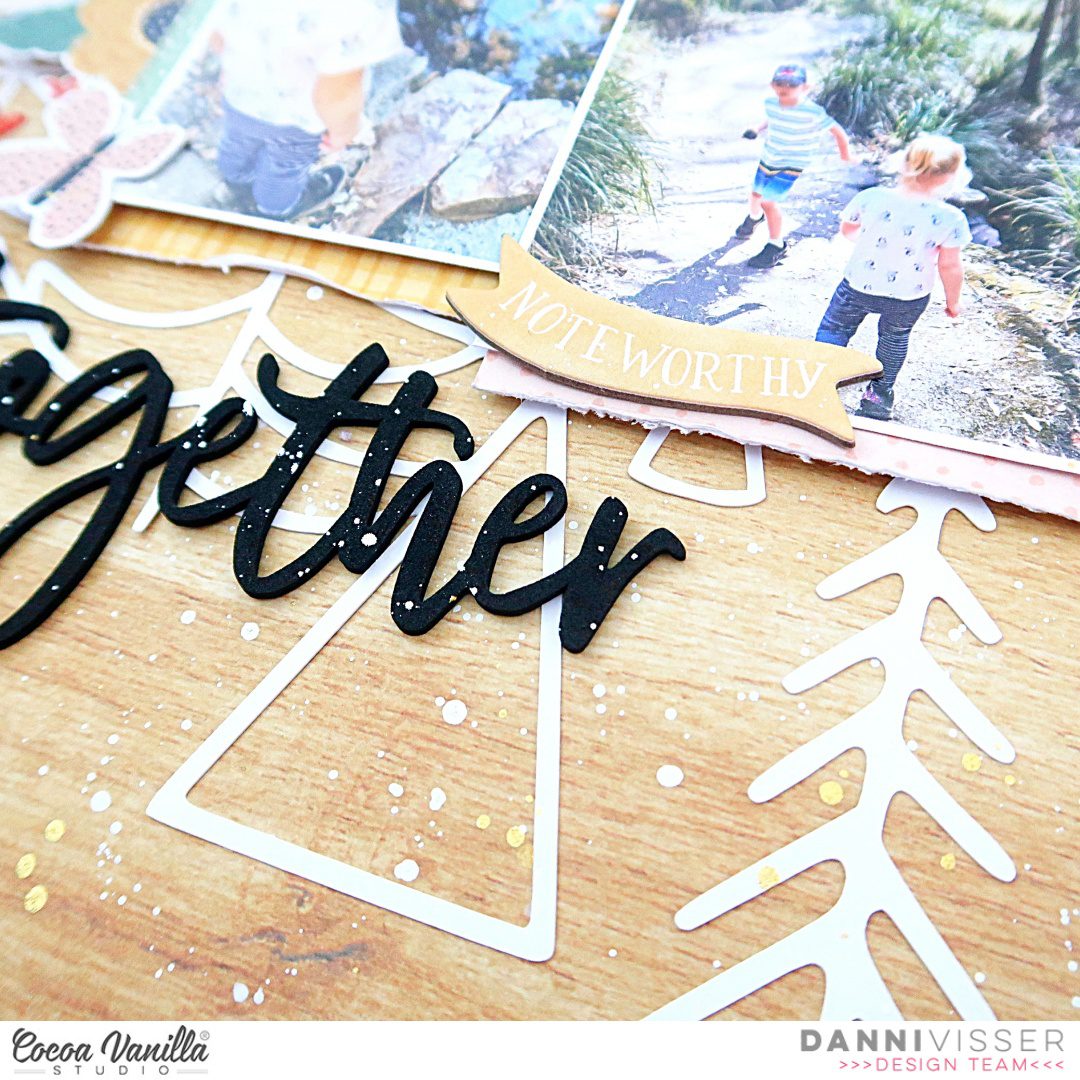
I was rummaging around in my craft room this week (trying to clean but actually making more mess, who can relate?) and found a cutfile in drawer that I had cut ages ago but never gotten around to using. It is meant to be a Christmas cutfile I think, but it immediately made me think of a recent hike my family took in the mountains. I found some photos and decided the tree theme would work perfectly for a layout.
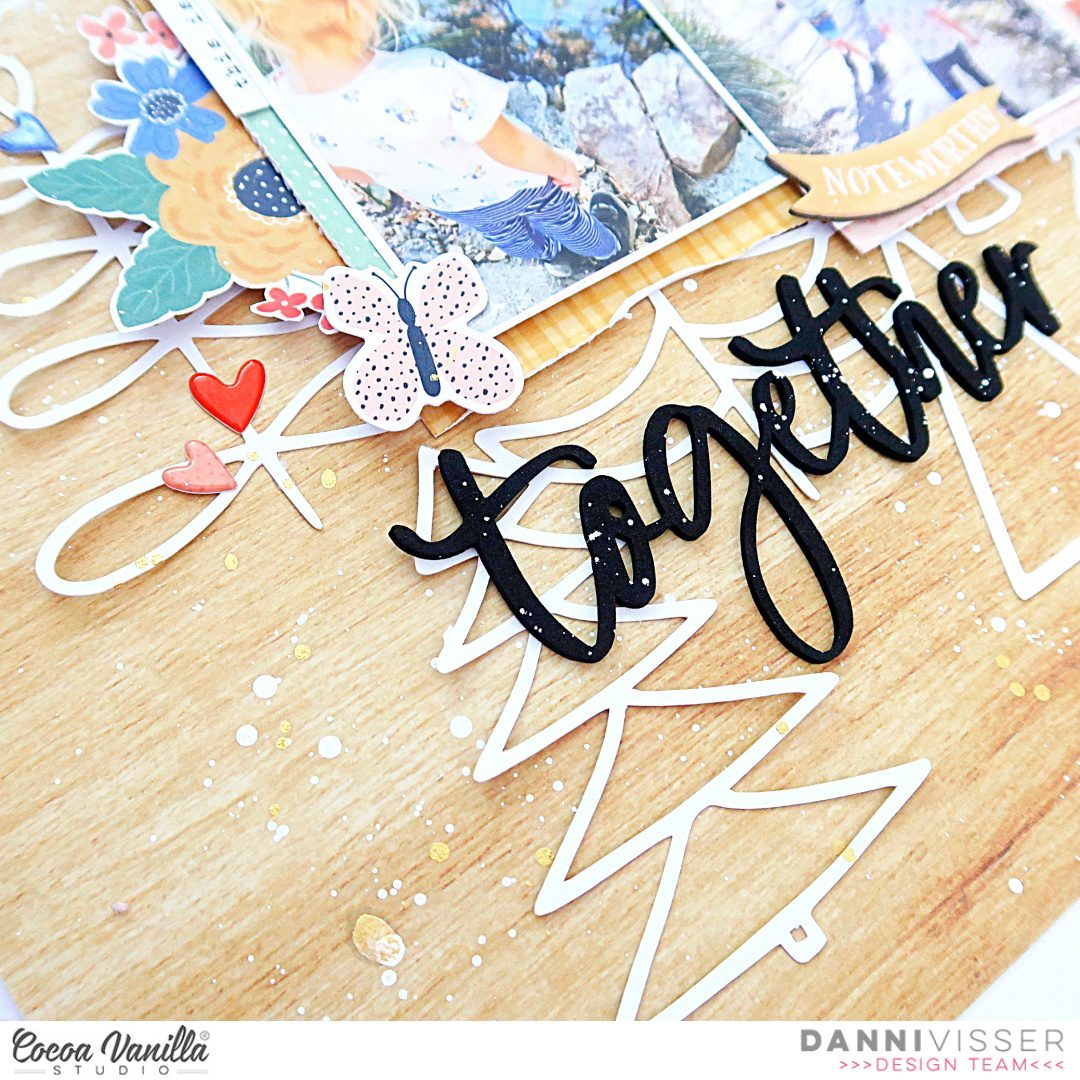
I started with the woodgrain side of Cross It Off 12×12 patterned paper as a background. I love a woodgrain paper at the best of times, and this light toned wood texture is perfect for a hiking layout. I added the cutfile on top of the patterned paper, deciding not to back it with papers because I like the clean look of the white on the woodgrain. I used small dots of glue at the trunk of each tree to ensure the tops and edges lifted up from the page to add dimension.
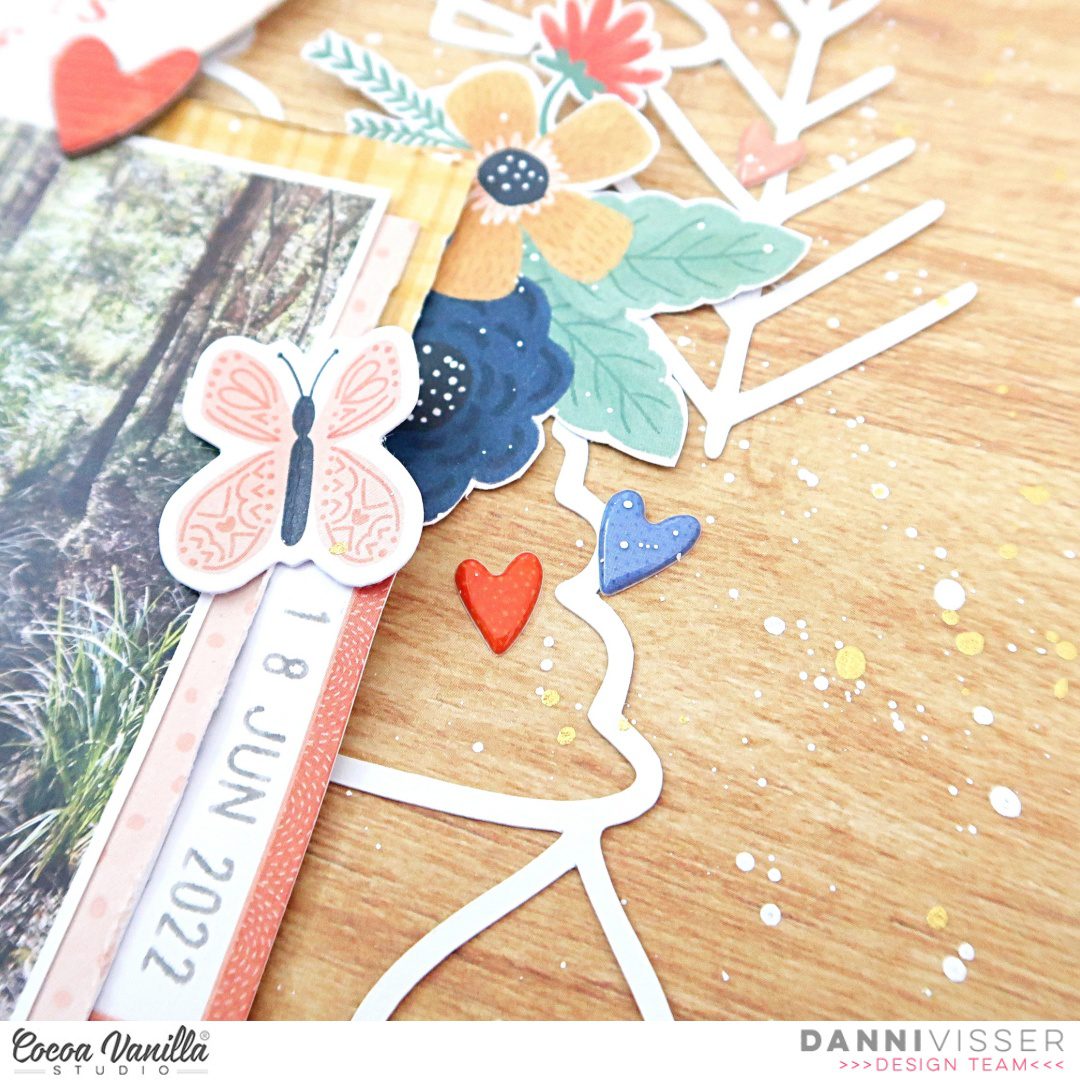
Next I matted my two 3x4inch photos with the double sided 3×4 cards. I love the patterns on these so much, and they are the perfect size to mat photos with. I also cut the ‘Love this life’ heart shape from one of the journal cards before using it as a mat, saving waste. I then added a strip of yellow to the photo mat using the A5 paper stack patterned papers. Once my photo mat was done I started to think about a title. I have been so excited to use the stunning foam title stickers so I chose ‘together’ and added it just below my photos. The script font of these is absolutely beautiful! I also took the heart shaped piece I cut from the double sided 3×4 cards earlier, and tucked it behind my photos at the top.
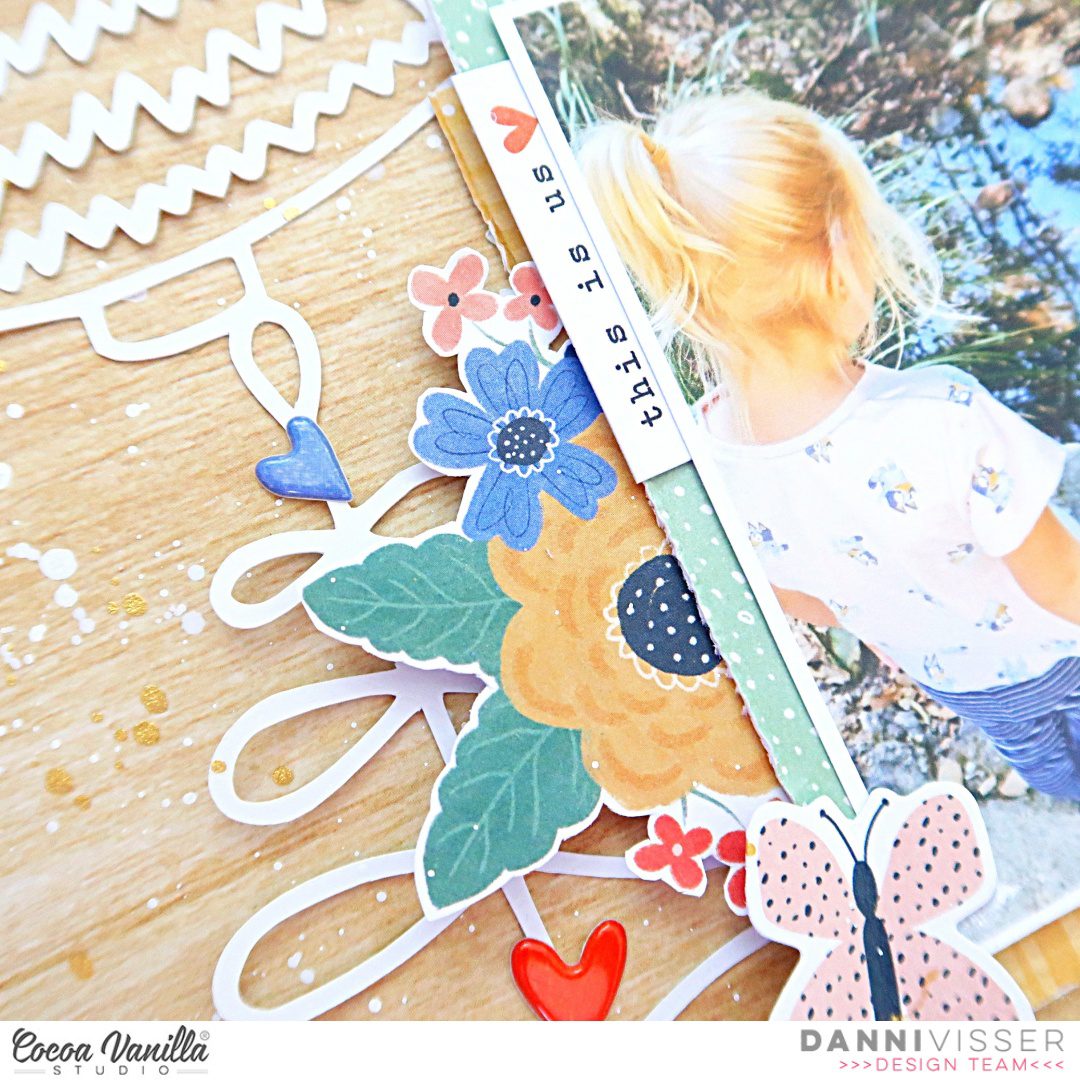
Next came the embellishments! I took two of the hearts from the chipboard stickers and added them around the larger heart, followed by a chipboard banner at the bottom of the photos. I like how this bridges the gap between my photos and main title. I stamped the date on a label from the accessory stickers and tucked it into the side of my photo mat. I also took an accessory sticker tiny word phrase and added it to the opposite side for balance.
I reached for the die cut ephemera next and was absolutely spoiled for choice! I chose two of the large flower clusters and added them to either side of my photo mat. I also chose two of the sweet little pink butterflies and added them to the flowers, bending the wings up for dimension. I wanted to bring in a couple more pops of the beautiful red colour, so I added a few puffy sticker hearts around the florals as well.
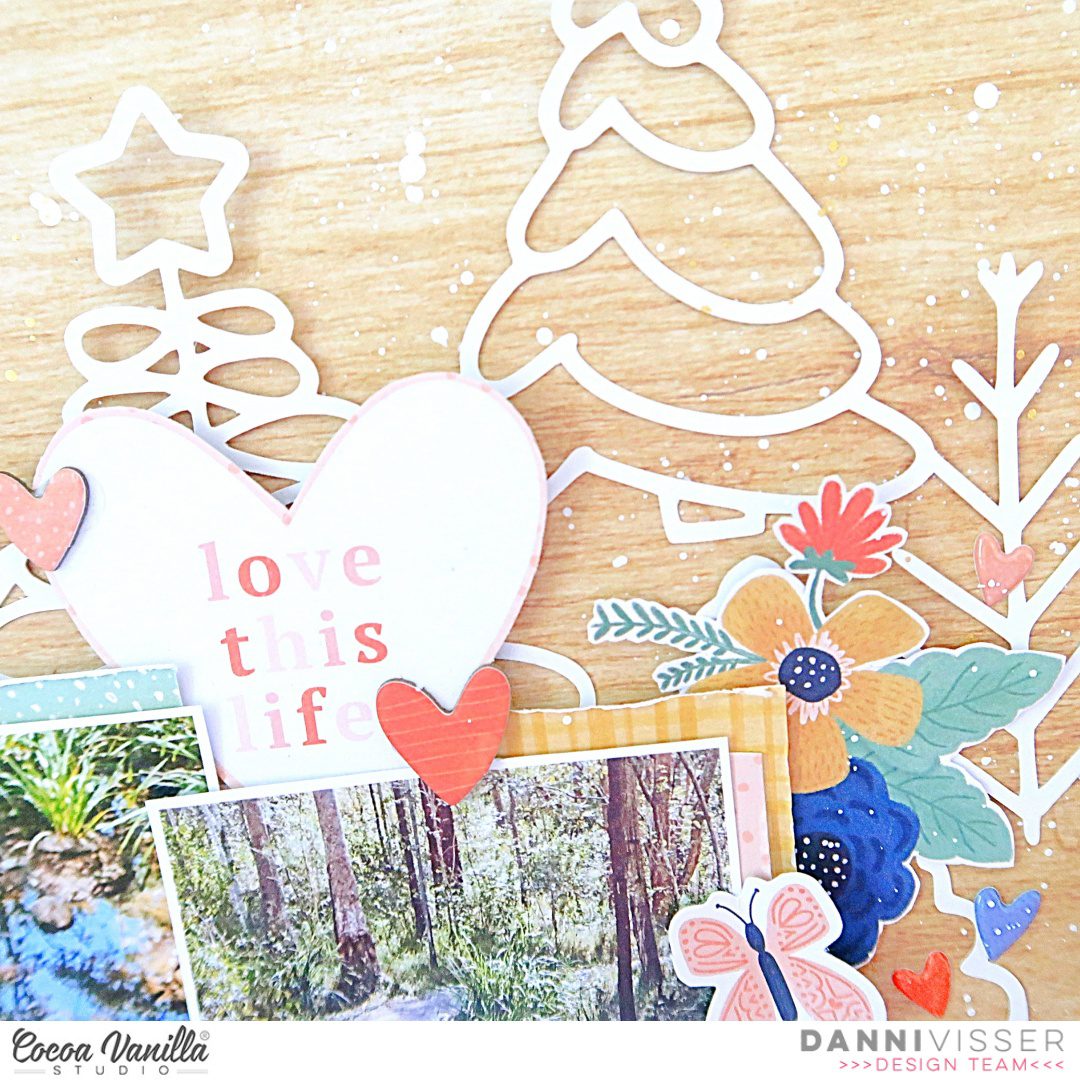
Finally, I added lots of splatters around my layout using a white acrylic ink and a gold shimmer mist. I love how white and gold look against woodgrain; very neutral colours but they added such a pretty detail. I hope you enjoyed joining me for this layout, I had so much fun making it. Happy scrapping!
Danni x


 I placed my photo slightly to the right of the page using craft foam to add dimension. I layered some papers from the A5 paper stack underneath the photo and distressed the edges slightly to add some texture and to help make the photo pop! I searched through the pocket cards and found the perfect one to suit the photo of my son as photographer! I used craft foam to adhere the pocket card to the left of the photo. When I am placing elements on my page and I am not 100% certain about their position, I will mostly always only use a very small amount of adhesive in case I need to reposition anything or add an extra layer underneath. Once I am happy with where everything ends up on my layout, I add extra adhesive for reinforcement.
 Now I have the main focus of the layout sorted out, next I added a title. I went through the gorgeous black Foam Titles and chose the word ‘Smile’. I placed this word at the bottom of the pocket card to help tie the photo, pocket card and title together. At either end of the photo and pocket card, I tucked in some pretty flower ephemera pieces, I also added the little piece that says ‘Snap Happy’ to the right of my photo.
 On top of my photo, I adhered the ephemera piece that says, ‘The Story Behind the Photo’ and also a small phrase sticker from the Accessory Sticker sheet in the top right corner. I also added some more of the phrase stickers above the photo and below the photo, these are great additions to a page to help tell a story! Above the pocket card, I added the camera die-cut using craft foam. From this point, I decided to add my embellishments in a tone on tone look…I took some of the super cute heart die-cuts, enamel hearts and wood epoxy buttons and placed them on their corresponding colours.


