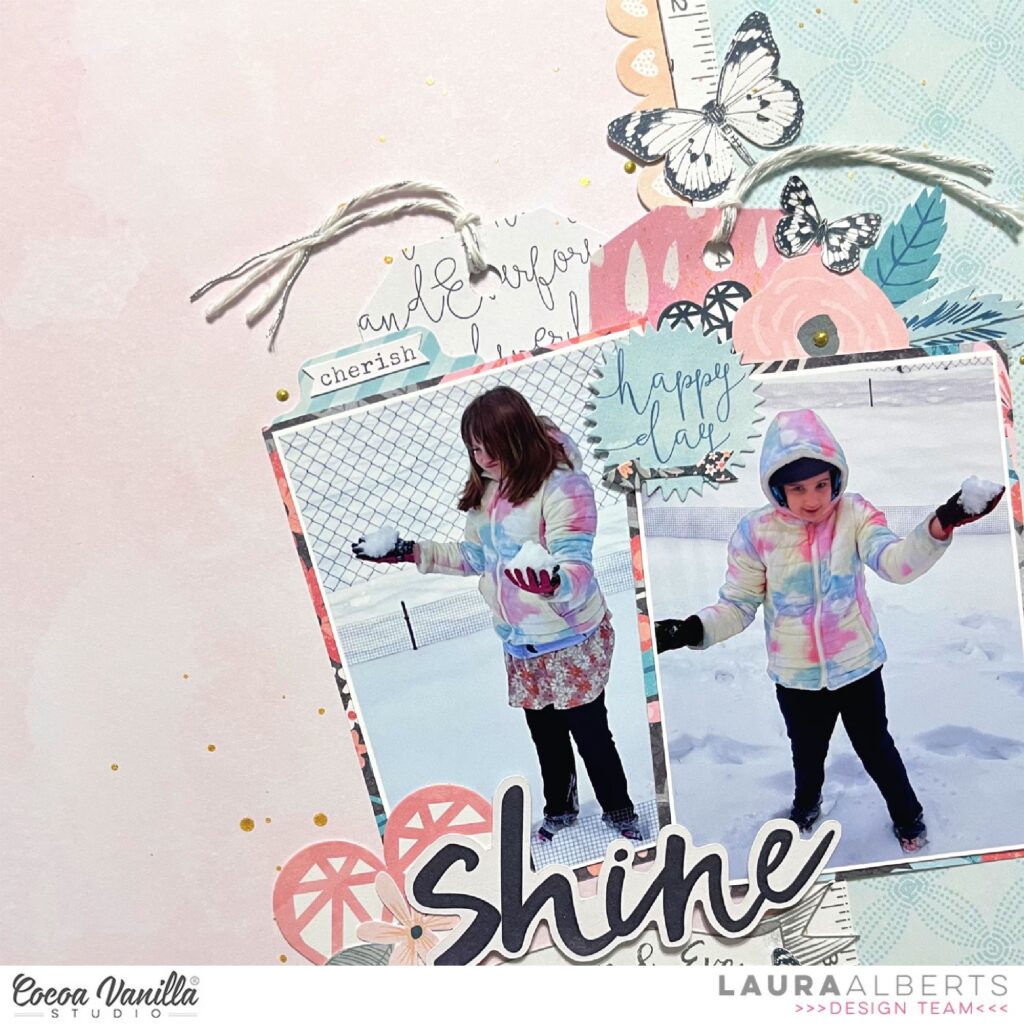
Hey y’all! Laura Alberts back again and I’m dipping into an OLD collection from 2016! After organizing my craft space, I found this collection and just had to dive in! It’s such a stunning mix of pastels and gray tones that were perfect for these first snow pictures. The title ephemera is from Midnight, but the rest is all from Love Always.
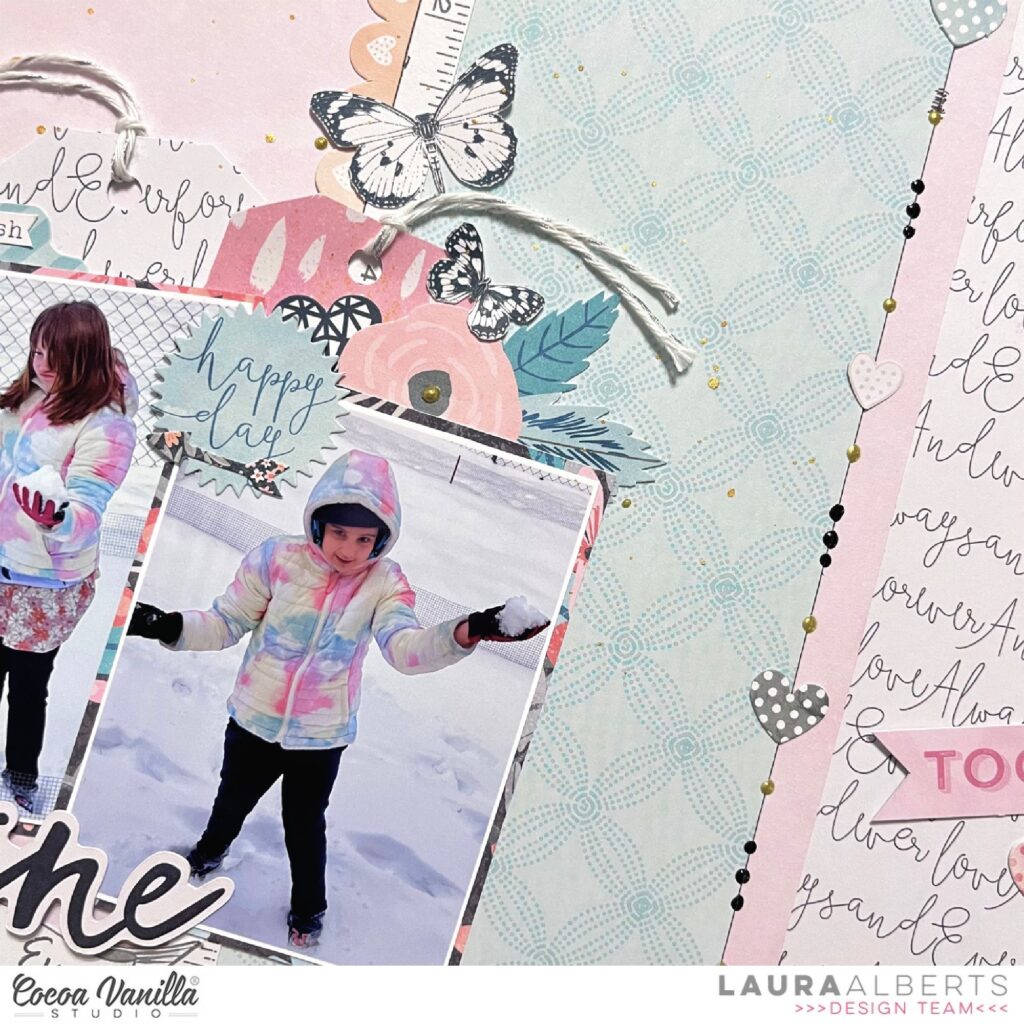
I started with this beautiful mixed media-style background paper, a strip of teal, then used ephemera pieces to create a border in between. The Nuvo drops and ephemera hearts along the right side gave this layout a fun pop of interest that it needed.
I cut out two tags from the patterned paper and layered them behind my photos, then built up two clusters that run diagonally through the photos. The cluster on the top leans to the right and the one on the bottom leans to the left. This guides the eye through the layout, and added to the butterflies, creates a sense of movement on the page.
If you’d like to see how “Shine” came together, be sure to check out the process video below!
It’s Tarrah back with you and today I am sharing a new layout created using the awesome Great Escape collection! I can not get enough of this collection! I think this is my 6th layout using this awesome collection and I still have heaps of ideas flowing! Talk about value for money! I pulled out a super cute photo of my youngest son from when he was about 3 going for a ride in the car, I just love the thumbs up gesture- so cute!
I chose to work with a darker background paper choosing the ‘Journey’ patterned paper for this layout. I knew I was going to be adding the white cut file title and I really wanted that to pop off the page. The cut file I chose is from CUT to YOU, I cut out the title in white and cut out the road in black and backed it with some white cardstock to make it resemble a road as close as possible! For the large open letters in the cut file I took the A5 paper stack and choose various papers to add in the open holes. Once the cut file was all backed, I adhered the road down first using regular adhesive and then for the title, I added craft foam and then adhered it down in the centre of the page, I love adding craft foam so that it creates some dimension on my layout, this also allows me to tuck in bits and pieces where I want to if I feel some places need extra detail.
I added my photo on the right side, tucking it in behind the ‘D’ in Road I would normally layer a paper or a die-cut underneath my photo but this time I left it free of these. Once I was happy with the photo placement and the title it was time for my favourite part and that is embellishing! Below the photo I added a chipboard piece and I also added the flag chipboard piece overlapping the road and coming out of the ‘A’ in Road. The So Much Fun chipboardpiece I added on top of the cut file and also added some of the phrase stickers from the Accessory sticker sheet to help tell my story.
I took a few die-cuts from the ephemera pack and also added these around my page too, I love finding the perfect piece that is the perfect shape or perfect colour to fit in spots! One of the many things I love to do when I create! I like to balance my pages and describe my style is very clean but colourful too!
Some of the smaller embellishments like the puffy shapes were some of the last things I added to my page, along with stamping the date stamp which is one of my go to things on every page! Do you have something you like to include on every project? Kind of like a signature? Lastly I trimmed down the ‘Journey’ patterned paper to roughly 11′ x 11′ and matted the entire layout on white cardstock. I then machine-stitched a border using black thread around the entire edge of the layout.
Thanks so much for stopping by the Cocoa Vanilla blog today! I hope you are inspired to use your Great Escape collection and create some adventure layouts!
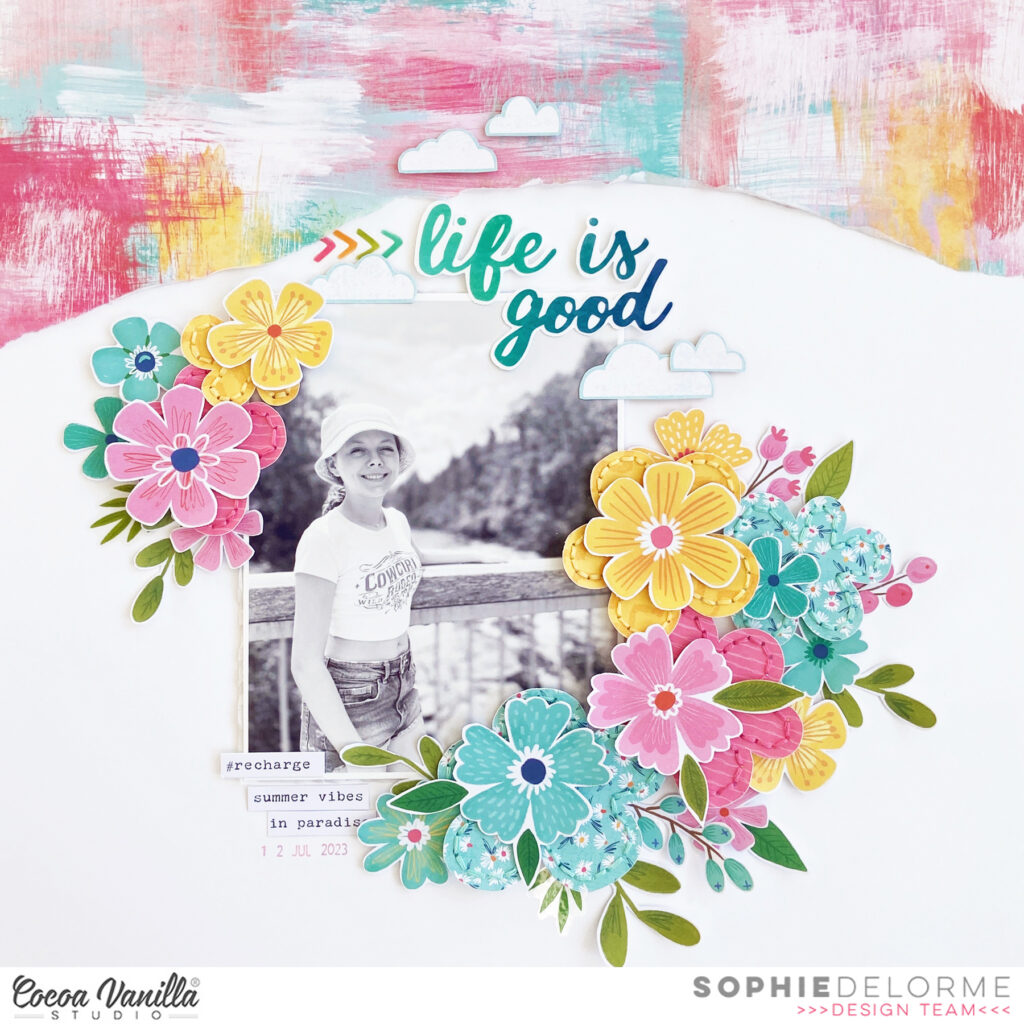
It’s Sophie with you today and I am thrilled to share my layout inspired by the May challenge!
The challenge this month is called “Flower Frenzy”: Using flowers as the main design element of a layout… The more the better…!
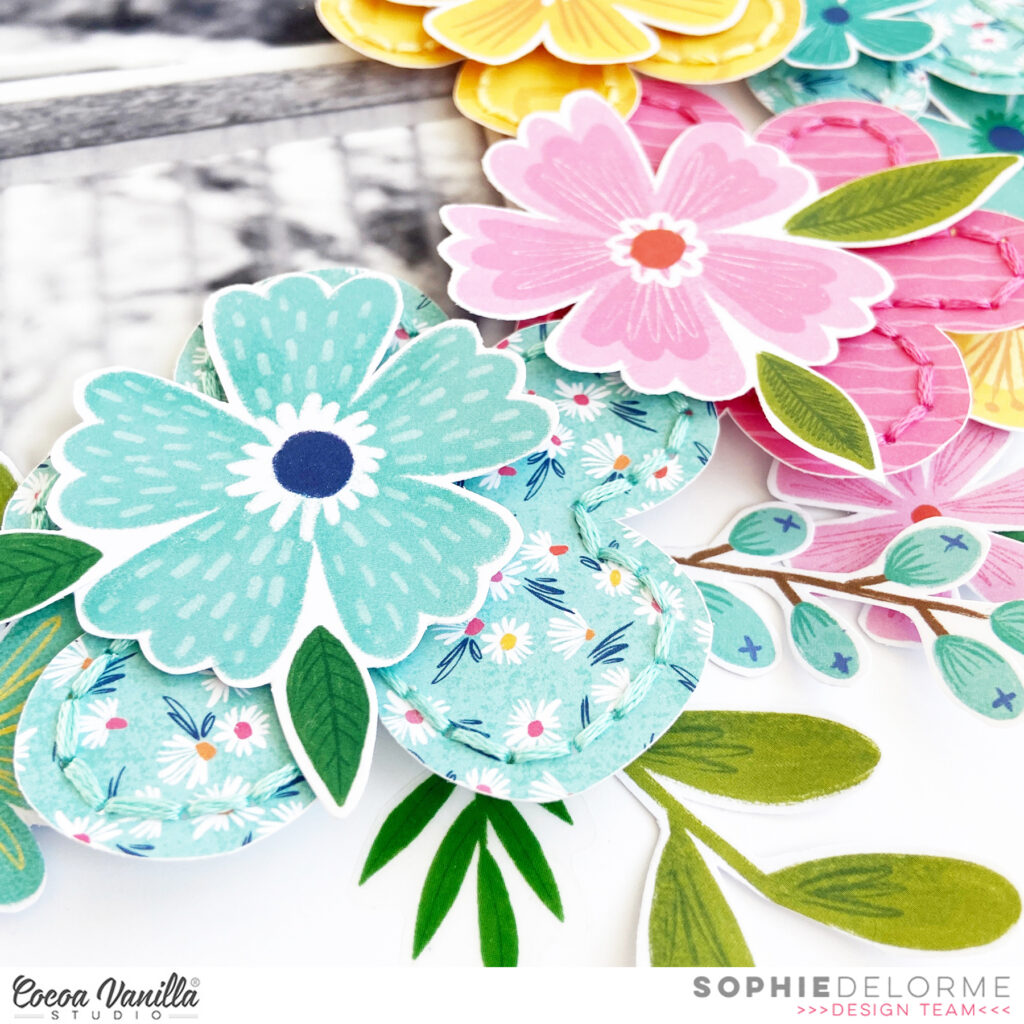
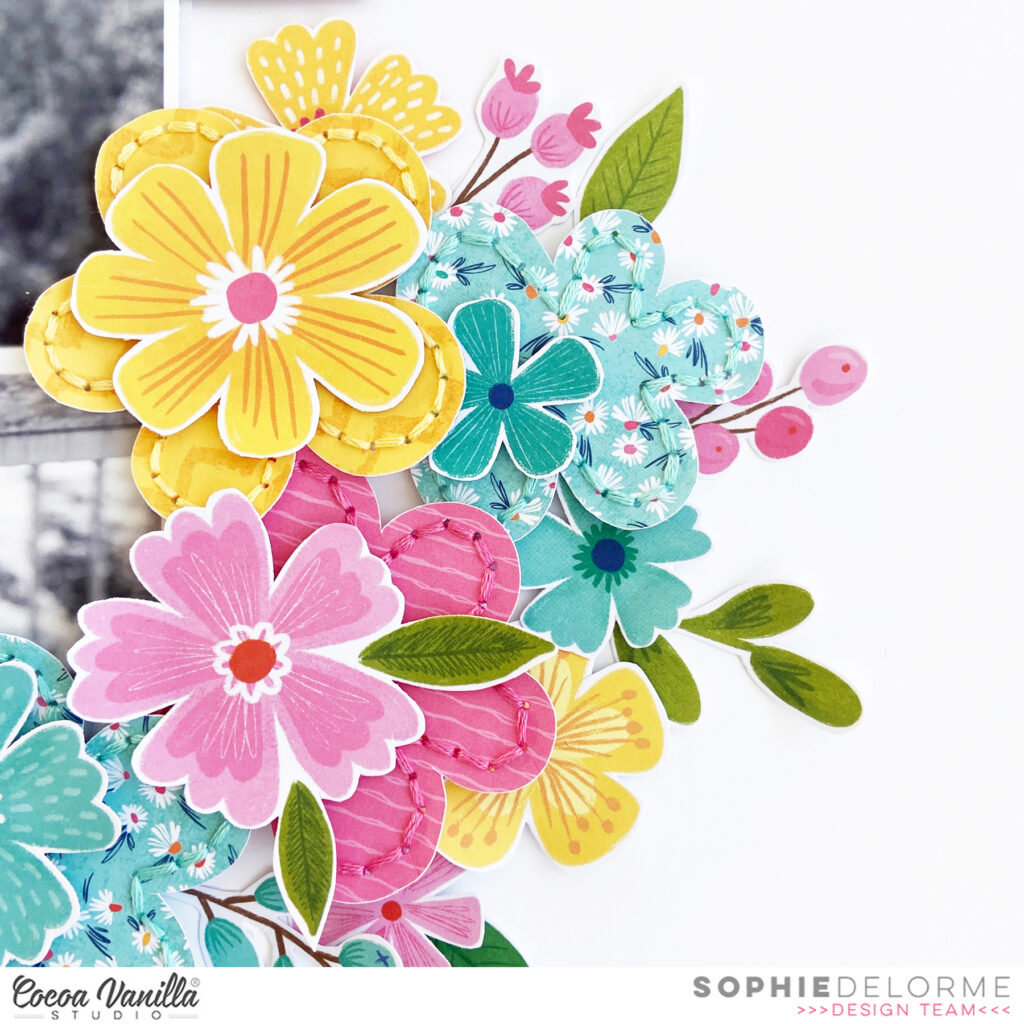
I used the Sunkissed collection for this colorful page and went with big floral clusters all around my black and white photo.
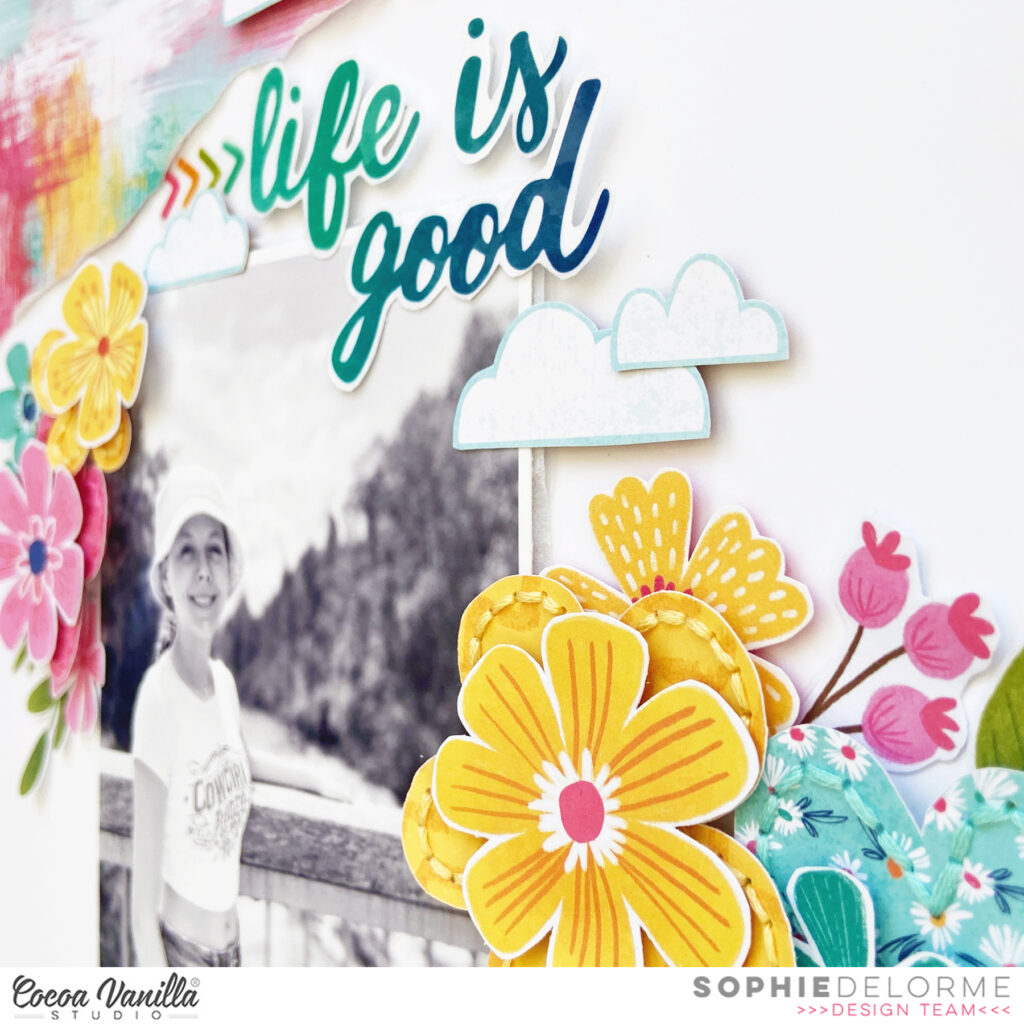
I drew a few flowers on three A5 patterned papers, cut them out and hand stitched on each petal. They served as a background for the flowers and leaves that are from the Sunkissed floral ephemera pack.It adds texture and depth to the clusters, and even though it’s very bold and colorful, it doesn’t compete with the black and white photo, that still stays the star of the page.
I teared a big chunk of the “Feelin’ Fine” paper and placed it on the upper part of the layout. I fussy cut a few clouds out of the “Just Chillin’” paper and used some Clear Stickers for my title.
Here are more close-ups:
It’s a very simple page with only beautiful florals as embellishments, and I love it!!
I hope you do too!!
You have the whole month of May to participate in this floral challenge. You can use any Cocoa Vanilla Studio collection, as they all have a huge amount of gorgeous flowers that can be used.
Welcome everyone. It’s Anna here with another page made with newest Cocoa Vanilla collection called “The great escape”. To be honest, I am more beach girl and trails, tents and campfires are not my first choice when it comes to spending free time. I do not have many photos from the wild to scrapbook with this line but it doesn’t stop me! Having fun has many shades. This time I picked two photos taken during one of the rides in theme park. Colors on them match “The great escape” perfectly.
For this page I created a little scene with a guidepost. I was inspired by one of the ephemera pieces to make one. I started with splashing white cardstock with light blue mist. Next step was to create a ground for my sighpost using two papers with green patterns: “Journey” and “Direction“.
Wooden pattern on the sighpost is from the older “No limits” collection. Yellow one is a piece of “Horizon” paper and orange one is “Happy camper” paper. Words on the sigh are made with alpha die and “Starry night” pattern. White “sky” felt very empty so I added few whimsical clouds hand cut from “Adventurer” paper.
It was time to add photos. I backed each of them with a piece of blue pattern paper from A5 Paper Stack. As usual, I embelished the area around the photos using bits and pieces from Ephemera Pack, elements cut out from “Wild life” paper and stickers from Accessory Stickers sheet.
As always I finished my pages adding tiny Puffy Stickers. They are my favourite final accent.
How do you like my idea for a simple, handmade scene? You can change things up by adding more words to the pole, changing theme from landscape to beach or a city. It’s a really versatile type of design.
That is all for today. Thank you so much for spending your time with mee and see you in May!
Welcome to Cocoa Vanilla Studio’s blog, and how wonderful that you’re looking for new scrapbook inspiration. Today, I’ve created a new scrapbook layout using the amazing and colorful “Happy Days” collection designed by Cocoa Vanilla Studio. These vibrant colors really give your layout that summery feel. I love to use this photo of my daughter on the Beverly Hills boulevard and chose to use a cut file from the Cricut store, I absolutely love this Destination Icon. I thought it was quite fitting the theme.
I cut the file from the beautiful yellow patterned paper of the “Happy Days” collection and placed the photo in the open center. I stitched the edges with white thread, using my sewing machine. I positioned the Destination Icon in the center of the 12×12 white cardstock sheet, which I’m using as my base.
I created flower clusters on the bottom left and top right corners. I used the die-cut flower shapes but also fussy-cut some flowers from the matching patterned paper of the “Happy Days” collection. I also cut out some butterflies and placed them around the flower clusters. I selected some fun die-cut shapes like the flag and the camera and giving them a place among the flowers.
For the title, I used the elegant puffy titles from the “Great Escape” collection. The title I’ve chosen for this scrapbook layout is “Road trip to LA. I added some splatters with white gesso, which I mixed with water, and also splattered some of my yellow distress ink “Fossilized Amber.” around the flower clusters.
I hope I’ve been able to inspire you with this layout and look forward to seeing you again on the Cocoa Vanilla Studio blog next time. Have a wonderful and creative day.
Hey y’all! Laura Alberts here with a diagonal design using the stunning Heart & Home collection. I adored these frames and was excited to use them for my Thanksgiving photos with extended family. I started with a Bazzill navy cardstock and cut this lovely text patterned paper from corner to corner to layer on top.
Along the seam of the two papers, I stair-stepped my framed photos with the title ephemera in between to connect them. To fill the open corners, I added a combination of vellum and card stock ephemera flowers. Tiny, fussy cut flowers are sprinkled around the edges, along with Nuvo drops.
I added in a few bits from the cut-apart sheet and finished the layout off with these adorable puffy heart stickers and a sketchy border all the way around.
To see how “Our Family” came together, be sure to check out the process video below:
It’s Tarrah back with you and today I am sharing a new layout featuring the awesome Great Escape collection.
Last year I was lucky enough to go to Ayers Rock for work, this collection is absolutely perfect for my photo, the colours match so well!
Lately I have been creating layouts that mainly just use embellishments, with very little patterned paper added to my layout, this layout is one of these where I chose just 3 different papers however 2 of them were just small strips, 1 strip from the Adventurer paper and 1 from the Wild Life paper. My background paper is the Happy Camper paper. I created my layout on plain white cardstock and trimmed the plain cardstock down to measure 11′ x 11′, once trimmed, I adhered it to the Happy Camper paper. Next, I machine-stitched a border around the outside.
Next, I added my photo with a frame die-cut layered underneath, adhering it with some craft foam to add some dimension. On the left-hand side of the photo, I tucked in the tag from the Accessory sticker sheetand also another piece of paper from the Wild Life paper. I then added both of the strips of patterned papers to the bottom, placing them horizontally. At the top, I added some chipboard and another die-cut. I layered the banner sticker in the top right-hand corner of the photo too. On the right of the photo, I placed another of the stickers from the Accessory sticker sheet.
My title is one of the puffy title stickers, I placed this at the bottom of my photo. I placed some more chipboard pieces including the arrow on the left hand side and the road sign on the bottom left corner of the photo and the Let’s Go banner also from the chipboard pack. I also placed some of the puffy stars from the title pack around the layout. Lastly I added some of the phrase stickers from the Accessory sticker sheet to help tell the story, stamped the date stamp and sprinkled some black mist.
Thanks so much for stopping by the Cocoa Vanilla blog today! I hope you enjoyed reading about how I created my layout as much as I enjoyed creating it.
Hi everyone, it’s Sue Plumb here to share another design team project with you. Today I am sharing a layout that has been inspired by our April “Chasing Rainbows” challenge. This month the criteria is to use a BIG rainbow as the main design element of your layout. Now if you know anything about me, you already know I am not great at following rules, which is why anytime I try to follow a sketch I end up somewhere completely different. So it should be no surprise to you that my interpretation of this challenge is a little loose. Here’s what I came up with…
I was determined to create a boy page for this challenge, so how do you create a boy rainbow? Simple! You just cut the pink and purple off! I really loved this striped Sunshine Lollipops paper from the ‘Happy Days’ collection so decided to use it as my big feature. I really wanted the colours to pop, so I first added some dark grey acrylic paint to my cardstock for my background. I wanted to keep the paper intact for my main feature, but add some extra interest, so I snipped a little along the line between each colour and used a narrow wooden skewer to help roll the ends up (some I curled a little more than others).
The photo of my boys was taken whilst we were out celebrating their 11th birthday, so using bright colours was perfect for the occasion. As the rainbow was to be the main feature of my page, I didn’t want to mess it up by muddling the colours at all, so I decided to use the tone-on-tone technique for my embellishments.
I used a mix of pieces from the Die Cut Ephemera and Floral Ephemera packs (yes, you CAN have flowers on a boy page!) as well as Accessory Stickers. I placed the embellishments on top of (or as close to) the corresponding colours on the paper and used foam tape to add dimension to some of them.
I really love the effect that using this technique gives, and it makes it super simple to decide where to place things, so putting this page together was a breeze! I finished off the page by adding the Chipboard Title across the top (I ADORE these chipboard titles – the font is so awesome!)
Thanks so much for stopping by today so I could share this with you. I hope I have inspired you to tackle this month’s challenge (who doesn’t love rainbows?!) You can load your entry over in the Cocoa Vanilla Studio Community group to be in with a chance to win. I can’t wait to see all those rainbows!
Hey CVS fans, it’s Kel back today sharing another layout using the new ‘The Great Escape’ collection. Im documenting some photos from a holiday in Fiji when I went parasailing with my family…lots of fun! Here is my page..
I started my design with layering up papers on the horizontal…papers I used were Horizon, Directionand Happy Camper. I wanted to then add a vertical element to my page so I cut one of the strips from the Wild Life paper along with the scallop design.. I love this fun piece!
I placed my photos along the horizontal, using a frame from the Ephemera die cuts to highlight my middle photo.
To the right of my photos I added some of the stars cut from the Star Gazing paper, along with some of the Chipboard Stickers. I also cut some of the word pieces and flag from the Wild Life paper.
I decided I wanted some more colour on my white cardstock so I used some ink to add some clouds. For my title I used the Puffy Title Stickers then cut some of the word strips from the Wild Life paper.
I added some of the stars from the collection around my title…
I hope you enjoyed my page and you are getting lots of inspiration from the DT using this new collection.
Hello everyone. It’s Anna here with another project made with brand new “The great escape” collection. This time I don’t have layout for you. Instead I wanted to share three simple, masculine cards. I don’t know how about you, but I always have problems making cards for men and I never have enough in my stash to give them away with gifts. I have plenty of pink and floral ones though… You all know I am not a master in making masculine projects at all so I like to keep thing as simple as possible. Simplicity is a key to success when you struggle!
Let’s start with the basics. To avoid looking for a matching card base, I like to make them with single sheets from A5 Paper Stack. I just fold them in half and it’s done! The best part is that pages are single sided so inside of the card is white and ready for your message. It’s not the first time that I am using this trick.
First card was inspired by one of the papers in A5 Paper Stack with a sort of a simple landscape. I trimmed it to the card size and added stitching around it. Next, I reached for my stash of old CVS Alpha Stickers from variety of collections and created a title “Sky is the limit”, which works great with the landscape. The last step was adding trees from Die Cut Ephemera pack on the bottom and clous fussy cut from one of the papers. Super cute and tine Puffy Stickers and the perfect finishing touch.
Second card was inspired by the navy paper with night sky. I trimmed it to the proper size, added stitching around it and created a card title using Puffy Alpha Stickers from a bit older “Heart & Home” collection. “Reach fo the stars” needed to be surrounded by stars of course. So I cut them out from one of the papers from A5 Paper Stack. I also picked few from Die Cut Ephemera pack. I finished my composition with tiny stars from Puffy Stickers sheet.
Inspiration for my third card came from this pocket card with numbers, cut out from “Wild life” paper. It looks like a bucket list, so I added incouraging words from 6*12 Accessory Stickers. I backed the card with a piece of “Happy camper” paper and embellished everything with bits and pieces from Die Cut Ephemera and Chipboard Stickers. Can you guess the final step? Yep. Super cute Puffy Stickers.
That is all for today my Friends. Do you also struggle with masculine projects or it’s a piece of cake for you?
Thank you so much for staying with me and see you in two weeks.