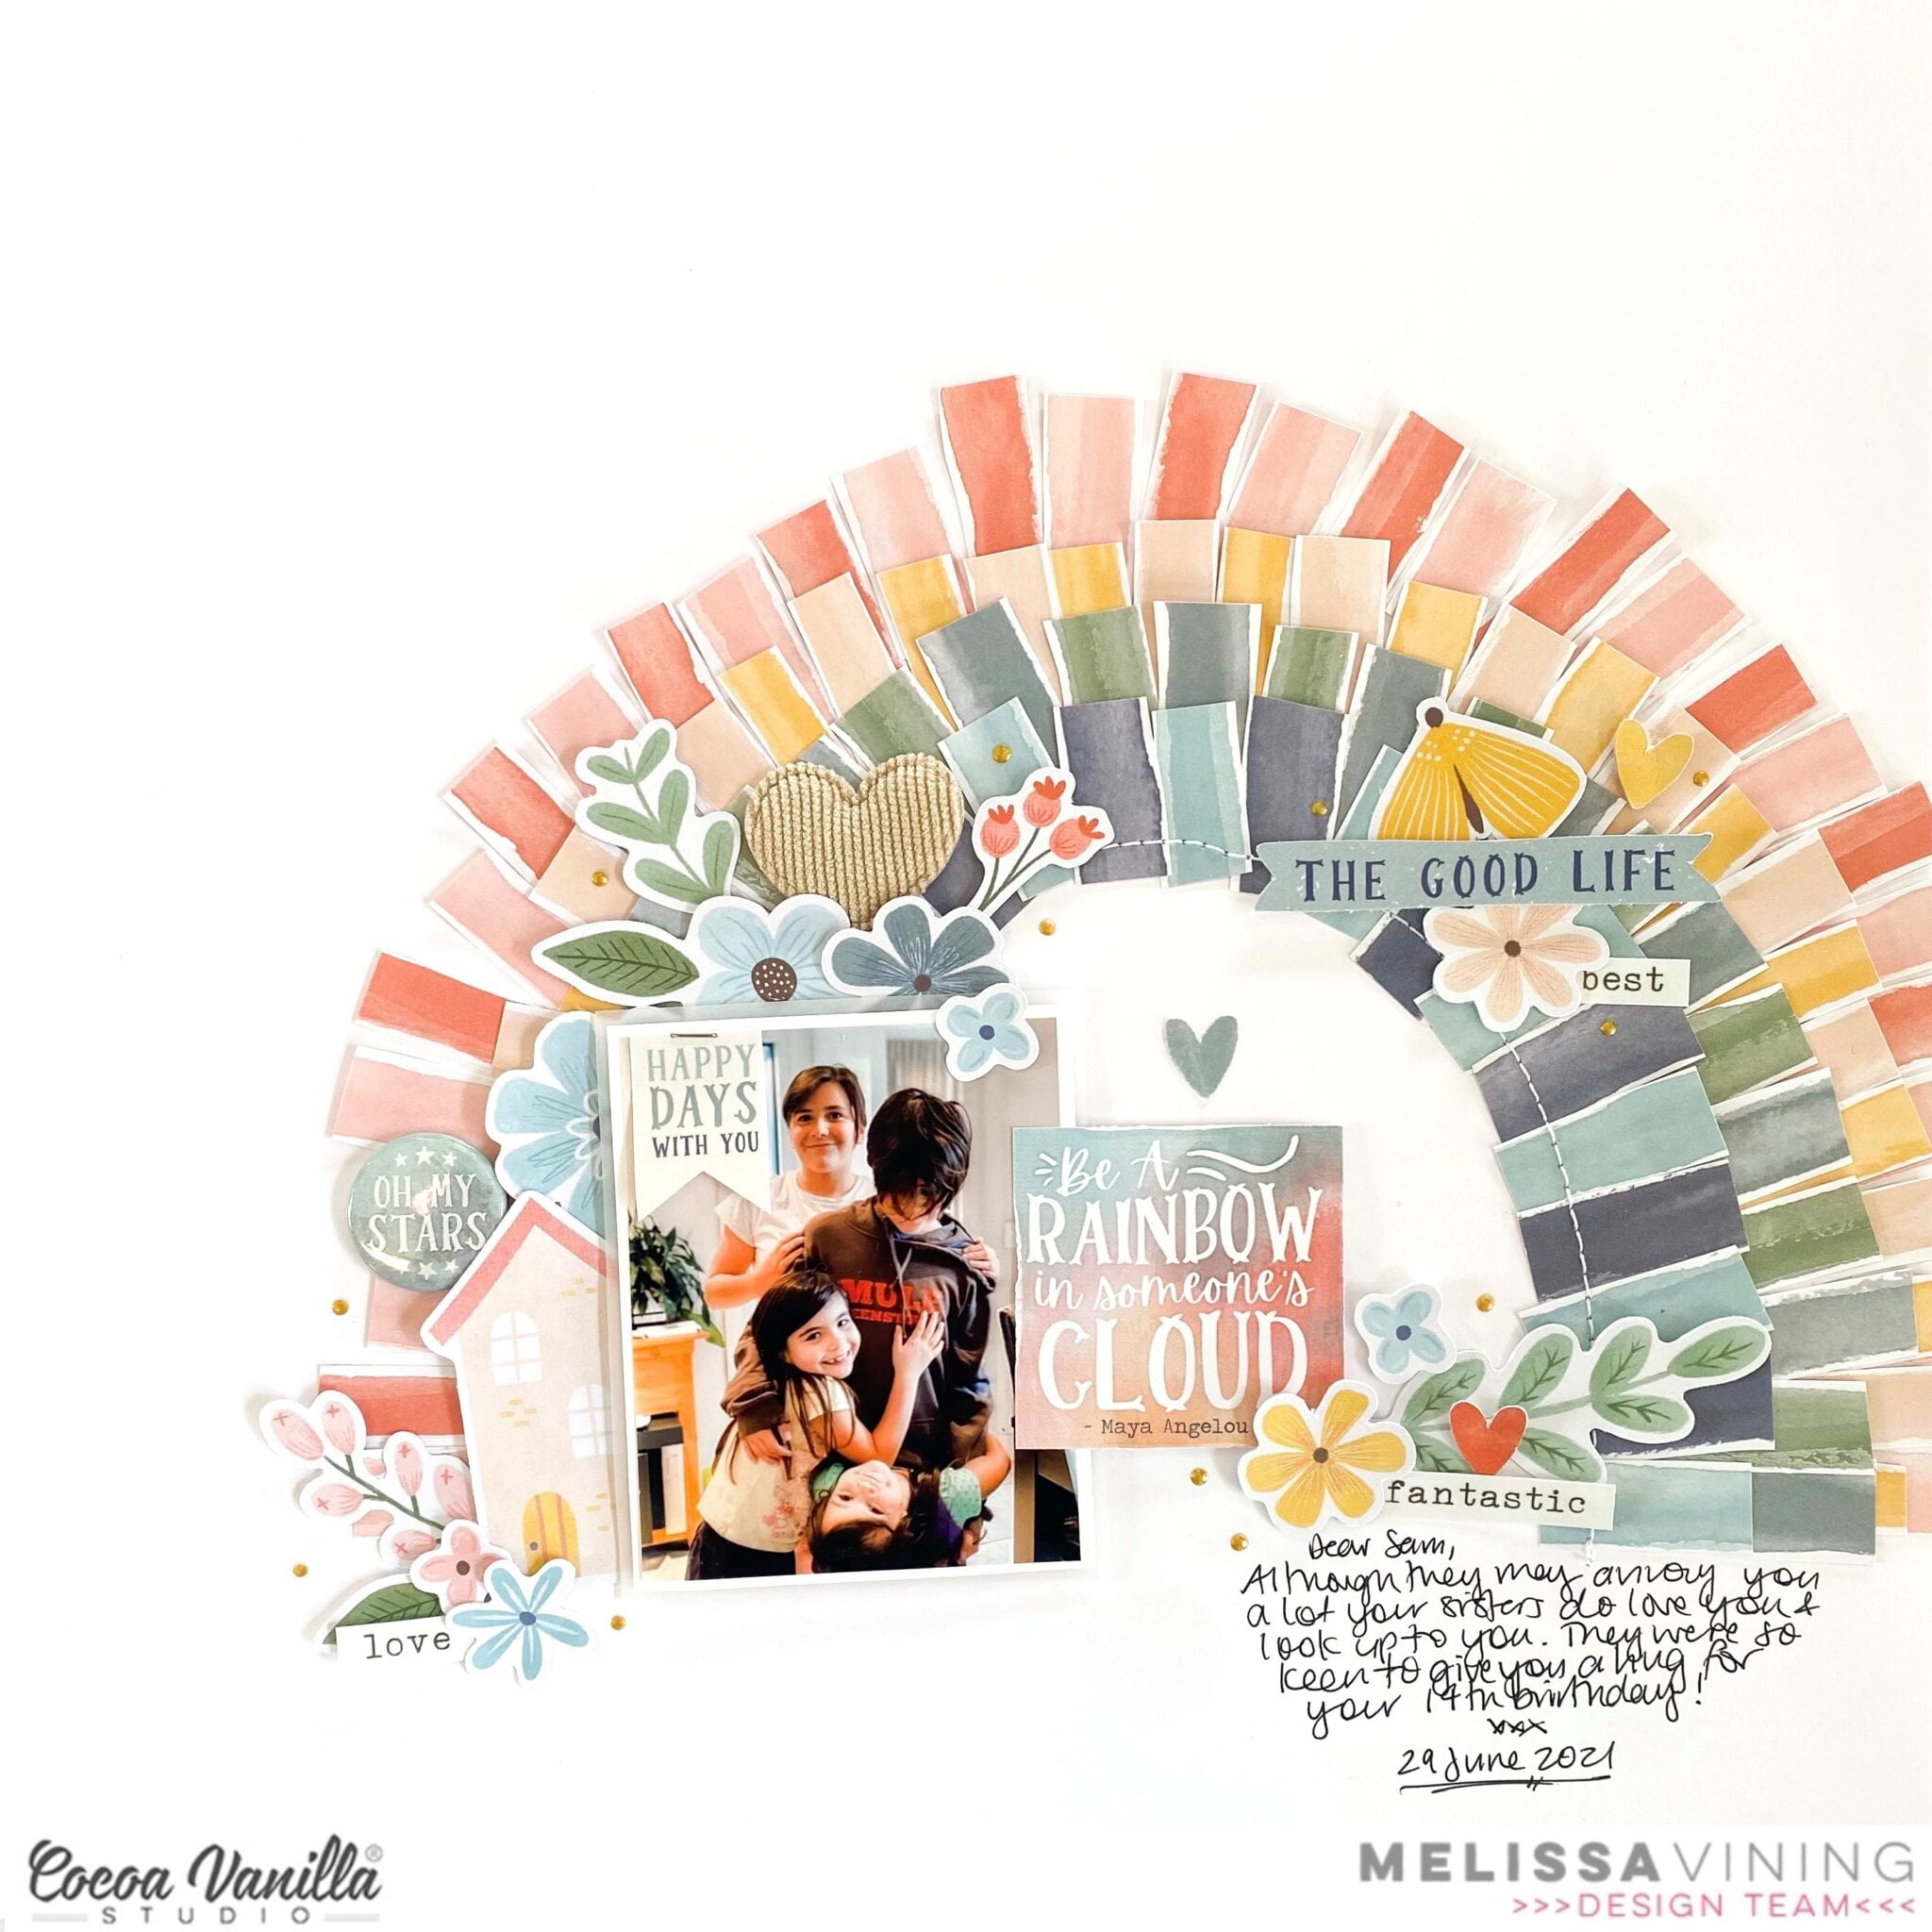
Hi everyone, its Melissa here and I’m so happy to be back with you sharing another layout!! I put up a poll on the Cocoa Vanilla Studio Facebook page asking whether I should use the Daydream collection or the Sunkissed collection. Daydream won, and I was happy to use it as I had an idea for the Stepping Stones paper. I decided to scrapbook a photo of my kids on Sam’s 14th birthday in March of this year.
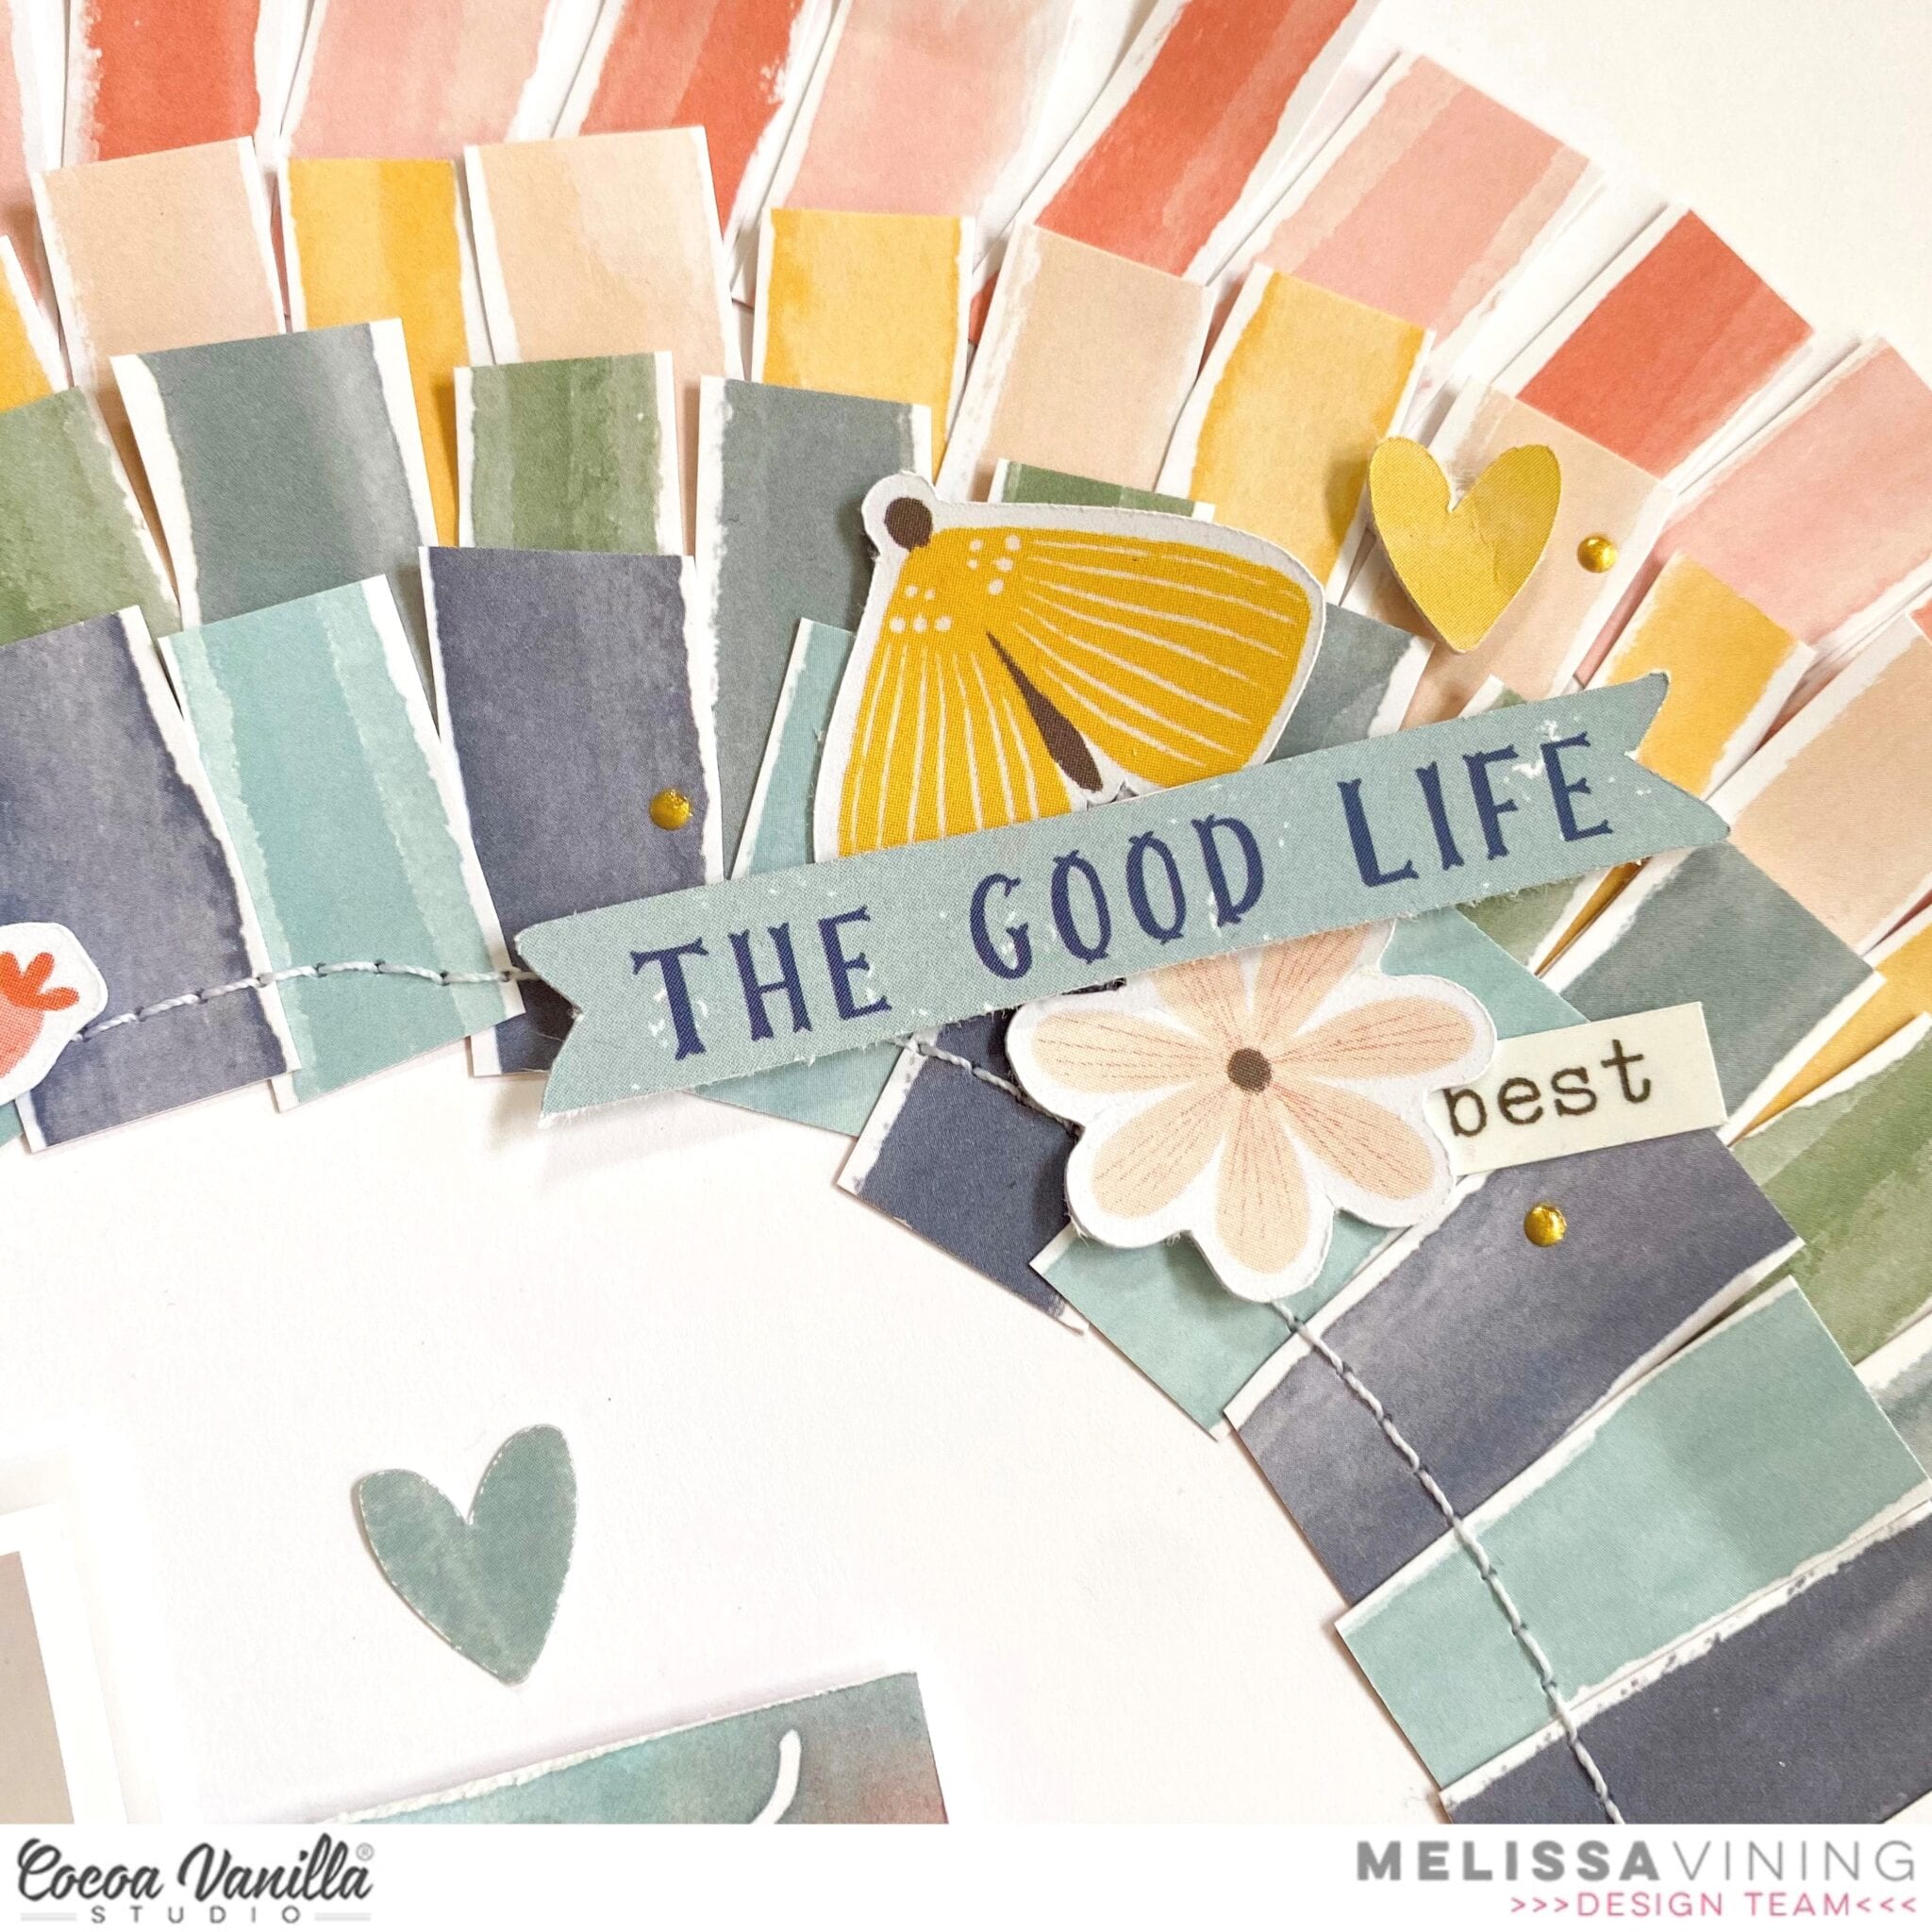
When I saw Stepping Stones I always had a plan to cut it into strips and recreate an organic rainbow shape with it. I’d been waiting for the perfect photo, and it turned out way better than I ever imagined!! I cut the strips roughly so they weren’t perfect, and then used a side plate to line up my first row of strips. I alternated the colours to include all of the strips from the paper. I machine stitched my last row to secure them.
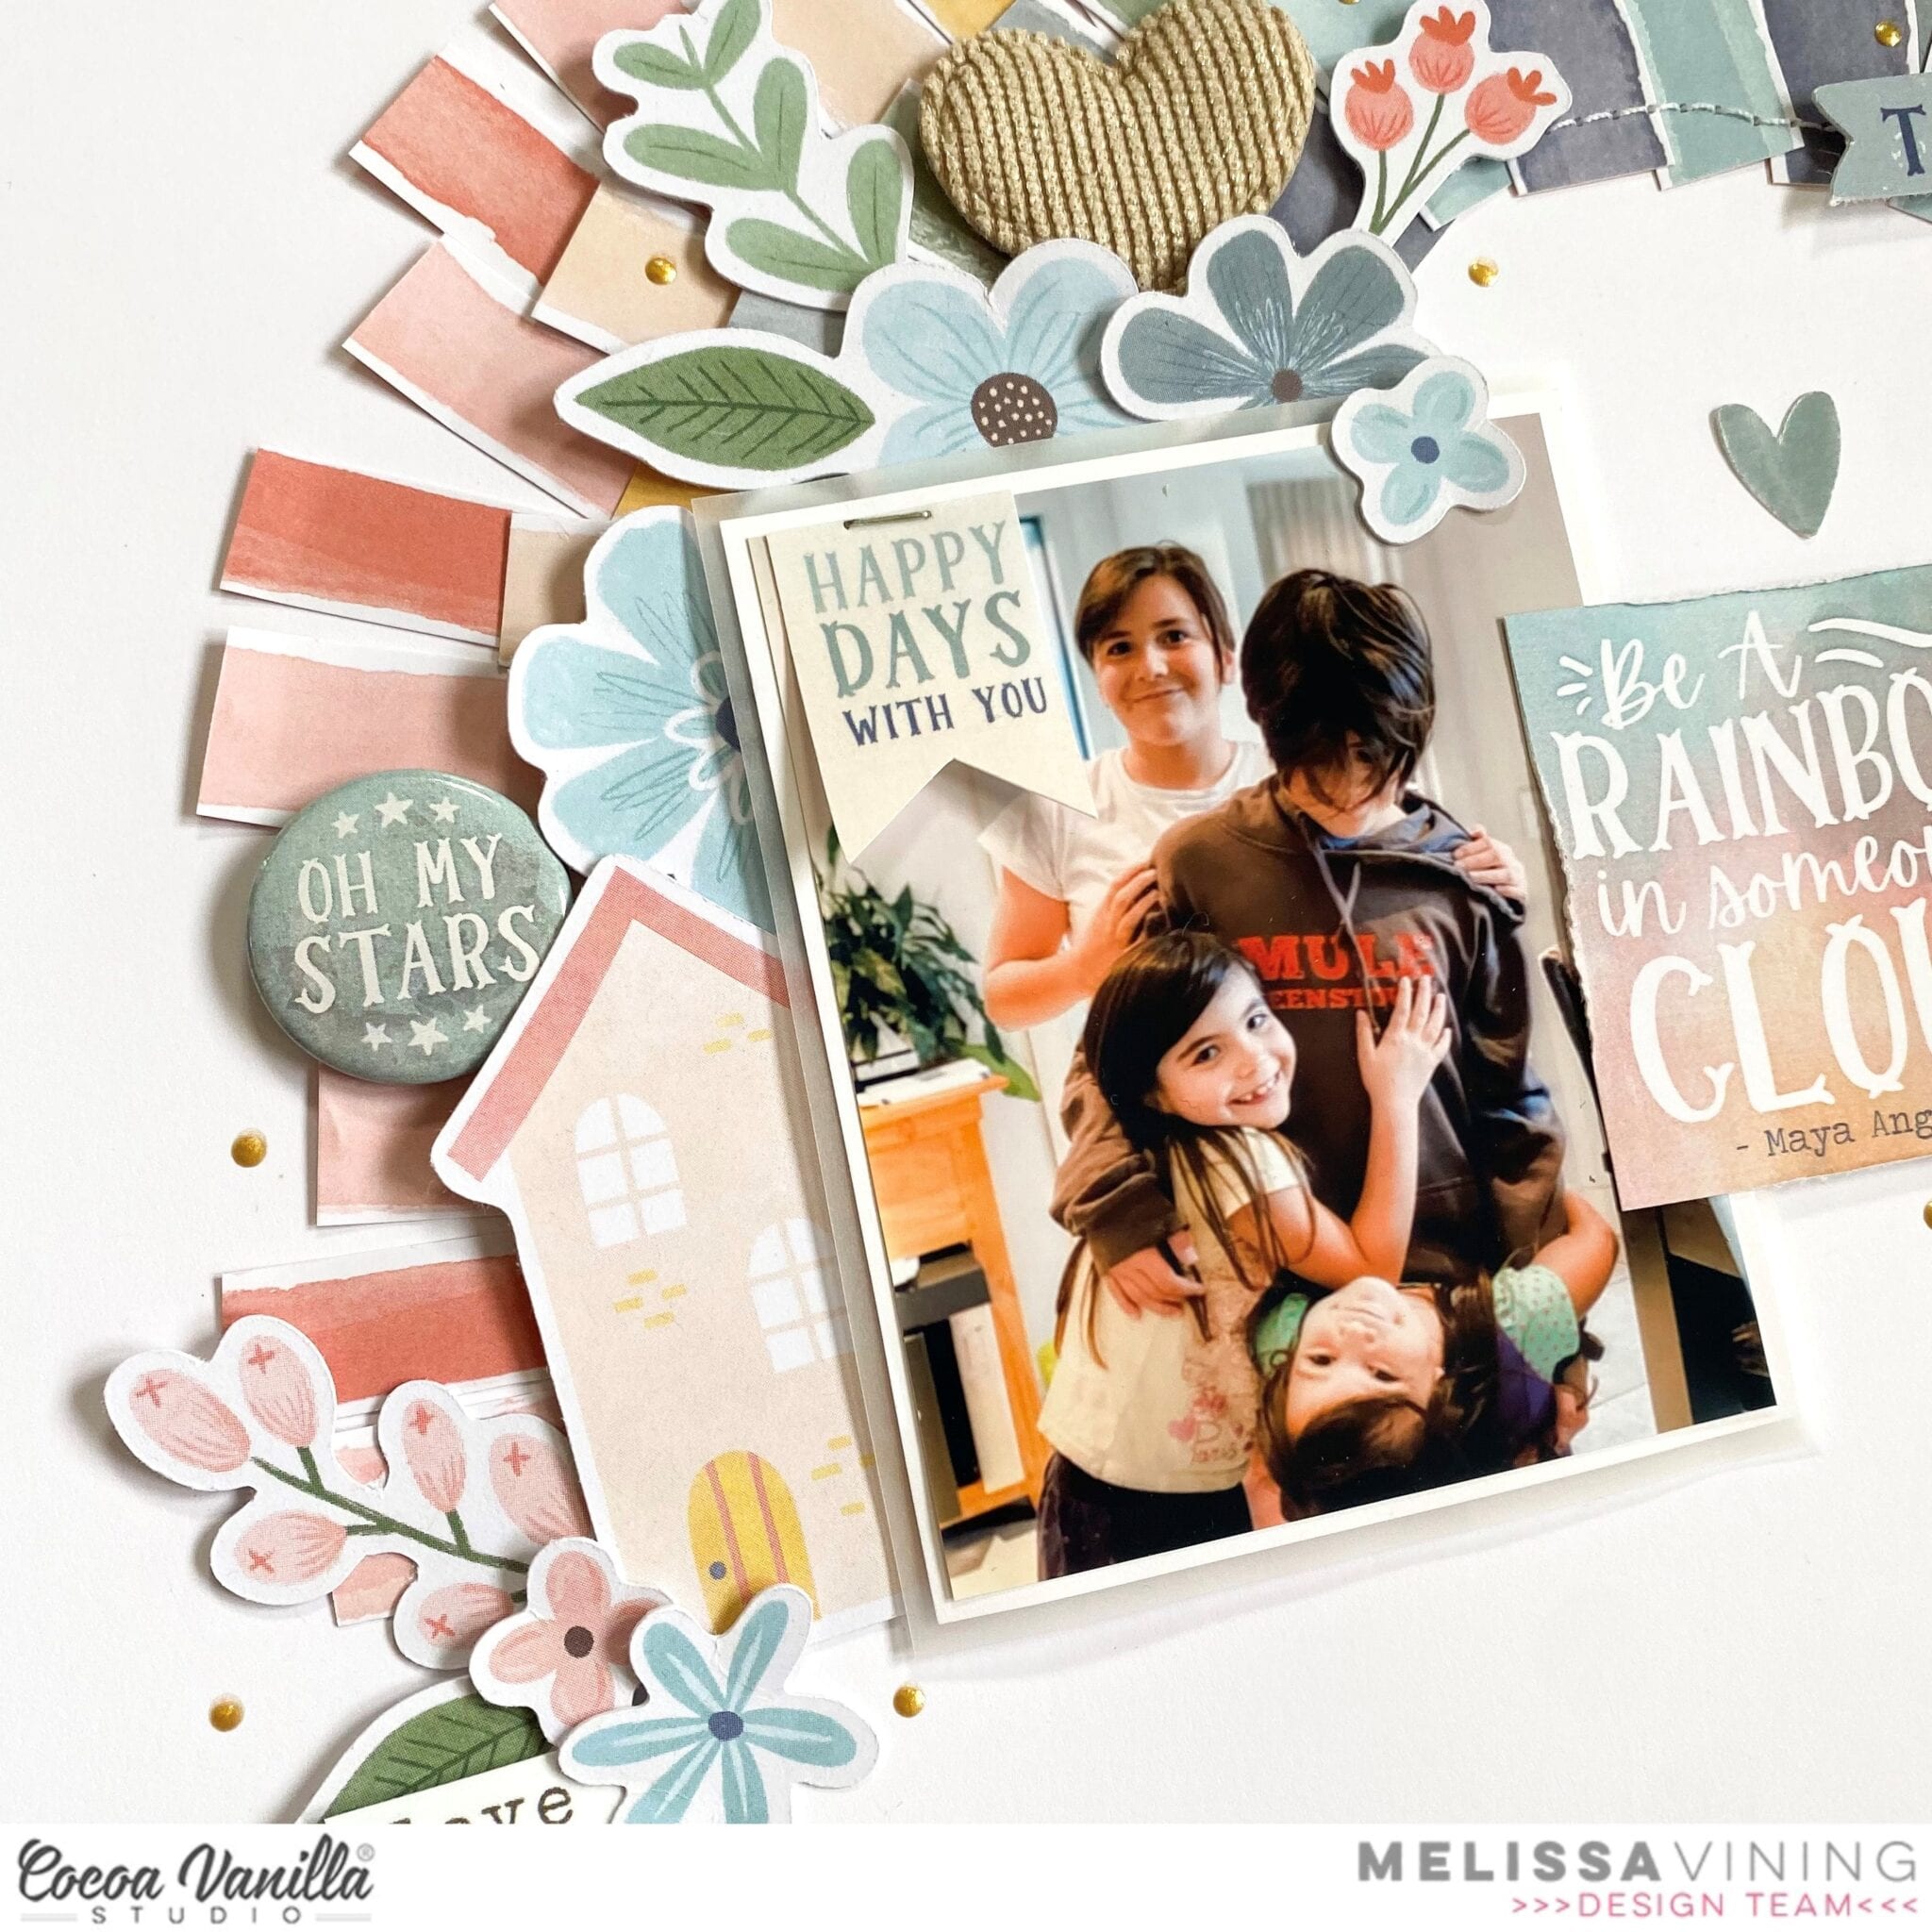
I only adhered the centres of the strips with liquid glue to enable movement, and I lifted the edges up for dimension. I embellished around my photo with bits and pieces from the Die Cut Ephemera. I also used one of the ‘Puffy Hearts’ and a Flair Button.
I created another area of embellishment that would also contain my title. I don’t always think titles have to be big and overpowering, and for this layout I really wanted the rainbow (and photo of course) to be the star. I also used some of the “Accessory Stickers”.
You can read my journalling in the photo below. My final touch was to add some metallic gold drops, and I love how they finish off my layout.
I made a process video that you can watch below.
I hope I inspired you to look at your patterned paper supplies in a different way!!
Hi everyone, today I have my second layout to share using the fab Sunkissed collection. I just adore this rainbow paper Sunny Days and this was the inspiration for my layout.
My photo is of my daughter at one of our gorgeous beaches in Western Australia. I used a swimsuit cut file from the Silhouette Design Store. I placed this on a slight angle of my page but only putting double sided tape in the middle of the swimsuit so I could tuck some flowers from the floral ephemera pack and so I could add machine stitching to the swimsuit (sewing machine needles do not like double sided tape).
I next added my photo with foam tape so I could add elements under it. My photo size is 4×5 inches. I am such a fan of puffy stickers and wood epoxy buttons which I have used to layer a single die cut.
I created an embellishment cluster under my photo my photo and using phrase sentiments from the die cut ephemera pack and so they didn’t get ‘lost’ on the busy rainbow paper I chose strong contrasting colours and added with foam tape to add height. I finished this cluster off adding puffy stickers and all Australian Jandals or thongs (flip flops for everyone else!!!)
I love adding embellishments to my photos, the sun puffy sticker perfect on my photo. I also added some gold hearts randomly over my rainbow paper from the glitter foam title stickers to add more texture to my layout.
I added some sky to my layout by tearing the top right corner of the rainbow paper and using the Just Chillin paper, which is the same paper I used for the swimsuit and adding a rainbow puffy sticker so they looked connected. If you are not sure about machine stitching on your layout here are some tips to make it easier: firstly make sure your speed is at the slowest in can be, this gives you more control and allows you to sew on the curves with greater accuracy, also I always add stitching at the beginning of my layout so if I mess it up I am not ruining a whole layout.
Thank you for stopping by today and I hope you all have a wonderful week with some time to scrap!
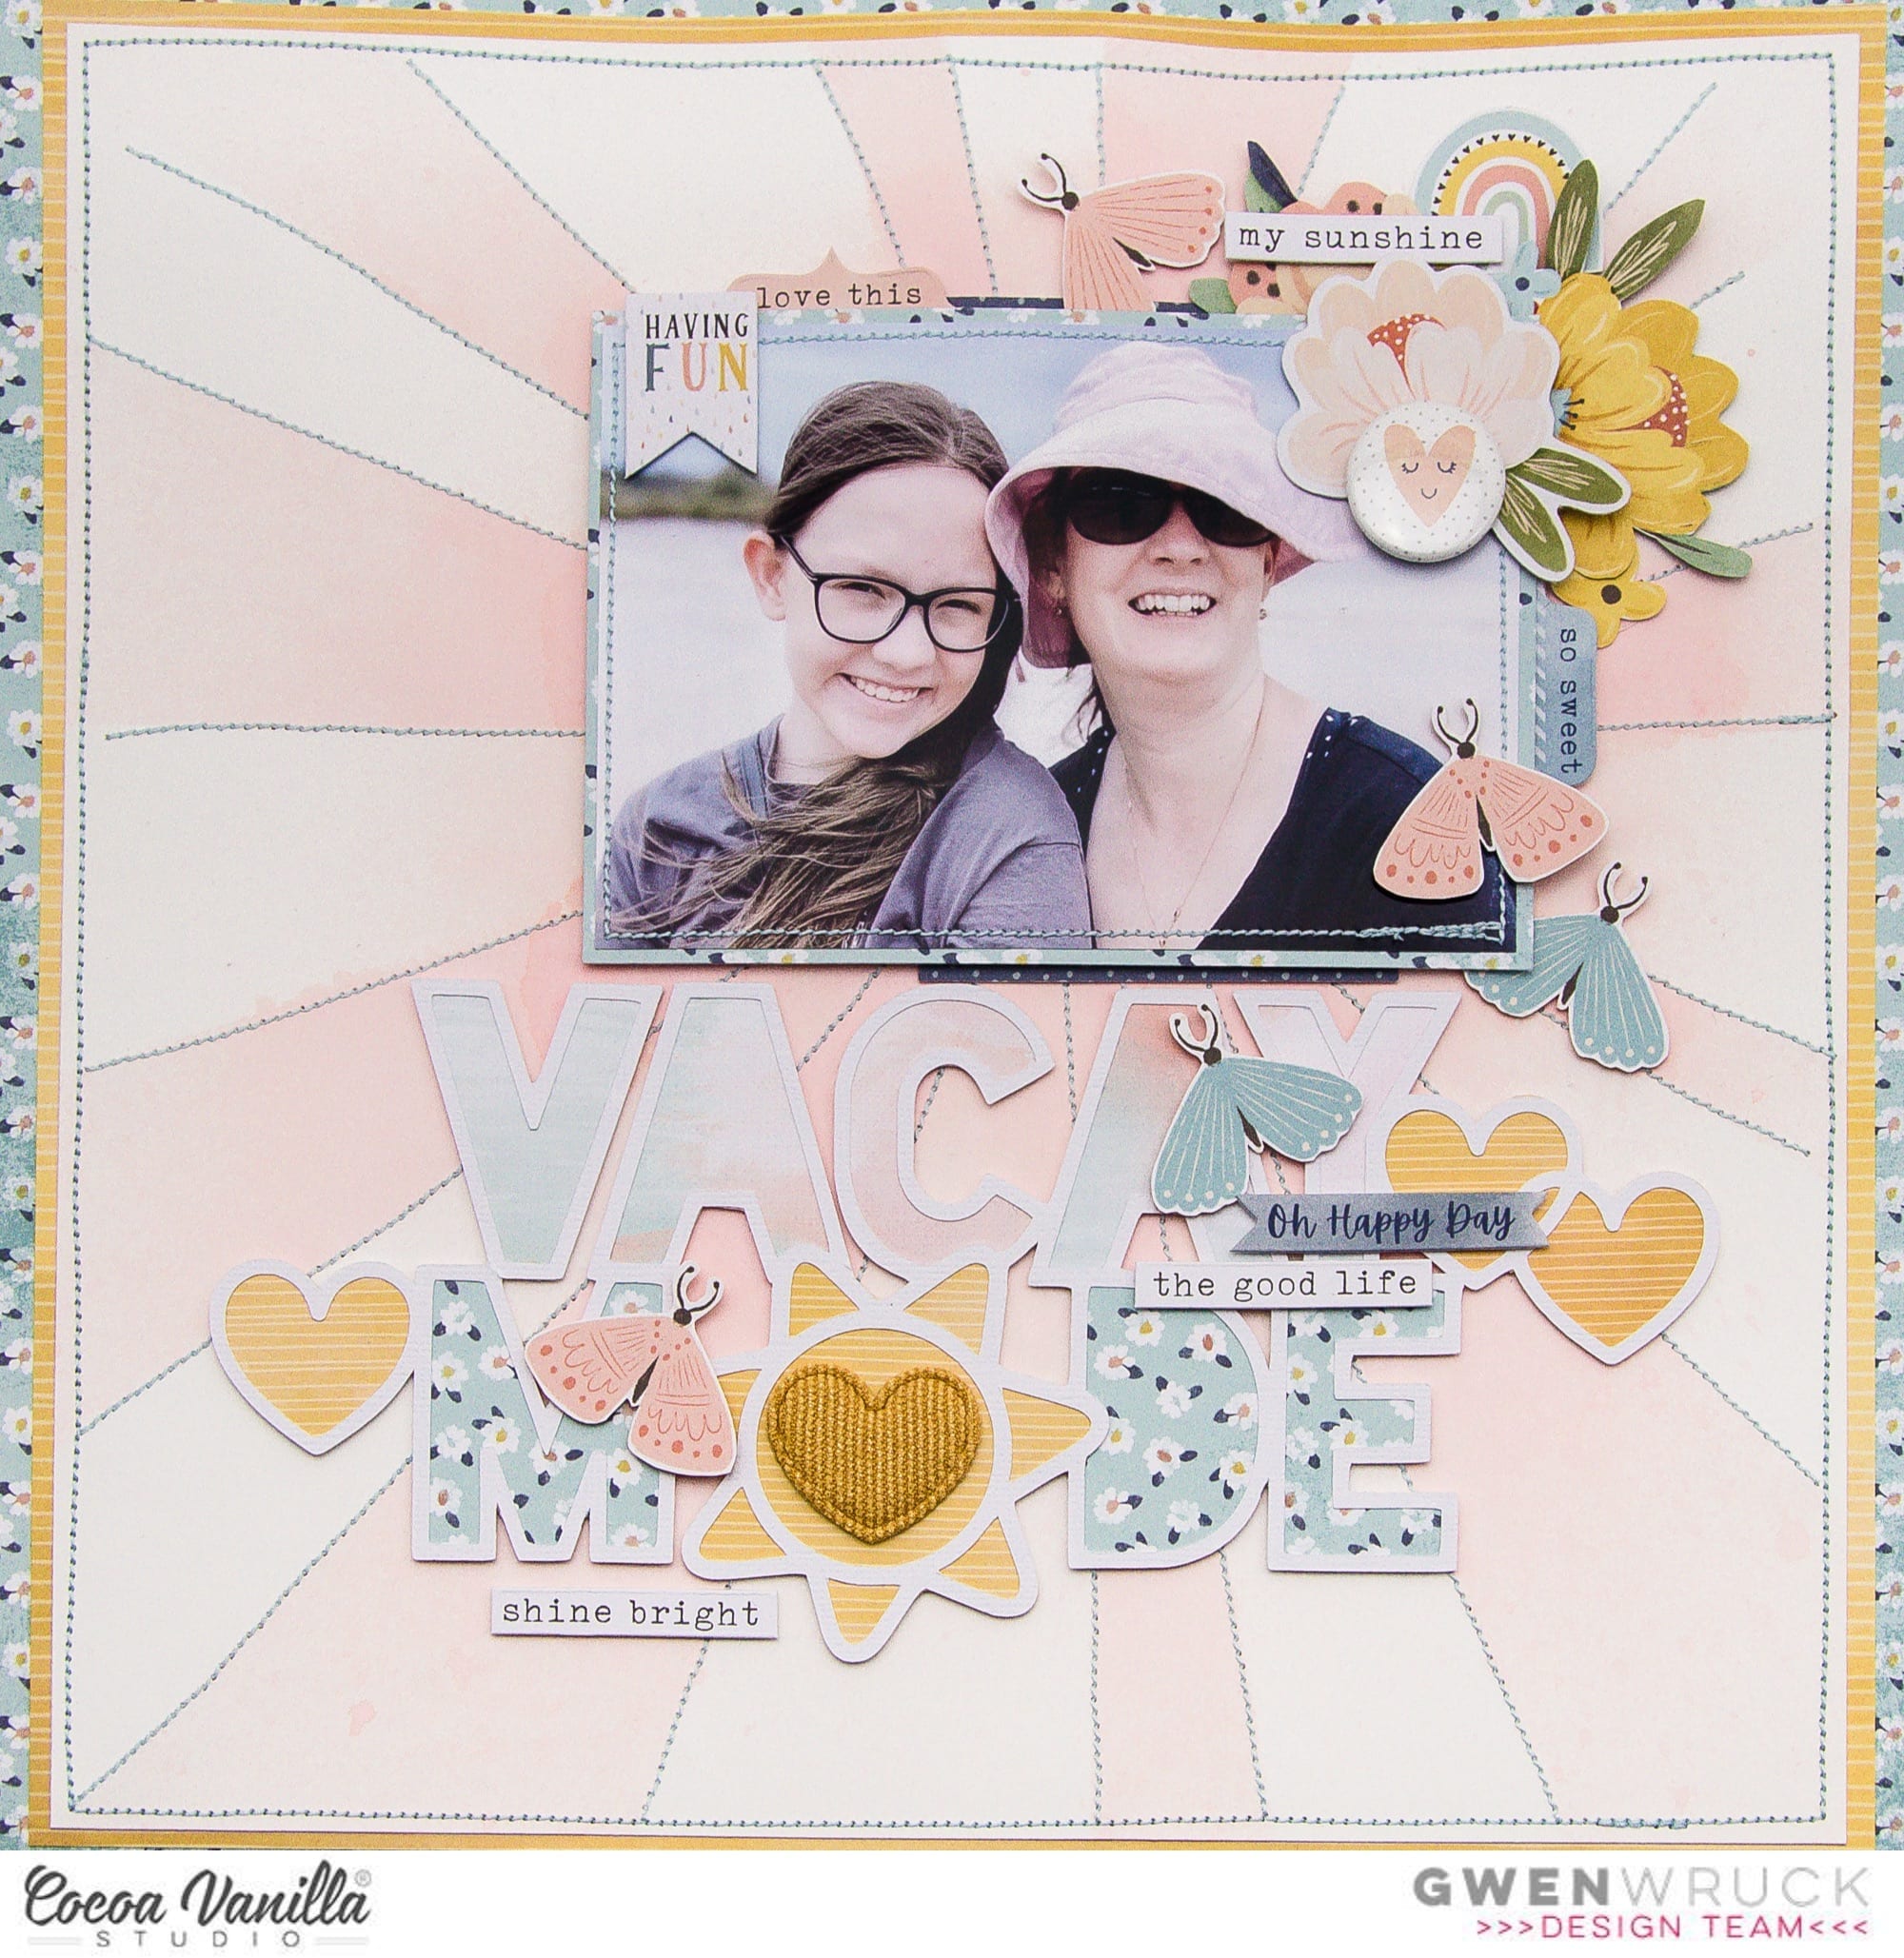
Hi Creative friends, Gwen back on the blog today with a fun summer-themed project for you. I was super inspired to use the ‘Daydream‘ collection for this photo of myself and my daughter on a recent family vacation to Harvey Bay in Queensland. I loved the soft fresh colours in the collection, they were the perfect match for my photo.
To begin the page, I wanted to create a soft sunburst effect on my background. To do this, I’ve used a stencil and mists from my stash. Once my mist was dry, I’ve gone ahead and stitched with my sewing machine, along the lines in the stencil for an added detail.
I’ve then trimmed this piece and mounted it onto the ‘Sun Shower‘ pattern paper. I’ve trimmed this pattern paper as well and added it onto the ‘Daisy Days‘ pattern paper to create a double border for my page. I’ve also added stitching along the outer edge to finish the background off.
For the title of my page, I’ve used a cut file from CUT to YOU, backing it with a mixture of papers including those mentioned above in my layout base. I’ve then mounted the whole title piece onto 3D foam.
For my photo, I’ve used more of the ‘Daisy Days‘ pattern paper to create a photo mat and added some stitching here as well. For this layout, I’ve gone with a pretty sky blue for my thread to add some contrast.
Next, I’ve mounted my photo onto 3D foam and added it to my background. It’s at this point that I have also locked in the position of my title. With these elements in place, I can now add the embellishments. For this, I’ve started with a fussy cut piece of the florals from the ‘Garden Variety‘ pattern paper and added to that some floral elements from the ‘Die Cut Epherma‘ pack. I’ve also added in a ‘Flair Button‘ and one of the Puffy Hearts.
I’ve also included some fussy cut elements from the ‘Happy Place‘ paper, such as the sweet little rainbows. Lastly, I’ve added a few of the fussy cut moths from the ‘All a Flutter‘ pattern paper mounted on 3D foam and some sentiments from the ‘Accessory Sticker Sheet’.
You can watch me create this layout here:
Thanks for popping by today to see how this page came together. As always, I hope I have inspired you in some way and I can’t wait to see what you make!
Hi CVS friends, with Christmas almost upon us and recently receiving the new Merry & Bright collection I just had to make a mini album in preparation of those Christmas photos.
I only made a 6 pages in this album because to be honest most of my Christmas photos are usually less than average, but I can add the best or highlights!
I used a cut file from the Silhouette Design Store. To protect my album cover I cut one in acetate and used an embossing file (stars) to add texture. I added a pop-pom tassel for that little something extra. I love the coloured O rings you can now get, I chose some teal ones to blend in with the colour schemes of Merry & Bright.
I used the 6×8 inch paper pad for this album, another reason I love 6×8 inch paper pads, the smaller prints are perfect for mini albums and mini albums. I used Season Greetings paper wood grain side to create a thin border and Oh Christmas Tree paper over top. I embellished with florals from the die cut ephemera, a phrase sticker from the Accessory Stickers and finished off adding a flair and puffy gold star.
Here I created a pocket and made a tag. I have used Jingle All the Way paper for the tree page and tag. I added the Santa card from the Oh What Fun paper.
So I could add multiple 2×2 inch photos I added a accordion flap to the page adding another paper element from the Oh What Fun paper.
I added two die cut baubles, a puffy star and finished off with a sprinkle gold paint across the page. I used the Oh Christmas Tree Paper as my base paper.
For my last page which I used Star Bright paper, added a frame die cut and created an embellishment cluster. You will notice I added a machine stitched border around each tree page to add texture and definition.
You could obviously add lots more pages or create double sided pages depending on how many photos you want to add, the good thing about mini albums like this you can make them bulky and they still look great.
Hi CVS friends! It’s Anna here with you again with a new layout. The focus of my layouts are usually my daughters, but for today’s project, I decided to use this picture of me and my sister. We both prefer to be behind the camera, but sometimes we have fun taking some selfies.
For my background, I made some mixed media on a watercolor sheet with pink and blue pigment powders. Then, I covered the top half of the page with two ripped papers. I used the B side of the Pretty Bits paper from the Unforgettable Collection and also the B side from the Daisy Days paper from the Daydream Collection.
I framed my photo with this wood polaroid frame from the Daydream Die Cut Ephemera pack and raised it with foam to make it stand out. I embellished it all around by creating clusters of flowers from the die cut pack too. I tried to give some dimension to the page raising some flowers with foam dots.
For my title, I used the word “hello” from the More than words collectionchipboard titles. I put it on top of the frame, and below it, I used an old foam alphabet that I had in my stash to spell the word sister. I completed the title with one of the stickers from the Daydream Accessory Stickers.
On the left side of the Hello, I glued a puffy fabric heart from the Daydream collection. I’m so in love with these hearts.
Finally, I cut a strip from the Garden Variety paper and use a scallop border punch. I lifted the edges and placed it on the top of my page to accentuate the romantic look of the page. I also scattered some hearts and butterflies die cuts.
I love how it turned out, so girly and romantic. I hope it gives you some inspiration. That’s a simple design to use when you’re stuck.
Thank you so much for stopping by today! See you very soon with another project!
Hey CVS friends today I have a fab boy layout to share using my fav paper from the Legendary collection, Wild One !
I have used a cut file from the Silhouette Design Store (Happy Rainbow). Once I had cut the rainbow I them added machine stitching to each rainbow piece (you could hand stitch this too), I loving adding texture to my layouts and sewing on your layout is a great way to do that.
I then used the reverse of the Wild One paper (yellow and left over after cutting the rainbow) and cut the Happy off set. I cut the actual letters in white cardstock. This is added under the rainbow which I attached with foam tape to create dimension.
I added phrase sentiments from the Accessory Sticker sheet that tied in with my theme and photo. I also added these with foam tape to add even more dimension. I LOVE the Clear Stickers especially the mixed media elements (It saves so much time and mess lol) and I have added a contrasting green and orange paint brush stroke clear sticker under the yellow title.
I next added my photo matting it on Off Beat paper (blue star side) and added with foam tape. I then tucked under Die Cut Ephemera elements. How cute is the geometric bear! I added some more clear stickers and Enamel Dots.
I finished off with a light splatter of black paint on the white cardstock. I love how this turned out and such a sweet photo of my boy and his pup documented!
Thank you for stopping by, if you have any questions about this layout please leave them in the comments and I will get back to you. Have a wonderful week!
Hey Creative friends, Gwen here today with some more scrapbook inspiration using the new ‘Legendary’ collection by Cocoa Vanilla Studio. I’ve scrapped another pic of my husband for this layout; this one was taken at one of our favourite local restaurants. For this one, I really just wanted to make a page that documents our relationship, I’m so lucky to have him!
The idea for this page actually started with my photo! I know right, that rarely happens for me! I’ve been wanting to scrap this one for a long time as it really captures my husband’s personality. I just love the colour tones in it and I knew it would be perfect for the ‘Legendary’ collection. I pulled out all of the blue and grey tones and found a stack of options, all that would go perfectly.
To start my page, I’ve created a base with some white cardstock from my stash and the ‘Brave Heart’ pattern paper. I’ve used it to create a border around my page as well as a photo mat for my picture. I’ve then gone about finding a cut file that would fit in with my ‘love’ theme (TN Geo Heart, from CUT to YOU).
I’ve backed the hearts with the dark blue and light blue blocks of the ‘Total Legend’ paper and the grey heart is the ‘All-Star’ pattern paper. Working with the darkest blue for the top heart and then the light grey for the bottom hearts.
At this point, I haven’t stuck anything down or decided on a page design. I knew I wanted to make a longer title element so I needed to sort that first. Going through the ‘Die Cut Title’ elements, I’ve decided on the title “Love this Dude So”… yep, it’s long, so I will need to be clever about how I position it on the page.
For the design of the layout, I decided on keeping everything vertical mainly because my title needed to be stacked in some way and I had the vertical style cut files. It is far easier to work with the elements you have than to try and work around them. Go with the flow I say! I simply played with the layout of the cut file, photo and title elements until I was happy focusing on things running top to bottom on the page.
With my four main elements locked in, it was now just a matter of adding in the embellishment details. For these, I like to work largest to smallest as I audition things. If you leave larger elements too late in the design process they just won’t fit, so it’s a great idea to work with them early on. The large circle piece that says ‘Authentic’ and the ticket element are both from the ‘Die Cut Ephemera’ pack.
I found this very sweet sentiment “to the moon and back” on the ‘Accessory Sticker Sheet’ which was perfect for my photo as well as the banner that says “You’re pretty Rad”. I like to add foam behind the stickers for added dimension on my page. I’ve also pulled the tab that says ‘Noteworthy’ even though it is orange. To make this work, I’ve added in some orange and blue stars from the ‘Die Cut Ephemera’ pack, I really like the small pop of orange, I think it gives the layout a bit more depth.
The page was now almost complete. I’ve added a flair from the ‘Flair Buttons’ pack and some Typed Sentiments from the ‘Accessory Sticker Sheet’. I’ve added some enamel dots in the centre of each of the star die cuts to finish off the page.
Thanks for popping by today to see my latest project. Do you have your hands on this collection yet? As always, be sure to pop into the Cocoa Vanilla Studio and CUT to YOU Facebook groups to share your pages, I love seeing what you make.
Hi all, Rachel here! I am loving all the boy layouts on the blog currently, the new Legendary Collection is so fab that’s for sure! Here is my first layout featuring a photo of my three boys.
I used this wild bear cut file as the main element of my page, the Outdoors Type paper just so perfect with it’s two colour tones and map print. I added it to my base paper, Offbeat with foam tape. I had already worked out my title so added a clear sticker word (Adventure) and the Let’s Go flair.
My photo is 4×6 inches long as I wanted it to centre it above the bear but needed room to add another die cut ephemera word to complete my title. I used the clear sticker paint brush strokes to frame my photo, using several of the colour options. I also added a smaller green one over my title word Epic.
I added in a random manner die cut ephemera stars around the border and to add texture I added messy machine stitching.
I added some blue paint splotches clear stickers around the bears paws so it gave the illusion of water splashing as he is walking (well that’s the picture in my head lol!).
I finished off my layout using an Accessory Sticker so I could add the date later and a clear sticker arrow. This layout is easy and quick to put together, having a mixed media base paper and a large cut file really just leaved the finer details to add.
The wild bear cut file is available in the Silhouette Design store. Thank you for stopping by today and see you again later in the month where I have a super cute mini album to share using Legendary of course!
Hey there CVS friends! Well here is the boy themed layout as chosen by you earlier in the month. I have used a mix of Boys Rule and You Rock collections.
I love grids and this is the basis of my design.
I used Boys Rule Messed Up paper as my background paper, who doesn’t love a paper where the mixed media is done for you! I then cut a 3×12 inch of Boys Rule Straight & Narrow paper and attached vertically to my base paper. I then hand punched different sized stars from Boys Rule Star Fall paper and arranged, slightly tucking some under the green paper and added some with foam tape slightly over the green paper. I added a row of stitching on the right side of the green strip to add texture.
I decided on a grid of three which allowed me one square for my photo and two to embellish. I started at the top creating an embellishment cluster, cutting a 3×3 inch square from Boys Rule Fun & Games paper. I added some random messy machine stitching and added a paper strip from the You Rock black cross paper. I then used the die cut ephemera from Boys Rule to embellish and finishing off with a flair from You Rock collection.
I next added my photo which is 2×2 inches, I used a die frame from the die cut pack and then matted onto Boys Rule Fun & Games denim square. I finished this off with some phrases from the Boys Rule Accessory Stickers and a flair from Made of Awesome collection.
I used another die cut frame for the Rubber tag Awesome. I used another phrase die cut and finished this off with enamel crosses from Made of Awesome collection, which I also added to the corners of my base page.
My title is created using Foam titles from Unforgettable collection (they don’t count as girl on this page lol!), they add such a wow factor in strong black with added height, a close second fav of mine, clear stickers being my absolute fav!
Of course you could add more photos, make your grid with 5 squares instead of three! I hope I lived up to the hype of creating a boy layout to inspire you. I can’t wait until the new boy collection Legendary arrives.
Hi all Rachel here! Wishing you all a Happy 2020 and may it be a fun and creative year.
Today I am revisiting a beautiful holiday in Italy, with the photo in my layout taken in Capri. You certainly do not have to use a vacation themed collection to memory keep your holidays as my layout shows you. I have used Unforgettable collection to document my vacation snap.
I used the florals as the main feature on my layout, keeping a tropical, summery feel. I firstly added my photo which is 3×3 inches with a white border. I then started arranging the floral die cut ephemera at the top and side of my photo. I have layered and some I have added with foam tape which stops the floral bunches looking ‘flat’ finished off with some extra die cut leaves tucked under.
I had to add the die cut camera because holidays and cameras are a must! Again I used foam tape to add and added some of the clear sticker hearts. I used a sticker ‘the Story’ from the accessory sticker sheet to form my journalling. I typed my location and date onto white cardstock and added under the sticker.
I created my title using the foam title stickers and added more journalling using the accessory stickers. To break up the white I added a small clear sticker over it.
I added butterflies, some clear stickers, some die cuts and others fussy cut from the 6×8 inch paper. I have added in a way that they connect from the bottom of my page, going in a diagonal direction to the top of my page.
I added another floral piece which was fussy cut from the garland paper, I added a clear sticker paint brush stroke behind the bunch to add a stark contrast. I added enamel dots from the collection under the butterflies, floral bunches and on the camera lens. Lastly I added a light splatter of black color shine to break up the white of my page.
I love how this turned out, white space can really enhance your other elements. Thank you for popping in today and I hope this has inspired you to get scrapping those holiday snaps! See you again soon.

 My photo is of my daughter at one of our gorgeous beaches in Western Australia. I used a swimsuit cut file from the Silhouette Design Store. I placed this on a slight angle of my page but only putting double sided tape in the middle of the swimsuit so I could tuck some


 I only made a 6 pages in this album because to be honest most of my Christmas photos are usually less than average, but I can add the best or highlights!
 I used a cut file from the Silhouette Design Store. To protect my album cover I cut one in acetate and used an embossing file (stars) to add texture. I added a pop-pom tassel for that little something extra. I love the coloured O rings you can now get, I chose some teal ones to blend in with the colour schemes of Merry & Bright.


