Hi everyone, its Melissa here and today I’m sharing a layout where I mixed a new collection with an older collection. I used Storyteller for the new collection and Unforgettable for the older collection. I used a cut file from Just Nick Studio featuring lots of leaves in a frame which was perfect for my photo of three of my kids dressed in camo and playing a game in our garden.
I used lots of the A5 Paper Stacks for backing the leaves of the cut file. These two collections worked really well together and I chose patterns that were either solid or with small repeating designs. My background woodgrain patterned paper is from Storyteller.
I used one of the Foam Titles from Unforgettable for my title. I love how the black foam really pops! I added an Accessory Sticker from Unforgettable underneath the title.
Next to my photo I placed a cut apart from Unforgettable. I distressed the edges and tucked it under my photo. I added a Wood Button on top of it. I embellished my photo with a cute heart Accessory Sticker.
I didn’t have too much journaling for this page, I used an Accessory Sticker from Storyteller to detail what was happening in my photo.
I hope I inspired you to mix newer and older collections!
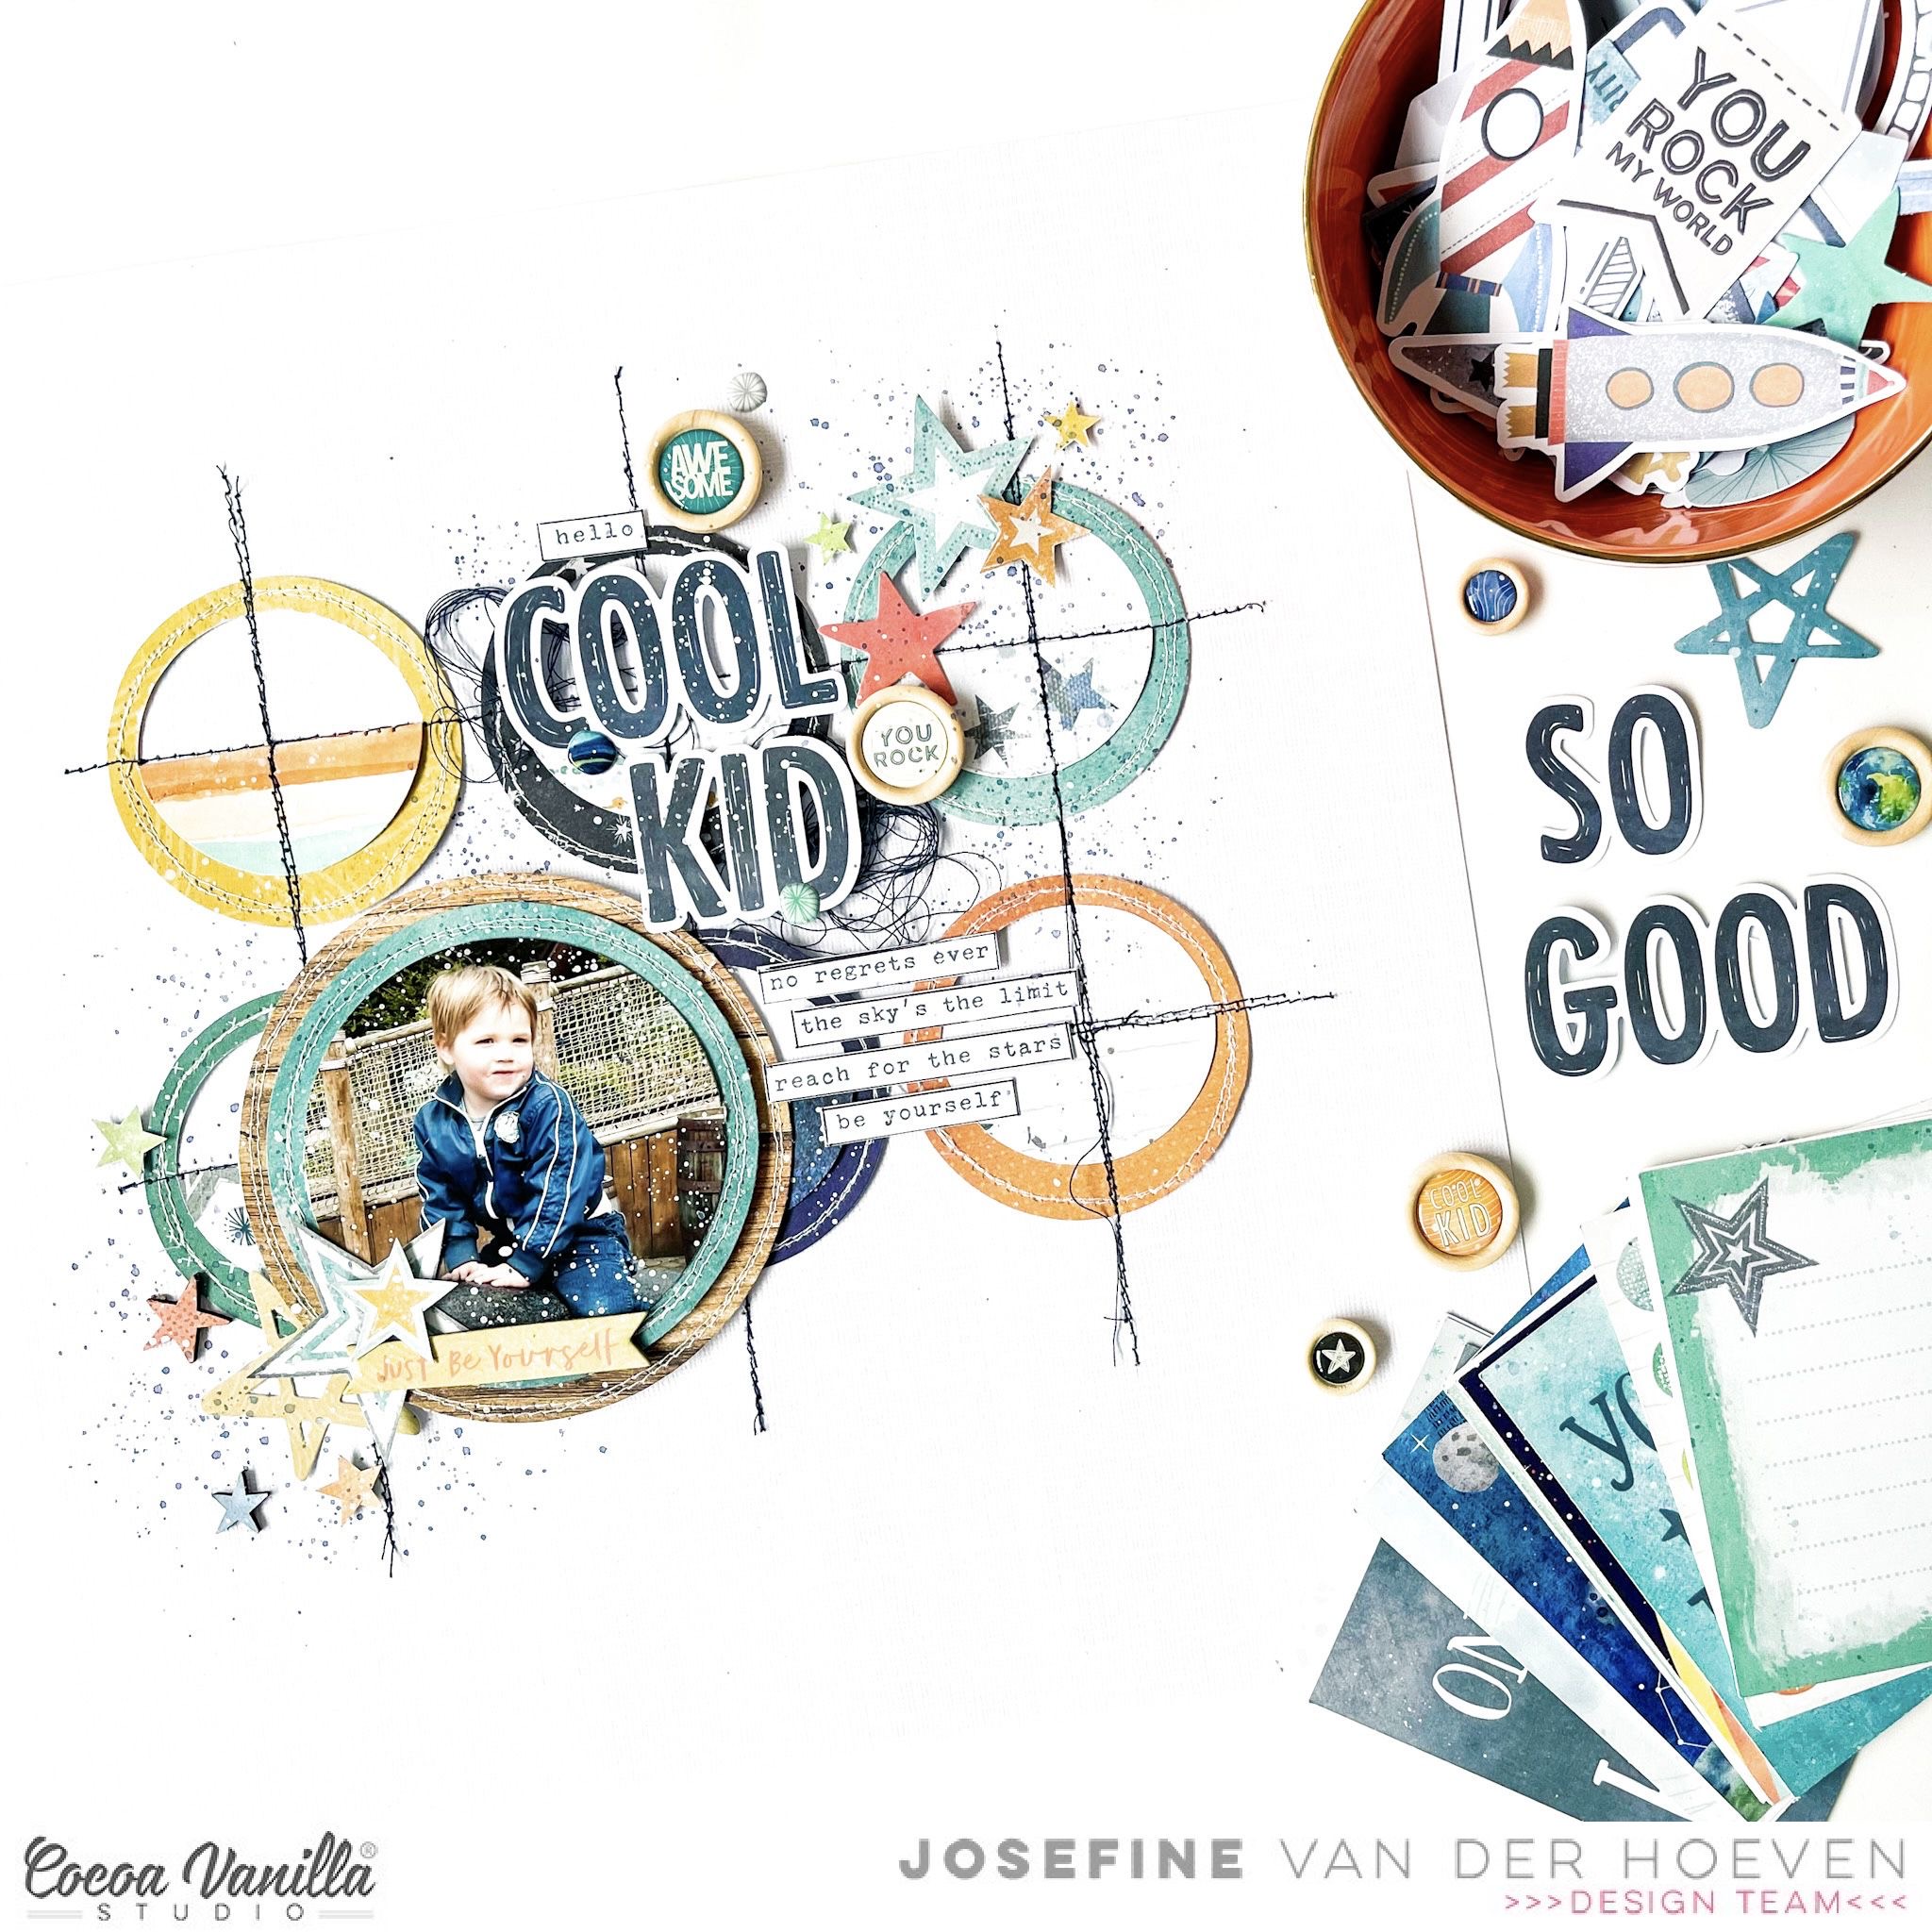
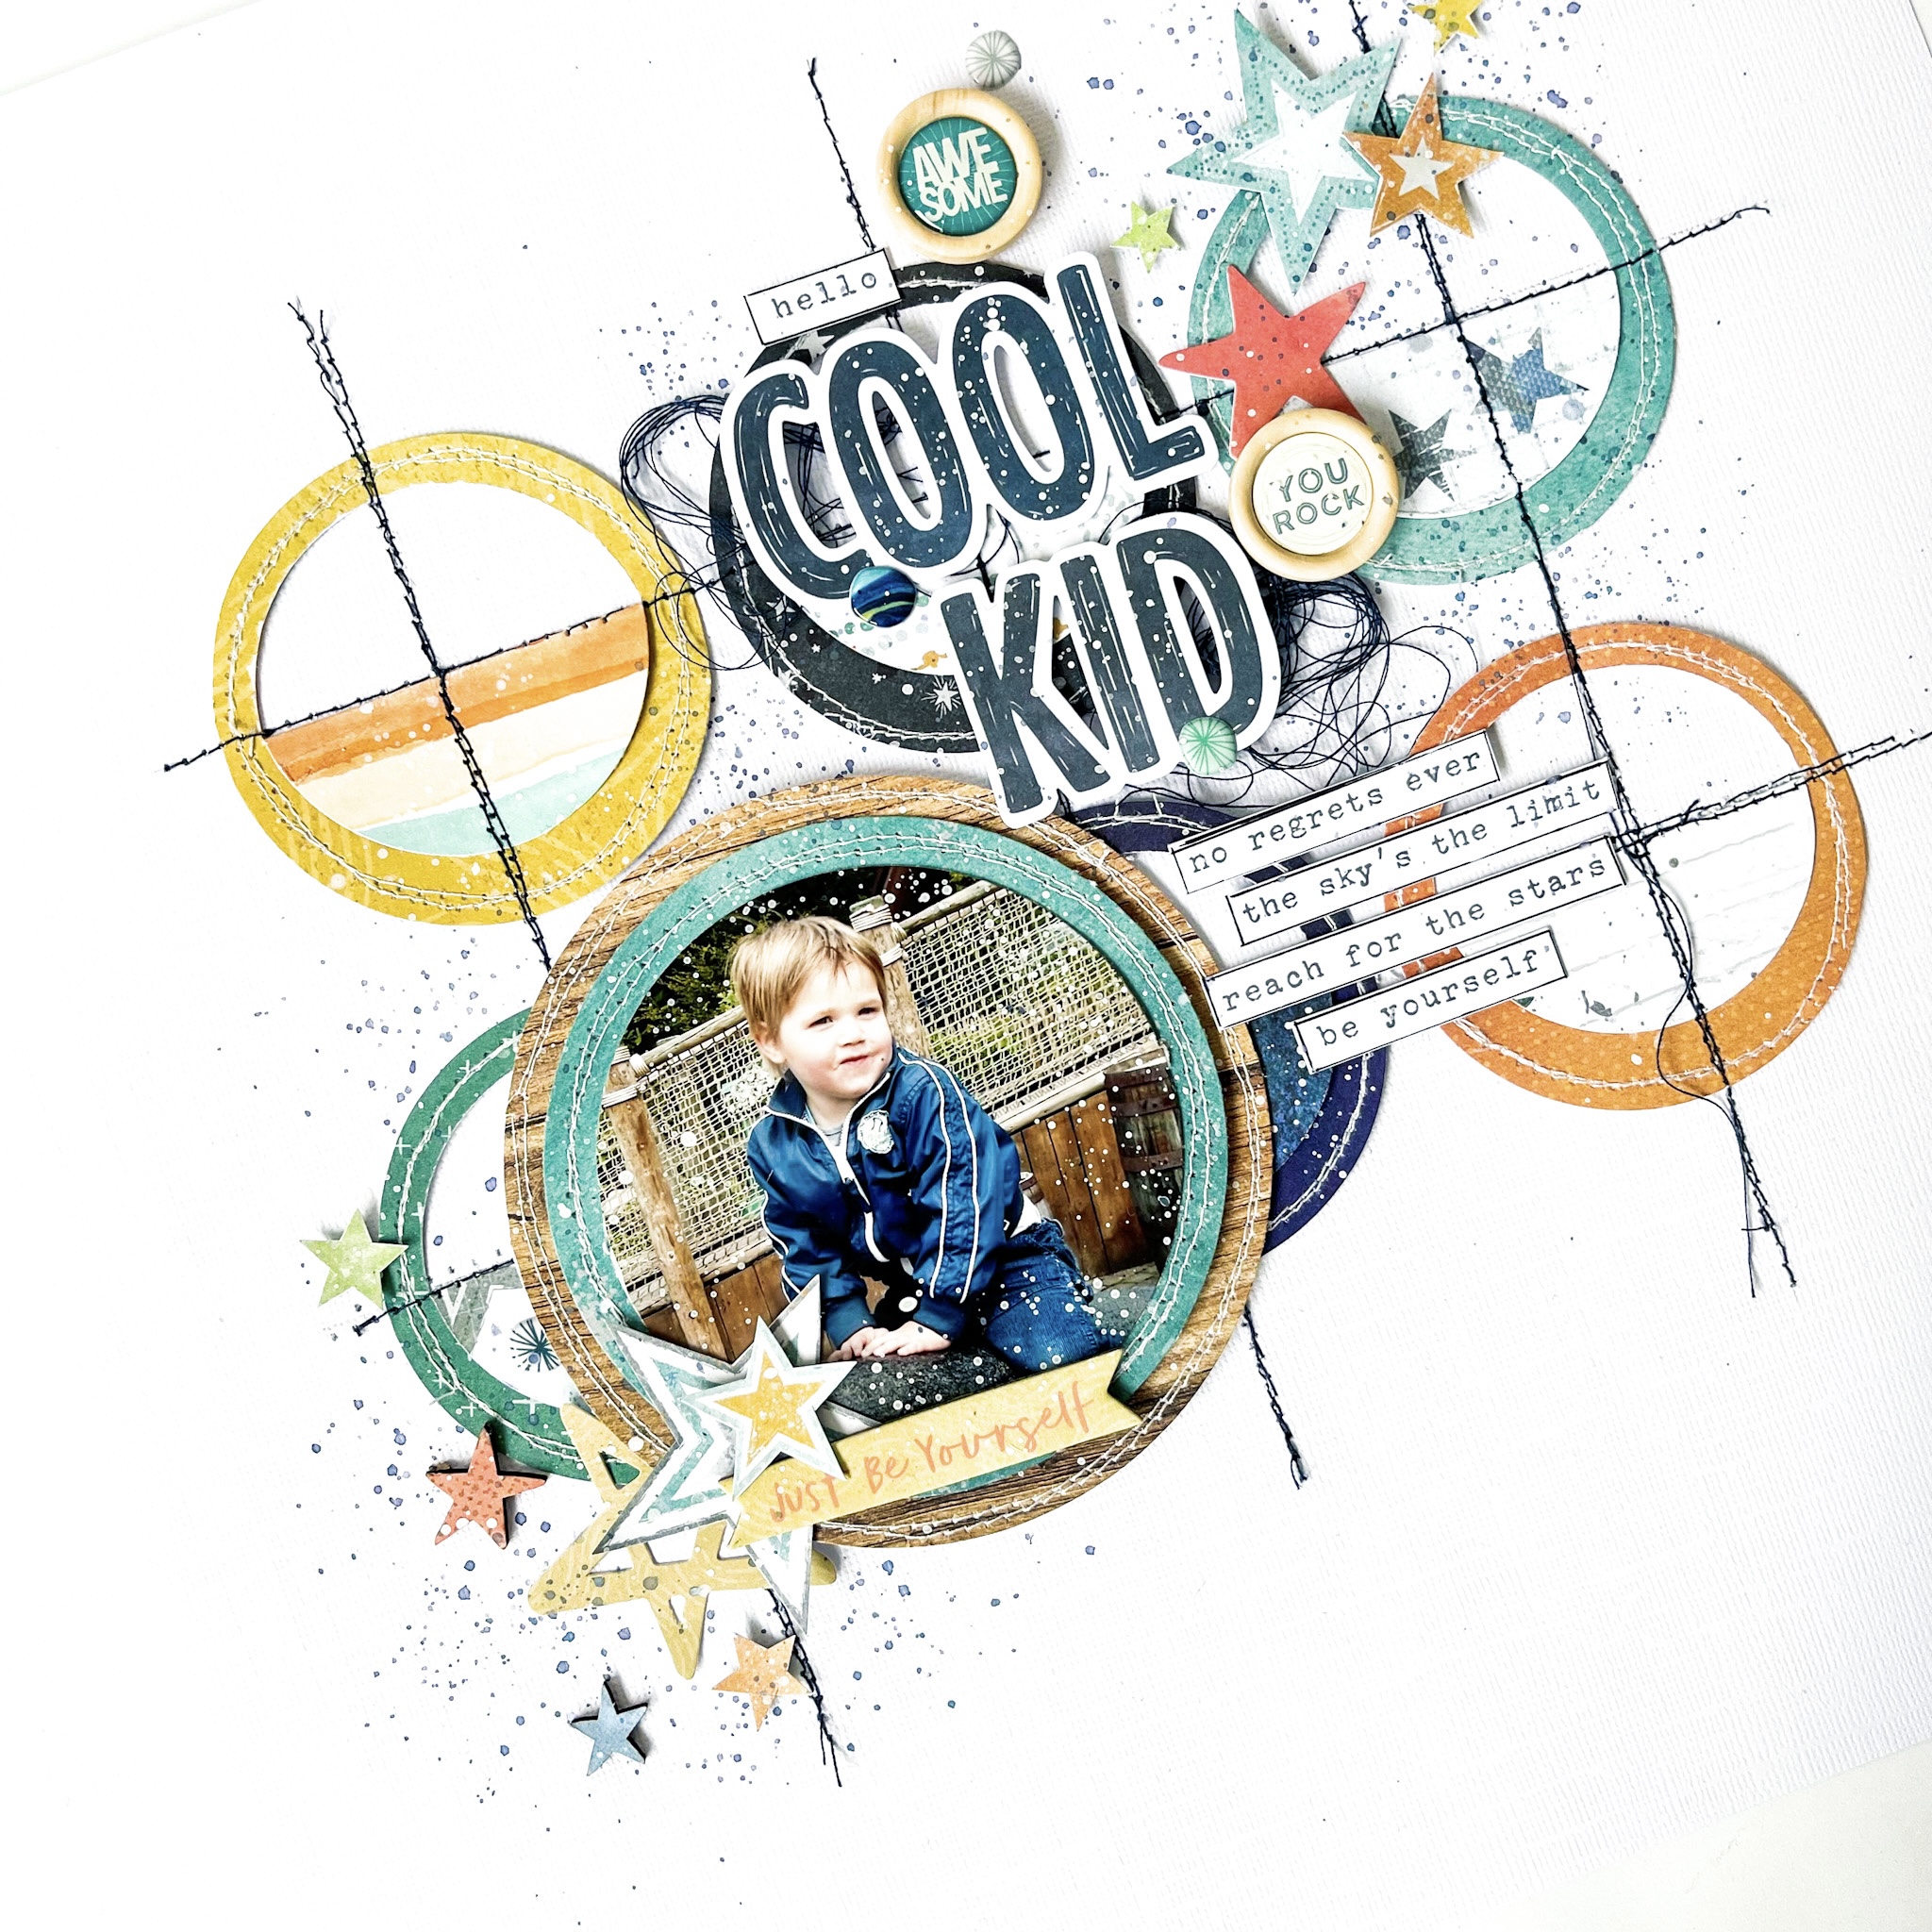
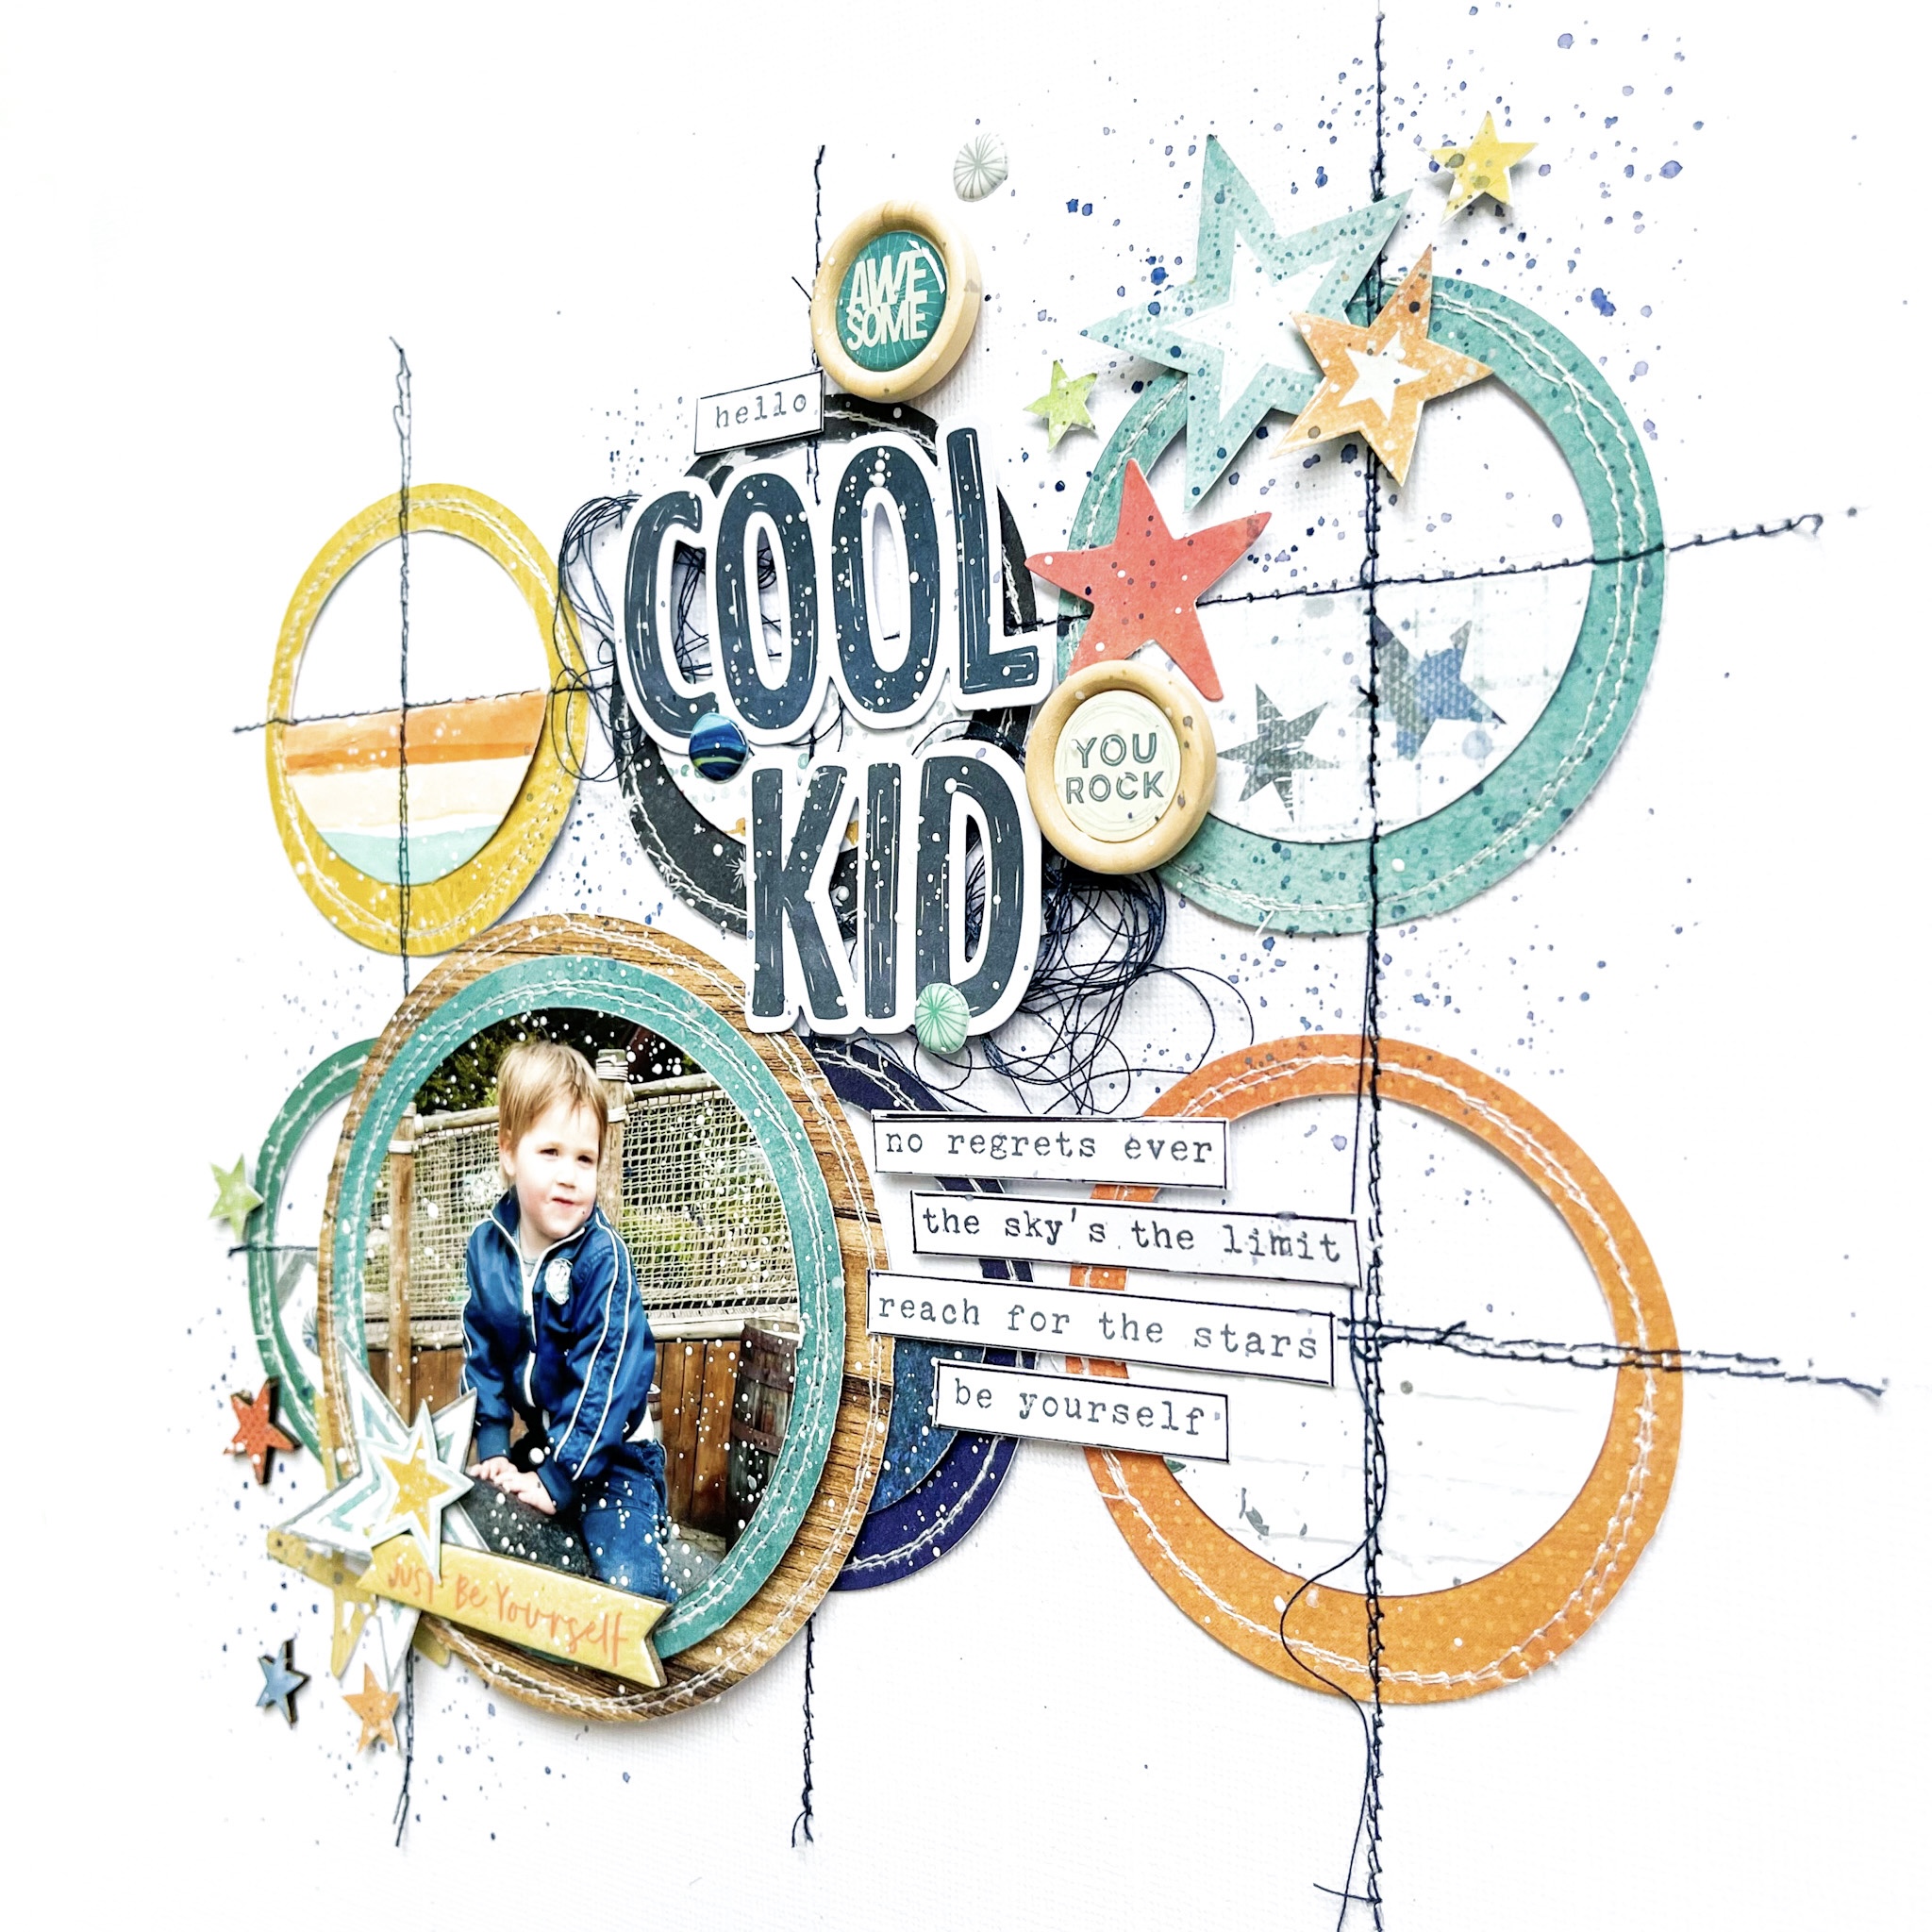
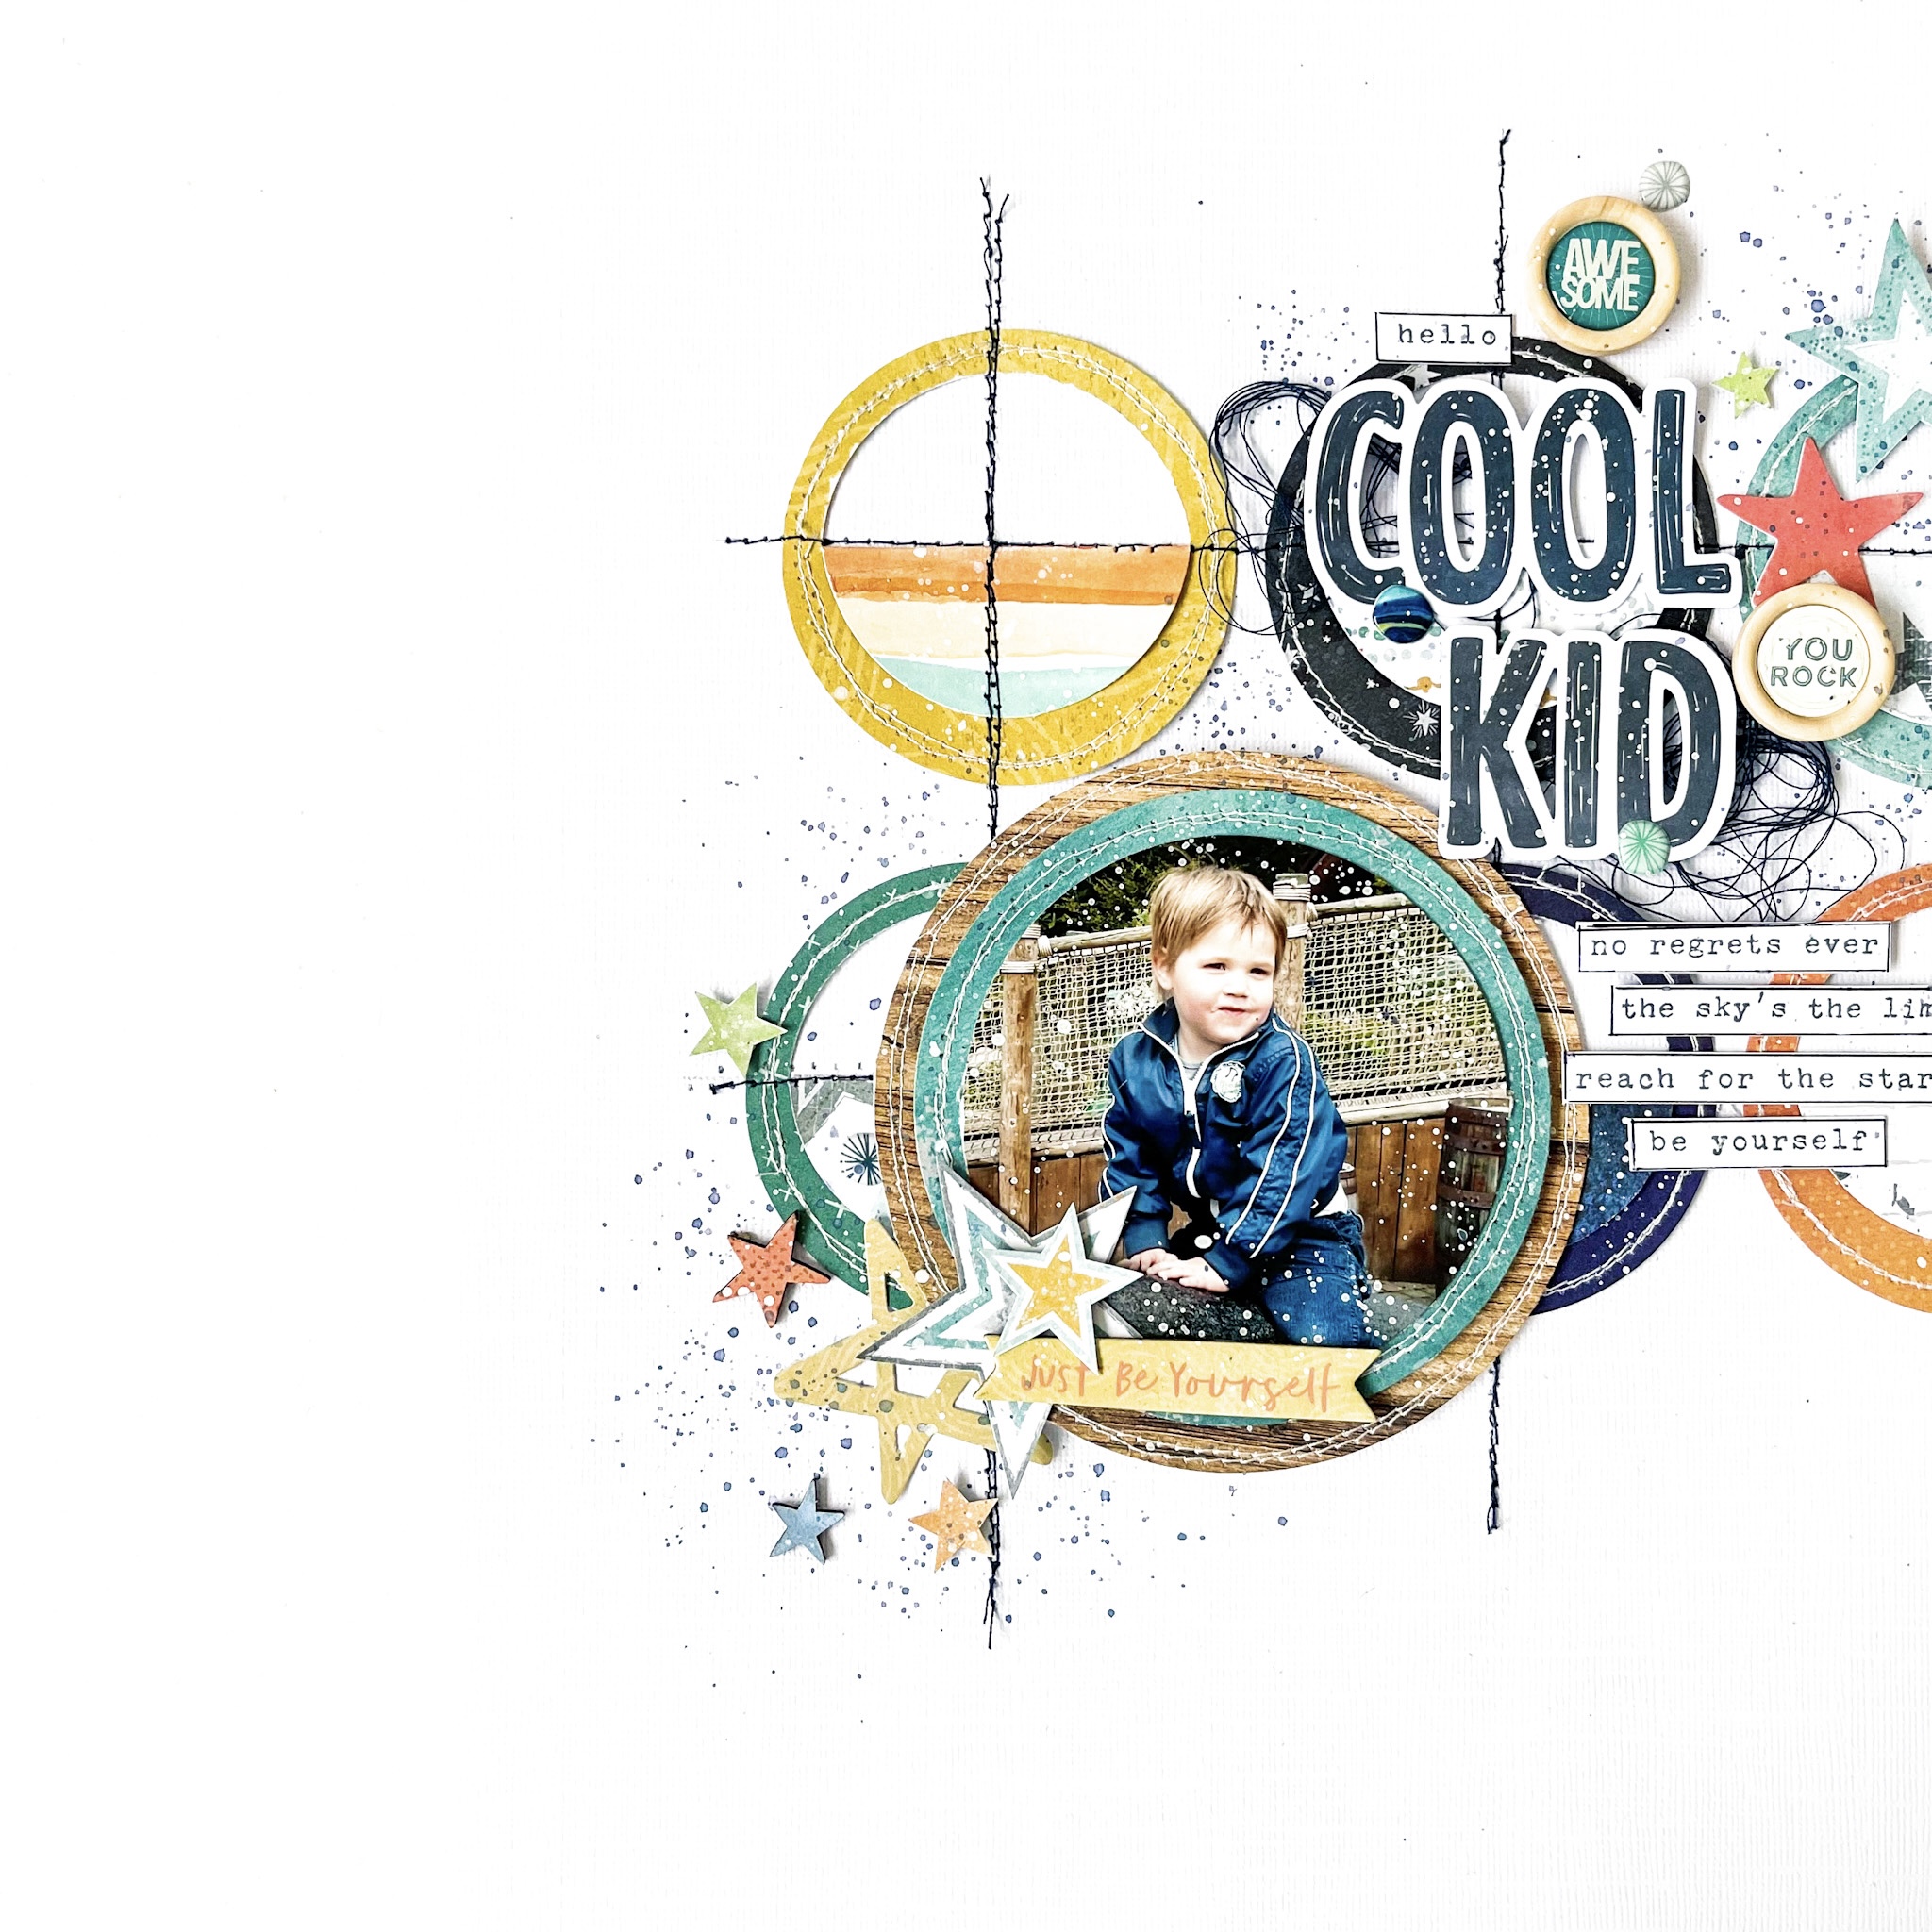
How lovely of you to visit the Cocoa Vanilla blog today I love to see you here. For this boy themed layout I really wanted to work with the fantastic collection “No Limits”
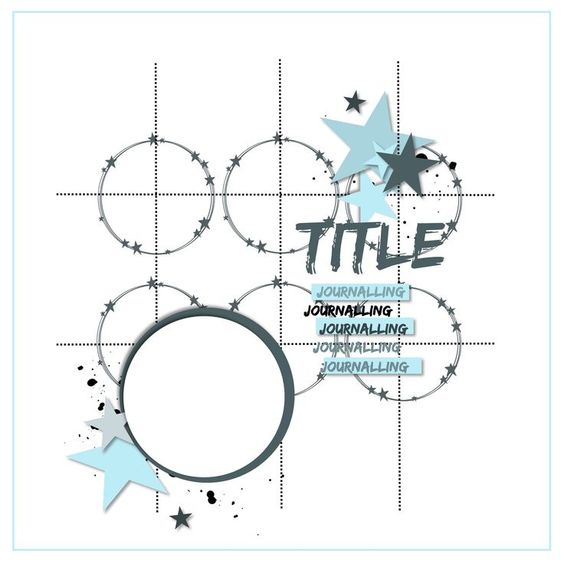
This photo of my son is from quite a few years ago but the colors and his cute little face fit this collection wonderfully well. For this layout I was inspired by a sketch by Lottie Loves Paper that I found on Pinterest. I love using a sketch. It can give you just that creative push you need at that moment.
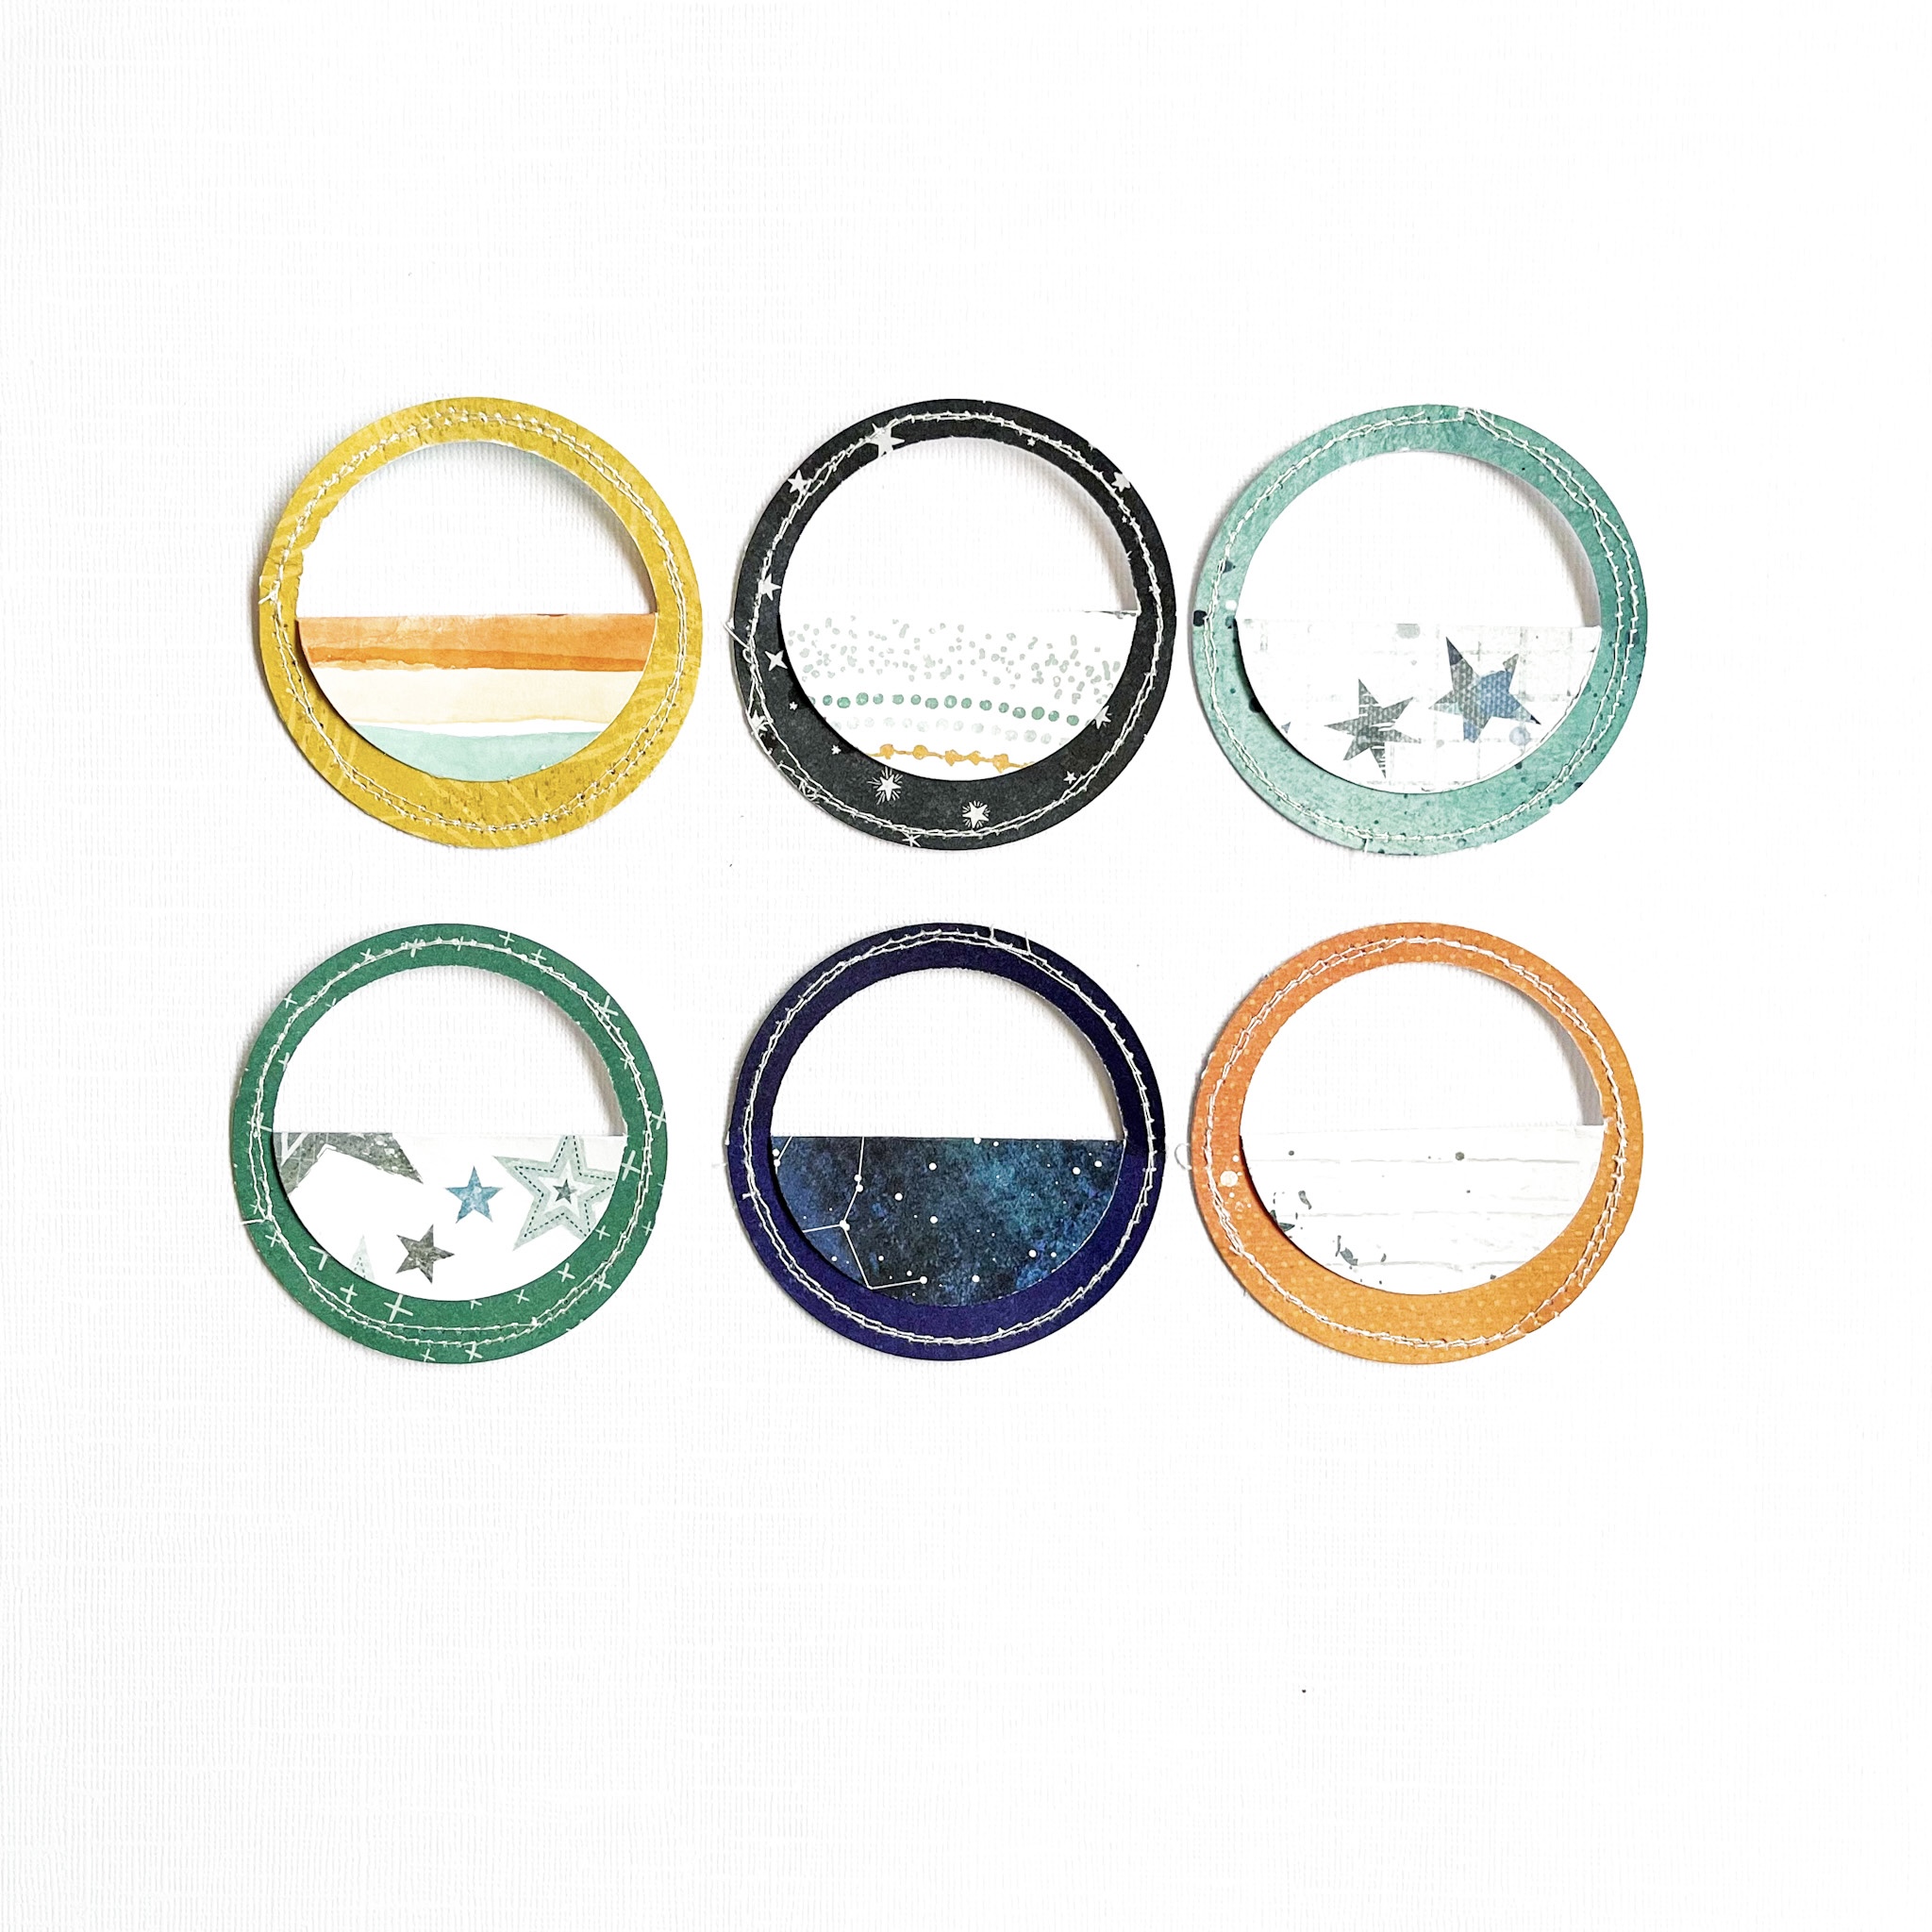
I took a 12×12 white cardstock paper and choose six of my fave design papers form the “No Limits” collection. I cut out six 3-inch circles and provide the edges of the circles with a stitch edge. I choose white sewing thread and use my sewing machine. Then I cut a half circle in the circles and fold them over. See picture…..
As also shown on the sketch, I am stitching a grid pattern on my layout. I choose dark blue sewing thread for the grid design. The dark blue is also reflected in the title as in the photo.
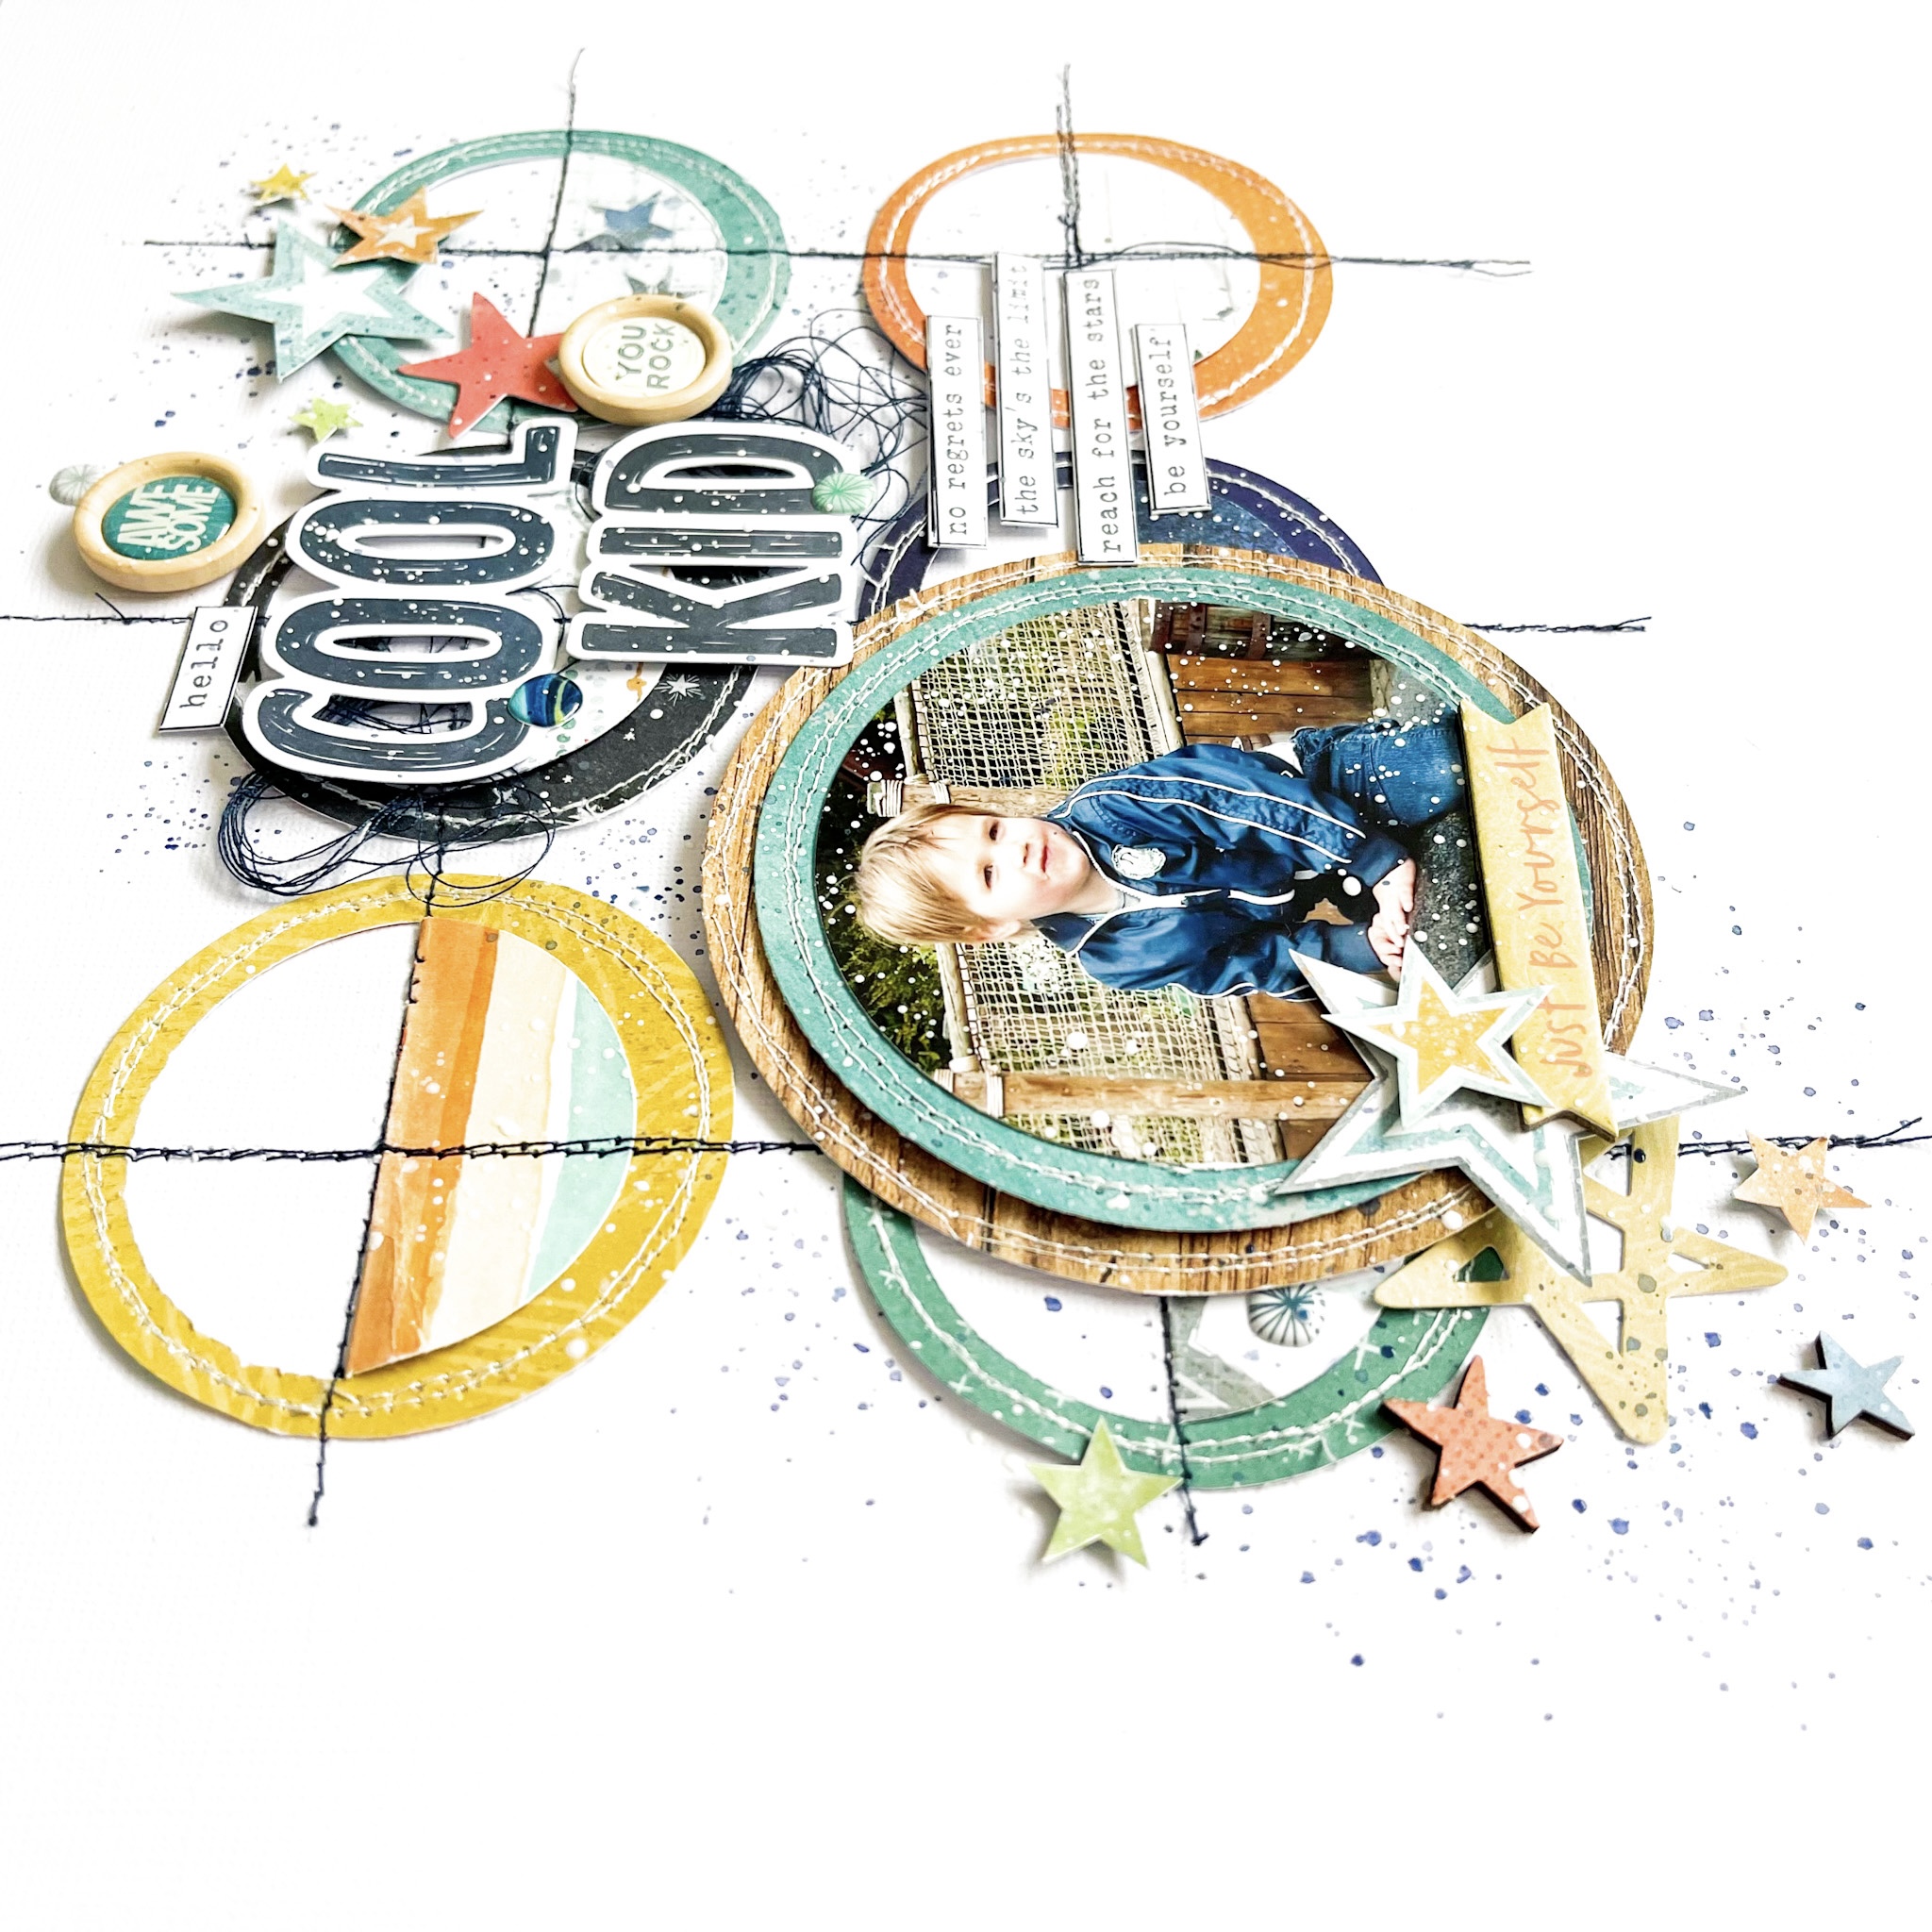
I cut two larger circles from the patterned paper and stitch the edges with white sewing thread. I also cut my son’s picture into a circle and place the circles on top of each other.
I fussy cut several stars from the pattern paper and created a cluster of stars on the top right and bottom left of the layout. In this way, I create a diagonal design.
The awesome bold and cool words from the die-cut titles are perfect to use for a title. The title for this layout will be ” Hello Cool Kid” under the die-cut title I fold some extra dark blue sewing thread.
I complete the title with some extra word strips that I added with a black line by using my fine liner.
I placed a few extra embellishments like wooden buttons, puffy stickers and cardstock embellishments to decorate my boys layout. Finally I give my layout some white gesso splatters. And for a little more color I add some dark blue splashes. I choose the color Distress Oxide “faded jeans” I love ink and gesso splatters on my projects. It looks festive and creative and I love that so much!
I hope I’ve given you some fun and cool ideas and that it can also be helpful for you as well to use a sketch sometimes. Love to see you next time on the blog and social with a new scrapbook project! Can’t wait to see your beautiful scrapbook inspiration on the Cocoa Vanilla FB groep! Happy creating and I wish you a fun and crafty day friends!
It’s Tarrah McLean back with you today to share a new layout created for the Throwback Thursday feature this week.
I chose to pull out the STUNNING Daydream collection as I had the perfect photo to document using this gorgeous collection! The photo is of myself with my crafty friends from a recent macrame workshop where we made rainbows. Just love how my rainbow turned out!
I chose a rainbow style background cut file from Paper Issues and cut it out from white cardstock, I then adhered the cut file to a sheet of the peachy coloured paper in the Daydream collection. I really love the effect of the cut file against the background paper. I backed my photo with one of the papers from the A5 paper stack and distressed the edges with my edge distresser tool. I like the texture this gives to the edges. I adhered the photo to the centre of my page and layered some papers and embellishments underneath.
My title is made up of a word from the awesome die-cut titles and an ephemera piece from the ephemera pack. I popped up both pieces with some pop dots and placed the title slightly on the left at the bottom of my photo. I tucked in one of the gorgeous fabric puffy hearts behind the Favourite ephemera piece and also chose some of the gorgeous rainbow die-cutsto adhere here as well. I used different size adhesive so that there were layers to my layout, I like how this creates shadows on my page.
On the right of my photo, I pulled out more rainbow pieces in both accessory stickers and ephemera pieces too and adhered them the same as the other side with different levels of adhesive for a layered effect and to create shadows. Another gorgeous puffy heart was also tucked in and I adhered some gorgeous, small floral ephemera pieces too. When I create my layouts, I will always place and adhere the larger things on my page first like the photo, a cut file and a title. From there my next step is to add the smaller embellishments like die-cuts, frames, chipboard etc and work down to even smaller embellishments again like enamel dots, sequins and small stickers.
I like to audition things before I completely commit to them staying on the layout so I will choose something I want to add and then I try it in a few different places before I am happy with how it looks, I take into consideration the colour, the size and if it balances with other things also on the page, I try to achieve the visual triangle on my pages so that my layouts are pleasing to the viewers eye. The last thing I did on this layout was added a few sequins and sprinkled some gold mist around my page.
Thank you so much for stopping by the Cocoa Vanilla blog today! I love how my layout turned out and I hope you enjoyed reading how I created it!
It’s Sophie here and I am so exciting to share this new layout with you!
This week’s theme is all about florals! Heaven!!! It clearly is my all-time favorite embellishment!
I used the beautiful These Days collection for my page.
I decided to do three cascades of flowers around my black and white photo.
I fixed three white embroidery threads of different lengths with a brad on a thick white cardstock. I punched tiny holes on each flower that I planned to use. They come from the Floral Ephemera pack and some are also fussy cut out of the “Home Grown” patterned paper.
I strung the flowers on the threads in descending order to create the cascades and fixed each of them with adhesive to make sure that they stay in place.
I added many tiny flowers and leaves scattered around the cascades as well.
I used a simple title cut out of “The Good Life” paper.
I placed a strip of the “Pretty Posies” paper and a scalloped strip of white cardstock at the base of the layout to ground everything, and handwrote my journaling.
Here are more close-ups:
This was fun to make!! And although it might look sophisticated, it was a very simple way to highlight the beauty of these pretty florals!
Today I’m sharing a page using the new ‘Storyteller’ collection with a focus on florals.
I decided I wanted to divide my page into thirds, using blue, yellow and red as the focus for each section. To start my page, I used a strip of white cardstock to stamp florals using my distress oxides..the red is Candied Apple, the blue is Faded Jeans and the yellow is Fossilized Amber.
I chose 3 of our wedding photos and printed them in black and white so they didnt compete with my colours. I wanted to have something to pop out from behind my photos, so I used some gauze that I coloured with the same inks…this adds a nice texture to the page.
Next, I went through all the embellishments..the ephemera pack, the chipboard, accessory stickers, wooden buttons and puffy hearts and pulled out all the colours that matched and icons that would work…making sure I used florals in each cluster.
While going through my collection I also found a yellow and blue stitched heart from previous page so I included these as well..
For my title, I used the Foam Title Stickers, placing one word on each line of the page… including some of the black foam hearts…perfect for a wedding page right?!
I hope you found some inspiration today and enjoy CVS florals as much as I do!
Mandy here with you today to share another layout using the amazing Storyteller collection! For today’s layout I chose to document a few photos from my recent birthday. We went out for brekkie in the morning, which is one of my favourite things to do. It was the perfect way to start the day, and even though we didn’t end up being able to go the beach like we’d planned because it rained, I had such an amazing day. The Storyteller collection was perfect for scrapbooking these happy snaps taken of me with family while we were out to brekkie.
I started this layout off by trimming down a sheet of white cardstock and matting it on the green Fly Away paper. I then printed my three 3×4 inch photos and arranged them into a photo strip. I layered multiple patterned paper, mostly from the A5 Paper Stack, behind the photos to create a bright and colourful photo mat.
I love fussy cutting the beautiful floral clusters on the Spring Fling paper to embellish my layouts with. Here you can see that I added one of these floral clusters to the right of the photo strip. I adhered just the centre of the flowers to the page, allowing the leaves and springs to lift off the page to create some movement and interest.
I added another fussy cut floral cluster to the left of the photos. This one I adhered with foam tape and overlapped it over the edge of the photos. I also added a wood epoxy button to the centre of the larger flower in the cluster. I love the texture and dimension that this adds to the page.
Lastly I added my title and journaling. I couldn’t go past using the amazing Foam Title Stickers for my title. There are so many great words and phrases in this pack, and I settled on using the phrase ‘This makes me Smile’. It was the perfect sentiment for these photos. I typed my journaling on my typewriter and added the journaling strips under the title.
I finished the layout off by adding a few die cut butterflies and a sprinkling of puffy heart stickers to the page.
Thanks so much for joining me here on the blog today! I hope that you enjoyed taking a look at my layout and found some inspiration.
Hi Cocoa Vanilla Studio friends! Danni here with a layout featuring the beautiful Storyteller collection. I used lots of patterned paper in this one; I think patterned paper has to be my favourite scrapbooking supply as it is just so versatile!
I have some photos of my littlest child splashing in some puddles in her bright yellow rain boots that I have been dying to document. This collection features the perfect shade of yellow to match her little boots. I started with the Oh My Heart 12×12 patterned paper for my background because the pattern reminds me of raindrops. I added some white acrylic paint to the area behind where my photos and embellishments would go to help them stand out on the patterned background.
Next I created a cutfile of some rain boots using a free image and my digital cutting machine. I backed it using the A5 paper stack. I used a yellow ink to fill in the white background of one of the patterns to add even more yellow to the boots.
I used a double sided3×4 card to mat one of my photos, distressing the edges for texture. Next I created three embellishment clusters. Two of the clusters I positioned framing the photos using the die cut ephemera, for the third cluster I filled the top of the boots with floral die cut ephemera pieces.
I added some of the small wood epoxy buttons over the camera lens and flower centres of my die cut ephemera. I stamped the date on an accessory sticker and added a sprinkling of puffy sticker hearts around my clusters.
Finally I added my title. I used a navy paper from the A5 paper stack to cut some letters on my digital die cutting machine, then added some messy machine stitching for extra texture and interest. This also enabled me to bend the edges of the letters up to create even more dimension.
I hope you enjoyed joining me for this layout. Happy scrapping!
Hey y’all! Laura Alberts back again with the Storyteller collection! These sweet photos of my puppy were perfect for a heart-filled layout I opted for a fairly simple vertical background with three of the stunning patterned papers in this collection: Oh My Heart, Little Love, and Ditsy Daisy. Layering a lovely paper doily behind my main 4×4 inch photo, then matting with paper from the A5 paper stack gave these photos a real pop on the page!
Underneath of the main photo, I placed a couple of banners from the icon ephemera pack to add a little movement on the page and guide your eye to the small 2×2 photos on the left. Around each of these photos, I added small word phrases and fussy cut florals for extra detailing. The title is from the foam words pack that accompanies this collection and nestled in beautifully around my photos.
For a little extra whimsy on this page, I added butterflies that I fussy cut from the 12×12 and A5 version of the Fly Away patterned paper. Fussy cutting out little details like these add such a special touch to a layout. Along with tucking a small cut apart piece from the A5 paper stack next to my photos, I added a sweet little cluster at the top, center and bottom of my cluster.
I hope this layout inspires you to have a play with clustering your photos together or adding clusters around your photos! To see how “You Are So Cute” came together, see the process video below!
Hello everyone. It’s Anna here and today I have a page for you created for a monthly theme: “Spring or fall”. I am so envy of all you Aussie girls for your current spring season. It saddly means we are slowly entering winter on the northern hemisphere (I know it’s still two months but it always feels like fall, winter and spring are combined into months months period and summer is here for like only two months). That’s why my choice of the season is quite obvious and I made a fall page. I even had a brand new photos of my girls taken in the nearby forest! I am still playing with the “Storyteller” line, that is so versatile that I could easily make a fall page with it.
I had this idea in my head to create a tree branches with some colorful leaves on them, framing my photos. And this is how this page started. Paper called “Cross it off” with wooden pattern was just perfect to hand cut my oak branches. I simply sketched the shape and used my scissors but you can also use your digital die cutting machine, if you do not trust your sketching skills. Next step was to die cut bunch of leaves in “fall” colors using patterns papers from A5 Paper Stack mostly. I focused on yellow, pink and dark green shades.
Next step was to find a proper background. I tried all the “Storyteller” 12*12 patterns but my leaves kept blending in too much. Here is where simple mixed media techniques and sheet of white cardstock come very handy. I picked a greyish blue shade of ink and simply blended it into my background. I wasn’t trying to apply the color evenly to make the illusion of clouds on the sky. I also splashed everything with drops of water for even more texture. I was really happy with how the background made the branches with leaves pop.
When the oak braches were glued down to their assigned spots, I started adding leaves applying glue only in the middle part and bending the edges a bit. It gave some needed texture and illusion of movement to the layout. In the gap between the branches I glued down my two photos. I backed them with pattern papers from A5 Paper Stack as I like when each picture has a frame of color around it. Decorating the composition with ephemera pieces and cardboard stickers was the final step of my process.
My title is a mix of foam title stickers from “These days” collection and some black alpha stickers from my stash. I had so much fun making this page. I just love the moments when idea in my head can be so smoothly and easly transfered to the paper. Because believe me – it doesn’t always work this way :)
I hope you like my idea too. It can be easily used for a spring page, where you would use like apple or cherry blossoms and young leaves on the branches and more blue color of the ink for the sky! Maybe you will scraplift it this way? Maybe I will scraplift myself for some future post :)
Thank you so much for spending your time with me and I hope you found some food for your soul here.
Hello, it’s Melissa here and today I’m sharing a new layout that I created with the gorgeous Storyteller collection. I really wanted to feature lots of the patterned papers so I went with a geometric cut file from Just Nick Studio called Broken Butterfly. Rather than my go to white patterned paper background I used Ditsy Daisy.
This is a very busy page with colour and pattern. In order to break it up I used navy ink applied with the packaging technique, and splatters in white and gold. This separated the butterfly cut file from the busy floral background. I used lots of papers from the A5 Paper Stack to back the cut file.
The photo is my youngest daughter at our new local supermarket pushing the little trolley. Its her favourite reason to help me shop! I clustered several flowers and leaves around my photo from the Floral Ephemera.
My title is from the Chipboard Stickers, and was perfect because sometimes I’m too lazy to think of a title myself! I was so happy to get a Wood Button onto my page too! I wrote my handwritten journaling onto a Die Cut Ephemera label, and the frame on my photo is also from this Ephemera.
I created a process video which you can watch below.