Hey y’all! Laura here with a bright rainbow filled layout so sweet it will warm your heart, even in the coldest winter! This gorgeous Daydream collection is just stunning and an absolute “dream” to work with, I have to tell you. My favorite part of this collection are the frames and florals, so I decided to showcase both of them on this darling 9×12 layout of my sweet girl on the trampoline. I even created two more frames with scrap paper to mix up the designs.
I backed each of the frames with patterned paper from the 6×8 pad and a couple with cut-aparts from the Happy Place paper. I fussy cut a ton of florals from the 6×8 paper pad and tucked them all around the corners where my photos met the frames, even a few of the itty bitty florals to use as detail pieces! When I added the butterflies, I just had to give them Nuvo trails behind them to create a little movement on the page.
To give this layered layout a little added texture, I popped rosettes into two of the clusters and glued the gold sequins from the embellishment pack alongside my fussy cut florals. I love the energy of this collection, it is just perfect for my happy go-lucky girls and their sweet imaginations!
I hope this frame filled layout inspires you to look at your ephemera a little differently! It’s fun to see how you can use frames in a new way. If you’d like to see the Lovely layout come together, I have the entire process in the video below!
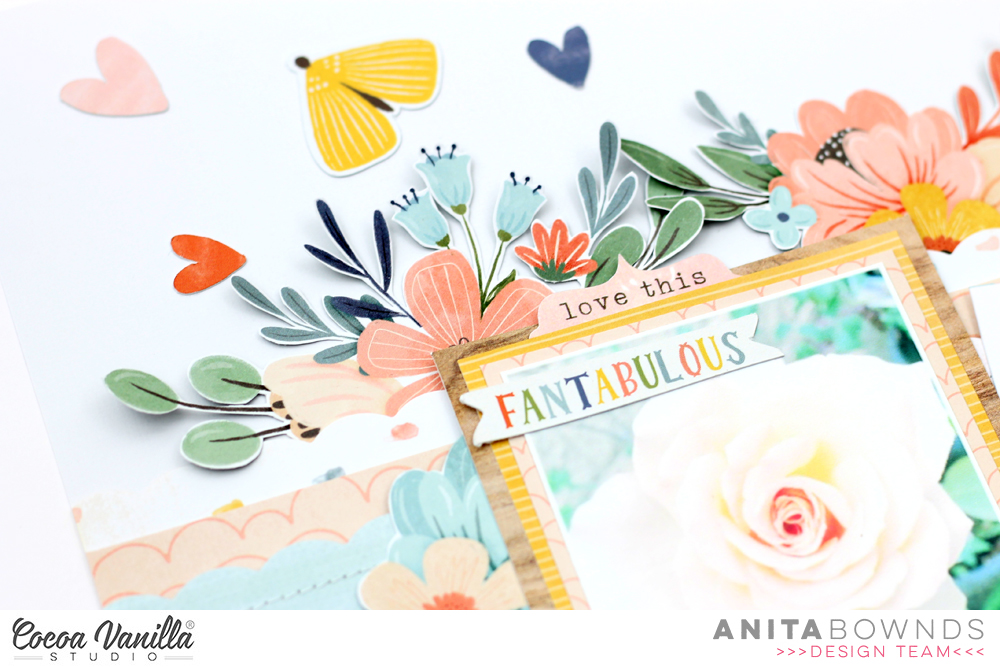
Hi crafty friends, Anita here with you today sharing my first layout using the beautiful new DayDream collection it’s so pretty with all the flowers just makes you wanna fussy cut them all out!!…
I started off by fussy cutting out the garden variety pattern paper to add floral’s to my background because who can’t resist that beautiful paper then next I chose 3 patterned papers Sun shower , Sweet Serenity, Happy Place and cut a strip from each to layer them on top of each other . I used decorative scissors to add a scalloped edge to 2 of the strips and some machine stitching.
Then I matted my photo on pattern paper from the 6×8 and frame from the ephemera pack and then I tucked a cut apart beside my photo and added a geo heart cut file from @neatncraftycutz i then
embossed with a embossing folder to add texture behind it.
Then I added more fussy cut flowers around my photo along with die cuts from the ephemera pack
To finish it off I added my title from the ephemera pack and a flair button.
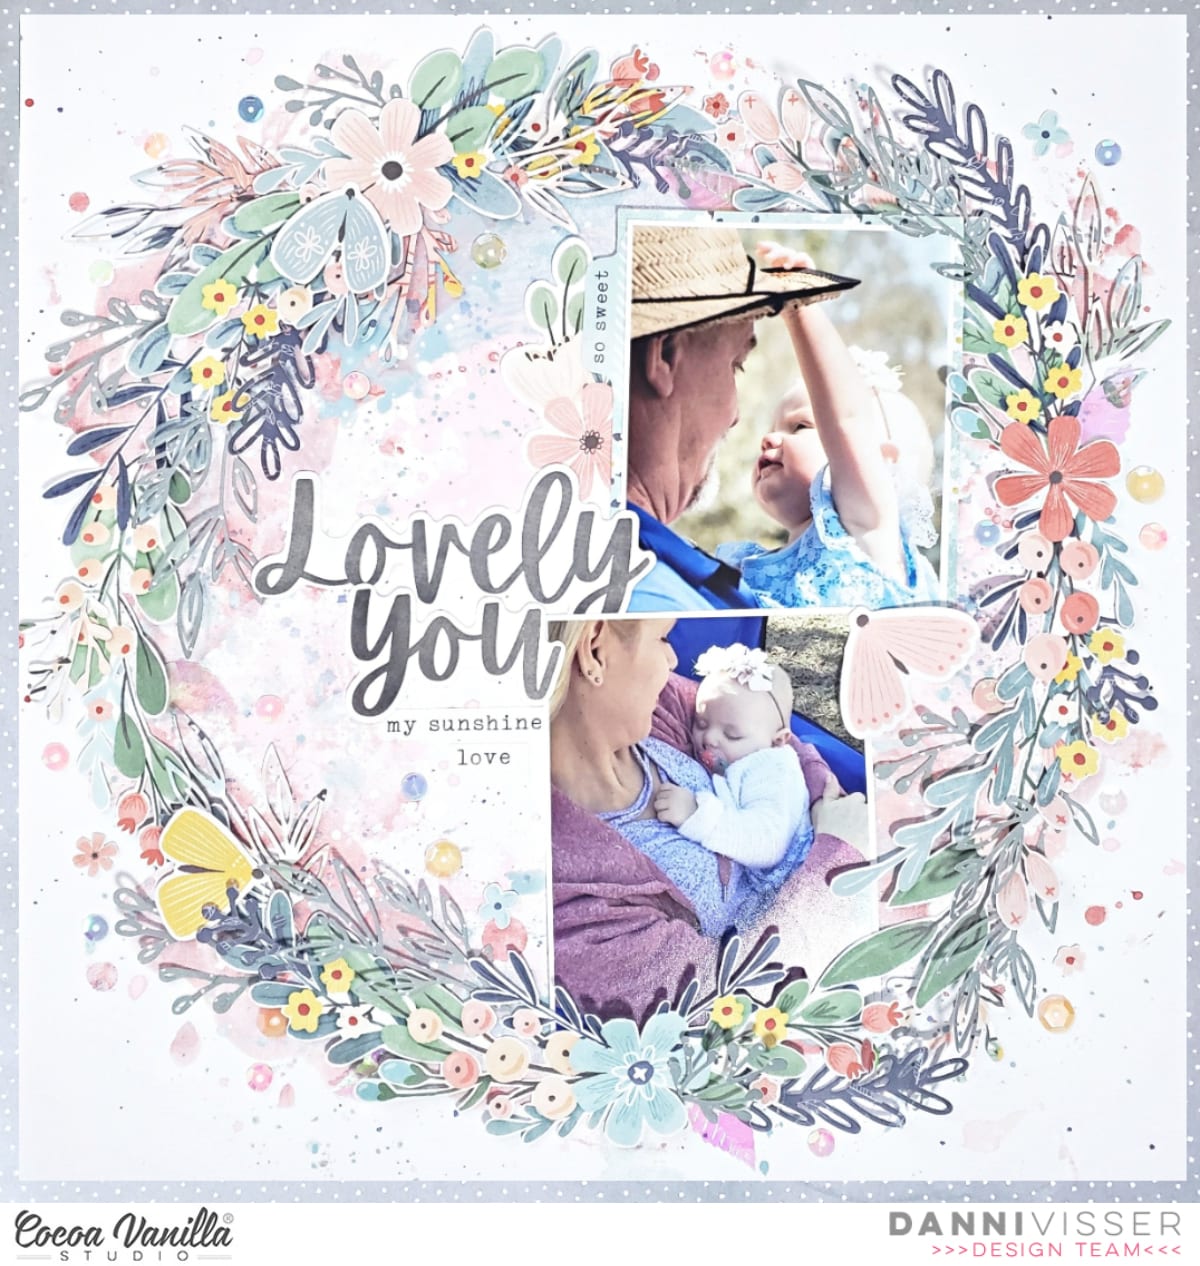
Hi there lovely Cocoa Vanilla fans! Today I am up with a fussy cutting, mixed media fest using the stunning new Daydream collection and some photos from my beautiful daughter’s first birthday.
When I first saw this collection, I knew I would be whipping out my scissors right away and getting stuck in to fussy cutting those gorgeous patterned papers, and the floral wreath in Daisy Days 12×12 paper immediately caught my eye. I used my precision scissors and a craft knife to cut out the wreath and cut away most of those tiny inside sections to add a feeling of real depth and dimension.
I knew I wanted to fill out the wreath with some extra foliage, so I used my manual die cutting machine and metal dies to cut a bunch of extra leaves from Garden Variety and Up in the Clouds patterned papers. I also cut a border from the same Garden Variety paper and added it behind some white mixed media cardstock to make the base for my background.
I went ahead with making my mixed media background by laying down some paints in a circular shape where my wreath would go. I used a combination of watered-down acrylic paints and distress oxide sprays in complimentary colours, adding them onto some plastic packaging and smooshing them onto the cardstock. I also added some splatters all the way around with a paintbrush.
Before I adhered my wreath down, I added some adhesive foam to the edges so all the little leaves and flowers would lift up from the page and look extra three dimensional. I then glued my wreath down and filled in any spaces with the leaves I die cut earlier. I tucked my two photos under the right inside edge of the wreath, then added my title “Lovely You” from the die cut titles to the left of my photos in the remaining space. I used three of the sweet little moths from the die cut ephemera around the wreath, popping their wings up with more adhesive foam to bring them to life.
I filled in the gaps on the inside of the wreath and beside my photos with some floral and tab stickers from the accessory stickers, and popped in some tiny word stickers below the title.
Lastly I used a bunch of the beautiful sequins from the new sequins & flowers pack to fill in all the gaps and spaces all the way around my wreath, adding lots of pretty sparkly details. These sequins are one of my favourite items from the new collection, I have used so many I will need to order a new pack very soon!
I hope you are loving this gorgeous new collection as much as I am! You can watch the process video of this layout below. Thank you for joining me today and happy scrapping!
We’ve got some more exciting new to share today – the winners of our ‘Daydream’ collection giveway!
First, let’s start with a big THANK YOU to all our friends, fans and retailers! We have been totally overwhelmed with the amazing response ‘Daydream’ has received from everyone, including the amount of entries we had for our giveaway. This new collection has been in such demand that our pre-order release sold out in record time, and our warehouse has been flat out around the clock shipping orders to stores all over the world. Please rest assured that we have more stock on the way, so if your favourite store was one that missed out, they will be able to order it again soon.
Now, let’s announce our lucky winner who will receive the ENTIRE ‘Daydream’ collection…
Congratulations Leah!
And we have a runner-up as well, who will receive a ‘Daydream’ collection kit…
Congratulations Colleen Berry!
Congratulations to both our lucky winners. (Please keep an eye on your Inbox and Sue will be in touch to organise your prizes.)
For everyone else, thank you for your support for this collection so far!
If you are trying to find somewhere to purchase our new collection, please join us in our Facebook Community Group – we have a pinned post at the top with a list of current retailers that can help you locate one near you. Or if you already have it and you have been busy creating, why not join us and share what you’ve been making – we love to see!
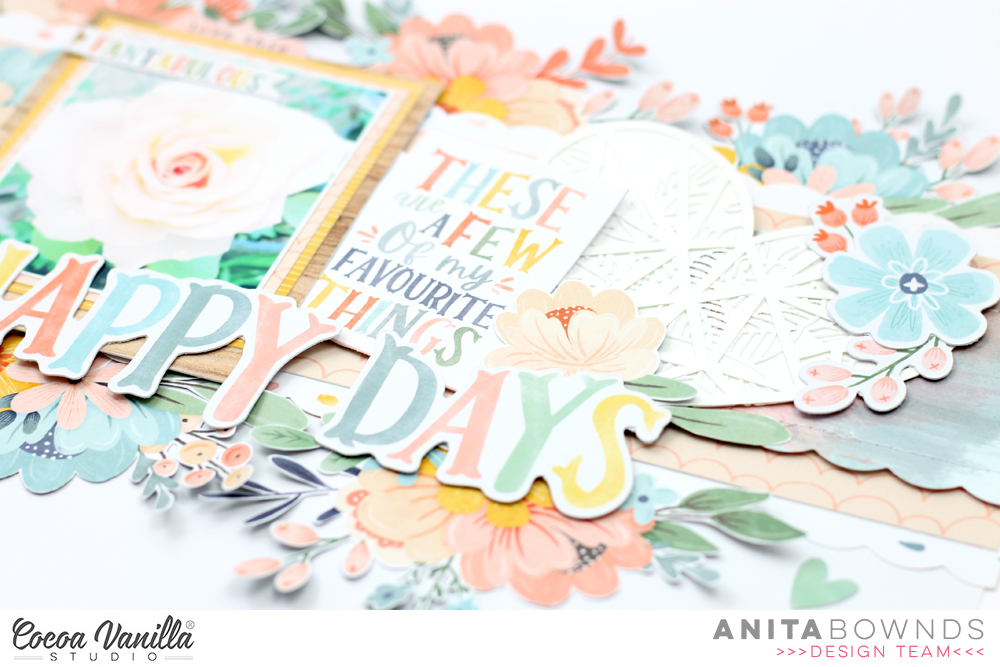
Hello Hello! It’s Michelle here today to share with you a new layout that I created with our BRAND NEW collection – Daydream. I’d give ALL the heart eye emojis for this collection, it is so beautiful! I spent an entire night on the couch fussy cutting and loving over all the sweet floral clusters from the Garden Variety paper. So so pretty!
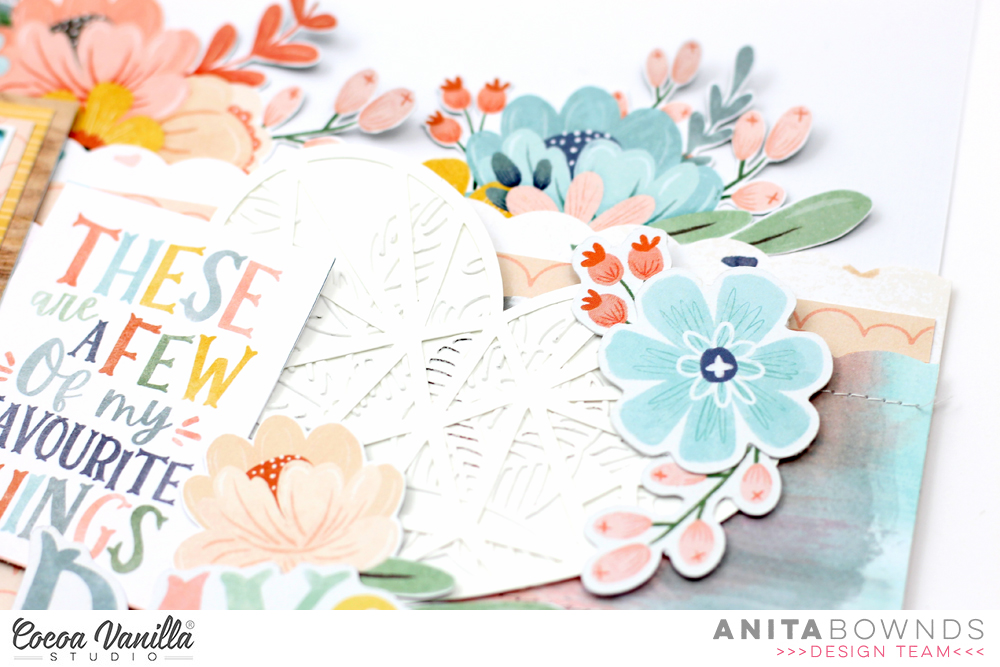
For this layout I felt the need to recreate an older layout of mine using circular elements grouped with florals, stickers and a little machine stitching. I started by choosing a couple different pattern papers Daisy Days, Sweet Serenity, All Aflutter and cut multiple circles from each one. I fussy cut the outer ring off 1 of each colour circle to create a smaller circle and an open circle, then arranged them in clusters within a triangular design on some white cardstock.
I slightly distressed the edges of each circle before adhering with double sided tape and machine stitched through the ones that overlapped the edge of the layout. I also stitched through a little on the open circles.
Before adding anymore to the layout I added in the photos, a couple of Leila from a few years back being as sweet and crazy as she can be. I adhered the photos to some of the yellow pattern paper Sun Shower and added one of the sticker tabs to the top left photo.
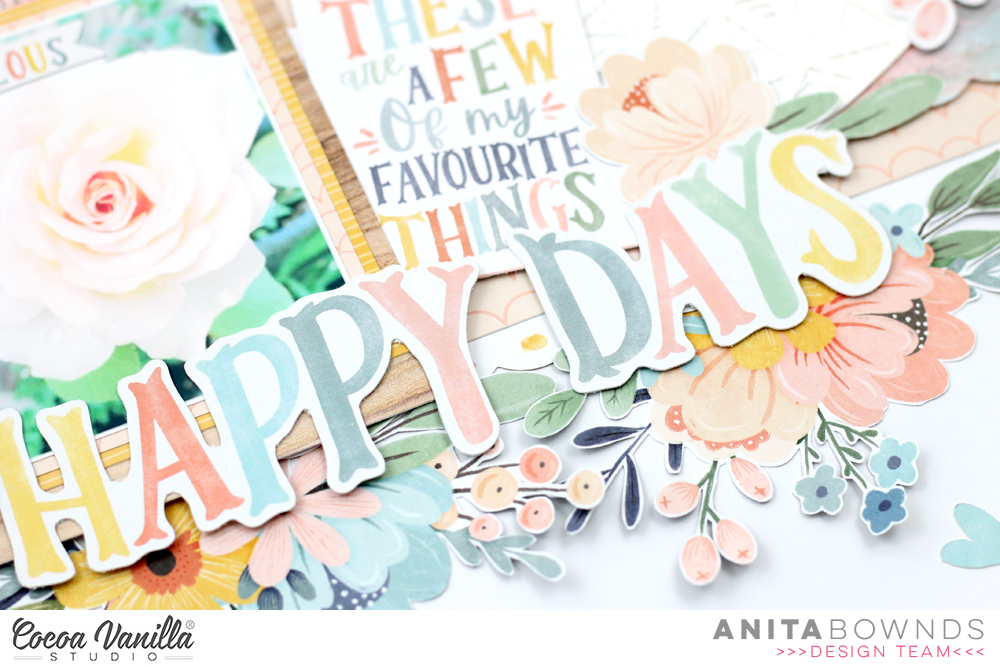
Next up I added in the title using cardstock title pieces from this collection along with some older white alpha stickers and some handwriting. I’ve adhered the cardstock pieces using foam tape to pop them up off the page and then machine stitched through the stickers to ensure they stay put on that layout in years to come, which also adds a little extra detail to the layout.
I then added the pretty floral clusters that were fussy cut from the Garden Variety paper to the groups of circles. In this cluster I also added a sweet flair button, ephemera heart & mini flower plus an accessory sticker strip.
In the cluster above the photo I used a mix of fussy cut florals with ephemera florals layered using different forms of adhesive. The ‘You are my sunshine’ element is from the accessory sticker sheet and one of the first embellishments I knew I wanted to mix into this layout.
Lastly the bottom cluster made using another mix of ephemera and fussy cut florals, sticker strip and heart. I added my usual splattering of gold ink all of the layout and called it complete.
Well friends thats all from me today. Thank you so much for stopping by to see the first layout I’ve created using our NEW Daydream Collection. You can find the details for this collection in the reveal post HERE. Hopefully it arrives at your favourite scrappy store real soon so that you can all get your craft on and create up a storm!
Hey sweet friends. It’s me!…..Kylie back with you all on the blog today. I’m SO excited to be sharing my new layout design with you as it is the first I have created with the new ‘Daydream’ collection. I have to say it, this collection is yet another stunner! Very, VERY daydreamy indeed.
The ‘DAISY DAYS’ paper was selected as my main background and I have added the ‘SWEET SERENTIY’ paper angled over the top, to which I had used a border punch from my craft stash around the edges for a ‘lacey’ effect.Then I added a piece of the ‘ALL AFLUTTER’ paper over the top. Some machine stitching was added around the edges of this piece of paper to add a lovely ‘rustic’ appearance to my completed design.
Next I added some ‘white washing’ to my background page, just to soften it a little. I did this by mixing a small amount of white paint 50/50 with some water and using a wide paintbrush to add some streaks across the page. Once dry it give s a very subtle effect. My photos were printed smaller at 2.5″x 2.5″ and backed with the ‘UP IN THE CLOUDS’ paper. I adhered these on an angle with foam tape so that they would sit up from the background, giving a little dimension.
The die cuts in the ‘DAYDREAM’ collection are soooo pretty! I have layered floral clusters on a diagonal to support and embellish my photos. Some were also added with foam tape, again to create dimension.
To complete my page I created a lovely big title from the die cut titles. I also added some sub title phrases from the sticker sheet.Once I had finished I was so happy with the softness of my page.
Thanks so much for stopping by today! I hope my layout has given you a little inspiration with your own creating.
It’s Tarrah back with you on the Cocoa Vanilla blog and today I am very excited to be sharing my first project using the stunning brand new Daydream collection! Oh my goodness it is just so beautiful! I think this one might be up there as one of my favourite all time collections from Zoe! So as soon as I received my goodies, I pulled out that amazing rainbow paper and believe me, it has been a very popular paper amongst the design team!
I decided to trim the rainbow paper down so that I could mat it with the darker blue paper and then again with the small black and white spotted paper. I like how the darker blue paper draws out the hearts in the bottom left and also the hat and dress of both of my nieces in the photo. The photo is a recent one of my sister and her gorgeous family on an outing to see a waterfall. I matted the photo with the woodgrain frame from the ephemera pack and also adhered one of the die-cut phrases on top of the photo. I layered half of the large circle die-cut and a paper doily on the left of the photo and tucked in some of the super cute florals and a tab on the right of the photo.
I love the strip of rainbows die-cut so I added that piece to the top of the photo. I chose to create a long title for this layout, choosing ‘You Are My Sunshine’ and splitting some of the title to draw your eye around the page. The ‘You Are My’ part I wanted to arrange in an arch to mimic the rainbow arch and the ‘Sunshine’ part of the title fits perfectly at the bottom of the photo. I did use craft foam underneath the title to give the page some dimension and create a shadow. You can see in the detail photo above the shadow this created in the words.
I chose some more of the gorgeous florals and pulled out one of the cute puffy hearts. I adhered all of these to the left of the photo. I had to add that awesome sun die-cut above the word ‘My’ and I layered one of the flair buttons straight on top. I chose some of the small heart stickers and die-cuts and placed these tone on tone around my layout. To finish off the page, I chose some of the phrases and words from the accessory sticker sheet that were appropriate and placed them around the layout, I also stamped the date stamp that the photo was taken.
Thank you so much for joining me on the Cocoa Vanilla Studio blog today! If you were thinking about purchasing this collection, don’t think any longer!! You NEED this collection. It is just so gorgeous and super super easy to work with. I have already completed almost 3 layouts and I have only had it for a week!
Make sure you get your local scrapbooking store to get the Cocoa Vanilla Studio Daydream collection in for you or find an online store who may be selling it. You will not regret it!!
Hi everyone! It’s Sue here today to share my very first layout using the brand new, and oh-SO-beautiful, ‘Daydream’ collection. This was created for our current ‘Outdoor Adventures’ theme, and I was very excited that the collection arrived in time for me to use it for this page.
The photo I chose to document was one that I took of my hubby and our boys doing some gardening together. My sons recently celebrated their 8th birthday, and one of them had requested “gardening stuff” as a present. (Isn’t that the cutest?) I couldn’t resist his lovely request, so I went and got him his own gloves, tools, seedlings, pots and potting mix. He was so happy, and has been lovingly caring for them ever since.
In keeping with the outdoor theme, I decided to use the wood grain print on the reverse side of the Over the Rainbow paper as my background. This gave the page a good “earthy” base, and because it’s such a beautiful detailed grain, it also made my job much easier as it really didn’t need anything added to it.
I then created the focal point for my page using layered pieces from the B sides of the patterned papers Sun Shower (a delicious rich yellow with stripes); All Aflutter(a lovely coral with a sweet heart print); and Garden Variety (a sweet blue-grey tiny spot).
I then added a small grey paper doily from my stash, before sticking my photo down using some scrap cardboard to pop it up from the page. (Did you notice the rainbow lens flare in my photo? I think it looks cool, which is one of the reasons I chose this shot.)
With my photo now in place, it was time to add some embellishments. The first thing I reached for to go with my gardening theme, was the stunning floral print on the Garden Variety paper. The flowers on this sheet were just begging to be fussy cut! I cut several clusters and tucked them in around my photo, bending the edges up away from the page to provide dimension.
I created a small cluster around the top left corner of my photo using the so sweet tab sticker from the Accessory Sticker sheet; a small flower and leaf from the Die Cut Ephemera pack; and one of the new embellishments on the block – a Puffy Heart. These fabric hearts are super cute, and they have beautiful, delicate gold thread woven through them.
Next, I added my page title to the right of my photo; using three words from the Die Cut Titles pack. (I actually cut the “s” off the word “days” so it fit the phrase I wanted.) I used foam tape under my title words so that they would sit up at the same height as the photo and allow me to overlap the edge. Above my title I added the sweet little die cut rainbow from the ephemera pack.
With my layout so bottom heavy at this point, I created a small cluster in the top right corner to help balance it out. I wanted to mimic the focal area of my page, so I used small pieces of the same papers, then topped it with the oh happy day banner from the sticker sheet.
To finish off my page, I used a label cut from the Happy Placecut apart paper to write my journalling, then added two small die cut flowers. A light splatter of some white mist around my page, and I was done!
This collection is just so easy, and such a pleasure to work with that I was able to create four pages before I even really came up for air. It has just started hitting the shelves of retailers, so make sure you check with your local store or favourite online retailer to see if they have it available. It really is one you need in your stash!
Hi Creative friends, Gwen back on the blog today with a new share and I’m so excited to be using the brand new collection ‘Day Dream’. This is the first layout I’ve created with this collection and I absolutely loved working with it, so soft and pretty! This week on the blog we are being inspired by the theme ‘Outdoor Adventures’ so I thought it would be fun to document a couple of photos from a recent family trip to Rainbow Beach.
The design of the page was inspired by my photos and this sweet pattern paper called ‘Over the Rainbow’. As soon as I saw the pattern paper, the idea popped into my head to make a little scene of sorts with the rainbow crossing over the sky in my pics.
I began by fussy cutting out the rainbow design and then placing it onto the ‘Sweet Serenity’ pattern paper and adding stitching along each of the rainbow arcs. Next, I’ve positioned my photos underneath the rainbow, mounting on the ‘Garden Variety’ pattern paper from the 6×8 paper pad. I love using the paper pad to back my photos as the prints in the designs are smaller and they translate really well as photo mats. I’ve raised my photos up on foam for dimension.
I’ve then gone ahead and placed the larger die-cut pieces, the florals are from the ‘Ephemera Pack’ and the title is from the ‘Die Cut Titles’ pack. Placing the larger elements first helps the page come together quickly. I’ve also raised some of these elements up on foam tape for dimension. I love mixing and matching the heights of elements on my page.
I’ve then worked on creating my ‘flowing clusters’ as I like to call them… clusters of embellishments that draw the eye around the page.
I’ve used a combination of elements from the ‘Accessory Sticker sheet’, ‘Die Cut Ephemera pack’ and the ‘Flair button pack’ to create one main cluster and two smaller ones that draw the eye from the top of the rainbow down to the photos.
To finish the page off, I’ve fussy cut out three of the cute moth elements from the ‘All Aflutter’ pattern paper and two of the cute hearts from the ‘Puffy Hearts’ pack, these smaller elements add texture and interest and finish off the page really nicely.
Thanks for popping by today, I hope this inspires you to take a look at the latest collection and add it to your stash, it’s shipping now so be sure ask for it at your local store. I’ve also created a YouTube process video for this layout if you’d like to see how it all came together. Check that out below or by clicking here.