Hi there CVS friends, today I am sharing a layout created with Daydream. I have been wanting to scrap this photo of my daughter out side the Notre-Dame Cathedral since it was almost completely destroyed in a fire. I of course I had to use Daydream and incorporate the rainbow paper!
I am loving that paper tearing and torn strips are back in and now I no longer a novice in scrapbooking I love tearing paper!!!!! I think the up in the clouds is perfect to use as my happy sky in this layout. I next used the sun shine paper on the bottom of my page and lastly used all aflutter paper. Once I had adhered my torn strips I rolled some of the edges back to expose the colour.
I added a floral bunch cascading onto the white base paper, using several flower and leaves from the die cut ephemera pack. I also added a phrase sticker from the accessory sticker sheet.
Paper strips are a great way to tuck elements under as I have here, a butterfly which looks like it is ‘flying out of the paper piece and my place and date journalling.
I matted my photo (which is 4 x 4 inches) on a 4.1 x4.1 inches of stepping stones paper. I added my photo with foam tape to add dimension. I used some phrase sentiment die cut banners to draw your eye to the photo.
Lastly I added my title and used Happy Days from the die cut ephemera pack. I used foam tape to add these, again to create a 3d effect on my page.
Remember tearing paper is not an exact science and you can only roughly measure by eye the paper strip sizes you want, the rest is up to the universe!!!!!!!! Just tear away!
Thank you for stopping by today and I have loved seeing all your Daydream layouts on FB and IG, all amazing.
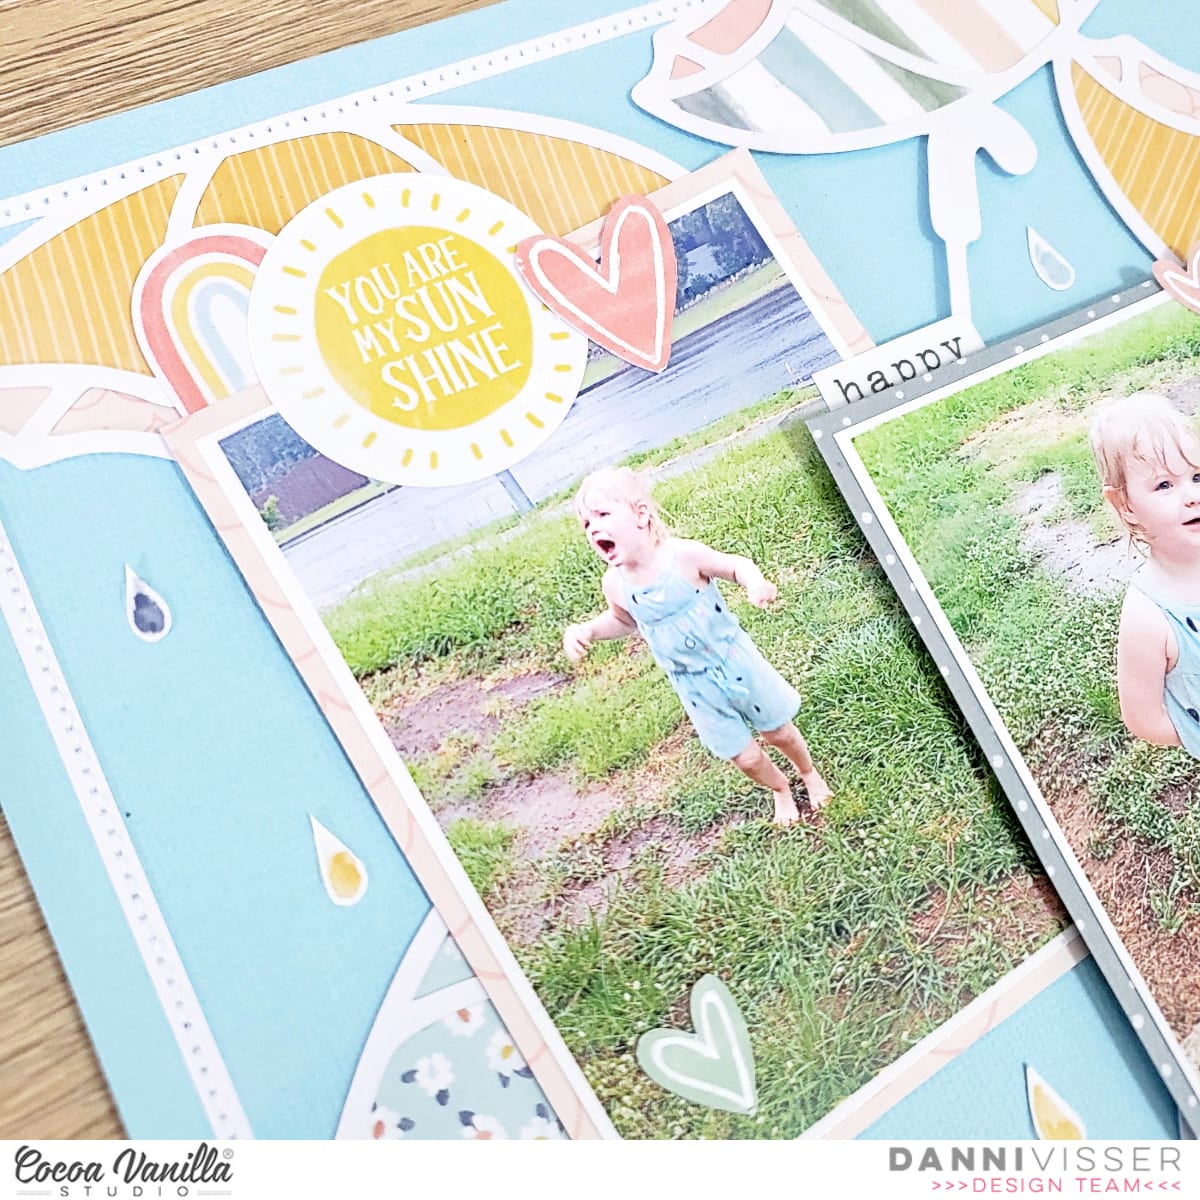
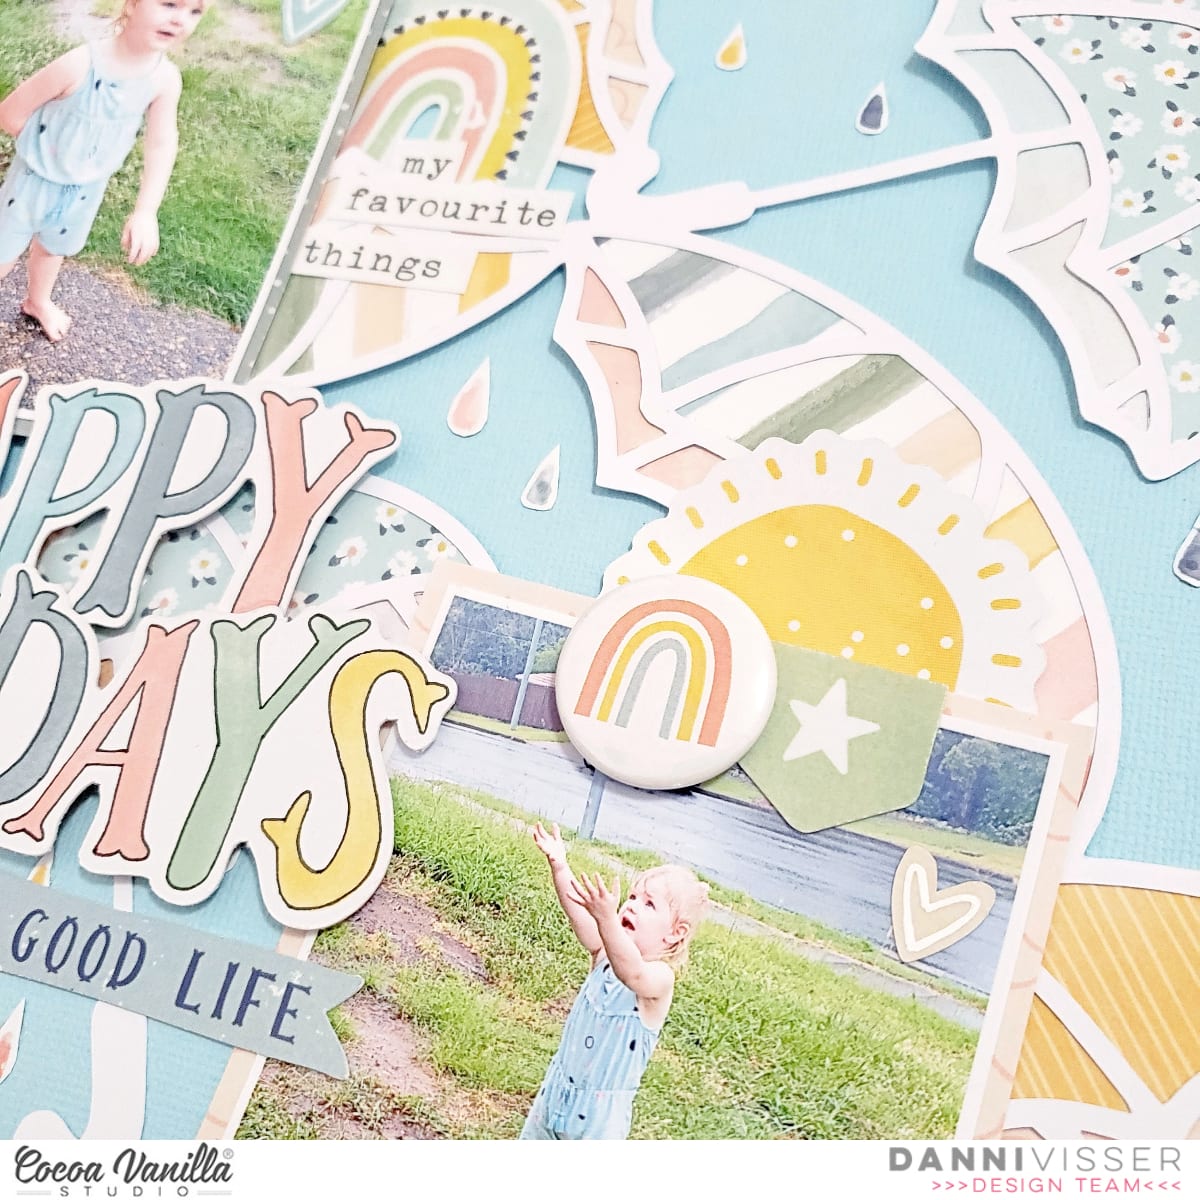
Hi there my fellow crafters! Today I am here to share a layout documenting some joyful photos of my daughter playing in the rain. I chose the Daydream collection because the motifs of suns and rainbows was perfect for this moment of a warm afternoon sun shower.
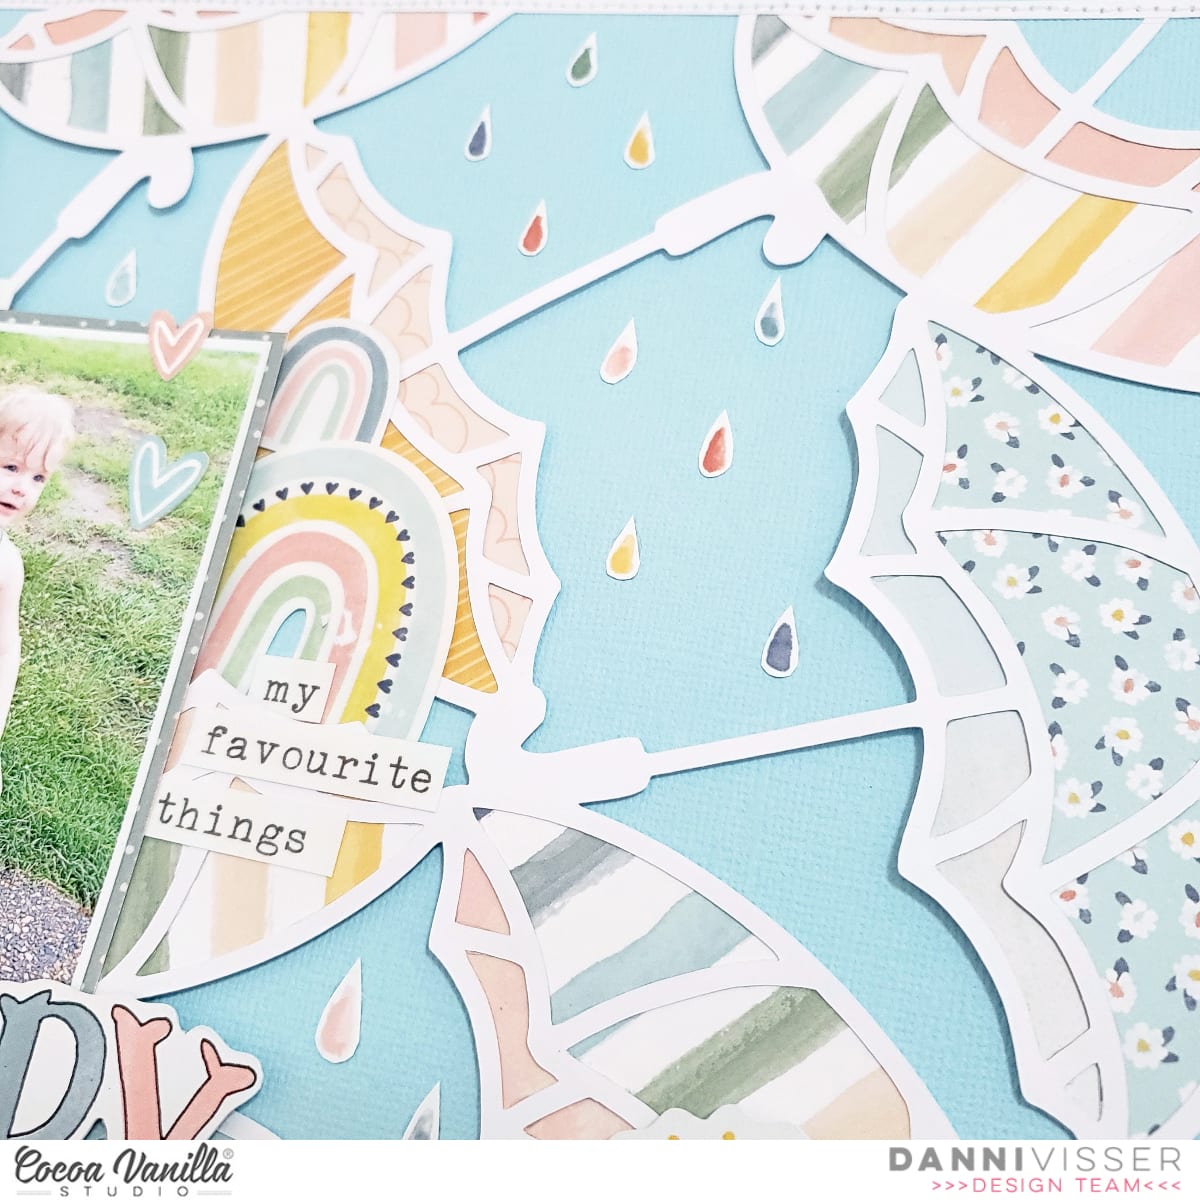
I chose a large background cut file from COAPA Cutfiles that features lots of little umbrellas. The rain itself isn’t easily visible in the photos, so I really wanted to emphasize the rain theme! I backed the cut file with the rainbow stripe, yellow stripe, and tiny daisy print papers from the 6×8 paper stack – I like this for backing cut files because the print is sized down, which allows more of the design to be visible.
For my background I chose a bright sky-blue cardstock. I love how it mimics the sky and the white of the cut file edge really pops against the bright colour. I ran the border edge of the cut file through my sewing machine with white thread, to firmly secure the cut file to the background while adding a lovely textured border.
The raindrop design on Sun Shower 12×12 patterned paper was just made for this layout! I tried it out as a background, but the white of the cutfile didn’t stand out enough for me, so I decided to fussy cut a whole bunch of the raindrops instead. If you get stuck with an idea not working, try to think of a slightly different way to use those supplies like this – sometimes it turns out even better! I sprinkled all those raindrops into the spaces between the cut file umbrellas, and I just love that effect.
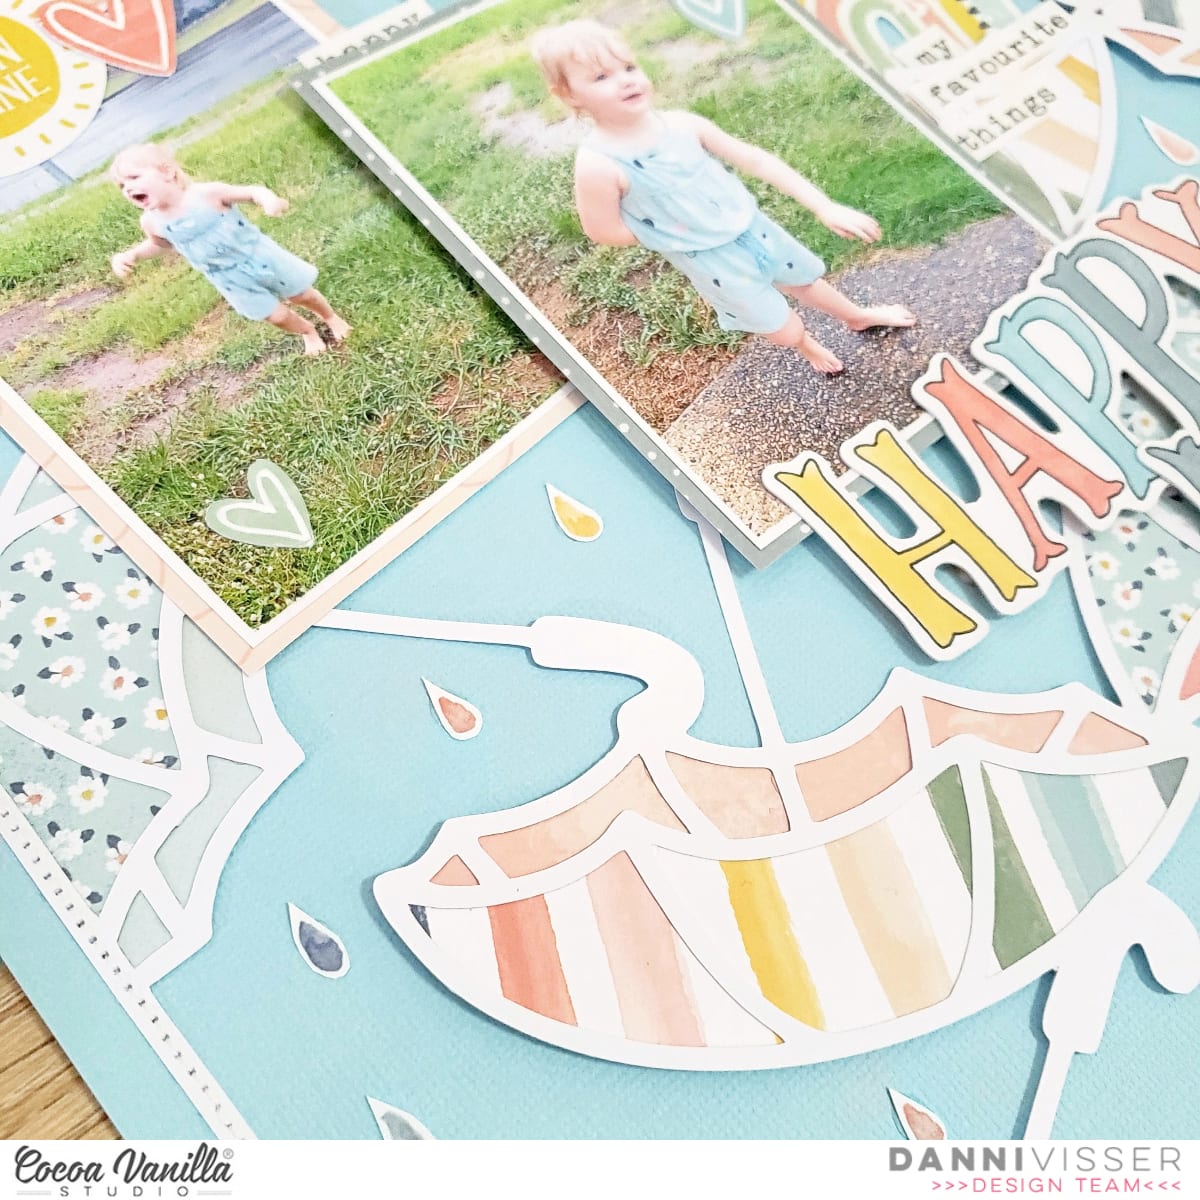
I matted my photos with Happy Place and Garden Variety 12×12 patterned papers to help separate them from the background. I positioned them diagonally on the page, leaving a gap between two of the photos for my title.
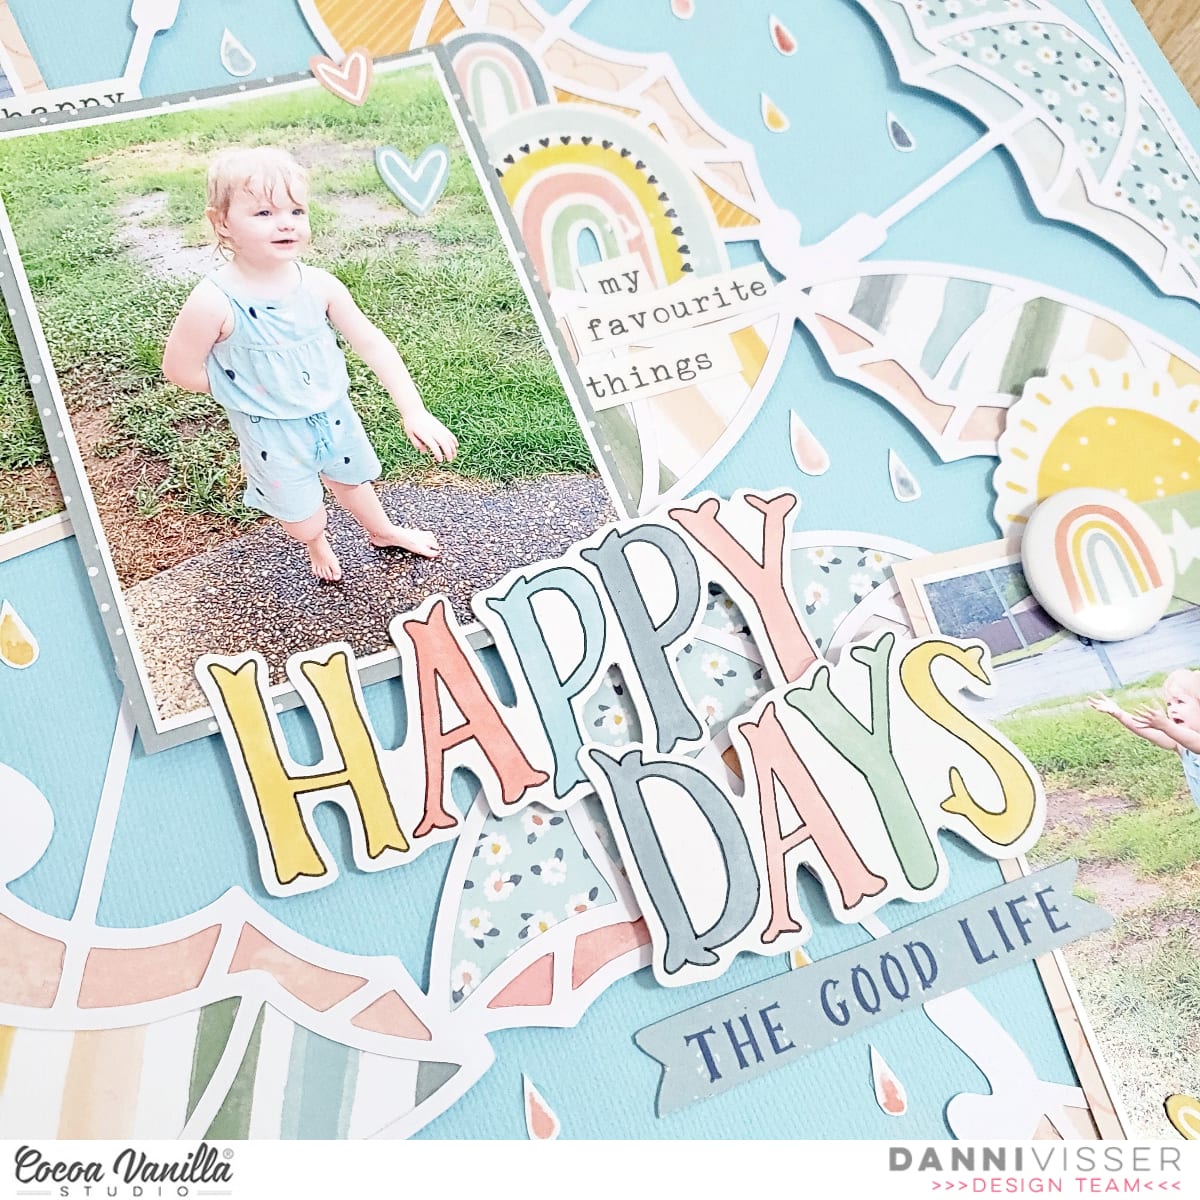
I chose the ‘Happy Days’ title from the die cut ephemera. I love the happy colours and the font, and to help emphasize the letters even more I traced around the edge of them in black fine liner pen. For good measure I added a banner die cut as a subtitle below.
Next, I created three embellishment clusters, one by each of my photos. I chose a combination of suns, rainbows and hearts from the accessory stickers and the die cut ephemera. I also managed to squeeze in an adorable rainbow flair button – I will be so sad when I run out of these!
For finishing touches, I used a white gel pen to outline all the little hearts, highlighting them further. I also added a cluster of my favourite tiny word stickers from the accessory stickers by each photo. I really love how these can take the place of journaling to help tell the story on a page.
I hope you enjoyed reading about this layout as much as I did making it! There is a process video linked below if you would like to see how it all came together. Happy scrapping!
Hello everyone. Happy LOVE DAY!!! I lie Valentine’s Day so much because what can be better to celebrate than LOVE? It doesn’t have to be the romantic one between partners. Love has so many shades and forms and this day is just another occassion to show our appreciation to the people we care the most. Each year I prepare little gifts for my daughters with handmade cards filled with love words. I usually make some decorative boxes too for a little treat. This year is no different. This time I reached for pretty “Daydream” collection and created two sets containing of paper bag and card.
Each bag is made with single sheet of paper: “Daisy days” and “Serenity“. I closed them with a ribbon bows so you can easily open them and close again. I also added a decoration on each bag with a little shaker. They are the part of the gift itself because they are mounted to the bag with magnets! You can remove them and put on the fridge or some other place.
Each shaker is made with a frame from ephemera pack and decorated with flowers and butterflies. You can fill them with sequins and beads like me, or use ready mixture from Sequins and flowers Pack. I also added words “love you” from stickers sheet.
Each bag has a matching card – very easy and fast to make. I chose the same pattern papers than I used for the bags, but this time I reached for smaller size. Paper stack comes very handy here. All the patterns and smaller, which works great with smaller projects, like cards.
Each card is made of trimmed paper and some ephemera pieces. I also used die cut titles to add a message on the top of embellishments. They are small enough to fit the card size, but still big enough to become a main focus element.
All I need to do now is to place some treats inside the bags and write personal messages to each of my daughters. Do not worry – hubby will also get his own gift :)
Thank you so much for stopping by and I wish you all to spend this day surrounded by people you love <3
Hello everyone, its Melissa here and I’m so happy to be back sharing with you, this time a Valentines Layout for our Love theme. Valentines Day isn’t a huge celebration or holiday here in New Zealand, but it is an opportunity to reflect on the love that I have for my husband. Its also the perfect excuse to scrapbook us instead of the kids!! I created this layout with the gorgeous Daydream Collection and a cut file by Confessions of a Paper Addict.
I stated by applying gesso to my white cardstock to prepare for mixed media. I chose some soft and pretty water soluble crayons in colours that would match the colours in Daydream and applied them with the packaging (smooshing, kissing etc) technique. I used my heat gun to dry off each layer. Once all my layers were complete I added some splatters of water activated splatters. I love the soft and pretty effect all my layers create!
I backed the cut file with predominantly papers from the 6 x 8 Paper Stack. I love the smaller scale of these patterns, and selected smaller repeating designs for the little envelopes and florals. I embellished the envelopes with fussy cut flowers, stickers from the Accessory Sticker Sheet, and even included Flair Button! The photo is of my husband and I (featuring our daughter photo-bombing!) on a day that we went boating at our largest local lake during January.
I used the 6 x 8 version of Stepping Stones to back the letter part of the cut file. This was perfect to contain my journalling! I embellished the letter with a Puffy Heart.
The word “Love” from the Die Cut Titles was perfect for my title, I needed a title that didn’t take up too much space, so that it would be of the right scale to not dominate the layout. My final step was to back the layout onto Happy Place.
I love how soft and pretty this layout turned out, a little different for me and perfect for my family scrapbook album!
It’s Anna here with you today. Welcome back to the blog! This Saturday is Valentine’s Day and the ladies of the design team will be creating projects full of love during the weekend. Today I want to share with you this lovely page featuring the beautiful Daydream Collection. I decided to document a photo of my oldest daughter with his father when she was almost two years old. I love this funny picture.
I started with the Daisy Days Paper as my background. It matches the greens of the photo and gives to the page the country look that I was looking for. And the wreath perfectly frames the title and the photo.
For my title, I cut the word “love” with my cutting machine. It’s not a cut file, I just used a font that I have on my computer. I cut it from the All Aflutter Paper and the outline from the Sun Shower Paper. Y stacked them together with foam dots to add more dimension and place it a little croocked on the page. On top of the “V” and “E”, I placed one of the die cuts to complete the title.
Below it, I placed my photo, matted by a piece of the Daisy Days Paper from the 6×8 paper pack. I embellished it with some die cuts, which I raised up with foam. I also put a puffy fabric heart and a flair button.
Around the wreath, I added more flowers because I wanted it to have more volume and integrate the title. Finally, some more die cuts and a phrase from the accessory stickers.
I love how it turned out. And remember that you can create your own cut files taking advantage of the fonts on your computer.
Thank you so much for stopping by today. I wish you a wonderful weekend and a Happy Valentine’s Day!
Hello friends. Have you seen brand new “Sunkissed” line reveal? I am so excited about this collection. It’s like combination of all my favorite things in one: summer, rainbows, seaside and vivid colors. I still have to wait for few weeks to dive into it but it gives me more time to play with another gorgeous collection – “Daydream“. I still have plenty of papers and embellishments in my stash so I decided to make another page. This time I reached for quite old photos of tiny Maja ans scrapbooked them in sweet and cute way.
I mixed together two papers to make my background – solid “Happy place” pattern and “All flutter” cut into film strips. I made them using my edge punch, that I own for ages. I challenged myself to use more of my tools this year. I glued the strips only in the middle are so i was able to bend the edges and tuck some elements behind them.
Next step was to add photos and flower clusters around them. You can find plenty of pretty florals in ephemera pack. I focused in ones in pink, coral and yellow colors trying to keep my page quite monochromatic. I also fussy cut cute, little rainbows from “Up in the clouds” paper. They are just a perfect little embellishment!
I finished my composition adding few fabric, puffy hearts. They are so cute and give such a nice texture to the page. I also added little flair button. I am running low on them and tend to hoard them :) but I managed to overcome my parsimony. Last step was adding title using my stash of alpha stickers. Maja just learned how to send kisses with her hand and my hubby took photo in the right time, when she was doing that. Hence “Sending kisses” title. I so miss those days, when she was so tiny and cute.
I really like how this page turned out and I am glad I used my punch to make those strips. They create little anchors for all the embellishments so they do not float on the empty background.
Thank you so much for stopping by and see you soon in my other post <3
Happy Australia Day! For today’s layout, my focus is the national colors: green and gold. I use gold very often in my projects, but green is not on my most used list. So, leaves and flowers came to the rescue. And I created this page with a picture of my sister and her son, mixing Daydream and Merry & Bright collections.
I used the Merry & Bright Star Bright Paper for my background and glued a white cardstock crooked on top of it, so you can see part of the Star Bright Paper on the left side. Then, I machine stitched two sides of the white cardstock.
Once I had the base, I made some brush strokes with gold metallic paint in the middle of the white cardstock. You can see it peeking through the elements.
With two of the Merry & Bright Pocket Cards, I framed my photo. I chose two with green tones to match my page. I put some foam behind the photo to rise it a little bit and add more dimension.
For my title, I used one of the black foam titles from the Unforgettable collection. I love who it stands out. I put it on top of the picture, so it seems to be floating. Behind it, I placed one of the words from the Daydream Accessory Stickers that say “sweetheart”. So, the title is “Hello sweetheart”.
In the upper right corner, I glued a green Puffy fabric heart with gold metallic thread underneath it. And finally, I scattered some hearts and sequins to add a shiny touch to the page.
I hope you like this layout, and it gives you some inspiration. I could never get tired of using Cocoa Vanilla flowers!
Thank you so much for stopping by today, and I wish you a wonderful Australia Day!!
Hello Hello! It’s Michelle here with you today to share a new layout. I’ve used a couple of different collections for this layout as part of our current ‘Green and Gold’ theme. A mixture of Legendary and Boys Rule with a hint of Daydream and Unforgettable.
When I think of ‘Green & Gold’ I picture bright Aussie style colours – Green & Yellow. So thats exactly where this colour palette took me on this creative journey this week. There are so many wonderful green patterns within the extended Cocoa Vanilla Studio range, but the shade of green I’ve used for this layout is by far my most favourite of them all.
To begin I created a grid style layout featuring a couple of cute photos of Lelia and her beloved bunny from a few years back that I printed out in Black & White. I cut out 3.5″ frames from papers in the Legendary Collection for both the photos and title areas ( Wild One & Explorer ) and added a strip of dotted paper along the bottom (Straight & Narrow) from the Boys Rule Collection.
This kid is an absolute HOOT! Her imagination has been wild from the beginning. This day in particular was so fun, creating a ‘Box Coaster’ for them to ride around the galaxy haha
I kept the embellishing of each frame to a minimum by using word stickers ( Accessory Stickers sheet – Legendary ), sticker heart ( Accessory Stickers sheet – Daydream ), tiny fussy cut stars ( All Star – Legendary ) and an arrow ( Ephemera pack – Legendary ). Both frames adhered to the layout using a piece of foam sheet to give a slight hint of dimension.
The title area of the layout also acts as a tidy spot for some hidden journalling. The ‘Wild and Free’ card can be found on the Epic Tales cut apart paper in the Legendary Collection and the hidden journalling card and ‘Be Rad’ piece can be found on the ‘Boy Stuff’ cut apart paper in the Boys Rule Collection.
Heres a peek at the journalling ..
I cut the card down slightly, rounded the edges on the right and made a tag top including punched hole at the opposite end to add string and tie a bow.
In the top right frame I added a couple extra words that can be used as part of an extended title. The white alphas are by far my most used Cocoa Vanilla Studio embellishment by far, and those foam words from the Unforgettable Collection work so well with pretty much every collection there is.
I sewed the white alphas down so that they stay in place for years to come, but also to add a little extra design element to the layout. I added machine stitching around both of the yellow frames to keep the white X paper in place (Star Fall – Boys Rule). The ‘You are my Sunshine’ can be found on the Daydream Collection Accessory Sticker Sheet and the green tab is a sticker from the Legendary Collection Accessory Sticker Sheet.
Lastly I added a bunch of fussy cut starts in green and yellow to the bottom left and top right of the layout, scattered to give the grid style layout a slight ‘diagonal’ design feel. I also added my usual splattering of gold ink to finish it all off.
Well friends thats all from me today, thanks so much for stopping by! I hope you’ve enjoyed seeing my take on our current ‘Green & Gold’ theme, be sure to share yours with us in the Cocoa Vanilla Studio Community Facebook Group.
Until Next time, Happy Scrapping!
Michelle x
PS.. A little side note regarding the fabulous Boys Rule Collection…. Because all us crazy crafters LOVED it so so much when it was originally released, back in the day, sadly its no longer available.
Hi everyone!! It’s Melissa here and I’m so happy to be back here with you sharing my first post of 20201!! And as its the beginning of the new year I thought it very appropriate to create a layout with my word for this year which is “Present”. One thing that lockdown taught me was that I need to spend more time with my children, and that even though I can be in the same room as them, I need to make an effort to put my phone down. I used the gorgeous ‘Daydream‘ collection, which I was very excited to return to after lots of Christmas scrapbooking!
For this layout I wanted a bold white title with my Silhouette Cameo, and I created this one by using the free fonts in the software. I cut the title letters 4 times and layered them up for added dimension. In order to make my title pop I used ‘Garden Variety’ for my background paper. I also used the A side of this paper and fussy cut both clusters and individual florals. I bent up the petals and used lots of dimensional adhesive to make them look realistic, and also added some glimmer paste on the open flowers.
I used the ‘6 x 8 Inch Paper Stack’ to create to mats around my photo. I chose two of the pink patterns and I love how they look against the grey of the background. I also used several ‘Die Cut Ephemera’ pieces for my embellishment.
I created clusters of flowers around the title, and also on top of my photo. It almost looks like a flower crown on my head!!
I cut apart ‘Happy Place’ for the heart and rainbow borders. I fussy cut around the tops of the rainbows for extra added interest, and I love that it creates a scallop border. The ‘Puffy Heart’ , tiny heart stickers (from the ‘Accessory Stickers’ and sequins from the ‘Sequins & Flowers’ provide sweet details. I was also proud of myself because I got one of the gorgeous ‘Flair Buttons’ onto my page too!
Here is a close up of my journalling, which explains more about how I will apply my word into my life this year.
I also made a process video which you can watch below. Also make sure you go to the Cocoa Vanilla YouTube channel and subscribe so you don’t miss out on all of the videos that we create for you!
It’s Tarrah back with you today to share a new project featuring the stunning Daydream collection. I decided to create something a little different for my project today. I have created a round canvas wall hanging for my craft room!
I chose a 12′ size round canvas and chose the gorgeous Over the Rainbow paper for the background. I traced the canvas onto the paper and free hand cut it out. I used a strong glue to adhere the paper to the canvas, making sure there weren’t too many bubbles. On the left, the paper didn’t quite reach to cover up the canvas so I improvised and covered it with lots of gorgeous florals from the ephemera pack. I used glue and craft foam here for different heights of dimension.
On the right of the canvas I created another cluster of florals to balance with the cluster on the left. I used both glue and foam tape here again for dimension. Once the florals were all dry I bent up the edges of the flowers and leaves for even more dimension.
On the left side of the canvas I just had to include the journal card that reads, ‘These Are a Few of My Favourite Things” from the Happy Place paper. It is the perfect phrase to suit my craft room! At the top of the rainbow, I chose a few of the heart die-cuts in various colours and added these using craft foam for dimension. In the centre of the canvas I added craft foam underneath my title – ‘Happy Days’ – after all every day is a happy day in my craft room! I added 3 butterflies and moths here also along with, ‘The Good Life’ phrase from the ephemera pack. One of the super cute puffy hearts made it on and also some more heart die-cuts.
Once I was happy with the front, I felt the outside was too bare so I trialed a few different trims from my stash finally settling on some lace that I felt matched the prettiness and girly feel of the canvas.
Thank you so much for stopping by the Cocoa Vanilla blog today! I hope you enjoyed my project today and that you are inspired in some way. Make sure to get yourself the beautiful Daydream collection from the online store now if you don’t already have it!