Love You | Unforgettable collection | Tarrah McLean
Hi crafty friends and Happy Mother’s Day to all the beautiful Mum’s out there!
It’s Tarrah back with you today to share a new layout for our Mother’s Day special today. I chose to document a photo of myself and my beautiful Mum using the stunning Unforgettable collection.
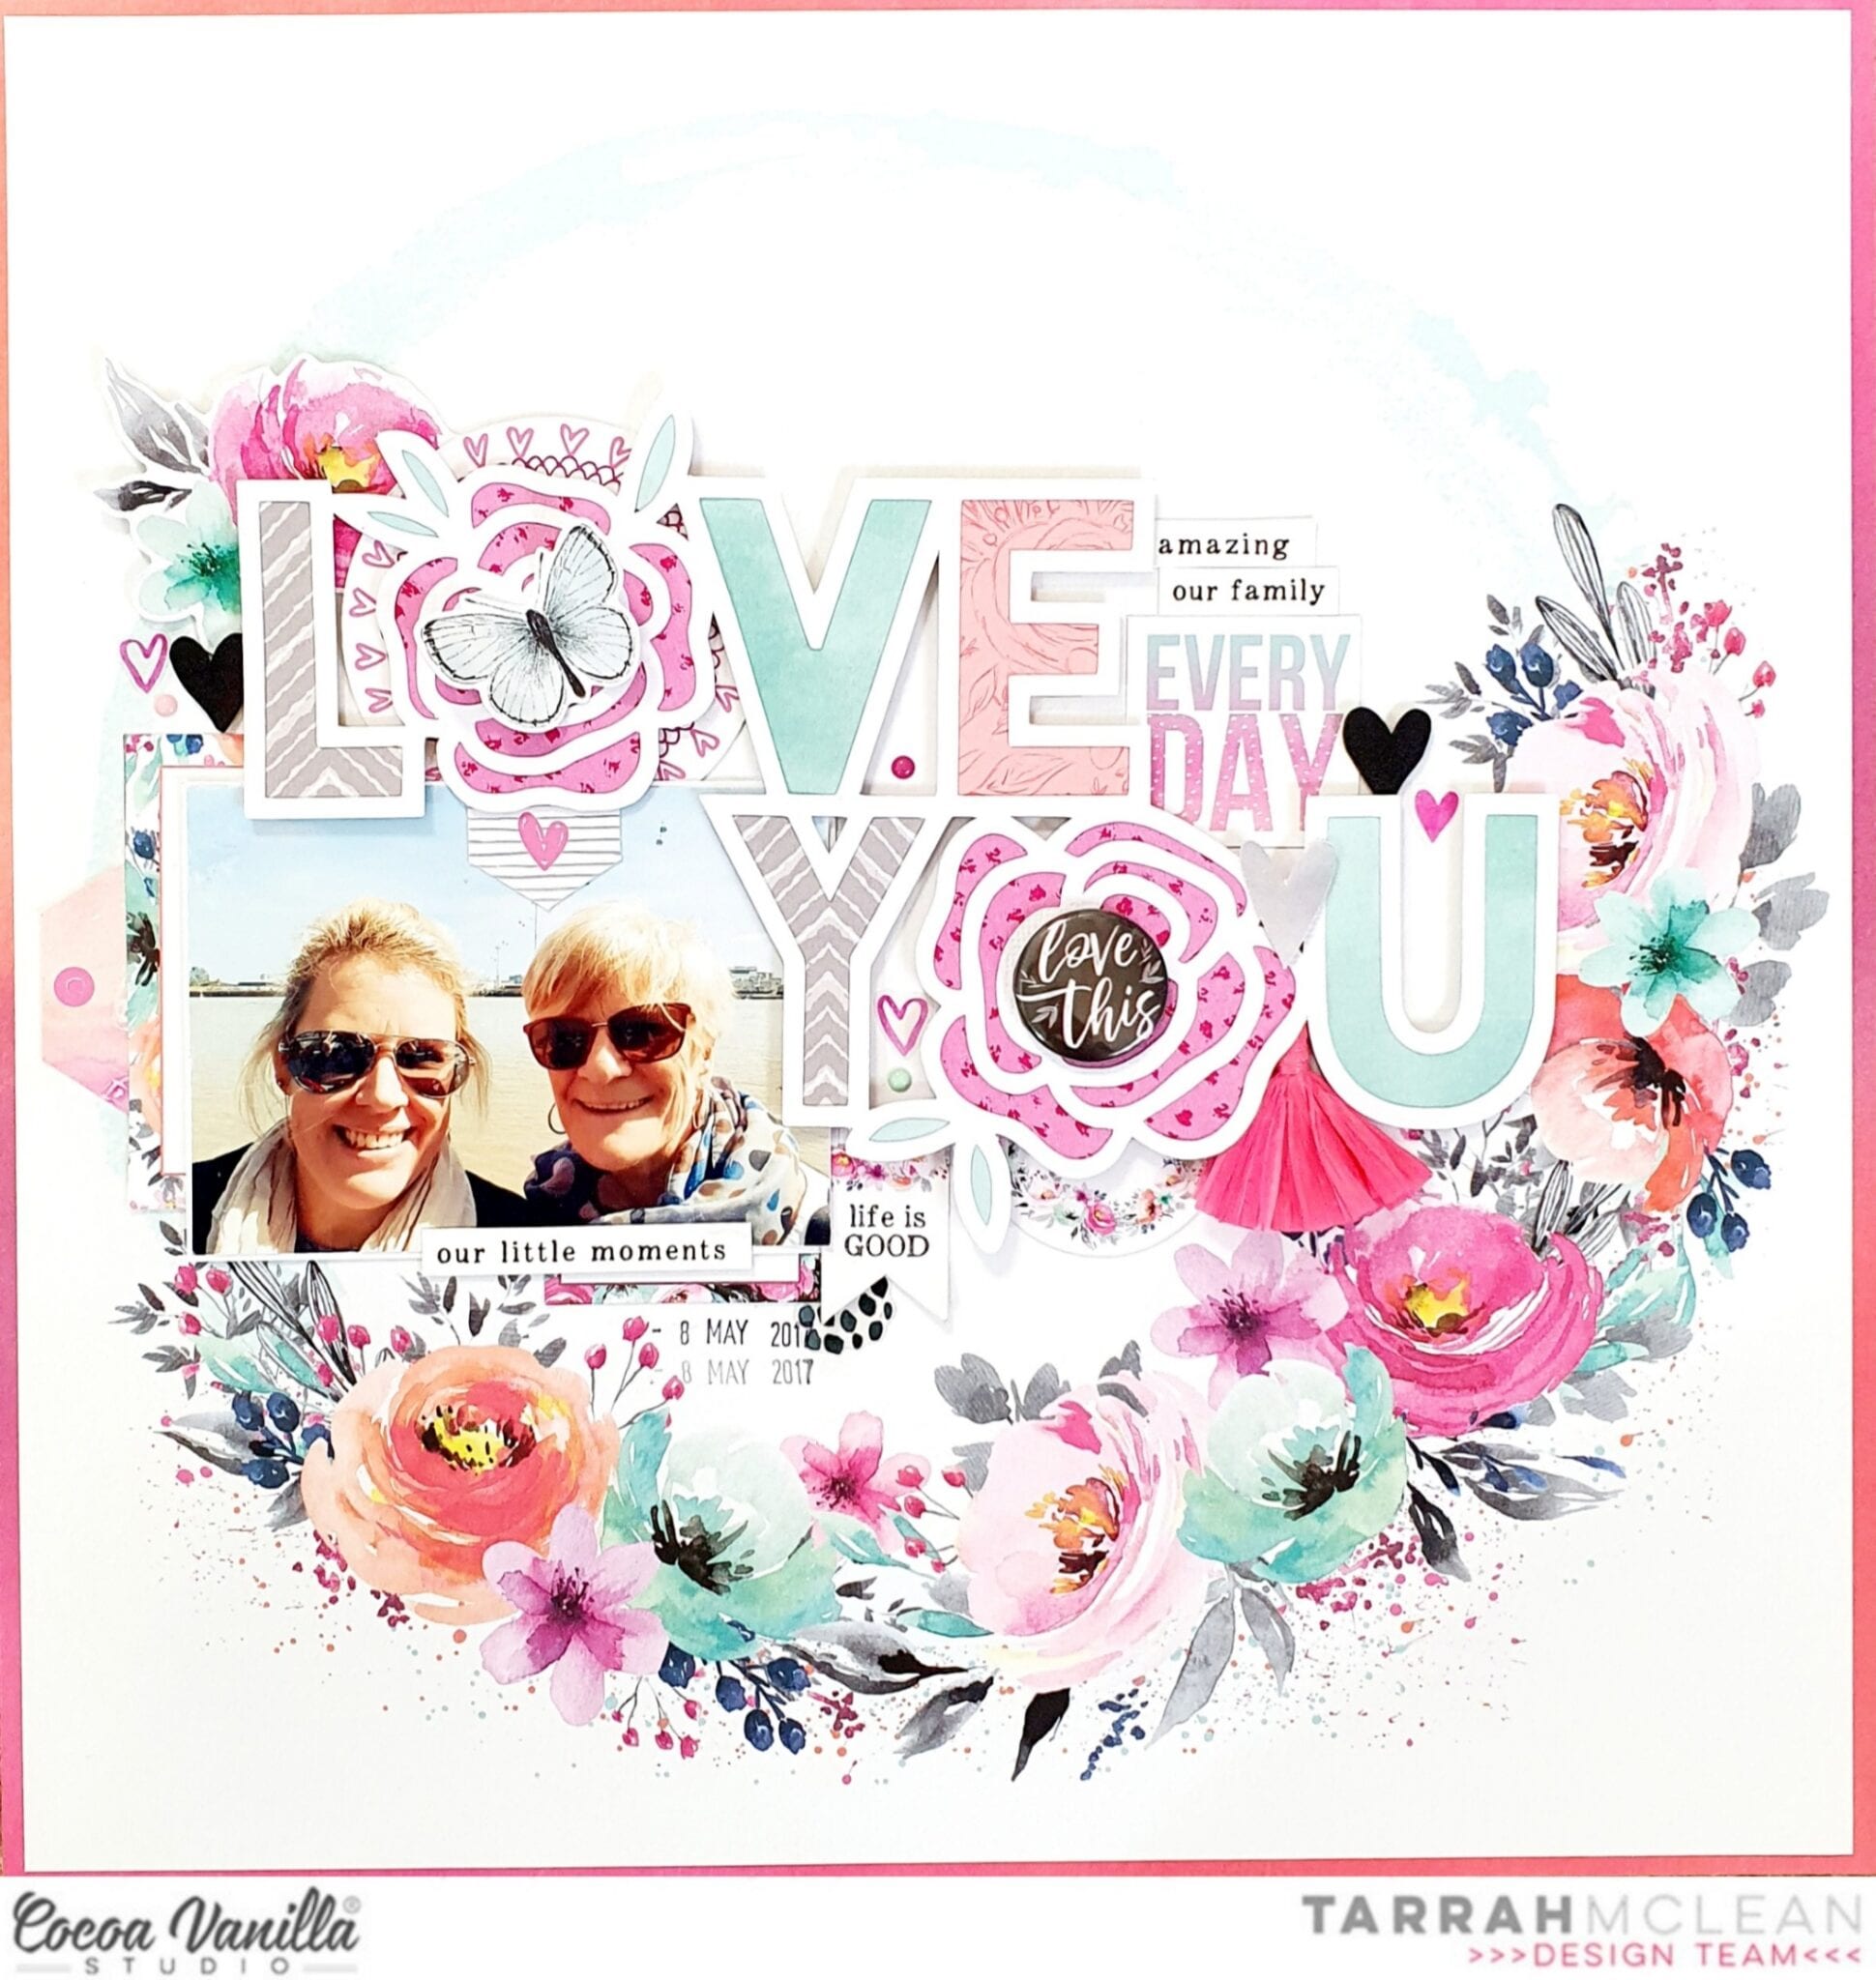
I chose a beautiful title cut file design from CUT to YOU and backed the open spaces of the design with different patterned papers from the Unforgettable 6′ x 8′ inch paper stack. Once the cut file was all backed, I added craft foam underneath and then adhered it to the centre of the pretty Garland paper. I trimmed down the Garland paper slightly and then adhered this sheet to the ‘B’ side of the Forget Me Not paper.

Underneath the flower in the ‘Love’ word of the cut file, I placed one of the round die-cuts. I also layered a butterfly die-cut on top of this flower. On the other flower, I adhered a flair button that says ‘Love This’. I placed my photo with some layers underneath to the left of my page underneath the ‘Love’ word. I placed an arrow sticker on top of my photo and also a phrase sticker too. On the right of the ‘Love’ word, I added the ‘Everyday’ accessory sticker and some accessory stickers. I love the paper tassels in this collection – they are so cute! I added a pink one poking out from the bottom of the ‘You’ word, I tucked in some die-cuts in this area too.

In the top left area of the cut file, I tucked in some more florals and added a black heart foam heart and a clear sticker heart too. I love the pop of black the foam hearts give the layout. When I create my layouts, I always add the largest things to my page first like my photo, some papers and a title, I then add medium sized embellishments like die-cuts and flair buttons and I finish with the smaller embellishments like stickers and enamel dots.

Thank you so much for stopping by the Cocoa Vanilla blog today! I hope you enjoyed my Mother’s Day themed layout. There is not a great deal of the Unforgettable collection in the Cocoa Vanilla store so make sure to get yourself some before it all goes for good!
Happy creating!
Tarrah x
 I fussy cut out the rainbow from the
  I next made three tropical flowers slightly varying in sizes. I used a cut file from the Silhouette design store. I used
  I added my 5×4 inch landscape photo with foam tape, tucking under the sun
  I created an embellishment cluster focusing on the drinks and fruits from the die cut pack and Puffy Stickers finishing off with some phrase sentiment die cuts. To avoid my layout looking ‘flat’ I added these elements with foam tape.
 Due to the colour overload I ensured there was enough negative space between embellishment clusters. I love creating layouts that have ‘no people’ photos and focusing on those little life pleasures which are just as important to document. Thank you for stopping by today!


 Here is my throwback Thursday layout featuring a photo of my daughter. I went for an uplifting/inspirational layout for her. As you can see I have used a mix of collections here but they still coordinate so well together. I used two cut files from the Silhouette design store, paint palette and title ‘paint your dreams’.
 I used the script writing inspirational paper as my base. I cut a 10×10 inch white cardstock strip and centred this on my base page. I next cut the paint palette and brush as this was the feature of my page. I found a wood grain paper in my CVS 12×12 paper box, once cut I added machine stitching to the edge. I backed it with a marble paper and to add a little something extra I added glitter to the paint blotches. I then added with foam tape off centre onto the white cardstock.
 I then added my paint brush and added some small butterfly die cuts under the palette. I found a gorgeous die cut doily and used this to mat my photo. I used some phrase sentiments under my photo and finished off with a camera die cut.
 I added my title, I used some silver glitter paper for one word to stop it from looking too flat visually. I also added a light splash of black paint to add some contrast.
 To finish off my page I added some beautiful die cut flowers and enamel dots. I added some more light splatters of black paint.
 Most of these papers and embellishments are no longer in the store but you can recreate this layout with what you have in your CVS stash and don’t forget CVS have