Super Sweet | Legendary Collection | Danni Visser
Hi again Cocoa Vanilla Studio fans! Danni here with a Super Sweet layout to share using the colourful Legendary collection. I was challenged to make flair buttons a feature on this layout, and I absolutely love flair, so I was really excited to get creating this one! For this layout, I wanted to feature multiple smaller photos of my little boy enjoying this bowl of ice cream. Because of the dessert, I decided to use sweets as the theme! I started with this super cool gumball machine cutfile and backed it with lots of different coloured patterns from the patterned papers in the collection.
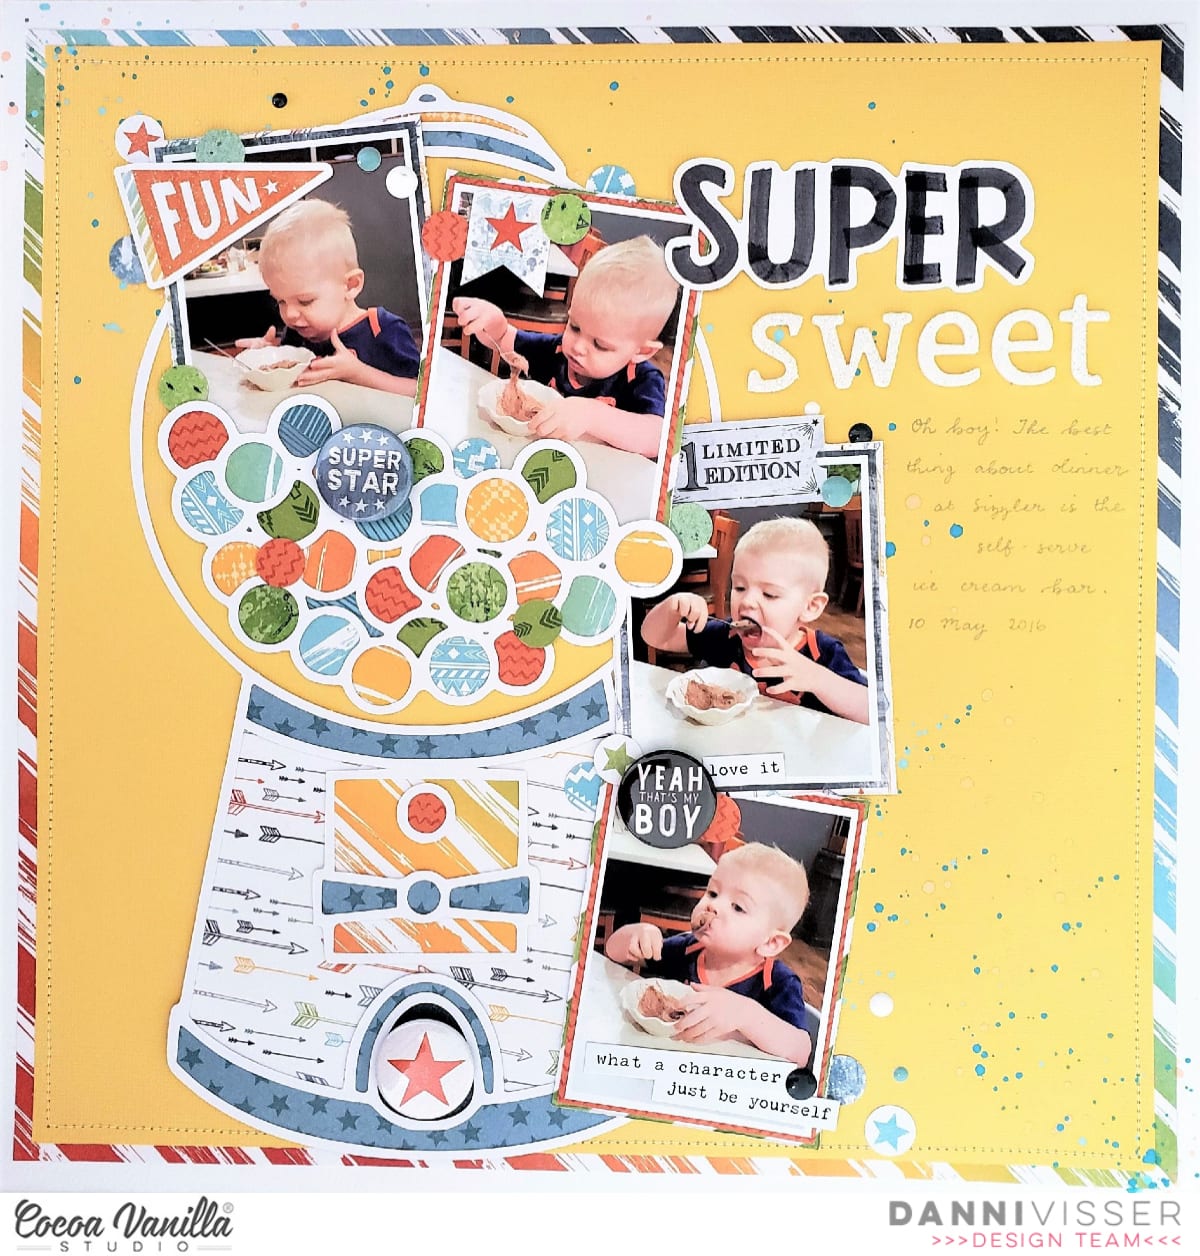
For my background, I took the Wild One 12×12 paper and mounted it with a thin white cardstock border, then popped some bright yellow card stock in the centre. I love how the rainbow stripe really pops between the two layers of plain cardstock! For some extra texture and to secure all the layers together, I machine stitched with white thread around the edge of the layers. Once my base was done, I added some peach and blue ink splatters on the background following a diagonal – this is roughly the way I planned to have my photos positioned across the page, so I wanted to draw the eye in the same direction with the splatters.
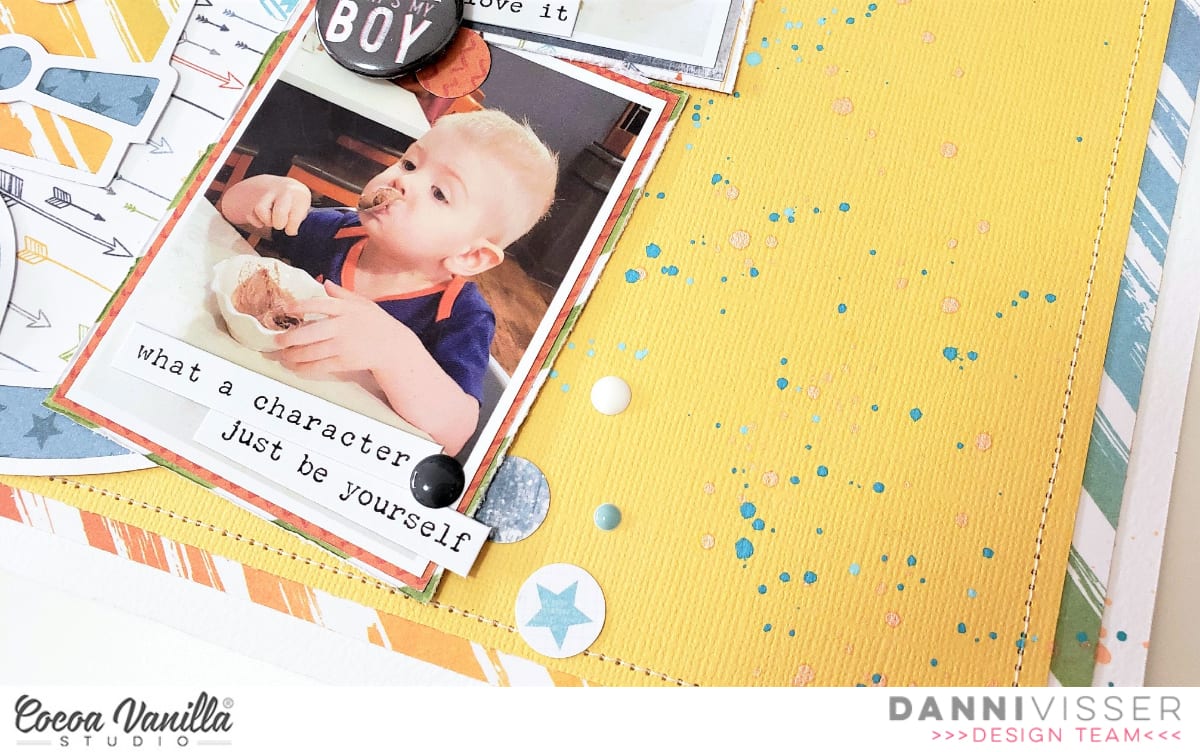
The photos were matted with alternating layers of One Way, Brave Heart and Explorer patterned papers, with 2 simple layers on each photo. I went through and distressed the edges of my photo mats too – I just love the textural effect this provides! I arranged my photos in a cascade from the top of the cutfile to the bottom, making sure they overlapped each other and showed the progression of events. How adorable is his little face?
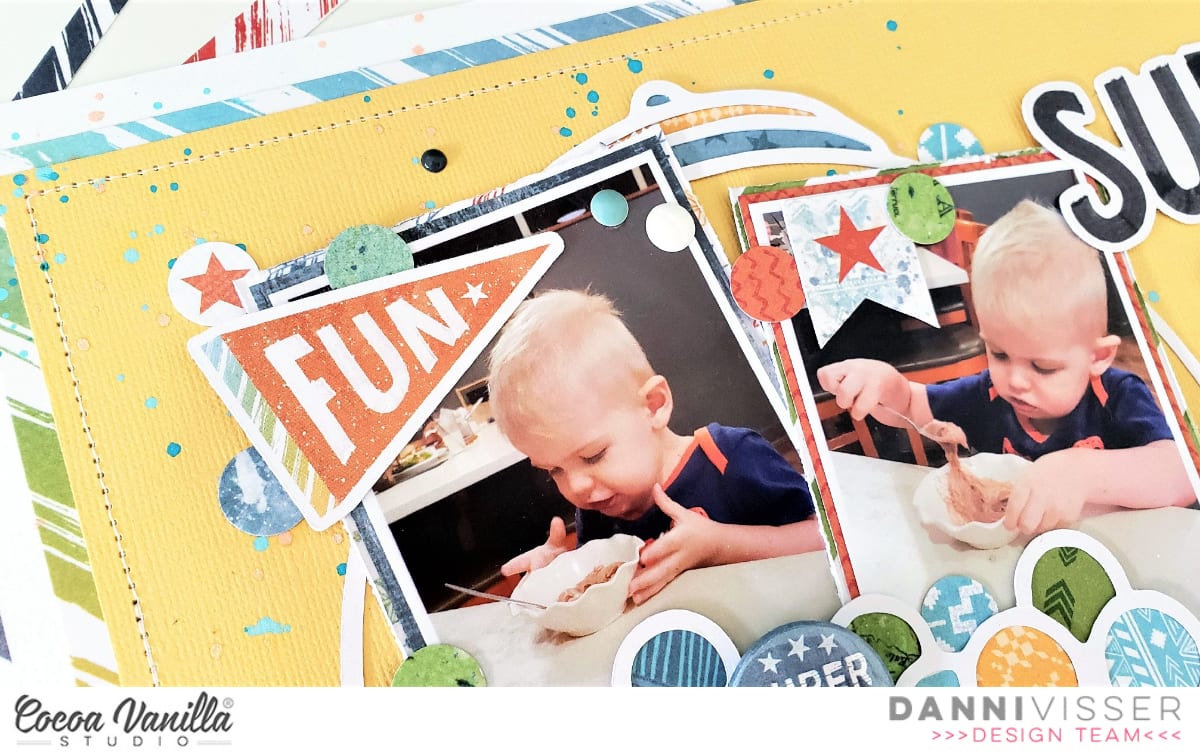
Time for flair buttons! I added them in three places, making sure to place one in the slot at the base of the machine, to looks as if a gumball was falling out. I just love how that looks! I went ahead and added some decorative clusters using the die cut ephemera and accessory stickers, taking care to strategically cover the random people in the background of the photos. I also punched a bunch of small circles from the patterned papers and used them to fill in any gaps.

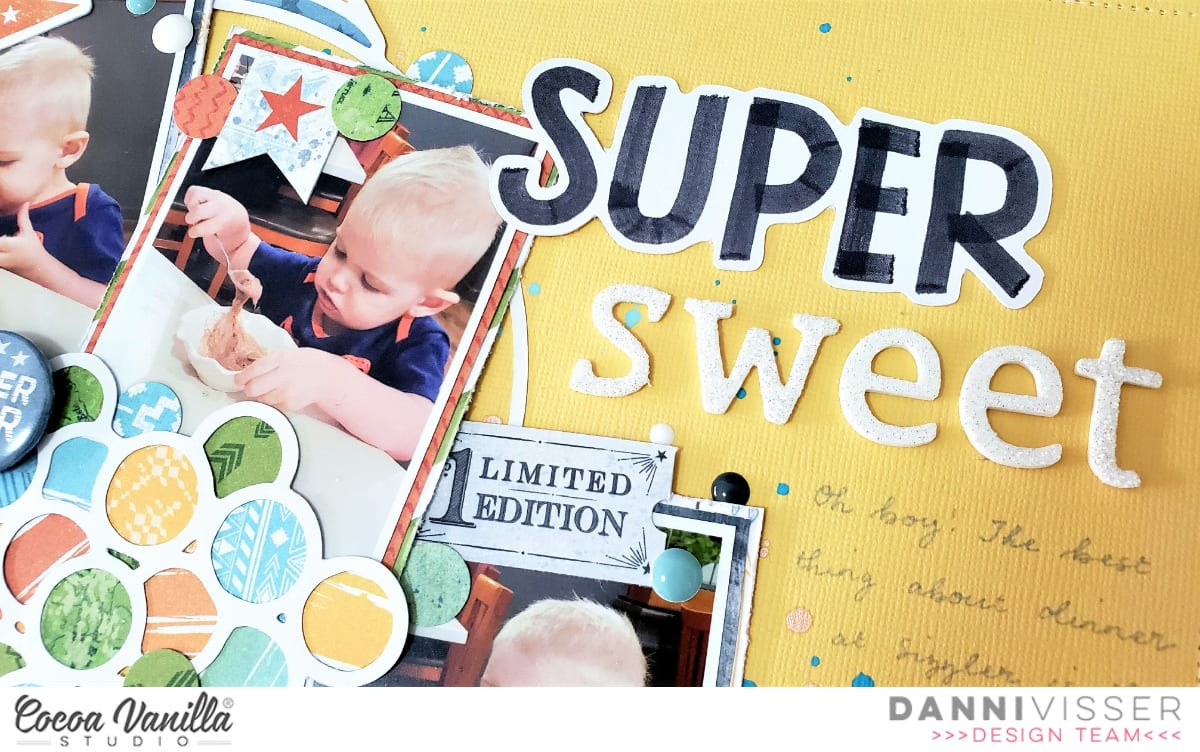
For my title I used SUPER from the die cut titles and some white foam alphas to make ‘SUPER Sweet’. I think that fits the theme of the layout quite nicely! To finish off I added a sprinkling of enamel dots and a few lines of journaling in grey pen.
Thank you so much for joining me today! I just love how colourful my layouts are turning out with the Legendary collection. There is a process video below if you would like to watch <3 Danni x https://youtu.be/sptSMo7H8OM


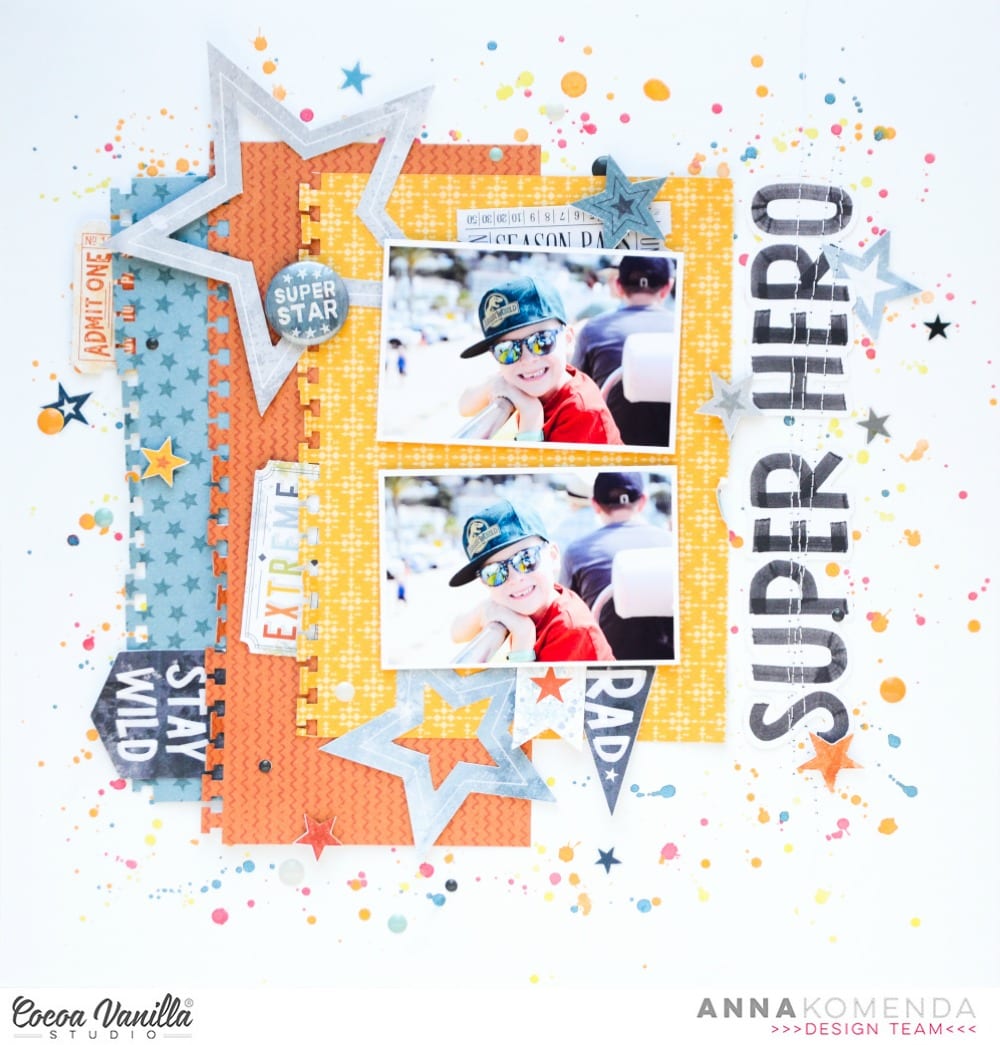
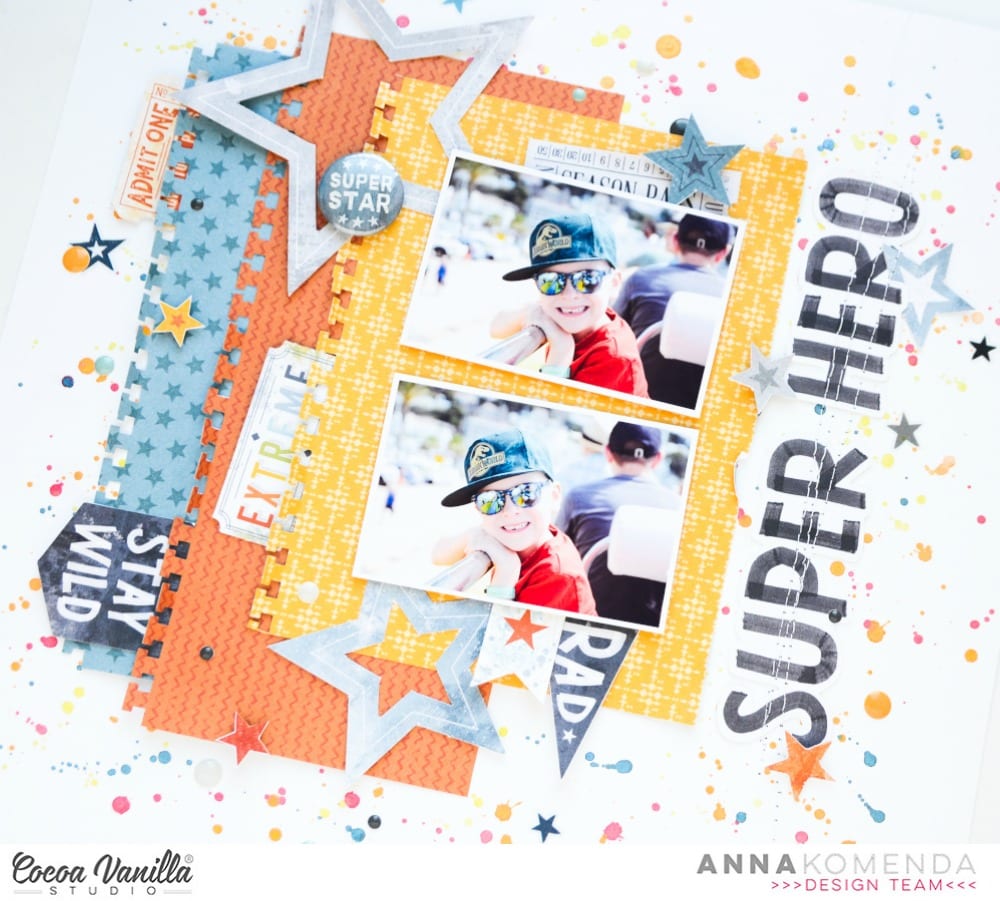
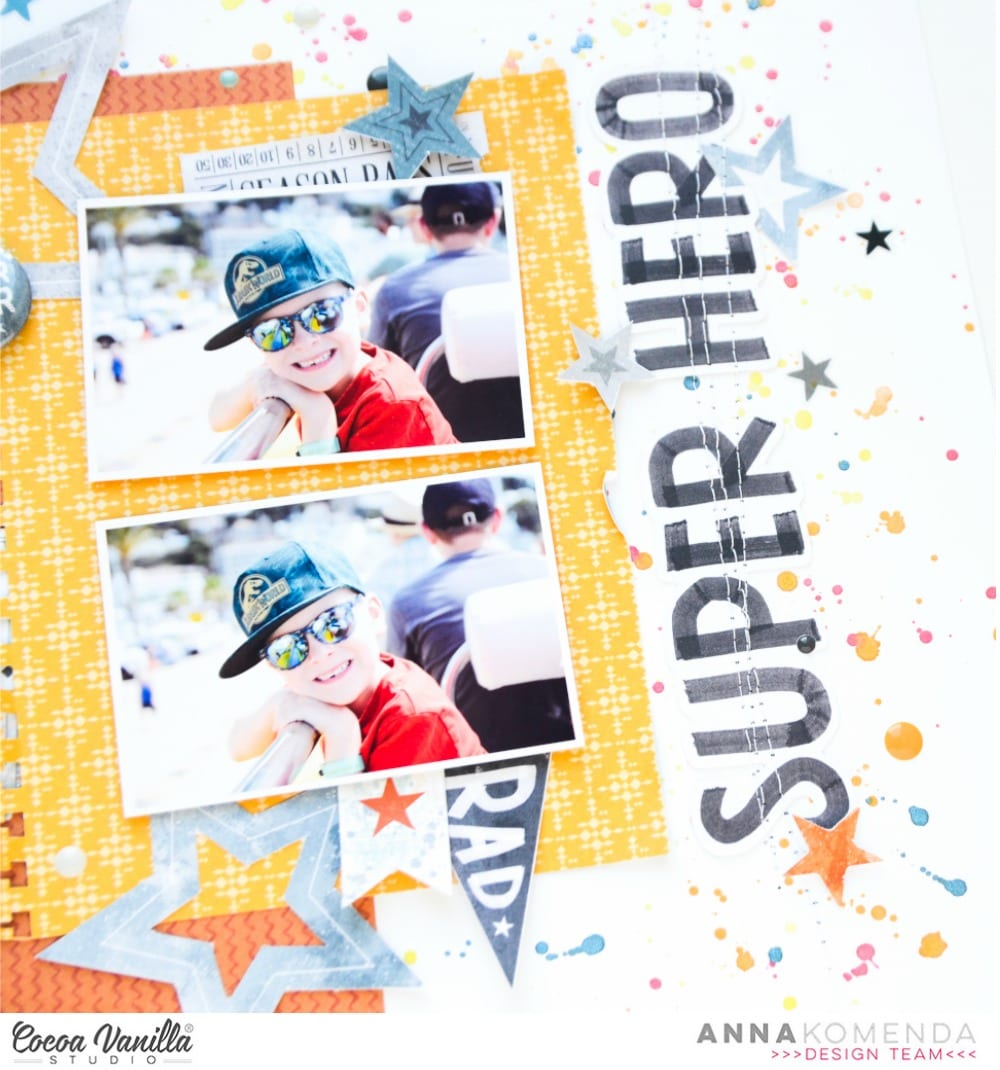


 I love the star die-cuts in the ephemera pack, I added the grey ones in 3 places to create a visual triangle on my page. I like how this takes your eye around the page. In between 2 of the stars I added some of the clear sticker stars, I like how this adds a bit more impact to the die-cut ones.
 Inside the large grey star, I added one of the large circle Authentic die-cuts, I used craft foam underneath it to raise it up, I like how it gives it shadow and dimension. I also added the ‘Epic’ die-cut title below my photo, this became my title for my page. The flairs are awesome in this collection so I added the ‘Let’s Go’ one on this page since the photo is my son getting into the car! I also added the ‘Admit One Adventure Pass’ ticket just above the flair also.
 I started with the stunning wood grain Outdoors Type paper to mat the center photo and create a border for the outside. I have three fantastic shots of my son as we walked around the neighborhood pond and just couldn’t narrow it down to a favorite, so I scrapped all three! To leave plenty of room for journaling, I focused on embellishing in just two areas, on a diagonal, and keeping the embellishments tight to the photos. Using a patterned paper background like this one, called Offbeat, gave me a head-start, so the layout came together very quickly!


 My title is one of the awesome cardstock titles and I added foam dots under this to pop it up at the bottom of my photo, I also layered one of the accessory phrase stickers over the top of the title. I absolutely adore that bear face die-cut so that had to make it on to this page! He looks super cute just above the title on the left overlapping on to my photo. Some more die-cuts were added including the mountains, the stars, hot air balloon, Limited Edition ticket, compass and Stay Wild banner at the top. Some of the stars are popped up using foam dots, I love how this creates shadows and height on my page.


 One of my favourite papers from the collection is the rainbow one called ‘Wild One’, I love how it is in a diagonal design! I trimmed it down slightly and added it to the ‘Explorer’ paper, I like the navy as a mat for the page. I then cut out a diagonal triangle cut file design from The Cut Shoppe from white cardstock and placed it over the top of the paper. I love how the white breaks up some of the rainbow paper. I machine stitched around the outside edge of the layout.
 The large stars in the ephemera pack have a line drawn on them so they were perfect to machine stitch, see the detail on 2 of the larger stars in the photo below. I matted my photo using the wood grain frame die-cut and one of the small cut out papers from the ‘Total Legend’ paper, I also stapled one of banner die-cuts to the top left corner of my photo. I adhered the largest star in the top left corner and the smaller one in the bottom right corner and then adhered my photo over the top.
 The Die-Cut title pack are awesome and I love the font of these! I chose the words ‘Cool Dude’ for my title and popped it up with pop dots underneath and placed to the right of my photo. I took lots of the coloured stars from the die-cut pack and popped them up in rainbow fashion like the paper. I love the height and shadows this creates! I also added one of the awesome flair buttons with the star on it to the right of the ‘Cool’ word in my title. Lastly I added a few of the clear stickers, accessory stickers and enamel dots to finish my layout.