Hey y’all! Laura here with a super sweet and silly 9×12 layout of my darling daughter when she was a toddler, playing happily in her water table. These photos were so bright and fun, I knew they would work beautifully with the Cocoa Vanilla Studio Sunkissedcollection! Using some punched and cut circles to create a vertical background design, I set my photos in a stair-step pattern so that I could fit all four of them on this smaller sized layout!
Around each of the photos, I added a cluster of embellishments. On the top photo, I used fussy cut florals, citrus fruits, and a “sweet memories” banner from the ephemera pack. On the second photo, I added a small scene with two palm trees and the sun, love this cluster around the title the most! It’s perfect for these sun-filled summer photos! In any awkward spaces, I added tiny florals to fill them in.
On the bottom two photos, I kept the embellishing minimal because I’d added a circle-cut journaling spot out of the pocket cards and tucked it in on top of a bold blue circle from the background. So, some tiny florals were all it needed to feel finished. As always, I dotted gold Nuvo drops around the page and then splattered with gold inks spray for the finishing touch! Loved playing with circles for this one!
I hope this layout inspires you to try a bright, summer color palette for your next layout! To see how “Love This” came together, check out the process video below!
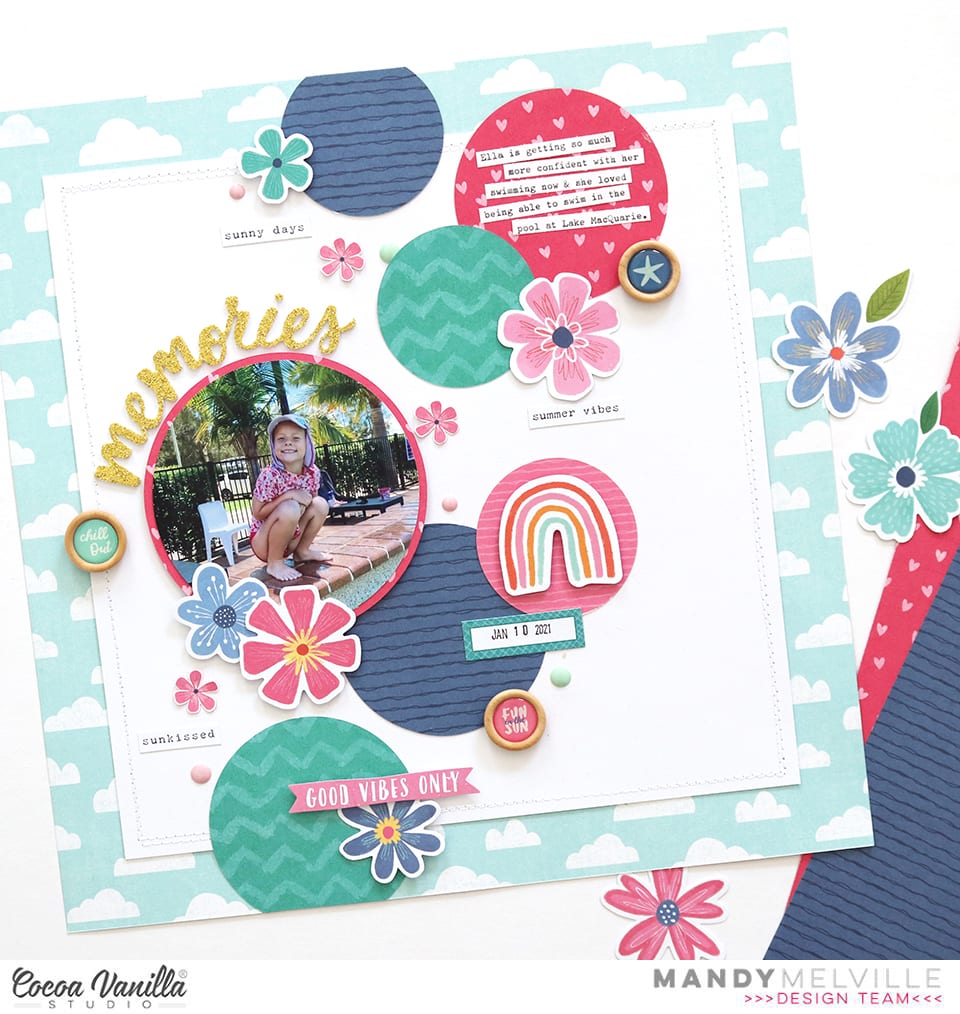
Mandy here with you today to share a new layout using the gorgeous Sunkissed collection! This week on the blog our design team are creating projects featuring either circles or squares. I have to admit that usually I would be more comfortable creating with squares, so that’s what I initially planned to use for my project. But I decided to challenge myself to use circles instead, and I’m so glad I did because it was a lot of fun!
I documented a cute photo of my youngest daughter Eleanor at the pool when we were on holidays in January.
I started my layout off by trimming my white cardstock background down to 10 inches, and matting it on the Just Chillin patterned paper. I also added some machine stitching around the edge of the white cardstock to give the page some additional texture. I then went ahead cutting various size circles out of the Sunny Days, Feelin Fine, and Bright Side patterned papers. There are so many gorgeous colours in this collection, but for this layout I decided to keep my colour palette to the teal, pink and blue. For this reason, I chose to use the more subtle b-sides of the papers to allow me to feature those three particular colours. Once I’d cut out my circles, I arranged them on the page so that they flowed from the top to the bottom, with some overlapping.
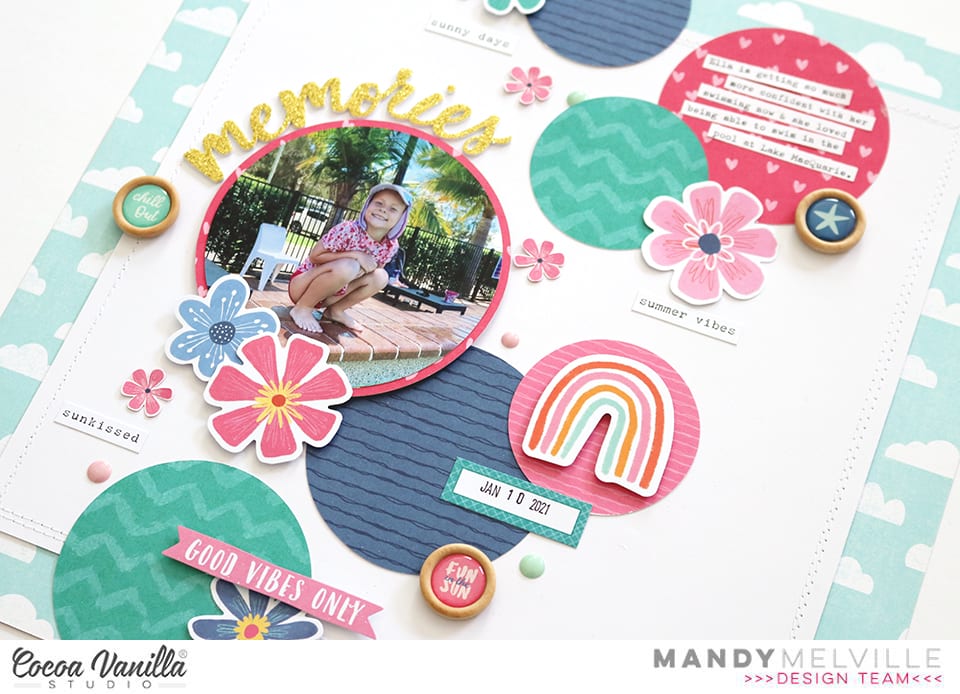
To continue with the circle theme I decided to cut my photo into a circle as well (I don’t remember the last time I did this!). I matted it with the Feelin Fine patterned paper and added some craft foam underneath it to help it to really pop off the page! I embellished around the photo with some flowers from the Floral Ephemera pack, and then added my title around the top of the photo using one of the gorgeous Glitter Foam Title Stickers.
I adhered my typed journaling to the pink circle at the top of the page. I also added another Floral Ephemera piece to this cluster, as well as one of the fun Wood Epoxy Buttons. I love that the wood buttons add another circular element to the layout!
I created another point of interest on my layout to the right of my photo. I embellished these circles with a beautiful die cut rainbow, a label from the Accessory Sticker sheet, and another Wood Epoxy Button.
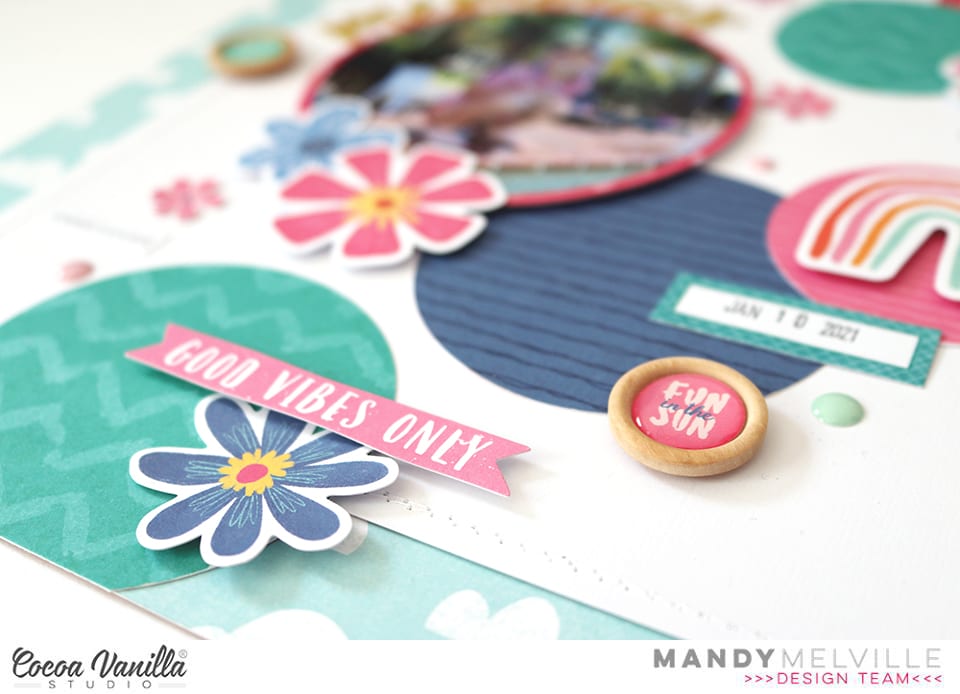
The final little cluster of embellishments is at the bottom of the page on the teal circle. Here I chose to add a blue flower from the Floral Ephemera pack, as well as a little die cut banner. You’ll notice that I kept my embellishing to the same colour combination that I chose for my patterned papers, focusing on the pinks, blues and teals in the collection.
Around my photo, I added three little flowers that I fussy cut out of the Growing Wild patterned paper. The visual triangle that this creates helps to direct the viewers eye towards the photo. To finish the layout off, I added a few little phrase stickers from the Accessory Stickers, and lastly I sprinkled around some Unforgettable enamel dots.
Thanks so much for joining me here on the blog today! Make sure you pop by each day this week to check out what our other design team members are creating for the circles and squares theme!
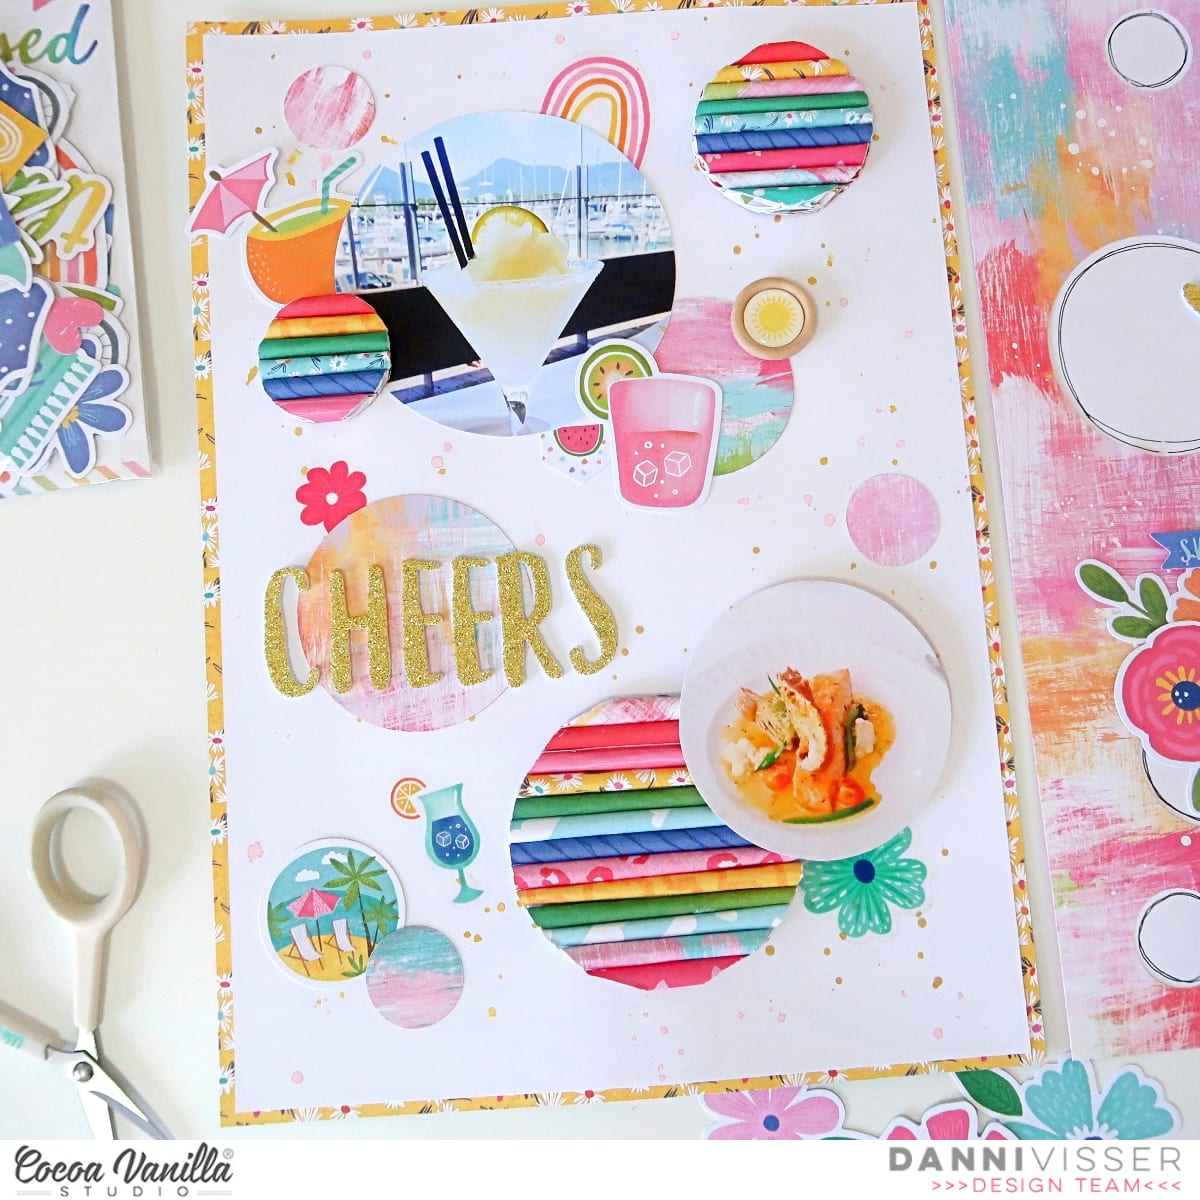
Hi Cocoa Vanilla fans! Danni here sharing an A4 double page layout using the gorgeous Sunkissed collection. This week we are playing with a ‘circles or squares’ theme, so I chose to document some photos of my husband and I out to dinner during our tropical holiday using circles.
I have been wanting to experiment with rolled paper for a while since I noticed this trend is making a comeback. I thought this could be a fun way to explore the shapes theme and do something a little fun! I used a mix of colours from the 12×12 patterned papers and the A5 paper stack to make a pile of little paper rolls.
I wanted to use circles on both pages, so I used my electronic die cutting machine to cut circles from Feelin’ Fine 12×12 patterned paper in various sizes, to use as a background. I backed this with white cardstock and added a sketchy outline to all the circles. For a little extra detail I splattered white acrylic ink randomly over the patterned paper background.
I used three of the cut out circle die cuts to mount my paper rolls, gluing them directly down with tacky glue. I varied the colours to give a pretty rainbow effect. I then used my scissors and a craft knife to trim the paper rolls and tidy the edges into neat circles.
I adhered the remaining die cut circles and the rolled paper circles over a white background, bordered with Fun in the Sun 12×12 patterned paper. This page got the same ink splatter treatment, this time using gold, yellow and pink distress oxide sprays.
I cut all my photos into circle shapes as well, layering them with the other circles on the pages. To continue with the theme, I added some epoxy wood buttons and the circular stickers from the accessory stickers to both layouts.
For embellishments I used a few of my remaining clear stickers on the white background, where they really pop. I added some cocktail die cut ephemera around the photo of my delicious margarita, then some floral ephemera clusters around the photos on the opposite page. Finally, I added a large title from the glitter foam titles and also used some of the glittery love hearts to sprinkle over the opposite page.
Sometimes I find a prompt like this so helpful to provide inspiration and ideas to experiment with when I am feeling uninspired. I love how this turned out! I hope you enjoyed reading about it, and you can also watch the video on the Cocoa Vanilla Studio YouTube channel below. Happy scrapping!
Hello everyone. Summer is my favorite season and I am always waiting impatiently for it to arrive. This year we have some delay in warm and sunny days but it’s almost here. Time to pull out hats, sun glasses and shorts. I was looking for all those hidden items and I found my daughter’s cute hat. We had a little fun trying it one by one and (of course) I snapped few photos. I scrapbooked them with amazing “Sunkissed” collection, full of colors and summer motiffs. My design is a perfect way to use up all the smaller paper scraps, tabs and tags.
I started with white 12*12 cardstock as a base and I used my ruler and pencil to mark a big square in the center. This will be the area filled with paper scraps. I wanted to add them looking like a roof tiles with upper ones overlapping the bottom row. I checked my papers for smaller leftover scraps and cut them in small rectangles. I was using mostly the ones from A5 paper stack. I also cut apart paper called “Fun in the sun” and picked some smaller elements for my composition.
I only applied glue on the top side of my rectangles, bending the bottom edge a little bit. I added pieces of foam tape under some of them for more dimensional look. My three photos are also added in the same way.
Title was created with word “summer” from golden foam title stickers and “ready” with alpha from my stash. I also added bits and pieces from ephemera pack like drink, orange slice or ice cream. I also included few stickers to the colorful mix. I wanted to use as manny patterns as possible so I even went through pocket cards and picked the ones with solid background.
As always, I added the smallest elements at the very end including few puffy stickers (I just used up my first sheet, send a new box!) and wooden buttons. They are so cute and they add amazing texture to the design. Few yellow splatters were the final step of making this project. It all went really fast and I finished the page in an hour.
Do you like my idea of using up smaller paper scraps? You can also make similar page with horizontal allignment of the “roof tiles”. That is all for today but I will be back once again in two weeks with another “Sunkissed” page.
I started by creating a mixed media background. I used thick white cardstock, added a lot of water and sprayed a few different Shimmerz paints (mostly Mustard Seed and Sweet Heart Vibez). I let the colors run and blend on the cardstock and also added a few splatters with a brush. I let it dry completely.
Hey everyone, it’s Raquel here with you today sharing my latest layout featuring the bright and beautiful Sunkissed collection with you.
This layout is featuring my fave paper in the collection ‘Bright side’. As soon as I saw this paper I knew that I wanted to create a layout that features the rainbow design from the paper. It has taken me many layouts using this collection to finally decide on a layout design that featured it.
The subject of my layout is my kiddies at Summer on our vacation. I have been able to create and document a number of our summer memories thanks to Sunkissed. The pocket cards were the perfect size to mat my photos and I was able to choose complimentary colours to the colours I’ve used from the rainbow. I printed the photos using my portable photo printer and adhered them matted to the page with a foam adhesive.
The rainbow was fussy cut from the patterned paper I decided to only feature three of the rainbow colours on this layout. I tacked them to my page lightly and secured them with machine stitching.
To the left of the photo I have embellished the page using a mix of ephemera, puffy stickers and floral ephemera pieces. I also used some of the gold foam hearts to match in with the title. The wood buttons were a nice finishing touch to the clusters of embellishments on the page.
I used similar embellishment choices to the right side of my photos also.
The gold foam stickers make the perfect feature title for a layout. Summer days worked perfectly on this layout and with these photos. Instead of my usual typewritten journaling I have used the mini word stickers on the Accessory sheet to sum up some thoughts from our day.
When adhering embellishments to the page I have used a combination of glue dots, liquid adhesive and foam adhesive.
The white card stock base was adhered to the ‘Summer lights’ paper on a slight angle to provide visual interest. I also machine stitched around the edges for further texture.
I hope this layout has inspired you today to get creating with this beautiful collection.
It’s Mandy Melville, and I’m so thrilled to be back here on the CVS blog for the first time in over a year to share some inspiration with you all! Unfortunately I had to take a break from my design team commitments over the past little while due to increased work commitments, but when I was invited to re-join the amazing CVS Design Team recently, of course I couldn’t say no! I love being able to share these gorgeous products with you all!
For my first layout share, I chose to use the absolutely stunning Daydream collection! If I had to pick a favourite scrapbook collection of all-time, it wouldn’t be an easy choice, but I think this collection might just be it! The gorgeous colours and the beautiful florals make it such an enjoyable and easy collection to create with! It was so perfect for documenting this lovely photo that I took of my eldest daughter Abi recently.
I’ve been hoarding the lovely Daisy Dayspatterned paper since I first got this collection, but I decided that it was time to finally use it! If you’re familiar with my scrapbooking style, you’ll know that I LOVE fussy cutting, especially floral elements! So of course I couldn’t resist fussy cutting that beautiful floral wreath to use as the main element on my layout.
I started my layout layout off with a sheet of American Crafts white textured cardstock as my background, which you can now purchase from the Cocoa Vanilla Studio store! I then cut a 10 inch square out of the heart print All Aflutter patterned paper, and I cut a circle out of the middle of the paper about 8 3/4 inches in diameter. I adhered this patterned paper to my white cardstock, and added some machine stitching around the outside of it to give the page some additional texture. I also smudged some white gesso onto it to fade out the colour just a little bit, as well as a few white splatters. I then layered the fussy cut wreath on top, just adding glue randomly to allow some of the leaves and flowers to lift freely off the page.
For my title, I combined some alphabet stickers from my stash with the word ‘beautiful’ from the Die Cut Titlespack. I love these beautiful scripty die cut words, and they make adding a title to your layouts so easy! I adhered it using foam tape for extra dimension, (which you might know is another thing that I love to add on my pages!)
I double matted my photo using one of the papers from the A5 Paper Stack, as well as the woodgrain polaroid frame from the Die Cut Ephemera pack. I also included a doily from my stash in my photo layers which adds some extra detail and texture. Under the right hand side of the photo I tucked a tab from the Accessory Sticker Sheet.
Next I added a couple of little butterflies that I fussy cut out of the All Aflutter paper from the A5 Paper Stack, as well as some tiny flowers that I cut out of the Garden Variety paper. I finished the layout off with a few little phrase stickers from the Accessory Sticker Sheet, which added the perfect sentiments to my layout about my beautiful girl.
Thanks so much for stopping by today! I hope that you enjoyed taking a look at my layout, and that you’ve found some inspiration. I look forward to sharing with you again here later in month. Until then, happy scrapping!
Hi there Cocoa Vanilla fans! Danni here with a layout using the amazing Sunkissed collection. My last share with you all was a layout featuring my signature style, so I thought this time I would do some things that are slightly out of my comfort zone! These include a white cardstock background, some ink blending and clean white space. It was really fun to try a different style and I really love the result.
I started with a white background and decided to jazz it up with a border using Summer Lights 12×12 patterned paper. I added some machine stitching around the edge for an extra detail. I had two 3×4 photos of myself and my son on an amusement park ride in the sun.
I added some photo mats to these using Feelin’ Fine and Bright Side 12×12 patterned papers. I went ahead and cut out the “Fun in the Sun” 3×4 card out of the Fun in the Sun 12×12 patterned paper cut apart sheet to use as a title card and distressed the edges for texture.
Next I took a hexagon stencil and some distress oxide inks for some fun ink blending on the background. I went with a combination of bright yellow, aqua and pink inks to compliment all the beautiful bright colours in this collection.
For embellishments I went straight to the gorgeous floral ephemera and started building some clusters around my photos. I also needed to add one at the bottom of my page because I had a little mishap with my sewing machine. Luckily it was easily covered with embellies! I decided to add the last of my tiny wood epoxy buttons to the centre of a large flower in each of the clusters. Love how this looks!
I only needed a couple of lines of journaling so I cut a label from the Fun in the Sun 12×12 patterned paper cut apart sheet and tucked it below my photo. Perfect spot for short journaling! I adore the Sunkissed puffy stickers so I sprinkled some of the tiny hearts in three places around my layout. To finish off the page I added three tiny word stickers from the accessory stickers around my photos.
I’m so happy with this bright layout! I hope you enjoyed joining me today as well. There is a process video on the Cocoa Vanilla Studio YouTube channel linked below if you would like to watch it all come together. Happy scrapping!
Hello scrappy people! It’s Anna here with my newest page made with gorgeous “Sunkissed” collection. This time I used this line to scrapbook some travel related photos from our trip to Carnac menhirs. It was really hot day and there was almost no shadow on the site. Really hard conditions to appreciate neolithic stones but we managed to survive :) “Sunkissed” is filled with summer related items mostly but you can use for more travel vibe pages too. I benefited from colorful paper patterns by backing the cut file filled with words about travelling. With such a colorful bakcground, you didn’t need much of embellishing!
I started with putting my digital die cutting machine in use after few months of break. I forgot how fun is it to incorporate this kind of elements into the pages. Backing the words with various pattern papers like: “Growing wild“, “Sunny days“, “Just chillin“, “Fun in the sun“, “Feelin fine“, “Bright side” and paper stack went pretty quick. Harder part was deciding where I want my photos to be places. Whole paper is filled with titles so I knew I need to cover some of them.
I managed to squeeze the photos on top of one bigger word having the rest of them visible and easy to read. I added few smaller elements from ephemera pack around the pictures, with a small individual title on top of them. As this is more travel than summer themed page I only picked more generic ones, skipping beach items and exotic drinks :)
I filled empty spots between the words using clear stickers like colorful arrows and paint strokes. They work perfectly with white background. I also added few puffy stickers here and there and my favorite wooden buttons. Colorful pattern papers are the main star of the page and I didn’t want to overshadow them.
I just love the final result and possibilities “Sunkissed” collection gives. I love squeezing out as much as possible from the papers themselves and those simple and fun patters are just perfect. White background makes them really pop.
I am sure it’s not my last word when it comes to this amazing, colorful collection. I still have so many ideas! Thank you so much for stopping by and see you in June!