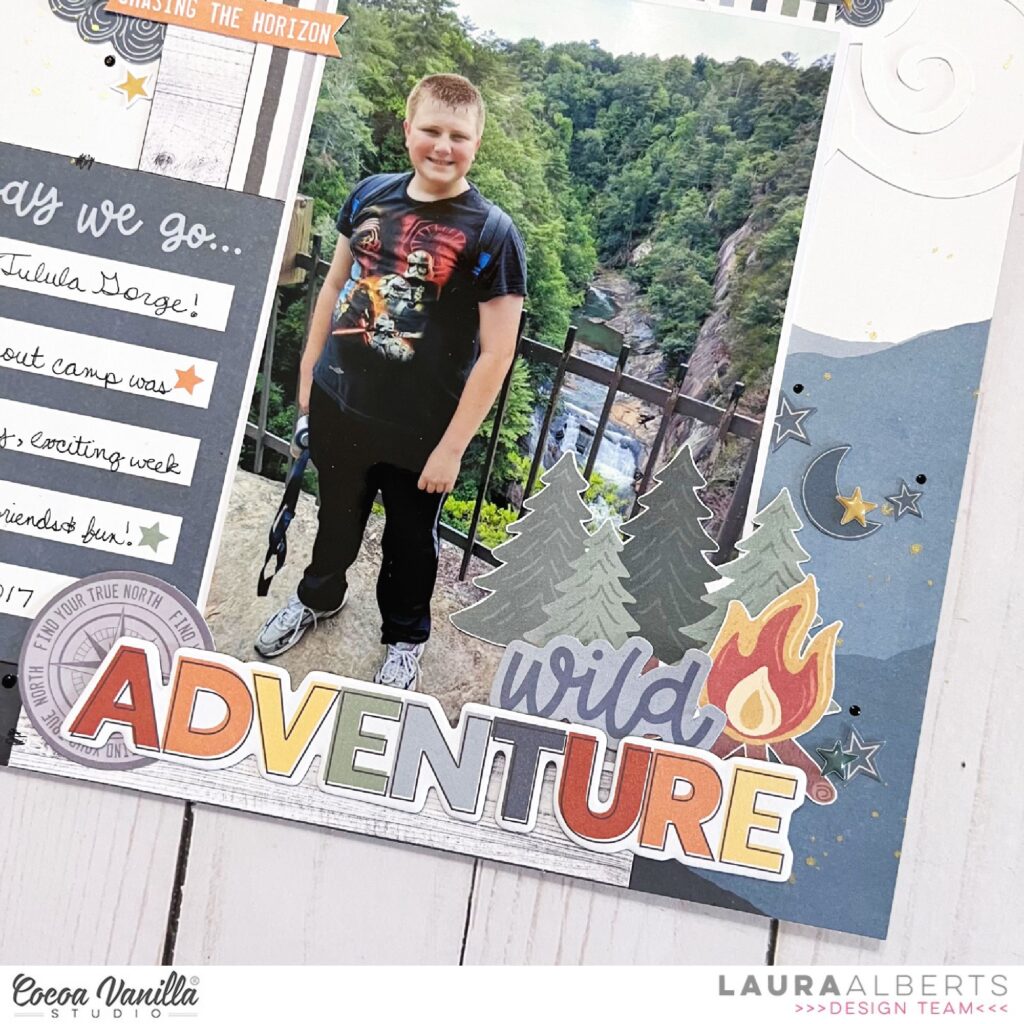
Hey y’all! Laura Alberts here again with a fun camp-out layout using the stunning new Great Escape collection. It’s such a fun mix of nature and camping themes! I love the navy and gray tones mixed with brighter tones.
For this outdoorsy photo, I thought this fantastic background was perfect! I added some lovely curly cloud cut files from the Silhouette shop to the Horizon patterned paper. Using a piece of A5 wood grain paper as a base, I built up a window frame for the photo.
The journaling spot is from the cut-apart sheet in this collection, as are the word phrases that are layered over the fussy cut clouds. A chipboard title along with die cut icons brings all of the colors together and draws the eye directly into the 4×6 photo of my son. I love how this layout captures the excitement as well as the setting of this picture.
To see how “Wild Adventure” came together, check out the process video below:
Hello everyone. It’s Anna here with another page made with brand new “The great escape” collection. it just landed on CVS shelves and you can purchase a whole bundle to get every element from this line! Once again I reached for the photos from our family travels. Since my girls are not little anymore, they do not pose to the photos as much as they used to so I need to stick to our summer memories. Rest of the year is almost non existant in my phone camera :) Beside the dog. He fills up the void.
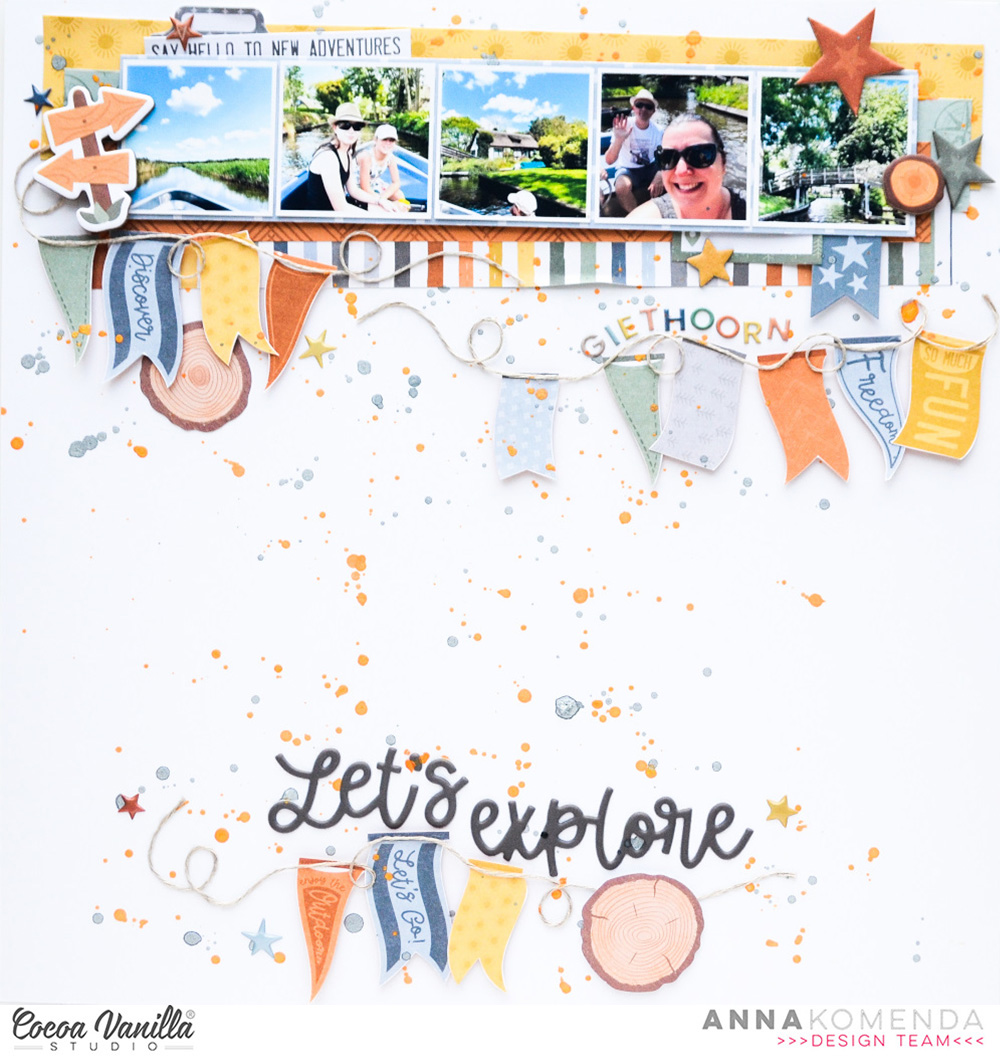
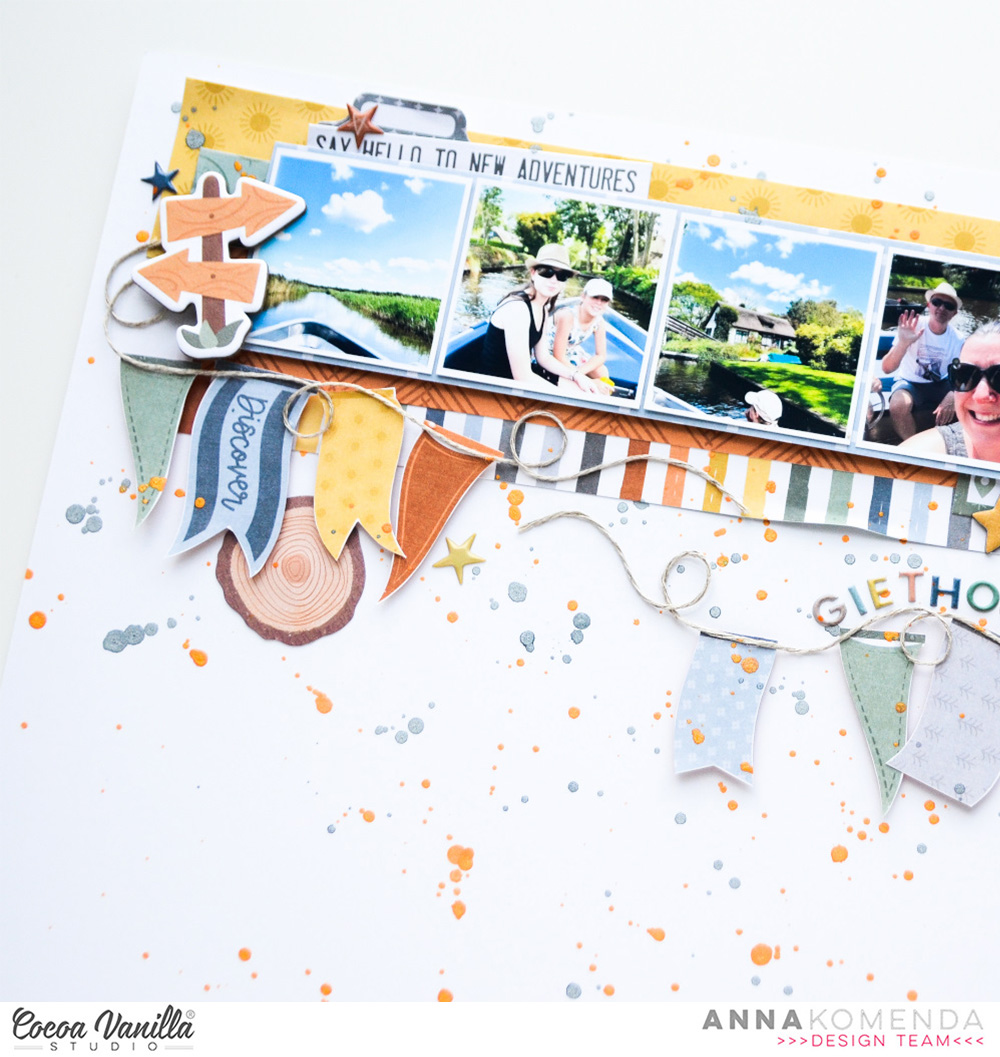
This time I reached for photos from our visit in one of the Netherland’s beautiful towns called Giethoorn, where instead of roads for cars, are water canals for boats. It looks so picturesque and we had an amazing time on the rental boat. I printed five small photos and placed them in a row, so they look like from a photo booth.
I started with white cardstock as a layout base adding few strips of several pattern papers under the photo. I used: “Happy camper“, “Horizon“, “Direction” and “Journey” patterns. Photos glued in a row on a strip of “Adventurer” paper were the next layer.
I spend some time fussy cutting banners from “Happy camper” paper to add them onto the page in few spots. After they were glued down, I used a string in natural color to make them look connected. Embellishing was quite easy and fast. I used few wood slices from Ephemera Pack and some stars from Chipboard Stickers.
My title was created with words from Puffy Title Stickers, that I places in the bottom of the page. I also added smaller word, with the name f the town, using Mini Puffy Alpha Stickers from older “Heart & Home” collection. Their color matches “The great escape” collection perfectly. I finished my project with super cute Puffy Stickers.
And that it all for today! Thank you so much for spending your precious time with me and see you in April!
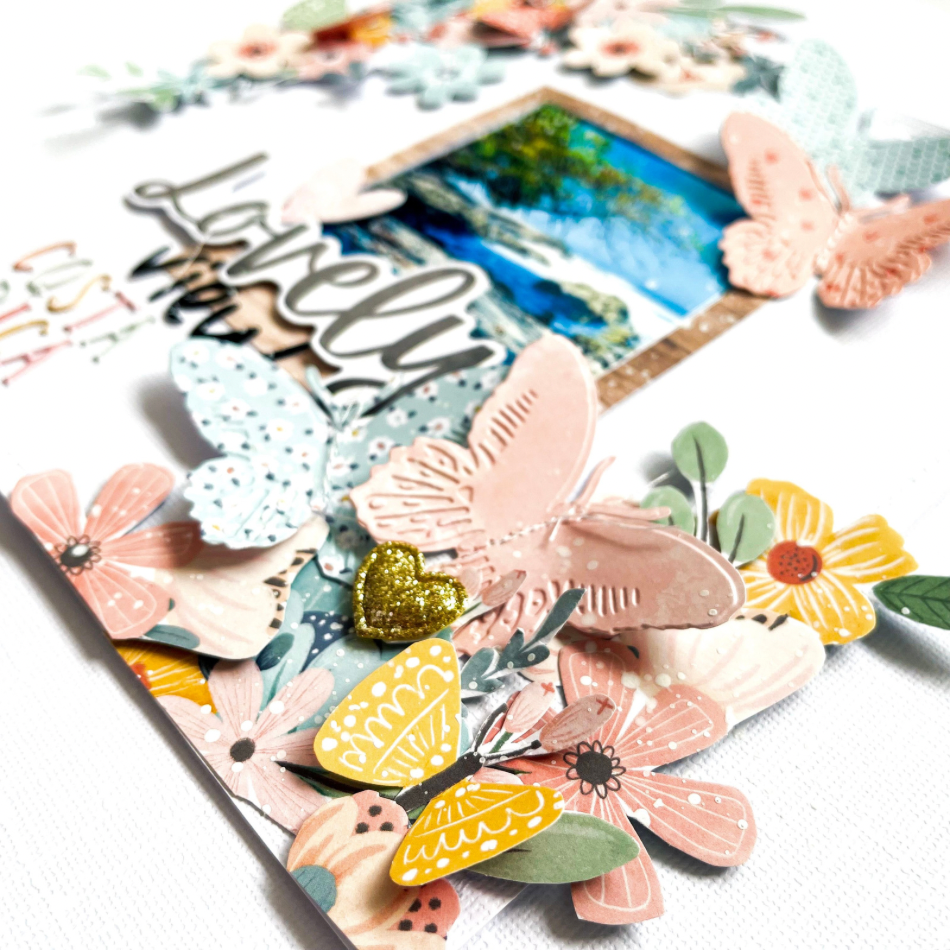
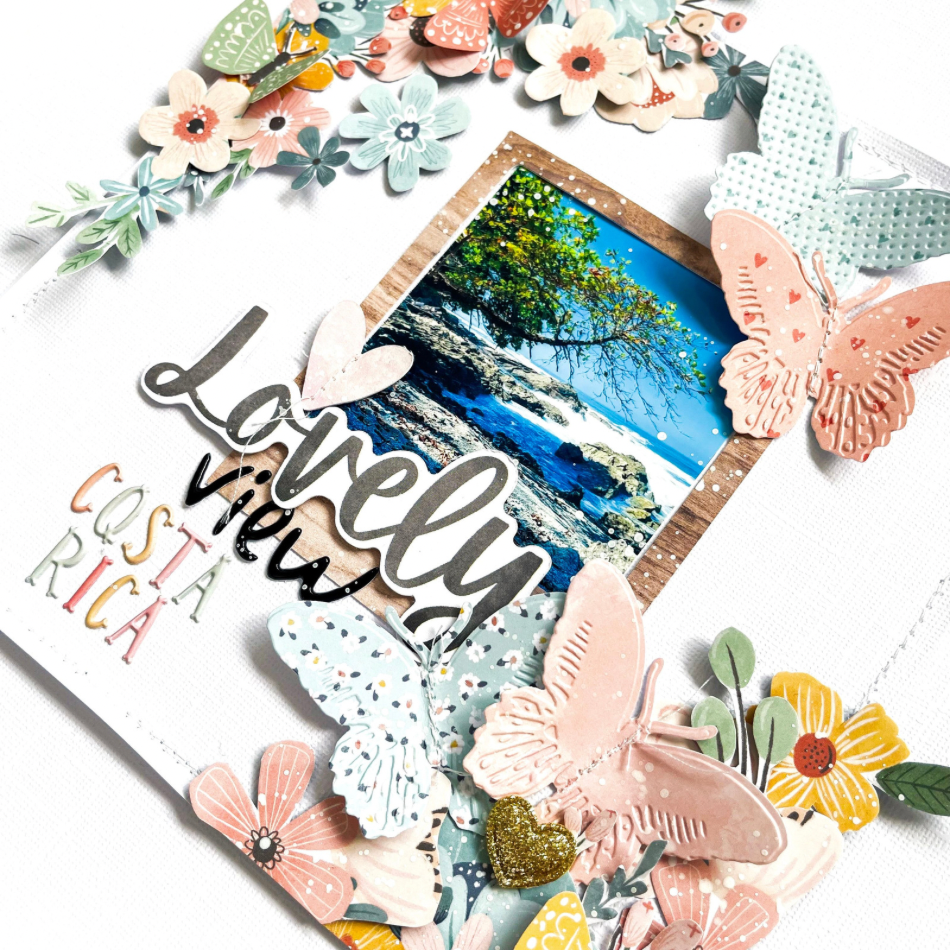
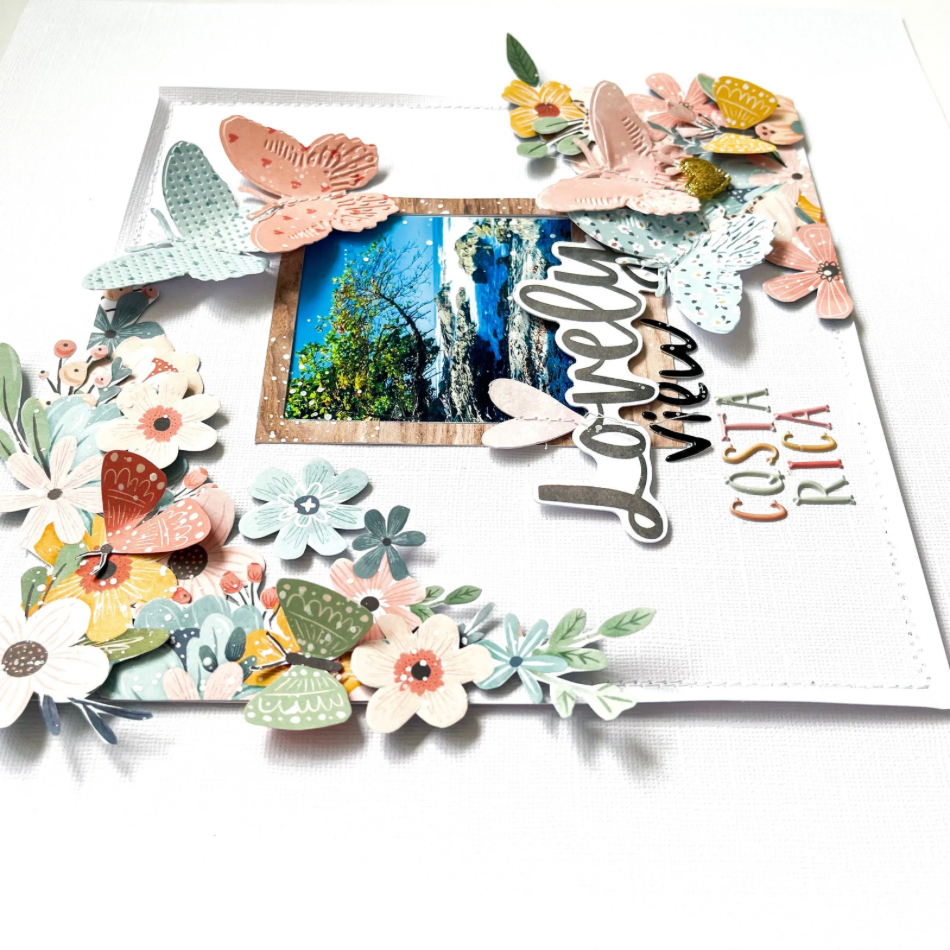
Welcome and how lovely to see you on the Cocoa Vanilla Studio blog. This time, I’ve created a scrapbook layout using the oh-so-beautiful “Day Dream” collection. I had some scraps left over and couldn’t resist capturing the gorgeous view of Costa Rica with Day Dream. The view is truly dreamy.
As almost always, my base is a lovely white sheet of cardstock. I use an extra white cardstock sheet to cut out a square of 8×8 inches. I stitch the edges of the square with a white stitched border using white sewing thread and placing the 8×8 square on my desk.
I start decorating the edges with the fussy-cut Day Dream flowers. I create lovely clusters of flowers both in the top left and bottom right corners. I die-cut four butterflies from the 5×8 patterned paper pack and stitch them in the center with white sewing thread. I frame the photo with a wood-colored photo frame and position it in the center of the custom-cut 8×8 square.
For the title, I use various alphabet sets and a black and white word title. The colored puffy stickers are from the “These Days” collection. The title of this layout is “Lovely View, Costa Rica.” I scatter the butterflies playfully across the layout. I also cut out a few more butterflies from the Day Dream patterned paper and place them on top of the clusters.
I fold the edges of the 8×8 square slightly and then adhere the square on top of the white 12×12 cardstock sheet using 3D foam tape. This makes it protrude slightly from the whole, giving a very nice and playful effect. Finally, I mix white gesso with some water and splatter it onto my layout. I hope I’ve inspired you with this layout and shown you how you can create fun layouts with leftovers. Wishing you all a very happy and creative day!
Hey y’all! Laura Alberts back again with the new Great Escape collection! These photos of my youngest son at the Delta State Fair were the perfect mix of colors for this collection, even though it steps well outside the nature/camping theme of Great Escape. The versatility of Cocoa Vanilla collections is one of the reasons it’s my favorite!
I started with a 10 inch circle using a chipboard template I made from a large bowl in my house. Using that as a guide, I stacked up tons of fussy cut stars around the circle. This gives the layout a celebratory feel that I think fits the State Fair!
I grouped my photos into two small clusters at the top left and bottom right, then built a larger focal image in the middle. For my 3×4 inch photo in the center, I built up a shelf using scraps and manufacturing strips. This gives visual support to my focal image.
If you would like to see how “Play” came together, check out the process video below:
It’s Tarrah back with you and today I am here to share a new scrapbook layout featuring the awesome Great Escape collection! I don’t know about you but I love travelling and I love documenting those travels too! Recently my partner and I took a trip to gorgeous Tasmania, it was wonderful, these photos are from beautiful Cradle Mountain and this collection has been perfect to document our travels.
I started by cutting out a cut file from CUT to YOU from white cardstock and then backed the different words and frames with papers from the Great Escape A5 paper stack.
I added 2 photos in the frames of the cut file as well and I had to be strategic with what photo I added in the top frame due to the frame below covering up part of the photo. I chose the ‘Direction’ patterned paper as my background, I then cut the navy blue strip from the ‘Wild Life’ patterned paper and adhered it to the left hand side of the paper. Once the cut file was all backed, I adhered it to the same background paper. Usually I adhere my cut files using craft foam to pop them up, however for this layout I knew I wanted to pop up the mountains and other die-cut embellishments in the middle. I added the mountains, the Fun Times sign, the wood piece and the Adventure word all from the ephemera pack.
I also placed the compass die-cut to the middle of the ‘O’ of the word ‘Our’ in the cut file, I used craft foam for this piece also to pop it up off the page. Down next to the ‘Yet’ word, I placed the super cute camper die-cut and layered some phrase stickers from the Accessory Sticker sheet on top from the ephemera pack. Once the larger elements were added to my page, I then added a few smaller embellishments including puffy enamel shapes and some more stickers from the Accessory sticker sheet, including the arrow sticker and the journal spot above the word ‘Our’. I love how the puffy enamel shapes add a touch of colour and dimension and I love how the phrase stickers help to tell the story if you don’t feel like journaling!
Lastly I stamped the date stamp and journaled where the photos were taken. I love how this cut file helped to make the design and placement decisions on my layout and the Great Escape collection really does make it so easy to create great memories!
Thanks so much for stopping by the Cocoa Vanilla blog today! I hope you enjoyed reading about how I created my layout as much as I enjoyed creating it! Make sure you get your hands on the awesome Great Escape collection!
Hi everyone, it’s Sue Plumb here to share another design team project with you. Today’s mixed media layout I am sharing was created to document a happy snap that was taken while we were out at a theme park celebrating my boys’ 11th birthday. This layout is part of a multi-page spread for my album that includes both 12×12″ and pocket pages. For this one I decided to use a mix of collections including Happy Days, Sunkissed, No Limits, and there’s even a little bit of You Rock from waaay back thrown in.
I began this page with white cardstock and some dark grey acrylic paint, which I applied randomly with a small brayer. You will often see this technique appearing on my pages, as the paint not only helps to define the focal area of the page, but in this case, the dark colour helps the brights to pop. I also used a red Distress Oxide and a stencil to add some extra detail over the top.
I then began the construction of my page with the Summer Lights paper from Sunkissed. I tore a couple of pieces and then flipped one over to show the reverse print, then layered them on top of one another. I also added a yellow paper doily and some frayed gauze to the stack, and matted my photo with some black and white striped tissue paper before mounting on top.
I then started on my embellishments, beginning with the rad sticker from the You Rock Accessory Sticker sheet in the corner of my photo and the tab behind it from the No Limits Accessory Sticker sheet which was stamped with the date. Alongside my photo I used the sunshine sticker from the Sunkissed Accessory Sticker sheet as the first part of my page title, and I also added the white ampersand which was from a set of CVS alpha stickers from long ago. The small chipboard arrow was from the You Rock Chipboard Stickers.
To the right of the photo I also added a handmade star embellishments from my stash, which I topped with one of the Sunkissed Wood Epoxy Buttons. The gold wire was from my stash and I added a few twisted pieces around my page and secured them with staples.
The large stars that I scattered around my page were fussy cut from the Starshine paper from the You Rock collection. The second part of my title, good times uses the Happy Days Chipboard Titles. I finished off my page with some brief handwritten journalling and stamped phrases.
Thanks so much for joining me today so I could share this with you. I hope I have inspired you to dig deep in your stash and mix different collections together. It’s fun combining old and new supplies together and seeing what you can create with them! I’ll be back again soon with another project to share.
And welcome on the Cocoa Vanilla Studio blog today! It’s fantastic to have you join us today. This time, I’ve been inspired by the Great Escape Challenge at Cocoa Vanilla Studio.
The challenge: scrap about your adventures, big or small, near or far… I chose to create a scrapbook layout filled with memories around the world. I’ve traveled to many places in Europe, America, Central America, and Africa. For this layout, I could only choose four, so I selected different countries across the globe where I’ve made fantastic memories such as Egypt, Jamaica, Austria, and Switzerland.
For this layout, I use for a white cardstock background and used a cut file from the Cricut Store. I cut out a globe and backed it with a blue-green patterned paper. The edge of the globe is adorned with a green stitched border.
Next, I selected some gold photo frames and matched them with various patterned papers and photos. I arranged the frames with the photos playfully around the globe. On the right side, I created a cluster of flower die-cuts, butterflies, and leaves. This cluster adds a little extra holiday vibe to my layout.
For the title, I used the lovely colored mini puffy alphas along with the black and white cardboard words. The title of this layout is “Memories around the world.” I’m a fan of the small mini sticker hearts from this collection, so I used them in clusters of three between the photo frames.
I also cut out a few butterflies and scattered them randomly across the layout. I added some splatters with white gesso and green watercolor. I love the playful effect of the splatters.
I hope I’ve inspired you with this layout and can’t wait to admire your beautiful creations on social media. Have lots of fun, and until next time!
It’s Tarrah back with you today to share another scrapbook layout featuring the gorgeous new Great Escape collection! I have documented another photo from my recent trip to Tasmania, this time a photo taken at pretty Horseshoe Falls. The Great Escape collection is absolutely perfect for outdoor adventures, nature photos and road trips!
I decided to start with a cut file found on the internet and cut this from white cardstock. I then took the A5 paper stack and backed the spaces in the cut file with a variety of different papers. Once the cut file was backed, I adhered it using craft foam to the Horizon 12′ x 12′ patterned paper. I cut a small strip of the ‘B’ side of the Wild Life patterned paper and tucked it in under the cut file t the bottom.
I placed my photo on the right-hand side of the page overlapping the cut file and allowing one of the clouds in the cut file to overhang onto the photo. I used craft foam to adhere the photo too. Above the photo, I placed a banner sticker, and on the left of the photo I placed a tab sticker all from the Accessory Sticker sheet. Below the photo, I placed the die-cut title ‘Explore’ from the ephemera pack and also added a puffy shape.
Also from the Wild Life patterned paper, I cut out the 3′ x 4′ card that says ‘Adventure Awaits’ and placed this right under the stars on the cut file again using craft foam to adhere it. I added another tab sticker to the left of the photo and also added the round sticker at the top of the mountain peak, both from the Accessory sticker sheet. I absolutely LOVE the chipboard elements in this collection! I added 2 of the stars, the flag popping out of the clouds, the log piece between the mountains and also the hexagon shape overlapping the mountains at the bottom.
Once the larger elements were placed and I was happy with them, I went ahead and placed some smaller finishing touches like some more puffy shapes and some extra die-cuts from the ephemera pack, I also stamped the date of when my photo was taken.
Thanks so much for stopping by the Cocoa Vanilla Studio blog today! I hope you have purchased the Great Escape collection or have plans to purchase it really soon so you can get busy creating with it!
Hi everyone, it’s Sue Plumb here to share another design team project with you. Today I am sharing a mixed media layout featuring the brand new ‘Great Escape’ collection. Of course I took the opportunity to create a boy page and documented a photo of my hubby and sons.
I started my layout with the gorgeous white wood grain print from the Starry Night paper for my background. I first added a little grey acrylic paint using a 2″ wide brush, then added some stamping over the top with black ink. This just adds a little extra depth to the background, which helps the foreground layers to pop more.
For the paper layers in the focal area of my page, I used a combination of the Adventurer and Happy Camper 12×12″ papers, as well as the compass print from the A5 Paper Stack. I cut and tore the papers then shuffled them until I was happy, before adding a grey doily and frayed gauze on top. I then backed my photo with some scrap cardboard before sticking it down on top of the stack.
In the space alongside my photo I chose the word hello from the Puffy Title Stickers pack; I also added the cute little signpost with fun times on it from the Die Cut Ephemera pack as the second part of my title. Below my photo, I used a journal card from the Wild Life cut apart paper which I had popped into my typewriter to add my journalling.
With the main elements of papers, photo, title and journalling in place, the only thing left to do was add my embellishments. I chose a compass piece from the Die Cut Ephemera pack which I placed over the bottom left corner of my photo and then the we were here phrase from the Accessory Sticker sheet nearby. I finished this cluster off with some fussy cut stars from the Star Gazing paper.
Back on the other side of my layout, I added a sweet little flag from the Die Cut Ephemera pack below my journalling to complete the cascading line of text and some more fussy cut stars. I also added a cluster of stars near to the top of the page to complete my “visual triangle”. I finished off with some scattered stars from the Puffy Title Stickers pack and some small stamped phrases.
Thanks so much for stopping by today so I could share this with you. The fabulous new ‘Great Escape’ collection is shipping out to retailers now, so look out for it at your favourite scrappy store. I’ll be back in a couple of weeks with some more inspiration. Until then, happy scrapping!
It’s Sophie with you on the blog sharing this new page created with the Great Escape collection!
I had this photo from a recent hike and thought it was perfect to match a Paige Evans cut file that I love and wanted to use.
I backed the cut file with several different patterned papers from the A5 Paper Stack, and added a few phrases in matching color to each of the signs.
I put the cut file and photo on the Horizon paper. I added a few die cuts from the Die Cut Ephemera pack and phrase stickers from the die cut sticker sheet. I also fussy cut cute clouds from the Starry Night paper and added the date.
Here are more close-ups:
I am very happy with the result and hope you like it too!! Did you get your hands on this collection??